Firstly, we express our heartfelt thanks and gratitude to Almighty God for His divine blessing enabling us to successfully complete the final year project. His endless patience, scientific orientation, constant encouragement, constant and energetic supervision, constructive criticism, valuable advice, reading many inferior drafts and correcting them at all stages have made the completion of this project possible. Shaikh Muhammad Allayear, Associate Professor and Head of MCT Department, for his kind help to complete our project and also to other faculty members and staff of MCT department of Daffodil International University.
We would like to thank all our course fellow at Daffodil International University who participated in this discussion during the completion of the course work. Since modern technology is at its peak now, the 3D animation process is now competent enough to express any story with the look, colors and emotions of any real-life object or character. The final result of this project is a video footage that combines all the work that has been done, hopefully expressing the idea of its creation.
Introduction
Motivation
In this project, the realities of the lives of privileged and disadvantaged children are shown side by side for comparison. In our society it is not uncommon to see children working instead of going to school just to feed themselves.
Objectives
This neat yet pathetic look was the motivation behind developing such a story and turning it into a 3D animation. Although the result of this project is a 3D animation, it is not necessarily aimed at children. The target audience of this project is people aged thirteen and above, but people of any age can watch the film and enjoy it.
Literature review
Methodology
Modeling
- Generator
- Stand Fan
- Hanging Bulb
- Tree Trunk
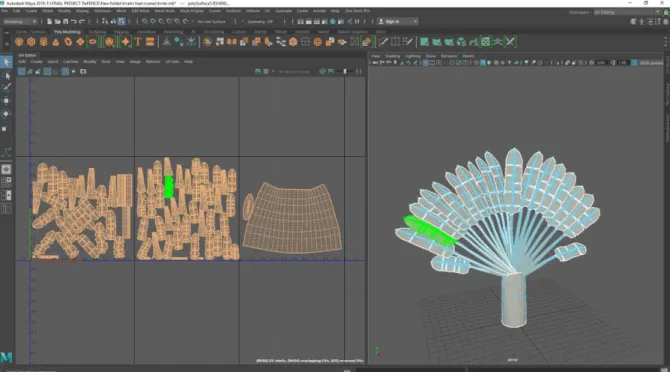
- Traveller Tree
- Gamcha
- Character Modelling
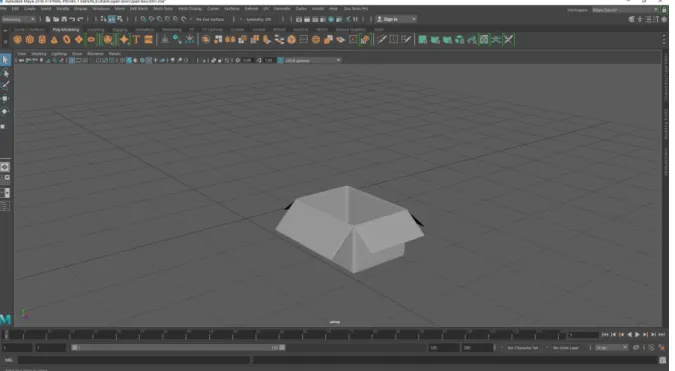
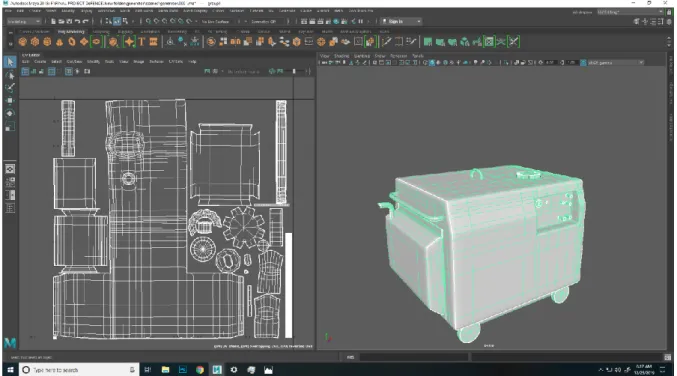
2nd part, To make the pockets on the bag, faces were duplicated where the pocket would exist. The strap of the bag is made the front of a box by extruding the edge and placing them by pulling the corners. Then add a loop to the bottom of the front and push forward to get a curve on the generator housing.
For the generator control board, make the added loops for it and print it down and scale it to the "x" axis for a rectangular shape. For the fuel tank mouth is made by a cylinder with 8 subdivision Boolean with Generator body. Smoke exhaust pipe was made by a poly cylinder using bending (Deform > Non-linear > bending).
First I took a sphere and then removed the half faces from the top extruded the selected top of the edge loop and scaled and placed edge according to the reference image. Electrical foot contact was made by extruding the top shell faces of the cylinder by pressing (ctrl + e). The selected two-sided the faces of the extrusion according to the reference and placed.
Where the branch of the trunk should be, I added their loops using the Insert Loop Tools of (Shift + Right Button + Edge Insert Loop Tool).

UV Unwrap
- Generator
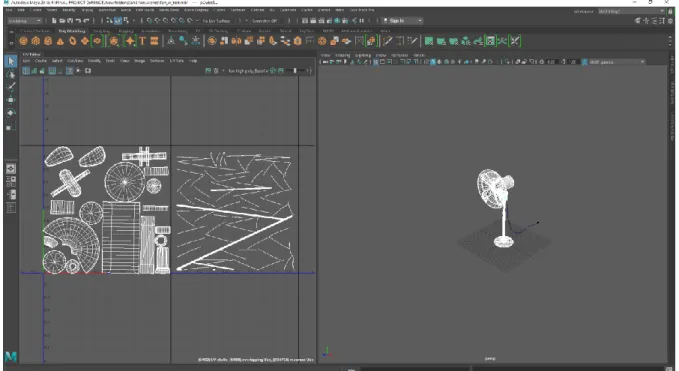
- Stand Fan
- Bulb and Bulb shader
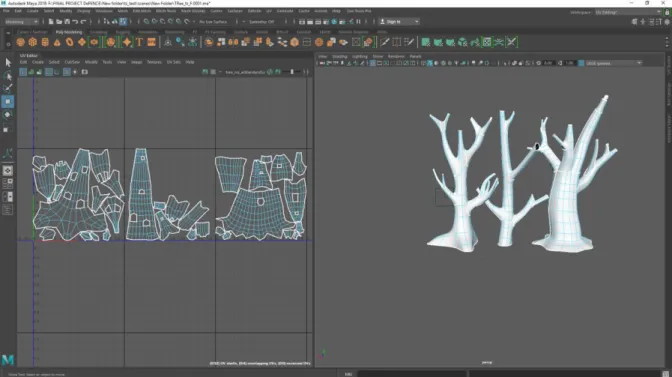
- Trunk: Unwrap
- Traveller tree
- Character UV
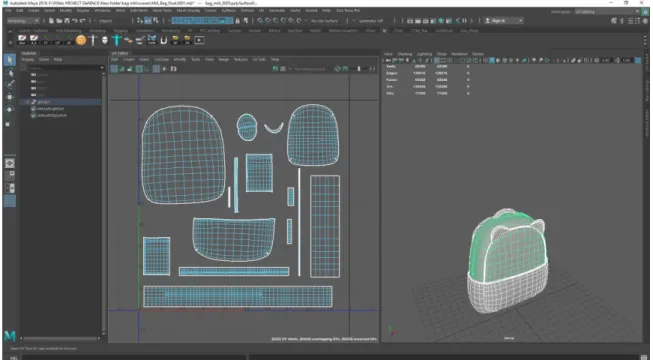
First, I select the edge of each component where I want to make it appear to unfold perfectly. I had to find the perfect edge for unfolding After selecting the edges press (Shift+x) to cut the edge. Because of this I had to use (Shift + Right Click > unfold > Unfold along U) then (unfold along V).
First, I found the edge where I want to make it visible for texturing, press (Shift+x) to cut the edge. After repeating the same process, select all the UVs, press ( Ctrl + L ) to display in the space 0-1. I found the rings of an edge I select that edge Press (Shift+x) to cut that edge and press (ctrl+u) to unfold.
First, I select the edge of any component where I want to appear and I will unfold perfectly.
Texturing .1 Bag
- Generator
- Character Texturing
- Gamcha
- Slide
- Swing
- Cabinet
- Hanging bulb
- Traveller tree
I duplicated the cabinet, then split the Substance Painter [4] cabinet. Export the high polymerization cabinet as obj format. Exporting a high poly travel tree as obj format I had to check the UDMI tile options Then import the obj file from Substance Painter [4].
Mash
Rigging
- Body Rigging
It is located on Shelf > Advance Skeleton > Pre > Model Clean > Create > Clean. It is located at Edit > Duplicate Special Tools > Options Box > Scale X-Axis Value -1. 3rd step, Bind the body with Skeleton from select Body and then Advance Skeleton > Body >.
Bind Skin method I used in this project, Link to : Shared Hierarchy, Link Method : Geodesic : Voxel , Skinning Method : Dual Quaternion , Weight Normalization : Interactive , Weight Distribution : Influences Distance and Max was 3. I set the lower circle just below the characters jaw and the upper circle just above the Characters head. Face: body, Whole head: Body, eye head. And other requests were right eye, left eye, upper teeth, lower teeth and tongue, we drag and drop the information by clicking the middle mouse button.
The percentage influence of different bones should be defined on the body called Skin Weight Painting.

Animation
Limitations and Challenges
Limitations
Challenges
UV-Opening: The default opening option sometimes does not work properly when opening shells. To fix this problem sometimes, the default unfold method had to be set to inherited in the options box next to unfold in the UV toolkit. Outfitting: As the project was mainly done in Autodesk Maya, the plugin we used for outfitting was not working properly.
In doing so, sometimes the leaves were not attached to the surface of the grid on which they were entered. Then it was found that if the master sheet was frozen transformed at the 0, 0, 0 point of the grid line, it would work correctly. Leaf texturing: The leaves were made with a PNG file on a plane to make the trees low poly.
Arnold Stand Ins: some heavy objects have been proxyed by the Arnold Stand In options to make the scenes less heavy. We couldn't solve this problem completely, but it was decided that the scene with Stand Ins will only be rendered with the computer in which they were made. Texture loading failed: since there were very heavy models in most of the scenes and all of them have high resolution textures, the GPUs in our computer could not load them, which eventually causes software to crash sometimes.
Failed to load viewport: Some scenes were so heavy that computers with less RAM failed to load them into the viewport. We couldn't afford that much time, so the rendering was split over a total of 29 computers. Some scenes were also rendered in the alpha channel, where the background can be a still image.
Manual subdivision causes PC freeze: To give the character hairs a high poly look, more subdivision was needed. So instead of physically increasing the subdivisions on the model, the iterations were increased when rendering in the Arnold tab, giving the model the desired high poly look without actually adding more subdivisions.
Conclusion