™
The Missing Manual
Facebook: The Missing Manual, Second Edition
BY E.A. VAndEr VEEr
Copyright © 2010 Emily Moore. All rights reserved. Printed in the United States of America.
Published by O’Reilly Media, Inc., 1005 Gravenstein Highway North, Sebastopol, CA 95472. O’Reilly books may be purchased for educational, business, or sales promotional use. Online editions are also available for most titles (http://my.safaribooksonline.com). For more information, contact our corporate/institutional sales department: 800.998.9938 or
corporate@oreilly.com.
Editor: Dawn Frausto
Production Editor: Nellie McKesson
Copy Editor: Andrea Sobrino
Indexer: Julie Hawks
Cover Designer: Karen Montgomery
Interior Designer: Ron Bilodeau
Print History:
January 2008: First Edition April 2010: Second Edition
The O’Reilly logo is a registered trademark of O’Reilly Media, Inc. Facebook: The Missing Manual and related trade dress are trademarks of O’Reilly Media, Inc.
Many of the designations used by manufacturers and sellers to distinguish their products are claimed as trademarks. Where those designations appear in this book, and O’Reilly Media, Inc. was aware of a trademark claim, the designations have been printed in caps or initial caps. While every precaution has been taken in the preparation of this book, the publisher and author assume no responsibility for errors or omissions, or for damages resulting from the use of the information contained herein.
Contents
Part One: From Signing Up to Staying
Connected
Chapter 1
Getting Started . . . 9
Signing Up for an Account . . . 10
Step 1: Finding Your Friends on Facebook . . . 14
Step 2: Creating Your Profile . . . 14
Step 3: Adding a Picture of Yourself . . . 17
Confirming Your Facebook Registration . . . 18
Viewing Your Profile . . . 19
Viewing Your Facebook Home Page . . . 32
Changing Account Info . . . 33
Chapter 2 Joining a Network . . . 35
How Networks Work . . . 36
Viewing the Networks You’re Already On . . . 37
Joining a Network . . . 38
Leaving a Network . . . 41
Suggesting a New Network . . . 42
Chapter 3 Finding and Adding Friends . . . 43
How Facebook Friends Work . . . 44
Finding Friends . . . 45
Inviting People to Be Your Friend . . . 52
Responding to Friend Requests . . . 54
Viewing Your Friends . . . 57
Organizing Your Friends . . . 58
Breaking Up: Unfriending Friends . . . 62
The Missing Credits . . . vii
Chapter 4
Sending Messages to Friends . . . 65
Sending Messages . . . 66
Receiving Messages . . . 69
Chatting . . . 71
Poking . . . 73
Writing on Walls . . . 74
Sending Gifts . . . 78
Chapter 5 Exchanging Automatic Updates . . . 81
Types of Updates . . . 82
News Feeds: What Others Are Doing . . . 82
Mini Feeds: What You’re Doing . . . 85
Facebook Notifications . . . 86
Subscriptions . . . 89
Creating Notes (Blogs) . . . 95
Part Two: Interest Groups and Shopping
Chapter 6 Participating in Groups . . . 107What’s a Group? . . . 108
Finding Existing Groups . . . 109
Joining a Group . . . 112
Creating a Group . . . 113
Participating in Groups . . . 118
Chapter 7 Facebook and the Real World: In-Person Events . . . 121
Types of Events . . . 122
Finding Existing Events . . . 123
RSVPing to an Event . . . 125
Chapter 8
Going Shopping . . . 129
The Marketplace Application . . . 130
Finding and Viewing Marketplace . . . 131
Placing an Ad . . . 133
Finding Stuff . . . 138
Answering an Ad . . . 139
Part Three: Doing Business on Facebook
Chapter 9 Hiring and Getting Hired . . . 143Recruiting New Hires . . . 144
Vetting Prospects . . . 151
Looking for a Job . . . 152
Chapter 10 Collaborating on Projects via Facebook . . . 157
Keeping in Touch . . . 158
Exchanging Files . . . 162
Keeping Up to Date with Feeds . . . 173
Chapter 11 Advertising on Facebook . . . 175
Facebook Pages: Profiles for Bands, Brands, and More . . . 176
Social Ads (Targeted Announcements) . . . 182
Connect Facebook to Your Website with Widgets . . . 188
High-Dollar Options . . . 191
Part Four: Privacy and Power Tools
Chapter 12 Customizing Facebook and Adding Applications . . . 195Modifying Your Home Page and Profile . . . 196
Chapter 13
Playing It Safe: Facebook Privacy . . . 207
Privacy and Facebook: An Overview . . . 208
Deciding How Much to Share . . . 210
Controlling Access to Your Account . . . 211
Adjusting Your Privacy Settings . . . 212
Fighting Back . . . 222
Chapter 14 Facebook Mobile . . . 225
How Facebook Mobile Works . . . 226
Setting up Facebook Mobile . . . 227
Using Facebook Mobile . . . 231
Facebook Help . . . 238
Getting Help from Other Facebook Members . . . 239
Contacting Facebook . . . 241
Useful Facebook-Related Websites . . . 242
The
Missing Credits
About the Author
E.A. Vander Veer started out in the software trenches, lexing and yaccing and writing shell scripts with the best of them. She remained busy and happy for years writing C++ programs and wresting data from recalcitrant databases. After a stint as an Object Technology Evangelist (yes, that’s an actual job title), she found a way to unite all her passions: writing about cool computer stuff in prose any human being can understand. Books followed—over a dozen so far—including PowerPoint 2007: The Missing Manual,JavaScript for Dummies, XML Blueprints, and the fine tome you’re holding right now. She lives in Texas with her husband and daughter. Email: [email protected].
About the Creative Team
Dawn Frausto (editor) is assistant editor for the Missing Manual series. When not working, she beads, plays soccer, and causes trouble. Email:
Nellie McKesson (production editor) lives in Jamaica Plain, Mass., where
she makes t-shirts for her friends (http://mattsaundersbynellie.etsy.com) and plays music with her band dr. & Mrs. Van der Trampp. Email: nellie@ oreilly.com.
Andrea Sobrino (copy editor) is a freelance editor and part-time graduate student based in new York City, where she lives with her husband, daugh-ter, and assorted wildlife. Email: [email protected].
Julie Hawks (indexer) is an indexer for the Missing Manual series. Her oth-er life includes testing software, tinkoth-ering with databases, reading Vedanta texts, and enjoying nature. Email: [email protected].
Tina Spargo (technical reviewer), her husband (and professional musi-cian) Ed, their preschooler Max, and their two silly Spaniels, Parker (Clum-ber), and Piper (Sussex), all share time and space in their suburban Boston home. Tina juggles being an at-home mom with promoting and marketing Ed’s musical projects and freelancing as a virtual assistant. Tina has over 20 years’ experience supporting top-level executives in a variety of industries. Website: www.tinaspargo.com.
Acknowledgements
Muchisimas gracias to the Missing Manual editorial team—y’all truly are second to none. Special thanks go to Peter Meyers for originally suggesting this book, and for overseeing the entire process with wisdom and grace. dawn Frausto and Chuck Stewart’s top-notch editing buffed the manu-script to a high sheen, and tech reviewer Tina Spargo triple-checked it for accuracy and currency (no mean feat when you’re writing about a website so popular it spits out new features faster than Hollywood spits out buddy movies). A smart, nimble team like this one is every writer’s dream.
The Missing Manual Series
Missing Manuals are witty, superbly written guides to computer products that don’t come with printed manuals (which is just about all of them). Each book features a handcrafted index; cross-references to specific pages (not just chapters); and repKover, a detached-spine binding that lets the book lie perfectly flat without the assistance of weights or cinder blocks.
recent and upcoming titles include:
Access 2010: The Missing Manual by Matthew Macdonald
Access 2007: The Missing Manual by Matthew Macdonald
AppleWorks 6: The Missing Manual by Jim Elferdink and david reynolds
Buying a Home: The Missing Manual by nancy Conner
CSS: The Missing Manual, Second Edition, by david Sawyer McFarland
Creating a Web Site: The Missing Manual by Matthew Macdonald
David Pogue’s Digital Photography: The Missing Manual by david Pogue
Dreamweaver 8: The Missing Manual by david Sawyer McFarland
Dreamweaver CS3: The Missing Manual by david Sawyer McFarland
Dreamweaver CS4: The Missing Manual by david Sawyer McFarland
Excel 2010: The Missing Manual by Matthew Macdonald
Excel 2007: The Missing Manual by Matthew Macdonald
FileMaker Pro 9: The Missing Manual by Geoff Coffey and Susan Prosser
FileMaker Pro 10: The Missing Manual by Susan Prosser and Geoff Coffey
Flash CS3: The Missing Manual by E.A. Vander Veer and Chris Grover
Flash CS4: The Missing Manual by Chris Grover with E.A. Vander Veer
Google Apps: The Missing Manual by nancy Conner
The Internet: The Missing Manual by david Pogue and J.d. Biersdorfer
iMovie ’08 & iDVD: The Missing Manual by david Pogue
iMovie ’09 & iDVD: The Missing Manual by david Pogue and Aaron Miller
iPhone: The Missing Manual, 2nd Edition by david Pogue
iPhone App Development: The Missing Manual by Craig Hockenberry
iPhoto ’08: The Missing Manual by david Pogue
iPhoto ’09: The Missing Manual by david Pogue and J.d. Biersdorfer
iPod: The Missing Manual, 8th Edition by J.d. Biersdorfer and david Pogue
JavaScript: The Missing Manual by david Sawyer McFarland
Living Green: The Missing Manual by nancy Conner
Mac OS X Snow Leopard: The Missing Manual, Tiger Edition by david Pogue
Microsoft Project 2007: The Missing Manual by Bonnie Biafore
Netbooks: The Missing Manual by J.d. Biersdorfer
Office 2007: The Missing Manual by Chris Grover, Matthew Macdonald, and E.A. Vander Veer
Palm Pre: The Missing Manual by Ed Baig
PCs: The Missing Manual by Andy rathbone
Personal Investing: The Missing Manual by Bonnie Biafore
Photoshop CS4: The Missing Manual by Lesa Snider
Photoshop Elements 8 for Mac: The Missing Manual by Barbara Brundage
Photoshop Elements 8 for Windows: The Missing Manual by Barbara Brundage
Photoshop Elements 7: The Missing Manual by Barbara Brundage
Photoshop Elements 6 for Mac: The Missing Manual by Barbara Brundage
PowerPoint 2007: The Missing Manual by E.A. Vander Veer
Premiere Elements 8: The Missing Manual by Chris Grover
QuickBase: The Missing Manual by nancy Conner
QuickBooks 2009: The Missing Manual by Bonnie Biafore
QuickBooks 2010: The Missing Manual by Bonnie Biafore
Quicken 2009: The Missing Manual by Bonnie Biafore
Switching to the Mac: The Missing Manual, Snow Leopard Edition by david Pogue
Switching to the Mac: The Missing Manual, Leopard Edition by david Pogue
Wikipedia: The Missing Manual by John Broughton
Windows XP Home Edition: The Missing Manual, 2nd Edition by david Pogue
Windows XP Pro: The Missing Manual, 2nd Edition by david Pogue, Craig Zacker, and Linda Zacker
Windows Vista: The Missing Manual by david Pogue
Word 2007: The Missing Manual by Chris Grover
Your Body: The Missing Manual by Matthew Macdonald
Your Brain: The Missing Manual by Matthew Macdonald
M
aybe a Facebook invitation showed up in your email inbox and you’re trying to decide whether to join the site. Maybe you were alarmed when you heard your kids mention poking each oth-er on Facebook. Maybe the Wall Street buzz caught your attention when Facebook—a whippersnapper of a website that didn’t even exist until 2004—clocked in at a breathtaking value of $15 billion. Or maybe you’ve noticed that Facebook mentions are regularly making it into your favorite local and national news programs.However you heard about it, everybody seems to be talking about book. And for good reason: In an astonishingly short period of time, Face-book has grown from an online yearFace-book for college kids to an Internet juggernaut with over 400 million members.
So what is Facebook, anyway? It’s a free-to-use, wildly popular social-networking site—which just means it’s a way to connect with other people—that combines the best of blogs, online forums and groups, photo sharing, and much more. By tracking the connections its members make with each other, Facebook makes it easy to find and contact peo-ple—everyone from old friends and roommates to new customers, new bosses, and even folks you’ve never met before who share your interests.
If you’re thinking that Facebook sounds a lot like MySpace, you’re right. The dif-ference? In a word, positioning. Facebook does pretty much the same stuff as MySpace, but in a cleaner, more controlled, more professional way. MySpace’s blinking, flashing, online teen haven now boasts far fewer members than Face-book. And over half of all new Facebook members count themselves among the 25-and-older crowd, so it’s not just for college kids anymore.
How Facebook Works
First, you type in your personal and professional information—as much or as little as you’re comfortable sharing. (Most folks add extras such as pho-tos, videos, and audio clips.) Then, you establish connections with groups of Facebook members, like everybody who went to your alma mater, or everybody who works at your company. Finally, you add individual con-nections to other members, such as the guys on your soccer team, your next-door neighbor, and the two or three old flames you’re still speaking to. Bingo: Instant access to the personal and professional details of all the folks you’re connected to, the folks they’re connected to, and so on. You can think of Facebook as a 400-million-plus-entry searchable rolodex—on steroids.
The two parts of the site you interact with most often are:
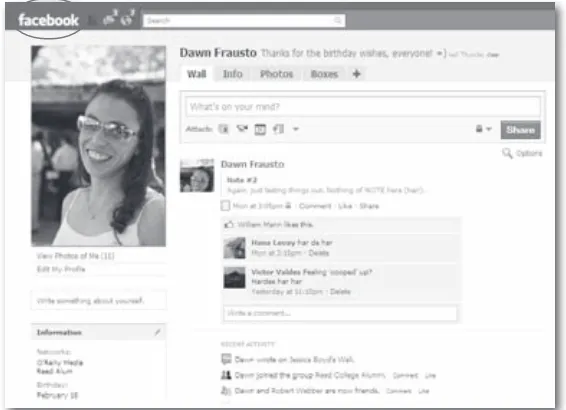
• Your Home page. The majority of your Facebook Home page is taken up by a News Feed (page 82) that chronicles your friends’ Facebook activities. The right side of the page shows stuff you might want to act on: requests your friends have made, upcoming birthdays, and so on. It also lists any requests—to befriend someone or to install an ap-plication (page 198) one of your friends found useful, for example— that require your attention. To get to your Home page, click either the word “facebook” or “Home” at the top of any Facebook screen. Page 83 shows you what a typical Home page looks like.
What You Can Do on Facebook
Like all social-networking sites, Facebook blurs the line between personal and professional: Your boss is just as likely to be on Facebook as your kids. Still, most folks focus on either professional or personal stuff when they’re on the site. The following sections list some of the things you can do on Facebook.
Social Activities
Facebook began as a social-networking site for college kids (it was started by a Harvard student), and personal interactions are still the main reason people sign up. You can:
• Look up (and be looked up by) long-lost pals. Facebook wouldn’t be very useful if no one used their real names—you wouldn’t be able to find anybody! But since it’s fun to find people and have them find you (and because Facebook’s official policy requires truthfulness), mem-bers tend to provide their real names, photos, and personal details. Chapter 3 teaches you how to search for people on Facebook.
• Keep in touch with far-flung friends and family. Other Facebook members can sign up for regular updates from you. For example, you can send out party updates to fellow students stuck in study hall, or share photos of your new granddaughter. Likewise, you can sign up to get updates about what your friends and family members are doing. Chapter 5 teaches you all about automatic updates.
• Make yourself heard. Facebook’s blogging feature (called notes—see page 95) lets you put text and photos on your profile. Think beefed-up online journal.
• Buy and sell stuff. Marketplace (Chapter 8), Facebook’s answer to classified ads, lets you buy and sell stuff online using a credit card.
• Keep tabs on your kids. Facebook started out as a way for students to meet online, and it’s still big with college and high-school kids. Get-ting acquainted with Facebook not only helps you understand the lan-guage your kids are speaking; it also gives you a frank look into their online social lives.
Professional Uses for Facebook
You don’t have to be out of work to benefit from social networking. More and more professionals are turning to Facebook to mingle, headhunt, advertise, and work more effectively. Here are some of the work-related things you can do on Facebook:
• Find a gig. The resumé you post on Facebook can be as extensive as you want (headhunters use Facebook, too), and there’s always the want-ads in Facebook’s Marketplace (Chapter 8). But because jobs often go to the best-qualified friend-of-a-friend, Facebook’s ability to show you who’s friends with who can be even more useful—maybe one of your friends knows the hiring manager, say.
• Find an employee. Facebook can help you recruit—and even vet— new hires (see Chapter 9).
• Keep up to date on team projects. Subscribing to feeds (page 89) and notifications (page 86) keeps you in the loop regarding upcoming deadlines and other details, such as whether team members on the other side of the building are still online or have left for the day.
• Collaborate. Use Facebook’s Walls (page 74), notes (page 95), and
Groups (Chapter 6) to exchange ideas, photos, and more; messages
• Market yourself, your products, or your company. For relatively lit-tle scratch, Facebook gives you a couple ways to promote things:
—Pages are special, interactive profiles for companies, bands, celeb-rities, and nonprofit organizations that you can create for free.
—Ads can include graphics and text; they appear in Facebook’s ad space (the lower-right part of any screen).
Big-bucks sponsor companies have even more marketing options. Chapter 11 explains all your choices.
About This Book
Facebook is a terrifically fun and useful site, and compared to a lot of oth-er websites, it’s remarkably easy to use. But that’s true only if you already know what you want to do on Facebook, and—most important—why.
That’s where this book comes in: It’s the book you should have been able to download when you registered for Facebook. It explains what kinds of things you can do on the site and how to go about doing them. You’ll find tips for diving headfirst into Facebook without looking like a newbie, keeping in touch with your friends, expanding your social circle, and us-ing Facebook as a poor-man’s business-collaboration tool. This book also guides you through the staggering forest of privacy options so you can get the most out of Facebook with the least amount of risk (see Chapter 13).
This book is designed for readers of every skill level, from I-just-plugged-in-my-first-computer-yesterday to Internet expert. Concise intros lead you into step-by-step instructions of how to get stuff done. The notes scat-tered throughout the text give you alternatives and additional info, and the Tips help you avoid problems.
Missing Manuals on Facebook
About MissingManuals.com
At www.missingmanuals.com, you’ll find articles, tips, and updates to Face-book: The Missing Manual. In fact, we invite and encourage you to submit such corrections and updates yourself. In an effort to keep this book as up-to-date and accurate as possible, each time we print more copies of it, we’ll make any confirmed corrections you’ve suggested. We’ll also note such changes on the website, so that you can mark important corrections into your own copy of the book, if you like. (Go to www.missingmanuals. com/feedback, choose the book’s name from the pop-up menu, and then click Go to see the changes.)
Also, on our Feedback page, you can get expert answers to questions that come to you while reading this book, write a book review, and find groups for folks who share your interest in using Facebook.
We’d love to hear your suggestions for new books in the Missing Manual line. There’s a place for that on MissingManuals.com, too. And while you’re online, you can also register this book at www.oreilly.com (you can jump directly to the registration page by going here: http://tinyurl.com/yo82k3). registering means we can send you updates about this book, and you’ll be eligible for special offers like discounts on future editions of Facebook: The Missing Manual.
Safari® Books Online
Safari® Books Online is an on-demand digital library that lets you easily search over 7,500 technology and creative reference books and videos to find the answers you need quickly.
With a subscription, you can read any page and watch any video from our library online. read books on your cellphone and mobile devices. Access new titles before they’re available for print, and get exclusive access to manuscripts in development and post feedback for the authors. Copy and paste code samples, organize your favorites, download chapters, book-mark key sections, create notes, print out pages, and benefit from tons of other time-saving features.
Part
1
1
Getting Started
G
oogle, the iPod, spam: Only a handful of technological forces have gone from tiny to towering seemingly overnight, and Facebook is part of this elite group. One big reason: Setting up a Facebook account couldn’t be easier. In the time it takes to say “howdy,” you too can be part of the frenzy.Signing Up for an Account
Facebook accounts are free, and have only two requirements: You need a working email address, and you have to be over 13 years old. Here’s how to sign up:
1. Point your web browser to www.facebook.com. If you’re on a Win-dows computer, you’ll get the best results with Internet Explorer or Firefox. If you’re on a Mac, use Firefox or Safari. (If you’re not familiar with Firefox [it’s free], check out www.firefox.com.)
Of course, the more info you give Facebook, the greater the risk that someone will steal or misuse that information. See Chapter 13 for ways to get the most out of Facebook while minimizing your risk.
2. In the Sign Up area, fill out all the fields. Facebook doesn’t let you skip any fields, but you can change your answers later (page 33).
—First Name/Last Name. Facebook expects you to use your real name, not an alias. don’t type in the name of a group or company, and don’t include special characters like parentheses or titles such as Mr., Ms., or dr.
If you like, after you finish the sign-up process you can add your maiden name to your account so people you knew before you got hitched can find you. To do so: At the top of any Facebook page, click the Account link and select Account Settings from the drop-down menu. On the page that appears, click name and type your full maiden name in the Full Alternate name field. You’ll see that Facebook is already set up to include your maiden name on your profile and in search results should any old flame be looking for you. Click the Change Alternate name button when you’re done.
—Your Email. Make sure you type in a working email address. If you don’t, you won’t receive the confirmation message Facebook sends you, and therefore won’t be able to complete the sign-up process. If you’re interested in joining your employer’s or school’s Facebook network (Chapter 2), use your work email address (kris_ [email protected]) or your student email address (kris_kringle@ asu.edu), respectively. If you’re worried about privacy, sign up for a free email address from a site such as www.mail.yahoo.com or
www.gmail.com and give Facebook this new email address.
—New Password. Make up a six-character or longer, case-sensitive password (you can use numbers, letters, and punctuation), and then jot it down in a notebook or some other safe place so you don’t forget it.
For the most part, it’s up to you whether or not you give Facebook accurate personal details. But Facebook actually uses a combination of computer programs and real, live humans to weed out obviously bogus registration details. Type in Elvis Presley or Mickey Mouse for your full name, for example, and there’s a good chance your registration won’t go through.
—Birthday. Make sure the year you choose puts you over age 12— Facebook doesn’t let under-13s use the site.
When you finish, click the Sign Up button. If you forgot to fill out any of the fields, you’ll see the Sign Up page again, this time with a mes-sage at the top that reads, “You must fill in all of the fields.” If you filled everything in to Facebook’s satisfaction, you’ll see a second Sign Up page, explained next.
—On the second Sign Up page, type the security check words into the “Text in the box” field. This step is to make sure you’re a real, live person and not a computer (computers can’t read the squiggly text).
Facebook requires you to hand over your birth date when you’re creating a per-sonal account. But because not everyone wants to share her age with the world, the site gives you a way to hide your birth date from fellow Facebook members (see page 22).
—Click the green Sign Up button. Ideally, you should click both the Terms of Use link and the Privacy Policy link and read both of them
before you click this button. In reality, though, you’d need 3 hours and a law degree to make sense of them. And because Facebook reserves the right to change them any time it gets the urge, you’d have to keep re-reading them every day. So just click Sign Up and be done with it. After you do, Facebook displays a three-step pro-cess you can use to find folks you know who are already on Face-book, and then describe yourself (by creating a Facebook profile
and, optionally, uploading a picture of yourself ) so that folks can find you.
Here’s the gist of Facebook’s terms of use and privacy policy: Be nice (don’t spam anybody or post pirated stuff ), be honest (leave out personal details if you must, but make sure the details you do give Facebook are accurate), and don’t blame Facebook for anything bad that happens (like your office Christmas party pictures ending up in National Enquirer after you post them on Facebook). Break these rules, and Facebook can boot you off the site.
Step 1: Finding Your Friends on
The whole point of being on Facebook is to get—and stay—in touch with people. So it’s no big surprise that the first of Facebook’s three setup steps gives you a chance to find out which of the folks you regularly email is already on Facebook. Page 47 covers this step in detail, but here’s the gist:
1. On the Getting Started screen, make sure Step 1: Find Friends is selected.
2. Type in the email address you use to communicate with the most pals (or, alternatively, leave in the email address you used when you registered for your Facebook account) and then type in the password to that email account.
3. Click Find Friends. When you do, Facebook scans your email account for email addresses and tries to match each one to a Facebook mem-ber profile.
If you regularly use email to keep in touch with pals and don’t mind hand-ing over the password to your email account (and that’s a big if ), the steps outlined above can be a quick way to add a bunch of your real-life friends to your Facebook social circle quickly and easily. But if you’d prefer to lo-cate your friends on Facebook yourself after you’ve had a chance to create a profile (explained next)—or just don’t feel comfortable giving email account info to Facebook—you’ve got options that you can come back to when you’re ready, as Chapter 3 describes. For now, click the “Skip this step” link to move along and start building your profile.
Step 2: Creating Your Profile
A Facebook profile is a collection of facts about you: everything from where you went to school and how old you are, to what kind of romantic relationship you’re in (or hope to be in) and your favorite TV shows. All your Facebook friends and fellow network members can see your profile details
Facebook automatically creates a bare-bones profile for you based on the info you entered when registering, and then gives you the opportunity to add just a couple more details concerning work and school that help you connect with Facebook friends quickly and easily. Whether or not you add additional details—and how much you add—is up to you.
When polishing your profile, ask yourself:
• What do I want to get out of Facebook? If you just want to check out your ex’s Facebook profile, you don’t need to waste time crafting one of your own. But if you hope to use Facebook to do some networking and land a job, spending some time building your profile is definitely worth the effort.
• How security conscious am I? Although Facebook’s success is based, in part, on its scrupulous commitment to member privacy, the sad truth is that everything you put on the Internet is subject to possible misuse and theft—including what’s in your Facebook profile. So think twice about including political, religious, sexual, and other sensitive proclivities unless revealing these details is absolutely necessary. For example, if you registered for Facebook specifically to connect with other political activists in your area, fill out the political section of your profile; otherwise, skip it.
• How much time do I want to spend on this? Profile building can be a huge time suck. If you’re anxious to start using Facebook, just add a few details now. You can always add more later (page 21).
If you do decide to flesh out your profile, brevity and truthfulness pay off by helping Facebook connect you with like-minded folks. That’s because Facebook automatically lists your profile answers in the search results of other members. The site can also suggest potential friends by matching your profile info with that of other members; see Chapter 3.
To add basic school and work details to your Facebook profile:
1. On the Getting Started screen, make sure Step 2: Profile Information is selected.
2. Click in the High School field, start typing the name of the school you attended, and—when Facebook displays your high school— click to select it.
3. Repeat step 2 for the College/University you attended (or are at-tending) and the Company you currently work for. If you went to a bunch of colleges or have worked for a bunch of companies, you can list them all; see page 26.
4. Click Save & Continue. Facebook displays a list of members you might know based on the schools and workplace you selected. To friend
(page 53) one or more of the folks listed, click the “Add as friend” link that appears below the person’s picture. When you finish, click Save & Continue.
.
If you’d rather not add anything at all to your profile at this point, click Skip. (You can always come back and add to your profile later; page 21 tells you how.)
Step 3: Adding a Picture of Yourself
Until you add a picture to your profile, Facebook displays a dorky blue-and-white outline of a guy with a cowlick. replacing that outline with a picture of yourself is a good idea because it helps searchers identify you more easily. To add a picture to your profile:1. On the Getting Started screen, make sure Step 3: Profile Picture is selected.
2. Click the “Upload a Photo” link.
.
3. In the Upload Your Profile Picture dialog box that appears, click Browse to search your computer for the 4-megabytes-or-less .jpg, .gif, or .png picture file you want to add to your profile. After you select the picture you want, Facebook automatically adds it to your profile. (Page 28 shows you how to change it.)
Confirming Your Facebook
Registration
After you register for an account, Facebook sends a confirmation email to the address you typed in while you were registering.
Most of Facebook’s useful features (such as letting you join Groups and discussions) don’t work until you confirm your registration, so you want to do so as soon as you get a chance. Here’s how:
1. In your Facebook inbox, click the “Check your email” registration reminder message that appears, or just open your email program the way you usually do. Either way, in your email program’s inbox, you’ll find a message from Facebook asking you to confirm that you want to join.
2. In your email program, click the link in the confirmation email or cut and paste the link into your web browser. Bingo: Facebook displays a welcome message on your newly created, personalized Facebook Home page. Congratulations—you’re officially registered! (You’re automatically logged in, too.)
Viewing Your Profile
Taking a look at your profile from time to time is a good idea because it lets you see yourself as other Facebook members see you. To view your profile:
1. Make sure you’re registered (page 10) and logged in (page 211). If you just finished registering by clicking the link in the confirmation email, you’re already logged in.
The profile that appears lists all the info you’ve given Facebook. If you’ve just registered, the only details you see are the bare-bones ones Facebook got from you during the registration process.
3. Click the Info tab. Facebook displays four main categories of profile information (you may need to scroll down to see them all): Basic, Per-sonal, Contact, and Education and Work.
Until you tell Facebook differently, anyone on Facebook can see your profile (except for sensitive stuff like your birthday and your political and religious views, which only your friends—and their friends—can see). To fine-tune who can see what, head to the top right of any Facebook page and click the Account link, select Privacy Settings from the drop-down menu, and then click Profile Information. Chapter 13 has more details.
Adding Basic Info
Most of the information Facebook categorizes as “basic” really isn’t all that useful. You’ll probably just want to type in your hometown and country and skip the rest. (You can skip all of it, if you like; none of it’s required.) Here’s how to add basic info to your profile:
1. At the top of any Facebook screen, click the Profile link.
2. On the page that appears, click the Info tab.
3. Make sure the Basic section is expanded. If it’s not, you won’t see any fields to fill in. To fix that, click the flippy triangle next to the word “Basic” and then you should see a bunch of fields including Sex, Birth-day, and Current City.
4. Fill in as many of the following fields as you like:
—Sex. From the drop-down list, choose Male or Female.
Over time, your profile can get so huge you can’t read it easily. To collapse a cat-egory of info, click the flippy triangle next to the catcat-egory’s header; click it again to expand the category back into view.
—Birthday. If you accidentally gave Facebook the wrong date when you signed up, you can change it here. To hide your age or birth-day from folks who can see your profile, from the “Show my full birthday in my profile” drop-down list, choose “Show only month & day” or “don’t show my birthday”.
—Current City. Start typing, and Facebook makes suggestions so you can select your city instead of typing the whole thing out. Filling in this field is useful if you plan to attend in-person events (page 121) advertised on Facebook.
—Hometown. Filling this in can help long-lost pals identify you. —Home Neighborhood. Type in any borough, barrio, or other
neighborhood description you like; Facebook doesn’t match this name against what you entered in the Hometown field.
—Family Members. If any of your clan is on Facebook (or if you want them to be), you can list them here. This can be useful for organiz-ing family reunions and rememberorganiz-ing important birthdays. First, click the Select relation field and then, from the drop-down list that appears, choose Son, Sister, or one of the other relationship options. Then, in the blank field next to the Select relation field, type in the person’s name. To list more folks, click the “Add another family member” link and repeat the process.
—Relationship Status. Click this field to announce your availability (or lack thereof ). If you’re interested in using Facebook to meet the love of your life, create a wish list by turning on the checkboxes next to the appropriate “Interested in” and “Looking for” choices.
—Political views. Cast your vote for Liberal, Conservative, or anoth-er label from this drop-down list (the list appears when you start typing).
—Religious Views. Start typing in this field and Facebook provides a list you can choose from. If you feel the need, you can expound on your theological leanings in the About Me field of the Personal section, explained next.
5. When you’re finished, click Save Changes. Or, if you want to discard what you entered, click Cancel.
Adding Personal Info
Thanks to its roots as a souped-up yearbook for college students, Face-book encourages you to wax rhapsodic about such personal details as your hobbies and your favorite TV shows. To add that kind of info, follow these steps:
1. At the top of any Facebook screen, click the Profile link.
2. On the page that appears, click the Info tab.
3. Scroll down to the Personal Information section and make sure it’s expanded (if it’s not, click the flippy triangle next to the Personal Information link).
4. In the section that appears, type as much as you like into any of the fields: Activities, Interests, Favorite Music, Favorite TV Shows, Fa-vorite Movies, FaFa-vorite Books, FaFa-vorite Quotations, and About Me.
5. When you finish, click Save Changes and Facebook automatically updates your profile. (Click Cancel to discard your changes.)
Adding Contact Info
After you register, Facebook members can contact you several different ways, including sending you a message in Facebook and writing on your Facebook Wall (page 74). But if you like, you can give folks additional ways to contact you by listing your street address, phone number, and instant messaging screen names. Here’s how:
1. At the top of any Facebook screen, click the Profile link and then click the Info tab.
2. Scroll down to the Contact Information section and make sure it’s expanded (if it’s not, click the flippy triangle next to the words “Contact Information”).
3. In the Contact Information section that appears, fill in as many of the following fields as you like.
—Emails. Clicking the Add/remove Emails link lets you change your contact email (the one Facebook uses to get in touch with you).
—IM Screen Name(s). If you have an account with an instant mes-saging service such as AIM (AOL Instant Messenger), you can add your instant messaging alias or screen name to your account. do-ing so lets anybody lookdo-ing at your Facebook profile see if you’re logged into your instant messaging program (Facebook displays a green dot next to your screen name when you’re logged in). If you’re logged in, people with an instant messaging program in-stalled on their computers can click your screen name to start mes-saging you.
To add a screen name, type it into the field and then, from the drop-down list, select your instant messaging service. Your choic-es are AIM, Google Talk, Skype, Windows Live, Yahoo, Gadu-Gadu, and ICQ. Facebook lets you add up to five different screen names.
—Mobile Phone, Land Phone, Address, City/Town, Neighbor-hood, Zip. If you wouldn’t feel comfortable heading to your lo-cal community center and tacking up a flyer listing your phone number and street address, you probably don’t want to add these details to your Facebook profile.
—Website. You can list multiple websites; just make sure you type each UrL (such as http://www.mycoolsite.com) on its own line. Feel free to skip the http:// part; Facebook adds it automatically.
4. When you’re finished, click Save Changes, or click Cancel to dis-card your changes.
Adding Education- and Work-Related Info
If you’re a student or work at a decent-sized company, adding a few school- or work-related details to your profile is well worth the time. After all, the whole point of Facebook is to try to mimic your real social circles—and if you’re like most folks, a lot of your real-life friends are fellow students and coworkers.
You may have added basic school- and work-related info right after you registered for Facebook (page 16). Taking the time to add to these de-tails is handy for connecting with long-lost pals, because Facebook lets you search for people based on matching profile details. So, for example, you can easily look up folks who worked at the same pizza place you wait-ressed at in college.
To add details about the school you go to (or attended in the past):
1. At the top of any Facebook screen, click the Profile link and then click the Info tab.
2. Scroll down to the “Education and Work” section and make sure it’s expanded (if it’s not, click the flippy triangle next to “Education and Work”).
3. Fill out any of the following fields that appear (they’re all optional):
—College/University. As soon as you start typing, Facebook pops up a helpful list of schools you can choose from. You can add up to five different colleges or universities.
—Year. Choose your graduation year from the drop-down list. —Attended for. Your choices are College or Graduate School. —Concentration. Type in the subject you majored (or minored) in. If
you double-majored, click “Add another concentration” to add up to three different subjects.
—Class Year. Choose the year you graduated high school from the drop-down list.
—Employer. When you start typing, Facebook displays a list of com-panies it knows about. If your company is among them, select it from the list; if not, just type in the name.
—Position, Description, City/Town.
—Time Period. Turn on the “I currently work here” checkbox if you’re still at this job, and then click to select the month and year you started. If you leave this checkbox turned off, Facebook displays another set of Month/Year fields so you can enter the date you left the company.
4. When you’re finished, click Save Changes or Cancel.
Adding or Changing Profile Pictures
Until you add a picture of yourself, your Facebook profile is about as visu-ally appealing as a plain brown wrapper. You may have added a picture during the registration process (page 17). If you didn’t—or if you did but want to change it—you can do so easily by creating or editing a Profile Picture Album containing multiple pictures, each of which you can give an optional caption.
.
If you haven’t uploaded a profile picture yet, here’s how:
1. At the top of any Facebook screen, click the Profile link.
2. On the page that appears, click the “Upload a Photo” link below the placeholder picture.
3. In the Upload Your Profile Picture box that appears, click Browse to search your computer for the image file you want to add to your profile. Make sure the image you choose is a .jpg, .gif, or .png file that weighs in at 4 megabytes or less (it probably will—JPG, GIF, and PnG files tend to be pretty small). If you need help, the Tip on page 163 tells you how to check a file’s type and size. After you select the file you want, Facebook automatically adds it to your profile. The next time you view your profile (page 19), you see your picture instead of the dorky outlined head.
If you’ve already added a picture to your Facebook profile and want to change it:
1. At the top of any Facebook screen, click the Profile link and then click the Photos tab.
2. On the Albums page that appears, click the Profile Pictures album. 3. On the “Your Photos - Profile Pictures” page that appears, click the
Change Profile Picture link.
4. On the Edit Profile Picture page that appears, click Browse to search your computer for the image file you want to add. Choose a .jpg, .gif, or .png file that’s smaller than 4 megabytes.
5. Turn on the “I certify…” checkbox. You can click the “Terms of Use” link to read the legal nitty-gritty of what you’re agreeing to, but here’s the bottom line: don’t add a picture that you didn’t personally shoot (or draw, or airbrush, or whatever).
6. Click the Upload Picture button. The next time you view your profile (page 19), Facebook displays your new picture.
If you like, you can tweak your picture or add more pictures to your Profile Picture Album from the Edit Profile Picture page. Here are your options:
—To upload an additional picture to your Profile Picture Album, simply repeat steps 4–6.
—To change your profile picture to another picture you’ve al-ready added, click the Profile Picture Album link (it’s on the left, below your current picture). Then, in the window that appears, click the photo you want. Finally, at the bottom of the window (scroll way down), click the Make Profile Picture link and, in the confirmation box that appears, click the Okay button.
—To add a caption to your profile picture, click the Profile Picture Album link and then click Edit Photos. In the window that appears, head to the Caption field that’s next to your profile picture; type your text and then click Save Changes. (Captions appear when folks viewing your photo albums mouse over pictures.)
—To delete a picture from your Profile Picture Album, click the Profile Picture Album link, click the image you want to remove, and then click delete This Photo.
Facebook displays a tiny thumbnail version of your profile picture in vari-ous places around the site depending on your Facebook activities. For example, if you join a Group (Chapter 6), Facebook includes your thumb-nail in the Members section of the Group’s profile page. And when you become friends with another member, your thumbnail appears on that person’s Friend List (page 58).
Viewing Your Facebook Home Page
After you’ve registered with Facebook, the site creates a Home page just for you. To see it:1. Point your web browser to www.facebook.com. You see a generic welcome page with a spot for you to log into Facebook on the right.
2. Log in. If you always access Facebook from the same computer, you may find that your email address already appears in the Email field. If not, type in the email address and password you gave Facebook when you registered, and then click the Login button.
3. After you finish your Facebook session, click the Account link in the upper-right part of any Facebook screen and then select Log-out. doing so prevents other folks from getting into your profile and designating you as being “In an Open relationship,” say.
For a website that doesn’t advertise itself as a photo-sharing site, Facebook lets you do a surprising amount of stuff to your pictures. You can create multiple photo albums, share your photos with Facebook members (and non-Facebook mem-bers)—even crop and rotate your photos 90 degrees. At the top of any Facebook screen, click the Profile link, click the Photos tab, and then click the Profile Pictures Album link. In the “Your Photos—Profile Pictures” window that appears, click any picture and then scroll to the bottom of the window to see your options.
Changing Account Info
Some of the stuff you share with Facebook—like your password, for ex-ample—isn’t for public consumption. Because these details are between you and Facebook, they’re not part of your profile, but are part of your Facebook account. To change account details:
1. At the top-right corner of any Facebook screen, click the Account link and, in the list that appears, click Account Settings. On the screen that appears, make sure the Settings tab is selected.
2. Click the name of one or more of the following fields:
—Name. If your name changes after you register with Facebook— due to a marriage or divorce, for example—you can update it in-stead of canceling your membership and re-registering. One ca-veat: Because Facebook runs your name change through security checks to spot potential fraud, the change won’t take effect imme-diately. (Think days, not hours.)
For example, say your brother heads to your Facebook profile. In his browser’s address bar, he sees something like this: http://www. facebook.com/#/profile.php?ref=profile&id=100000598910304.
But after you choose a username, he’ll see something like this in-stead: http://www.facebook.com/eileendover.
—Email. If your email address changes, here’s where you let Face-book know.
—Password. For security reasons, you have to type in your old pass-word, and then enter your new password twice.
—Linked Accounts. If you regularly use another site, such as Google or Yahoo, and then switch over to Facebook (hey, there are worse morning-coffee routines), you can save time by telling Facebook to log you into Facebook automatically each time you log into Google (or Yahoo, or MySpace).
—Privacy. Facebook lets you decide who gets to see the info you share with the site. Privacy is a big issue with potentially nasty ram-ifications, so Chapter 13 is devoted to understanding and custom-izing your privacy settings.
—Deactivate Account. If you don’t like Facebook, you can just stop using it, but Facebook gives you a better way to break things off. By deactivating your account, you get a chance to tell Facebook’s designers why you don’t like it (actually, you can’t deactivate un-til you do). And turning on the “Opt out of receiving emails from Facebook” checkbox during the deactivation process lets you stop Facebook-related notifications and invitations from appearing in your inbox.
At the time of this writing, usernames aren’t available to all Facebook members.
2
Joining a Network
W
hat Facebook does best is track connections between people who’ve joined the site. The easiest way to make a bunch of Facebook connections in one fell swoop is to join a network—a group of people who have work or school in common: in other words, fellow employees at a company or graduates and current attendees of a particular school. Joining a network takes a lot of the grunt work out of finding interesting real-world groups and events, shopping for local stuff, and contacting real-life friends and coworkers. You can’t just join any ol’ network, though—there are some restrictions, as this chapter explains. And if you want to create a new network, you can suggest it to Facebook. read on for the full scoop.
How Networks Work
A Facebook network is simply a group of people who work or go to school (or who used to work or go to school) in the same place. You’ll probably want to join at least one network as soon as you register, because until you do, the only folks whose profiles you can see are those you specifically tell Facebook you want to be friends with (see Chapter 3).
When you join a network, two things happen:
• You get immediate access to the Facebook profiles of all fellow network members, as well as access to the network’s Groups, events, market listings, and other goodies. There are a few excep-tions: Some Facebook members choose to hide their profiles, and some Groups and events are restricted (see Chapter 13). But you still get access to a mountain of dishy details—all of which are potentially useful and interesting to you because you have something big in com-mon with all the other network members: the school you go (or went) to, or the company you work (or worked) for.
• Everybody else in the network can look up your profile informa-tion—including a running list of all the things you’ve been doing in Facebook. network members can also see your hometown, your political views, your contact email address, and everything else you added to your profile. And by viewing the Mini Feed (a running list of your—and, optionally, your friends’—activities on Facebook) that automatically shows up on your profile, they can also see that an hour ago you uploaded a picture, half an hour ago you joined a Group, and two minutes ago someone wished you Happy Birthday.
You can’t see a network member’s profile until you join that network, but you can
see a few public details, such as the member’s profile pictures and friends.
Another way to home in on people who share a common interest (such as Oprah fans, marathon runners, or needle felters) is by creating or joining a Facebook
Viewing the Networks You’re
Already On
Maybe you’ve already joined a network. Maybe you can’t remember if you have or you haven’t. To see which networks you’ve already joined:
1. At the top right of any Facebook page, click the Account linkand, in the drop-down list that appears, click Account Settings.
2. On the My Account screen that appears, click the Networks tab. The tab that appears lists all the networks you belong to. To see who else is in a particular network, scroll down to the network you’re inter-ested in and click the “XYZ people” link.
Joining a Network
When you register, Facebook automatically adds you to the not-super-use-ful Global network, which gives you access to globally organized groups and events. But you definitely want to join at least one more network. Technically, you can belong to as many as five different networks, but if you’re like most people, two or three (a network for your work, your school, and maybe that fresh-out-of-college gig you left a few years back) fills the bill.
You can’t just join any old network—you need a valid email address that matches the workplace, college, or high school network you want to join. For example, if your email address is [email protected], Facebook lets you join the IBM workplace network. If your email address is guy_wire@ asu.edu, you can join the Arizona State University college network.
Fortunately, you’re not limited to one email address (and therefore one network). You can join multiple networks as long as you have multiple val-id email addresses—for example, an address from the school where you got your undergrad degree, one from the school where you earned your master’s, and one from your employer. To join multiple networks, follow
To join a network:
1. At the top right of any Facebook page, click the Account link and, in the drop-down list that appears, click Account Settings.
2. On the My Account page that appears, click the Networks tab.
3. In the “Network name” field, start typing the name of a school or company and, when Facebook displays the network you want, click to select it (you may have to click through the alphabetical list to find the one you want). If the school or company name is really long, you can save yourself a little typing by entering the city where the school or company is located instead; when you do, Facebook pops up a helpful list of suggestions.
If you join more than one network, you need to designate one as your primary network, which is the one that appears below your name when folks search for you. Because it represents the group you most closely identify with, it affects your search results (all other things being equal, Groups, events, and Facebook mem-bers in your primary network appear in your search results first) and also affects the ads you see on the site.
4. Depending on whether you’re joining a school or company net-work, type in your work email address or your school status (un-dergrad, grad, or faculty), school year (when you graduated), and school email. You need to have a company-issued email address to join a company’s network, and a school-issued email address to join a school’s network.
5. Click the Join Network button. If the email address you typed in step 4 matches the company or school you chose, Facebook sends a confir-mation message to that address. (If the address doesn’t match, Face-book displays an error message.)
6. Open your favorite email program, find the network confirmation message Facebook sent, and follow the instructions in the email to confirm that you are who you say you are and that you really do want to join the network. now when people search for you on Facebook, your network appears under your name.
7. If you like, join additional networks (you can have up to five total). To do so, simply follow steps 3–6 for each network.
8. If you join more than one network, tell Facebook which one you want to be your primary network. Facebook automatically earmarks the first network you joined as your primary network, which means that when folks search for you on Facebook, they see this network list-ed under your name. (Your choice of primary network also affects your
search results, because Facebook sorts your search results starting with the ones that match your primary network.) If the first network you joined isn’t the one you feel is most “you,” change your primary network. To do so: On the networks tab of the My Account page, find the network you want to be your primary one and click Make Primary. Then, when Facebook kicks up a confirmation box, click the Make Pri-mary button.
Leaving a Network
Suggesting a New Network
Maybe you work for a small company or went to school in a tiny backwater town. If you check Facebook’s network listings and don’t see a network that describes where you work or go to school, you can ask Facebook to add your school or company to its network listings. Just follow these steps:
1. Point your web browser to one of the following:
—For work networks: http://www.facebook.com/help/contact. php?show_form=add_work
—For college networks: http://www.facebook.com/help/contact. php?show_form=add_college
—For high school networks: http://www.facebook.com/help/con-tact.php?show_form=hs_add
2. Fill out the fields that appear and, when you finish, click Submit. Because actual people need to approve your request, expect to wait a few days—or even weeks—for Facebook to get back to you. There’s no guarantee they’ll approve your request, but if your network sugges-tion is reasonable, you’ll probably get a thumbs-up.
3
Finding and Adding
Friends
I
n real life, your social network consists not just of people who work or study where you do, but also of people you’ve formed one-on-one rela-tionships with: teachers, ex-sisters-in-law, bowling buddies, and so on. It’s the same with Facebook: You start with a network of school or work buddies (see Chapter 2), and then add friends one at a time. You can even use Facebook to look up old friends and find new ones.How Facebook Friends Work
In the world of Facebook, a friend is any Facebook member who has agreed that you two have something in common. Maybe you play on the same softball team, volunteer at the local animal shelter together, or keep run-ning into each other at parties thrown by the same ex-roommate. Maybe you dated, took a road trip together, or you’re second cousins twice re-moved. How you know a Facebook friend doesn’t matter; all that matters is that you both agree that you know each other.
Two people become Facebook friends when one person extends an in-vitation and the other person accepts, or confirms, it. When you become friends with someone in Facebook, three things happen:
• You appear on your friend’s Friend List (page 58) and on her profile page (and vice versa). On Facebook, as in life, you’re known by the company you keep: Everyone with access to your friend’s profile (or yours) can see the relationship between the two of you. And with the click of a mouse, folks can hop from your friend’s profile to yours, or from your profile to your friend’s.
• You can see your friend’s profile (and vice versa) even if he’s not in your network. This means you can see the events he’s planning to attend, the Groups he’s joined, and all the other people he’s friends with, among other details. (The exception to this is if your friend has specifically blocked you from seeing certain personal details, as explained on page 222.)
Facebook has no way of verifying the relationships between friends. But one of the major differences between Facebook and MySpace—the other big social network-ing site—is that Facebook strongly encourages truthfulness. So, while havnetwork-ing a zillion “friends” is considered a status symbol on MySpace, it’s not on Facebook. On Facebook, the goal is to put together a manageable list of people you actually know—and actually care about keeping up with.
• You receive automatic updates in your News Feeds (page 82) chron-icling your friend’s Facebook activities (and vice versa).
Finding Friends
Before you can make someone your friend, you first have to find that per-son on Facebook. The site gives you four different ways to do this:
• You can look up real-life friends and acquaintances who are already Facebook members.
• You can invite real-life friends and acquaintances who aren’t on Face-book yet to join the site.
• You can search for Facebook members you’ve never met but who share your interests (such as a background in server-side technology or a passion for container gardening).
• You can browse through the potential friends Facebook suggests for you (based on criteria such as both of you going to college at the same time and sharing a common Facebook friend).
Finding People Who Are Facebook Members
Some of your real-life friends and acquaintances might already be on Face-book. To find them, use one of the following search methods:
• Search for Facebook members by name. To do so:
1. Type the person’s name in the search box at the top of any Facebook screen and then press Enter.
2. On the search results page that appears, click the People link on the left hand side to weed out extraneous results, such as Groups and applications that happen to contain your searchee’s name. Facebook displays a list of people matching the name you typed in. If the list is gigantic, you can narrow your search by typing in a location, school, or workplace, and then click-ing the refine Search button.
• Search for Facebook members who are classmates, ex-classmates, or coworkers. At the bottom right of any Facebook screen, click the Find Friends link. On the page that appears, scroll down to the “Search for People” section and click the appropriate link. Facebook custom-izes these links based on the information you’ve provided, so the links will read something like, “Find classmates from [your high school],” “Find classmates from [your college],” and “Find coworkers from [your company]”.
In Facebook, all clickable links are blue. If one of the names you see in your search results (or on your Friends List, or anywhere else in Facebook) is blue, then clicking it takes you straight to that person’s profile (or as much of the profile as the person has granted you access to; see page 211).
The screen that appears depends on which link you click and how many details you added to your profile. For example, if you already told Facebook you graduated from Arizona State University in 1990, then click-ing “Find classmates from [your school]”
displays a list of members whose profiles mention that they attended Arizona State in 1990. If, on the other hand, you haven’t added any work-related details to your profile and click the “Find current or past coworkers” link, Facebook displays a screen you can use to type in the company you want.
• Search for people you regularly email from your Web-based email account. If you have a Web-based email address (such as your_name@ gmail.com, [email protected],or [email protected]), you can give Facebook your email account password and let it scan your email address book for matching Facebook members.