CODING WITH MINECRAFT®
BUILD TALLER, FARM FASTER, MINE DEEPER, AND
AUTOMATE THE BORING STUFF
BY AL SWEIGART
CODING WITH MINECRAFT. Copyright © 2018 by Al Sweigart.
All rights reserved. No part of this work may be reproduced or transmitted in any form or by any means, electronic or mechanical, including photocopying, recording, or by any information storage or retrieval system, without the prior written permission of the copyright owner and the publisher.
For information on distribution, translations, or bulk sales, please contact No Starch Press, Inc. directly: No Starch Press, Inc.
245 8th Street, San Francisco, CA 94103 phone: 1.415.863.9900; [email protected] www.nostarch.com
Library of Congress Cataloging-in-Publication Data
Names: Sweigart, Al, author.
Title: Coding with Minecraft: build taller, farm faster, mine deeper, and automate the boring stuff / Al Sweigart.
Description: San Francisco : No Starch Press, Inc., [2018] | Includes index.
Identifiers: LCCN 2017046330 (print) | LCCN 2017058488 (ebook) | ISBN 9781593278540 (ebook) | ISBN 1593278543 (ebook) | ISBN 9781593278533 (pbk.) | ISBN 1593278535 (pbk.)
Subjects: LCSH: Minecraft (Game) | Lua (Computer program language) | Computer programming.
Classification: LCC GV1469.35.M535 (ebook) | LCC GV1469.35.M535 S94 2018 (print) | DDC 794.8--dc23
LC record available at https://lccn.loc.gov/2017046330
No Starch Press and the No Starch Press logo are registered trademarks of No Starch Press, Inc. Other product and company names mentioned herein may be the trademarks of their respective owners. Rather than use a trademark symbol with every occurrence of a trademarked name, we are using the names only in an editorial fashion and to the benefit of the trademark owner, with no intention of infringement of the trademark.
Minecraft is a registered trademark of Mojang Synergies AB, which does not authorize or endorse this book.
The information in this book is distributed on an “As Is” basis, without warranty. While every precaution has been taken in the
ABOUT THE AUTHOR
ABOUT THE TECHNICAL REVIEWER
BRIEF CONTENTS
Acknowledgments Introduction
Chapter 1: Getting Started with ComputerCraft Chapter 2: Programming Basics
Chapter 3: Talking to Your Turtle
Chapter 4: Programming Turtles to Dance Chapter 5: Making a Better Dancer
Chapter 6: Programming a Robot Lumberjack Chapter 7: Creating Modules to Reuse Your Code Chapter 8: Running an Automated Tree Farm Chapter 9: Building a Cobblestone Generator Chapter 10: Making a Stone Brick Factory Chapter 11: Constructing Walls
Chapter 12: Constructing Rooms Chapter 13: Constructing Floors
Chapter 14: Programming a Robotic Farm Chapter 15: Programming a Staircase Miner Function Reference
CONTENTS IN DETAIL
Running Programs in the Turtle GUI Fueling the Turtle
That’s So Random: Generating Random Numbers Storing Values with Variables
3
TALKING TO YOUR TURTLE Teaching Your Turtle to Say Hello!
Running the hello Program
Listing All Files with the ls Command Displaying Text with the print() Function
The String Data Type
Stringing Strings Together with Concatenation Retrieving Turtle Names
Getting Keyboard Input with the io.read() Function Bonus Activity: Proper Introductions Giving Text a Typewriter Effect
Changing Turtle Names
Bonus Activity: A Turtle by Any Other Name What You Learned
Making Decisions with if Statements
Comparing Two Values with Comparison Operators Making Alternate Decisions with elseif Statements Nested Code Blocks
Detecting Blocks with the Turtle Detection Functions The not Boolean Operator
The and Boolean Operator The or Boolean Operator
Terminating Programs with the error() Function Mining Blocks with the Turtle Digging Functions
Comparing Blocks with the Turtle Comparison Functions Returning to the Ground
Startup Programs and the shell.run() Function Bonus Activity: Going Down What You Learned
7
CREATING MODULES TO REUSE YOUR CODE Creating Functions with the function Statement
Arguments and Parameters Return Values
Making a Module of Functions
Loading a Module with the os.loadAPI() Function Experimenting with the hare Module
Looking at the Turtle’s Inventory Selecting an Inventory Slot
Counting the Number of Items in a Slot Getting Item Details from a Slot
Examining the Table Returned by the turtle.getItemDetail() Function Global and Local Scope
Finding an Item with a for Loop Selecting an Empty Inventory Slot
Loading Modules with the os.loadAPI() Function Checking for Files with the fs.exists() Function Selecting Saplings in the Turtle’s Inventory
Planting a Tree
Inspecting Blocks and Waiting for the Tree to Grow Breaking Out of Loops with break Statements
Running Other Programs with the shell.run() Function Handling Items with the Turtle’s Drop Functions
Rewriting Your Code for When You Have No Bone Meal Bonus Activity: Lone Turtle Farmer
What You Learned
9
BUILDING A COBBLESTONE GENERATOR Blueprints for the Cobblestone Generator
Setting Up Furnaces for Smelting the Cobblestone Writing the cobminer Program
Running the cobminer Program
Setting Up Your Program and Making a Constant Variable Mining the Cobblestone from the Generator
Interacting with Furnaces
Making Code Readable with Constants Dropping the Cobblestone into the Furnaces
Rounding Numbers with the math.floor() and math.ceil() Functions Calculating the Cobblestone to Distribute in Each Furnace
Moving the Cobblestone Miner Back into Position
What You Learned
10
MAKING A STONE BRICK FACTORY Designing a Program to Craft Stone Bricks Crafting a Crafty Turtle
Moving the Turtle Back into Position Bonus Activity: Cake Factory Writing and Running the buildwall Program Loading the hare Module
Using the Array Data Type
Reading Command Line Arguments Creating Usage Messages
Calling hare.buildWall() to Build a Wall
Bonus Activity: mylabel Program with Command Line Arguments What You Learned
12
CONSTRUCTING ROOMS
Designing a Room-Building Algorithm Extending the hare Module
Calculating the Total Number of Blocks Needed to Build a Room Writing the buildRoom() Function
Bonus Activity: Plus-Shaped Rooms
Moving Along the Rows and Columns
Figuring Out If a Number Is Even or Odd with the Modulus Operator The Even-Width and Odd-Width Paths
Writing Functions to Use in the Main Program Checking the Crop
Planting Seeds Storing Wheat Farming with a Loop
Bonus Activity: Giant Wheat Fields Tips for Automating Other Kinds of Farming
Milking Cows and Shearing Sheep
Distinguishing Between Blocks That Share Name IDs List of Block Name IDs
ACKNOWLEDGMENTS
It’s misleading to have just my name on the cover. This book wouldn’t exist without the efforts of many people. I’d like to thank my publisher, Bill Pollock; my developmental editors, Jan Cash and Annie Choi; my production editor, Laurel Chun; my technical reviewer, Daniel Ratcliffe; my copyeditor, Anne Marie Walker; and all of the staff at No Starch Press. I’d also like to thank Josh Ellingson for a great cover illustration.
INTRODUCTION
“Just three more diamonds, and then I’ll stop,” I remember telling myself while playing Minecraft. I needed the diamonds for a new pickaxe. I needed the pickaxe to mine more obsidian. I needed the obsidian to make a Nether portal. I needed to go to the Nether to pick up lava. And I needed the lava for . . . what did I need the lava for again? Oh, right. I was sculpting a giant phoenix statue in the side of a mountain, and I wanted to make lava pour out from its eyes and beak. Two hours later, I was still playing, unable to pry myself away from the task at hand.
Minecraft is an addictive game. It has sold over 107 million copies, making it the second most popular video game of all time, beaten only by Tetris. It’s an open-ended, creative platform for gathering resources and building whatever you can imagine. You can build castles to protect against zombie hordes, plant crops and tend to animals, or team up with friends to build massive works of art. Minecraft appeals to a diverse set of people: children, teenagers, and even adults love playing it.
In this book, you’ll use the ComputerCraft mod (also known as CC) to turn your addiction to building into an addiction to coding. But what exactly is ComputerCraft—or a mod, for that matter?
WHAT ARE MINECRAFT MODS?
Minecraft by itself, called vanilla Minecraft, is just the beginning. Minecraft can be modified and extended by third-party software called mods (short for modifications) to provide additional features such as blocks, environments, items, monsters, and even worlds that are not included with the vanilla version of the game. Due to its popularity, Minecraft has attracted one of the largest modding communities of any video game.
These fan-made mods are free to download. Some mods add space exploration and rockets. Others add sorcery and spells. You can even find Minecraft mods for creating your own dinosaur zoos, high-speed train networks, and bee-breeding apiaries. In this book, we’ll use the ComputerCraft mod to learn how to program.
WHAT IS COMPUTERCRAFT?
automatically perform all the time-intensive chores the player usually must do manually.
Figure 1: Turtles chopping trees (left) and mining (right)
The catch is that you have to learn to program first. These turtles understand code written in Lua (moon in Portuguese), which is a programming language used by professional software developers in fields such as embedded computing systems and video game development. The interpreter software that runs Lua scripts is just 100KB, which means that it can be easily embedded inside other pieces of software, such as a Minecraft mod. Lua is often used within video game code—for example, in World of Warcraft, Dark Souls, Portal 2, Factorio, and many others.
Although Lua is simpler than other programming languages, it’s still fast and powerful. These qualities work in your favor. Lua’s simplicity makes it a good language to start with if you have no programming experience.
HOW TO USE THIS BOOK
You’ll need a purchased copy of Minecraft for Windows or macOS, the free ComputerCraft mod, and the free ATLauncher software to use this book. See Chapter 1 for all download and installation instructions.
When typing the source code from this book, do not type the line numbers at the start of each line. For example, if you saw the following line of code, you would not need to type the 9. on the left side
or the one space immediately following it:
9. print('What is your name?')
You’d enter only this:
print('What is your name?')
The numbers are there just so this book can refer to specific lines in the program. They are not part of the actual program’s source code.
Sometimes you’ll also see an unnumbered ...snip... line in the code. This indicates that some code
has been omitted for brevity. The ...snip... is not part of the code itself.
After the first few chapters, which cover basic programming concepts, each chapter in this book focuses on how to write a program your turtle can run to help you survive and thrive in Minecraft. You’ll also find bonus activities that help you test your programming skills.
Here’s what you’ll find in each chapter:
Chapter 1: Getting Started with ComputerCraft helps you install and set up Minecraft and the ComputerCraft mod so you can start programming.
Chapter 2: Programming Basics introduces you to basic programming concepts and the interactive shell.
Chapter 3: Talking to Your Turtle introduces the file editor, which you’ll use to write your first program.
Chapter 4: Programming Turtles to Dance shows you how to write a program to move the turtles around the Minecraft world.
Chapter 5: Making a Better Dancer adds on to the previous chapter’s dancing program with some new programming instructions.
Chapter 6: Programming a Robot Lumberjack features a program to make a turtle chop down a single tree and collect its wood.
Chapter 7: Creating Modules to Reuse Your Code teaches you how to write code once and share it with multiple programs.
Chapter 8: Running an Automated Tree Farm extends the program from Chapter 6 to create a fully automated tree farm so your turtles can harvest wood from multiple trees.
Chapter 9: Building a Cobblestone Generator features a program for mining unlimited amounts of cobblestone, which the turtles will use as building material for Chapters 10 through 13.
Chapter 10: Making a Stone Brick Factory features a program to turn the cobblestone from Chapter 9 into stone bricks.
Chapter 11: Constructing Walls includes a program that uses stone bricks to build walls.
Chapter 12: Constructing Rooms contains a program that lets you join walls together to build rooms.
Chapter 13: Constructing Floors features a program to build floors and ceilings for your rooms.
Chapter 14: Programming a Robotic Farm features a program to make turtles plant and harvest different kinds of crops so you can keep yourself fed.
Chapter 15: Programming a Staircase Miner features a program that digs stairs deep into the ground to mine ore and other valuable blocks.
The Function Reference lists and explains how to use all the functions in this book.
The Name ID Reference lists commonly used Minecraft blocks and items along with their name IDs, which you’ll use to identify block types and other items in your programs.
Minecraft famously lacks a tutorial for new players. It doesn’t have an instruction manual or even a help menu. Minecraft forces you to be responsible for your own education. You’ll need to do online research, form questions, find answers, and sometimes just do some plain old experimentation. Minecraft cultivates a growth mindset in players. Even after falling into lava or having their base blown up by a creeper, players come back determined to learn how to overcome these problems.
However, this book is about the ComputerCraft mod, not the basics of playing Minecraft. To use this book, you should already know how to do the following in Minecraft:
Mine for ore, stone, coal, wood, and other blocks
Craft a workbench and tools such as axes, shovels, torches, and pickaxes Craft a furnace, fuel it, and then smelt ore blocks or cook meat in it
Craft stairs, ladders, chests, doors, fences, and other parts you’ll use for buildings Plant seeds and farm food
If you don’t know how to do all of these things, don’t worry. You can teach yourself by searching online. Go to the search engine of your choice and enter the word minecraft along with what you want to learn. For example, you could use the search terms minecraft smelt ore, minecraft bake cake, or even just minecraft basic tutorial to find the information you need. You can also search for Minecraft video tutorials on websites such as https://www.youtube.com/ by using the same search terms you would use in a search engine.
As I mentioned previously, because ComputerCraft isn’t made by the same people as Minecraft, most Minecraft websites won’t have information about CC. You can learn about CC from the ComputerCraft Wiki at http://www.computercraft.info/wiki/. If you have questions specific to CC, you can sign up for a free account on the ComputerCraft forums at http://www.computercraft.info/forums2/. If you have additional questions about the programs in this book, you can post those to the community at https://www.reddit.com/r/turtleappstore/.
ONLINE RESOURCES
You can download all the programs in this book directly from inside the Minecraft game (see “Sharing and Downloading Programs Online” on page 42 for instructions). And, although Minecraft doesn’t support copying and pasting text from outside the game, all the code and resources for this
book are available for reference on its companion website,
https://www.nostarch.com/codingwithminecraft/. There, you can also download the code for the bonus activities if you get stuck and want to check out the solutions! You’ll also find links to the installation files (see Chapter 1 for detailed installation instructions). If you want to explore other programs or share your code, you can do so through https://turtleappstore.com/, which is a free website for ComputerCraft scripts (see “turtleappstore.com” on page 44 for details).
WHAT YOU LEARNED
lets you program turtles in the Lua programming language. By learning to program with Lua and CC, you can automate many jobs you would otherwise have to do by yourself, including mining, farming, building, and crafting.
Using Minecraft and ComputerCraft, you’ll solve problems independently and learn basic computer programming skills along the way.
1
GETTING STARTED WITH COMPUTERCRAFT
Before you can start programming robotic turtles to do your bidding, you’ll need to install and set up Minecraft and the ComputerCraft mod. Fortunately, the free ATLauncher software makes this process painless. In this chapter, I’ll show you how to obtain Minecraft and the ComputerCraft mod, and then I’ll walk you through all the configuration steps you’ll need to do before you start programming.
INSTALLING MINECRAFT, ATLAUNCHER, AND
COMPUTERCRAFT
Configuring Minecraft’s mods used to be tricky because it involved a series of complicated steps. However, you can now use the ATLauncher software to load mods into Minecraft more easily. Because Minecraft, ATLauncher, and ComputerCraft are created by different groups, you’ll need to download and install each program separately. All three are available for the Windows, macOS, and Ubuntu operating systems, but the ComputerCraft mod isn’t available for Minecraft on mobile, Xbox, or PlayStation platforms.
Mods only work for Minecraft’s Java Edition, which is also called the Windows version of Minecraft. The Windows 10 version of Minecraft doesn’t support mods, although it supports a new form of mods called add-ons. But don’t worry! We’ll be using software called ATLauncher to download and install the correct version of Minecraft.
BUYING MINECRAFT ONLINE
NOTE
Keep your Mojang account password safe and secret. Don’t share it with friends or people who claim to be Mojang employees. Use it only to log into the ATLauncher software or the https://www.minecraft.net/ website and no other sites. If you think someone else might be logging into your account, change your password immediately.
DOWNLOADING AND INSTALLING ATLAUNCHER
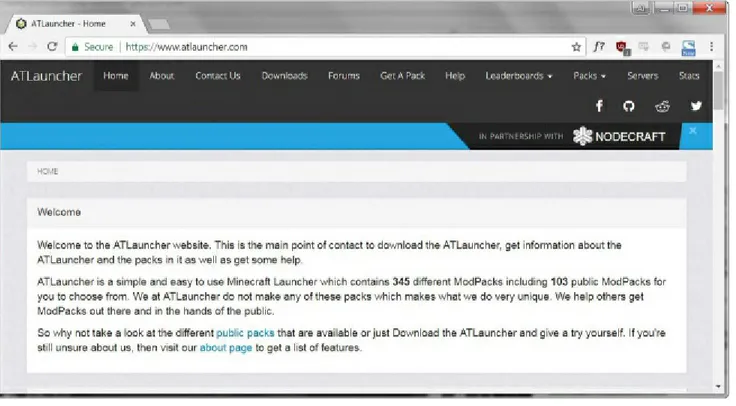
The ATLauncher software makes it easy to add mods to Minecraft. Figure 1-1 shows how you can download it for free at https://www.atlauncher.com/. Click the Downloads link at the top of the page to find the installation help video. Follow the steps in the video to download and install ATLauncher. The video is also available on YouTube at https://youtu.be/gTf7rRCwMcI/.
Figure 1-1: The ATLauncher website, where you can download the software
After installing ATLauncher, run it and click the Accounts tab on the right side. Fill in your Mojang account’s username and password. You can select Remember password so you don’t have to enter this information each time you run Minecraft.
To connect to a Minecraft server, you must install the same mods (and versions of each mod) as the server. Because so many mod combinations are possible, fans have created modpacks that consist of a standardized set of mods. We’ll download a “vanilla” modpack (that is, a modpack with very few mods) now, and we’ll add the ComputerCraft mod next. Click Packs and find the Vanilla Minecraft modpack. You’ll add ComputerCraft to this version of Minecraft.
Enabling the user lock means that only the Windows, macOS, or Linux user you are logged in as will be able to access this instance.
NOTE
Future versions of ComputerCraft may be compatible with newer versions of Minecraft. In this case, up-to-date installation instructions will become available at https://www.nostarch.com/codingwithminecraft/.
In the Select Mods to Install window that appears, select only the box next to Minecraft Forge (Recommended) and then click Install. The Minecraft Forge mod is required for ComputerCraft.
USING A MOD ON A SERVER
When you first play Minecraft, I recommend playing in Singleplayer mode. But if
you want to connect to a public multiplayer server, your instance needs to have
the same mods as the server. Most public servers won’t have just the
ComputerCraft mod installed, so you’ll need to install a modpack instance that
isn’t Vanilla Minecraft from the Packs tab instead. Popular modpacks that
include ComputerCraft are Resonant Rise, Sky Factory 2, Space Astronomy, The
Golden Cobblestone, and Yogscast Complete. (My favorite is Resonant Rise.)
You can also browse the list of modpacks on ATLauncher’s Packs tab and click
the
View Mods
button to see whether ComputerCraft is included. If you use one
of these modpacks, you can skip the instructions in “Downloading and Installing
ComputerCraft” on page 4 because the correct version of ComputerCraft and
Minecraft will automatically be installed with the pack. Modpacks have version
numbers, so when you play on public servers, you’ll need to install the same
version of the modpack that the server uses.
To find public servers for these modpacks, do a web search for <
modpack
name> public servers
or go to
https://www.atlauncher.com/
and click the
Servers
link at the top.
When the installation is finished, you can find your instance of Minecraft by selecting the Instances tab on the right side of the ATLauncher window. This instance is for Vanilla Minecraft, so you’ll have to manually download and install ComputerCraft.
DOWNLOADING AND INSTALLING COMPUTERCRAFT
shows how to install ComputerCraft at https://youtu.be/g4Zs2JY1vi8/. You can download the ComputerCraft mod at http://www.computercraft.info/download/. Click the Download ComputerCraft 1.79 (for Minecraft 1.8.9) link to download the file ComputerCraft1.79.jar. This file is also available at https://www.nostarch.com/codingwithminecraft/.
I like to keep this file in ATLauncher’s folder so that it’s easy to find. On ATLauncher’s Instances tab, click the Edit Mods button next to your Vanilla Minecraft instance. You’ll see the Editing Mods for CC Minecraft window, as shown in Figure 1-2, which currently has only the Minecraft Forge (Recommended) mod installed and enabled.
Figure 1-2: The Editing Mods for CC Minecraft window
Click the Add Mod button, and in the window that appears, click the Select button and find the ComputerCraft1.79.jar file you downloaded. Next to Type of Mod, select Inside Minecraft.jar from the drop-down menu. Then click the Add button.
The ComputerCraft1.79.jar file will appear on the right side under Disabled Mods. This mod is now installed to your Minecraft instance, but you must enable it to use it. Select the checkbox next to ComputerCraft1.79.jar, and then click the Enable Mod button at the bottom of the window. The ComputerCraft mod will move to the left side of the window under Enabled Mods. Click the Close button to complete the process.
Figure 1-3: The Update Available window
If you accidentally click Yes and update the instance, the ComputerCraft mod might not work correctly. You’ll have to delete the instance and repeat all the instance and mod-adding steps again.
CONFIGURING COMPUTERCRAFT
ComputerCraft has some configurable settings stored in a text file named
ComputerCraft.cfg
. In general, you don’t need to modify this file, and this book
assumes you’re using the default configuration. Most public multiplayer
Minecraft servers use the default configuration too. However, if you want to
change CC’s settings for any reason, you’ll need to know where the
configuration file is located.
You’ll find this file on your computer under the same subfolders where you
installed ATLauncher. On my Windows computer, I’ve installed ATLauncher in
t h e
C:\ATLauncher
folder, so the configuration file is located in
C:\ATLauncher\Instances\CCMinecraft\config\ComputerCraft.cfg
. Open this file
in a text editor, such as Notepad or TextMate. The settings are described in the
file, and you can change them by entering new values after the equal signs (
=).
RUNNING MINECRAFT
Figure 1-4: Minecraft’s main menu
Click the Singleplayer button, which should take you to a list of Minecraft worlds you’ve made. If this is the first time you’re running Minecraft, you’ll need to create a world.
CREATING A NEW WORLD
Minecraft does not have a standard set of levels. Rather, the game world is randomly generated and always provides you with a new, unknown area to explore. From the Singleplayer menu, click the Create New World button, and the Create New World menu will appear, as shown in Figure 1-5. Enter the name My CC World in the World Name text field. Then click the Game Mode button until it
Figure 1-5: The Create New World menu
Click the More World Options… button, and then click the Allow Cheats button until it displays Allow Cheats: ON. Cheats will allow you to switch between the Survival and Creative game modes, which is explained next. To generate the new world, click the Create New World button.
MINECRAFT GAME MODE DIFFERENCES
Minecraft has three modes you can play in: Creative, Survival, and Hardcore.
In Creative mode, you can fly, don’t need to eat, can’t die, and will have an unlimited supply of all blocks. This mode is ideal if you just want to create structures out of Minecraft blocks, such as castles or giant artwork.
In Survival mode, things get real. You’ll need to find food to prevent yourself from starving. The only blocks you get to build with are the ones you’ve mined yourself. You can’t fly, and if you fall off a cliff, you’ll take damage or even die. At night, monsters come out.
Because you set the Allow Cheats option to ON when you created the world, you’ll be able to use the /gamemode command to switch between the Survival and Creative modes. To change the game mode,
press the T key to open the chat window and enter /gamemode creative or /gamemode survival, as shown in
Figure 1-6: Entering the/gamemode creativecommand into the chat window
I think playing in Survival mode makes the game more challenging and fun. Resources are limited and you have to work for your blocks. Survival mode is also where ComputerCraft shines. By programming turtles to help you automate boring chores, you can keep yourself fed, safe, and well stocked while braving the elements.
Don’t worry about dying in Survival mode. When you die, you’ll drop the items that you were carrying and start back at your original spawn point, but you can keep playing.
Hardcore mode is similar to Survival mode, but you get one life and one life only. After dying, you must delete the game world. ComputerCraft also works in Hardcore mode, but I recommend sticking to Survival mode for now.
WHAT YOU LEARNED
You’ve now completed all the setup steps you need to use this book. You downloaded and installed Minecraft, ATLauncher, and the ComputerCraft mod. As mentioned earlier, ATLauncher and ComputerCraft are free. Minecraft is not.
2
PROGRAMMING BASICS
In this chapter, we’ll explore the basics of crafting Minecraft robots, or turtles. We’ll create our first turtle and name it. Then we’ll fuel it up and try out a few programming instructions! You’ll also learn some basic programming concepts and how you can practice coding in Minecraft.
GETTING STARTED WITH TURTLES
Figure 2-1: An example of colorful turtle art
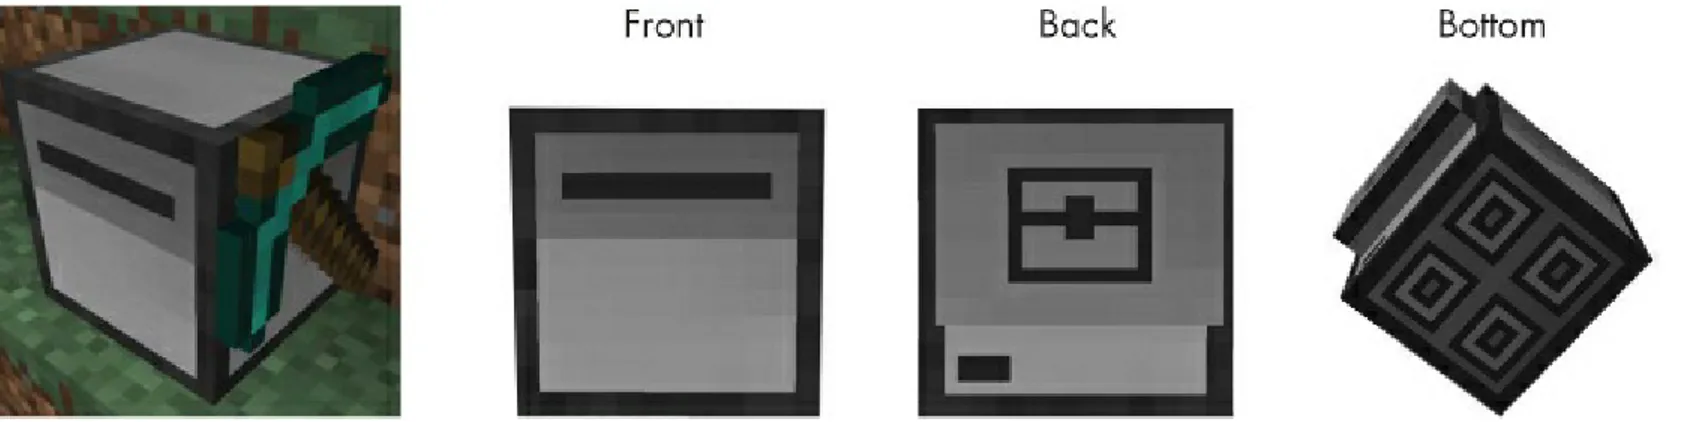
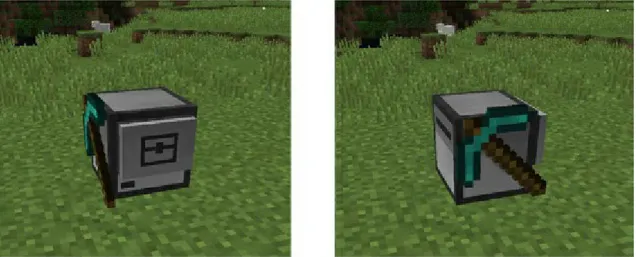
ComputerCraft brings the same idea to the Minecraft world, where turtles are robots that can mine and craft according to programs you write. Figure 2-2 shows what these block-shaped turtle robots (also called bots) look like.
Figure 2-2: A turtle equipped with a pickaxe (left) and what turtles look like from different sides
These boxy bots may not look like much, but they have a lot of potential. Turtles can move in all directions. They can hover, survive underwater, carry items, and move through lava. Once you’ve mastered some programming skills, your turtles will carry out complex tasks at your command.
CRAFTING A MINING TURTLE
When you’re in Creative mode, you can spawn a turtle just like any other item. You spawn a turtle by pressing E to open your inventory, clicking the compass tab, and then typing turtle to find all the
Figure 2-3: Spawning a turtle in Creative mode
NOTE
To switch to Creative mode, press T or the / key to bring up the chat/command window; then enter /gamemode creative and press ENTER. To switch to Survival mode, press T or the / key and
enter /gamemode survival.
But we want to use turtles in Survival mode, where we’ll need to craft turtles (along with everything else) from scratch. Here’s how to do it.
1. Craft a computer. The turtle-crafting recipe requires a computer, so before we can craft a turtle, we must craft a computer using stone, redstone, and a glass pane. (If you don’t know how to make stone or glass panes, or where to find redstone, open a web browser to a search engine site and enter “minecraft find redstone” or “minecraft craft glass pane.”) To craft a computer, we’ll follow the recipe in Figure 2-4.
Figure 2-4: Crafting a computer with seven stone blocks, one redstone block, and one glass pane
Figure 2-5: Crafting a turtle with seven iron blocks, one chest, and one computer
3. Equip the turtle with tools! So far, we just have a basic turtle. It can move around, but it can’t mine, dig, or do much else until we give it a tool. We can equip turtles with diamond pickaxes, shovels, axes, hoes, or swords. These tools must be diamond tools and brand new. An iron tool or a diamond tool with wear and tear won’t work. We can also equip turtles with crafting tables.
For our first turtle, let’s use a diamond pickaxe to craft a mining turtle by following the recipe in Figure 2-6.
Figure 2-6: Crafting a mining turtle with one turtle and one diamond pickaxe
RUNNING PROGRAMS IN THE TURTLE GUI
Figure 2-7: The turtle’s GUI
The GUI consists of your inventory, the turtle’s inventory, and the command shell, which is where you’ll write your programs and enter commands. (Oddly enough, the terms shell and turtle are just a coincidence.) You can store multiples of the same items in a single inventory slot to create a stack of items. For most items, you can stack up to 64 items in a single slot. Turtles have 16 inventory slots, and you can easily drag items between your inventory and the turtle’s.
Turtles come preloaded with some programs, including label, dance, refuel, go, and lua. We should
first name our turtle using the label program. In this book, I’ve named the turtles after four Italian
Renaissance painters: Sofonisba, Lavinia, Artemisia, and Elisabetta. You can use these names or choose different ones.
Right-click the turtle to open the GUI, and run the label program by entering label in the command
shell, followed by the words to set the turtle’s name, which in this case are set Sofonisba. Then press
ENTER:
> label set Sofonisba
Computer label set to "Sofonisba"
The words set Sofonisba are called command line arguments, and they tell the label program what
do to. Together, the label program and set Sofonisba command line arguments form a command for the
turtle to carry out.
The > symbol at the start of the code is called the prompt. We type our commands at the prompt,
and after the turtle has carried them out, a new > prompt will appear and wait for our next command.
WARNING
set a label for it. Otherwise, it will lose all its fuel and erase any programs it had. (Fuel is described in the next section.) Mining a turtle also causes it to drop its inventory, much like mining a chest.
Now that the label program has set the turtle’s name to Sofonisba, run the dance command to start
another preloaded program:
> dance
Preparing to get down...
Press any key to stop the groove
Press ESC to close the turtle GUI. You’ll see that as the dance program runs, the turtle bot randomly
spins around. Right-click the turtle to bring up the turtle GUI again. The dance program is still running,
but it is programmed to stop when you press any key. You can also stop any program by holding down
CTRL-T for one full second while the GUI is open.
DANCE, DANCE, TURTLE: RERUN COMMANDS
If you want to run a program that you’ve previously run, you can use a quick shortcut. When you press the up and down arrow keys, the command shell will display previous programs you’ve run. For example, you’ve already entered the dance command:
> dance
If you want to run the dance program again, you don’t have to enter the dance command again;
just press the up arrow key, and the command shell will fill itself with the last written command. If you press the up arrow again, the command shell will continue going back in your command history to find earlier commands you’ve entered, starting with the most recently entered command. This also works in the Lua shell, which is described in “Getting Started with Lua Programming” on page 17.
FUELING THE TURTLE
Turtles can move forward, backward, up, or down (and they can fly!). But in order to move, they need fuel. Any items you can burn in a furnace can be consumed as fuel, and one unit of fuel can move the turtle one block. Table 2-1 shows how many units of fuel each item provides.
Table 2-1: Turtle Fuel Sources
Item Item name Units of fuel
Wooden tools (pickaxe, shovel, and so on)10
Wood 15
Planks 15
Coal or charcoal 80
Blaze rod 120
Coal block 800
Lava bucket 1,000
The item that provides the most fuel is a bucket of lava. Notice that wood and planks both provide 15 fuel units. You can craft a wood block into four planks, so you can get four times as much fuel if you turn wood blocks into planks before you use them as fuel. In general, using coal or charcoal is usually the easiest way to fuel your turtles. Coal provides 80 fuel units, but coal blocks provide 800 units. Because it takes only nine coal items to craft a coal block, it’s more efficient to craft coal into coal blocks before fueling. Blaze rods are rare (they’re only dropped by defeated blaze mobs in the Nether) and don’t give that much fuel, so you should save them for crafting instead.
A basic turtle can store up to 20,000 units of fuel. Only moving uses fuel. You don’t need fuel for turning, mining, crafting, digging, and everything else a turtle does. Hovering in the air doesn’t require fuel either; it’s just like being on the ground.
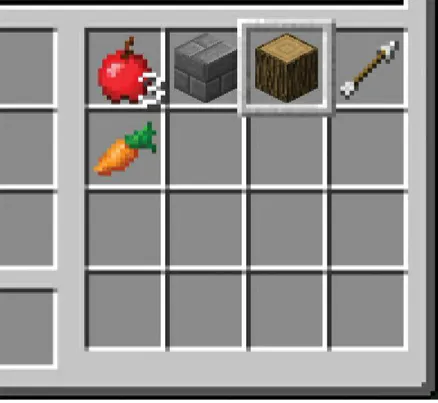
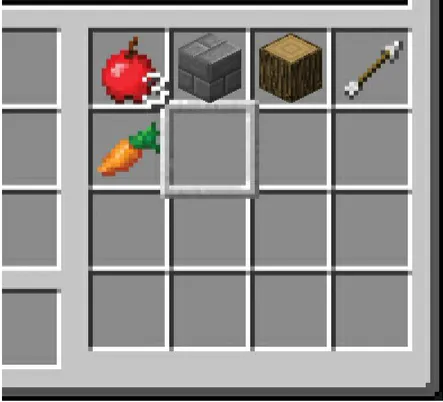
To burn an item for fuel, it must be in the turtle’s inventory and in the selected slot, which has a thick border around it, as shown in Figure 2-8.
one item to burn for fuel, enter the number of items you want to burn after refuel.
Figure 2-8: The currently selected slot of the turtle’s inventory has a thicker border than the other slots.
For example, enter the following in the command shell:
> refuel 64
Fuel level is 5120
This command will run the refuel program and burn up to 64 items in the currently selected slot.
The amount of fuel units this produces depends on the type of item in the slot. To find out how much fuel the turtle has, just run refuel 0:
> refuel 0
Fuel level is 5120
This command will display how much fuel the turtle has without burning any fuel items in the inventory.
WARNING
If you mine a turtle with a pickaxe to put it in your inventory before setting a label for the turtle, it will lose all the fuel it had. Be sure to run the label program to give it a label first.
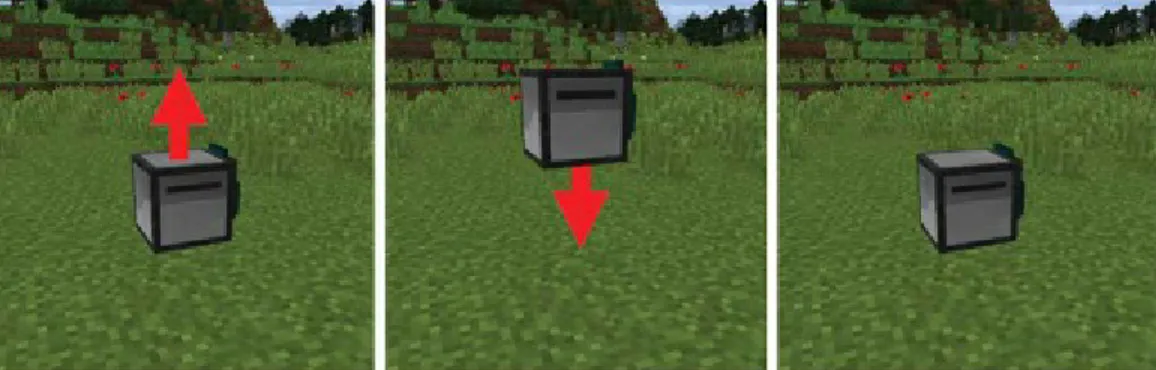
MOVING THE TURTLE
Now that the turtle is fueled up, let’s move it. From the command shell, we can run the go program to
tell it to move forward and backward. Enter the following into the command shell:
> go forward
When you press ESC to close the GUI, the turtle will have moved forward one space. Note that if a
terminate the program, hold down CTRL-T for a full second.
To tell the turtle to go backward, enter the following:
> go back
The turtle will move back one space. Enter a number after forward or back to move the turtle that
number of spaces, as in the following example:
> go forward 2
The turtle will move forward two spaces.
Turning the turtle is similar. Enter the words left or right followed by a number to make the turtle
turn left or right that number of times. For example, go left will make the turtle turn to face left.
Entering go right 2 will make the turtle turn right twice so it’s facing the opposite direction.
We can even chain multiple movements together, as in the following example:
> go forward 2 up right forward down back 3 left
The turtle will move forward two spaces, move up one space, turn right, move forward one space, move down one space, move back three spaces, and then turn left.
There are a few shortcut words you can use for the go program: fd for forward, bk for back, lt for left, rt for right, and dn for down. Enter the following example into the command shell:
> go fd 2 up rt fd dn bk 3 lt
This moves the turtle the same way the previous example did, except there is much less to type.
GETTING STARTED WITH LUA PROGRAMMING
Running the programs that turtles come with is useful, but the real power comes when you write your own programs in the Lua programming language. A programming language is a language that you can use to write instructions that a computer can understand. At this point, it might be difficult to determine what these instructions and programming words are used for, but keep in mind that they’re just the building blocks for useful programs you’ll make later. You’ll learn these Lua instructions one at a time.
RUNNING THE LUA SHELL
Lua has a Lua shell, which allows you to enter and run Lua instructions in the turtle’s GUI. You’ll need to run the lua program to access it:
> lua
Interactive Lua prompt. Call exit() to exit. lua>
instructions. The Lua shell is handy for seeing what each instruction does because you can enter one instruction at a time, which saves a lot of work.
NOTE
In this book, the Lua shell is where you enter Lua code. It displays the lua> prompt at the front
of each line where you enter your instructions in the Lua language. The command shell is where you enter commands to run programs. It has the simpler > prompt. It’s easy to confuse
the two. If you get error messages when you run your code, double-check which prompt you’re using.
Figure 2-9: The Lua shell in the turtle’s GUI
Let’s start with a simple instruction that tells a turtle to turn left. Enter this instruction into the Lua shell:
lua> turtle.turnLeft()
true
As you type, Lua will autofill the instruction it thinks you’re typing. You can press TAB to use the
autocomplete suggestion and save time. In Figure 2-10, I’ve typed turtle.tu, and the autocomplete
suggests turtle.turnLeft(. Pressing TAB will fill in the rnLeft( highlighted part, and then I can type the
Figure 2-10: Autocomplete suggeststurtle.turnLeft(when you enterturtle.tu.
The word true that appears after you enter the command is called a return value, and it lets you
know the turtle was successfully able to turn left. Many turtle instructions will return true if they can
carry out your instruction and false if they can’t. (The true and false values are called Boolean values
and are explained in Chapter 5.)
After returning true, the lua> prompt appears again, waiting for your next instruction. Press ESC to
see that the turtle has turned to the left, as shown in Figure 2-11.
Figure 2-11: The turtle before and after runningturtle.turnLeft()
Right-click the turtle to bring up the turtle’s GUI again, and enter the following into the Lua shell:
lua> turtle.turnRight()
true
Now when you press ESC, you’ll see that the turtle has turned to the right and is facing its original
direction. The turtle.turnLeft() and turtle.turnRight() instructions are functions. In programming, a
function is a kind of miniprogram inside a program. Functions contain a set of instructions to perform a small action. When a function is run as a Lua instruction, we say that we are calling the function.
The turtle.turnLeft() and turtle.turnRight() functions are in the turtle module. A module is a
collection of functions. To call the functions inside the turtle module, you need to type turtle with a
period before the function name. The turtle module has many functions for making the turtle move,
GOODBYE LUA: EXITING LUA’S PROMPT
Notice that pressing ESC will exit the GUI, but the next time you right-click the turtle, you’ll still be in
the Lua shell. You can exit the Lua shell and go back to the command shell prompt by calling the exit()
function. Enter the following into the Lua shell:
lua> exit()
>
After exiting back to the command shell prompt, you’ll see that the lua> prompt has been replaced
with the command shell’s > prompt.
LETTING LUA DO THE MATH
Don’t worry if you think you’re not good at math—Lua will do all the math for you! Lua can solve math problems just like a calculator if you give it the right instructions.
Return to the Lua prompt and enter the following:
lua> 2 + 2
4
We call these math problems expressions. T h e 2s in the expression are called values.
Specifically, they are number values. The + sign in the expression is called an operator. When you
give these values and operators to Lua as an expression, Lua will evaluate the expression to a single value, which is the answer to the math problem. The expression 2 + 2 evaluates to 4.
Spacing doesn’t matter in an expression. You can use as many or as few spaces as you want. Enter the following into the Lua shell:
lua> 3+4
7
lua> 3 + 4
7
Even though you can use as many spaces as you like, most programmers will use a single space between values and operators to make their code easier to read.
Lua recognizes the math operators for addition (+), subtraction (-), multiplication (*), division (/),
and exponentiation (^). Enter the following into the Lua shell to see examples of these operators in
Although some of these operations don’t use the same symbols you would use in math class, they work in the same way.
A value by itself is also an expression: it evaluates to itself. Enter the following into the command shell to see an example:
lua> 42
42
You can see that the value 42 by itself evaluates to 42. Expressions always evaluate to a single
value, even for a small expression like 42.
Expressions can be as long as you like. Enter the following into the Lua shell:
lua> 1 + 2 + 3 + 4 + 5
15
This expression has five values and four operators, but Lua can evaluate it to the single value 15.
Lua evaluates the expression one step at a time, working from left to right, but you don’t see all these steps on your computer.
ERROR! ERROR!
Notice that for multiplication, Lua uses the asterisk *, not the cross symbol or letter x. If you try
to use x for multiplication, Lua will show an error:
lua> 5 x 5
bios.lua:14: [string "lua"]:1: unexpected symbol
An error just means that Lua couldn’t understand the instruction you gave it. Make sure your instruction is properly typed and enter it again.
Programming error messages can be confusing. If you don’t understand what the message means, you can enter the error message (such as “unexpected symbol” in the example) into a search engine to find explanations for it.
ORDER OF OPERATIONS
The rules that determine which parts of an expression are evaluated first are called the order of operations. The order of operations in Lua is the same as the order of operations in mathematics. Going from left to right, operations in parentheses are done first, then the ^ operations, then the * and /
operations, followed by the + and – operations. Enter the following into the command shell:
lua> 2 + 3 * 4
14
The expression 2 + 3 * 4 evaluates to 14 instead of 20 because the 3 * 4 evaluates to 12 first, making
Lua evaluates this expression one step at a time, as shown here:
You can change the order of operations by using parentheses. Enter the following into the Lua shell:
lua> (2 + 3) * 4
20
Now the (2 + 3) part evaluates to 5 first, making the expression 5 * 4, which evaluates to 20. Lua
evaluates this expression as shown here:
THAT’S SO RANDOM: GENERATING RANDOM NUMBERS
One other way Lua can help you do your math is by providing random numbers. Lots of games and programs use random numbers (think of how many board games use random numbers generated from rolling dice), so at times you’ll need to generate random numbers for your programs, too. To do so, you’ll use the math.random() function, which returns a random number every time you call it. Notice thatthe random() function is inside the math module. Enter the following into the Lua shell:
lua> math.random(1, 6)
6
lua> math.random(1, 6)
1
lua> math.random(1, 6)
1
lua> math.random(1, 6)
3
lua> math.random(100, 200)
142
Because the return values are random, your numbers will probably be different from the ones in this example. Notice that when we call the random() function, we include two numbers inside the
parentheses. These values are the function call’s arguments. Arguments are values given to the function call that tell the function how to behave. When you put arguments inside a function call’s parentheses, you’re passing arguments to the function call. The random() function takes two arguments:
the minimum and maximum random number that the function call should return. When you pass 1 and 6
return value will be between 100 and 200.
Whenever you need to add a random element to your program, you’ll use the random() function.
We’ll do this in the mydance program we’ll write in Chapter 4.
STORING VALUES WITH VARIABLES
To use values multiple times, you can store them in variables. A variable is like a box in the computer’s memory in which you can store a single value (see Figure 2-12). To make a variable, you write the variable name, followed by an equal sign (=), followed by the value you want to store in the variable. For example, if you wanted to keep track of how much coal you have, you could use the instruction coal = 10 to store the value 10 in a variable named coal. (Perhaps this variable keeps track of
how much coal the turtle has mined.) This kind of instruction is called an assignment statement, and the equal sign (=) is called the assignment operator.
Figure 2-12: The instructioncoal = 10is like telling the program, “The variablecoalnow has the number value10in it.”
You can use a variable in expressions wherever you would use the value of the variable. For example, enter the following into the Lua shell:
lua> coal = 10
lua> coal + 4
14
lua> coal + 10
20
lua> 12 – coal + 3
5
You set the coal variable to 10 on the first line. After you do this, the value 10 is used wherever you
use coal.
Also, just like how a value by itself evaluates to itself, you can see what value is in a variable by entering the variable name into the Lua shell:
lua> coal
10
We previously assigned coal the number 10, so when we enter coal, it evaluates to the value 10.
Let’s change the value stored in the coal variable using another assignment statement. This is called
overwriting the variable. Enter the following into the Lua shell:
lua> coal = 100
lua> 2 + coal + 3
105
lua> coal = 200
lua> 2 + coal + 3
205
Variables can store only one value at a time. When a variable’s value is overwritten with a new value, the old value is discarded and forgotten, as shown in Figure 2-13.
Figure 2-13: Thecoalvariable is overwritten with the value200, and the old 100value is forgotten.
Once a variable has a value, you can use the variable in its own assignment statement. Using a different variable named counter, enter the following into the Lua shell:
➊ lua> counter = 0
lua> counter
0
➋ lua> counter = counter + 1
➌ 1
arrow to display previous instructions, just like you did in the command shell. Adding 1 to counter lets
you use counter to count up. This technique will be useful in your future programs when, for example,
you need to count the number of times you’ve run a command. You can reassign counter as many times
as you want, and you can even modify it with values other than 1, such as 100➎.
Variables are useful for storing the results of calculations or other data that you want to use later in a program. Most programs you’ll write (and almost every program in this book) use variables.
VARIABLE NAMES
Variable names can be anything as long as they begin with a letter or underscore and consist of only letters, numbers, and underscores. Variable names usually describe the value they store, such as fuelPercentage, spaceLeft, or coal. Variable names are case sensitive, which means the
same variable name in a different case is considered a different variable. The variables coal, Coal, and COAL are considered to be three different variables.
CHECKING THE TURTLE’S FUEL LEVELS
Let’s use variables and expressions in the Lua shell to calculate the amount of coal needed to completely fuel the turtle. The turtle.getFuelLevel() function returns the current fuel level, and the turtle.getFuelLimit() function returns the maximum amount of fuel the turtle can hold. Enter the
following into the Lua shell:
lua> turtle.getFuelLimit()
20000
lua> turtle.getFuelLevel()
968
➊ lua> spaceLeft = turtle.getFuelLimit() – turtle.getFuelLevel()
lua> spaceLeft
19032
➋ lua> coalNeeded = spaceLeft / 80
lua> coalNeeded
237.9
The expression turtle.getFuelLimit() – turtle.getFuelLevel() calculates the amount of space left in the
turtle’s fuel tank ➊. The value this expression evaluates to is stored in the spaceLeft variable. Because
coalNeeded variable ➋.
You can see how function calls, expressions, and variables can be combined into useful code for a turtle robot. As you learn more programming concepts, the code you create will become more sophisticated.
WHAT YOU LEARNED
In this chapter, you learned how to create and control turtles. Turtle robots can be crafted just like any other item in Minecraft, and they can be equipped with brand-new diamond tools. Turtles need to be fueled with items such as wood or coal to be able to move. Right-clicking the turtle brings up its GUI, which shows its inventory and command shell. The command shell is where you enter commands and programs. Turtles come with some programs, such as label, dance, and refuel.
You also learned some basic Lua programming with the Lua shell. The simplest type of Lua instructions are expressions, such as 2 + 2. Expressions are made up of values (like 2) and operators
(like +), and they evaluate to a single value.
Lua code also includes functions, which are miniprograms inside your Lua program. By calling these functions, you can perform simple actions, such as turning the turtle around or generating a random number. Function calls evaluate to values, and these values are known as return values.
Values can be stored in variables to be used later in a program, and almost every program uses variables. You use an assignment statement, such as coal = 10, to store a value in a variable.
3
TALKING TO YOUR TURTLE
IT’S ALIVE! In Chapter 2, you created your first turtle robot, fueled it, and brought it to life. Your robotic creation has a body, but it doesn’t have much in the way of a brain. A Minecraft turtle’s brain is its program, which tells it what to do. Without a program to run, your robot doesn’t do anything. Let’s give the robot a bit of personality by writing a program that lets us talk with it.
TEACHING YOUR TURTLE TO SAY HELLO!
We’ll use the turtle’s edit program to create a new file and write and edit our first program. Programs
like the edit program, which we use to write other programs, are called text editors. Right-click the
turtle to open its GUI, and then enter the following into the command shell:
> edit hello
Whenever you want to create or open a file, you’ll write the keyword edit followed by the
filename. The edit hello code runs the edit program and creates and opens a hello file to edit. In the
file, we’ll write the instructions for our program. The instructions will all run one after another instead of one at a time like when we were entering them into the Lua shell in Chapter 2. The hello
program will display Hello, world! on the screen—a traditional program for new programmers to
write.
Even though the text editor doesn’t have a lot of room, you’ll still be able to type long instructions on one line. To move the blinking cursor to other lines, use the keyboard keys listed in Table 3-1.
Table 3-1: Keyboard Keys to Move the Text Editor’s Cursor
Keyboard keys Cursor action
Up, Down, Left, RightMoves the cursor in the key’s direction
PgUp, PgDn Moves the cursor several lines up or down at a time
Backspace Erases the text behind the cursor
Home Moves the cursor to the start of the line
End Moves the cursor to the end of the line
Tab Can autocomplete an instruction you’ve started to type
A program’s instructions are called its source code. Enter the following source code for the hello
program into the editor, but don’t type the number, period, and space at the beginning of each line. The line numbers are just used for reference in this book. I’ll explain the code step by step in this chapter, so don’t worry about what each line means for now.
hello
1. print('Hello, world!')
2. print('I am ' .. os.getComputerLabel()) 3. print('What is your name?')
4. name = io.read()
5. textutils.slowPrint('Nice to meet you, ' .. name)
When you finish entering the code, press the CTRL key to bring up the Save/Exit menu at the bottom
of the shell. The edit program will look like Figure 3-1 when the menu is open.
Figure 3-1: Thehelloprogram typed into the editor
The [Save] option has brackets around it to highlight it. Press ENTER to save the hello file on the
turtle so you can access, edit, and run the program later. Then press CTRL to bring up the Save/Exit
menu again. Press the right arrow key to highlight [Exit], and press ENTER to take you out of the file
and back to the command shell prompt.
RUNNING THE HELLO PROGRAM
programs. Just enter hello in the command shell:
program, you haven’t named your turtle using the
labelprogram. From the shell’s
>prompt, run the
label set Sofonisbacommand to set your turtle’s name to Sofonisba.
(You can also choose a different name.)
The turtle says hello, introduces itself, and waits for you to type your name. After I enter my name,
Al, the program looks like this:
> hello
When the program finishes, it returns to the > prompt and is ready for you to run another program.
The software that runs programs written in the Lua programming language is called the Lua interpreter. We shorten the name of the interpreter and call it Lua, so Lua refers to both the programming language and the software that runs code written in that language. The place in the code where the Lua interpreter is currently running instructions is called the execution. The execution always starts at the first line of a program. It executes (or runs) the instruction on line 1. Then it moves down and executes each instruction, or line of source code.
Look at the text the program produced, and then look back at the hello program’s source code.
Before moving on to the explanation, try to figure out on your own what each line of code does. Try modifying the print('Hello, world!') line to print('Greetings') instead. Then save the program, exit the
editor, and run the hello program again to see what changed. These are the steps you use to become a
skilled programmer: guess what the code does, determine whether your guess is correct, figure out why your guess is incorrect (if it is), and experiment with the code to see what changes.
LISTING ALL FILES WITH THE LS COMMAND
If you forget which files you have on a turtle, you can run the ls (or “list,” note the lowercase “l”)
command to list them. Enter the following into the command shell:
> ls
The ls command lists files, including programs, and folders that contain other files. The rom
folder contains other files that come with the turtle, but we won’t be using them in this book.
DISPLAYING TEXT WITH THE PRINT() FUNCTION
Let’s look at the hello program line by line. The first line is as follows:hello
1. print('Hello, world!')
This line is a function call to the print() function, which makes the Hello, world! text appear. You
can experiment with the print() function at the Lua shell. Run the lua program, and enter the following.
lua> print('Hello, world!')
Hello, world! 1
When you want to determine how a piece of code works, you can enter it into the Lua shell to examine what it does. As you can see, the print() function displays text on the screen. The 1 at the end
is the return value of the print() function, which is the number of lines of text that were printed. The 1
won’t appear when you call the print() function in a program like hello. It only appears here because
the Lua shell helpfully displays the return values of all functions.
Recall from Chapter 2 that the math.random() function took two values inside the parentheses when it
was called. These arguments told the function the range for the random number it should return. The
print() function also takes an argument, which in this case is 'Hello, world!'. This kind of text value is
known as a string, which you’ll learn about next.
THE STRING DATA TYPE
You’ve used number values, such as 2 and 10, in your programs, but you’ll also want to use letters.
Strings are a type of value that contain text instead of numbers. Similar to number values, strings can be stored in variables or used in expressions. Strings and numbers are the data types of these values. You’ll learn about other data types, such as Booleans and nil, in Chapter 5.
Because strings are made up of letters that could look like Lua commands, Lua needs to know when a string value begins and ends so it doesn’t confuse it as Lua code. Strings begin and end with a single quote ('), as in 'Hello, world!'. The single quote is not a part of the text; it just marks where the
text begins and ends in your source code. You can also use double quotes ("), as in "Hello, world!".
You can also use a string value with no text at all between the two quotes: ''. This is called an
empty string.
STRINGING STRINGS TOGETHER WITH CONCATENATION
Let’s look at line 2 in the hello program’s source code:hello
Line 2 has a call to the print() function, but the value we pass to print() has some new Lua code.
The .. is called the string concatenation operator. It behaves like the + operator for numbers except
it’s for strings. Just like the + operator can combine two numbers together into a new number, the ..
operator can concatenate, or combine, two string values into a single string. Enter the following into the Lua shell:
lua> 'Hello,' .. 'world!'
Hello,world!
This line of code is an expression, just like 2 + 2. 'Hello,' and 'world!' are values, and .. is an
operator. Like all expressions, 'Hello,' .. 'world!' evaluates to a single value, which in this case is the
string 'Hello,world!'.
Lua doesn’t add spaces when you concatenate strings. Because neither of the two strings in our example had a space, there is no space between the words in the evaluated string. If you want a space between your text, you must add it to one of the two strings’ values. For example, 'Hello, ' .. 'world!'
or 'Hello,' .. ' world!' will evaluate to 'Hello, world!'.
Line 2 of the program concatenates the two strings 'I am ' and the string returned by a new function
named os.getComputerLabel(). We’ll look at how this function works in the next section.
RETRIEVING TURTLE NAMES
In Chapter 2, you set the turtle’s name using the label program. Your programs can retrieve this name
as a string value using the os.getComputerLabel() function. Function calls can be part of an expression,
just like values, because a function call evaluates to its return value. Enter the following into the Lua shell to see how this function works:
lua> os.getComputerLabel()
The function call evaluates to a string value of the turtle’s name, so turtleName = os.getComputerLabel()
is the same as turtleName = 'Sofonisba'.
Take another look at line 2 in the hello program: hello
2. print('I am ' .. os.getComputerLabel())
The expression 'I am ' .. os.getComputerLabel() concatenates the turtle’s name with the string 'I am '
to evaluate to a single string. This single string is passed to the print() function, which is why I am Sofonisba appears on the screen when the program is run. Line 2 is just an expression that evaluates to
Remember that the print() function returns a value of the number of lines it printed, which is why it
evaluates to 1. The string value that the print() function prints isn’t its return value.
GETTING KEYBOARD INPUT WITH THE IO.READ()
FUNCTION
Look at lines 3 and 4 in the hello program: hello
3. print('What is your name?') 4. name = io.read()
Line 3 is another call to print(). But line 4 has a new function: io.read(). When called, the io.read()
function pauses the program until the player types something and presses ENTER. The text the player
inputs is returned from io.read() as a string, which is assigned to the variable name.
If the player entered Al, name would be assigned the string value 'Al'.
BONUS ACTIVITY: PROPER INTRODUCTIONS
You’ve written a
hello
program to tell the turtle your name, but you can also tell
the turtle a bit more about yourself. Write a program where the turtle asks the
player for not only their name but also their age and favorite video game. Save
each of these responses in separate variables, and then use the
print()function and
..operator to display them back to the player.
GIVING TEXT A TYPEWRITER EFFECT
You may have noticed when you ran the hello program that the text in the last line was displayed letter
by letter as though it was slowly being typed with a typewriter. This is done using the
textutils.slowPrint() function:
hello
The argument to slowPrint() is the string 'Nice to meet you, ' concatenated with the string in the
variable name, which is how the program says hello to the player using their name. Line 5 is the last
line of code, so the program terminates, or quits, after it’s executed.
CHANGING TURTLE NAMES
You can change the turtle’s name by calling the os.setComputerLabel() function and passing it a string
value. Enter the following code into the Lua shell.
lua> os.setComputerLabel('Elisabetta')
lua> os.getComputerLabel()
Elisabetta
Your turtle’s name is now Elisabetta. You can rename your turtle as many times as you’d like using the os.setComputerLabel() function.
BONUS ACTIVITY: A TURTLE BY ANY OTHER NAME
Try writing your own version of the label program. You can run edit mylabel to create the file.
Have your program call print() and io.read() to ask the player for the turtle’s new name, and then
pass that name to the os.setComputerLabel() function.
WHAT YOU LEARNED
In this chapter, we created a “Hello, world!” program, which is a customary first program for new programmers to make. This program can output text (using the print() and textutils.slowPrint()
functions) and input text (using the io.read() function). In Lua, text takes the form of string values,
which can be stored in variables or used in expressions, just like number values.
String values also have operators, just like number values. The .. string concatenation operator
can combine multiple strings to form one new string.
The hello program in this chapter was just the first step in writing programs for your robots. In
4
PROGRAMMING TURTLES TO DANCE
Now that our turtles can talk, let’s make them walk. Or even better, let’s make them dance! Although turtles come with a program called dance, it’s a simple program that only makes the turtles
Figure 4-1: The turtle’s dance steps
WRITING A DANCE PROGRAM
Using the text editor, create a program named mydance by entering edit mydance in the command shell. In
the text editor, enter the following lines of code. Remember not to type the line numbers because they’re just for reference.
mydance
1. --[[Dance program by Al Sweigart 2. Make the turtle dance!]]
3.
4. print('Time to dance!') 5.