USER
MANUAL
LAVAMAT 68276FL
EN 8VHUPDQXDO :DVKLQJ0DFKLQHKKK994500
KKE994500
EN User ManualCONTENTS
1. 2. 3. 4. 5. 6. 7. 8. 9. 10. 11. 12. 13. 14. 15. 16. SAFETY INFORMATION ... 3 SAFETY INSTRUCTIONS ... 5 PRODUCT DESCRIPTION ... 6 CONTROL PANEL ... 7BEFORE FIRST USE ... 10
DAILY USE ... 11
MAKING COFFEE ... 12
MAKING CAPPUCCINO AND MILK-BASED COFFEES ... 14
FAVOURITE ... 14
CLEANING ... 15
DESCALING ... 19
SETTING WATER HARDNESS ... 20
WATER SOFTENER FILTER ... 21
TECHNICAL DATA ... 22
DISPLAYED MESSAGES ... 23
TROUBLESHOOTING ... 25
FOR PERFECT RESULTS
Thank you for choosing this AEG product. We have created it to give you impeccable performance for many years, with innovative technologies that help make life simpler features you might not find on ordinary appliances. Please spend a few minutes read-ing to get the very best from it.
Visit our website to:
Get usage advice, brochures, trouble shooter, service information: www.aeg.com/webselfservice
Register your product for better service: www.registeraeg.com
Buy Accessories, Consumables and Original spare parts for your appliance: www.aeg.com/shop
CUSTOMER CARE AND SERVICE
Always use original spare parts.
When contacting our Authorised Service Centre, ensure that you have the following close to hand: model, PNC, serial number.
The information can be found on the rating plate. Warning / Caution-Safety information General information and tips
3 ENGLISH
Before the installation and use of the appliance, carefully
read the supplied instructions. The manufacturer is not
re-sponsible if an incorrect installation and use causes injuries
and damages. Always keep the instructions with the
appli-ance for future reference.
1.1
Children and vulnerable people safety
The appliance is not intended for use by persons (including
children) with reduced physical, sensory or mental
capabili-ties, or lack of experience and knowledge, unless they are
supervised or receive instructions concerning use of the
ap-plication by a person responsible for their safety.
Children should be supervised to ensure that they do not play
with the appliance.
For European markets only:
This appliance can be used by children aged from 8 years
and above if they have been given supervision or instruction
concerning use of the appliance in a safe way and if they
understand the hazard involved. Cleaning and user
mainte-nance shall not be made by children unless they are older
than 8 and supervised. Keep the appliance and its cord out of
the reach of children aged less than 8 years.
Children shall not play with the appliance
1.2
General Safety
Designated use: this appliance is designed and made to
prepare coffee and milk based beverages and hot water. Any
other use is considered improper and thus dangerous. The
manufacturer is not liable for damage deriving from improper
use of the appliance.
The surface of the heating element remains hot after use and
the outside of the appliance may retain the heat for several
minutes depending on use.
Clean all the components thoroughly, taking particular care
with parts in contact with the coffee and milk.
Cleaning and user maintenance shall not be made by
chil-dren without supervision.
Never submerge the appliance into water.
CAUTION: To prevent damage to the appliance do not use
alkaline cleaning agents when cleaning, use a soft cloth and
a mild detergent.
This is an household appliance only. It is not intended to be
used in: staff kitchen areas in shops, offices and other
work-ing environments; farm houses; by clients in hotels, motels
and other residential type environments; bed and breakfast
type environments.
If the plug or power cable is damaged, it must be replaced by
customer services only to avoid all risk.
Appliances with removable cord: avoid splashes of water on
the power cord connector or socket at the back of the
appli-ance.
WARNING: Models with glass surfaces: do not use the
appli-ance if the surface is cracked.
For European markets only:
Appliances can be used by persons with reduced
physi-cal, sensory or mental capabilities or lack of experience and
knowledge if they have been given supervision or instruction
concerning use of the appliance in a safe way and
under-stand the hazards involved.
When not in use and before cleaning, always unplug the
ap-pliance.
Surfaces marked with this symbol become hot during
use (the symbol is present in certain models only).
5 ENGLISH
2.
SAFETY
INSTRUCTIONS
DANGER!
This is an electrical appliance, it is therefore important to respect the fol-lowing safety warnings:
• Never touch the appliance with damp hands.
• Never touch the plug with damp hands. • Make sure the socket used is freely
acces-sible at all times, enabling the appliance to be unplugged when necessary.
• Unplug directly from the plug only. • Never pull the power cable as you could
damage it.
• To disconnect the appliance completely, place the main switch (A10) on the side of the appliance in the 0 position.
• If the appliance is faulty, do not attempt to repair.
• Turn it off using the main switch (A10), unplug from the mains socket and contact Customer Services.
IMPORTANT!
Keep all packaging (plastic bags, polystyrene foam) away from children.
DANGER OF BURNS!
This appliance produces hot water and steam may form while it is in operation.
Avoid contact with splashes of water or hot steam. Use knobs and han-dles.
IMPORTANT!
Do not grasp the coffee maker when it is out of the cabinet.
Do not rest recipients containing liq-uids or inflammable or corrosive ma-terials on top of the appliance. Place the accessories required to make the coffee (the measure for example) in the special holder.
Do not rest large objects which could obstruct movement or unstable ob-jects on the appliance.
IMPORTANT!
Do not use the appliance when extracted. Make sure the appliance is inactive before extracting it.
The only exception is adjusting the coffee mill which must be done with the machine out (see the section “Adjusting the coffee mill”). Use original or manufacturer recom-mended accessories and spare parts only.
2.1 Designated use
This appliance is designed and made to prepare coffee and heat drinks. All other use is considered improper. This appliance is not suitable for commercial use.
The manufacturer is not liable for damage deriving from improper use of the appliance. This appliance can be installed over a built-in oven if the latter is fitted with a cooling fan at the rear (maximum microwave power: 3 kW).
2.2 Instructions
Read these instructions carefully before using the appliance.
• Keep these instructions
• Failure to respect these instructions may result in burns or damage to the appliance. • The manufacturer is not liable for
dam-age deriving from failure to respect these instructions.
The appliance has a cooling fan. This comes on whenever coffee,
steam or hot water is delivered. After several minutes, the fan goes off automatically.
2.3 Connecting the appliance
DANGER!
Check that the mains power supply voltage corresponds to the value indi-cated on the rating plate on the side of the appliance.
Connect the appliance to an efficiently earthed and correctly installed socket with a minimum current rating of 10A only.
If the power socket does not match the plug on the appliance, have the socket replaced with a suitable type by a qualified professional.
3.
PRODUCT DESCRIPTION
Please refer to the Quick Guide leaflet
3.1 Description of the
appliance
A10 A2 A4 A3 A8 A6 A7 A5 A12 A1 A13 A11 A14 A9To comply with safety directives, an omnipolar switch with a minimum contact distance of 3 mm must be installed.
Do not use multiple sockets or exten-sions.
IMPORTANT!
Safety cutout devices must be included in the mains power supply in compliance with the installation regulations in the country concerned.
A1 Coffee ground container
A2 Brewing unit
A3 Interior lighting
A4 ON/OFF/stand-by button
A5 Hot water/steam connection nozzle
A6 Water tank
A7 Coffee spouts (adjustable height)
A8 Drip tray
A9 Grinding adjustment dial
A10 Main ON/OFF switch
A11 Ground coffee funnel
A12 Cup storage compartment (average temperature 35°C) (*)
A13 Accessories compartment (left/right)
A14 Beans container
(*) make sure the “energy saving” mode is deactivated and that auto-matic turning off is set to at least 1.5 hours
7 ENGLISH
4.
CONTROL PANEL
4.1 Control panel
1 2 3 C1 C3 C2 C4 C5 Espresso Normal Menu 30ml Options DEMO 2 cups C8 C11 C12 C6 C7 C9 C10 C1 Display C2 Rotary C3 Favourite icons C4START icon C5 STOP icon3.2 Accessories
B
STOP START B1 B3 B4 B5 B6 B7 B2B
B1 B3 B4 B5 B7 B6 B8 B2B1 “Total Hardness Test” indicator paper
B2 Ground coffee measure
B3 Descaler
B4 Water softener filter (certain models only)
B5 Cleaning brush
B6 Hot water/steam spout
B7 Connection nozzle cover
B8 Milk container
Functions and settings C1Display
C2Rotary Turn the rotary to adjust the settings and browse the menu. Press to confirm the selected functions/settings.
The selected function on the display, is underlined.
Select “Back” to go to the upper level menu, or “OK” to go back to the main menu.
C3Favourite Save your favourite
C4Start Start delivering the beverages C5Stop Stop delivering the beverages
8 www.aeg.com 9
Functions and settings C6Demo Basic Settings Service
Demo Mode
When Demo is activated the heating elements remain inac-tive and the Coffee Machine is kept safe for the showroom. The predefined secret code 2468 needs to be inserted both for activating and deactivating the demo mode.
C7Number of cups / % milk 1 cup 2 cups % milk C8Menu Cleaning Basic Settings Rinsing Descaling Time of Day Auto Start Auto Off Child Lock Energy Saving Cup warmer Lights Water Setup Service Start Start 00:00 On - Off Set Start time
From 15 minutes to 3 hours On - Off
On - Off On - Off On
Only when brew Off Softener On - Off Hardness From 1 to 4 Language Key tones Alarm/Error tones Buzzer volume Display brightness Demo Mode
Show software version Statistics
Resetfavourite Reset recipes Factory settings
4.2 Description of the display
1 2 3 C3 C2 C4 C5 Espresso Normal Menu 30ml Options DEMO 2 cups C8 C11 C12 C6 C7 C9 C10 C6 Demo C7 Number of cups C8 Menu C9Cup size C10 Options/clock C11 Aroma C12Recipes
9 ENGLISH
Functions and settings
C9Cup size (*) Small Medium Large Extra Large
C10Options Coffee temperature
Save as Favourite Keep Changes Low Medium High Max
C11 Aroma Pre-ground coffeeExtra Mild
Mild Normal Strong Extra Strong C12Recipes Coffee + Milk Specials Ristretto Espresso Espresso lungo Long Coffee Americano Espresso Macchiato Macchiato Cappuccino Cappuccino Plus Latte Macchiato Flat White Caffe Latte Hot Milk Hot Water Steam Jug from 40% to 60% milk from 20% to 80% milk from 20% to 80% milk from 20% to 80% milk from 20% to 80% milk from 40% to 90% milk from 40% to 90% milk
(*) The quantities shown on the display will vary depending on the calibration of the coffee grinder, the temperature and ambient humidity.
5.1 Controls after transport
After removing the packaging, check that the appliance is intact and that all accessories are included. Do not use the appliance if it is visibly damaged. Contact Customer Services.5.2 Initial cleaning
Coffee has been used to factory-test the appliance and it is therefore completely normal for there to be traces of coffee in the grinder.
Customise water hardness as soon as possible following the instructions in the “Setting water hardness” section.
5.3 Installing the appliance
IMPORTANT!
• Installation must be performed by a qualified professional in compliance with legislation in force in the country of installation (see Built-in installation). • The packing elements (plastic bags,
polystyrene foam, etc.) should be kept out of reach of children.
• Do not install the appliance in rooms where the temperature may drop to 0°C or lower.
• Customise the water hardness as soon as possible following the instructions in the “Setting water hardness” section.
5.4 First connection
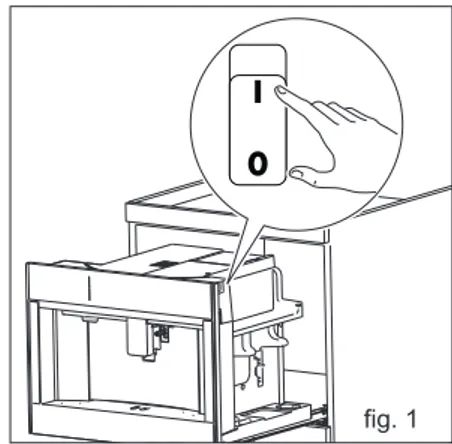
Connect the appliance to the mains electricity supply and make sure the main switch (A10) on the side of the appliance is pressed down (fig. 1);
fig. 1 Turn the rotary (C2) (fig. 2 Quick Guide) to select the required “Language”, then press the rotary to confirm;
Turn the rotary again to select “Display Brightness” and press it to confirm. Turn the rotary to set from 1 to 5 level. Turn the rotary to select “Time of day” and press it to confirm. Turn the rotary to select “Minute of the day” and press it to confirm. Turn the rotary to set the hours and minutes until the current time is displayed and press it to confirm. Turn the rotary to select “demo mode” or “First use”.
First use setup:
• FILL WATER TANK is displayed: remove the water tank (A6), open the lid, fill to the MAX line (marked on the inside of the tank) with fresh water (fig. 4 Quick Guide), close the lid and put the tank back in the appliance; • INSERT THE WATER SPOUT is
displayed: Check that the hot water/ steam spout (B6) is inserted on the connection nozzle (A5) (fig. 5 Quick Guide) and place a container holding a minimum of 100 ml underneath; • PLACE A CUP (at least 100ml)
UN-DER THE WATER SPOUT PRESS OK TO START DELIVERING HOT WATER appears on the display; • Select OK to confirm. The appliance
delivers water from the spout then
11 ENGLISH goes off automatically.
The coffee machine is now ready for normal use.
The first time you use the appli-ance, you need to make 4-5 cap-puccinos before it starts to give satisfactory results.
The first time you use the ma-chine, the water circuit is empty and the appliance could be very noisy. The noise becomes less as the circuit fills.
When making the first 5-6 cap-puccinos, it is normal to hear the noise of boiling water. After this, the noise becomes less.
To improve the performance of your appliance, we recommend installing a water softener filter (B4) as described in section “Wa-ter softener fil“Wa-ter”. If your model is not provided with a filter, you can request one from Customer Services.
Each time the appliance is turned on, it performs an automatic preheat and rinse cycle which cannot be interrupted. The appliance is ready for use only after completion of this cycle.
DANGER OF BURNS
During rinsing, a little hot water flows from the coffee spouts (A7). Avoid contact with splashes of water.
The machine turns off automatically after a preset Time (see Menu). In case you want to turn off before press the ON/OFF stand-by button (A4) (Fig 7 Quick Guide) The message “TURNING OFF” is displayed, then (if applicable) the appli-ance performs a rinse cycle and goes off (standby).
If you will not be using the appli-ance for some time, first empty the water circuit, then unplug from the mains socket as follows:
first turn the appliance off by pressing the ON/OFF stand-by button (A4);
release the main switch (A10) at the side of the appliance.
IMPORTANT!
Never press the main switch (fig. 1) while the appliance is on.
6.1 Rinsing
Use this function to clean the coffee spouts (A7), to clean and heat the appli-ance’s internal circuit. Place a container with a minimum capacity of 100 ml under the coffee spouts.
DANGER OF BURNS!
Do not leave the appliance unat-tended while hot water is being delivered.
If the appliance is not used for more than 3-4 days, when switched on again, we strongly recommend performing 2/3 rinses before use;
After cleaning, it is normal for the ground container (A1) to contain water.
6.2 Auto Start
You can set the auto-start time in order to have the appliance ready at a certain time (for example in the morning) so you can make coffee immediately.
To enable this function, the time must already be set correctly. When the appliance is turned off using the main switch (A10), the auto-start setting (if enabled) is lost.
7.1 Coffee beans
IMPORTANT!
Do not use green, caramelised or candied coffee beans as they could stick to the coffee mill and make it unusable.
1. Fill the beans container (fig. 9 Quick Guide) with coffee beans;
2. Place a cup (or two cups) under the coffee spouts (A7);
3. Lower the spouts as near as possible to the cup. This makes a creamier coffee;
4. Select the required coffee by turning the rotary.
Choose the desired coffee: • Ristretto • Espresso • Espresso lungo • Long Coffee • Americano Espresso Specials +Milk
5. Customize Aroma, coffee quantity and number of cups.
6. Press START icon.
7. Preparation begins. An image of the selected beverage appears on the display (C1), together with a progress bar which gradually fills as prepara-tion proceeds.
While the machine is making cof-fee, delivery can be interrupted at any moment by pressing STOP.
Once the coffee has been made, the appliance is ready to make the next beverage.
Various alarm messages could be displayed while using the ap-pliance (fill tank, empty ground container, etc.). Their meaning is explained in section “Displayed messages”.
• For hotter coffee, see section “Tips for a hotter coffee”.
• If the coffee is delivered a drop at a time, too weak and not creamy enough or too cold, read the tips in sections “Adjusting the coffee mill” and “Trou-bleshooting”.
• Preparation of each coffee can be customised.
• If “Energy Saving” mode is active, you may have to wait a few seconds before the first coffee is delivered.
7.2 Pre-ground coffee
IMPORTANT!
Never add pre-ground coffee when the machine is off or it could spread through the inside of the machine and dirty it. This could damage the appliance.
7.
MAKING COFFEE
6.3
Energy saving
Use this function to enable or disable en-ergy saving. When enabled, the function reduces energy consumption in compli-ance with European regulations.
6.4
Coffee temperature
Use this function to modify the tem-perature of the water used to make the coffee.13 ENGLISH While the machine is making
cof-fee, delivery can be interrupted at any moment by pressing STOP icon.
IMPORTANT!
Halfway through preparation, the message ADD PRE-GROUND COFFEE is displayed. Add one level measure of pre-ground cof-fee and press START.
7.3 Adjusting the coffee mill
The coffee mill is set by default to prepare coffee correctly and should not require regulating initially.However, if after making the first few cof-fees you find that the coffee is either too weak and not creamy enough or delivery is too slow (a drop at a time), this can be corrected by adjusting the grinding adjustment dial.
IMPORTANT!
The grinding adjustment dial must be turned only when the cof-fee mill is in operation (grinding sound) during the initial phase of coffee preparation.
If the coffee is delivered too slowly or not at all, and when the wording GROUND TOO FINE appears in versions with dis-play, turn the coffee grinding dial one or two clicks in a clockwise direction.
To deliver more full-bodied, creamier coffee, turn the dial in an anti-clockwise
direction by one click toward number 1 (not more than one click at a time, other-wise the coffee might start to drip) These adjustments will only be evident after at least 2 cups of coffee have been delivered. If this adjustment does not obtain the desired result, turn the dial another click.
7.4 Tips for a hotter coffee
For hotter coffee, it is recommended to: • increase the coffee temperature in thesettings menu.
• warm the cups with hot water/steam using the hot water/steam function.
8.1 Using the hot water/steam
spout
8.2 Using the milk container
1. Remove the lid (fig. 16 Quick Guide);
2. Fill the milk container (B8) with a sufficient quantity of milk, not exceed-ing the MAX level marked on the con-tainer. Each mark on the side of the container corresponds to about 100 ml of milk;
For a denser more even froth, you must use skimmed or partially skimmed milk at refrigerator tem-perature (about 5°C).
If “Energy Saving” mode is ena-bled, you may have to wait a few seconds before the beverage is delivered.
3. Make sure the milk intake tube is
correctly inserted in the bottom of the milk container lid (fig. 16 Quick Guide);
4. Place the lid back on the milk con-tainer;
5. Remove the hot water/steam spout (B6);
6. Attach the milk container (B8) to the connection nozzle (A5) and push as far as it will go (fig. 17 Quick Guide).
7. Place a sufficiently large cup under the coffee spouts (A7) and frothed milk spout. Adjust the length of the milk spout. To move it nearer the cup, simply pull it downwards (fig. 18 Quick Guide).
8. Follow the instructions below for each function.
Turn the froth adjustment dial on the milk container lid to adjust the amount of froth on the milk delivered while making milk-based coffees. Follow the tips in the table below:
Dial
posi-tion Description Recommended for… No
froth CAFFE LATTE / HOT MILK Min. froth LATTE
MACCHIATO Max. froth CAPPUCCINO /
MILK (FROTHED MILK)
To avoid milk with poor froth or large bubbles, always clean the milk container lid and hot water connection nozzle as described in sections 10.10 / 10.11 / 10.12.
8.
MAKING CAPPUCCINOS AND MILK-BASED COFFEES
The aroma, quantity and milk% of the drinks can be saved according the pref-erences.
The Favourite button on the panel allows
the user to prepare their favourite bever-age with a single touch.
This feature allows the User to save the current settings. (The recipe and any
15 ENGLISH
Please refer to the Quick Guide leaflet
10.1 Cleaning the machine
The following parts of the machine must be cleaned regularly:• the appliance’s internal circuit; • coffee ground container (A1); • drip tray (A8);
• water tank (A6); • coffee spouts (A7);
• pre-ground coffee funnel (A11); • brewing unit (A2), accessible after
opening the brewing unit door; • milk container (B8);
• hot water/steam connection nozzle (A5);
• control panel.
IMPORTANT!
Do not use solvents, abrasive detergents or alcohol to clean the coffee machine. You need not use chemical products to clean the
machine.
None of the components of the appliance can be washed in a dishwasher with the exception of the milk container (B8).
Do not use metal objects to remove encrustations or coffee deposits as they could scratch metal or plastic surfaces.
10.2 Cleaning the machine’s
internal circuit
If the appliance is not used for more than 3/4 days, before using it again, we strongly recommend switching it on and:
1. performing 2-3 rinse cycles by select-ing the “Rinse” function.
2. Delivering hot water for a few sec-onds.
After cleaning, it is normal for the ground container (A1) to contain water.
10.
CLEANING
user-preferred parameters)
Important: Note that, “Save as Favourite” does not overwrite the current recipe, use Options /Keep Changes to change the current recipe default values. By selecting Save as Favourite on the list:
1. The screen shows a popup with instruction. It is possible to Cancel by pressing the rotary and selecting Cancel.
2. The control panel shows and blink the 3 icons 1 2 3.
3. Start icon is Off. By selecting one position:
1. The screens shows the saved recipe renamed with the prefix “My”.
2. The selected position icon turns On. Any other favourites that have
already been saved also light up.
3. The Start icon turns On.
The user can overwrite a favourite by selecting a point where a favourite is already saved. In this case, a popup win-dow will appear to confirm the action. In this case:
• The selected favourite position will start to flash
• The other 2 icons will turn off By selecting “NO”, the screen backs to the previous screen - see Options: Save as Favourite - Saving
By selecting “YES”, the screen goes to Quickset - see Options: Save as Favour-ite - Saving
To cancel, select “Menu” /“Basic Set-tings”, /“Service”/”Reset favourite”.
10.3 Cleaning the coffee
ground container
When “Empty ground container” appears on the display (C1), the ground container must be emptied and cleaned. The appli-ance cannot be used to make coffee until the ground container has been cleaned. Even if not full, the empty ground con-tainer message is displayed 72 hours after the first coffee has been prepared. For the 72 hours to be calculated cor-rectly, the machine must never be turned off with the main switch (A10).
To clean (with the machine on):
1. Open the bottom door (if present) by rotating it downwards (fig. 25 Quick Guide).
2. Remove the drip tray (A8) (fig. 26 Quick Guide), empty and clean.
3. Empty the ground container (fig. 27 Quick Guide) and clean thoroughly to remove all residue left on the bottom. This can be done using the spatula on the brush (B5) provided.
IMPORTANT!
When removing the drip tray, the ground container must be emptied, even if it contains only few grounds. If this is not done, the ground container may overfill and clog the machine as the user continues to prepare coffees.
10.4 Cleaning the drip tray
IMPORTANT!
The drip tray (A8) is fitted with a level indicator (red) showing the level of water it contains. Before the indicator protrudes from the cup tray, the drip tray must be emptied and cleaned, otherwise the water may overflow the edge and damage the appliance, the surface it rests on or the surround-ing area.
To remove the drip tray, proceed as follows:
1. Remove the drip tray and coffee ground container (A1) (fig. 26 Quick
Guide);
2. Empty the drip tray (fig. 28 Quick Guide) and ground container and wash them.
10.5 Cleaning inside of the
coffee machine
DANGER!
Before cleaning internal parts, the machine must be turned off and unplugged from the mains power supply. Never submerge the appli-ance into water.
1. Check regularly (about once a month) that the inside of the appli-ance (accessible after removing the drip tray (A8) ) is not dirty.
2. If necessary, remove coffee deposits with the brush (B5) supplied and a sponge. Remove all the residues with a vacuum cleaner (fig. 29 Quick Guide).
10.6 Cleaning the water tank
1. Clean the water tank (A6) regularly (about once a month) and whenever you replace the water softener filter (B4) (if provided) with a damp cloth and a little mild washing up liquid. Rinse thoroughly before filling the tank and putting it back in the appli-ance;
2. Remove the filter (if present) and rinse with running water;
3. Replace the filter (if provided), fill the tank with fresh water and replace the tank;
4. (Models with water softener filter only) Deliver about 100ml of hot water to reactivate the filter.
10.7 Cleaning the coffee
spouts
1. Clean the coffee spouts (A7) regu-larly with a sponge or cloth;
2. Check that the holes in the coffee spouts are not blocked. If necessary, remove coffee deposits with a
tooth-17 ENGLISH pick.
10.8 Cleaning the pre-ground
coffee funnel
Check regularly (about once a month ) that the pre-ground coffee funnel (A11) is not blocked. If necessary, remove coffee deposits with the brush (B5) supplied.
10.9 Cleaning the brewing unit
The brewing unit must be cleaned at least once a month.IMPORTANT!
The brewing unit (A2) must not be removed when the appliance is on. Do not use force to remove the brewing unit.
1. Make sure the machine is correctly turned off.
2. Open the service door.
3. Remove the drip tray and waste cof-fee container (fig. 26 Quick Guide).
4. Press the two coloured release but-tons inwards and at the same time pull the brewing unit outwards (fig. 31 Quick Guide).
IMPORTANT!
Do not use washing up liquid to clean the brewing unit. It would remove the lubricant applied to the inside of the piston.
5. Soak the brewing unit in water for about 5 minutes, then rinse (fig. 32 Quick Guide).
6. After cleaning, replace the brewing unit (A2) by sliding it onto the internal support and pin at the bottom, then push the PUSH symbol fully in until it clicks into place.
If you encounter difficulty inserting the brewing unit, before inserting it you must adapt it to the right dimension by pressing it forcefully from the bottom and top.
7. Once inserted, make sure the two coloured release buttons have snapped out.
8. Replace the drip tray and waste cof-fee container.
9. Close the service door.
10.10 Cleaning the milk
con-tainer (B8)
Each time the coffee machine performs a milk based recipe, it
automatically asks to clean the circuit of the jug at the end of the recipe. Turn the rotary to the CLEAN position.
Clean the milk container each time you prepare milk as described below:
1. Lift and remove the lid;
2. Extract the milk container (B8) from the thermal casing, holding it by the two side grips.
IMPORTANT!
The thermal casing must not be filled with or immersed in water. Clean with a damp cloth only.
3. Remove the milk spout and intake tube (fig. 33 Quick Guide).
4. Turn the froth adjustment dial clock-wise to the “INSERT” position and pull off.
5. Wash all components of the frother thoroughly with hot water and a mild dish-washing detergent. All compo-nents and the container are dish-washer safe, placing them in the top basket of the dishwasher.
Make sure there are no milk residues on the hollow and groove under the dial.
If necessary, scrape the groove with a toothpick.
6. Rinse inside the froth adjustment dial seat and the milk frother connector hole.
7. Check that the intake tube and spout are not clogged with milk residues.
8. Replace the dial (lining up the arrow with the word INSERT), spout and milk intake tube.
9. Place the milk container in the ther-mal casing.
10. Place the lid back on the milk
con-tainer.
10.11 Cleaning the hot water/
steam connection nozzle
Each time you prepare milk, clean the connection nozzle (A5) with a sponge to remove milk residues from the gaskets.
10.12
Cleaning the hot water/
steam spout after use
Always clean the hot water/steam spout (B6) after use to avoid the build-up of milk residues and prevent it from clog-ging.
1. Place a container under the hot water/steam spout and deliver a little water. Stop delivery of hot water by pressing STOP.
2. Wait a few minutes for the hot water/ steam spout to cool down, then extract. Hold the spout with one hand and with the other, turn the cappuc-cino maker and pull it downwards.
3. Also remove the steam connection nozzle by pulling it downwards.
4. Check the hole in the connection nozzle is not blocked. If necessary, clean using a toothpick.
5. Wash all parts of the spout thorough-ly with a sponge and warm water.
6. Insert the connection nozzle, then the cappuccino maker on the spout by pushing it upwards and turning it clockwise until it is attached.
19 ENGLISH
IMPORTANT!
Before use, read the instructions and the labelling on the descaler pack.
You should use descaler author-ised by the manufacturer only (cod. 9029798718 M3BICD200) WebShop AEG:
www.aeg.com/shop.
Using unsuitable descaler and/or performing descaling incorrectly may result in faults not covered by the manufacturer’s warranty. Descale the appliance when PLEASE DESCALE YOUR MACHINE appears on the display. To descale immediately, press DESCALE, and follow the instruc-tions from point 4;
To access the descaling menu:
1. Turn the rotary (C2) to select “Menu”, then press the dial to confirm.
2. Select “Cleaning” and confirm.
3. Set “Descaling” and confirm.
4. Select “Start” to start the descaling cycle then follow the instructions on the display;
5. REMOVE SOFTENER FILTER (if activated); extract the water tank (A6), remove the softener filter (B4) (if included), empty the water tank. Press NEXT;
6. ADD DESCALER (UP TO LEVEL A) AND WATER (UP TO LEVEL B); Pour the descaler into the tank up to the level A marked inside the tank (equal to one 100 ml pack), then add water (one litre) up to level B and put the water tank back.
7. Press YES;
8. PLACE 2.5l CONTAINER UNDER SPOUTS PRESS OK TO START DESCALING:
Place an empty container with a minimum capacity of 2.5 litres under the hot water/steam spout (B6) and coffee spouts (A7);
DANGER OF BURNS!
Hot water containing acid flows
out of the hot water/steam spout. Take care to avoid contact with splashes of this solution.
9. Press OK to confirm that you have added the descaling solution. DES-CALING UNDERWAY, appears on the display. The descale programme starts and the descaler liquid comes out of the hot water/steam and coffee spouts. A series of rinses and pauses is performed automatically to remove all the scale residues inside the cof-fee machine;
After about 25 minutes, descaling stops:
10. RINSE AND FILL WATER TANK UP TO MAX LEVEL: the appliance is now ready to rinse with fresh water. Empty the container used to collect the descaler solution. Extract the water tank, empty, rinse under run-ning water, fill with fresh water up to the MAX level and put back in the appliance;
11. PLACE 2.5l CONTAINER UNDER SPOUTS. PRESS OK TO START RINSING: Place the container used to collect the descaler solution empty under the coffee spouts and hot wa-ter/steam spout (fig. 8 Quick Guide) and press OK;
12. Hot water is delivered first from the coffee spouts, then from the hot water/steam spout and RINSING, please wait is displayed;
13. When the water in the tank has run out, empty the container used to col-lect the rinsing water;
14. (If the filter is installed) INSERT THE FILTER IN ITS HOUSING Press NEXT and extract the water tank. Replace the water softener filter if removed previously;
15. FILL WATER TANK UP TO MAX LEVEL: Fill the tank up to the MAX level with fresh water;
16. INSERT WATER TANK: Put the water tank back in the appliance;
17. PLACE 2.5l CONTAINER UNDER SPOUTS. PRESS OK TO START RINSING:
Place the container used to collect
PLEASE DESCALE YOUR MACHINE message is displayed after a period of time established according to water hardness.
The machine is set by default for a hard-ness level of 4. The machine can also be programmed according to the hard-ness of the mains water in the various regions so that the machine needs to be descaled less often.
12.1 Measuring water
hard-ness
1. Remove the “Total hardness test” indicator paper (B1) from its packag-ing.
2. Immerse the paper completely in a glass of water for one second.
3. Remove the paper from the water and shake lightly. After about a min-ute, 1, 2, 3, or 4 red squares form, depending on the hardness of the water. Each square corresponds to one level.
12.2 Setting water hardness
1. Turn the rotary (C2) to select “Menu”, then press the dial to confirm.
2. Select “Basic Settings”, press to confirm, select “Water” and confirm.
3. Select “Hardness” and set the required level from 1 to 4 (Level 1 = soft water; Level 4 = very hard water);
The machine is now reprogrammed with the new water hardness setting.
12.
SETTING WATER HARDNESS
the descaler solution empty under the hot water/steam spout and press OK;
18. Hot water is delivered from the hot water/steam spout and RINSING is displayed.
19. EMPTY DRIP TRAY: At the end of rinsing, remove, empty and replace the drip tray (A8) and ground con-tainer (A1). Press OK;
20. DESCALE COMPLETE;
21. Press OK; Machine is turned off. Descaling is complete.
If the descaling cycle is not com-pleted correctly (e.g. no electric-ity) we recommend repeating the cycle;
After descaling, it is normal for the ground container (A1) to contain water.
If the water tank has not been filled to the MAX level, at the
end of descaling, the appliance requests a third rinse to guaran-tee that the descaler solution has been completely eliminated from the machine’s internal circuits. Before starting rinsing, remember to empty the drip tray;
The appliance may request desca-ling cycles at very short intervals. This is normal and due to the appliance’s advanced control system.
21 ENGLISH
Certain models are fitted with a softener filter (B4). If this is not the case with your model, you are recommended to purchase one from Customer Services. (cod. 9029798726 M3BICF200) WebShop AEG: www.aeg.com/shop. To use the filter correctly, follow the instructions below.
13.1 Installing the filter
1. Remove the filter (B4) from its pack-aging;
2. Turn the rotary (C2) to select “Menu”, then press the dial to confirm.
3. Select “Basic Settings”, press to confirm, select “Water” and confirm.
4. Select “Softener” and set On.
5. TURN DATE INDICATOR TO DIS-PLAY NEXT 2 MONTHS
turn the date indicator disk until the next two months of use are dis-played. Press OK;
The filter lasts about two months if the appliance is used normally. If the coffee machine is left unused with the filter installed, it will last a maximum of 3 weeks.
6. RUN WATER INTO FILTER HOLE UNTIL IT COMES OUT FROM OPENINGS: To activate the filter, run tap water through the hole in the filter as shown in the figure until water comes out of the openings at the side for more than a minute. Press OK;
7. Extract the tank (A6) from the appli-ance and fill with water.
8. IMMERSE FILTER IN THE WATER TANK LETTING AIR BUBBLES ESCAPE: Insert the filter in the water tank and immerse it completely for about ten seconds, sloping it and pressing it lightly to enable the air bubbles to escape. Press OK;
9. INSERT FILTER INTO ITS HOUS-ING AND PUSH IT DOWN TO BOTTOM: Insert the filter in the filter housing and press as far as it will go. Press OK;
10. INSERT WATER TANK: Close the tank with the lid, then replace the tank in the machine.
11. PLACE 0.5L CONTAINER UNDER
SPOUTS, PRESS OK TO FILL FILTER: Place the container under the hot water/steam spout (B6), then press OK. Delivery begins and stops automatically.
13.2 Replacing the filter
Replace the filter (B4) when the message REPLACE SOFTENER FILTER appears on the display.
To replace, proceed as follows:
1. Follow the “Remove filter” procedure (paragraph 13.3);
2. Extract the tank (A6) and exhausted filter;
3. Remove the new filter from the pack-aging;
4. Follow the “Install filter” procedure (paragraph 13.1).
After two months (see date indica-tor) or when the appliance has not been used for 3 weeks, you should replace the filter even if the message has not yet been displayed.
13.3 Removing the filter
If you want to use the appliance without the filter (B4), it must be removed and its removal must be signalled to the appli-ance. Proceed as follows:1. Extract the tank (A6) and exhausted filter; reinsert the tank.
2. Turn the rotary (C2) to select “Menu”, then press the dial to confirm.
3. Select “Basic Settings”, press to confirm, select “Water” and confirm.
4. Select “Softener” and confirm. 5. Turn the rotary (C2) to select OFF
and confirm.
After two months (see date indica-tor) or when the appliance has not been used for 3 weeks, you should replace the filter even if the message has not yet been displayed.
Voltage: 220-240 V~ 50-60 Hz max. 10A Absorbed power: 1350W
Pressure: 15 bar Water tank capacity: 2.5 litres Size: LxHxD: 594x454x412mm Weight: 20 kg
This appliance conforms to EC Regulation 1935/2004 concerning materi-als and articles intended to come into contact with food.
DISPOSAL
The appliance must not be
disposed of with household waste, but taken to an author-ised waste separation and recycling centre.
23 ENGLISH
15.
DISPLAYED MESSAGES
Displayed message Possible cause Remedy
FILL WATER TANK Insufficient water in the tank
(A6). Fill the tank with water and/or insert it correctly, push-ing it as far as it will go until it clicks into place.
EMPTY GROUND CONTAINER The ground container (A1) is full. Empty the ground container and drip tray (A8), clean and replace. Important: when removing the drip tray, the ground container must be emptied, even if it contains only a few grounds. If this is not done, the ground container may overfill and clog the ma-chine as the user continues to prepare coffees. INSERT GROUND CONTAINER After cleaning, the ground
container (A1) has not been replaced.
Remove the drip tray (A8) and insert the ground container.
ADD PRE-GROUND COFFEE The “pre-ground coffee” function has been selected without plac-ing any pre-ground coffee in the funnel (A11).
Place pre-ground coffee in the funnel and repeat delivery
The pre-ground coffee funnel
(A11) is clogged. Empty the funnel with the help of a brush (B5), as described in the section “Cleaning the pre-ground coffee funnel”.
FILL BEAN CONTAINER The coffee beans have run out. Fill the beans container (fig. 9 Quick Guide).
GROUND TOO FINE. ADJUST
GRIND LEVEL The grinding is too fine and the coffee is delivered too slowly or not at all.
Repeat coffee delivery and turn the grinding adjustment dial one click clockwise towards “7” while the coffee mill is in opera-tion. If after making at least 2 coffees delivery is still too slow, repeat the correc-tion procedure, turning the grinding adjustment dial another click until delivery is correct (see section “Ad-justing the coffee mill”). If the problem persists, make sure the water tank (A6) is fully inserted.
If the softener filter (B4) is present, an air bubble may have been released inside the circuit, obstructing delivery.
Insert the hot water/steam spout (B6) in the appliance and deliver a little water until the flow becomes regular.
Displayed message Possible cause Remedy
TOO MUCH POWDER Too much coffee has been
used. Select a milder taste or reduce the quantity of pre-ground coffee (maximum 1 measure).
INSERT WATER SPOUT The hot water spout (B6) is not inserted or is inserted incorrectly
Insert the water spout as far as it will go.
INSERT MILK CONTAINER The milk container (B8) is
not inserted correctly. Insert the milk container as far as it will go (fig. 17 Quick Guide).
INSERT BREWING UNIT The brewing unit (A2) has not been replaced after cleaning.
Insert the brewing unit as described in the section “Cleaning
the brewing unit”. AIR BUBBLE ALARM The water circuit is empty Press OK to deliver water
from the spout (B6) until it flows out normally. Delivery stops automatically. If the problem persists, make sure the water tank (A6) is fully inserted.
TURN THE MILK FROTH ADJUSTMENT DIAL TO <CLEAN> TO START CLEANING
Milk has been delivered recently and the tubes inside the milk container must be cleaned.
Turn the froth adjustment dial to CLEAN.
TURN THE MILK FROTH ADJUSTMENT DIAL TO MILK POSITION
The milk container has been in-serted with the froth adjustment dial in the CLEAN position.
Turn the dial to the required froth position.
PLEASE DESCALE YOUR
MACHINE The machine must be descaled. Press DESCALE to start descaling REPLACE SOFTENER
FILTER The softener filter (B4) is exhausted. Press OK to replace or remove the filter, or ESC to carry out the procedure later. Follow the instruc-tions in section “Water softener filter”. GENERAL ALARM: REFER
TO USER MANUAL The inside of the appliance is very dirty. Clean the inside of the appliance thoroughly, as described in the section “Cleaning”. If the mes-sage is still displayed after cleaning, contact Customer Services.
25 ENGLISH
16.
TROUBLESHOOTING GUIDE
Problem Possible cause Remedy
The coffee is not hot. The cups were not
pre-heated. Warm the cups by rinsing them with hot water (Please note! you can use the hot water function).
The brewing unit has cooled down because 2/3 minutes have passed since the last coffee was made.
Before making the coffee, heat the brewing unit by rinsing using the rinse function
A low coffee temperature
is set. Set a hotter coffee tem-perature in the menu. The coffee is weak or not
creamy enough. The coffee is ground too coarsely. Turn the grinding ad-justment dial one click anticlockwise towards “1” while the coffee mill is in operation. Continue one click at a time until coffee delivery is satisfactory. The effect is only visible after delivering 2 coffees (see section “Adjusting the cof-fee mill”).
The coffee is unsuitable. Use coffee for espresso machines.
The coffee is delivered too
slowly or a drop at a time. The coffee is ground too finely. Turn the grinding adjust-ment dial one click clock-wise towards “7” while the coffee mill is in operation. Continue one click at a time until coffee delivery is satisfactory. The effect is only visible after delivering 2 coffees (see section “Ad-justing the coffee mill”). Coffee does not come out of
one or both of the spouts. The coffee spouts (A7) are blocked. Clean the spouts with a toothpick. Below is a list of some of the possible
malfunctions.
If the problem cannot be resolved as described, contact Customer Services.
Problem Possible cause Remedy
The appliance does not
come on It is not plugged into the mains socket. Plug into the mains socket. The main switch (A10) is
not turned on. Press the main switch (fig. 1). The brewing unit cannot be
extracted The appliance has not been turned off correctly Turn the appliance off by pressing the ON/OFF/ stand-by button (A4) At the end of descaling, the
appliance requests a third rinse
During the two rinse cycles, the water tank (A6) has not been filled to the MAX level
Follow the instructions displayed by the appliance, but first empty the drip tray (A8) to avoid the water overflowing.
The milk does not come out
of the milk spout The lid of the milk container (B8) is dirty Clean the milk container lid as described in section “Cleaning the milk con-tainer”.
The milk contains large bubbles and squirts out of the milk spout or there is little froth
The milk is not cold enough or is not semi-skimmed or skimmed.
Use skimmed or semi-skimmed milk at refrigerator temperature (about 5° C). If the result is not as you wished, try changing brand of milk.
The froth adjustment dial is
incorrectly adjusted. Adjust following the instruc-tions in section “Adjusting the amount of froth”. The milk container lid or
froth adjustment dial is dirty Clean the milk container lid and froth adjustment dial as described in section “Clean-ing the milk container”. The hot water/steam
con-nection nozzle (A5) is dirty Clean the connection noz-zle as described in section “Cleaning the hot water/ steam connection nozzle”. The machine emits noises
or small puffs of steam while not in use
The machine is ready for use, or has recently been turned off, and condensate is dripping into the hot vaporiser
This is part of normal operation. To limit the phenomenon, empty the drip tray.
27 ENGLISH