Android
™
Application Development
Cookbook
93 Recipes foR Building Winning Apps
Indianapolis, IN 46256
www.wiley.com
Copyright © 2013 by John Wiley & Sons, Inc., Indianapolis, Indiana
Published simultaneously in Canada
ISBN: 978-1-118-17767-9 ISBN: 978-1-118-22729-9 (ebk) ISBN: 978-1-118-24028-1 (ebk) ISBN: 978-1-118-26491-1 (ebk)
Manufactured in the United States of America
10 9 8 7 6 5 4 3 2 1
No part of this publication may be reproduced, stored in a retrieval system or transmitted in any form or by any means, electronic, mechanical, photocopying, recording, scanning or otherwise, except as permitted under Sections 107 or 108 of the 1976 United States Copyright Act, without either the prior written permission of the Publisher, or authorization through payment of the appropriate per-copy fee to the Copyright Clearance Center, 222 Rosewood Drive, Danvers, MA 01923, (978) 750-8400, fax (978) 646-8600. Requests to the Publisher for permission should be addressed to the Permissions Department, John Wiley & Sons, Inc., 111 River Street, Hoboken, NJ 07030, (201) 748-6011, fax (201) 748-6008, or online at http://www.wiley.com/go/permissions.
Limit of Liability/Disclaimer of Warranty: The publisher and the author make no representations or warranties with respect to the accuracy or completeness of the contents of this work and specifically disclaim all warranties, including without limitation warranties of fitness for a particular purpose. No warranty may be created or extended by sales or pro-motional materials. The advice and strategies contained herein may not be suitable for every situation. This work is sold with the understanding that the publisher is not engaged in rendering legal, accounting, or other professional services. If professional assistance is required, the services of a competent professional person should be sought. Neither the pub-lisher nor the author shall be liable for damages arising herefrom. The fact that an organization or Web site is referred to in this work as a citation and/or a potential source of further information does not mean that the author or the publisher endorses the information the organization or Web site may provide or recommendations it may make. Further, readers should be aware that Internet Web sites listed in this work may have changed or disappeared between when this work was written and when it is read.
For general information on our other products and services please contact our Customer Care Department within the United States at (877) 762-2974, outside the United States at (317) 572-3993 or fax (317) 572-4002.
Wiley publishes in a variety of print and electronic formats and by print-on-demand. Some material included with standard print versions of this book may not be included in e-books or in print-on-demand. If this book refers to media such as a CD or DVD that is not included in the version you purchased, you may download this material at http:// booksupport.wiley.com. For more information about Wiley products, visit www.wiley.com.
Library of Congress Control Number: 2012948549
To my family,
About the Author
Wei-Meng Lee
is a technologist and founder of Developer Learning Solutions (
www.learn2develop .net), a technology company specializing in hands-on training on the latest mobile technologies.
Wei-Meng has many years of training experience and his courses place special emphasis on the
learn-ing-by-doing approach. This hands-on approach to learning programming makes understanding the
subject much easier than reading books, tutorials, and other documentation.
Wei-Meng is also the author of
Beginning iOS 5 Application Development
(Wrox, 2010)
and
Beginning Android 4 Application Development
(Wrox, 2011). You can contact him at
About the teChniCAL eDitor
exeCutive eDitor
viCe PresiDent AnD exeCutive grouP PubLisher
Richard Swadley
viCe PresiDent AnD exeCutive PubLisher Neil Edde
Scott Klemp, Word One New York
ACKnoWLeDgMents
A Lot oF DeveLoPMent
in the Android world has happened since my last book,
Beginning Android 4
Application Development
, went to print. Google has released a new version of the SDK: Android 4.1
SDK. With the Android 4.1 SDK and the ADT Plugin 20.0.3, it is now much easier to write Android
applications — from those that run on older devices right up to the latest and greatest.
I would like to thank some key people who have worked hard behind the scenes to make this book
a reality.
First, my personal gratitude to Bob Elliott, executive editor at Wrox. Bob is always ready to lend a
listening ear and offer help when it’s needed. It is a great pleasure to work with Bob, as he is one of
the most responsive people I have ever worked with. Thank you, Bob, for the help and guidance.
Of course, I cannot forget Ami Sullivan, my editor (and friend), who is always a pleasure to work
with. Thank you for your guidance and encouragement to keep the project going, Ami.
I am also grateful to my technical editor, Chaim Krause. Chaim has been eagle-eye editing the book
and testing my recipes, ensuring that my code works as written. Thanks, Chaim.
Contents
INTRODUCTION
xv
ChAPter 1: AnDroiD FunDAMentALs
1
Recipe 1.1 linking Activities
1
Solution 2
Recipe 1.2 passing data between Activities
5
Solution 6
Recipe 1.3 passing objects between Activities
11
Solution 11
Recipe 1.4 sending and Receiving Broadcasts
13
Solution 14
Recipe 1.5 Assigning priorities to Broadcast Receivers
18
Solution 19
Recipe 1.6 Auto-launching Your Application at Boot Time
21
Solution 21
Recipe 1.7 calling Built-in Apps
22
Solution 23
Recipe 1.8 Making Your Application callable by others
32
Solution 32
ChAPter 2: using vieWs to Design the user interFACe
39
Recipe 2.1 using Buttons
40
Solution 40
Recipe 2.2 using image Buttons
44
Solution 44
Recipe 2.3 using Radio Buttons
46
Solution 46
Recipe 2.4 using checkBoxes
49
Solution 50
Recipe 2.5 implementing a star Rating system
52
Solution 52
Recipe 2.6 using AutocompleteTextView
55
Solution 55
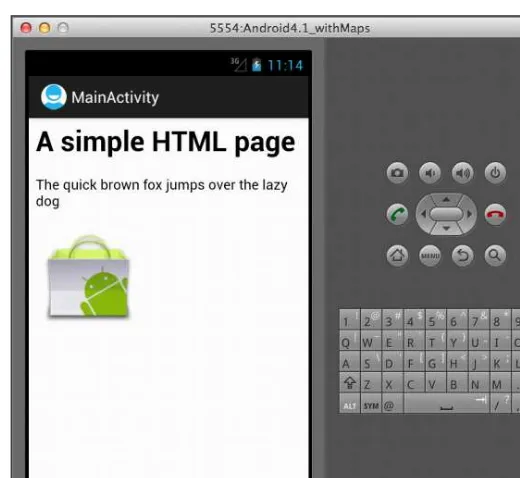
Recipe 2.7 displaying Web pages
57
x
Solution 62
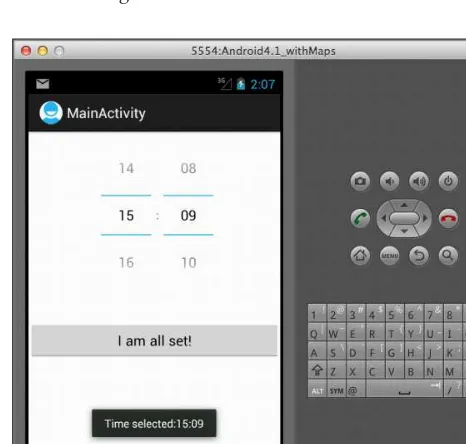
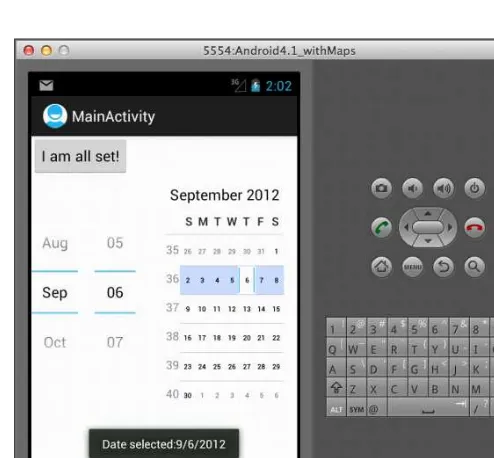
Recipe 2.9 using the datepicker
64
Solution 65
Recipe 2.10 using linearlayout for View positioning
66
Solution 67
Recipe 2.11 using Relativelayout for View positioning
72
Solution 72
Recipe 2.12 using framelayout for View positioning
74
Solution 74
Recipe 2.13 using Tablelayout for View positioning
77
Solution 77
Recipe 2.14 using the scrollView
79
Solution 79
Recipe 2.15 displaying context and options Menus
83
Solution 83
Recipe 2.16 displaying dialogs
90
Solution 91
Recipe 2.17 implementing paging
98
Solution 98
ChAPter 3: DisPLAying Lists oF iteMs AnD iMAges
105
Recipe 3.1 displaying a list of items using the listView
106
Solution 106
Recipe 3.2 customizing the listView
108
Solution 108
Recipe 3.3 displaying Multiple listViews
111
Solution 111
Recipe 3.4 creating custom listViews
114
Solution 115
Recipe 3.5 further customizing each Row with Additional
TextViews 117
Solution Part One: Adding Additional TextViews
118
Solution Part Two: Recycling Each Row
122
Recipe 3.6 displaying a list of items using the spinner View
125
Solution 126
Recipe 3.7 displaying a list of images
128
Solution 129
Recipe 3.8 Animating the changing of images using the
imageswitcher 133
xi
conTenTs
Recipe 3.9 displaying images using the gridView
138
Solution 138
Recipe 3.10 Building a Master-detail user interface
141
Solution 143
ChAPter 4: teLePhony
151
Recipe 4.1 calling from Your Application
151
Solution 152
Recipe 4.2 Monitoring the state of the phone
153
Solution 153
Recipe 4.3 Monitoring phone state in the Background
156
Solution 156
Recipe 4.4 Blocking outgoing calls
158
Solution 159
Recipe 4.5 Auto-Answering an incoming call
160
Solution 160
Recipe 4.6 switching to Airplane Mode
163
Solution 163
Recipe 4.7 getting the phone number, iMei, and siM card id
165
Solution 166
Recipe 4.8 enabling Bluetooth
167
Solution 167
Recipe 4.9 displaying the call log
173
Solution 173
ChAPter 5: MessAging
175
Recipe 5.1 sending sMs Messages Through the Built-in
Messaging Application
175
Solution 176
Recipe 5.2 sending sMs Messages programmatically in Your
Android Application
178
Solution 178
Recipe 5.3 Monitoring the status of sent sMs Messages
programmatically 179
Solution 180
Recipe 5.4 Monitoring outgoing sMs Messages
183
Solution 184
Recipe 5.5 intercepting incoming sMs Messages
187
xii
Recipe 6.1 connecting to servers using HTTp geT
191
Solution 192
Recipe 6.2 connecting to servers using HTTp posT
195
Solution 195
Recipe 6.3 downloading Binary data using HTTp
198
Solution 199
Recipe 6.4 consuming XMl Web services
200
Solution 201
Recipe 6.5 consuming Json Web services
204
Solution 205
Recipe 6.6 getting the ip Address of the device
210
Solution 211
Recipe 6.7 creating a socket server
212
Solution 212
Recipe 6.8 creating a socket client
218
Solution 218
Recipe 6.9 checking for the Availability of Bluetooth
222
Solution 222
Recipe 6.10 Monitoring the state of Bluetooth
224
Solution 225
Recipe 6.11 creating a Bluetooth chat Application
226
Solution 227
ChAPter 7: using googLe MAPs
243
Recipe 7.1 displaying google Maps
243
Solution 244
Recipe 7.2 Zooming in and out of google Maps
250
Solution 250
Recipe 7.3 changing Map Modes
253
Solution 253
Recipe 7.4 navigating the Map to a particular location
256
Solution 256
Recipe 7.5 Adding Markers to the Map
258
Solution 258
Recipe 7.6 finding a user-friendly Address using Reverse
geocoding, and Vice Versa
268
Solution 268
Recipe 7.7 Responding to Zooming and panning
275
xiii
conTenTs
ChAPter 8: LoCAtion-bAseD DAtA serviCes
279
Recipe 8.1 obtaining geographical location using gps, Wi-fi, or
cellular networks
280
Solution 280
Recipe 8.2 choosing the Best location provider to use
284
Solution 284
Recipe 8.3 Monitoring a location
288
Solution 288
Recipe 8.4 using a BroadcastReceiver to obtain locations
289
Solution 290
Recipe 8.5 location data logging
293
Solution 293
ChAPter 9: ACCessing the hArDWAre
301
Recipe 9.1 capturing pictures with the camera
301
Solution 301
Recipe 9.2 detecting the presence of Hardware features
304
Solution 305
Recipe 9.3 checking network state
306
Solution 306
Recipe 9.4 Turning gps on/off
308
Solution 308
Recipe 9.5 capturing Hardware Buttons programmatically
310
Solution 310
Recipe 9.6 switching on the flashlight
313
Solution 314
Recipe 9.7 capturing Barcodes
319
Solution 320
ChAPter 10: Persisting DAtA
325
Recipe 10.1 saving and loading user preferences
325
Solution 326
Recipe 10.2 creating a preference screen
328
Solution 328
Recipe 10.3 saving files to the data directory
333
Solution 333
Recipe 10.4 saving files to the cache directory
338
Solution 338
Recipe 10.5 saving files to external storage
340
xiv
Solution 346
Recipe 10.7 creating and using sQlite databases programmatically 347
Solution 348
Recipe 10.8 pre-creating the sQlite databases
353
Solution 353
ChAPter 11: DePLoying your AnDroiD APPLiCAtions
357
Recipe 11.1 localizing Your Application
357
Solution 358
Recipe 11.2 exporting Your Application as an ApK file
362
Solution 362
Recipe 11.3 deploying Your App Through e-mail
365
Solution 365
Recipe 11.4 deploying Your App Through the Web
367
Solution 368
Recipe 11.5 deploying Your App Through an sd card
369
Solution 369
Recipe 11.6 specifying the Application installation location
370
Solution 371
introDuCtion
the PACe oF AnDroiD DeveLoPMent
has been fast and furious. Within a short time span of a few
years, Android has matured into a stable platform, rivaling that of its main competitor, iOS. At the
time of writing, the latest version of Android is 4.1 (aka Jelly Bean). Android 4.1 runs on both
smart-phones and tablets, making it the platform of choice for many developers.
This book was born out of the many frustrations I have had when developing Android applications.
It is often the case that you just need a quick snapshot showing how to do a certain task, and a code
snippet would be a quick fix. However, a trip to the official Android documentation often caused
more confusion than help, as the code samples are not always complete. Hence, this book aims to
fill the void by providing standalone examples that you can quickly “embrace and extend.”
Each recipe tackles a problem that you might face in your daily life as an Android developer —
whether it’s as minor as using a Button view or as involved as implementing a Master-Detail
appli-cation using fragments. You can read this book from the first recipe until the last recipe, or you can
turn directly to the recipes that interest you most.
Who this booK is For
This book is targeted at Android programmers who already have some basic knowledge of creating
Android applications. It is assumed that you know how to create an Android project using Eclipse,
and that you are already familiar with the structure of an Android project.
All the code samples in this book were written and tested using the Android 4.1 SDK, together with
Eclipse (Juno release) and the ADT plugin 20.0.3. All projects are able to run on Android devices
beginning with Android version 2.2. In particular, all projects make use of the Android Support
pack-age that is by default included in Android 4.1 projects. Using the Android Support Packpack-age enables
your applications to make use of the newer features introduced with Android version 3.0 (such as
fragments) and still run on older Android devices.
xvi
WhAt this booK Covers
This book covers all key areas of Android programming using the Android 4.1 SDK. It is divided
into 11 chapters.
Chapter 1:
Android Fundamentals
covers basic topics such as how to link activities, pass data
between activities, send and receive broadcasts, call built-in apps, and more.
Chapter 2:
Using Views to Design the User Interface
explains how to use the various views to build
the user interface of your Android applications. Also covered are the different types of layouts
sup-ported in Android to arrange the views, including LinearLayout, RelativeLayout, FrameLayout, and
others. You will also learn how to display context and option menus.
Chapter 3:
Displaying Lists of Items and Images
covers how to use the ListView and Spinner, and
how to customize them to display a list of items. It also demonstrates how to use fragments to create
Master-Detail applications.
Chapter 4:
Telephony
covers topics related to the phone on your Android device, such as how to
block outgoing calls, auto-answering incoming calls, enabling Bluetooth, and more.
Chapter 5:
Messaging
covers how to send and intercept SMS messages on your Android phone. You
will also learn how to monitor for SMS messages sent by your users.
Chapter 6:
Network Programming
covers topics related to getting your Android application
con-nected to the outside world. You will learn about how to consume XML and JSON web services,
sockets programming, and Bluetooth communications.
Chapter 7:
Using Google Maps
includes topics about how to display Google Maps in your Android
application, how to perform reverse geocoding, and more.
Chapter 8:
Location-Based Data Services
covers the key techniques you need to know to build
location-based services. You will also learn how to implement location data logging.
Chapter 9:
Accessing the Hardware
covers how to access the many hardware features from your
Android application. It includes recipes demonstrating how to take pictures using the built-in
cam-era, how to turn GPS on/off, as well as how to enable the device’s flashlight.
Chapter 10:
Persisting Data
covers several methods for persisting your data, including internal
stor-age, external storstor-age, a database, and more.
xvii
introDuCtion
hoW this booK is struCtureD
Chapters in this book are divided into main topics, with each chapter containing multiple “recipes”
that address specific subtopics in more detail. Instead of adopting the step-by-step approach of
creating a project and then explaining how the code works, this books demonstrates the key
ingre-dients of each recipe — the key points you need to understand in order to meet a requirement or
solve a problem (or complete a common task) in Android programming. Each recipe covers the core
concepts you need to understand, without any unnecessary code that can complicate an example.
Using this approach, it would be easiest for you to copy-and-paste the code into your own project
and then enhance it for your own purpose. This, in my opinion, is the best way to learn Android
programming.
To that end, every chapter has a very defined structure. Each recipe is numbered and has a title. The
recipe begins with a list of components needed to successfully complete the solution, like so:
reCiPe
0.0
the reCiPe requireMents
Android Versions
Each recipe uses APIs from the Android SDK. The Android Versions section
states the version (level number) from which the APIs are from. For example,
you might see “Level 1 and above.” This indicates that the APIs used in this
recipe are available from Android level 1 (i.e., version 1.0) and above.
permissions
The Permissions section shows the permissions that you need to add into
your application, specifically the
AndroidManifest.xmlfile, in order to use
the APIs described in the recipe. Be sure to add the permission; forgetting to
do so will usually cause the application to crash during run time.
source code to download from Wrox.com
The Source Code section shows the name of the ZIP file that you can
down-load from the support web site of this book from Wrox.com. The ZIP file
contains the complete project used to illustrate the concept in that recipe. If
you want to quickly get the code for the recipe into your own project,
down-loading the source code is your fastest option.
xviii
A note About inCLuDing PerMissions in CoDe
To make the recipes succinct and easy to follow, this book assumes that you know
how to add permissions in your application. For example, instead of listing the entire
AndroidManifest.xml
file and highlighting the permissions that you need to add,
like this:
<manifest xmlns:android="http://schemas.android.com/apk/res/android" package="net.learn2develop.http"
android:versionCode="1" android:versionName="1.0" >
<uses-sdk
android:minSdkVersion="8" android:targetSdkVersion="15" />
<uses-permission android:name="android.permission.INTERNET" /> <uses-permission
android:name="android.permission.ACCESS_NETWORK_STATE"/>
<application
android:icon="@drawable/ic_launcher" android:label="@string/app_name" android:theme="@style/AppTheme" > <activity
android:name=".MainActivity"
android:label="@string/title_activity_main" > <intent-filter>
<action android:name="android.intent.action.MAIN" />
<category android:name="android.intent.category. LAUNCHER" />
</intent-filter> </activity>
</application>
</manifest>
… the recipe will simply indicate that you need to add the following permissions:
<uses-permission android:name="android.permission.INTERNET" /> <uses-permission
android:name="android.permission.ACCESS_NETWORK_STATE"/>
xix
introDuCtion
WhAt you neeD to use this booK
Most of the examples in this book run on the Android emulator, which is included as part of the
Android SDK. However, to get the most out of this book, using a real Android device is
recom-mended (though not absolutely necessary).
Additionally, each recipe begins with a list of requirements specific to that recipe (versions,
permis-sions, and source code), as previously discussed.
Conventions
To help you get the most from the text and keep track of what’s happening, a number of conventions
are used throughout the book:
➤
New terms and important words are
highlighted
in italics when first introduced.
➤
Keyboard combinations are treated like this: Ctrl+R.
➤
Filenames, URLs, and code within the text are treated like so:
persistence.properties.
➤
Code is presented in two different ways:
We use a monofont type with no highlighting for most code examples.
We use bolding to emphasize code that is of particular importance in the present context.
note
Notes, tips, hints, tricks, and asides to the current discussion look like
this.
sourCe CoDe
As you work through the examples in this book, you may choose either to type in all the code
man-ually or to use the source code files that accompany the book. All the source code used in this book
is available for download at
www.wrox.com. When at the site, simply locate the book’s title (use the
Search box or one of the title lists) and click the Download Code link on the book’s detail page to
obtain all the source code for the book.
xx
note
Because many books have similar titles, you may find it easiest to search
by ISBN; this book’s ISBN is 978-1-118-17767-9.
errAtA
We make every effort to ensure that there are no errors in the text or in the code. However, no one
is perfect, and mistakes do occur. If you find an error in one of our books, such as a spelling mistake
or a faulty piece of code, we would be very grateful for your feedback. By sending in errata, you may
save another reader hours of frustration and at the same time help us provide even higher-quality
information.
To find the errata page for this book, go to
www.wrox.comand locate the title using the Search box
or one of the title lists. Then, on the book details page, click the Book Errata link. On this page, you
can view all errata that has been submitted for this book and posted by Wrox editors. A complete
book list, including links to each book’s errata, is also available at
www.wrox.com/misc-pages/ booklist.shtml.
If you don’t spot “your” error on the Book Errata page, go to
www.wrox.com/contact/techsupport .shtmland complete the form there to send us the error you have found. We’ll check the
informa-tion and, if appropriate, post a message to the book’s errata page and fix the problem in subsequent
editions of the book.
P2P.Wrox.CoM
For author and peer discussion, join the P2P forums at
p2p.wrox.com. The forums are a web-based
system for you to post messages relating to Wrox books and related technologies and to interact with
other readers and technology users. The forums offer a subscription feature to e-mail you topics of
interest of your choosing when new posts are made to the forums. Wrox authors, editors, other
industry experts, and your fellow readers are present on these forums.
At
p2p.wrox.com, you will find a number of different forums that will help you not only as you
read this book but also as you develop your own applications. To join the forums, just follow
these steps:
1.
Go to
p2p.wrox.comand click the Register link.
2.
Read the terms of use and click Agree.
3.
Complete the required information to join as well as any optional information you want to
provide and click Submit.
xxi
introDuCtion
note
You can read messages in the forums without joining P2P, but in order to
post your own messages you must join.
After you join, you can post new messages and respond to messages that other users post. You can
read messages at any time on the Web. If you want to have new messages from a particular forum
e-mailed to you, click the Subscribe to This Forum icon by the forum name in the forum listing.
Android fundamentals
In this chapter, you learn about the fundamental topics in Android that most developers need to
know, including how to link to other applications using the Intent object, how to communicate
with other applications (or parts of the same application) using broadcast receivers, and how
to pass data between activities.
reCiPe 1.1
LinKing ACtivities
Android Versions
Level 1 and above
permissions
None
source code to download at Wrox.com
Linking.zip
Unless you are writing a Hello World application, chances are good that your application
con-tains several activities that you need to connect in order to form a cohesive application. This
recipe shows you the various ways to link to another activity in your Android application.
solution
Suppose you have two activities in your application. The following
AndroidManifest.xmlfile
shows the two activities classes,
MainActivityand
Activity2:
<manifest xmlns:android="http://schemas.android.com/apk/res/android" package="net.learn2develop.linking"
android:versionCode="1" android:versionName="1.0" >
<uses-sdk
android:minSdkVersion="8" android:targetSdkVersion="15" />
<application
android:icon="@drawable/ic_launcher" android:label="@string/app_name" android:theme="@style/AppTheme" >
<activity
android:name=".MainActivity"
android:label="@string/title_activity_main" > <intent-filter>
<action android:name="android.intent.action.MAIN" />
<category android:name="android.intent.category.LAUNCHER" /> </intent-filter>
</activity>
<activity
android:name=".Activity2"
android:label="@string/app_name" > <intent-filter>
<action android:name="net.learn2develop.Activity2" /> <category android:name="android.intent.category.DEFAULT" /> </intent-filter>
</activity>
</application>
</manifest>
Assuming you are currently in the
MainActivityactivity, to link to
Activity2you can use the
fol-lowing code snippet:
package net.learn2develop.linking;
import android.app.Activity;
import android.content.Intent;
Recipe 1.1 linking Activities
❘
3public class MainActivity extends Activity {
@Override
public void onCreate(Bundle savedInstanceState) { super.onCreate(savedInstanceState);
setContentView(R.layout.activity_main);
//---link to
Intent i = new Intent("net.learn2develop.Activity2"); startActivity(i);
} }
To link to another activity, you create an
Intentobject and set its constructor to the name (as set
in the
<action>element in the
AndroidManifest.xmlfile) of the target activity. Then, call the
startActivity()
method to launch that activity.
Alternatively, you can create an
Intentobject and then call its
setAction()method to set the
name of the target activity:
//---link to Intent i = new Intent();
i.setAction("net.learn2develop.Activity2"); startActivity(i);
The previous code snippets are useful for calling an activity that is within the same application, as
well as for other applications to call your activity. If you want to call an activity that is internal to
your application, you can also call it using its class name, like this:
//---link to
Intent i = new Intent(this, Activity2.class);
If you do not want other activities to call your activity from outside your application, simply remove
the
<action>element within the
<intent-filter>element:
<activity
android:name=".Activity2"
android:label="@string/app_name" > <intent-filter>
<action android:name="net.learn2develop.Activity2" /> -->
<category android:name="android.intent.category.DEFAULT" /> </intent-filter>
</activity>
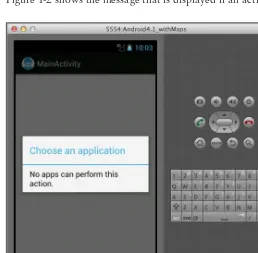
To ensure that your application does not stop abruptly,
call the
startActivity()method together with the
Intent.createChooser()
method. The
createChooser()method takes an
Intentobject and a string to display if
an activity cannot be found (or if more than one activity
has been found to satisfy your
Intentobject):
Intent i = new Intent("net.learn2develop.Activity2");
startActivity(Intent.createChooser(i, "Choose an application"));
Figure 1-2 shows the message that is displayed if an activity cannot be found.
Figure 1-2
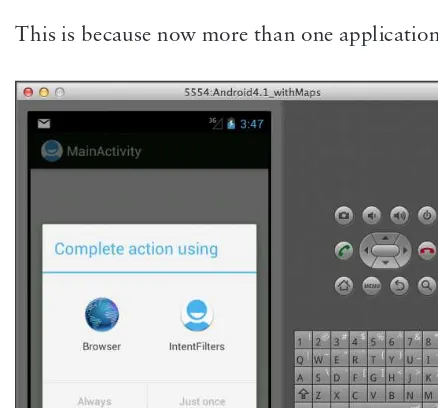
Figure 1-3 shows the message that is displayed when more than one activity has been found.
Note that when using the
createChooser()method, you need to specify the name of the activity
(such as
net.learn2develop.Activity2as seen in the previous example) that you are launching,
not its class name. The following code snippet will not work:
//---the following will never link to Intent i = new Intent(this, Activity2.class);
startActivity(Intent.createChooser(i, "Choose an application"));
Recipe 1.2 passing data Between Activities
❘
5Figure 1-3
reCiPe 1.2
PAssing DAtA betWeen ACtivities
Android Versions
Level 1 and above
permissions
None
source code to download at Wrox.com
PassingData.zip
The preceding recipe demonstrated how to launch another activity using the
startActivity()solution
You can make use of the
Intentclass to pass data to another activity. To pass primitive data types
to another activity, you can use the
putExtra()method, as the following code snippet shows:
package net.learn2develop.passingdata;
import android.app.Activity;
import android.content.Intent;
import android.os.Bundle;
import android.view.View;
public class MainActivity extends Activity {
@Override
public void onCreate(Bundle savedInstanceState) { super.onCreate(savedInstanceState);
setContentView(R.layout.activity_main); }
The preceding statements create an
Intentobject and then attach two values to it using the
putExtra()
method: one for a string and one for an integer.
You can also pass in a
Bundleobject using the
Intentobject. A
Bundleobject is like a dictionary
object, as you can specify key/value pairs. To pass a
Bundleobject using an
Intentobject, create a
Bundle
object, populate it, and then attach it to the
Intentobject using the
putExtras()method,
as the following code shows:
extras.putString("str2", "This is another string"); extras.putInt("age2", 35);
//---attach the Bundle object to the Intent i.putExtras(extras);
Recipe 1.2 passing data Between Activities
❘
7When you start another activity using the
Intentobject, the data attached to the
Intentobject is
passed to the destination activity. To call another activity with the intention of getting some data
back from it, use the
startActivityForResult()method:
public void onClick(View view) {
extras.putString("str2", "This is another string"); extras.putInt("age2", 35);
The
startActivityForResult()method takes an
Intentobject as well as a request code. The
request code is an integer value that is greater than or equal to zero. This request code is used to
identify returning activities, as you may call more than one activity simultaneously. If you set the
request code to -1, then the call of
startActivityForResult()is equivalent to
startActivity().
That is, you will not be able to obtain data passed back from the destination activity.
On the target activity, to retrieve the data that was passed to it, you use the
getIntent()method
to obtain the instance of the
Intentobject that was passed to it. To get the simple data type passed
in through the
putExtra()method, use the
get<type>Extra()method, where the type may be
String
,
int,
float, and so on. The following code shows how the two primitive data types are
retrieved:
package net.learn2develop.passingdata;
import android.app.Activity; import android.os.Bundle; import android.widget.Toast;
public class SecondActivity extends Activity {
@Override
public void onCreate(Bundle savedInstanceState) { super.onCreate(savedInstanceState);
setContentView(R.layout.activity_second);
//---get the data passed in using Toast.makeText(this,Integer.toString(
getIntent().getIntExtra("age1", 0)), Toast.LENGTH_SHORT).show();
}
}
To retrieve the data passed in through the
Bundleobject, use the
getExtras()method of the
Intent
object. The
getExtras()method returns a
Bundleobject, which you can use to retrieve the
various key/values using the
get<type>()method, where type may be
String,
int, and so on:
@Override
public void onCreate(Bundle savedInstanceState) { super.onCreate(savedInstanceState);
setContentView(R.layout.activity_second);
//---get the data passed in using Toast.makeText(this,getIntent().getStringExtra("str1"), Toast.LENGTH_SHORT).show();
//---get the data passed in using Toast.makeText(this,Integer.toString(
getIntent().getIntExtra("age1", 0)), Toast.makeText(this, bundle.getString("str2"), Toast.LENGTH_SHORT).show();
//---get the data using the getInt()
Toast.makeText(this,Integer.toString(bundle.getInt("age2")), Toast.LENGTH_SHORT).show();
}
The destination may also pass data back to the calling activity. To pass data back, you can create
another
Intentobject and set the values as described earlier. You can also use the
setData()method to pass a
Uriobject through the
Intentobject. To pass the result back to the calling
activity, use the
setResult()method, as shown in the following code:
package net.learn2develop.passingdata;
Recipe 1.2 passing data Between Activities
❘
9@Override
public void onCreate(Bundle savedInstanceState) { super.onCreate(savedInstanceState);
setContentView(R.layout.activity_second);
//---get the data passed in using Toast.makeText(this,getIntent().getStringExtra("str1"), Toast.LENGTH_SHORT).show();
//---get the data passed in using Toast.makeText(this,Integer.toString(
getIntent().getIntExtra("age1", 0)), Toast.makeText(this, bundle.getString("str2"), Toast.LENGTH_SHORT).show();
//---get the data using the getInt()
Toast.makeText(this,Integer.toString(bundle.getInt("age2")), Toast.LENGTH_SHORT).show();
The
RESULT_OKconstant enables you to indicate to the calling activity whether the data returned
should be ignored. If you want the calling activity to ignore the result, you can use the
RESULT_ CANCELLEDconstant. How the calling activity interprets the result is really up to it, but the use of
these two constants serves as an indication.
code is the number that you earlier passed to the
startActivityForResult()method, which is 1
in this example:
//---start the activity to get a result startActivityForResult(i, 1);
You can also check the result code to see if it is
RESULT_OK:
package net.learn2develop.passingdata;
public class MainActivity extends Activity {
@Override
public void onCreate(Bundle savedInstanceState) { super.onCreate(savedInstanceState);
setContentView(R.layout.activity_main); }
extras.putString("str2", "This is another string"); extras.putInt("age2", 35);
Recipe 1.3 passing objects Between Activities
❘
11//---get the result using Toast.makeText(this, Integer.toString( data.getIntExtra("age3", 0)), Toast.LENGTH_SHORT).show();
//---get the result using Uri url = data.getData();
Toast.makeText(this, url.toString(), Toast.LENGTH_SHORT).show(); }
} }
}
To retrieve the data sent using the
setData()method, use the
getData()method of the
Intentobject (passed in as the second argument of the
onActivityResult()method).
reCiPe 1.3
PAssing objeCts betWeen ACtivities
Android Versions
Level 1 and above
permissions
None
source code to download at Wrox.com
PassingData.zip
In the previous recipe, you saw how to pass simple data (such as strings and integers) between
activi-ties. This recipe demonstrates how to pass objects between activites. For example, you might have
encapsulated the information of a customer (such as the customer ID, name, company, and so on)
within an object and you need to pass it over to another activity for processing. Instead of passing
the various pieces of the information of the customer individually, it would be easier to simply pass
that object.
solution
Besides passing simple data types using the
putExtra()and
putExtras()methods, you can also
pass objects using an
Intentobject. If you have your own custom class, you need to ensure that your
class implements the
Serializablebase class. The following
MyCustomClassclass is an example:
package net.learn2develop.passingdata;
public class MyCustomClass implements Serializable { private static final long serialVersionUID = 1L; String _name;
String _email;
public void setName(String name) { _name = name;
public void setEmail(String email) { _email = email;
To pass an object to another activity, use the
putExtra()method:
public void onClick(View view) {
extras.putString("str2", "This is another string"); extras.putInt("age2", 35);
myObject.setEmail("[email protected]"); i.putExtra("MyObject", myObject);
//---start the activity to get a result startActivityForResult(i, 1);
}
Recipe 1.4 sending and Receiving Broadcasts
❘
13typecast the result returned by this method to the
MyCustomClassclass and assign it to a
vari-able of this type:
@Override
public void onCreate(Bundle savedInstanceState) { super.onCreate(savedInstanceState);
setContentView(R.layout.activity_second);
//---get the data passed in using Toast.makeText(this,getIntent().getStringExtra("str1"), Toast.LENGTH_SHORT).show();
//---get the data passed in using Toast.makeText(this,Integer.toString(
getIntent().getIntExtra("age1", 0)), Toast.LENGTH_SHORT).show();
//---get the Bundle object passed Bundle bundle = getIntent().getExtras();
//---get the data using the getString()--- Toast.makeText(this, bundle.getString("str2"), Toast.LENGTH_SHORT).show();
//---get the data using the getInt()
Toast.makeText(this,Integer.toString(bundle.getInt("age2")), Toast.LENGTH_SHORT).show();
//---get the custom object passed MyCustomClass obj = (MyCustomClass)
getIntent().getSerializableExtra("MyObject");
Toast.makeText(this, obj.Name(), Toast.LENGTH_SHORT).show(); Toast.makeText(this, obj.Email(), Toast.LENGTH_SHORT).show();
}
reCiPe 1.4
senDing AnD reCeiving broADCAsts
Android Versions
Level 1 and above
permissions
None
source code to download at Wrox.com
In Android, a broadcast enables you to send a message to another part of your application (or
another application) so that you can inform it of something happening. In this recipe, you learn
how to create a broadcast receiver to listen for broadcasts, as well as send broadcasts to other
applications.
solution
There are two ways to create a broadcast receiver: programmatically through code and declaratively
via the
AndroidManifest.xmlfile. The following sections address each possible solution.
programmatically Registering a Broadcast Receiver
public class MainActivity extends Activity { MyBroadcastReceiver myReceiver;
IntentFilter intentFilter;
@Override
public void onCreate(Bundle savedInstanceState) { super.onCreate(savedInstanceState);
setContentView(R.layout.activity_main);
myReceiver = new MyBroadcastReceiver();
intentFilter = new IntentFilter("MY_SPECIFIC_ACTION");
}
@Override
public void onResume() { super.onResume();
//---register the
registerReceiver(myReceiver, intentFilter); } unregisterReceiver(myReceiver); }
Recipe 1.4 sending and Receiving Broadcasts
❘
15public void onClick(View view) {
Intent i = new Intent("MY_SPECIFIC_ACTION"); i.putExtra("key", "some value from intent"); sendBroadcast(i);
}
public class MyBroadcastReceiver extends BroadcastReceiver { @Override
The preceding code snippet shows the inner class
MyBroadcastReceiverextending from the
BroadcastReceiver
base class. In this class, you need to override the
onReceive()method so that
when the broadcast is received, you can perform the action that you want to perform. To get the
data that is passed to the receiver, you can make use of the
Intentobject in the second argument
of the
onReceive()method.
To use this class, you need to create an instance of it, as well as create an
IntentFilterobject:
myReceiver = new MyBroadcastReceiver();
intentFilter = new IntentFilter("MY_SPECIFIC_ACTION");
You specify a user-defined action in the
IntentFilter’s constructor, and use your own string to
define this action.
To register the
BroadcastReceiverobject, use the
registerReceiver()method, passing it the
BroadcastReceiver
object as well as the
IntentFilterobject:
registerReceiver(myReceiver, intentFilter);
Now that you have registered a
BroadcastReceiverobject, you can send a broadcast to test
whether it works. To send a broadcast, you use the
sendBroadcast()method, passing it an
Intent
object:
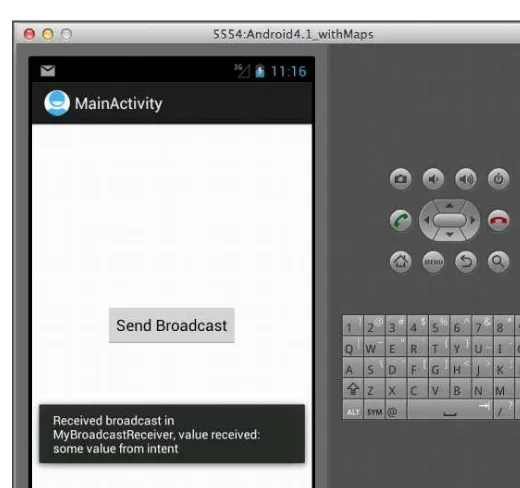
public void onClick(View view) {
Intent i = new Intent("MY_SPECIFIC_ACTION"); i.putExtra("key", "some value from intent"); sendBroadcast(i);
}
If you want to pass data to the receiver, you can use the
putExra()method. To unregister the
broadcast receiver, use the
unregisterReceiver()method:
Figure 1-4 shows the receiver receiving the broadcast.
Figure 1-4
The broadcast receiver will work even if the broadcast was sent by another application.
Registering the BroadcastReceiver in the AndroidManifest.xml file
In the previous example, if the application is in the background, the broadcast receiver will no
longer work because you have unregistered the broadcast receiver when the application goes to the
background:
@Override
public void onPause() { super.onPause();
//---unregister the unregisterReceiver(myReceiver); }
If you want a more persistent way to receive broadcasts, you need to register the
BroadcastReceiver
class in the
AndroidManifest.xmlfile.
To do so, you create the
BroadcastReceiverclass in another Java class. The following code snippet
shows the content of the
MySecondBroadcastReceiver.javafile:
package net.learn2develop.usingbroadcastreceiver;
Recipe 1.4 sending and Receiving Broadcasts
❘
17import android.content.Intent; import android.widget.Toast;
public class MySecondBroadcastReceiver extends BroadcastReceiver { @Override
public void onReceive(Context context, Intent i) { Toast.makeText(context,
To register this receiver in the
AndroidManifest.xmlfile, add the
<receiver>element:
<manifest xmlns:android="http://schemas.android.com/apk/res/android" package="net.learn2develop.usingbroadcastreceiver"
android:versionCode="1" android:versionName="1.0" >
<uses-sdk
android:minSdkVersion="8" android:targetSdkVersion="15" />
<application
android:icon="@drawable/ic_launcher" android:label="@string/app_name" android:theme="@style/AppTheme" > <activity
android:name=".MainActivity"
android:label="@string/title_activity_main" > <intent-filter>
<receiver android:name=".MySecondBroadcastReceiver" > <intent-filter>
Figure 1-5
reCiPe 1.5
Assigning Priorities to broADCAst
reCeivers
Android Versions
Level 1 and above
permissions
None
source code to download at Wrox.com
UsingBroadcastReceiver.zip
Recipe 1.5 Assigning priorities to Broadcast Receivers
❘
19solution
To programmatically assign a priority to a broadcast receiver, use the
setPriority()method:
public class MainActivity extends Activity { MyBroadcastReceiver myReceiver;
IntentFilter intentFilter;
@Override
public void onCreate(Bundle savedInstanceState) { super.onCreate(savedInstanceState);
setContentView(R.layout.activity_main);
myReceiver = new MyBroadcastReceiver();
intentFilter = new IntentFilter("MY_SPECIFIC_ACTION"); }
@Override
public void onResume() { super.onResume();
intentFilter.setPriority(10);
registerReceiver(myReceiver, intentFilter); }
The
setPriority()method takes a priority value between 0 (default) and 1,000. The larger the
number, the higher priority it has, and hence broadcast receivers with a higher priority are called
before those with lower priority. If more than one broadcast receiver has the same priority, they are
called randomly. The preceding code snippet sets the priority to 10.
To set the priority of broadcast receivers in the
AndroidManifest.xmlfile, use the
android:priority
attribute:
<receiver android:name=".MySecondBroadcastReceiver" > <intent-filter android:priority="50">
<action android:name="MY_SPECIFIC_ACTION" /> </intent-filter>
</receiver>
The preceding example sets the priority to 50.
To send a broadcast that is delivered to broadcast receivers with higher priority first, you cannot
use the
sendBroadcast()method. Instead, you need to use the
sendOrderedBroadcast()method,
passing it an
Intentobject, plus any additional permission that the receiver must have in order to
receive your broadcast:
public void onClick(View view) {
Intent i = new Intent("MY_SPECIFIC_ACTION"); i.putExtra("key", "some value from intent");
//sendBroadcast(i);
//---allows broadcast to be
//---allows broadcast receivers to set sendOrderedBroadcast(i, null);
If you try to send the broadcast now, you will notice that the broadcast receiver declared in the
AndroidManifest.xml
file is called first, before the one declared programmatically through code.
If you want to send a broadcast to only broadcast receivers with the permission to access the
Internet, you will specify the permission in the second argument of the
sendOrderedBroadcast()method, like this:
sendOrderedBroadcast(i, “android.permission.INTERNET”);
Aborting a Broadcast
When broadcasts are sent using the
sendOrderedBroadcast()method, broadcast receivers are
called in the order of the priorities defined. When a broadcast receiver of higher priority receives
the broadcast, it will handle that and the broadcast will be passed to the next broadcast receiver in
line. In some scenarios, you might want to handle the broadcast and stop the broadcast from being
propagated to the next receiver. To do that, you can use the
abortBroadcast()method:
package net.learn2develop.UsingBroadcastReceiver;
import android.content.BroadcastReceiver; import android.content.Context;
import android.content.Intent; import android.widget.Toast;
public class MySecondBroadcastReceiver extends BroadcastReceiver { @Override
public void onReceive(Context context, Intent i) { Toast.makeText(context,
"Received broadcast in MySecondBroadcastReceiver; " + "value received: " + i.getStringExtra("key"),
Toast.LENGTH_LONG).show();
//---abort the abortBroadcast();
} }
In the preceding code snippet, the
MySecondBroadcastReceiverclass aborts the broadcast after
receiving it. Once it aborts the broadcast, other receivers who are waiting in line will not be able
to receive it.
Recipe 1.6 Auto-launching Your Application at Boot Time
❘
21reCiPe 1.6
Auto-LAunChing your APPLiCAtion At
boot tiMe
Android Versions
Level 1 and above
permissions
android.permission.RECEIVE_BOOT_COMPLETED
source code to download at Wrox.com
AutoStartApp.zip
If you need to automatically start your application whenever the device starts up, you need to register
a
BroadcastReceiver. This recipe shows you how.
solution
To auto-launch your app during device boot-up, add a new class to your package and ensure that it
extends the
BroadcastReceiverbase class. The following
BootupReceiverclass is an example:
package net.learn2develop.autostartapp;
import android.content.BroadcastReceiver; import android.content.Context;
import android.content.Intent; import android.widget.Toast;
public class BootupReceiver extends BroadcastReceiver { @Override
public void onReceive(Context context, Intent intent) {
Toast.makeText(context, "App started", Toast.LENGTH_LONG).show();
//---start the main activity of our
Intent i = new Intent(context,MainActivity.class); i.addFlags(Intent.FLAG_ACTIVITY_NEW_TASK);
context.startActivity(i); }
}
When the device boots up, it will fire this broadcast receiver and call the
onReceiver()method. To
display your activity when the device boots up, you will use an
Intentobject. Remember to add the
FLAG_ACTIVITY_NEW_TASK
flag to the
Intentobject.
To register the broadcast receiver, you need to add the
<receiver>element to the
AndroidManifest.xml
file. You also need the
RECEIVE_BOOT_COMPLETEDpermission:
android:versionCode="1" android:versionName="1.0" >
<uses-sdk
android:minSdkVersion="8" android:targetSdkVersion="15" />
<uses-permission android:name="android.permission.RECEIVE_BOOT_COMPLETED"/>
<application
android:icon="@drawable/ic_launcher" android:label="@string/app_name" android:theme="@style/AppTheme" > <activity
android:name=".MainActivity"
android:label="@string/title_activity_main" > <intent-filter>
<action android:name="android.intent.action.MAIN" />
<category android:name="android.intent.category.LAUNCHER" /> </intent-filter>
</activity>
<receiver android:name=".BootupReceiver"> <intent-filter>
<action android:name="android.intent.action.BOOT_COMPLETED" /> <category android:name="android.intent.category.DEFAULT" /> </intent-filter>
</receiver>
</application>
</manifest>
Your application will now be automatically launched when the device has booted up.
reCiPe 1.7
CALLing buiLt-in APPs
Android Versions
Level 1 and above
permissions
None
source code to download at Wrox.com
Recipe 1.7 calling Built-in Apps
❘
23One of the key features of Android is the functionality it provides for applications to call other
applications seamlessly. This enable you to integrate various applications on the device to form a
coherent experience for your users. This recipe shows you the various ways to call the applications
on your device.
solution
There are many ways to call built-in apps, and how depends on which application you are calling.
For this recipe’s solution, you will learn how to call some of the commonly installed applications on
your Android device, such as:
➤
How to display maps
➤
How to direct the user to a particular application on Google Play
➤
How to send e-mails
➤
How to send text and graphic content to applications that can handle them
displaying Maps
To display maps in your application, you can launch an activity using the
geo:scheme, as shown
in here:
package net.learn2develop.callingapps;
import android.app.Activity; import android.content.Intent; import android.net.Uri; import android.os.Bundle;
public class MainActivity extends Activity {
@Override
public void onCreate(Bundle savedInstanceState) { super.onCreate(savedInstanceState);
setContentView(R.layout.activity_main);
Intent i = new Intent(android.content.Intent.ACTION_VIEW);
i.setData(Uri.parse("geo:37.827500,-122.481670"));
startActivity(i); }
}
To launch an application from the list, select the
application (say, Google Earth) and select either
Always or Just once. If you select Always, the
appli-cation you have just selected (in this case, Google
Earth) will always be launched automatically. If you
select Just once, you will see this prompt (asking if
you want to launch it Always or Just once) each time
you run this application.
When you select the Earth application, the
Google Earth application will launch (see
Figure 1-7).
Similarly, selecting the Maps application launches
the Google Maps application (see Figure 1-8).
Figure 1-6
Recipe 1.7 calling Built-in Apps
❘
25launching google play
If you want to redirect the user to another application that is available on Google Play (formerly
known as Google Market), use the
market:scheme:
Intent i = new Intent(android.content.Intent.ACTION_VIEW); i.setData(Uri.parse(
"market://details?id=com.zinio.mobile.android.reader")); startActivity(i);
The preceding code snippet will display the Zinio application available on Google Play (see
Figure 1-9).
sending e-mail
To send an e-mail message from within your application, use the following code snippet:
Intent i = new Intent(Intent.ACTION_SEND); i.setData(Uri.parse("mailto:"));
String[] to = { "[email protected]" , "[email protected]" }; String[] cc = { "[email protected]" , "[email protected]" }; i.putExtra(Intent.EXTRA_EMAIL, to);
i.putExtra(Intent.EXTRA_CC, cc);
i.putExtra(Intent.EXTRA_SUBJECT, "Subject here..."); i.putExtra(Intent.EXTRA_TEXT, "Message here..."); i.setType("message/rfc822");
startActivity(Intent.createChooser(i, "Email"));
Figure 1-10 shows the E-mail application displaying the content of the e-mail.
Recipe 1.7 calling Built-in Apps
❘
27sending content to other Apps
Occasionally, you may want to launch another activity and send some content to it. For example,
you might want to send some content to Facebook as well as the E-mail application. In this case,
instead of targeting a particular application to invoke, you can use the generic
ACTION_SENDcon-stant to invoke a list of applications from which to choose. Consider the following code snippet:
Intent i = new Intent(android.content.Intent.ACTION_SEND); i.setType("text/plain");
i.putExtra(Intent.EXTRA_SUBJECT, "Subject..."); i.putExtra(Intent.EXTRA_TEXT, "Text...");
startActivity(Intent.createChooser(i, "Apps that can respond to this"));
When run on a real device, the preceding code might invoke the list of applications shown in
Figure 1-11.
If you selected the Messaging app, the data you set in the
Intentobject will then be sent as an
SMS message (see Figure 1-12).
If you selected Gmail, the data you set in the
Intentobject will then be sent as an e-mail (see
Figure 1-13).
If you selected Twitter (assuming you have Twitter installed on your device), the data you set in the
Intent
object will then be sent as a tweet (see Figure 1-14).
Figure 1-13
sending Binary content
If you have some images in your
drawablefolders, you can also send them to other applications
using the following code snippet:
//---sending binary Uri uriToImage =
Uri.parse(
"android.resource://net.learn2develop.CallingApps/drawable/" + Integer.toString(R.drawable.android));