p・ョァ・ュ「。ョァ。ョ@
aーャゥォ。ウゥ@w・「@
ュ・ョァァオョ。ォ。ョ
Yii
Web Application
Development with
Yii and PHP
Second Edition
Learn the Yii application development framework by
taking a step-by-step approach to building a Web-based
project task tracking system from conception through
production deployment
Jeffrey Winesett
Web Application Development with
Yii and PHP
Second Edition
Copyright © 2012 Packt Publishing
All rights reserved. No part of this book may be reproduced, stored in a retrieval system, or transmitted in any form or by any means, without the prior written permission of the publisher, except in the case of brief quotations embedded in critical articles or reviews.
Every effort has been made in the preparation of this book to ensure the accuracy of the information presented. However, the information contained in this book is sold without warranty, either express or implied. Neither the author, nor Packt Publishing, and its dealers and distributors will be held liable for any damages caused or alleged to be caused directly or indirectly by this book.
Packt Publishing has endeavored to provide trademark information about all of the companies and products mentioned in this book by the appropriate use of capitals. However, Packt Publishing cannot guarantee the accuracy of this information.
First Edition: August 2010
Second Edition: November 2012
Production Reference: 1121112
Published by Packt Publishing Ltd. Livery Place
35 Livery Street
Birmingham B3 2PB, UK.
ISBN 978-1-84951-872-7
www.packtpub.com
Credits
Author
Jeffrey Winesett
Reviewers
Wojciech Bancer Carsten Brandt Brett Gregson Stephan Hohmann Alexander Makarov
Acquisition Editor
Usha Iyer
Lead Technical Editors
Sonali Tharwani Sweny M. Sukumaran
Technical Editor
Sharvari Baet
Copy Editors
Insiya Morbiwala Laxmi Subramanian Brandt D'Mello Aditya Nair
Project Coordinator
Leena Purkait
Proofreader
Maria Gould
Indexers
Monica Ajmera Mehta Tejal R. Soni
Rekha Nair
Production Coordinator
Arvindkumar Gupta
Cover Work
About the Author
Jeffrey Winesett
has over ten years of experience building large-scale, web-based applications. He has been a strong proponent of using open source development frameworks when developing applications, and a champion of the Yii framework in particular since its initial alpha release. He frequently presents on, writes about, and develops with Yii as often as possible.I would like to thank Qiang Xue for creating this amazing framework, and the entire Yii framework development team who continually improve and maintain it. I thank all of the technical reviewers, editors, and staff at Packt Publishing for their fantastic contributions, suggestions, and improvements.
About the Reviewers
Wojciech Bancer
has a Master's Degree in Computer Science. He has over ten years of experience in web application development. In 2007, after passing the Zend exam, he gained a Zend Certiied Engineer for PHP5 certiicate. Wojciech started his career developing web applications in PHP4 and PHP5 as a freelancer. Later, he started working for a digital media agency in London, where he was introduced to various PHP frameworks and agile processes. Currently, he is a technical consultant for ORM London working on a range of web, mobile, and touch projects.To my wife and son, I wish them the best.
Carsten Brandt
has been a freelance PHP developer for many years. He founded his own ISP company providing web development and hosting services in 2007. Together with his wife and little son, he is currently living in Berlin, Germany and studying Computer Science at Technische Universität Berlin.He irst started with Yii in 2010 and has contributed heavily to the yiiext extension repository
http://yiiext.github.com/ since then. After Yii moved to GitHub, he started contributing to the Yii framework code too, and since August 2012 he has been an active member of the Yii framework developer team.
I would like to thank my beloved wife Mila for letting me do open source work in my free time, and not arguing too much when I stay late for doing work I don't get paid for.
Brett Gregson
is a PHP/iOS software developer based in South Africa. His main area of expertise is user interface design and user experience. He is a big fan of the Yii framework and jQuery. He currently works at RAW Media Concepts in Johannesburg, South Africa.Stephan Hohmann
, having been raised in the reach of an 8086 IBM PC, had his career choice set in his early ages. After toying around with a plethora of programming languages and operating systems, Stephan has now settled mostly for Fedora Linux and web programming with PHP (for the time being). He is currently involved in making the Yii framework better and creating formidable applications with it.Alexander Makarov
is an experienced engineer from Russia, and a member of the Yii framework core team since 2010. He is the author of another book on the Yii framework called Yii 1.1 Application Development Cookbook, Packt Publishing.Thanks to my family for being patient with me as I took up yet another project and spent less time with them.
www.PacktPub.com
Support iles, eBooks, discount offers and more
You might want to visit www.PacktPub.com for support iles and downloads related to your book.
Did you know that Packt offers eBook versions of every book published, with PDF and ePub iles available? You can upgrade to the eBook version at www.PacktPub.com and as a print book customer, you are entitled to a discount on the eBook copy. Get in touch with us at [email protected] for more details.
At www.PacktPub.com, you can also read a collection of free technical articles, sign up for a range of free newsletters and receive exclusive discounts and offers on Packt books and eBooks.
http://PacktLib.PacktPub.com
Do you need instant solutions to your IT questions? PacktLib is Packt's online digital book library. Here, you can access, read and search across Packt's entire library of books.
Why Subscribe?
f Fully searchable across every book published by Packt
f Copy and paste, print and bookmark content
f On demand and accessible via web browser
Free Access for Packt account holders
Table of Contents
Preface
1
Chapter 1: Meet Yii
9
Easy 10
Eficient 10
Extensible 11
MVC architecture 11
Model 12
View 12
Controller 13
Stitching these together: Yii request routing 13
Blog posting example 14
Object-relational mapping and Active Record 16
Active Record 16
The view and controller 17
Summary 18
Chapter 2: Getting Started
19
Installing Yii 19
Installing a database 22
Creating a new application 23
"Hello, World!" 26
Creating the controller 26
Coniguring Gii 26
One inal step 30
Reviewing our request routing 31
Adding dynamic content 32
Adding the date and time 32
A different approach for adding the date and time 33
Have you been paying attention? 34
Linking pages together 35
Linking to a new page 35
Getting a little help from Yii CHtml 37
Summary 38
Chapter 3: The TrackStar Application
39
Introducing TrackStar 39
Creating user stories 40
Users 40
Projects 40
Issues 41
Navigation and page low 42
Data relationships 43
Creating the new application 45
Connecting to the database 46
Yii and databases 46
Testing the database connection 49
Using the interactive shell 49
Automated testing – unit and functional tests 50
Unit and functional testing 50
Beneits of testing 50
Chapter 4: Project CRUD
55
Feature planning 55
Creating the project table 56
Yii database migrations 57
Naming conventions 60
Creating the AR model class 61
Coniguring Gii 61
Using Gii to create our Project AR class 62
Enabling CRUD operations for projects 65
Creating CRUD scaffolding for projects 65
Creating a new project 68
Form ield validation 69
Reading the project 73
Managing projects in Admin mode 74
Summary 77
Chapter 5: Managing Issues
79
Feature planning 79
Designing the schema 80
Deining some relationships 81
Building objects and their relationships 81
Creating active record model classes 84
Creating the Issue model class 85
Creating the User model class 85
Creating the issue CRUD operations 85
Using the issue CRUD operations 86
Creating a new issue 87
Adding drop-down ields 88
Adding the issue type drop-down 89
Adding the status dropdown: do it yourself 93
Fixing the owner and requester ields 95
Enforcing a project context 95
Deining ilters 96
Adding a ilter 96
Specifying the iltered actions 97
Adding ilter logic 98
Adding the project ID 100
Altering the project details page 101
Returning back to the owner and requester dropdowns 102
Generating the data to populate the dropdowns 105
Making one last change 106
The rest of the CRUD 107
Listing the issues 108
Altering the project controller 108
Altering the project view ile 109
Final tweaks 112
Getting the status and type text to display 112
Adding the text display to the form 113
Changing the issue detail view 114 Displaying owner and requester names 116
Using relational AR 116
Making some inal navigation tweaks 118
Summary 122
Chapter 6: User Management and Authentication
125
Feature planning 125
User CRUD 126
Component behavior 128
Adding a password conirmation ield 136
Hash the password 139
Authenticating users using the database 140
Introducing the Yii authentication model 141
Changing the authenticate implementation 146
Extending user attributes 148
Displaying the last login time on the home page 149
Summary 151
Chapter 7: User Access Control
153
Feature planning 154
Access control ilter 155
Role based access control 160
Coniguring the authorization manager 162
Creating the RBAC database tables 162
Creating the RBAC authorization hierarchy 166
Writing a console application command 167
Assigning users to roles 170
Adding RBAC roles to users on a per-project basis 171
Adding RBAC business rules 173
Implementing the new project AR methods 174
Adding users to projects 176
Altering the project model class 177
Adding the new form model class 178
Adding the new action method to the project controller 179
Adding the new view ile to display the form 181
Putting it all together 183
Checking authorization level 184
Summary 186
Chapter 8: Adding User Comments
187
Feature planning 187
Creating the model 188
Creating the comment CRUD 191
Altering the scaffolding to meet our requirements 192
Adding a comment 193
Displaying the form 194
Creating a recent comments widget 198
Introducing CWidget 198
Named scopes 199
More on relational AR queries in Yii 200
Creating the widget 203
Chapter 9: Adding an RSS Web Feed
211
Feature planning 211
A little background–content syndication, RSS, and Zend Framework 212
Installing Zend Framework 212
Using Zend_Feed 213
Creating user-friendly URLs 217
Using the URL manager 217
Coniguring routing rules 218
Adding the feed links 222
Summary 224
Chapter 10: Making It Look Good
225
Feature planning 225
Designing with layouts 226
Specifying a layout 226
Applying and using a layout 227
Deconstructing the main.php layout ile 229
Introducing the Blueprint CSS framework 229
Understanding the Blueprint installation 230
Setting the page title 231
Deining a page header 231
Displaying menu navigation items 233 Creating a breadcrumb navigation 235 Specifying the content being decorated by the layout 236
Deining the footer 237
Nesting the layouts 237
Creating themes 240
Building themes in Yii 240
Creating a theme 240
Coniguring the application to use a theme 242
Translating the site to other languages 244
Deining locale and language 244
Performing language translation 245
Performing message translation 246
Performing ile translation 249
Summary 250
Chapter 11: Using Yii Modules
251
Feature planning 252
Working with modules 252
Creating a module 252
Using a module 255
Applying a layout 258
Restricting admin access 260
Adding a system-wide message 263
Creating the database table 264
Creating our model and CRUD scaffolding 265 Adding a link to our new functionality 267 Displaying the message to users 270
Importing the new model class for application-wide access 271
Selecting the most recently updated message 271
Adding a little design tweak 272
Summary 274
Chapter 12: Production Readiness
275
Feature planning 275
Logging 275
Message logging 276
Categories and levels 277
Adding a login message log 278
Message routing 279
Handling errors 282
Displaying errors 284
Caching 288
Cache coniguration 290
Using a ile-based cache 291
Cache dependencies 295
Query caching 296
Fragment caching 297
Declaring fragment caching options 298
Using fragment cache 298
Page caching 300
General performance tuning tips 302
Using APC 302
Disabling the debug mode 302
Using yiilite.php 303
Using caching techniques 303
Enabling schema caching 303
Summary 304
Preface
This book is a step-by-step tutorial to developing a real-world application using the Yii web application development framework. The book attempts to mirror the environment of a software development team that is being tasked with building an online application, touching on each aspect of the software development lifecycle, as you build a project task management application from its conception to its production deployment.
After a brief, general introduction to the Yii framework, and going through the iconic "Hello World" example, the remaining chapters break down in the same way as software development iterations do in real-world projects. We begin with creating a working application with a valid, tested connection to a database.
We then move on to deining our main database entities and domain object model,
and become familiar with Yii's Object Relational Mapping (ORM) layer Active Record. We learn how to lean on Yii's code generation tools to automatically build our create/read/update/delete (CRUD) functionality against our newly created models. We also focus on how Yii's form validation and submission model works. By the end of Chapter 5, Managing Issues, you will have a working application that allows you to manage the projects and issues (tasks) within those projects.
We then turn to the topic of user management. We learn about the built-in authentication model within Yii to assist with the application login and logout
functionality. We take a deep dive into the authorization model, irst taking
By the end of Chapter 7, User Access Control, all of the basics of a task-management application are in place. The next several chapters begin to focus on additional user features, user experience, and design. We add user comment functionality, introducing a reusable, content portlet architecture approach in the process. We add in an RSS web feed and demonstrate how easy it is to integrate other third-party tools and frameworks within a Yii application. We take advantage of Yii's theming structure to help streamline and design the application, and then introduce Yii's internationalization (I18N) features so that the application can be adapted to various languages and regions without engineering changes.
In the inal chapter, we turn our focus to preparing the application for production
deployment. We introduce ways to optimize performance and improve security, to prepare the application for a production environment.
What this book covers
Chapter 1, Meet Yii, provides you with a brief history of Yii, an introduction to the
Model View Controller (MVC) application architecture, and you are introduced to the typical request life cycle as it makes its way from the end user through the
application, and inally as a response back to the end user.
Chapter 2, Getting Started, is dedicated to downloading and installing the framework,
creating a new Yii application shell, and introducing Gii, Yii's powerful and lexible
code generation tool.
Chapter 3, The TrackStar Application, is where the TrackStar application is introduced. This is an online, project-management and issue-tracking application that you will be building throughout the remaining chapters. Here you learn how to connect a Yii application to an underlying database. You also learn how to run the interactive shell from the command line. The last part of this chapter is focused on providing an overview of unit and functional testing within a Yii application, and provides a concrete example of writing a unit test in Yii.
Chapter 4, Project CRUD, helps you to start interacting with the database, to begin adding features to the database-driven Yii application TrackStar. You learn how to use Yii Migrations for database change management, and we use the Gii tool to create model classes and also to build out create, read, update, and delete (CRUD)
Chapter 5, Managing Issues, explains how additional related database tables are added to the TrackStar application, and how the reader is introduced to the relational
Active Record in Yii. This chapter also covers using controller ilters to tap into the
application life cycle in order to provide pre-action and post-action processing. The
oficial Yii extension library Zii is introduced, and we use Zii widgets to enhance the
TrackStar application.
Chapter 6, User Management and Authentication, explains how to authenticate users in a Yii. While adding the ability to manage users in the TrackStar application, the reader learns to take advantage of Behaviors in Yii, which provide an extremely
lexible approach to sharing common code and functionality across your Yii
components. This chapter also covers the Yii authentication model in detail. Chapter 7, User Access Control, is dedicated to Yii's authorization model. First we
cover the simple access control features, which allow you to easily conigure access
rules for the controller actions that are based on several parameters. Then we look at how role-based access control (RBAC) is implemented in Yii, which allows a much more robust authorization model for complete access control based on hierarchical model of roles, operations, and tasks. Implementing role-based access control into the TrackStar application also introduced the reader to using the console command in Yii.
Chapter 8, Adding User Comments, helps demonstrate how to implement the feature for allowing users to leave comments on projects and issues in the TrackStar
application; we introduce how to conigure and use a statistical query relation, how
to create highly reusable user interface components called Widgets, and how to deine and use named scopes in Yii.
Chapter 9, Adding an RSS Web Feed, demonstrates how easy it is to use other third-party frameworks and libraries in Yii applications, and shows you how to use the URL management features of Yii to customize your applications' URL format and structure.
Chapter 10, Making It Look Good, helps you learn more about the views in Yii, and how to use layouts to manage markup and content shared across your application pages. Theming is also introduced, as we show how easy it is to give a Yii application a completely new look without having to alter any of the underlying engineering. We then take a look at internationalization (i18n) and localization (l10n) in Yii as language translation is added to our TrackStar application.
Chapter 11, Using Yii Modules, explains how to add administrative features to the
TrackStar site by using a Yii module. Modules provide a very lexible approach to
Chapter 12, Production Readiness, helps us prepare our TrackStar application for production. You learn about Yii's logging framework, caching techniques, and error-handling methods to help get your Yii applications production-ready.
What you need for this book
The following software are required for this book:
• Yii framework Version 1.1.12
• PHP 5.1 or above (5.3 or 5.4 recommended)
• MySQL 5.1 or above
• A web server capable of running PHP 5.1; the examples provided in the book were built and tested with the Apache HTTP server, on which Yii has been thoroughly tested within both Windows and Linux environments
• Zend Framework Version 1.1.12 or above (only needed for Chapter 9, Adding an RSS Web Feed, and the downloading and coniguration of this library, which is covered in this chapter)
Who this book is for
If you are a PHP programmer with a knowledge of object-oriented programming and want to rapidly develop modern, sophisticated web applications, then this book is for you. No prior knowledge of Yii is required to read this book.
Conventions
In this book, you will ind a number of styles of text that distinguish between
different kinds of information. Here are some examples of these styles, and an explanation of their meaning.
A block of code is set as follows:
'components'=>array( 'db'=>array(
'connectionString' => 'mysql:host=localhost;dbname=trackstar', 'emulatePrepare' => true,
'username' => '[YOUR-USERNAME]', 'password' => '[YOUR-PASSWORD]', 'charset' => 'utf8',
), ),
When we wish to draw your attention to a particular part of a code block, the relevant lines or items are set in bold:
'components'=>array( 'db'=>array(
'connectionString' => 'mysql:host=localhost;dbname=trackstar',
'emulatePrepare' => true,
'username' => '[YOUR-USERNAME]', 'password' => '[YOUR-PASSWORD]', 'charset' => 'utf8',
), ),
Any command-line input or output is written as follows:
$ yiic migrate create <name>
%cd /WebRoot/trackstar/protected/tests
New terms and important words are shown in bold. Words that you see on the screen, in menus or dialog boxes for example, appear in the text like this: "clicking the Next button moves you to the next screen".
Warnings or important notes appear in a box like this.
Reader feedback
Feedback from our readers is always welcome. Let us know what you think about this book—what you liked or may have disliked. Reader feedback is important for us to develop titles that you really get the most out of.
To send us general feedback, simply send an e-mail to [email protected], and mention the book title via the subject of your message.
If there is a topic that you have expertise in and you are interested in either writing or contributing to a book, see our author guide on www.packtpub.com/authors.
Customer support
Now that you are the proud owner of a Packt book, we have a number of things to help you to get the most from your purchase.
Downloading the example code
You can download the example code iles for all Packt books you have purchased
from your account at http://www.PacktPub.com. If you purchased this book elsewhere, you can visit http://www.PacktPub.com/support and register to have
the iles e-mailed directly to you.
Errata
Although we have taken every care to ensure the accuracy of our content, mistakes
do happen. If you ind a mistake in one of our books—maybe a mistake in the text or
the code—we would be grateful if you would report this to us. By doing so, you can save other readers from frustration and help us improve subsequent versions of this
book. If you ind any errata, please report them by visiting http://www.packtpub. com/support, selecting your book, clicking on the erratasubmissionform link, and
entering the details of your errata. Once your errata are veriied, your submission
Piracy
Piracy of copyright material on the Internet is an ongoing problem across all media. At Packt, we take the protection of our copyright and licenses very seriously. If you come across any illegal copies of our works, in any form, on the Internet, please provide us with the location address or website name immediately so that we can pursue a remedy.
Please contact us at [email protected] with a link to the suspected pirated material.
We appreciate your help in protecting our authors, and our ability to bring you valuable content.
Questions
Meet Yii
Web development frameworks help jump-start your application by immediately delivering the core foundation and plumbing needed to quickly turn your ideas scribbled on the whiteboard into functional, production-ready code. With all of the common features expected from web applications today, and available framework options that meet these expectations, there is little reason to code your next web
application from scratch. A modern, lexible, and extensible framework is almost as
essential a tool to today's web developer as the programming language itself. And when the two are particularly complementary, the results are an extremely powerful toolkit—Java and Spring, Ruby and Rails, C# and .NET, and PHP and Yii.
Yii is the brainchild of founder Qiang Xue, who started the development of this open source framework on January 1, 2008. Qiang had previously developed and maintained the PRADO framework for many years prior to starting this. The years
of experience and user feedback cultivated from the PRADO project solidiied the need for a much easier, more extensible, and more eficient PHP5-based framework,
to meet the ever-growing needs of application developers. The initial alpha version
of Yii was oficially released to meet these needs in October of 2008. Its extremely
impressive performance metrics when compared to other PHP-based frameworks
immediately drew very positive attention. On December 3, 2008, Yii 1.0 was oficially
released, and as of Oct 1, 2012, the latest production-ready version is up to 1.1.12. It has a growing development team and continues to gain in popularity among PHP developers everyday.
The name Yii is an acronym for Yes, it is, and is pronounced as Yee or (ji:). Yii is a high-performance, component-based, web application framework written in PHP5. The name is also representative of the adjectives most used to describe it, such as
easy, eficient, and extensible. Let's take a quick look at each of these characteristics
Easy
To run a Yii version 1.x-powered web application, all you need are the core
framework iles and a web server supporting PHP 5.1.0 or higher. To develop with
Yii, you only need to know PHP and object-oriented programming. You are not
required to learn any new coniguration or templating language. Building a Yii
application mainly involves writing and maintaining your own custom PHP classes, some of which will extend from the core, Yii framework component classes.
Yii incorporates many of the great ideas and work from other well-known web programming frameworks and applications. So if you are coming to Yii from using
other web development frameworks, it is likely that you will ind it familiar and easy
to navigate.
Yii also embraces a convention over coniguration philosophy, which contributes to its ease of use. This means that Yii has sensible defaults for almost all the aspects that
are used for coniguring your application. Following the prescribed conventions, you
can write less code and spend less time developing your application. However, Yii does not force your hand. It allows you to customize all of its defaults and makes it easy to override all of these conventions. We will be covering some of these defaults and conventions later in this chapter and throughout the book.
Eficient
Yii is a high-performance, component-based framework that can be used for developing web applications on any scale. It encourages maximum code reuse in
web programming and can signiicantly accelerate the development process. As mentioned previously, if you stick with Yii's built-in conventions, you can get your
application up and running with little or no manual coniguration.
Yii is also designed to help you with DRY development. DRY stands for Don't Repeat Yourself, a key concept of agile application development. All Yii applications are built using the Model-View-Controller (MVC) architecture. Yii enforces
this development pattern by providing a place to keep each piece of your MVC code. This minimizes duplication and helps promote code reuse and ease of maintainability. The less code you need to write, the less time it takes to get your application to market. The easier it is to maintain your application, the longer it will stay on the market.
Of course, the framework is not just eficient to use, it is remarkably fast and
performance optimized. Yii has been developed with performance optimization
Extensible
Yii has been carefully designed to allow nearly every piece of its code to be extended
and customized to meet any project requirement. In fact, it is dificult not to take
advantage of Yii's ease of extensibility, since a primary activity when developing a Yii application is extending the core framework classes. And if you want to turn your extended code into useful tools for other developers, Yii provides easy-to-follow steps and guidelines to help you create such third-party extensions. This allows you to contribute to Yii's ever-growing list of features and actively participate in extending Yii itself.
Remarkably, this ease-of-use, superior performance, and depth of extensibility does
not come at the cost of sacriicing its features. Yii is packed with features to help you
meet those high demands placed on today's web applications. AJAX-enabled widgets, RESTful and SOAP Web services integration, enforcement of an MVC architecture, DAO and relational ActiveRecord database layer, sophisticated caching, hierarchical role-based access control, theming, internationalization (I18N), and localization (L10N) are just the tip of the Yii iceberg. As of version 1.1, the core framework is now
packaged with an oficial extension library called Zii. These extensions are developed and maintained by the core framework team members, and continue to extend Yii's core feature set. And with a deep community of users who are also contributing by writing Yii extensions, the overall feature set available to a Yii-powered application is growing daily. A list of available, user-contributed extensions on the Yii framework website can be found at http://www.yiiframework.com/extensions. There is also an unoficial extension repository of great extensions that can be found at
http://yiiext.github.com/, which really demonstrates the strength of the community and the extensibility of this framework.
MVC architecture
As mentioned earlier, Yii is an MVC framework and provides an explicit directory structure for each piece of model, view, and controller code. Before we get started
with building our irst Yii application, we need to deine a few key terms and look at
Model
Typically in an MVC architecture, the model is responsible for maintaining the state,
and should encapsulate the business rules that apply to the data that deines this state.
A model in Yii is any instance of the framework class CModel or its child class. A model class is typically comprised of data attributes that can have separate labels (something user friendly for the purpose of display), and can be validated against a set of rules
deined in the model. The data that makes up the attributes in the model class could come from a row of a database table or from the ields in a user input form.
Yii implements two kinds of models, namely the form model (a CFormModel class) and active record (a CActiveRecord class). They both extend from the same base class CModel. The class CFormModel represents a data model that collects HTML form
inputs. It encapsulates all the logic for form ield validation, and any other business logic that may need to be applied to the form ield data. It can then store this data in memory or, with the help of an active record model, store data in a database.
Active Record (AR) is a design pattern used to abstract database access in an object-oriented fashion. Each AR object in Yii is an instance of CActiveRecord or its child class, which wraps a single row in a database table or view, that encapsulates all the logic and details around database access, and houses much of the business logic that
is required to be applied to that data. The data ield values for each column in the
table row are represented as properties of the active record object. Active Record is described in more detail a little later.
View
Controller
The controller is our main director of a routed request, and is responsible for taking user input, interacting with the model, and instructing the view to update and display appropriately. A controller in Yii is an instance of CController or a child class thereof. When a controller runs, it performs the requested action, which then interacts with the necessary models, and renders an appropriate view. An action, in its simplest form, is a controller class method whose name starts with the word action.
Stitching these together: Yii request
routing
In MVC implementations, a web request typically has the following life cycle:
• The browser sends a request to the server hosting the MVC application
• A controller action is invoked to handle the request
• The controller interacts with the model
• The controller invokes the view
• The view renders the data (often as HTML) and returns it to the browser for display
Yii's MVC implementation is no exception. In a Yii application, incoming requests
from the browser are irst received by a router. The router analyzes the request to
decide where in the application it should be sent for further processing. In most
cases, the router identiies a speciic action method within a controller class to
Blog posting example
To help all of this make more sense, let's look at a ictitious example. Let's pretend that we have used Yii to build ourselves a new blog site http://yourblog.com. This site is like most typical blog sites out there. The home page displays a list of recently posted blog posts. The names of each of these blog postings are hyperlinks that take the user to the page that displays the full article. The following diagram illustrates how Yii handles an incoming request sent from clicking on one of these hypothetical blog post links:
The igure traces the request that is made from a user clicking on the link:
http://yourblog.com/post/show/id/99
First the request is sent to the router. The router parses the request, to decide where to send it. The structure of the URL is key to the decision that the router will make. By default, Yii recognizes URLs with the following format:
http://hostname/index.php?r=ControllerID/ActionID
The r querystring variable refers to the route that is analyzed by the Yii router. It will parse this route to determine the appropriate controller and action method, to further handle the request. Now you may have immediately noticed that our example URL
above does not follow this default format. It is a very simple matter of coniguring
the application to recognize the URLs in the following format:
We will continue to use this simpliied format for the purposes of this example.
The ControllerID name in the URL refers to the name of the controller. By default
this is the irst part of the controller class name, up to the word Controller. So for example, if your controller class name is TestController, the ControllerID name would be test. ActionID similarly refers to the name of the action that is deined by the controller. If the action is a simple method deined within the controller, this
will be whatever follows the word action in the method name. For example, if your action method is named actionCreate(), the ActionID name is create.
If the ActionID is omitted, the controller will take the default action, which by convention is a method in the controller called actionIndex(). If the ControllerID is also omitted, the application will use the default controller. The Yii default controller is called SiteController.
Turning back to the example, the router will analyze the URL, http://yourblog. com/post/show/id/99, and take the irst part of the URL path post to be the
ControllerID and the second part show to be the ActionID. This will translate to routing the request to the actionShow() method within the PostController class. The last part of the URL, the id/99 part, is a name/value querystring parameter that will be available to the method during processing. In this example, the number 99
represents the unique internal ID for the selected blog post.
In our ictitious blog application, the actionShow() method handles requests for
speciic blog post entries. It uses the querystring variable id to determine which
speciic post is being requested. It asks the model to retrieve information about
blog post entry number 99. The model AR class interacts with the database to retrieve the requested data. After retrieving the data from the model, our controller further prepares it for display by making it available to the view. The view is then responsible for handling the data layout and providing a response back to the browser for user display.
Yii does a lot more to help you enforce this separation, than simply providing some naming conventions and suggestions for where your code should be placed. It helps to take care of all the lower-level, "glue" code needed to stitch all the pieces together.
This allows you to reap the beneits of a strict MVC designed application without
having to spend all the time in coding the details yourself. Let's take a look at some of these lower-level details.
Object-relational mapping and Active
Record
For the most part, the web applications we build house their data in a relational database. The blog posting application we used in the previous example holds blog post content in database tables. However, web applications need the data that is held in the persistent database storage to be mapped to in-memory class properties that
deine the domain objects. Object-relational mapping (ORM) libraries provide this mapping of database tables to domain object classes.
Much of the code that deals with ORM is about describing how ields in the database
correspond to properties in our in-memory objects, and is tedious and repetitive to write. Luckily, Yii comes to the rescue and saves us from this repetition and tedium by providing an ORM layer in the form of the Active Record (AR) pattern.
Active Record
As previously mentioned, AR is a design pattern used to abstract database access in an object-oriented fashion. It maps tables to classes, rows to objects, and columns to class properties. In other words, each instance of an Active Record class represents a single row in a database table. However, an AR class is more than just a set of attributes that are mapped to columns in a database table. It also houses the necessary business logic
to be applied to that data. The end result is a class that deines everything about how it
By relying on convention and sticking with reasonable defaults, Yii's implementation of AR will save the developer a ton of time that might otherwise be spent in
coniguration, or in writing the tedious and repetitive SQL statements required to
create, read, update, and delete data. It also allows the developer to access data stored in the database in an object-oriented manner. To illustrate this, let's take our
ictitious blog example once again. The following is some example code that uses AR to operate on a speciic blog posting, whose internal ID, which is also used as the
table's primary key, is 99. It irst retrieves the posting by using the primary key. It then changes the title and updates the database to save the changes:
$post=Post::model()->findByPk(99); $post->title='Some new title'; $post->save();
Active Record completely relieves us of the tedium of having to write any SQL code or to otherwise deal with the underlying database.
In fact, active record in Yii does even more than this. It integrates seamlessly with many other aspects of the Yii framework. There are many "active" HTML helper
input form ields that tie directly to their respective AR class attributes. In this way, AR extracts the input form ield values directly into the model. It also supports
sophisticated, automated data validation, and if the validation fails, the Yii view classes easily display the validation errors to the end user. We will be revisiting AR and providing concrete examples many times throughout this book.
The view and controller
The view and the controller are very close cousins. The controller makes available the data for display to the view, and the view generates pages that trigger events that send data to the controller.
In Yii, a view ile belongs to the controller class that rendered it. In this way, we can
access the controller instance by simply referring to $this inside a view script. This implementation makes the view and controller very intimate indeed.
When it comes to Yii controllers, there is a lot more to the story than just calling the model and rendering views. Controllers can manage services to provide sophisticated pre and postprocessing on requests, implement basic access control rules to limit access
to certain actions, manage application-wide layout and nested layout ile rendering,
Summary
In this chapter, we were introduced at a very high-level to the Yii PHP Web application framework. We also covered a number of software design concepts embraced by Yii. Don't worry if the abstract nature of this initial discussion was a tad
lost on you. It will all make sense once we dive into speciic examples. But to recap, we speciically covered:
• The importance and utility of application development frameworks
• What Yii is and the characteristics of Yii that make it incredibly powerful and useful
• MVC application architecture and the implementation of this architecture in Yii
• A typical Yii web request life cycle and URL structure
• Object-relational mapping and Active Record in Yii
Getting Started
The real pleasures and beneits of Yii are quickly revealed simply by using it. In
this chapter, we will see how the concepts introduced in the previous chapter are manifested in an example Yii application. In the spirit of Yii's philosophy of
convention over coniguration, we will follow a standard convention and begin by
writing a "Hello, World!" program in Yii. In this chapter we will cover:
• Yii framework installation
• Creating a new application
• Creating controllers and views
• Adding dynamic content to view iles
• Yii request routing and linking pages together
Our irst step is to install the framework. Let's do that now.
Installing Yii
Prior to installing Yii, you must conigure your application development
Some popular installation packages include:
• http://www.apachefriends.org/en/xampp.html
• http://www.mamp.info/en/index.html (mac only)
The basic Yii installation is almost trivial. There are really only two necessary steps: 1. Download the Yii framework from
http://www.yiiframework.com/download/.
2. Unpack the downloaded ile to a web-accessible directory. There are several versions of Yii to choose from when downloading the framework. We will be using version 1.1.12 for the purpose of this book, which is the latest stable version as of the time of writing. Though most of the example code should work with any 1.1.x version of Yii, there may be some subtle differences if you are using a different version. Please attempt to use 1.1.12 if you are following along with the examples.
After you have downloaded the framework iles and unpacked them in a
web-accessible directory, list the contents. You should see the following high-level
directories and iles: • CHANGELOG • LICENSE • README • UPGRADE • demos/ • framework/ • requirements/
Now that we have our framework unpacked in a web-accessible directory, it is
advised that you verify that your server satisies all of the requirements of using
Yii, to ensure that the installation was a success. Luckily, doing so is very easy. Yii comes with a simple requirements checking tool. To use the tool and have it verify the requirements for your installation, simply point your browser to the index.php
entry script under the requirements/ directory that came with the downloaded
iles. For example, assuming that the name of the directory containing all of the framework iles is simply called yii, the URL to access the requirements checker might look like:
The following screenshot shows the results that we see for our coniguration:
Using the requirements checker is not, in itself, a requirement for installation. But it is certainly recommended to ensure proper installation. As you can see, not all of our results under the details section received a Passed status, as some display a
Warning result. Of course, your coniguration will most likely be slightly different
from ours, and consequently your results may be slightly different as well. That is okay. It is not necessary that all of the checks under the Details section pass, but it is necessary to receive the following message under the Conclusion section: Your
The Yii framework iles do not need to be, and it is recommended they
not be, placed in a publicly accessible web directory. We did this here simply to quickly take advantage of the requirements checker in our browser. A Yii application has a one entry script, which is usually the
only ile that needs to be placed in the webroot (by webroot, we mean
the directory containing the index.php entry script). Other PHP
scripts, including all of the Yii framework iles, should be protected
from outside user access to avoid security issues. Simply reference the
directory containing the Yii framework iles in the entry script and place these iles outside of the webroot.
Installing a database
Throughout this book, we will be using a database to support many of our examples and the application that we will be writing. In order to properly follow along with this book, it is recommended you install a database server. Though you can use any database that is supported by PHP with Yii, if you want to use some of the built-in database abstraction layers and tools within Yii, as we will be using, you will need to use one that is supported by the framework. As of version 1.1 those are:
• MySQL 4.1 or later
• PostgresSQL 7.3 or later
• SQLite 2 and 3
• Microsoft SQL Server 2000 or later
• Oracle
While you may follow along with all of the examples in this book by using any of the supported database servers, we will be using MySQL
(5.1 to be more speciic) as our database server throughout all the
examples. It is recommended that you also use MySQL, version 5 or greater, to ensure that the examples provided work without having to make adjustments. We won't need a database for our simple "Hello, World!" application seen in this chapter.
Now that we have installed the framework and have veriied that we have met the
Creating a new application
To create a new application, we are going to use a little powerhouse of a tool that comes packaged with the framework, called yiic. This is a command-line tool that you can use to quickly bootstrap a brand new Yii application. It is not mandatory
to use this tool, but it saves time and guarantees that a proper directory and ile
structure is in place for the application.
To use this tool, open up your command line, and navigate to a place in your
ilesystem where you will want to create your application's directory structure. For
the purpose of this demo application, we will assume the following:
• YiiRoot is the name of the directory where you have installed the Yii
framework iles
• WebRoot is conigured as a document root of your web server
From your command line, change to your WebRoot directory and execute the
yiic command:
% cd WebRoot
% YiiRoot/framework/yiic webapp helloworld
Create a Web application under '/Webroot/helloworld'? [Yes|No] Yes
mkdir /WebRoot/helloworld
mkdir /WebRoot/helloworld/assets mkdir /WebRoot/helloworld/css generate css/bg.gif
generate css/form.css generate css/main.css
Your application has been created successfully under /Webroot/ helloworld.
The yiic command may not work for you as expected, especially if you are attempting to use it in a Windows environment. The yiic ile is an executable that runs using your command-line version of PHP. It invokes the yiic.php script. You may need to fully qualify by using php in front, as in $ php yiic or $ php yiic.php. You may also need to specify the PHP executable to be used, such as C:\PHP5\php.exe yiic. php. There is also the yiic.bat ile, which executes the yiic.php ile, that may be more suitable for Windows users. You may need to ensure that your PHP executable location is accessible in your %PATH% variable.
The yiic webapp command is used to create a brand new Yii web application. It takes just a single argument to specify either the absolute or relative path to the directory in which the application should be created. The result is the generation
of all the necessary directories and iles that are used to provide a skeleton of the
default Yii web application.
Let's list the contents of our new application to see what was created for us:
assets/ images/ index.php themes/ css/ index-test.php protected/
The following is a description of these high-level items that were automatically created:
• index.php: Web application entry script ile
• index-test.php: Entry script ile for loading a test coniguration • assets/: Contains published resource iles
• css/: Contains CSS iles • images/: Contains image iles
• themes/: Contains application themes
• protected/: Contains protected (non-public) application iles
With the execution of one simple command from the command line, we have created
all the directory structure and iles needed to immediately take advantage of Yii's sensible default coniguration. All of these directories and iles, along with the subdirectories and iles that they contain, can look a little daunting at irst glance.
However, we can ignore most of them as we are getting started. What is important to
note is that all of these directories and iles are actually a working web application.
The yiic command has populated the application with enough code to establish a simple home page, a typical contact-us page to provide an example of a web form, and a login page to demonstrate basic authorization and authentication in Yii. If your web server supports the GD2 graphics library extension, you will also see a CAPTCHA widget on the contact-us form, and the application will have the
As long as your web server is running, you should be able to open up your browser and navigate to http://localhost/helloworld/index.php. Here you will be presented with a My Web Application home page along with the friendly greeting Welcome To My Web Application, followed by some helpful next steps information. The following screenshot shows this example home page:
You will need to ensure that both the assets/ and protected/ runtime/ directories are writable by your web server process, otherwise you may see an error rather than the working application.
You'll notice that there is a working application navigation bar along the top of the page. From left to right there is Home, About, Contact, and Login. Click around and explore. Clicking on the About link provides a simple example of a static page. The
Contact link will take you to the contact us form that was mentioned before, along
with the CAPTCHA input ield in the form. (Again, you will only see the CAPTCHA ield if you have the gd graphics extension as part of your PHP coniguration.)
"Hello, World!"
All of this generated code will start to make more sense once we walk through a simple example. To try out this new system, let's build that "Hello, World!" program we promised at the start of this chapter. A "Hello, World!" program in Yii will be a simple web page application that sends this very important message to our browser. As discussed in Chapter 1, Meet Yii, Yii is a Model-View-Controller framework. A typical Yii web application takes in an incoming request from a user, processes information in that request in order to create a controller, and then calls an action within that controller. The controller can then invoke a particular view to render and return a response to the user. If dealing with data, the controller may also interact with a model to handle all the CRUD (Create, Read, Update, Delete) operations on that data. In our simple "Hello, World!" application, all we will require is the code for a controller and a view. We are not dealing with any data, so a model will not be needed. Let's begin our example by creating our controller.
Creating the controller
Previously, we used the yiicwebapp command to help us generate a new Yii web application. To create a new controller for our "Hello, World!" application, we'll use another utility tool provided by Yii. This tool is called Gii. Gii is a highly customizable and extensible, web-based, code-generating platform.
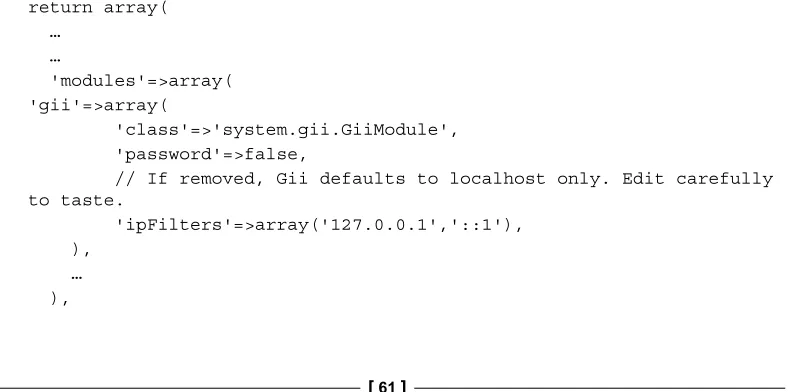
Coniguring Gii
Before we can use Gii, we have to conigure it within our application. We do this in our main application coniguration ile located at protected/config/main.php. To
conigure Gii, open up this ile and uncomment the gii module. Our autogenerated code already added the gii coniguration, but it is commented out. So all we need
to do is uncomment and then also add our own password, as shown in the following snippet:
return array(
'basePath'=>dirname(__FILE__).DIRECTORY_SEPARATOR.'..', 'name'=>'My Web Application',
// preloading 'log' component 'preload'=>array('log'),
),
'modules'=>array(
// uncomment the following to enable the Gii tool /*
'gii'=>array(
'class'=>'system.gii.GiiModule',
'password'=>'Enter Your Password Here',
// If removed, Gii defaults to localhost only. Edit carefully to taste.
'ipFilters'=>array('127.0.0.1','::1'), ),
*/ ),
Once uncommented, Gii is conigured as an application module. We will cover Yii
modules in detail, later in the book. The important thing at this point is to make sure
this is added to the coniguration ile and that you provide your password. With
this in place, navigate to the tool via http://localhost/helloworld/index. php?r=gii.
Actually, you can specify the password value as false then the module will not require a password. Since the ipFilters property is
speciied to only allow access to the localhost machine, it is safe to
set the password to false for you local development environment.
Okay, after a successful entry of your password (unless you speciied that a
Gii has several code generation options listed in the left-hand side menu. We want to create a new controller, so click on the Controller Generator menu item.
Doing so will bring us to a form that allows us to ill out the relevant details to create
a new Yii controller class. In the following screenshot, we have already illed out the
Controller ID value to be message, and we have added an Action ID value that we are calling hello. The following screenshot also relects that we have clicked on the Preview button. This is showing us all of the iles that will be generated along with
our controller class:
We can see that in addition to our MessageController class, Gii is also going to
create a view ile for each of the Action IDs that we speciied. You may recall from
Chapter 1, Meet Yii, that if message is the Controller ID, our corresponding class ile
is named MessageController. Similarly if we provide an Action ID value of hello, we would expect there to be a method name in the controller called actionHello. You can also click on the links provided in the Preview option to see the code that
will be generated for each ile. Go ahead and check them out. Once you are happy
with what is going to be generated, go ahead and click on the Generate button. You should receive a message telling you that the controller was successfully created, with a link to try it now. If instead you received an error message, make sure that the
Clicking on the try it now link will actually take us to a 404 page not found error page. The reason for this is that we did not specify the default actionID index when we created our new controller. We decided to call ours hello instead. All we need to do in order to make the request route to our actionHello() method is to add the actionID to the URL. This is shown in the following screenshot:
Now we have it displaying the result of calling the MessageController: :actionHello() method.
This is great. With a little help from Gii, we have generated a new controller PHP
ile called MessageController.php, and it was placed properly under the default controllers' directory protected/controllers/. The generated MessageController
class extends an application base class Controller located at protected/
components/Controller.php, and this class in turn extends the base framework class CController. Since we speciied the actionID hello, a simple action was also created within MessageController called actionHello(). Gii also assumed that
this action, like most actions deined by a controller, will need to render a view. So it added the code to this method to render a view ile by the same name, hello.php, and placed it in the default directory protected/views/message/ for view iles associated with this controller. Here is the uncommented part of the code that was generated for the MessageController class:
<?php
class MessageController extends Controller {
public function actionHello() {
As we can see, since we did not specify 'index' as one of the actionIDs when creating this controller with Gii, there is no actionIndex() method. As was discussed in Chapter 1, Meet Yii, by convention, a request that speciies a message as the controllerID, but does not specify an action, will be routed to the actionIndex()
method for further processing. This is why we initially saw the 404 error, because the request was not specifying an actionID.
Let's take a second and ix this. As we have mentioned, Yii favors convention over coniguration and has sensible defaults for almost everything. At the same time, almost everything is also conigurable, and the default action for a controller is no
exception. With a simple, single line at the top of our MessageController, we can
deine our actionHello() method as the default action. Add the following line to the top of the MessageController class:
<?php
class MessageController extends Controller {
public $defaultAction = 'hello';
Downloading the example code
You can download the example code iles for all Packt books you
have purchased from your account at http://www.PacktPub.com. If you purchased this book elsewhere, you can visit http://www. PacktPub.com/support and register to have the iles e-mailed directly to you.
Try it out by navigating to http://localhost/helloworld/index.php?r=message. You should still see the hello action page being displayed and no longer see the error page.
One inal step
To turn this into a "Hello, World!" application, all we need to do is customize our hello.php view to display "Hello, World!". Doing so is simple. Edit the ile
protected/views/message/hello.php so that it contains just the following code:
<?php
<h1>Hello World!</h1>
It now displays our introductory greeting, as shown in the following screenshot:
We have our simple application working with stunningly minimal code. All we have added is one line of HTML to our hello.php view ile.
You may be wondering where/how all of the other HTML is being generated. Our basic hello.php view ile only contains a single line with an <h1> tag. When we call render() in our controller, there is
also a layout view ile being applied. No need to worry too much about
this now, as we will be covering layouts in greater detail later. But if curious, you can take a look at the protected/views/layouts/
directory to see the layout iles that have been deined and to help shine a little light on where the rest of the HTML is deined.
Reviewing our request routing
Let's review how Yii analyzes our request within the context of this example application: 1. Navigate to the "Hello, World!" page by pointing your browser at the URL
http://localhost/helloworld/index.php?r=message (or you can use the equivalent URL http://localhost/helloworld/index.
php?r=message/hello).
2. Yii analyzes the URL. The r (route) querystring variable indicates that the controllerID is message. This tells Yii to route the request to the
message controller class, which it inds in protected/controllers/ MessageController.php.
3. Yii also discovers that the actionID speciied is hello. (Or if no actionID is
4. The actionHello() method renders the hello.php view ile located at protected/views/message/hello.php. And we altered this view
ile to simply display our introductory greeting, which is then returned
to the browser.
This all came together with very little effort. By following Yii's default conventions, the entire application request routing has been seamlessly stitched together for
us. Of course, Yii gives us every opportunity to override this default worklow if
needed, but the more you stick with the conventions, the less time you will spend in
tweaking coniguration code.
Adding dynamic content
The simplest way to add dynamic content to our view template is to embed PHP code into the template itself. View iles are rendered by our simple application to
result in HTML, and any basic text in these iles is passed through without being
changed. However, any content between <?php and ?> is interpreted and executed
as PHP code. This is a typical way that PHP code is embedded within HTML iles
and is probably familiar to you.
Adding the date and time
To spice up our page with dynamic content, let's display the date and time: 1. Open up the hello view again and add the following line below the
greeting text:
<h3><?php echo date("D M j G:i:s T Y"); ?></h3>
2. Save and view: http://localhost/helloworld/index.php?r=message/ hello.
Presto! We have added dynamic content to our application. With each page refresh, we can see the displayed content changing.
A different approach for adding the date and
time
Although this approach of embedding PHP code directly into the view ile does allow for any PHP code of any amount or complexity, it is strongly recommended that these statements do not alter data models and remain simple, display-oriented statements. This will help keep our business logic separate from our presentation
code, which is part of the beneit of using the MVC architecture.
Moving the data creation to the controller
Let's move the logic that creates the time back to the controller and have the view do nothing more than display the time. We'll move the determination of the time into our actionHello() method within the controller and set the value in an instance variable called $time.
First let's alter the controller action. Currently our action in our MessageController,
actionHello(), simply makes a call to render our hello view by executing the following code:
$this->render('hello');
Before we render the view, let's add the call to determine the time and then store it in a local variable called $theTime. Let's then alter our call to render() by adding a second parameter, which includes this variable:
$theTime = date("D M j G:i:s T Y");
$this->render('hello',array('time'=>$theTime));
When calling render() with a second parameter containing array data, it will extract the values of the array into PHP variables and make those variables available to the view script. The keys in the array will be the names of the variables made available
to our view ile. So in this example, our array key 'time', whose value is $theTime, will be extracted into a variable named $time, which will be made available in the view. This is one way to pass data from the controller to the view.