4
A DDING C ONTENT TO Y OUR W EB P AGES
ll (X)HTML documents are made up of two primary sections, the head and body section. This chapter focuses on the body section, which displays all of the content that the people who visit your web pages will see. In other words, it’s where all the real exciting action is. You will learn how to work with a wide number of (X)HTML elements, including elements that display headings, text, lists, line breaks, as well as elements that allow you to emphasize text, highlight phrases, and quote text. Understanding how to work with these elements is essen- tial because they provide web browsers with the instruction they require in order to know how to render web page content in a format that is understandable to people.
Specifically, you will learn:
• How to group contents using the div and span elements
• How to format text using headings and paragraphs
• Different ways of highlighting and emphasizing text
• How to organize data using different types of lists
• How to create line breaks and horizontal rules
• How to integrate JavaScript into your web documents
A
P
ROJECTP
REVIEW: A K
NIGHT’
ST
ALEIn this chapter’s web project you will learn how to create a new web application that creates a story based on user input. This project will provide an early preview of JavaScript and its ability to interact with the user through popup dialog windows. Figure 4.1 shows the popup dialog that is displayed when the web page containing the JavaScript is loaded into the browser.
FIGURE 4.1
The script prompts the user to enter his name.
Once the user answers the script’s first question, a second question is presented, as demon- strated in Figure 4.2.
FIGURE 4.2
The script prompts the user
for additional information.
The user enters information into the popup dialog by typing it into the popup dialog’s text field and clicking on its OK button. Once the script has collected all of the information it needs to tell its story, the execution of the script concludes by displaying a popup dialog window like the one shown in Figure 4.3.
FIGURE 4.3
Information collected from
the user is integrated into the
story that is told.
D
EVELOPING THE BODYS
ECTIONNow that you know how to formulate the DOCTYPE element, the head element, and how to work with all of the elements that can be applied to the head section of your (X)HTML documents, it’s time to focus on the fun part of web development: the content that is displayed in the browser window. With the exception of the head section’s title element, the only content that is displayed when your web documents are loaded and rendered by the browser is the content that you embed within your web document’s body section.
Content is a term that loosely refers to everything that people see and hear when they load web pages into their web browser. Content includes any text, graphics, audio, and video visible to your visitors.
All content displayed by the web browser must be placed within your web document’s body section. The body section is made up of a starting <body> tag and a closing </body> tag, as highlighted here:
<!DOCTYPE HTML PUBLIC "-//W3C//DTD HTML 4.01//EN"
"http://www.w3.org/TR/html4/strict.dtd">
<html xmlns="http://www.w3.org/1999/xhtml" lang="en" xml:lang="en">
<head>
</head>
<body>
</body>
</html>
Although older versions of HTML supported a number of different attributes for the <body> tag, these attributes have been deprecated in XHTML Strict 1.0.
The body element is a block element. It can only contain other block-level elements. It cannot contain text or an inline element. To be used, text and inline elements must first be embedded within other block-level elements. Any content placed outside of the opening <body> tag and
H I NT
T RA P
the closing </body> tag will make the document invalid and thus poorly formed. Any such text will display inconsistently in different browsers or might not even be displayed at all.
P
ROPERLYM
ANAGINGC
ONTENT(X)HTML supplies a host of different elements, each of which is designed to work with a spe- cific type of content. There are elements for working with things like headings and para- graphs. There are also elements that are designed to emphasize or highlight text in various meaningful ways. There are even elements for creating and presenting text in different types of lists. In many cases, you can use different elements to produce similar results. However, these elements are best used when properly matched up to the semantic requirements of your documents. Part of your challenge as a web developer is to thoughtfully and carefully select the proper element with which to display text within your web documents.
As Table 4.1 shows, (X)HTML supports a wide range of tags, each of which is designed for a specific purpose. There are far too many different types of tags to attempt to cover them all within this book. The rest of this chapter is dedicated to reviewing and demonstrating the use of a number of the most commonly used (X)THML elements, explaining proper application and usage of these elements. If you want to learn more about any tag not covered in this book, you can do so by visiting www.w3schools.com/tags/.
T
A B L E4 . 1 ( X ) H T M L T
A G SA
V A I L A B L E I N T H E B O D YS
E C T I O N(X)HTML Tag Description DTD Support Deprecated
<!-- Identifies the beginning of a comment STF
--> Identifies the end of a comment STF
<a> Creates an anchor STF
<abbr> Identifies an abbreviation STF
<acronym> Defines an acronym STF
<address> Defines document contact information STF
<applet> Creates an embedded applet TF Yes
<area /> Marks an area within an image map STF
<b> Highlights text in bold STF
<bdo> Specifies the direction of text STF
<big> Specifies text size as big STF
<blockquote> Defines a lengthy quote STF
<br /> Inserts a line break STF
<button> Creates a push button STF
<caption> Supplies a table caption STF
<center> Centers text TF Yes
<cite> Defines a citation STF
<code> Identifies computer code STF
<col> Sets attribute values for table columns STF
<colgroup> Creates a table column group STF
<dd> Provides a term description in a definition list STF
<del> Identifies deleted text STF
<dir> Specifies a directory listing TF Yes
<div> Groups related content within a document STF
<dfn> Specifies a definition term STF
<dl> Specifies a definition list STF
<dt> Defines a term within a definition list STF
<em> Emphasizes text STF
<fieldset> Sets a form STF
<font> Specifies font, color, and size attributes for text TF Yes
<form> Creates a form STF
<frame /> Creates a frame F
<frameset> Outlines a frameset F
<h1> Defines level 1 heading STF
<h2> Defines level 2 heading STF
<h3> Defines level 3 heading STF
<h4> Defines level 4 heading STF
<h5> Defines level 5 heading STF
<h6> Defines level 6 heading STF
<hr /> Generates a horizontal line STF
<i> Displays text in italic STF
<iframe> Creates an inline frame TF
<img /> Adds an image to a document STF
<input /> Creates an input control STF
<ins> Identifies text as being inserted text STF
<isindex> Adds a searchable index to a document TF Yes
<kbd> Displays text as keyboard text STF
<label> Creates a label for an input element STF
<legend> Adds a caption to a fieldset element STF
<li> Creates a list item STF
<map> Creates an image-map STF
<menu> Creates a menu list TF Yes
<noframes> Provides alternate content for browsers that do not support frames
TF
<noscript> Specifies alternate content for browsers with JavaScript support
STF
<object> Creates an embedded object STF
<ol> Creates an ordered list STF
<optgroup> Creates a collection of related options for a select list
STF
<option> Specifies a select list option STF
<p> Creates a paragraph STF
<param> Specifies an object parameter STF
<pre> Displays preformatted text STF
<q> Displays text as a short quotation STF
<s> Strikes through text TF Yes
<samp> Renders text as sample computer code STF
<script> Encloses client-side scripts STF
<select> Creates a drop-down list STF
<small> Renders text in a small format STF
<span> Identifies a small incline section of text STF
<strike> Strikes through text TF Yes
<strong> Renders text in a strong format STF
<sub> Subscripts text STF
<sup> Superscripts text STF
<table> Creates a table STF
<tbody> Identifies table body content STF
<td> Establishes a cell within a table STF
<textarea> Creates a multi-line text form input control STF
<tfoot> Identifies table footer content STF
<th> Creates a table heading STF
<thead> Groups the table heading content STF
<tr> Creates a table row STF
<tt> Lays out text in teletype format STF
<u> Underlines text TF Yes
<ul> Creates an unordered list STF
<var> Defines a variable part within a text string STF
The DTD Support column indentifies which versions of XHTML 1.0 support each tag (legend: S=Strict, T=Transitional, F=Frameset).
G
ROUPINGC
ONTENTAll but two (X)HTML elements that you will learn about in this chapter have some sort of semantic meaning. For example, the block-level p element is used to create paragraphs and the inline em element is used to add emphasis to a select portion of text. The div and span
elements, on the other hand, have no semantic value of their own. Their primary purpose is to group contents into discreet units so that it can be further manipulated by CSS or JavaScript.
The div Element
The div element is one of just two generic elements in (X)HTML. The div element is a block- level element whose only purpose is to group related elements together. By grouping two or more elements together, web developers can more easily manipulate them via CSS or JavaScript.
Despite its semantic limitation, the div element is one of the most used (X)HTML elements. In fact, it is often used so frequently that web developers have as- signed a name to the practice of excessive div usage: divitis.
The div element is made up of an opening <div> tag and a closing </div> tag. This block-level element can contain text or any other block or inline element. When rendered, the div ele- ment begins on its own line. Otherwise, its use has no impact on content presentation.
The following example demonstrates the use of the div element. As you can see it has been used to group together a heading and two paragraphs.
<div>
<h1>A Short Fairy Tale</h1>
<p>Once upon a time there was a brave king named William the Great.
King William ruled over a mountainous land on the far side of the world. This reign was known as the golden age of learning and enlightenment.<//p>
<pp>One dark night an evil monster began to prey upon his people and their lands. The king called upon his bravest knights to go out and face the dread beast. One by one all of the knights were defeated. Finally, with no one left to turn to, King William rode out to face the monster. After a long and bloody struggle, King William killed the monster and once again brought hope and freedom to the people.<//p>
<pp>The End<//p>
<ddiv>
T RA P
By grouping various elements inside the div element, you simplify the application because you can apply style rules just once to the div element instead of having to create separate rules for each of its enclosed elements.
The span Element
The span element, like the div element, has no semantic value of its own. This element is similar to the div element except that instead of being block-level, span is an inline element.
As such, its purpose is to offset a portion of text located within a block-level element as demonstrated here:
<p>Once upon a time there was a brave king named William the Great.
King William ruled over a mountainous land on the far side of the world. This reign was known as the <<span>golden age of learning and enlightenment<</span>.<</p>
Here, the span element has enclosed a portion of the content within a p element. When written in this manner, you can affect the presentation of the text enclosed by the span element using CSS.
P
ARAGRAPHS ANDH
EADINGS(X)HTML provides a number of different types of elements that allow you to display text. Two of the most basic and commonly used types of content are paragraphs and headings. Heading elements are used to add titles to web pages. Paragraphs are used to group sentences together into units. In some cases, these may be the only two elements required to build many text- only web pages.
The p Element
One of the most commonly used (X)HTML elements used in the development of web docu- ments is the paragraph (p) element. A paragraph is a collection of one or more sentences that elaborate on a particular thought or that discusses a specific topic. Paragraphs are created using the p element. This element is a block-level element that begins with the <p> tag and ends with the </p> tag. Paragraphs can only contain text and inline elements. Every paragraph begins on its own line and is followed by a blank line after it ends.
Web browsers are often very forgiving applications--so much so that they often allow web developers to get away with sloppy markup. One common error made by web developers is the omission of the required closing </p> tag. Be careful not to make this mistake. The result may be the inconsistent presentation of your content across different browsers.
T RA P
By default, paragraph text is left-aligned. HTML provides an align attribute that can be used to apply any of the following values to paragraphs: right, left, center, justify. However, the align attribute has been deprecated in XHTML 1.0 and therefore its use should be avoided.
CSS’s text-align property can be used to manage paragraph alignment.
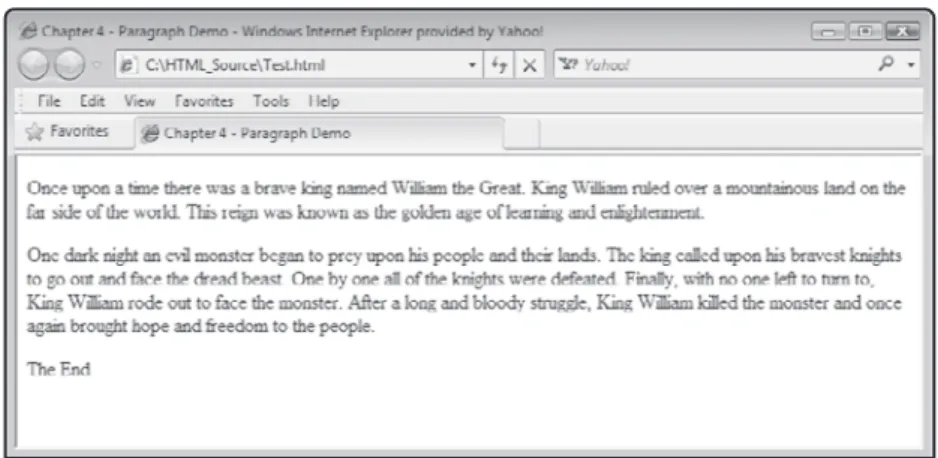
As an example of how to work with the paragraph element, take a look at the following example, which shows an XHTML document made up of three paragraphs.
<!DOCTYPE html PUBLIC "-//W3C//DTD XHTML 1.0 Strict//EN"
"http://www.w3.org/TR/xhtml1/DTD/xhtml1-strict.dtd">
<html xmlns="http://www.w3.org/1999/xhtml" lang="en" xml:lang="en">
<head>
<meta http-equiv="Content-type" content="text/xhtml; charset=UTF-8" />
<title>Chapter 4 - Paragraph Demo</title>
</head>
<body>
<<p>Once upon a time there was a brave king named William the Great.
King William ruled over a mountainous land on the far side of the world. This reign was known as the golden age of learning and enlightenment.<</p>
<<p>One dark night an evil monster began to prey upon his people and their lands. The king called upon his bravest knights to go out and face the dread beast. One by one all of the knights were defeated. Finally, with no one left to turn to, King William rode out to face the monster. After a long and bloody struggle, King William killed the monster and once again brought hope and freedom to the people.<</p>
<<p>The End<</p>
</body>
</html>
Figure 4.4 shows how this example looks when rendered by Internet Explorer.
FIGURE 4.4
An example of a web page whose
content is displayed in three
paragraphs.
Web developers sometimes embed extra paragraph elements in their web doc- uments in order to add additional white space. This practice should be avoided.
Instead, the proper way of inserting additional white space in your web docu- ments is through the application of CSS.
Heading Elements
(X)HTML supports six different levels of headings named h1, h2, h3, h4, h5, and h6. Heading elements are intended to be used as titles of headings for sections of text within documents.
The h1 element represents the highest or more important type of heading. The h6 element represents the lowest or least important type of heading. Used together, the range of headings supported by (X)HTML allows you to establish a hierarchy showing the relative importance of information within your web documents.
The following example demonstrates how to work with each of the six headings and provides an indication of what each head looks like with respect to each other.
<h1>Level 1 Heading<</h1>
<h2>Level 2 Heading<</h2>
<h3>Level 3 Heading<</h3>
<h4>Level 4 Heading<</h4>
<h5>Level 5 Heading<</h5>
<h6>Level 6 Heading<</h6>
Figure 4.5 shows how this example looks when rendered by the Apple Safari web browser. As you can see, web browsers display headings at varying sizes using a bold font.
T RA P
FIGURE 4.5
(X)HTML headings present text in a range of different-
sized text.
Although not required, you should try to use only one h1 heading element per page, since there should only be one high-level heading per page. You can use as many other types of headings as you need. However, you should use them in sequence, starting with h1 and work- ing your way down to h6, unless you have a compelling need to use headings out of sequence.
Like most (X)HTML elements, you can use CSS, covered in Chapters 7 and 8, to modify the appearance of heading elements.
W
ORKING WITHS
MALLERB
LOCKS OFT
EXTHeadings provide an effective means of adding titles and different levels of headings to your web pages, and paragraphs are perfect for organizing text into sections. Using these elements you can effectively manage and organize large collections of text. However, there are times when you will need to work with block-level text that is not a heading and not well suited for display as paragraphs. The next five sections review a number of alternative block-level elements.
Displaying Preformatted Test
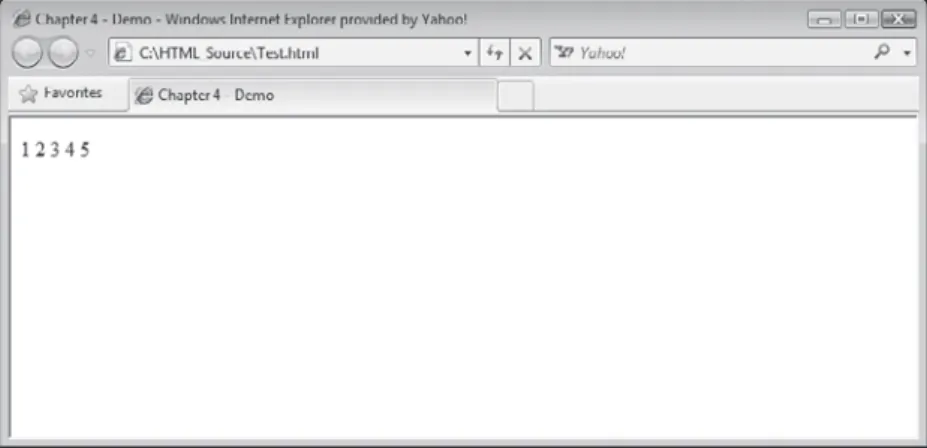
By default, web browsers remove any extra white space or blank lines found between text when rendering and displaying text, as demonstrated here:
<body>
<p>
1 2
H I NT
3 4 5 </p>
</body>
Figure 4.6 shows how the browser displays the output generated by the previous example.
FIGURE 4.6
By default, web browsers remove extra white space.
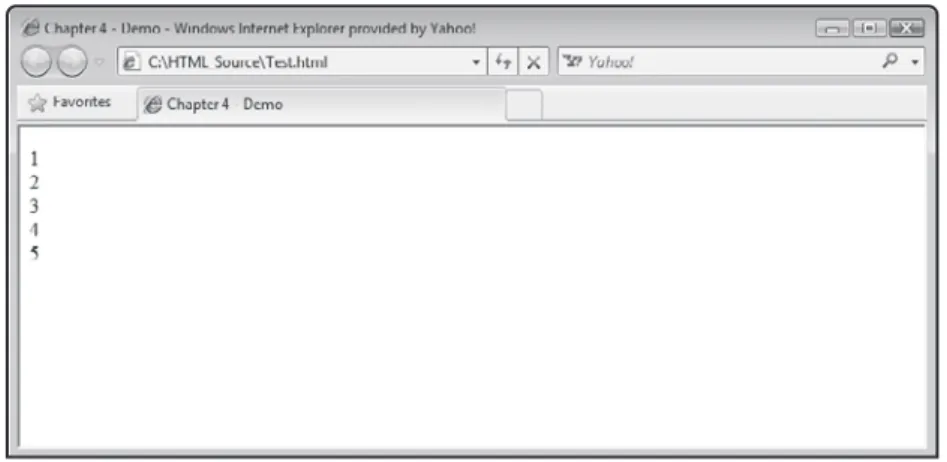
To modify the browser’s default behavior, you can exercise a degree of control over how text is displayed using the br element to insert line breaks within your documents, as demon- strated here:
<body>
<body>
<p>
1<br />
2<br />
3<br />
4<br />
5 </p>
</body>
Figure 4.7 shows how the browser displayed the output generated by the previous example.
FIGURE 4.7
Thebr element can be used to insert line breaks within text strings.
If you want to preserve the text formatting in your web documents, you can use the pre element. This element instructs browsers to display text exactly as out laid out within your web documents, as demonstrated here:
<body>
<pre>
1 2 3 4 5
</pre>
</body>
Figure 4.8 shows how the browser displayed the output generated by the previous example.
FIGURE 4.8
You can use the pre element to preserve text
layout.
Displaying Quotes
Another element that you may want to use is the q element, which displays embedded text as a quotation. Generally speaking, you should use this element to quote text that is no longer than two lines. For anything longer, you should use the blockquote element instead. The fol- lowing example demonstrates the use of this element.
<body>
<q>Better to remain silent and be thought a fool than to speak out and remove all doubt.<</q>
</body>
As shown in Figure 4.9, web browsers automatically enclose quoted text within quotation marks.
FIGURE 4.9
Use the q element to display short
quotations.
Working with the blockquote Element
Like the q element, the blockquote is used to display quotations. Specifically, the q element is designed to display short quotations (1-2 lines) and the blockquote is designed to format longer quotations. By default, browsers automatically display white space before and after the blockquote. The following example demonstrates the use of this element.
<body>
<blockquote>
Fourscore and seven years ago our fathers brought forth upon this continent a new nation, conceived in liberty, and dedicated to the proposition that all men are created equal... We here highly resolve that these dead shall not have died in vain, that this nation, under God, shall have a new birth of freedom; and that government of the
people, by the people, and for the people, shall not perish from the earth.
</blockquote>
</body>
As shown in Figure 4.10, web browsers automatically indent text contained within a blockquote element.
FIGURE 4.10
Use the blockquote element to display longer quotations.
Managing Address Information
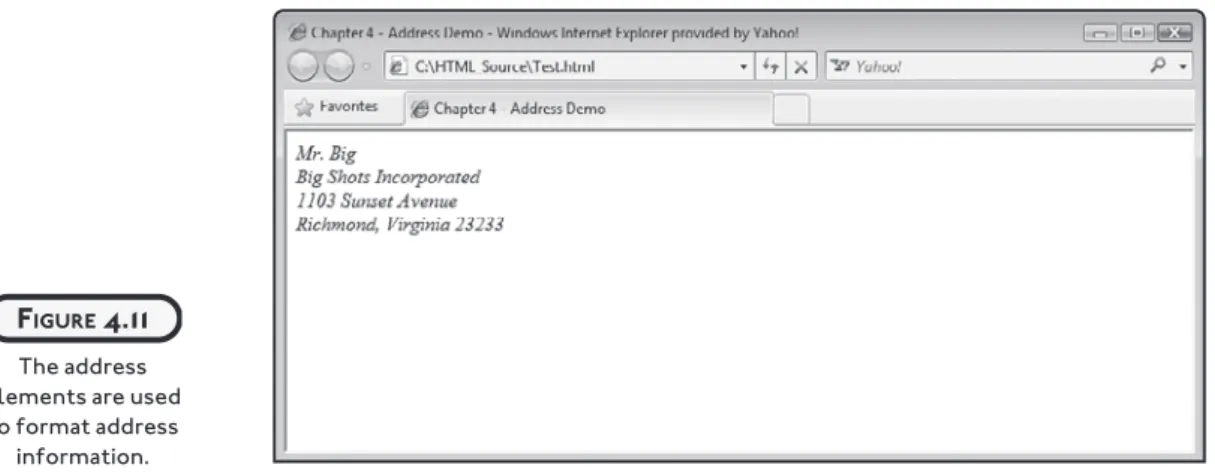
Another block-level element that you can use is the address element. As its name implies, this element structures address information. Web developers often use it when adding contact information to web pages. The following example demonstrates the use of this element. Note the use of the br element to help manage the format of the example.
<body>
<address>
Mr. Big<br />
Big Shots Incorporated<br />
1103 Sunset Avenue<br />
Richmond, Virginia 23233
</address>
</body>
As shown in Figure 4.11, web browsers automatically render text embedded within the address element in italic and add a line break before and after the element.
FIGURE 4.11
The address elements are used
to format address information.
W
ORKING WITHI
NLINEE
LEMENTSTo give you further control over how to define the structure of text within your web docu- ments, (X)HTML provides a number of inline elements that let you emphasize text, make it more strongly emphasized, and change its influence by indicating its importance relative to its size. The next four sections review a number of commonly used inline elements that can be used to help structure text.
The inline elements covered in the next four sections not only influence text structure but also have an impact on its appearance. As such, it is easy to fall into the trap of using these elements strictly for presentation purposes. However, you are better served using CSS for control presentation. Take care when work- ing with these inline elements to apply them only when it makes good structural sense to do so.
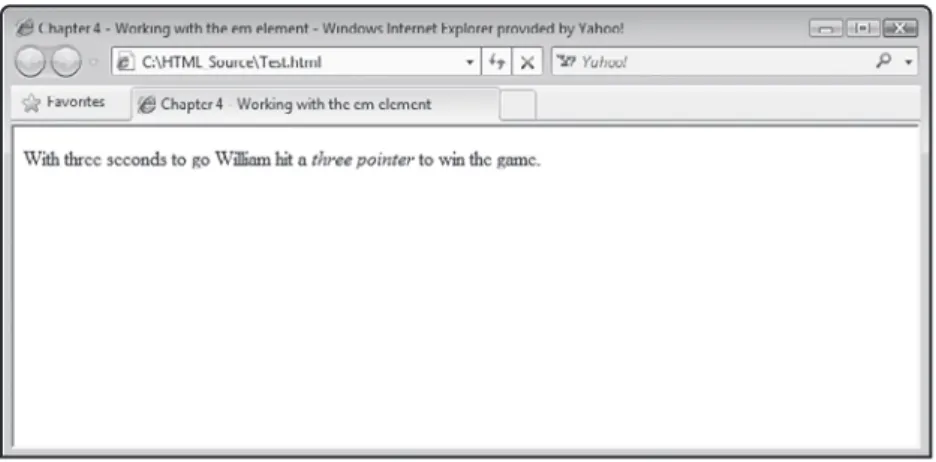
Working with the em Element
Using the em element you can provide additional meaning to inline text by displaying it in italics. Although this element has qualities that affect text presentation, it has not been dep- recated. The following example demonstrates the use of this element.
<body>
<p>With three seconds to go William hit a <<em>three pointer<</em> to win the game.</p>
</body>
Figure 4.12 shows how Internet Explorer rendered text embedded within an em element.
T RA P
FIGURE 4.12
Use the em element to place
additional emphasis on inline
text.
Working with the strong Element
Using the strong element, you can provide additional meaning to inline text by displaying it in a sstronger format. Although this element has qualities that affect text presentation, it has not been deprecated. The following example demonstrates the use of this element.
<body>
<p>With three seconds to go William hit a <<strong>three pointer <</strong> to win the game.</p>
</body>
Figure 4.13 shows how Internet Explorer rendered text embedded within a strong element.
FIGURE 4.13
Use the strong element to display
inline text in a strong manner.
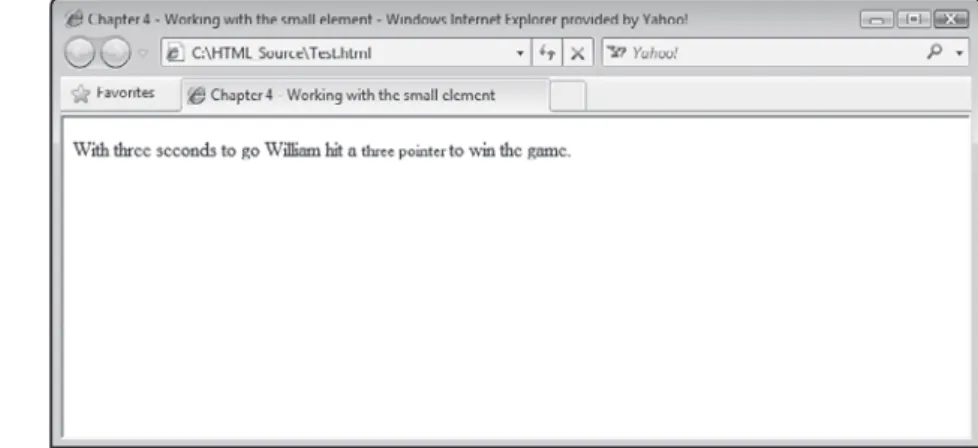
Working with the small Element
Using the small element you can provide additional meaning to inline text by displaying it in a reduced font size. Although this element has qualities that affect text presentation, it has not been deprecated. The following example demonstrates the use of this element.
<body>
<p>With three seconds to go William hit a <<small>three pointer <</small> to win the game.</p>
</body>
Figure 4.14 shows how Internet Explorer rendered text embedded within a small element.
FIGURE 4.14
Use the small element to display
inline text in a reduced size.
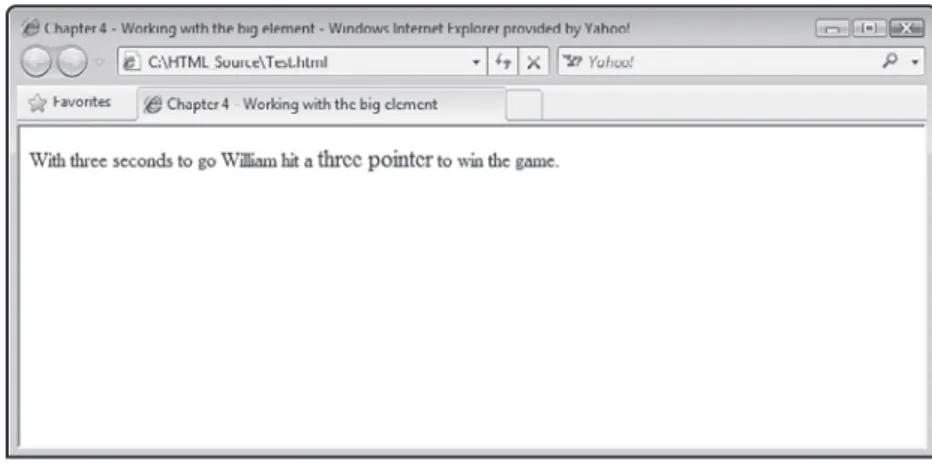
Working with the big Element
Using the big element you can provide additional meaning to inline text by displaying it in an enlarged font size. Although this element has qualities that affect text presentation, it has not been deprecated. The following example demonstrates the use of this element.
<body>
<p>With three seconds to go William hit a <<big>three pointer<</big>
to win the game.</p>
</body>
Figure 4.15 shows how Internet Explorer rendered text embedded within a big element.
FIGURE 4.15
Use the big element to display
inline text in an enlarged size.
O
RGANIZINGT
EXT WITHL
ISTSAnother way of organizing content is to display it in a list. Lists help structure text by orga- nizing it into intuitive and meaningful collections. (X)HTML supports three types of lists:
unordered, ordered, and defined lists.
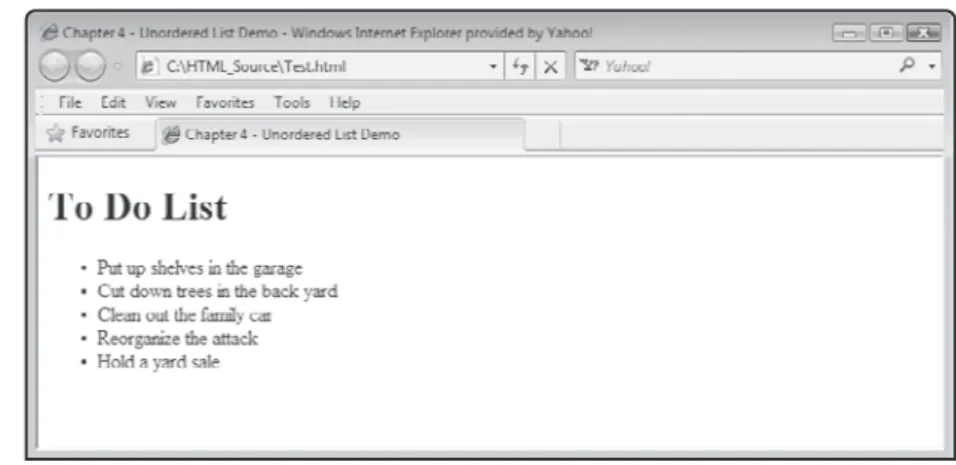
Creating Unordered Lists
An unordered list is a collection of related items. The order in which items appear in the list is not important. In order to create an unordered list, you need to work with two elements, ul and il. The ul element is used to define an unordered list. The il element is used to embed an item with the list. The following example demonstrates how these two elements work in tandem to generate lists.
<body>
<h1>To Do List</h1>
<ul>
<<li>Put up shelves in the garage<</li>
<<li>Cut down trees in the back yard<</li>
<<li>Clean out the family car<</li>
<<li>Reorganize the attack<</li>
<<li>Hold a yard sale<</li>
</ul>
</body>
Figure 4.16 shows how Internet Explorer rendered the list from the previous example.
FIGURE 4.16
Unordered lists are good for displaying lists where sequence is
not important.
Creating Ordered Lists
An ordered list is a collection of related items. The order in which items appear in the list is important. In order to create an ordered list, you need to work with two elements, ol and il. The ol element is used to define an ordered list and the il element is used to embed an item within the list. By default, the browsers will render numbered lists. However, using CSS, you can render lists using letters of the alphabet or using roman numerals. The following example demonstrates how these two elements work in tandem to order lists.
<body>
<ol>
<li>Oil and sharpen the chain saw. </li>
<li>Explain to kids that they are too old for a tree house. </li>
<li>Make sure kids are not in tree house! </li>
<li>Cut down trees in the back yard. </li>
</ol>
</body>
Figure 4.17 shows how Internet Explorer renders the ordered list outlined in the previous example.
FIGURE 4.17
Ordered lists are good for displaying lists where the order of
items in the list is important.
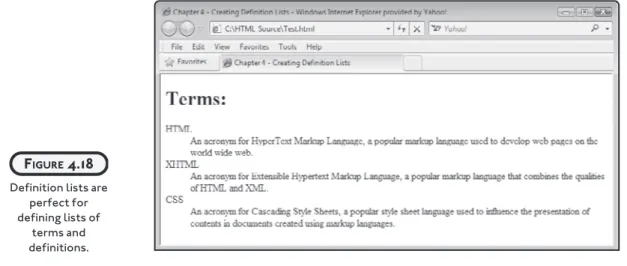
Creating Definition Lists
A definition list is a collection of terms and their definitions. In order to create a definition list, you need to work with three elements, dl, dt, and dd. The dl element is used to define a to add a definition for that term. The dd element may also include things like paragraphs, links, and images. The following example demonstrates how these three elements work in tandem to order definition lists.
<body>
<h1>Terms:</h1>
<dl>
<dt>HTML</dt>
<dd>
An acronym for HyperText Markup Language, a popular markup language used to develop web pages on the world wide web.
</dd>
<dt>XHTML</dt>
<dd>
An acronym for Extensible Hypertext Markup Language, a popular markup language that combines the qualities of HTML and XML.
</dd>
<dt>CSS</dt>
<dd>
An acronym for Cascading Style Sheets, a popular style sheet language used to influence the presentation of contents in
definition list. The dt element is used to define a term in the list, and the dd element is used
documents created using markup languages.
</dd>
</dl>
</body>
Figure 4.18 shows how Internet Explorer renders the definition list outlined in the previous example.
FIGURE 4.18
Definition lists are perfect for defining lists of
terms and definitions.
L
INEB
REAKS ANDH
ORIZONTALR
ULES(X)HTML provides two handy elements that you can use to organize content within web pages.
These elements let you execute line breaks and add horizontal rules (lines) to your web pages.
Though handy, these elements should be used stringently and with care and not abused for the purpose of presentation where CSS can be used.
The br Element
By default, web browsers automatically wrap text when it reaches the edge of the browser window, breaking lines between words. Using the br element, you can introduce line breaks yourself, when needed. The br element is an empty element made up of a single tag using the syntax outlined here:
<br />
The following example demonstrates how to use the br element to control the format of paragraph text.
<!DOCTYPE html PUBLIC "-//W3C//DTD XHTML 1.0 Strict//EN"
"http://www.w3.org/TR/xhtml1/DTD/xhtml1-strict.dtd">
<html xmlns="http://www.w3.org/1999/xhtml" lang="en" xml:lang="en">
<head>
<meta http-equiv="Content-type" content="text/xhtml; charset=UTF-8" />
<title>Chapter 4 - Line Break Demo</title>
</head>
<body>
<h1>Jor-El's Message to Kal-El in Superman II</h1>
<p>You will travel far, my little Kal-El, but we will never leave you, even in the face of our deaths.<<br />
You will make my strength your own.<<br />
You will see my life through your eyes, as your life will be seen through mine.<<br />
The son becomes the father. And the father, the son.</p>
</body>
</html>
When executed, this example produces the output shown in Figure 4.19.
FIGURE 4.19
Using line breaks to mark the end of
lines.
Web developers have often inappropriately used the br element as a means of inserting repeated numbers of blank lines in web pages. Don’t make this same mistake. Instead, use CSS to manage margin size and add padding as necessary to add any blank space you need. Instead, you should limit your use of the br ele- ment to controlling line breaks within text.
The hr Element
The hr (horizontal rule) element is used to add a horizontal line to web pages. Its purpose is to divide web pages into different sections, separating one section of contents from another.
The hr element is an empty element and has the following syntax.
<hr />
The hr element is a block-level element. It appears on its own line. You can use CSS to configure how browsers treat horizontal rules, specifying top and bottom margins, width, etc. The fol- lowing example demonstrates how the hr element can be used in (X)HTML documents.
<!DOCTYPE html PUBLIC "-//W3C//DTD XHTML 1.0 Strict//EN"
"http://www.w3.org/TR/xhtml1/DTD/xhtml1-strict.dtd">
<html xmlns="http://www.w3.org/1999/xhtml" lang="en" xml:lang="en">
<head>
<meta http-equiv="Content-type" content="text/xhtml; charset=UTF-8" />
<title>Chapter 4 - Horizontal Rule Demo</title>
</head>
<body>
<h1>Report Card</h1>
<p>For Alexander Lee Ford</p>
<h2>Science</h2>
<p>1st Term: A+</p>
<p>2nd Term: A+</p>
<<hr />
<h2>Math</h2>
<p>1st Term: A</p>
<p>2nd Term: A+</p>
<<hr />
<h2>English</h2>
<p>1st Term: B+</p>
T RA P
<p>2nd Term: A</p>
</body>
</html>
When executed, this example produces the output shown in Figure 4.20.
FIGURE 4.20
Using horizontal rules to organize a
web page’s content.
I
NTRODUCINGJ
AVAS
CRIPTThe primary focus of this book is on HTML, XHTML, and CSS. However, web development requires that you learn how to work with a number of different languages and technologies.
In order to continue to provide more interesting and fun web projects in each succeeding chapter, it is necessary to delve a little into JavaScript early on. Otherwise, all the book’s web projects would have to be based on simple, static contents. While useful, it is not very exciting and significantly limits the types of web projects and games that you can tackle.
Integrating JavaScript into Your Web Documents
JavaScript is an interpreted programming language, which means that JavaScripts are not converted to an executable form until the HTML page they reside in is processed. In Chapter 3, you learned how to work with the script element and to use it to embed scripts within
your web documents. You also learned how to use the script element to reference external JavaScript files.
The drawback to interpreted scripts is that they execute slower than programs written in compiled programming languages, which are converted into executable code at development time.
A JavaScript Example
JavaScript is regarded as a flexible programming language. JavaScript imposes a minimal set of syntax rules that govern the formulation of statements. JavaScript statements begin and end on the same line. However, if necessary, you can continue a statement onto another line using concatenation (explained in Chapter 9). If you want, you can even place two or more statements on the same line if you separate them with semicolons (;). Semicolons identify the end of statements.
The following example demonstrates how easy it is to integrate a JavaScript into a web document.
<!DOCTYPE html PUBLIC "-//W3C//DTD XHTML 1.0 Strict//EN"
"http://www.w3.org/TR/xhtml1/DTD/xhtml1-strict.dtd">
<html xmlns="http://www.w3.org/1999/xhtml" lang="en" xml:lang="en">
<head>
<meta http-equiv="Content-type" content="text/xhtml; charset=UTF-8" />
<title>Chapter 9 - Creating a JavaScript function</title>
<<script type = "text/javascript">
wwindow.alert("JavaScript programming is fun and powerful.");
<</script>
</head>
<body>
</body>
</html>
As you can see, the JavaScript has been embedded within the web document’s head section.
The script begins with an opening <script> tag. The tag’s type attribute is set to "text/
javascript"". This instructs the browser as to what languages it needs to process. The JavaScript ends with the closing </script> tag. In between is a single JavaScript statement that tells the browser to display a text message in a popup dialog window.
JavaScript can be very small as in the case of this example. They can also consist of hundreds or thousands of lines of code statements, creating complex web applications capable of inter- acting with the user. Javascript supports a full range of programming statements that provide the ability to define and store data, implement conditional logic, and to set up loops that are capable of processing unlimited amounts of data. A good understanding of JavaScript is essential to any web developer.
Learning More About JavaScript
The first eight chapters of this book focus exclusively on HTML, XHTML, and CSS. However, all of the chapter game projects going forward are going to involve the use of JavaScript. As a result, you may find it useful to skip on to Chapter 9, where JavaScript is covered in detail, and read up on JavaScript before continuing on with the rest of the book. If you don’t think you are ready to tackle JavaScript just yet, then for now you should keep your focus on basic concepts that are covered in each chapter and when you are presented with a little JavaScript, simply accept high-level explanations that are provided and key it in as instructed.
B
ACK TO THEK
NIGHTST
ALEP
ROJECTAlright, now it is time to return your attention to this chapter’s project, a Knights Tale. This web project consists of a single web document containing an embedded JavaScript, which when executed interacts with the user using different types of popup dialog windows.
The first two popup dialog windows displayed by this web application will display two buttons, OK and Cancel. In order for the application to work correctly, the user must key in the required information to the popup window’s text file and click on the OK button. If the user fails to enter anything or clicks on the Cancel buttons instead of the OK buttons, things will not work correctly.
Designing the Application
The development of this web application will be performed in four steps, as outlined here:
1. Create a new XHTML document.
2. Develop the document’s markup.
3. Develop the document’s JavaScript.
4. Load and test the XHTML page.
Step 1: Creating a New XHTML Document
As has been the case with all of the web projects that you have worked on up to this point in the book, the first step is the creation of an empty text file. Do so using your preferred code or text editor and then save and name the file KnightsTale.html.
H I NT
Step 2: Developing the Document’s Markup
The second step in the development of the Knights Tale project is to assemble the web docu- ment’s markup. Begin by adding the following elements to the KnightsTale.html file.
<!DOCTYPE html PUBLIC "-//W3C//DTD XHTML 1.0 Strict//EN"
"http://www.w3.org/TR/xhtml1/DTD/xhtml1-strict.dtd">
<html xmlns="http://www.w3.org/1999/xhtml" lang="en" xml:lang="en">
<head>
</head>
<body>
</body>
</html>
Next, let’s ensure that the head section is well formed by adding the following elements to it.
<meta http-equiv="Content-type" content="text/xhtml; charset=UTF-8" />
<title>A Knight's Tale</title>
Unlike all of the other projects that you have worked on in this book, the web page that is rendered with this project does not display anything. It is completely blank. Therefore, as shown next, there is no markup for you to add to the body section.
Step 3: Creating the Document’s Script
The Knights Tale application makes use of a JavaScript embedded within its head section. As you learned in Chapter 3, in order to embed a JavaScript within an (X)THML document, you must use the script element. So, the first step in the creation of the script is to add the fol- lowing statement to bottom of the web document’s head section.
<script type = "text/javascript">
</script>
Unfortunately, while the vast majority of web surfers use web browsers that support JavaScript, there are some that do not. Since these browsers do not understand JavaScript and do not know what to do with it, they may end up displaying the script’s code statement on
the resulting web page, which is clearly not what you are going to want to happen. To prevent this behavior, it is common practice to begin all JavaScript code with the (X)HTML comments shown here:
<script type = "text/javascript">
<!-- Start hiding JavaScript statements
// End hiding JavaScript statements -->
</script>
This enables browsers that know how to work with JavaScripts to do so but at the same time it allows browsers that do not support JavaScript to ignore everything between the opening and closing comments. So, if you have not already done so, modify your JavaScript as shown above.
Now it’s time to add the code statements that make up the JavaScript. To do so, type everything you see below in between the opening and closing comment statements that you just added to the document.
var hero;
var villain;
var tale;
hero = prompt("What's your name?", "");
villain = prompt("What's your best friend's name?", "");
tale = "There once was a peaceful village located in a far off " + "land. One day a dark knight named " + vvillain +
" appeared in the middle of the village square in a " + "puff of smoke. Everyone ran in fear as the dark knight " + "began rampaging through the village killing and " +
"burning everything that came across his path. \n\n" + "It was not long before a trumpet was heard in the " + "distance and the great white knight " + hhero +
" rode swiftly into the center of the village where the " + "dark knight " + vvillain + " defiantly stood, soaked with " + "the blood of his helpless victims. \n\n A great " +
"fight erupted that lasted for hours. Finally, all " + "fell quiet as the dust settled, revealing that " +
hhero + " was victorious. Thanks to " + hero + ", peace " +
"and justice once again reigned within the village. \n\n" + "The End";
alert(tale);
This script defines three variables, which are locations in memory where data is stored, and then displays two popup dialog windows that prompt the user to type in his name and the name of a friend. This information is stored in variables. Next, a large text string is created and assigned to a variable named tale. Because the text of the story is so large, it is broken up into a series of smaller strings, which are then concatenated together. If you look closely, you see that the instances of the hero and villain variables have been embedded within the story. As a result, their contents will be displayed in place of their names when the story is finally displayed. The last statement shown above executed a built-in JavaScript function named alert(), passing the tale variable as an argument. When executed, this function will display the application’s final popup dialog window and display the value assigned to tale (e.g., the text that makes up the story).
The Finished HTML Document
At this point, your copy of the KnightsTale.html document should be complete. To make sure that you have assembled it correctly, take a look at the following example, which shows what the finished document should look like.
<!DOCTYPE html PUBLIC "-//W3C//DTD XHTML 1.0 Strict//EN"
"http://www.w3.org/TR/xhtml1/DTD/xhtml1-strict.dtd">
<html xmlns="http://www.w3.org/1999/xhtml" lang="en" xml:lang="en">
<head>
<meta http-equiv="Content-type" content="text/xhtml; charset=UTF-8" />
<title>A Knight's Tale</title>
<script type = "text/javascript">
<!-- Start hiding JavaScript statements
var hero;
var villain;
var tale;
hero = prompt("What's your name?", "");
villain = prompt("What's your best friend's name?", "");
tale = "There once was a peaceful village located in a far off " + "land. One day a dark knight named " + villain +
" appeared in the middle of the village square in a " + "puff of smoke. Everyone ran in fear as the dark knight " + "began rampaging through the village killing and " +
"burning everything that came across his path. \n\n" + "It was not long before a trumpet was heard in the " + "distance and the great white knight " + hero +
" rode swiftly into the center of the village where the " + "dark knight " + villain + " defiantly stood, soaked with " + "the blood of his helpless victims. \n\n A great " +
"fight erupted that lasted for hours. Finally, all " + "fell quiet as the dust settled, revealing that " +
hero + " was victorious. Thanks to " + hero + ", peace " + "and justice once again reigned within the village. \n\n" + "The End";
alert(tale);
// End hiding JavaScript statements -->
</script>
</head>
<body>
</body>
</html>
Step 4: Loading and Testing the Knight’s Tale Project
Okay, it is time to open your favorite web browser, load your new web page, and see how things have turned out. To do so, open your preferred web browser and then execute the following procedure.
1. Click on the browser’s File menu and select the Open File command. This displays a standard file open dialog.
2. Using the dialog window, navigate to the folder where you stored the web page and select it.
3. Click on the Open button. The browser will load and display the specified document.
If everything works as you expect it to, try loading the web document using one or two other browsers and make sure that its content is displayed in a consistent manner.
S
UMMARYThe primary focus of this chapter was on the development and presentation of content stored within the body section of your web documents. As part of this presentation, this chapter provided an overview of many of the elements that are essential to the organization and structuring of text on web pages. This included learning about elements that display head- ings, text, lists, line breaks, emphasize text, highlight phrases, and quote text. You also learned how to execute controlled line breaks and to add horizontal rules to your web pages.
To top things off, you learned how to create the Knights Tale application.
Challenges
1. As currently written, once the user has finished reading the web application’s story, he is left with a blank web page to look at. Consider modifying the XHTML document by adding markup to the body section that instructs the user to click on the browser’s refresh button to reload the application and run it again.
2. As currently written, the KnightsTale.html file contains an embedded JavaScript file. To streamline this file’s contents, create a new copy of the application and externalize its JavaScript. To do so, create a new file named KnightsTale.js and move the code statements that make up the application’s JavaScript into it (less the opening <script> and closing
</script> tags and their associated comment statements).
Next, modify the KnightsTale.html file by adding src =
"KnightsTale.js" as an attribute to the opening <script> tag.