This research focuses on Wave.hat's integrated product development process: Brainwave detects smart safety helmets for construction workers. The project was started in June 2019 as a university-industry collaboration project between the Creative Design Engineering Department of Ulsan National Institute of Science and Technology, and local startup HHS co. Such decisions regarding Wave.hat's design were informed by extensive user research, including Focus Group Interview, Fly-on-the Wall and Contextual Inquiry.
Specifically, this thesis will deal with the process of the physical product, Wave.hat, which is the main part of this university-industry collaboration. In Chapter 3, it covers how the three concepts (ergonomic, functional and symbolic) of Wave.hat were generated.
Introduction
- Background
- Opportunity
- Problem Statement
- Objectives
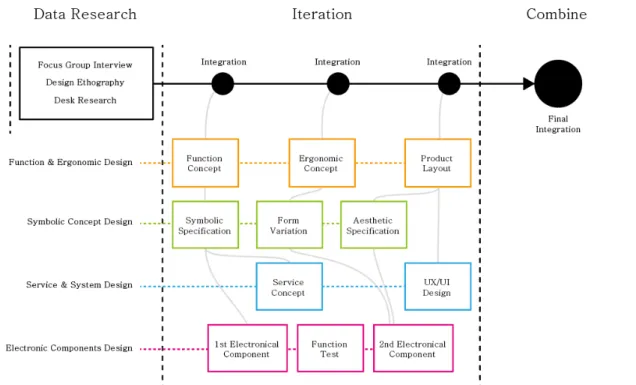
- Design Approach
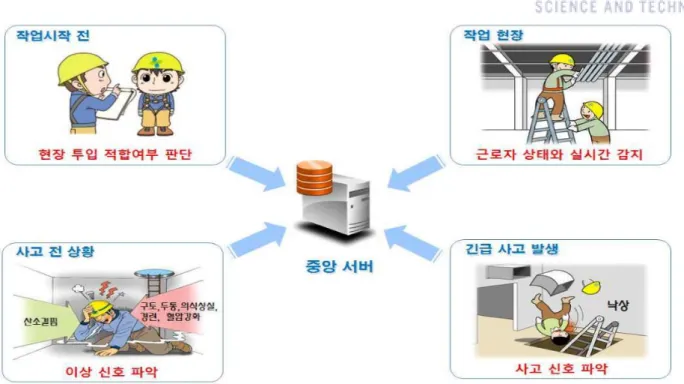
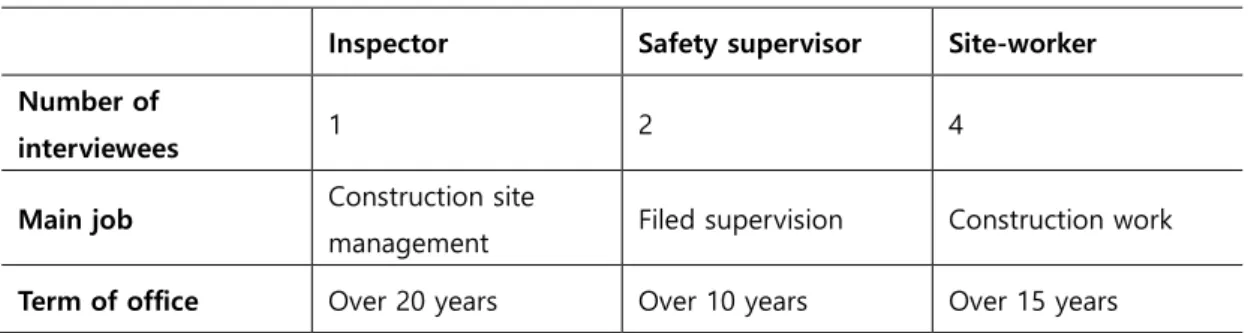
They asked our design research team to design and develop their new EEG-sensing smart safety helmet for construction workers. The original purpose of this task was to design and develop a smart safety helmet that collects brain wave data from the forehead, allowing the supervisors to easily determine the accuracy of the condition of the workers on the construction site. The author of this article was assigned two requirements from Table 1: Ergonomic smart hard hat design and detail modeling and a starting prototype of smart hard hat and integrated design.
4. Integrated Design and Development of Prototypes for Testing Demonstration of Hard Smart Hats Requirements Design Based on. The author of this paper was assigned to do the path 1 and the final required result, 4) development of smart hard hat prototypes and integrated design.
User Research
User Definition
- User Study
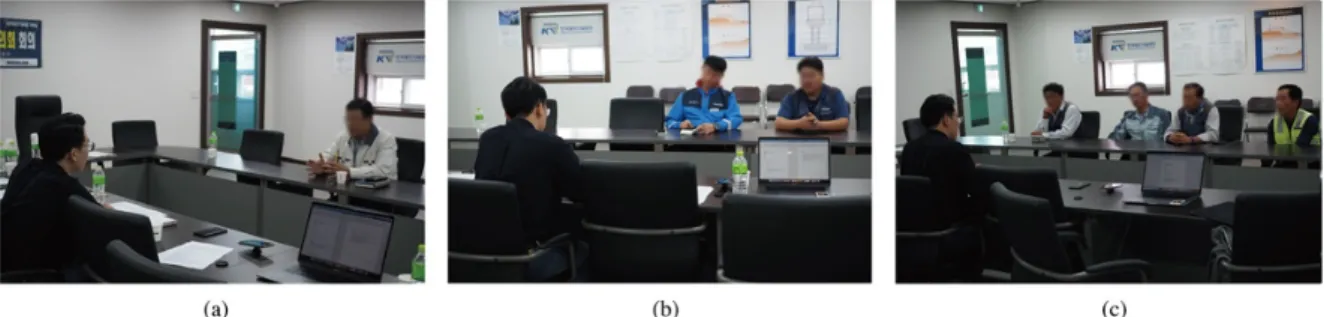
- On-site Worker/Supervisor Interviews
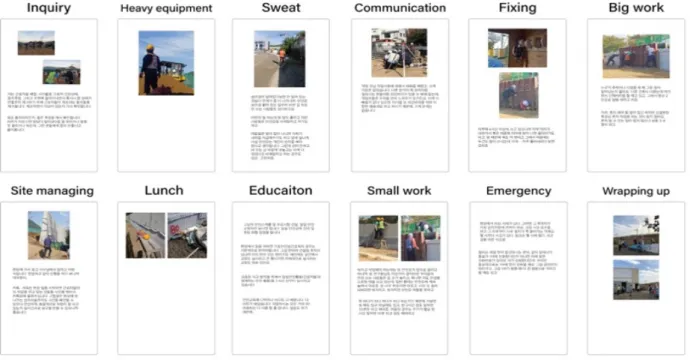
- On-site Observation / Contextual Inquiry
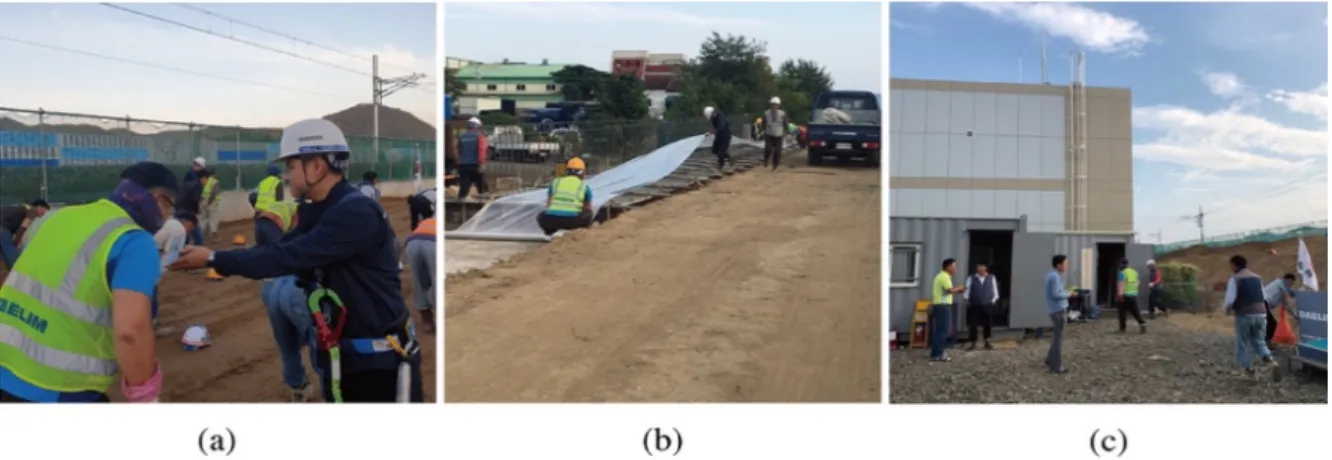
The aim of this project was to design a smart safety helmet for the safety of construction workers on site. The danger of objects falling from a high-story construction environment is one of the most common accidents. We conducted user research through interviews with three groups of stakeholders and arranged observations to clarify users' needs and site conditions.
The primary content of the interviews was related to construction site management and the accessibility of safety hard hats. Meanwhile, some tasks undertaken by site workers were photographed, such as severely bending their waists, and some of the problematic points were documented through memos and sketches.
Analyzing the User Data
- Affinity Diagram
- A Dimensional Themes’ Matrix
- User Interpretation
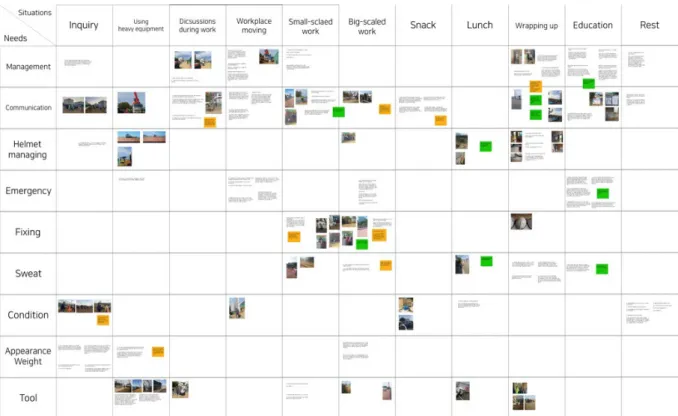
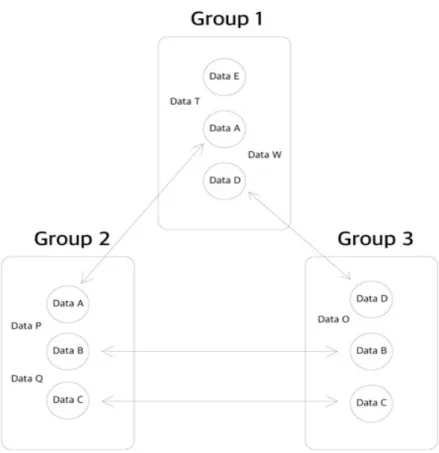
Then, to build a two-dimensional matrix, the needs-based keywords were placed in the row and the situation-based keywords were placed in the column. Cells have been generated in the matrix that generate the two keywords, one from the row and the other from the column, which intersect. With the development of the matrix it was possible to more accurately evaluate the user's challenges and needs.
Furthermore, by comparing the sum of data stored in each cell, it was possible to identify the value of needs arising from a specific circumstance. Dimensional theme's matrix, situation-based theme keywords on row and need-based theme keywords on column.
Discussion
Concept Generation Phase
- Functional & Ergonomic Concept Design
- Concepts Generation Workshops
- Concepts Selection & Final Functions List-up
- Symbolic Concept Design
- Keyword Generation
- Integrated Keyword Mapping
- Symbolic Concept
- Product Layout & Usage Scenario
- Discussion
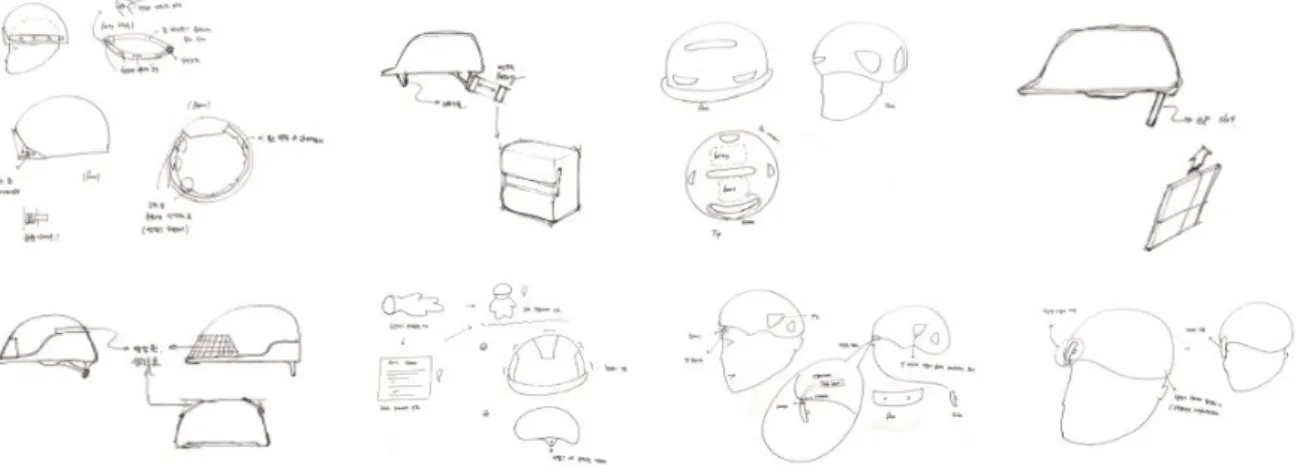
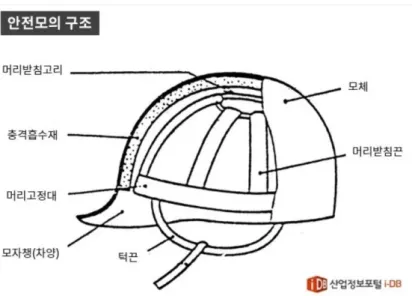
Several key features of the hard hat were created so that when designing the new EEG smart hat, features would not be lost during the design process. In other words, the main features found during this process were the essential functions of the hard hat. One of the original hard hat studies was the POSCO industry hard hat.
To generate style concepts, we generated style concept keywords based on our interpretation of the user research data. However, it was found that the original style concepts for the hard hat represented by drawings had a weak connection with the results of the user research. Based on the main brands, we branched out keywords while considering the style direction of the smart helmet.
In the design process it is necessary that designers are aware of the user spectrum, needs and wishes. However, in some situations, designers can lose the link between the research data and the design outcome. This is a situation where the designers move on to a design deliverable and lose the link between the initial user research data and the design deliverables.
By setting the base curves and referring to the original final 2D symbol concept, the final helmet model was created. Rather, it was used to determine the criteria and roadmap for product detail development. However, the empty space at the top of the protective hat was considered to be a buffer against potential accidents.
Thus, the electronic components were placed on the back of the hard hat to provide other functions of the original hard hat. To reduce such circumstances, a ventilation hole was placed on the front of the helmet to cool the path on the forehead.
Design Embodiment of Wave.hat
Detail Design
- Detail Design of Form
- Detail Design of Internal Structure
- Defining the electronical component’s Shape & Size
- Defining the Connecting Structure
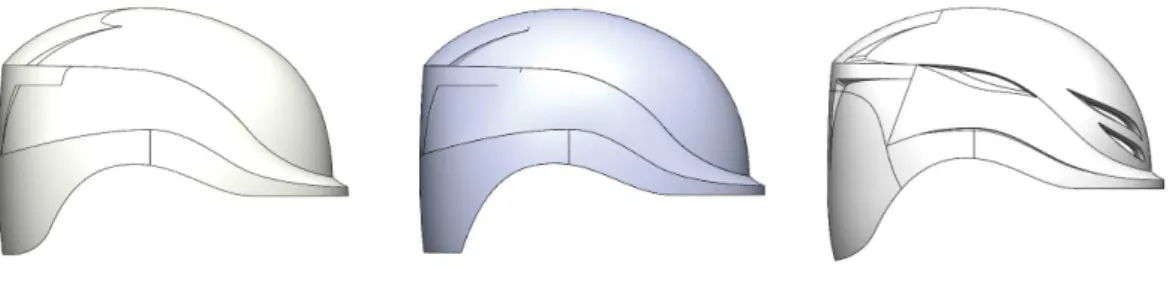
Based on the 2-dimensional form, a large part of the product was developed as shown in Fig. This main shape went through many attempts because it required a clean surface of the hard hat. As a result, the final shape of the main body was created with a continuous surface curvature, as can be seen in the photo on the far right of Figure 27.
After creating the main part of Wave.hat, an internal structure was created to support the main features of the design. We started by creating the rear part of the cap, which was intended to store the main electronic components. As shown in Figure 30, the initial attempt was just to see the maximum size of the electronic component that the model could handle.
The final structure and the shape of the electronic component were integrated into the process to find the reasonable size and shape. After determining the shape of the component, it was important to create a connection structure between the electronic component stored part and the main shell of the Wave.hat. The other structural design factors include the connection structure between the harness and the shell of the Wave.hat.
The position and size of the connecting structure has been carefully designed to withstand the force originating from the external impact. As a result, the design shown on the right side of Figure 33 was selected as the final design of the connecting structure. As a result of this detailing process, one final Wave.hat model was designed (Figure 34).
Design Implementation
- Implementation of Form
- Implementation of Structural and Functional Concept
- Implementation of Internal Interference Design
- Implementation of Symbolic Concept
- Implementation of Electronic Components
Besides testing the size and shape, it was important to check the functionality of the product. In this step, multiple trials took place, including the implementation of the connection structure of shell and electronic component connecting the buckle structure and the shape of the harness inside the product (Figure 37). While investigating the buckle structure, it was discovered that it could not fit into the hard hat due to the asymmetry of the directions of buckles.
The harness prototype went through many iterations, resulting in more than 16 different versions. The back of the product, which contains the electronic components, was also tested to see if it could successfully integrate the electronic components without any interference (Fig. 38). This process was carried out with the electronic component design party, because basic knowledge of the electronic specification was not shared by the product design party.
Finally, both parties could see the limitation and the direction of the model, enabling both to proceed to the next step. It needed to be created in a physical concept model because it was important to check the color and the overall aesthetic. After such an effort, it was possible to successfully select the color code for the final working prototype.
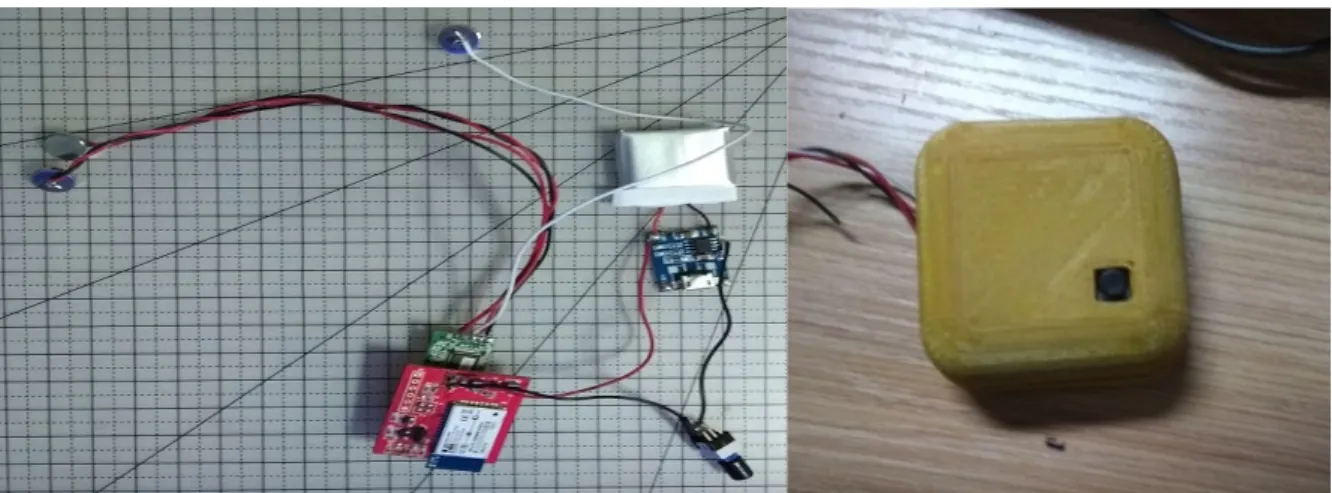
These were the test of the function of electronic components, the capabilities of the connection structure, the shape and size of the overall components, etc. With all the components made based on the final 3D digital data and from the electronic component, it was assembled (figure 40). After assembling the electronic components inside the Wave.hat, it was then checked on a trial basis whether the embedded sensors succeeded in collecting the data.
Discussion
Conclusions
뒷면에 있는 헬멧 전원 스위치를 한 번 클릭하세요. 헬멧의 남은 배터리 용량을 표시하고 충전이 필요한 경우 사용자에게 피드백을 제공할 수 있습니다. 10개의 요소로 구성된 RGB LED 스트립이 헬멧 뒷면 내부에 장착되어 외부에서 빛을 방출합니다.
헬멧을 착용하고 사이즈를 조절하세요. 머리 크기에 맞게 헬멧을 고정합니다. 헬멧을 착용하고 턱끈을 당겨 클립을 고정합니다.
사용자의 뇌파를 측정하여 사용합니다. 헬멧이 뇌파를 정확하게 측정하지 못하고 있음을 인지하고 사용자에게 피드백을 제공합니다. 헬멧 측면에 위치한 진동 모터에서 4번의 경고음이 울립니다.
헬멧 측면에 위치한 진동 모터에서 삐 소리가 세 번 짧게(계속) 울립니다. 헬멧 내부의 온도를 열감지 센서로 측정해 위험한 상황이 감지되면 진동모터가 1회씩 길게 소리를 낸다. 열 센서는 헬멧 내부에 있습니다.
헬멧 측면의 테크니컬 스위치를 빠르게 5번 누르세요. 장치를 올리고 내리면 헬멧 통풍구가 열리고 닫힙니다.