1
DEVELOPMENT AND PERFORMANCE ANALYSIS OF AN AUTOMATIC THROWING
ROBOT WITH AN INTEGRATED METHOD FOR DESTINATION DETECTION
Submitted by
Name Student Id.
Sanzida Hossain 201218011
Nahiduzzaman 201218036
Md. Mazharul Islam Akand 201218061
Supervised and approved by
Major Md. Altab Hossain, PhDActing Head, Dept. of Nuclear Science and Engineering
Faculty of Nuclear Science & Biomedical Engineering, MIST, Bangladesh
Department of Mechanical Engineering Faculty of Mechanical Engineering
Military Institute of Science and Technology (MIST) Mirpur Cantonment, Dhaka, Bangladesh.
December 2015
2
Declaration by Candidates
This is to certify that the work presented in this thesis paper is the outcome of the investigation and research carried out by the following students under the supervision of Major Md. Altab Hossain, PhD, Acting Head, Dept. of Nuclear Science and Engineering, Faculty of Nuclear Science & Biomedical Engineering, MIST, Bangladesh.
It is also declared that neither this thesis paper nor any part thereof has been submitted anywhere for the award of any degree, diploma or other qualifications.
Sanzida Hossain 201218011
Nahiduzzaman 201218036
Md. Mazharul Islam Akand 201218061
3
Supervisor certificate
This is to certify that, Sanzida Hossain, student ID: 201218011; Nahiduzzaman, student ID: 201218036; Md. Mazharul Islam Akand, student ID: 201218061 have completed their undergraduate project and thesis entitled “Development and performance analysis of an automatic throwing robot with an integrated method for automatic destination detection”. This paper embodies original work done under my supervision.
Major Md. Altab Hossain, PhD
Acting Head, Dept. of Nuclear Science and Engineering
Faculty of Nuclear Science & Biomedical Engineering, MIST, Bangladesh
4
Acknowledgement
We are thankful to Almighty Allah for his blessings for the successful completion of our thesis. Our heartiest gratitude, profound indebtedness and seep respect go to our supervisor Major Md. Altab Hossain, PhD, Acting Head, Dept. of Nuclear Science and Engineering, Faculty of Nuclear Science & Biomedical Engineering, MIST, Bangladesh, for his constant supervision, affectionate guidance and encouragement and motivation. His keen interest on the topic and valuable advices throughout the study was of great help in completing thesis.
We are especially grateful to the Department of Mechanical Engineering (ME) of Military Institute of Science and Technology (MIST) for providing their all put support during the thesis work.
5
Abstract
A robot is a machine that can perform a certain task given to it automatically. It may perform various task as its design. Among all the task a robot can perform throwing is an important one. Our aim was to understand the automated mechanism of a throwing robot which can perform an efficient throw delivery. In order to do so we first established a method through which our robot can automatically detect its destination of throw. By use of a sonar sensor and a servo motor it locates the angular and radial distance of the destination from the sensor.
From this acquired data our robot decides the correct position for throwing and the velocity that is required to reach the object at the destination. By a servo motor our robot places the arm at the right direction for throwing the object at the destination. Then our robot automatically decides the voltage required to attain that velocity and delivers the throw successfully. For achieving such result we had to develop some geometric relations and also we had to inspect some experimental behavior of the robot. These data can be used for further research on throwing mechanism. This mechanism can further be improved for designing throwing mechanism of a humanoid robot, artificial arm design and military purposes.
6
Contents
Declaration by candidates 2
Supervisor certificate 3
Acknowledgement 4
Abstract 5
Table of content 6-8
List of figures 9-10
Nomenclature 12
Chapter 1: Introduction 13-17
1.1 Background 14
1.2 Objectives 16
1.3 Applications 17
Chapter 2: Literature Review 18-29
2.1 Robots and Robotics 19
2.1.1 Definition of Robot 19
2.1.2 Different parameters of Robot 20
2.1.3 Robotics 22
2.1.4 Laws of Robotics 23
2.2 Historical development of Robots 23
2.2.1 Early history of Robots 24
2.2.1 History of Humanoid Robot 25
2.3 The revolution of Robotics 26
2.4 Ball throwing capacity of Robots 29
7
Contents
Chapter 3: Experimental Method 30-81
3.1 Electrical equipment 31
3.1.1 Transformer 31
3.1.2 Diodes 32
3.1.3 Bridge rectifier 34
3.1.4 Capacitor 35
3.1.5 Servo motor 36
3.1.6 DC motor 41
3.1.7 Arduino 42
3.1.8 Motor driving IC (L293D) 43
3.1.9 Sonar sensor (Ultrasonic transducer) 46
3.2 Structure and mechanism 48
3.2.1 Basement 48
3.2.2 Position detecting mechanism 49
3.2.3 Throwing mechanism 51
3.2.4 Arm rotating mechanism 53
3.2.5 Electronic architecture 55
3.3 Procedure 65
3.3.1 Initial manual control and experimentation 65 3.3.2 Geometrical analysis of throwing position 66
3.3.3 Algorithm 76
3.3.4 Coding and automation 80
8
Contents
Chapter 4: Results and Discussion 82-100
4.1 Accumulated results of the experiment 83
4.1.1 Initial observation of the throw characteristics with varying voltage
83 4.1.2 Initial observation of the throw characteristics with
varying angle
87
4.1.3 Observation of automatic performance 97
Chapter 5: Conclusion 101-104
5.1 Conclusion 102
5.2 Limitations 103
5.3 Recommendations 104
Reference 105
Appendix 109
9
List of Figures
Figure 1: Transformer 31
Figure 2: Diode 33
Figure 3: Bridge rectifier 34
Figure 4: Capacitor 36
Figure 5: Servo Motor s8203 37
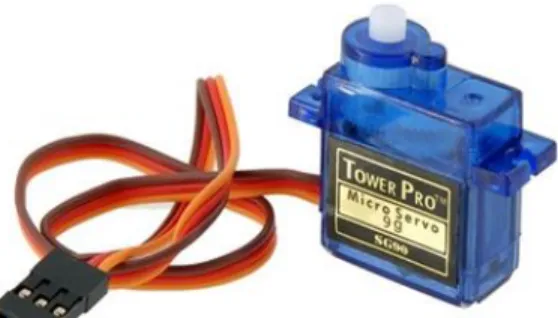
Figure 6: Servo motor TP SG90 39
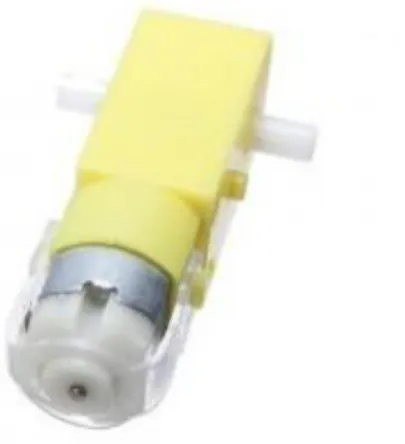
Figure 7: DC motor 41
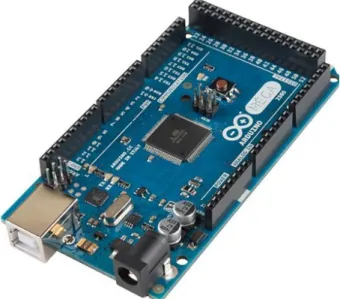
Figure 8: Arduino Mega 42
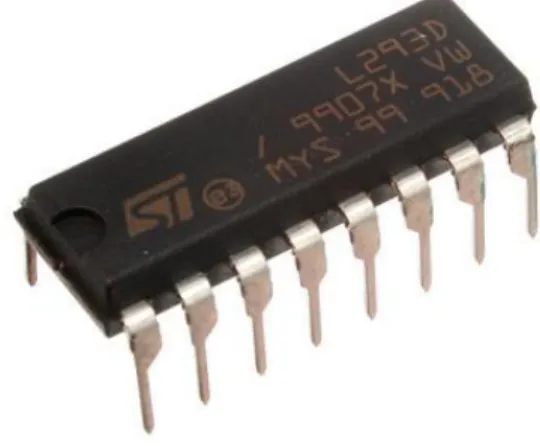
Figure 9: Motor driving IC (L293D) 44
Figure 10: Sonar sensor 46
Figure 11: Total Construction of the robot 48
Figure 12: Position detecting mechanism 50
Figure 13: The throwing arm 52
Figure 14: Arm rotating mechanism 54
Figure 15: Electronic architecture of the robot. 56 Figure 16: circuit diagram of the power supply unit 57 Figure 17: Actual power supply unit of the robot 58
10
Figure 18: Transformer windings 59
Figure 19: Center Tap Full Wave Rectifier 60
Figure 20: Voltage regulating circuit 60
Figure 21: AC to DC conversion circuit 61
Figure 22: A voltage regulator 62
Figure 23: Controller unit block diagram 63
Figure 24: Determination of angular rotation of the lower arm by geometrical analysis when the throwing destination is in the left side of robot.
69
Figure 25: Determination of angular rotation of the lower arm by geometrical analysis when the throwing destination is in the left side of robot.
73
Figure 26: Throwing distance vs. Voltage graph for 45°
projectile angle
86
Figure 27: Throwing distance vs. angle of projectile graph for 6 volt
89
Figure 28: Throwing distance vs. angle of projectile graph for 8 volt
91
Figure 29: Throwing distance vs. angle of projectile graph for 10 volt
93
Figure 30: Throwing distance vs. angle of projectile graph for 12volt.
95
11
List of Tables
Table 1: Determination of throwing distance with varying voltage at constant projectile angle 45°
85
Table 2: Determination of throwing distance with varying angle of projectile at constant 6 Volt
88
Table 3: Determination of throwing distance with varying angle of projectile at constant 8 Volt
90
Table 4: Determination of throwing distance with varying angle of projectile at constant 10 Volt
92
Table 5: Determination of throwing distance with varying angle of projectile at constant 12 Volt
94
Table 6: Automatic throwing distance and lower arm angle calculation of robot by geometrical analysis using data from sensor.
99-100
12
Nomenclature
Symbol Meaning
θ₁ Sensor angle
a Distance measured by sensor
θ Angle of rotation of lower arm
d Distance of throw
da Actual distance of throw
dt Theoretical distance of throw
V Velocity of throw
X Distance between sensor and center
of lower arm
r Length of the lower arm
t Travel time of the throwing arm
Α Throwing angle
M-1 Lower arm servo motor
M-2 Throwing arm dc motor
M-3 Gripping servo motor
13
Chapter 1
Introduction
14
1.1 Background
Robotics is a constant developing sector. Scientists have been working for decades to advance the robots. No matter how much they accomplished, it never seemed enough. The ultimate goal is to make a robot do all the jobs that a human can do.
As a result scientists have tried to make a robot run, talk, play games and even do household chores. Among these functions throwing is a very important and sophisticated function.
To throw an object a robot must have the right mechanism and the right command.
It is a challenge for the scientists to make a robot throw an object at an exact place.
Some examples are ASIMO by Honda which is a humanoid robot that can kick a ball at any destination, Spot by Boston Dynamics is a four legged robot that can throw a cylinder block across a room.
A throwing robot must have the ability to throw an object at any given destination automatically. It should be able to detect the destination within a short period of time. It should also have the correct command o decide how the throw will be conducted. Suppose for a basketball playing robot it is necessary to determine the position of constantly moving object and also throw the ball at the destination or at the basket while moving.
15 One burning question is, what is the purpose of a throwing robot? To answer that we must know the need of a humanoid robot. Human life is a very valuable thing.
It is also very delicate. Sometimes it is hard for people to go to a harmful environment and efficiently work there. Sometimes the environment is such that human life cannot exist there. To complete the task of a human being at such conditions the humanoid robots were created. Throwing is also a function of a human being which needs to be replicated by the humanoid robots.
In case of flood affected areas it is risky for a man to distribute the relief between the people. A throwing robot can be used to construction purposes where the huge blocks are needed to be transported fast. In military use the throwing robots can be used to efficiently drop a bomb at a destined position without any mistake.
Our aim was to make a robot that can decide the position of a basket and using various mechanisms throw an object inside that basket. With further modification our robot can be used for many industrial, construction and military purposes.
16
1.2 Objectives
The objectives of the study are:
1. To develop a mechanism that allows the robot to determine the position of
the destination at which the object is to be thrown.
2. To develop a code that will allow our robot to throw an object automatically
without the help of an operator.
3. To investigate the performance of the developed robot to find out its
efficiency and deviation.
17
1.3 Applications
A throwing robot can be used for military purposes. In the battlefield it is necessary to drop the bomb in the enemy lines at the exact destination. For a human to complete this job it is difficult and life threatening. A throwing robot can be used to throw the bombs inside enemy territory and at the exact given position without any mistake.
This mechanism can be used in an artificial arm for people who are handicapped. With other functions the throwing mechanism can also be incorporated to make it more like a real arm. With the help of this the handicapped people can play various games like normal people.
At dangerous environmental calamities like flood the relief distribution is a crucial work. For a person to do it he must be very highly skilled and still there might be life risk. If we allow a throwing robot to distribute the reliefs then there will be no casualties and if the robot is made water resistant then there will not be any harm to the robot as well.
Heavy construction blocks and other heavy materials can be easily transported by a throwing robot which would be impossible by a normal human worker.
It has been a new trend to make the robot play various games for recreational purposes. The throwing mechanism can be used for cricket playing robot, baseball playing robot, basketball playing robot etc. It can also be used to collect the ball that has gone out of the field and throw it back to the players.
18
Chapter 2
Literature review
19
2.1 Robot and robotics
2.1.1 Definition of robot
The term "robot" was first used to denote fictional automata in the 1921 play R.U.R.
(Rossum's Universal Robots) by the Czech writer, Karel Čapek. According to Čapek, the word was created by his brother Josef from the Czech "robota", meaning servitude. [1]
The definition of industrial robot (defined by ISO 8373) is as, "An automatically controlled, reprogrammable, multipurpose manipulator programmable in three or more axes." [3]
A Robot is a reprogrammable, multi-functional manipulator designed to move material, parts, tools, or a specialized devices through variable programmed motions for the performance of variety of tasks. It is a system that contains sensors, control systems, manipulators, power supplies and software all working together to perform a task. Designing, building, programming and testing a robots is a combination of physics, mechanical engineering, electrical engineering, structural engineering, mathematics and computing. In some cases biology, medicine, chemistry might also be involved.
20
2.1.2 Different parameters of robot
Number of axes:
Two axes are required to reach any point in a plane; three axes are required to reach any point in space. To fully control the orientation of the end of the arm (i.e.
the wrist) three more axes (yaw, pitch, and roll) are required. Some designs (e.g.
the SCARA robot) trade limitations in motion possibilities for cost, speed, and accuracy.
Degree of freedom:
This is usually the same as the number of axes.
Working envelope:
This is the region of space a robot can reach.
Kinematics:
The actual arrangement of rigid members and joints in the robot, which determines the robot's possible motions. Classes of robot kinematics include articulated, Cartesian, parallel and SCARA.
21 Payload:
This is the measure of how much weight a robot can lift.
Speed:
This is the measure of how fast the robot can position the end of its arm. This may be defined in terms of the angular or linear speed of each axis or as a compound speed i.e. the speed of the end of the arm when all axes are moving.
Acceleration:
This is the measure of how quickly an axis can accelerate. Since this is a limiting factor a robot may not be able to reach its specified maximum speed for movements over a short distance or a complex path requiring frequent changes of direction.
Accuracy:
How closely a robot can reach a commanded position is called the accuracy of a robot. When the absolute position of the robot is measured and compared to the commanded position the error is a measure of accuracy. Accuracy can be improved
22 with external sensing for example a vision system or Infra-Red. . Accuracy can vary with speed and position within the working envelope and with payload.
Repeatability:
How well the robot will return to a programmed position is called the repeatability of the robot. This is not the same as accuracy. It may be that when told to go to a certain X-Y-Z position that it gets only to within 1 mm of that position. This would be its accuracy which may be improved by calibration. But if that position is taught into controller memory and each time it is sent there it returns to within 0.1mm of the taught position then the repeatability will be within 0.1mm.Accuracy and repeatability are different measures. Repeatability is usually the most important criterion for a robot and is similar to the concept of 'precision' in. measurement [3]
2.1.3 Robotics
Robotics is the branch of mechanical engineering, electrical engineering, electronic engineering and computer science that deals with the design, construction, operation, and application of robots, as well as computer systems for their control, sensory feedback, and information processing.
These technologies deal with automated machines that can take the place of humans in dangerous environments or manufacturing processes, or resemble
23 humans in appearance, behavior, and/or cognition. Many of today's robots are inspired by nature contributing to the field of bio-inspired robotics.
2.1.4 Laws of robotics
Three Laws of Robotics (often shortened to The Three Laws or Three Laws, also known as Asimov's Laws) are a set of rules devised by the science fiction author Isaac Asimov. The rules were introduced in his 1942 short story "Runaround", although they had been foreshadowed in a few earlier stories. The Three Laws, quoted as being from the "Handbook of Robotics, 56th Edition, 2058 A.D.", are:
1. A robot may not injure a human being or, through inaction, allow a human being to come to harm.
2. A robot must obey the orders given it by human beings except where such orders would conflict with the First Law.
3. A robot must protect its own existence as long as such protection does not conflict with the First or Second Laws.[4] [5]
2.2 Historical development of robots
The history of robots has its origins on the ancient world. The modern concept began to be developed with the onset of the Industrial Revolution which allowed
24 for the use of complex mechanics and the subsequent introduction of electricity.
This made it possible to power machines with small compact motors. In the early 20th century, the notion of a humanoid machine was developed. From the time of ancient civilization there have been many accounts of user-configurable automated devices and even automata resembling animals and humans, designed primarily as entertainment. As mechanical techniques developed through the Industrial age, there appeared more practical applications such as automated machines, remote- control and wireless remote-control.
2.2.1 Early history of robots
Greek mathematician Archytas of Tarentum postulated a mechanical bird he called
"The Pigeon" which was propelled by steam. Yet another early automaton was the clepsydra, made in 250 BC by Ctesibius of Alexandria, a physicist and inventor from Ptolemaic Egypt. [6]
In ancient China , an account on automata is found in the Lie Zi text, written in the 3rd century BC, in which King Mu of Zhou (1023–957 BC) is presented with a life- size, human-shaped mechanical figure by Yan Shi, an "artificer".[7]
The Cosmic Engine, a 10-metre (33 ft) clock tower built by Su Song in Kaifeng, China , in 1088, featured mechanical mannequins that chimed the hours, ringing gongs or bellsamong other devices.[8] [9]
25
2.2.2 History of Humanoid robot
One of the first recorded designs of a humanoid robot was made by Leonardo da Vinci (1452–1519) in around 1495. Da Vinci's notebooks, rediscovered in the 1950s, contain detailed drawings of a mechanical knight in armor which was able to sit up, wave its arms and move its head and jaw. [10]
The first humanoid robot was a soldier with a trumpet, made in 1810 by Friedrich Kauffman in Dresden, Germany. The robot was on display until at least April 30, 1950.Westinghouse Electric Corporation built Televox in 1926 – it was a cardboard cutout connected to various devices which users could turn on and off. In 1939, the humanoid robot known as Elektro was debuted at the World's Fair. [11][12]
In 1928, Japan's first robot, Gakutensoku, was designed and constructed by biologist Makoto Nishimura. [13]
In 1941 and 1942, Isaac Asimov formulated the Three Laws of Robotics, and in the process of doing so, coined the word "robotics". In 1948, Norbert Wiener formulated the principles of cybernetics, the basis of practical robotics.
'Artificial Intelligence' was created at a conference held at Dartmouth College in 1956. Allen Newell, J. C. Shaw, and Herbert A. Simon pioneered the newly created artificial intelligence field with the Logic Theory Machine (1956), and the General
26 Problem Solver in 1957. In 1958, John McCarthy and Marvin Minsky started the MIT Artificial Intelligence lab with $50,000. [14]
John McCarthy also created LISP in the summer of 1958, a programming language still important in artificial intelligence research. [15]
2.3 The revolution of robotics
Here given the evolution of robots over the course of history.
1954: The first programmable robot is designed by George Devol. He coins the term Universal Automation.
1956: Devol and engineer Joseph Engelberger form the world's first robot company, Unimation.
1962: The first industrial robot was online in a General Motors automobile factory in New Jersey. It was Devol and Engelberger's UNIMATE. It performed spot welding and extracted die castings.
1969: Nachi starts its robotic business.
1973: German robotics company, KUKA, creates the first industrial robot with six electromechanically-driven axes. It is called the Famulus.
27 1974: A robotic arm (the Silver Arm) that performed small-parts assembly using feedback from touch and pressure sensors was designed. Professor Scheinman, the developer of the Stanford Arm, forms Vicarm Inc. to market a version of the arm for industrial applications. The new arm is controlled by a minicomputer.
1977: The Motoman L10 was introduced. The Motoman L10 was introduced in 1978: Vicarm, Unimation creates the PUMA (Programmable Universal Machine for Assembly) robot with support from General Motors. Many research labs still use this assembly robot.
1979: Nachi developed the first motor-driven robots for spot welding.
1980: The industrial robot industry starts its rapid growth,with a new robot or company entering the market every month.
1981: Takeo Kanade builds the direct drive arm. It is the first to have motors installed directly into the joints of the arm. This change makes it faster and much more accurate than previous robotic arms.
1985: OTC DAIHEN became the official OEM supplier of robots to the Miller Electric Company. Miller chose to assign different model numbers to the robots sold in the North American market. The prefixed the letters in the model with "MR," for Miller Robot. Miller no longer supports the robots that were manufactured in this era.
The Japanese models featured their own number and name.
28 1987: ASEA of Vasteras, Sweden (founded 1883) and BBC Brown Boveri Ltd of Baden, Switzerland, (founded 1891) announce plans to form ABB Asea Brown Boveri Ltd., headquartered in Zurich, Switzerland. Each parent will hold 50 percent of the new company.
1988: The Motoman ERC control system was introduced with the ability to control up to 12 axes, more than any other controller at the time.
1989: Nachi Technology Inc., U.S.A. is established.
1992: FANUC Robot School was established. GM Fanuc Robotics Corporation was restructured to FANUC's wholly owned share holding company, FANUC Robotics Corporation, together with its subsidiaries, FANUC Robotics North America, Inc.
and FANUC Robotics Europe GmbH. A Prototype of the intelligent robot was built.
1994: The Motoman MRC control system was introduced with the ability to control up to 21 axes. It could also synchronize the motions of two robots.
1995: Miller departed from the robotic business. OTC launched the Dynamic Robotic Division and moved the headquarters to Ohio to focus on selling robots to new users.
1996: Nachi expands robotics business, cutting tool, and bearing product ranges.
2003: OTC DAIHEN introduced the Almega AX series, a line of arc welding and handling robots. The AX series robots integrate seamlessly with the OTC D series welding power supplies for advanced control capabilities. [16][17][18][19]
29
2.4 ball throwing capacity of robots
Tetrahedral mobile robot is a development of ball throwing capability of mobile robots. In this type of robots, the body is in its center of the whole structure. The driving part that produces the propelling force are located at each corner. As a driving wheel mechanism, Omni ball [20] developed with one active and two passive rotational axes. Generally two hemisphere rotates passively and the active rotational axis lies in the center of the Omni ball, in order to rotate, both the hemisphere and the passive.
When the active axis rotates, the Omni ball produces a propelling force in a direction perpendicular to the active rotational axis. At the same the wheel does not produces a propelling force in the horizontal direction. Hence, there is an additional functions of the central axis to change the mode of the robot, it can be used for the equalizer on rough terrain. [21]Since our main concern is about ball throwing capability of robots, so it is a must to discuss the ball throwing robots.
The throwing robots actually select a target, throw an object to that target. The application are mainly soccer robots, Honda Asimo robot etc.
30
Chapter 3
Experimental methods
31
3.1 Electrical equipment
We cannot imagine a robot without various electrical equipment. For a robot to work properly it must have some sensors that sense the environment, one control unit that decides the action from the data received through the sensors, and some actuators to do some efficient work. Our throwing robot also had some sensors, a control unit, and some motors as the actuators. To make our robot work properly various electrical equipment were used.
3.1.1 Transformer
A transformer is an electrical device that transfers electrical energy between two or more circuits through electromagnetic induction. Electromagnetic induction produces an electromotive force across a conductor which is exposed to time varying magnetic fields. Commonly, transformers are used to increase or decrease the voltages of alternating current in electric power applications.
Figure1: Transformer
32 A varying current in the transformer's primary winding creates a varying magnetic -flux in the transformer core and a varying magnetic field impinging on the transformer's secondary winding. This varying magnetic field at the secondary winding induces a varying electromotive force (EMF) or voltage in the secondary winding due to electromagnetic induction. Making use of Faraday's Law (discovered in 1831) in conjunction with high magnetic permeability core properties, transformers can thus be designed to efficiently change AC voltages from one voltage level to another within power networks.
Uses in the project:
Because of using of 120 v voltage, it will be dangerous to operate the servo motor model number: s8203. Rated voltage is about 6 to 7.2 Volt only. So when the voltage is above the 7.2, it will damage the motor for sure.
To avoid this, we have used transformer which will give voltage between -12 volts to +12 volts. With the help of this we can easily give the rated voltage for motor rotation.
3.1.2 Diodes
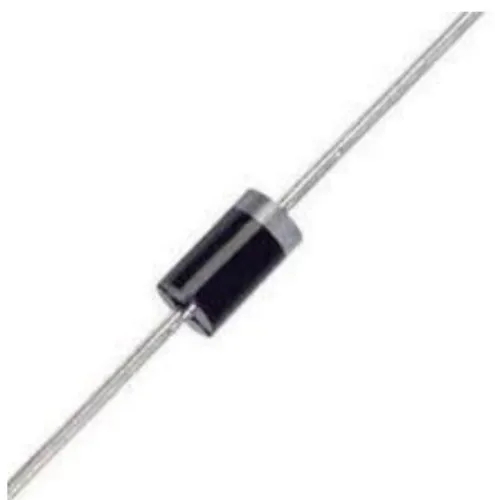
In electronics, a diode is a two-terminal electronic component that conducts primarily in one direction (asymmetric conductance); it has low (ideally zero)
33 resistance to the flow of current in one direction, and high (ideally infinite) resistance in the other. A semiconductor diode, the most common type today, is a crystalline piece of semiconductor material with a p–n junction connected to two electrical terminals. [22]
Figure 2: Diode Main functions of diode:
The most common function of a diode is to allow an electric current to pass in one direction (called the diode's forward direction), while blocking current in the opposite direction (the reverse direction). Thus, the diode can be viewed as an electronic version of a check valve. This unidirectional behavior is called rectification, and is used to convert alternating current to direct current, including extraction of modulation from radio signals in radio receivers—these diodes are forms of rectifiers.
34
3.1.3 Bridge rectifier
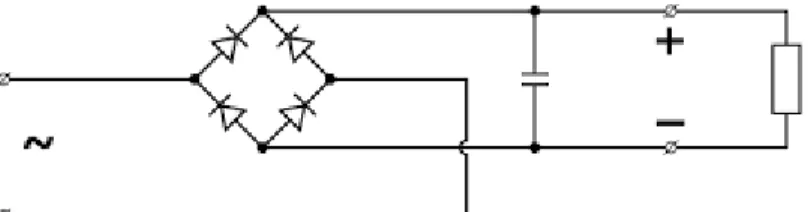
A diode bridge is an arrangement of four (or more) diodes in a bridge circuit configuration that provides the same polarity of output for either polarity of input.
When used in its most common application, for conversion of an alternating current (AC) input into a direct current (DC) output, it is known as a bridge rectifier.
A bridge rectifier provides full-wave rectification from a two-wire AC input, resulting in lower cost and weight as compared to a rectifier with a 3-wire input from a transformer with a center-tapped secondary winding. [23]
The essential feature of a diode bridge is that the polarity of the output is the same regardless of the polarity at the input
Figure 3: Bridge rectifier
35 Basic operation
According to the conventional model of current flow (originally established by Benjamin Franklin and still followed by most engineers today [24], current is defined to be positive when it flows through electrical conductors from the positive to the negative pole. In actuality, free electrons in a conductor nearly always flow from the negative to the positive pole. In the vast majority of applications, however, the actual direction of current flow is irrelevant. Therefore, in the discussion below the conventional model is retained.
When the input connected to the left corner is negative, and the input connected to the right corner is positive, current flows from the lower supply terminal to the right along the red (positive) path to the output, and returns to the upper supply terminal via the blue (negative) path. [25]
3.1.4 Capacitor
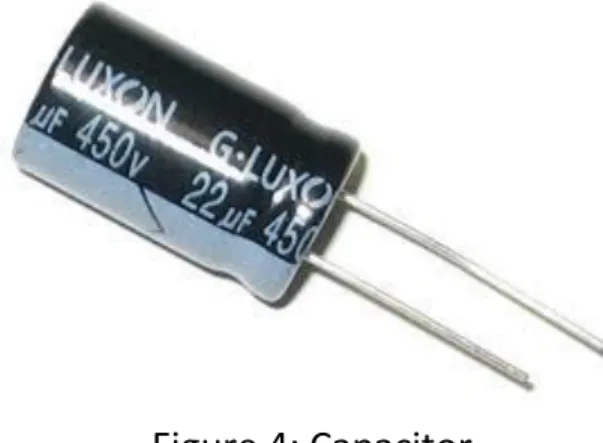
A capacitor (originally known as a condenser) is a passive two-terminal electrical component used to store electrical energy temporarily in an electric field. The forms of practical capacitors vary widely, but all contain at least two electrical conductors (plates) separated by a dielectric (i.e. an insulator that can store energy by becoming polarized). The conductors can be thin films, foils or sintered beads of metal or conductive electrolyte, etc. The non-conducting dielectric acts to increase the capacitor's charge capacity. A dielectric can be glass, ceramic, plastic film, air,
36 vacuum, paper, mica, oxide layer etc. Capacitors are widely used as parts of electrical circuits in many common electrical devices. Unlike a resistor, an ideal capacitor does not dissipate energy. Instead, a capacitor stores energy in the form of an electrostatic field between its plates.
When there is a potential difference across the conductors (e.g., when a capacitor is attached across a battery), an electric field develops across the dielectric, causing positive charge +Q to collect on one plate and negative charge −Q to collect on the other plate. If a battery has been attached to a capacitor for a sufficient amount of time, no current can flow through the capacitor. However, if a time-varying voltage is applied across the leads of the capacitor, a displacement current can flow.
3.1.5 Servo motor
A servomotor is a rotary actuator or linear actuator that allows for precise control of angular or linear position, velocity and acceleration. [26] It consists of a suitable
Figure 4: Capacitor
37 motor coupled to a sensor for position feedback. It also requires a relatively sophisticated controller, often a dedicated module designed specifically for use with servomotors.
Servomotors are not a specific class of motor although the term servomotor is often used to refer to a motor suitable for use in a closed-loop control system.
Servomotors are used in applications such as robotics, CNC machinery or automated manufacturing.
Working principle:
As the name suggests, a servomotor is a servomechanism. More specifically, it is a closed-loop servomechanism that uses position feedback to control its motion and
Figure 5: Servo Motor s8203
38 final position. The input to its control is some signal, either analogue or digital, representing the position commanded for the output shaft.
The motor is paired with some type of encoder to provide position and speed feedback. In the simplest case, only the position is measured. The measured position of the output is compared to the command position, the external input to the controller. If the output position differs from that required, an error signal is generated which then causes the motor to rotate in either direction, as needed to bring the output shaft to the appropriate position. As the positions approach, the error signal reduces to zero and the motor stops.
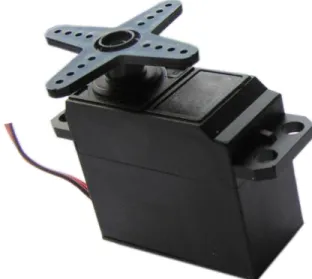
Servo motor s8203:
New ballraced digital servo with metal gears. Powerfull servo for steering applications in 1/5 and 1/6 scale cars, can be used for throttle/brake as well.
Voltage: 6 – 7.2 V
Torque: @ 7.2 V = 30 kg/cm / 6 V = 28 kg/cm Speed: 60° @ 6 V – 0.14 Sek.
Connector: Graupner-J/R + Robbe/Futaba
Dimensions: 59.5 mm length, 29.2 width, 51.3 mm height and 154 grams weight.
39 Application of servo s8203 in the project:
As it is a high torque motor (30 kg/ cm) , it is used in the lower arm to hold and move the throwing mechanism.
Specifications of SG - 90 :
The TP SG90 is similar in size and weight to the Hitec HS-55, and is a good choice for most park flyers and helicopters. Hobbyists from around the world has used the SG90 on famous planes like GWS Slow Stick, E-Flite Airplanes, Great Planes, Thunder Tiger, Align, EDF jets and more.
The TP SG90 servo weighs 0.32 ounces (9.0 grams). Total weight with wire and connector is 0.37 ounces (10.6 grams). The TP SG90 has the universal "S" type connector that fits most receivers, including Futaba, JR, GWS, Cirrus, Blue Bird, Blue Arrow, Corona, Berg and Hitec.
Figure 6: Servo motor TP SG90
40 TP SG90 Specifications:
Dimensions = (L x W x H) = 0.86 x 0.45 x 1.0 inch (22.0 x 11.5 x 27 mm) Weight = 0.32 ounces (9 grams)
Weight with wire and connecter = 0.37 ounce (10.6 grams) Stall Torque at 4.8 volts = 16.7 oz/in (1.2 kg/cm)
Operating Voltage = 4.0 to 7.2 volts
Operating Speed at 4.8 volts (no load) = 0.12 sec/ 60 degrees Connector Wire Length = 9.75 inches (248 mm)
Universal "S" type connector fits most receivers.
Application of DC SG-30:
Since it is a high speed low torque motor, it can take low weight and can have fast moving. So this used the arm grip to hold the ball until the end of the throwing.
41
3.1.6 DC motor:
A DC motor is any of a class of electrical machines that converts direct current electrical power into mechanical power. The most common types rely on the forces produced by magnetic fields. Nearly all types of DC motors have some internal mechanism, either electromechanical or electronic, to periodically change the direction of current flow in part of the motor. Most types produce rotary motion;
a linear motor directly produces force and motion in a straight line.
DC motors were the first type widely used, since they could be powered from existing direct-current lighting power distribution systems. A DC motor's speed can be controlled over a wide range, using either a variable supply voltage or by changing the strength of current in its field windings. Small DC motors are used in tools, toys, and appliances. The universal motor can operate on direct current but is a lightweight motor used for portable power tools and appliances. Larger DC
Figure 7: DC motor
42 motors are used in propulsion of electric vehicles, elevator and hoists, or in drives for steel rolling mills. The advent of power electronics has made replacement of DC motors with AC motors possible in many applications. [27][28]
3.1.7 Arduino:
The project is based on microcontroller board designs, manufactured by several vendors, using various microcontrollers. These systems provide sets of digital and analog I/O pins that can be interfaced to various expansion boards ("shields") and other circuits. The boards feature serial communications interfaces, including USB on some models, for loading programs from personal computers. For programming the microcontrollers, the Arduino project provides an integrated development environment (IDE) based on the Processing project, which includes support for the C and C++ programming languages.
Figure 8: Arduino Mega
43 Hardware:
An Arduino board consists of an Atmel 8-, 16- or 32-bit AVR microcontroller with complementary components that facilitate programming and incorporation into other circuits. Arduino used the AtMel megaAVR series of chips, specifically the ATmega8, ATmega168, ATmega328, ATmega1280, and ATmega2560. A handful of other processors have also been used by Arduino compatibles.
Software:
Arduino programs may be written in any programming language with a compiler that produces binary machine code. Atmel provides a development environment for their microcontrollers, AVR Studio and the newer Atmel Studio.
After compilation and linking with the GNU toolchain, also including with the IDE distribution, the Arduino IDE employs the program avrdude to convert the executable code into a text file in hexadecimal coding that is loaded into the Arduino board by a loader program in the board's firmware.
3.1.8 Motor Driving IC ( L293D) :
L293D is a typical Motor driver or Motor Driver integrated circuit which is used to drive direct current on either direction. It is a 16-pin IC which can control a set of
44 two DC motors simultaneously in any direction. It means that it can control two DC motor with a single L293D IC. Dual H-bridge Motor Driver integrated circuit (IC).The l293d can drive small and quite big motors as well.
Working principle of L293D:
The 4 input pins for this l293d, pin 2, 7 on the left and pin 15, 10 on the right as shown on the pin diagram. Left input pins will regulate the rotation of motor connected on the left side and right input for motor on the right hand side. The motors are rotated on the basis of the inputs provided at the input pins as LOGIC 1 or LOGIC 0.
In simple you need to provide Logic 0 or 1 across the input pins for rotating the motor.
Figure 9: Motor driving IC (L293D)
45 L293D Logic Table:
Let’s consider a Motor connected on left side output pins (pin 3,6). For rotating the motor in clockwise direction the input pins has to be given with Logic 1 and Logic 0
• Pin 2 = Logic 1 and Pin 7 = Logic 0 | Clockwise Direction
• Pin 2 = Logic 0 and Pin 7 = Logic 1 | Anticlockwise Direction
• Pin 2 = Logic 0 and Pin 7 = Logic 0 | Idle [No rotation] [Hi-Impedance state]
• Pin 2 = Logic 1 and Pin 7 = Logic 1 | Idle [No rotation]
In a very similar way the motor can also operate across input pin 15, 10 for motor on the right hand side.
Voltage specifications:
The voltage (Vcc) needed to for its own working is 5V but L293d will not use that Voltage to drive DC Motors. That means you should provide that voltage (36V maximum) and a maximum current of 600mA to drive the motors and maximum resistance is 60 ohms. [29][30][31][32]
46
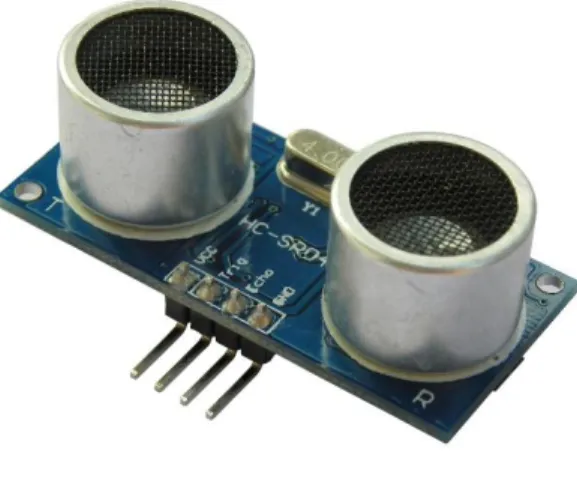
3.1.9 Sonar sensor (Ultrasonic Transducer)
Ultrasonic transducers are transducers that convert ultrasound waves to electrical signals or vice versa. Those that both transmit and receive may also be called ultrasound transceivers; many ultrasound sensors besides being sensors are indeed transceivers because they can both sense and transmit. These devices work on a principle similar to that of transducers used in radar and sonar systems, which evaluate attributes of a target by interpreting the echoes from radio or sound waves, respectively.
Active ultrasonic sensors generate high-frequency sound waves and evaluate the echo which is received back by the sensor, measuring the time interval between sending the signal and receiving the echo to determine the distance to an object.
Passive ultrasonic sensors are basically microphones that detect ultrasonic noise that is present under certain conditions, convert it to an electrical signal, and report it to a computer.
Figure 10: Sonar sensor
47 Passive ultrasonic sensors may be used to detect high-pressure gas or liquid leaks, or other hazardous conditions that generate ultrasonic sound. In these devices, audio from the transducer (microphone) is converted down to human hearing range.
High-power ultrasonic emitters are used in commercially available ultrasonic cleaning devices. An ultrasonic transducer is affixed to a stainless steel pan which is filled with a solvent (frequently water or isopropanol). An electrical square wave feeds the transducer, creating sound in the solvent strong enough to cause cavitation. [33][34]
48
3.2 Structure and mechanism:
To understand the throwing mechanism of a robot we had to build a structure that could throw an object to a destination by itself. With our very less resources it was hard to build a very efficient robot. However we tried construct a mechanism which has a reasonable amount of error with quite satisfactory results.
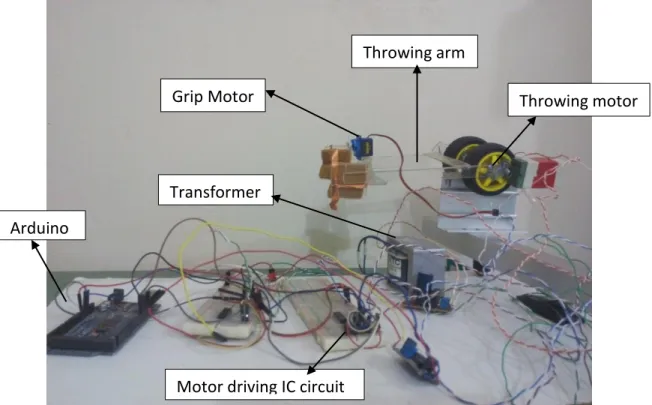
Figure 11: Total Construction of the robot
3.2.1 Basement:
The basement of the structure holds all the equipment and mechanism. As our robot is just for analyzing the throwing performance it is stationary. So the
Arduino
Motor driving IC circuit Transformer
Grip Motor
Throwing arm
Throwing motor
49 basement of the robot remain fixed at the location where it is placed. The basement is made of wooden board and stands on four legs. There are several slots and holes in the basement to make room for other mechanisms where they fit accurately for their purposes. All other equipment are bolted into the basement and remain attached rigidly with it.
3.2.2 Position detecting mechanism:
The distance of the position where the robot has to throw is measured by the distance measuring mechanism. The distance measuring mechanism consists of ultrasonic sound sensor (sonar) and servo motor.
The ultrasonic sound sensor transmits ultrasonic sound. The sound wave travels along the free spaces and obstructed by any object locating in its path. The sound wave then reflects and travels back to the sensor where the receiver detects the reflected sound wave. The velocity of ultrasonic sound time spent in this traveling of sound wave is used to determine the distance travelled by the sound wave. Thus the distance of any object around the sensor is calculated. If the object is the identification of the location where the robot has to throw ball the robot will then throw the ball in a manner that the ball travels exactly the distance and reaches the position. The direction in which the ball has to be thrown is determined by a servo motor.
50 Figure 12: Position detecting mechanism
Servo motor is basically an actuator which operates with a voltage pulse. But this can also be used to determine the angular position as well. The servo motor is set to rotate in angular directions. It rotates and the sonar sensor that detects objects and attached with the motor also rotates with it. The micro controller always checks the position of the motor where it is rotating with an angular velocity. As soon as it finds any sign of object detection it records the position of the servo motor. This position is the angular distance of the object from the predefined reference line.
Thus with this information throw can be performed accurately. This is ensured by the control unit which does all the data processing and calculation and gives
Sonar sensor Servo motor
51 command to the actuators to perform in a required manner. The parameters like velocity, throwing angle etc. are controlled by the input voltage and cutoff timing, solely controlled by control circuit.
3.2.3 Throwing mechanism:
The throwing mechanism of the robot has two dc motors and a servo motor. The motors are fitted in a throwing arm. The arm is made of acrylic plastic sheet. The arm is constructed in a form of truss to increase the strength of narrow and light weight plastics. As a result the arm has a very good strength with very low weight.
Two dc motors fitted with the lower end of the arm make the arm move in an angular manner. Two motors are used to achieve increased ability of lifting the arm from idle condition to overcome inertia of the arm and give it a quite good speed.
Also it helps to achieve a good and balanced throw. The motors run at different rpm with different input voltage. This allows the controller to control the speed of the throwing arm and velocity of the throwing object by setting up pulse width modulation for voltage signal.
52 Figure 13: The throwing arm
A small servo motor is fitted at the outside end of the arm. The truss structure is designed to have a room for this servo motor. Where the servo motor can fit perfectly and perform necessary task. The servo is used to control the grip of the arm to the object. The servo make the arm holding the object for throwing and opens the grip at the right time to let the object go. The grip has friction materials in the inner side that help to better gripping and preventing any slip in the grip.
During the throw the controller set the dc motors to move the arm with a speed necessary for throw and controls the servo to open the grip in the correct time to achieve required throw angle. If the servo do not opens up at the right time the
Grip control servo motor
Throwing arm motor
Friction material for gripping
53 angle at which the throw will take place can have error. Which will result in faulty throwing of the robot. The throwing mechanism also have optical sensors to determine the position of the arm. With these sensors the controller determines the angle of the throwing arm.
3.2.4 Arm rotating mechanism:
A robot may not throw objects only in one direction. Sometimes it may require different throwing positions in different directions. These directions are determined and calculated by the controller with the help of servo motor of the distance measuring mechanism. But in order to make the robot throw in various direction it should be allowed with an additional degree of freedom that will allow the robot’s arm to move in different direction than the throwing motion. To achieve this degree of freedom our robot is provided with an additional arm that holds the throwing arm. This arm is coupled with a high torque servo motor.
54 Figure 14: Arm rotating mechanism
The servo motor takes the whole throwing mechanism to a required direction from where if the throwing arm throws the ball in linear direction the ball will go to the required position. The servo motor makes the lower arm to move in a circular motion. If during motion the throwing object is released it will go in the direction of the tangent of releasing point of the rotating circle of the lower arm. Thus by measuring a correct angle for this lower arm will lead to correct throwing direction.
The lower arm is made of mild steel. It is a hollow square shape arm. This geometrical structure gives it more strength and light weight. Also it is made of mild steel so it has greater strength than other structures. As this arm holds the whole
Servo motor for lower arm rotating
Cluster ball to support load
55 throwing mechanism it has to be stronger. Also it has to withstand heavy vibration of the throwing arm movements. The throwing arm has rapid movements. This causes vibration. This vibration can be responsible for joint failure of the throwing arm and lower rotating arm. The lower arm also undergoes torsional vibration during this process. In order to avoid this type of problems the lower arm should be strong enough.
A cluster ball bearing is attached underneath the rotating lower arm. This allows the arm to support the load of the throwing mechanism and also causes smooth and frictionless travel of the arm throughout its moving area.
A beam made of mild steel is riveted into the arm. It has holes and slots to allow the throwing arm to fasten with the lower arm rigidly. Rigid attachment is very important. Two steel wires are used to fasten the upper arm motor with the lower arm beam in order to avoid vibration.
3.2.5 Electronic architecture:
The electronic architecture of the system controls all the power flow and directs them in right direction in the right amount and at right time. It manipulates the electricity from direct line and make it usable for the robot. It can be said as the nerve system of the robot. It senses the outside condition and takes decision in the controller unit and takes necessary action by giving command to the motors.
56 Figure 15: Electronic architecture of the robot.
The electronic system consists of several parts. These are power supply unit, sensors, controller unit, actuators. All the different parts are connected with the controller unit with some connecting wires. These parts performs different tasks necessary for the effectiveness of the robot. Without any of the parts the robot cannot perform perfectly. And with the failure of any of the parts the whole system can fail. Such as the power supply unit. If this unit fails the whole system will not have any electricity to power up themselves.
Arduino
Motor driving IC circuit
Transformer
57 Power supply unit:
The power supply unit powers up the whole system and provide necessary current flow to different electronic components. Such as the controller needs 5volt, the high torque servo motor needs 7.2 volts, the small servo needs 5 volts and the dc motor needs 6 to 12 volts. The voltage regulating is done in the power supply unit by the help of voltage regulating device. The high torque servo motor draws a very high amount of current flow. Power supply unit also ensures it. This unit makes sure that the different voltage allocation is done to right unit. Otherwise the unit that runs with small current and voltage may get damaged by the high voltage and current of other device. Also the unit that runs with high voltage and current will not run effectively with small voltage and current that is for other small units.
Figure 16: circuit diagram of the power supply unit
The power supply unit of the robot consists of a transformer (2ampere, -12 volt to +12volt), a bridge rectifier containing diode, two capacitors, voltage regulating IC
58 and output knob. This components are connected in a circuitry to form the power supply unit.
Selecting a suitable transformer is of great importance. The current rating and the secondary voltage of the transformer is a crucial factor. The current rating of the transformer depends upon the current required for the load to be driven. The input voltage to the 7805 IC should be at least 2V greater than the required output, therefore it requires an input voltage at least close to 7V for the controller as it runs on 5V. But the dc motor sometimes may need 12V and the servo motor needs 7.2 volts.
Figure 17: Actual power supply unit of the robot
So we chose a 12-0-12transformer with current rating 2000mA as the servo needs up to 2000mA.
Rectifier circuit
Transformer Voltage regulator
and capacitor circuit
59 Figure 18: Transformer windings
Transformer has 240 V primary windings and center tapped secondary winding. The transformer has flying colored insulated connecting leads (Approximately 100 mm long). The Transformer act as step down transformer reducing AC - 240V to AC - 12V.
The best is using a full wave rectifier. Its advantage is DC saturation is less as in both cycle diodes conduct. Higher Transformer Utilization Factor (TUF). 1N4007 diodes are used as it is capable of withstanding a higher reverse voltage of 1000v whereas 1N4001 is 50V
60 Figure 19: Center Tap Full Wave Rectifier
Datasheet of 7805 prescribes to use a 0.01μF capacitor at the output side to avoid transient changes in the voltages due to changes in load and a 0.33μF at the input side of regulator to avoid ripples if the filtering is far away from regulator.
Figure 20: Voltage regulating circuit
A large capacitor like the 2200 uF act as a "reservoir" to store energy from the rough DC out of the bridge rectifier. The larger the capacitor the less ripple and the more
61 constant the DC. When large current peaks are drawn the capacitor supplied surge energy helps the regulator not sag in output.
Such capacitors are usually "electrolytic capacitors". These have good ability to filter out low frequency ripple and to respond to reasonably fast load changes. By itself it is not enough to do the whole job as it is not good at filtering higher frequency noise because electrolytic tend to have large internal inductance + large (relatively) internal series resistance (ESR).
Figure 21: AC to DC conversion circuit
The small input capacitor will be non-polarized and will usually nowadays be a multilayer ceramic capacitor with low ESR and low inductance giving it excellent high frequency response and noise filtering capabilities. By itself it is not enough to do the whole job as it cannot store enough energy to deal with the energy needed to filter out ripple changes and large load transients.
62 A voltage regulator generates a fixed output voltage of a preset magnitude that remains constant regardless of changes to its input voltage or load conditions.
There are two types of voltage regulators: linear and switching.
A linear regulator employs an active (BJT or MOSFET) pass device (series or shunt) controlled by a high gain differential amplifier. It compares the output voltage with a precise reference voltage and adjusts the pass device to maintain a constant output voltage.
Figure 22: voltage regulator
A switching regulator converts the dc input voltage to a switched voltage applied to a power MOSFET or BJT switch. The filtered power switch output voltage is fed back to a circuit that controls the power switch on and off times so that the output voltage remains constant regardless of input voltage or load current changes.
63 Controller unit circuitry:
The controller unit is the brain of the robot. So all the elements and components have to be connected with the controller. The power supply powers up the controller and makes it ready to control all the processes. In our robot Arduino Mega 2560 is used as controller unit. The MEGA 2560 is designed for more complex projects. With 54 digital I/O pins, 16 analog inputs and a larger space for your sketch it is the recommended board for 3D printers and robotics projects. Thus for our case it is the right choice as the robot has to undergo complex calculation and has to take data from sensors and controlling multiple number of actuators.
Figure 23: Controller unit block diagram
The sonar sensor is connected with a digital pin of Arduino by which the Arduino makes the sensor ready for sensing when necessary. Arduino makes the pic high to power up the sensor. The signal pin of the sensor is also connected with a digital I/O pin of the Arduino. The servo motor used for angel determination of the throwing position from the sensor is connected with the Arduino. A digital pin is
64 connected with the signal pin of the sensor. By which Arduino takes data to determine the angle.
The actuators which are three motors in our case is connected with the Arduino in various manners. Two servo motors are directly connected with two different digital I/O pins. But the dc motor is not connected directly with the Arduino. A motor driving IC is used in case of the dc motor. The IC acts as a switching and amplifying device for the dc motor. Arduino connects with motor driving IC’s two input pins with two different digital I/O pins. Here the Arduino pins act as output pins and triggers the input pin of the motor driving IC. An external voltage is supplied to the IC in an input pin at which the motor has to run. The output of the IC is connected with the two wires of the motor. When Arduino triggers the IC pins then IC makes the motor on with the external voltage that has been supplied. Thus the IC acts as an amplifier and the Arduino can control the motor.
65
3.3 procedure
The whole experiment was a very long process containing various different experiments. To meet the expected objectives and good result an effective plan of the whole process must be set up before starting the actual work. The detailed procedure of construction a throwing robot is as follows.
3.3.1 Initial manual control and experimentation
After construction of the structure. The first task was to show if the mechanism works. We see that there are three motors for the throwing mechanism. The motor that is used to rotate the arm about the vertical axis is the M-1 motor. The motor that helps the throwing by rotating the arm about a horizontal axis is called the M- 2 motor. And the motor that is used to hold and release the ball is called the M-3 motor.
At first a ball was placed inside the grip. A fixed voltage (12 volt) was provided to the motor M-2 to initiate the throwing velocity and after a few milliseconds the grip was opened by supplying a voltage (5 volt) to the motor M-3. This caused the ball to go to a certain distance and the throw was successfully delivered.
66 After that we varied the voltage of the motor M-2 with a constant throwing angle of α=45°. With various applied voltage we observed various traveled distance. The motor M-2 started from a fixed position and stopped at another fixed position at α=45°. By measuring the time required to travel this distance the velocity of motor M-2 was calculated. From this velocity applying the pre-existent theories of the traveling path of a projectile we could understand the deviation of the actual output of throwing distance to the theoretical output.
After that we varied the throwing angle with a constant applied voltage to the motor M-2 and measured the throwing distance. For various angle and the fixed throwing velocity we also determined the theoretical throwing distance to observe the deviation encountered.
From those values the behavior of the robot can be identified. And we can predict how the robot will perform under certain operating conditions. This phenomena is utilized in making the robot perform in a required manner.
3.3.2 Geometrical analysis of throwing position:
The position where the ball will be thrown may not be always in a perpendicular direction. The position can be at an angle with the throwing arrangement of the robot. So the robot needs to align itself in the direction of throwing position. It
67 rotates and faces its throwing arm towards the destination. This is done by the lower arm holding the throwing mechanism.
The high torque servo motor rotates with an angle to achieve this condition. But to perform this action the robot must be aware of the angle at which it will rotate its arm. This angle must be determined by the robot itself. For this job the geometrical analysis is necessary. Because the robot cannot measure the angle directly. To achieve necessary result a servo motor is used with which a sonar sensor is attached.
The sonar sensor detects any obstruction in the travel path of the ultrasonic sound wave and sends it to the controller unit. In the meantime the servo motor rotates randomly with successive angles. The angle is continuously recorded by the controller. When the controller is given any signal by the sonar sensor it stores the angle of the servo motor and records the distance of the object from the signal of sonar sensor. But the angle found is the angle of the sensor. Meaning the polar coordinate of the throwing location with respect to the sensor. This specifies the location of the destination. But the throwing arm is not in the same position that of the sensor. So the angle that is determined is not the angle at which the lower arm has to move to make the throwing mechanism in line with the destination. But these data can be used to measure the angle at which the lower arm will rotate.
The lower arm can only moves in a circle. So to throw in various position the line of throwing should be the tangent of the circle in which the lower arm moves. This
68 consideration is also important in the geometrical analysis. The angle of rotation of the lower should be such that the throwing mechanism can throw to the destination tangentially from the circle of movement of lower rotating arm.
With all these consideration keeping in mind we can start our geometrical analysis to determine the angle of rotation of lower arm. The initial data will be manipulated to give the measure of that angle with the help of geometry. In order to analyze geometrically the position of the sensor attached with servo motor, the circle of rotation of the lower arm, and the throwing destination is shown the figure1.
Here,
P = location of the throwing point T = throwing mechanism
S = sensor
SR = reference line of the sensor servo motor for angle determination OT = lower arm length = r
θ = angle at which lower arm need to rotate θ₁ = angle of the sensor servo motor
69 Figure 24: Determination of angular rotation of the lower arm by geometrical analysis when the throwing destination is in the left side of robot.
We need to find out θ. From the sonar sensor the distance PS is found. And from the angle of rotation of the servo motor angle θ₁ is found. For sensor servo plain of reference is SR. So θ₁ is the angle that will be recorded.
Now, θ₁ + θ₂ = 180°
So, θ₂ = 180° - θ₁
₂₃
₄₅
70 Now from ∆PBS,
PB = PS.sinθ₂ (1)
Considering, PS = a = distance measured by the sensor PB = a.sin(180 – θ₁)
So, PB = a.sinθ₁ (2)
Also, BS = a.cosθ₂ BS = a.cos(180° - θ₁)
BS = - a.cosθ₁ = AO (3)
So, PA = PB + AB
Considering AB = x = constant
So, PA = a.sinθ₁ + x From ∆ AOP, PO = √𝑃𝐴2+ 𝐴𝑂2
So, PO = √(𝑎. sinθ₁ + x)2 + (− a. cosθ₁)2 (4) From the same triangle,
71 𝜃₃ = tan−1𝑃𝐴
𝐴𝑂
𝜃₂ = tan−1 𝑎𝑠𝑖𝑛 𝜃1+𝑥
−𝑎𝑐𝑜𝑠 𝜃1 (5)
Now, from ∆POT, 𝑃𝑇 = √𝑃𝑂2− 𝑂𝑇2
Or, 𝑃𝑇 = √(𝑎 sin 𝜃₁ + 𝑥)2+ (−𝑎 cos 𝜃₁)2− 𝑟2 (6) Here, PT= Throwing distance = d
𝜃₄ = cos−1𝑂𝑇 𝑃𝑂
𝜃₄ = cos−1 𝑟
√(𝑎 sin 𝜃₁+𝑥)2+(−𝑎 cos 𝜃₁)2 (7)
So, the required angle, 𝜃 = 180⁰ − (𝜃₃ + 𝜃₄)
𝜃 = 1800 − tan−1 asin 𝜃₁+𝑥
−acos 𝜃₁ − cos−1 𝑟
√(𝑎 sin 𝜃₁+𝑥)2+(−𝑎 cos 𝜃₁)2 (8) Where,
a = distance measured by the sonar sensor