Microsoft
®
XNA
™
U N L E A S H E D
Chad Carter
Graphics and Game
Programming for
Microsoft® XNA™ Unleashed: Graphics and Game Programming for Xbox 360 and Windows
Copyright © 2008 by Chad Carter
All rights reserved. No part of this book shall be reproduced, stored in a retrieval system, or transmitted by any means, electronic, mechanical, photocopying, recording, or otherwise, without written permission from the publisher. No patent liability is assumed with respect to the use of the information contained herein. Although every precaution has been taken in the preparation of this book, the publisher and author assume no responsibility for errors or omissions. Nor is any liability assumed for damages resulting from the use of the information contained herein.
ISBN-13: 978-0-672-32964-7 ISBN-10: 0-672-32964-6
Library of Congress Cataloging-in-Publication Data
Carter, Chad.
Microsoft XNA unleashed : graphics and game programming for Xbox 360 and Windows / Chad Carter. — 1st ed.
p. cm.
ISBN 0-672-32964-6
1. Microsoft XNA (Computer file) 2. Computer games—Programming. 3. Video games. I. Title.
QA76.76.C672C383 2007 794.8’1526—dc22
2007025607
Printed in the United States of America First Printing July 2007
Trademarks
All terms mentioned in this book that are known to be trademarks or service marks have been appropriately capitalized. Sams Publishing cannot attest to the accuracy of this information. Use of a term in this book should not be regarded as affecting the validity of any trademark or service mark.
Warning and Disclaimer
Every effort has been made to make this book as complete and as accurate as possi-ble, but no warranty or fitness is implied. The information provided is on an “as is” basis. The author and the publisher shall have neither liability nor responsibility to any person or entity with respect to any loss or damages arising from the information contained in this book or from the use of the CD or programs accompanying it.
Bulk Sales
Pearson offers excellent discounts on this book when ordered in quantity for bulk purchases or special sales. For more information, please contact:
U.S. Corporate and Government Sales 1-800-382-3419
[email protected] For sales outside of the U.S., please contact:
Contents at a Glance
Introduction. . . .1
Part I Get Up and Running with XNA on Your PC and Xbox 360
1 Introducing XNA and XNA Game Studio Express. . . .7
2 XNA and the Xbox 360. . . .19
3 Performance Considerations. . . .35
Part II Understanding XNA Basics
4 Creating 3D Objects. . . .59
5 Input Devices and Cameras. . . .85
Part III Content Pipeline
6 Loading and Texturing 3D Objects. . . .113
7 Sound and Music. . . .123
8 Extending the Content Pipeline. . . .153
Part IV 2D in XNA
9 2D Basics. . . .171
10 2D Effects. . . .191
11 Creating a 2D Game. . . .217
Part V High Level Shader Language
12 HLSL Basics. . . .255
13 Advanced HLSL. . . .275
Part VI Physics and Artificial Intelligence
14 Physics Basics. . . .289
15 Finite State Machines and Game State Management. . . .307
16 AI Algorithms. . . .337
Part VII 3D Effects
17 Advanced Texturing Techniques. . . .353
18 Special Effects. . . .379
19 Particle System. . . .397
Part VIII Putting It Into Practice
20 Creating a 3D Game. . . .433
21 Improving the Game. . . .463
Table of Contents
Introduction 1
Part I Get Up and Running with XNA on Your PC and Xbox 360
1 Introducing XNA and XNA Game Studio Express 7
What Is the XNA Framework?. . . .7
The Foundation of the XNA Framework. . . .8
XNA Today. . . .9
Installing Visual C# Express. . . .10
Installing the DirectX Runtime. . . .14
Installing XNA Game Studio Express. . . .15
Creating Spacewar Windows Project. . . .17
Compiling and Running Spacewar. . . .17
Summary. . . .17
2 XNA and the Xbox 360 19 Creating Spacewar Xbox 360 Project. . . .19
Buying the XNA Creators Club Subscription. . . .20
Connecting the Xbox 360 to the PC. . . .22
Deploying on the Xbox 360. . . .23
Debugging on the Xbox 360. . . .25
Creating a Test Demo for the Xbox 360. . . .25
Programming for Dual Platforms. . . .28
The .NET Compact Framework on the Xbox 360. . . .33
Summary. . . .33
3 Performance Considerations 35 Measure, Measure, Measure. . . .35
The 80–20 Rule. . . .36
Creating a Benchmark. . . .37
Monitoring Performance on the Xbox 360. . . .39
Managing Memory. . . .40
Understanding the Garbage Collector. . . .41
On the .NET Framework (Windows). . . .41
On the .NET Compact Framework (Xbox 360). . . .42
Optimization Suggestions. . . .43
Sealing Virtual Methods. . . .53
Collections. . . .53
Summary. . . .54
Part II Understanding XNA Basics 4 Creating 3D Objects 59 Vertices. . . .59
Vectors. . . .59
Matrices. . . .60
Transformations. . . .60
Translation. . . .60
Scaling. . . .60
Rotation. . . .60
Transformations Reloaded. . . .60
Creating a Camera. . . .61
Projection. . . .61
View. . . .62
World. . . .63
Vertex Buffers. . . .63
Effects. . . .66
Textures. . . .68
Index Buffers. . . .69
XNA Game Components. . . .72
Checking Performance. . . .75
Transformations Revolutions. . . .79
Summary. . . .83
5 Input Devices and Cameras 85 Creating a Game Service. . . .85
Starting a Library. . . .88
Working with Input Devices. . . .91
Keyboard. . . .91
Game Pad. . . .95
Mouse (Windows Only). . . .98
Creating a Stationary Camera. . . .100
Creating a First Person Camera. . . .103
Creating a Split Screen. . . .106
Summary. . . .110
Part III Content Pipeline
6 Loading and Texturing 3D Objects 113
Understanding the Content Pipeline. . . .113
Loading 3D Models. . . .114
Texturing 3D Models. . . .120
Summary. . . .121
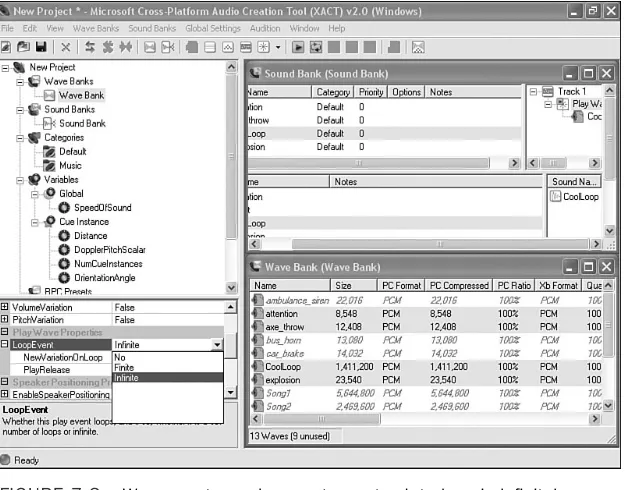
7 Sounds and Music 123 Microsoft Cross-Platform Audio Creation Tool (XACT). . . .123
Wave Banks. . . .124
Sounds Banks. . . .125
Understanding Variations. . . .125
Updating Our Input Handlers. . . .134
Plugging In Our Sound Manager. . . .140
Creating a Sound Demo. . . .147
Summary. . . .151
8 Extending the Content Pipeline 153 Creating a Skybox. . . .153
Creating the Skybox Content Object. . . .154
Creating the Skybox Processor. . . .154
Creating the Skybox Compiler. . . .162
Creating the Skybox Reader. . . .164
Using the Skybox. . . .165
Debugging the Content Pipeline Extension. . . .167
Summary. . . .168
Part IV 2D in XNA 9 2D Basics 171 Sprite Batches. . . .171
Sprite Blend Modes. . . .173
Sprite Sort Modes. . . .173
Save State Modes. . . .174
Practical Sprite Batches. . . .175
Splash or Loading Screen Demo. . . .176
Drawing Multiple Sprites from One Texture Demo. . . .178
Sprite Batch Blend and Sort Mode Demo. . . .179
Progress Bar Demo. . . .184
Using Sprite Fonts. . . .188
Importing Truetype Fonts. . . .188
Microsoft XNA Unleashed
Creating Bitmap Fonts. . . .189
Drawing 2D Text. . . .189
Summary. . . .190
10 2D Effects 191 Cel Animation. . . .191
Rotating and Scaling. . . .201
Blending Mode Example. . . .203
Fade to Color. . . .204
Making Fire Old School Style. . . .206
Explosions. . . .214
Summary. . . .216
11 Creating a 2D Game 217 Setting Up the Game Skeleton. . . .217
Creating Parallax Scrolling. . . .220
Switching States. . . .229
Drawing Our Hero. . . .230
Drawing Our Enemies. . . .235
Handling Collision Detection. . . .241
Winning and Losing. . . .243
Adding Transitions. . . .244
Adding Explosions. . . .247
Adding Sounds. . . .252
Summary. . . .252
Part V High Level Shader Language 12 HLSL Basics 255 Understanding the Shader Process. . . .257
HLSL Syntax. . . .258
Variable Types. . . .258
Semantics. . . .260
Structs. . . .260
Intrinsic Functions. . . .263
Loops and Conditions. . . .267
Vertext Shaders. . . .267
Pixel Shaders. . . .268
Techniques. . . .269
Passes. . . .269
Passing Application Data to the GPU. . . .270
HLSL Demo 270
13 Advanced HLSL 275
Vertex Displacement. . . .275
Postprocessing. . . .277
Setting Up Our Game Code. . . .277
Setting Up Our Effect Code. . . .280
More Postprocessing Examples. . . .281
Negative Image. . . .281
Switching RGB Values. . . .281
Sharpening the Image. . . .282
Blurring an Image. . . .282
Embossed. . . .283
Grayscale. . . .283
Chalk. . . .284
Wavy. . . .284
Summary. . . .285
Part VI Physics and Artificial Intelligence 14 Physics Basics 289 Kinesmatics. . . .289
Velocity. . . .290
Acceleration. . . .290
Force. . . .294
Collisions. . . .295
Momentum. . . .295
Impulse. . . .296
Conservation of Momentum. . . .296
Kinetic Energy. . . .296
Coefficient of Restitution. . . .296
Conservation of Kinetic Energy. . . .297
Solving Our Final Velocities. . . .297
Creating a Collision Response Demo. . . .297
Summary. . . .305
15 Finite State Machines and Game State Management 307 Finite State Machine. . . .307
Object-Oriented Design. . . .308
Managing Game States. . . .309
Managing Game States Demo. . . .312
Summary. . . .335
Microsoft XNA Unleashed
16 AI Algorithms 337
Setting Up Our Demo. . . .337
Chase Algorithm. . . .342
A Better Chase Algorithm. . . .343
Evading Algorithm. . . .344
Random Movement. . . .344
Creating a Finite State Machine. . . .346
Summary. . . .349
Part VII 3D Effects 17 Advanced Texturing Techniques 353 3D Lighting. . . .353
Creating a Custom Vertex Format. . . .353
Creating the Demo. . . .356
Ambient Lighting. . . .359
Directional Lighting. . . .361
Bump Mapping. . . .364
Normal Mapping. . . .365
Parallax Mapping. . . .369
Relief Mapping. . . .372
Texture Animation. . . .376
Summary. . . .378
18 Special Effects 379 Transitions. . . .379
Cross-Fade (Dissolve). . . .384
Directional Wipes. . . .385
Making Fire. . . .390
Summary. . . .396
19 Particle System 397 Particle System Defined. . . .397
Point Sprite Defined. . . .398
Creating the Particle Class. . . .398
Creating the VertexPointerSpriteStruct. . . .404
Creating the Particle System Engine. . . .405
Point Sprite Effect File. . . .414
Particle System Demo. . . .417
Creating Particle Effects. . . .420
Rain 420
Bubbles. . . .423
Laser Shield. . . .424
Laser Scanner. . . .426
Summary. . . .430
Part VIII Putting It Into Practice 20 Creating a 3D Game 433 Creating the Tunnel Vision Game. . . .433
Creating the Game States. . . .433
Adding a Skybox to Our Game. . . .434
Compiling the Game. . . .435
Creating the Game Logic. . . .435
Creating the Crosshair. . . .456
Creating the Game-Specific Camera. . . .457
Summary. . . .461
21 Improving the Game 463 Creating the Radar. . . .463
Creating the Tunnel. . . .465
Creating the Level Timer. . . .469
Creating the HUD. . . .471
Adding Scoring. . . .472
Keeping Track of High Scores. . . .474
Summary. . . .478
22 Finishing Touches 479 Updating the Title Screen. . . .479
Updating the Start Menu. . . .483
Creating the High Score Screen. . . .487
Updating the Options Menu. . . .492
Updating the Remaining States. . . .495
Using the Particle System. . . .495
Adding Sound. . . .497
Suggested Improvements. . . .499
Summary. . . .500
Index 501
Microsoft XNA Unleashed
Foreword
It’s hard to believe that it’s been so long since the first version of Managed DirectX was released in 2002. I sit in wonderment at how far we’ve come in such a short period of time. It wasn’t all that long ago when I was just some guy with a crazy idea that games could (and should!) be written in managed code. We released a preview of what would become known as “Managed DirectX” at the Game Developers Conference, and from that point on it’s been a non-stop thrill ride. People were excited, and everyone wanted to know if you could get the same kinds of benefits you get from managed code writing games as you do in Windows programming. People were worried about the performance aspects, many people simply didn’t believe. As time went on, though, more and more people started to realize the truth. There were a great number of benefits from using managed code, and the performance concerns were overblown.
Everyone began to notice, and soon I was leaving the DirectX team I had been with for so long and moving to a new team that was developing something vaguely called “XNA.” Since you have this book, I assume you know what that turned out to be (and if not, keep reading, you will soon enough)! The team had a vision of game development that could change the world. Everything I had hoped to achieve when I started out on this journey so many years ago was achieved and then some. We worked long, hard hours, but we got a release out for people to play with and we did it in record time. Now not only could you develop games that you played on your computer, you could also develop games you could play on your Xbox 360. Nothing like this had ever been done before and I felt honored to be a part of it.
Now, as then, I’m excited for the future of game development. When I see an author write a book like this, I get even more excited, and I hope you do as well. Whether you’ve never tried to write a game before, or you are simply looking for the “XNA way” of doing things, you’ll be pleased with what you find.
For me, I’m anxiously awaiting what the community can develop. I look forward to playing the next generation of amazing games. I get excited as I think of games that break the mold from all the same genres we see today, and do something completely original. I hope you will be the person writing them!
About the Author
Chad Carteris the CTO at Robertson Marketing Group (RMG). RMG services many
Dedication
Acknowledgments
There are a host of people responsible for making this book a reality. For starters, my wife was extremely supportive of me writing this book. There were many long hours, late nights, and missing weekends involved in this project and she handled all of the normal duties I typically attend to. There is absolutely no way this book could have been completed if it were not for her support! Christy, I love you. Thank you! I’d also like to thank Caleigh for being patient with her daddy when he had to stop playing and “work on the book.”
Next, I want to give praise to my Lord, God Almighty, who sustained me during these past few months to actually complete this book. I also need to thank the prayer partners and the Joshua’s Men group for their prayers for me as I took on this task.
Brian Wilson, a coworker and a friend, deserves a big thank you for helping me keep to the goals I set. Those Thursday meetings really motivated and inspired me! I look forward to reading your book, Brian!
Next, I’d like to thank Neil Rowe, the acquisitions editor at Sams Publishing. He agreed to work with me on this project and was my main point of contact at Sams. Although the original deadline was not met (partially due to the refresh version of the XNA Framework being released), there was never any major pressure from Neil. I’d like to also thank the rest of the Sams team that I had direct contact with on this project including Mark Renfrow, Cindy Teeters, Teresa Horton, Andrew Beaster, and Mary Sudul. I’d also like to thank the rest of the Sams team that I did not have any communication with but were behind the scenes making this book a reality. I’m looking forward to seeing those names on the first page of this book.
A big thank you goes out to Shawn Hargreaves, an XNA Framework developer at
Microsoft, who was the technical editor of this book. The book is definitely better because of his expertise! His blog can be found at http://blogs.msdn.com/shawnhar/. Even before he was the technical editor of this book, his blog and his forum answers helped me tremendously in learning this technology. I’m very thankful that Shawn was the technical editor of this book.
I’d like to thank all of the XNA Framework developers and Microsoft in general for making this great technology!
I’d like to thank the XNA community in general for all of the excellent tutorials and sample code that were produced in such a short amount of time. With a community like this, we really could be on the verge of YouTube for games!
My brother, Joshua Carter, recently joined the Army and is in boot camp as I write this. Having a brother serve our country brings me great joy and a tremendous amount of pride. Thank you and all of our troops for helping keep this country free.
We Want to Hear From You!
As the reader of this book, you are our most important critic and commentator. We value your opinion and want to know what we’re doing right, what we could do better, what areas you’d like to see us publish in, and any other words of wisdom you’re willing to pass our way.
As a senior acquisitions editor for Sams, I welcome your comments. You can fax, email, or write me directly to let me know what you did or didn’t like about this book[md]as well as what we can do to make our books stronger.
Please note that I cannot help you with technical problems related to the topic of this book, and that due to the high volume of mail I receive, I might not be able to reply to every message.
When you write, please be sure to include this book’s title and author as well as your name and phone or fax number. I will carefully review your comments and share them with the author and editors who worked on the book.
Email: [email protected]
Fax: 317-428-3310
Mail: Neil Rowe, Senior Acquisitions Editor Sams Publishing
Introduction
Many developers became interested in programming because they saw a video game and thought, “How did they do that?” This book helps demystify what is required to make video games. Being able to write games on a next-generation console like the Xbox 360 has never been an option for the masses before. Now with the XNA Framework, games can be written for the console.
By the end of the book, readers will have created two complete games and many demos along the way. This book takes a serious look at performance-related issues when writing games using XNA for Windows and the Xbox 360. It devotes two chapters to the High Level Shader Language (HLSL), which is a necessity for writing great games. It covers physics and artificial intelligence (AI). It also covers special effects, including explosions, transitions, and how to create a 3D particle system. It also demonstrates how to create a sound project using the Microsoft Cross-Platform Audio Tool (XACT) and how to inte-grate the sound into the game. Saving and loading a high score list and creating full menu system are also taught in this book. In general, this book contains a great founda-tion for many topics that need to be learned to create a full game.
Who Should Read This Book?
This book was written for developers. The reader should have a good understanding of programming in general. The book uses C#, but if the reader knows any modern language like C++, Java, or VB.NET he or she will have no problem understanding the code in this book. The book assumes some understanding of the Microsoft .NET Framework, as that is what the XNA Framework runs on. Without prior experience writing code using the .NET Framework, the reader might have to do a little research now and then, but should not have trouble reading this book.
2 Microsoft XNA Unleashed
Hardware and Software Requirements
The code in this book is compiled against the XNA Framework 1.0 Refresh. In order to complete the games and demos in this book the requirements that follow must be met.
Supported Operating Systems
The following operating systems are supported:• Windows XP Home Edition
• Windows XP Professional Edition
• Windows XP Media Center Edition
• Windows XP Tablet Edition
• Windows Vista Home Basic Edition
• Windows Vista Home Premium Edition
• Windows Vista Business Edition
• Windows Vista Enterprise Edition
• Windows Vista Ultimate Edition
Windows XP requires Service Pack 2 or later.
Hardware Requirements
When running XNA Framework games on Windows, a graphics card that supports Shader Model 1.1 is required. This book has samples that use Shader Model 2.0 and a couple that use Shader Model 3.0. To get the most from this book, a graphics card that supports Shader Model 3.0 is required. The graphics card should have the most up-to-date drivers. Updated drivers can be found on the graphics card’s hardware vendor Web sites.
When running XNA Framework games on the Xbox 360 console, a hard drive must be connected to the console.
Software Requirements
All of the software required to utilize the XNA Framework on Windows is free:
Microsoft Visual C# 2005 Express Edition
Microsoft XNA Game Studio Express
DirectX 9.0c
Introduction 3
Code Examples
PART I
Get Up and Running
with XNA on Your PC
and Xbox 360
IN THIS PART
CHAPTER 1
Introducing XNA and XNA
IN THIS CHAPTER
.What Is the XNA Framework?
.Installing Visual C# Express
.Installing the DirectX Runtime
.Installing XNA Game Studio Express
.Creating Spacewar Windows Project
.Compiling and Running Spacewar
CHAPTER
1
Introducing the XNA
Framework and XNA
Game Studio Express
M
ost developers I know decided to enter the computer field and specifically programming because of computer games. Game development can be one of the most chal-lenging disciplines of software engineering—it can also be the most rewarding!Never before has it been possible for the masses to create games for a game console, much less a next generation game console. We are coming in on the ground floor of a technology that is going to experience tremendous growth. Microsoft is leading the way into how content will be created for game consoles. Soon other game console manu-facturers will be jumping at a way to allow the public to create content for their machines. The great news for the Xbox 360 is that Microsoft has spent so much time over the years creating productive and stable development envi-ronments for programmers. We will be installing one of Microsoft’s latest integrated development environments (IDEs) in this chapter. Before we get to that, let’s take a look at the technology we discuss in this book—XNA.
What Is the XNA Framework?
8 CHAPTER 1 Introducing the XNA Framework and XNA Game Studio Express
The Foundation of the XNA Framework
Let’s take a journey back to the days of DOS on the PC. When programming games, graphic demos, and the like in DOS, programmers typically had to write low-level code to talk directly to the sound card, graphics cards, and input devices. This was tedious and the resulting code was error prone because different manufacturers would handle different BIOS interrupts, IO ports, and memory banks—well, differently, so the code would work on one system and not another.
Later, Microsoft released the Windows 95 operating system. Many game programmers were skeptical at writing games for Windows—and rightly so—because there was no way to get down to hardware level to do things that required a lot of speed. Windows 95 had a protected memory model that kept developers from directly accessing the low-level interrupts of the hardware.
To solve this problem, Microsoft created a technology called DirectX. It was actually called Windows Game SDK to begin with, but quickly switched names after a reporter poked fun at the API names DirectDraw, DirectSound, and DirectPlay, calling the SDK Direct “X.” Microsoft ran with the name and DirectX 1.0 was born a few months after Windows 95 was released. I remember working with DirectDraw for a couple of demos back when this technology first came out.
Because of DirectX, developers had a way to write games with one source that would work on all PCs regardless of their hardware. Hardware vendors were eager to work with Microsoft on standardizing an interface to access their hardware. They created device drivers to which DirectX would map its API, so all of the work that previously had to be done by game programmers was taken care of, and programmers could then spend their time doing what they wanted to—write games! Vendors called this a Hardware
Abstraction Layer (HAL). They also developed a Hardware Emulation Layer (HEL), which emulates hardware through software in case hardware isn’t present. Of course, this is slower but it allowed certain games to be run on machines with no special hardware.
After a couple of years Microsoft released DirectX 3.0, which ran on Windows NT 4 as well as Windows 95. As part of those upgrades, they introduced Direct3D. This allowed developers to create 3D objects inside of 3D worlds. DirectX 4 was never released, but DirectX 5 was released in 1997 and later had some upgrades to work under Windows 98.
When DirectX 8 came on the scene in 2000, some of the newly available graphics hard-ware had vertex and pixel shaders. As a result, Microsoft added in a way to pass custom program code to the hardware. Through assembly code, the game developer could manip-ulate the data the main game passed to the graphics card. This assembly code was
consumed directly by the graphics hardware.
What Is the XNA Framework? 9
1
This brings us to present-day DirectX: We are up to DirectX 9 and 10. Before I talk about DirectX 9, I spend some time talking about DirectX 10. DirectX 10 was released at the same time as Microsoft Windows Vista. In fact, DirectX 10 only works on Vista. This is largely due to the fact that Microsoft has made major changes in the driver model for this operating system. DirectX 10 also requires Shader Model 4.0 hardware.
The Xbox 360 runs on DirectX 9 plus some additional partial support for Shader Model 3.0 functionality. DirectX 9 is the foundation for Managed DirectX, an API that exposed the core DirectX functionality to .NET Framework developers. There was a lot of concern about whether this “wrapper” could be as fast as the C++ counterparts. Fortunately, it was almost as fast—about 98 percent was the benchmark touted. I experienced these bench-mark speeds firsthand while on the beta team for this technology. I fell in love with Managed DirectX.
The XNA Framework used the lessons learned from Managed DirectX and used that foun-dation as a launching pad. To be clear, XNA was built from the ground up and was not built on top of Managed DirectX. It didn’t use the same namespaces as Managed DirectX and is not simply pointing to the Managed DirectX methods in the background.
Although XNA utilizes DirectX 9 in the background, there are no references to DirectX’s API like there were in Managed DirectX.
XNA Today
XNA is actually a generic term much like the term .NET. XNA really refers to anything that Microsoft produces that relates to game developers. The XNA Framework is the API we are discussing. The final piece to XNA is the XNA Game Studio Express application, which we discuss in detail later. This is the IDE we use to develop our XNA games.
TIP
In this book, whenever we use the term XNA, we are really referring to the XNA Framework unless otherwise noted.
XNA allows us to do a lot of things. We have easy access to the input devices (keyboard, game pad or controller, mouse). XNA gives us easy access to the graphics hardware. We are able to easily control audio through XNA. XNA provides the ability for us to store information like high scores and even saved games. XNA does not currently have any networking capability. Microsoft wants to use the Xbox Live technology for adding network support to XNA. However, there is more work to be done to make sure Microsoft can provide multiplayer functionality in a secure manner.
10 CHAPTER 1 Introducing the XNA Framework and XNA Game Studio Express
graphics hardware that can support Shader Model 2.0 you can pick up a card relatively inexpensively for about $35 USD. If possible, you should purchase a graphics card that can support Shader Model 3.0, as a couple of examples at the end of the book require it.
At this point, games cannot be created for commercial use on the Xbox 360 but Microsoft has mentioned they are interested in supporting commercial games in future versions. Fortunately, we can create community games for the Xbox 360 with the Express versions.
XNA Game Studio Express is great for the game hobbyist, a student, or someone just getting started because you do not have to shell out a lot of (any!) money to get up and running. One exception to this is if you actually want to deploy your games on your Xbox 360. To do that, you will need to subscribe to the XNA Creators Club for $99 USD a year (or $49 USD for four months). Remember, writing games for the PC using XNA is totally free!
Oh, in case you are wondering what XNA stands for, XNA’s NotAcronymed (or so Microsoft says in the XNA FAQ).
Installing Visual C# Express
To get started, we must have the software installed. Let’s start by installing Visual C# Express. Visual C# Express is the IDE that is required to run XNA Game Studio Express. XNA requires C# due to how the Content Pipeline is used. There are some people who have successfully created demos using other languages such as VB.NET and even F#. However, this is not supported by Microsoft currently and won’t be discussed in this book. This book assumes you have a good understanding of C#. If you know C++, Java, or VB.NET, you should be able to pick up C# pretty quickly.
I am going to be detailed in the steps to make sure that anyone who has not worked with Visual C# Express will be able to get it installed with no issues. Feel free to skip this section if you already have Visual C# Express installed.
To install Visual C# Express, follow these steps:
1. You will need to be connected to the Internet to install the application. The applica-tion can be downloaded by browsing to
http://msdn.microsoft.com/vstudio/express/downloads/ and clicking the Visual C# Express Go button to download the vcssetup.exe setup program.
11
1
Installing Visual C# Express
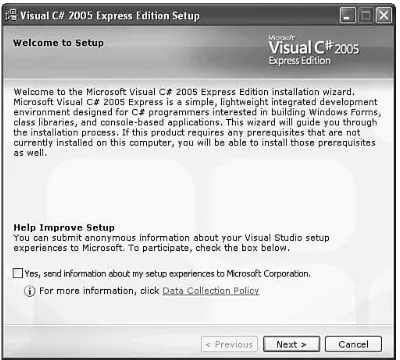
FIGURE 1.1 Select the check box if you want the system to provide feedback to Microsoft
about your installation experience.
3. Click Next to continue.
4. The next screen is the End-User License Agreement. If you accept the terms, select the check box and click Next.
5. The following screen, shown in Figure 1.2, has two installation options you can check. Neither of these options is required to utilize XNA.
CHAPTER 1 Introducing the XNA Framework
12
6. Click Next to continue.
7. The next screen, shown in Figure 1.3, asks where we would like to install Visual C# Express. It is going to install other required applications including Microsoft .NET Framework 2.0. This is required, as C# runs on the .NET Framework. You will also notice it requires more than 300MB of space.
8. Click Next to continue.
FIGURE 1.3 Specify which directory you want Visual C# Express to be installed in.
9. Now we are looking at the Installation Progress screen where we will be able to monitor the progress of the installation.
10. Finally, on the Setup Complete screen we can see the Windows Update link we can click on to get any of the latest service packs for Visual C# Express.
11. Click Exit to complete the installation.
Installing Visual C# Express 13
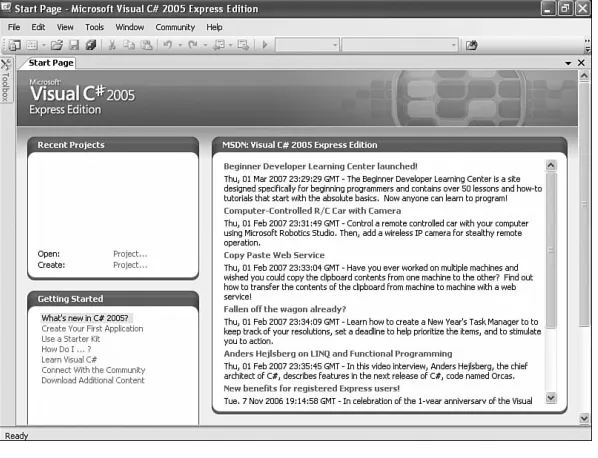
1
FIGURE 1.4 This is the Start Page inside of Visual C# Express.
The following procedure is optional, but it does ensure that everything is working correctly on our machine.
1. In the Recent Projects section, find Create Project and click the link. You can also create a new project under the File menu.
2. Visual C# Express installed several default templates that we can choose from. Select the Windows Application template as displayed in Figure 1.5.
CHAPTER 1 Introducing the XNA Framework
14
4. Click OK to create the application.
At this point a new project should have been created and we should be looking at a blank Windows Form called Form1.
5. Press Ctrl+F5 or click Start Without Debugging on the Debug menu.
If everything compiled correctly, the form we just saw in design mode should actually be running. Granted, it doesn’t do anything, but it does prove that we can compile and run C# through Visual C# Express. The end result can be seen in Figure 1.6. Let’s close down the application we just created as well as Visual C# Express. Feel free to discard the application.
FIGURE 1.6 This is a C# Windows Form application after compiling and running the default
template.
Installing the DirectX Runtime
We also need the DirectX 9 runtime if it isn’t already on the machine. To get started, follow these steps:
1. Run the dxwebsetup.exe file from Microsoft’s website. This can be found by click-ing on the DirectX Runtime Web Installer link at the bottom of the Creator’s Club Resources—Essentials web page http://creators.xna.com/Resources/Essentials.aspx. This file contains the redistribution package of the February 2007 DirectX 9. You will need to be connected to the Internet so it can completely install the application.
2. We are greeted with the End-User License Agreement. Handle with care.
3. The next screen is a dialog box asking where we would like the installation files to be stored. We can pick any directory we want as long as we remember it so we can actually install the runtime—we are simply extracting the files needed to install the runtime.
5. We will be prompted to create that directory if the directory entered doesn’t exist. Click Yes to continue.
6. Wait for the dialog box with the progress bar to finish unpacking the files. Now we can actually install the runtime by following these steps:
1. Browse to the folder where we installed the files and run the dxsetup.exe file to actually install DirectX 9 onto the machine.
2. The welcome screen we see includes the End-User License Agreement. Select the appropriate radio button to continue.
3. Following the agreement is a screen stating that it will install DirectX—click Next.
4. Once it finishes installing (a progress bar will be visible while it is installing the files) we will be presented with the Installation Complete screen.
5. Simply click Finish to exit the setup.
Now, we can move on to installing XNA Game Studio Express.
Installing XNA Game Studio Express
To use XNA Game Studio Express we must use Visual C# Express. We cannot use Visual Studio .NET Professional nor can we use any other IDE. Although there are people who have successfully been able to run XNA and even get the Content Pipeline (which we talk about in Part III of the book) to work in Visual Studio .NET Professional, it is not officially supported by Microsoft and is not covered in this book.
WARNING
You must run the Visual C# Express IDE at least one time before installing XNA Game Studio Express. If this is not done, not all of the functionality will be installed. If XNA Game Studio Express was installed prematurely, you will need to uninstall XNA Game Studio Express and run Visual C# Express and then exit the IDE. Then you will be able to reinstall XNA Game Studio Express.
To get started complete the following steps:
1. Run the xnagse_setup.msi file from Microsoft’s website. The file can be downloaded by clicking on the top link of the Creator’s Club Resources—Essentials web site http://creators.xna.com/Resources/Essentials.aspx.
2. Click Next to get past the setup welcome screen.
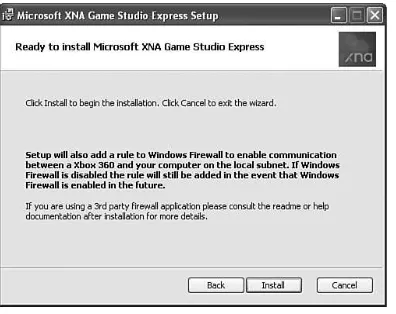
3. The next screen is the End-User License Agreement. If you accept the terms, select the check box and click Next.
4. This will open up a notification dialog box that explains that the Windows Firewall will have a rule added to it to allow communication between the computer and the Installing XNA Game Studio Express 15
FIGURE 1.7 XNA Game Studio Express modifies the Windows Firewall so an Xbox 360 and the PC can talk to each other.
5. Click Install to continue. The next screen shows the progress of the installation.
6. Once it has completed installing all of the required files we will be presented with the completion dialog box. Simply click Finish to exit the setup.
After we have installed XNA Game Studio Express, we can go to the Start menu and see it added a few more items than those contained in the IDE. Make sure to take time and read through some of the XNA Game Studio Express documentation. There is also a Tools folder that contains a couple of tools we will be looking at later. We will be discussing the XACT tool in Chapter 6, “Loading and Texturing 3D Objects,” and the XNA Framework Remote Performance Monitor for Xbox 360 application in Chapter 3, “Performance Considerations.” Go ahead and open the IDE by clicking XNA Game Studio Express on the Start menu.
Hmm, this looks identical to the Visual C# Express IDE. There is a good reason for this—it is the same application! When we installed XNA Game Studio Express it added properties to Visual C# Express to allow it to behave differently under certain circumstances. Mainly it added some templates, which we will look at shortly, and it added the ability for Visual C# Express to handle content via the XNA Content Pipeline. It also added a way for us to send data to our Xbox 360, as we will see in the next chapter.
TIP
If you ever uninstall XNA Game Studio Express, you will need to uninstall Visual C# Express first. Otherwise, XNA Game Studio Express will not properly uninstall.
CHAPTER 1 Introducing the XNA Framework and XNA Game Studio Express
Creating Spacewar Windows Project
With XNA Game Studio Express opened, create a new project and we should see a screen similar to Figure 1.8. Select the Spacewar Windows Starter Kit template and feel free to change the name of the project. Click OK to create the project.
Summary 17
1
FIGURE 1.8 We can see that installing XNA Game Studio Express added six more templates
to Visual C# Express.
Compiling and Running Spacewar
At this point we have our software installed and have even created a starter template that was created by Microsoft that we can take for a spin. We need to make sure we can compile the code. To just compile without running we can press Ctrl+Shift+B or press F6 or click Build Solution on the Build menu. It should have compiled without any issues. You can now press Ctrl+F5 to actually run the game. Have some fun playing the game. Feel free to look around the code and tweak it. Fortunately, you can always re-create the template if something gets really messed up!
Summary
IN THIS CHAPTER
.Creating Spacewar Xbox 360 Project
.Buying the XNA Creators Club Subscription
.Connecting the Xbox 360 to the PC
.Deploying on the Xbox 360
.Debugging on the Xbox 360
.Creating a Test Demo for the Xbox 360
.Programming for Dual Platforms
.The .NET Compact Framework on the Xbox 360
CHAPTER
2
XNA and the Xbox 360
X
NA allows us to write games for the Xbox 360, but an Xbox 360 is not required to enjoy XNA. We can write games strictly for the PC. However, if we do want to write games that we can play on our Xbox 360 and share with others to play on their consoles, we need to purchase the XNA Creators Club subscription. Of course, this will also allow us to play other community games (which other developers create) on our Xbox 360 as well.Creating Spacewar Xbox 360
Project
With XNA Game Studio Express opened, we can follow these steps to create a Spacewar project that can run on the Xbox 360:
1. Create a new project, and we should see a screen similar to Figure 2.1.
FIGURE 2.1 XNA Game Studio Express provides templates
20 CHAPTER 2 XNA and the Xbox 360
2. Select the Spacewar Xbox 360 Starter Kit template and change the name of the project if desired.
3. Click OK to create the project.
Buying the XNA Creators Club Subscription
We need an Internet connection because we need to be connected to Xbox Live to deploy our games from our PC to our Xbox 360 console. To purchase the subscription we need to go to the Xbox Live blade in the Xbox 360 dashboard and complete the following steps:
1. Select the Xbox Live Marketplace and then select Games.
2. Go to All Game Downloads and hold down the right trigger to page down to the end of the games.
3. There toward the bottom we see XNA Creators Club. Select this entry as shown in Figure 2.2.
CAN’T FIND THE XNA CREATORS CLUB GAME ENTRY?
If you do not see the XNA Creators Club entry it is most likely because of the parental controls that are set up. XNA Creators Club is unrated, which means that we will have to select Allow All Games. Fortunately, we can then change your parental controls to the setting we had before once we have subscribed and downloaded the XNA Game Launcher. Then we will need to enter a valid pass code to actually run the XNA Game Launcher.
4. Now select Memberships and pick a plan to purchase.
5. Follow the instructions to enter the appropriate billing information. After entering the billing information, confirm to purchase the plan selected.
6. Under XNA Creators Club, select and download the XNA Game Launcher applica-tion.
7. Once the XNA Game Launcher is downloaded, go to Games Blade and click Demos and More as shown in Figure 2.3.
Buying the XNA Creators Club Subscription 21
2
FIGURE 2.3 Demos and More not only allows us to play demos, but it also lets us navigate
to the XNA Game Launcher.
Connecting the Xbox 360 to the PC
We have the subscription, but we also need to associate the Xbox 360 with the PC. To do this, follow these steps:
1. Go to the XNA Game Launcher’s Settings menu and select Generate Connection Key. This will create an encryption key that needs to be entered into XNA Game Studio Express.
2. Choose Accept New Key inside of the XNA Game Launcher.
3. Close the Settings menu and choose Connect to Computer. This screen can be seen in Figure 2.4.
CHAPTER 2 XNA and the Xbox 360
22
FIGURE 2.4 The XNA Game Launcher allows us to connect to our PC so we can deploy our
games.
4. Inside of XNA Game Studio Express, go to Options on the Tools menu. The Options dialog box will open.
5. Select the XNA Game Studio Express Xbox 360 option and click Add.
6. Type the name of the Xbox 360 (this can be anything) and then type the connec-tion key in the spaces provided. An example of this screen is shown in Figure 2.5.
7. Click Test Connection. If everything is successful, XNA Game Studio Express will save the connection key. It is important that the Xbox 360 and the development and deployment PC are on the same subnet. For example, if one is on a wireless router and the other on a wired router, there will be connection issues.
8. Click OK.
9. Click OK to close the Options dialog box.
FIGURE 2.5 Associate the Xbox 360 to the PC by entering the connection key generated on the Xbox 360 into XNA Game Studio.
Deploying on the Xbox 360
To deploy on our Xbox 360, we need to perform the following steps:
1. Click Connect to Computer inside of the XNA Game Launcher on the Xbox 360. (If continuing from the previous step then the Xbox 360 is already in this waiting state.)
2. Go back inside of XNA Game Studio Express on the PC and select Deploy Solution from the Debug menu.
3. The Xbox 360 will start receiving the files needed to run the application.
DEPLOYING CONTENT ON THE XBOX 360
Deploying on the Xbox 360 takes a little bit of time, depending on how much content needs to be sent over the wire. The good news is that if content does not change then it does not get sent over again, so we are only waiting on the items we actually changed. There are a couple of times even after the first deployment that content will be resent to the Xbox 360.
1. While deploying, if an error occurs or if the deployment is stopped for any reason, the next time the project is deployed it will be a complete deployment.
2. If the configuration is different from the last deployment, a complete deployment Deploying on the Xbox 360 23
When the files have been fully deployed, the Xbox 360 will revert back to Waiting for computer connection, as seen in Figure 2.6. Also, in XNA Game Studio Express we should see the message Deploy Succeeded in the status bar.
CHAPTER 2 XNA and the Xbox 360
24
FIGURE 2.6 Before and after deploying a game to the Xbox 360, the XNA Game Launcher
shows that it is Waiting for computer connection.
To actually play the game we just deployed on the Xbox 360, simply exit out of the connection screen and then select My XNA Games inside the XNA Game Launcher. We should now see Spacewar as a game that is installed. Select it and then select Play and enjoy the game on the Xbox 360!
STOP THE FIGHTING—QUITTING SPACEWAR
To exit the Spacewar game, go to the main menu by pressing Start and then press the Back button on the game pad.
DISTRIBUTING YOUR GAME
Not only can we deploy our games to our own Xbox 360, we can distribute our game so that others can enjoy our game on their Xbox 360 consoles or their Windows PCs. We can distribute our source code or we can package up our game and content and just distribute the package.
When consumers get the package, they will need an active XNA Creators Club
Game Studio Express installed, they will need the XNA Framework as well as certain DirectX 9 files. For more information, please refer to the XNA Game Studio Express documentation. Information can be found in the “Sharing and Distributing Your Game” section under the “Using XNA Game Studio Express” section of the help.
Debugging on the Xbox 360
Without too much pain we were able to get a game running on the Xbox 360. Now comes this question: How hard is it to debug games deployed on the Xbox 360? Well, we will answer that question in this section.
To get started we need to run the XNA Game Launcher and connect to our computer as previously described. Once the console is waiting on a connection, we can press F10 to step into our Spacewar game.
STEPPING THROUGH THE CODE
Make sure you have set the active solution configuration to Debug to step through the code on your Xbox 360.
Follow these steps for this exercise:
1. Open the SpacewarGame.cs file.
2. Put a breakpoint in the first line of code under the constructor.
3. Press F5 to run the application in debug mode.
Visual C# Express will do as expected and stop the code at the appropriate line. We can see that the console has a black screen because it hasn’t been told to draw anything yet, as we are holding up the process with our breakpoint. Press F5 to let the game run. When finished with the game, we can close out the Spacewar template.
Creating a Test Demo for the Xbox 360
We are going to create a simple application we can deploy and then debug on the Xbox 360. To get started we need to create another project, but this time we will use the Xbox 360 Game template to start with.
To deploy a game to the Xbox 360, the template created a file called AssemblyInfo.cs. The Windows Game template also creates this file but it holds a little more importance for Xbox 360 games. Once we open this file we can see an attribute called AssemblyTitle. This attribute determines what is displayed under My XNA Games in the XNA Game Launcher on the Xbox 360. Unless overridden by the Windows.Titleproperty through code, this attribute is also used to populate the title of the window in Windows. OverridingWindows.Titlehas no effect on the Xbox 360.
Creating a Test Demo for the Xbox 360 25
Not only can we change the title attribute, but we can (and should) also change the description attribute called AssemblyDescription. For Windows, this shows up if someone right-clicks the executable and looks at its properties. For the Xbox 360 it shows up in a nice panel carved out just for it inside of the XNA Game Launcher—very cool! There is a 300-character limit on the description. Anything over 300 characters will be truncated and not displayed inside the XNA Game Launcher.
Another thing to note in this code file is the attribute Guid. Although the source code comment above this attribute suggests that its only use is for COM, it is actually needed to deploy games to the Xbox 360 as well. Make sure you have a unique globally unique identifier (GUID) for all of the games you create. Fortunately, Visual C# Express does this automatically when it creates the file. As long as our project contains the AssemblyInfo.cs source file we will be able to deploy the application to the Xbox 360.
After changing the assembly title and description we can then press F5 (we need to make sure that the console is waiting for a computer connection) to run the demo on the Xbox 360. On the console we should see a nice blank cornflower blue screen. To exit the demo we only need to press the Back button on the controller. If we did not set the console to be waiting for a computer connection then Visual C# Express will time out trying to deploy the application.
It is easy to just gloss over how simple it was to create a graphics application and deploy it on the Xbox 360. This was not always the case. Just to get this screen up in a Windows environment was challenging in the days before XNA (even with Managed DirectX). We just witnessed how easy it is to get a framework set up, complete with a game loop and that talks to the graphics device.
Our game is now in the XNA Game Launcher’s list of games. Simply exit the connection screen and then enter My XNA Games. Now we see a list of the games we have
deployed—Spacewar and this demo. In Figure 2.7 we can see that the XNA Game Launcher extracted the title and description from the assembly we deployed.
We talk about Sprite Batches in detail in Part IV of the book where we will discuss 2D in XNA, but to start a debugging exercise we will want to add the following member fields to the top of our class:
private SpriteBatch spriteBatch; private Texture2D spriteTexture;
Locate the LoadGraphicsContentmethod and inside of the condition block add the following code:
spriteBatch = new SpriteBatch(this.graphics.GraphicsDevice); spriteTexture = content.Load<Texture2D>(“texture”);
Find an image (.jpg, .bmp, or .tga) and add it into the project. Feel free to use a texture from the Spacewar game folder we created. After the file is added into the project, change the Asset Name in the properties panel to texture. We discuss all of these items in detail in later chapters, so you do not need to worry about any of the details at this point.
CHAPTER 2 XNA and the Xbox 360
FIGURE 2.7 XNA Game Launcher reads the title and description values entered in the AssemblyInfo.cs file of the XNA applications we deploy.
Finally, add the following code inside of the Drawmethod under the TODO: Add your drawing code herecomment.
spriteBatch.Begin();
spriteBatch.Draw(texture, Vector2.Zero, Color.White); spriteBatch.End();
We simply added a texture that will be displayed at the top left corner of our screen. Let’s compile and deploy our changes. Once we have completed that task we can put a break-point on spriteBatch.Begin()and run the project in debug mode. We need to make sure our Xbox 360 is waiting for a connection before we try to deploy.
When the application is finished deploying we can see the lovely black screen as we haven’t let it get into the Drawmethod. Press F5 to let it process the Drawmethod once and then take a look at the Xbox 360 screen. We now have our blue screen with the texture we loaded at the top left. We do not need to labor the point of stepping through more code, as we know we will have plenty of opportunity to debug our code as we progress in our game writing journey. We can remove the breakpoint and exit the demo.
The .NET Framework has a System.Diagnosticsnamespace that is also available on the Xbox 360. This namespace includes a Debugclass that includes, among other things, the
WriteandWriteLinemethods. Let’s add the following code to the end of the condition inside of the LoadGraphicsContentmethod:
Creating a Test Demo for the Xbox 360 27
While we are at it, we should add this line of code inside of the UnloadGraphicsContent
method:
System.Diagnostics.Debug.WriteLine(“game content unloaded”);
That line of code can be put right after the call to unload our content.
We can recompile, deploy, and run the changes on our Xbox 360. We can see inside of the output window of XNA Game Studio the text was printed out! Now we can capture data to our IDE if something is really puzzling us or if we just want to dump data during the game play—a manual log of sorts.
We can set breaks inside of our code and step through pieces of code even while it is running on the console. We can also write information to our output window inside of the IDE while the game is running on the Xbox 360. Wow!
Programming for Dual Platforms
There is something else we need to discuss as we continue our adventure of writing games for the Xbox 360. We need to share as much code as possible for our Xbox 360 game as well as our Windows PC game. Although it is perfectly acceptable to exclusively build applications for one platform or the other, with the XNA Framework it is not that much of a technical jump to use the same code base on both platforms.
With that being said, there are valid reasons why certain developers only target one system or the other. Some developers do not own an Xbox 360 and that is a pretty good reason not to write games for it—it is difficult to debug on a platform without access to it. Some developers require additional components to be present with their game that cannot be installed on the Xbox 360. Some want network support and will roll their own because there is no support for Xbox Live through XNA yet. Some only want to fine tune their game for the Xbox 360 hardware and not worry about the different graphic cards and other PC configurations that their games would need to support.
The goal of this section is to allow us to write one code base that we can easily maintain to work on both platforms. We could start the process by creating a Windows project and then creating an Xbox 360 project that shares the same files. Instead, we will start with the Xbox 360 demo we just created and add a Windows project to the solution. We cannot support both platforms inside of one project but we can support both platforms inside of one solution. We could also create two different solutions and just link the files from one solution to the other—this is what Microsoft currently suggests. However, in this book we will have one solution with two projects that share the same source code location. The idea here is that we can quickly compile our changes in both solutions at the same time. We do this because we want to make sure that we have not added calls to methods that do not exist in the platform we were not actively coding for. We discuss this in more detail in the next section.
Follow these steps to create our Windows Game project inside of our current solution that already contains our Xbox Game project:
1. Right-click the Solution and select Add and New Project from the context menu.
2. Select the Windows Game template and click OK. This will create a subfolder inside the solution with the name of the new project.
CHAPTER 2 XNA and the Xbox 360
3. Close Visual C# Express.
4. Through the file system, move the WindowsGame1.csproj file from the subfolder into the Xbox360Game1 subfolder. Do not move it to the parent folder where the solution file is located.
5. Edit the Xbox360Game1.sln solution file in the parent folder. This can be done through Notepad or another text editor.
6. Find the line toward the top of the file that references the project you just created. Change the line of text so it will reference the new location of the project you just moved. For example, change
Project(“{FAEA4EC0-301F-11D3-BF4B-00C34F79EFBC}”) = “WindowsGame1”, “
➥ WindowsGame1\WindowsGame1.csproj”, “{F6F0F4BF-D9C6-46DA-8160-C7D5CB702FAE}”
to
Project(“{FAEA4EC0-301F-11D3-BF4B-00C34F79EFBC}”) = “WindowsGame1”,
➥ “Xbox360Game1\WindowsGame1.csproj”, “{F6F0F4BF-D9C6-46DA-8160-C7D5CB702FAE}”
7. Save the solution file.
8. Move any Windows-specific files created to the same folder where the project file resides. In this case, we need to move the Game.ico file.
9. Delete the WindowsGame1 subfolder.
10. Open the solution file.
We can see that the solution platforms drop-down list box (located in the Visual C# Express toolbar) now has Mixed Platforms as its selection. This allows us to quickly build, deploy, and run our projects at one time, or we can choose to only work on one platform at a time. Let’s set the Windows project as our starting project. This can be done by right-clicking the WindowsGame1 project and selecting Set as StartUp Project. Let’s change the solution plat-form to x86. Currently, XNA does not support 64-bit systems. To make sure we have every-thing set up properly, we need to run the application. We can do this by pressing F5.
TWO HEADS ARE BETTER THAN ONE: IS THE SAME TRUE ABOUT SOLUTION FILES?
An alternative to having two projects in one solution is creating two individual solutions and linking the files. This is what Microsoft suggests. It is really just a personal prefer-ence. The upside to two solutions is that no outside editing in a text editor is required for the solution file. The downside to two solutions is that we would need our machine to use resources to have two Visual C# Express applications loaded for each solution if we wanted to check if changes affected either of the solutions. Regardless if we use one solution or two, when we add files to one project we need to get the other project to recognize them. If we are using two solutions we can add a link to the file as shown in Figure 2.8. If we are using one solution with two projects we can display all files and then right-click and include the file that was recently added in the other project. We could also drag the files from one project to the other inside of the Solution Explorer.
Programming for Dual Platforms 29
FIGURE 2.8 To add a linked file into a solution we click on the small down arrow beside the Add button in the Add Existing Item dialog box and then click Add As Link.
Visual C# Express compiled and ran the Windows version of the demo and did not bother compiling the Xbox 360 version, which is what we were expecting. Expand the references tree node for both projects. We can see the two XNA references the templates provided us when we set up the projects. If we look at the paths in the properties panel we will see that they are located in two different places. Appropriately, the Windows reference points to\Windows\x86\and the console reference points to \Xbox360\. This is the reason we need to have two separate projects.
The solution platform drop-down list box tells the Visual C# Express which platforms to compile (and deploy). The project setting Set as StartUp Project tells the IDE which project to run. We cannot run both the executable for Windows and the Xbox 360 at the same time. This really would not be beneficial to us anyway because we could not tell the IDE which application we wanted to break into when debugging. If for some reason we did want to do this then we should go with the two solutions and linked files approach. See the sidebar earlier in this chapter, “Two Heads Are Better Than One: Is the Same True About Solution Files?”
Because the two projects have different references of the XNA Framework we will run into the issue of having functionality in one system and not the other. An example of this is that the Xbox 360 does not have any support for the mouse. Fortunately, we do not have to create and maintain two separate code files for situations like this. Instead we can use a preprocessor directive to tell the compiler to ignore parts of our code if it is compiling for a certain platform. The following code shows an example of compiling functionality specific to Xbox 360:
#if XBOX360
//do Xbox 360 specific code here #endif
The following code shows an example of compiling a Windows-specific functionality: CHAPTER 2 XNA and the Xbox 360
#if !XBOX360
//do Windows specific code here #endif
This means we can keep our code in one file and put a conditional preprocessor directive around the code we need to handle differently based on a particular platform. Of course, we can opt to create a totally separate file that would be included in one project but not the other. The key is that we have a choice and it will make sense to do it both ways in a larger project. An example would be a large input handler class that might have its own Mouse source file that would be included in the Windows project and excluded from the Xbox 360 project. The main game loop that checks a particular input value might have the condition in place to ignore the mouse information unless it is being compiled for Windows.
The last thing we need to talk about in this section is the difference between PC monitors and television sets. On PC monitors the developers have confidence that any objects they draw on the screen from the top left corner to the bottom right will be seen by the gamer. When developing for a console like the Xbox 360 developers have to account for the fact that not all TVs are created equal. When drawing to a television screen, we need to be aware of two items in particular: aspect ratio and the title safe area. We talk about the aspect ratio in Chapter 4, “Creating 3D Objects.” The title safe area is the area of the screen that the user will definitely be able to see. This is the inner 80 percent or 90 percent area of the TV screen. It is beneficial to put any critical text (like a title), game scores, timers, and the like inside of this title safe area while filling all of the screen with our environment. Following is a method taken directly from the XNA Game Studio Express documentation that allows us to easily calculate the title safe area:
private Rectangle GetTitleSafeArea(float percent) {
Rectangle retval = new Rectangle(graphics.GraphicsDevice.Viewport.X, graphics.GraphicsDevice.Viewport.Y,
graphics.GraphicsDevice.Viewport.Width, graphics.GraphicsDevice.Viewport.Height); #if XBOX360
// Find Title Safe area of Xbox 360 float border = (1 - percent) / 2; retval.X = (int)(border * retval.Width); retval.Y = (int)(border * retval.Height); retval.Width = (int)(percent * retval.Width); retval.Height = (int)(percent * retval.Height); return retval;
#else
return retval; #endif
}
We can see in this code we use a conditional compilation directive as mentioned earlier. This code simply takes in a percentage—we could pass in either .8 or .9 to let it calculate the title safe area. It only does the calculation if it is compiling for the Xbox 360,
other-Programming for Dual Platforms 31
We can add this method to our demo we created. We can also add the following private member field:
private Rectangle titleSafeArea;
We can assign a value to this rectangle by adding the following code to the top of the
LoadGraphicsContentmethod:
titleSafeArea = GetTitleSafeArea(.80f);
By passing in .80 we are stating we want the inner 80 percent of the screen. Now we can edit our code that draws the texture. We do not need to worry about the details of the graphic portion of this code as we will cover it later, but we do want to replace the
spriteBatch.Drawline of code with the following line:
spriteBatch.Draw(texture, new Vector2(titleSafeArea.X, titleSafeArea.Y),
➥ Color.White);
We told the texture to not render at coordinates 0, 0 (top left of the screen) which is what
Vector2.Zerotold it to do but instead we used the x and y coordinates from the title safe rectangle we retrieved at the beginning of the program. When we run this on Windows, the x and y coordinates will still be 0, but when we run it on the Xbox 360 we will see that it is offset to make up for televisions that do not display all of the screen. We can see an example of this in Figure 2.9.
CHAPTER 2 XNA and the Xbox 360
32
The .NET Compact Framework on the Xbox 360
We need to discuss another difference between developing for the Xbox 360 and develop-ing for Windows. The difference is the version of the .NET Framework the two platforms are running. Windows runs on the full-blown .NET Framework (2.0 is required for XNA), whereas the Xbox 360 runs on the smaller .NET Compact Framework. The .NET Compact Framework is used in certain Windows CE powered devices such as the Pocket PC, Pocket PC Phone Edition, and Smartphone. As the name implies, it is compact—not only because the devices it typically runs on are compact, but also because the framework itself is a subset of what is available on the desktop. What this means from an Xbox 360 devel-opment point of view is that we need to make sure that if we are accessing functionality on the .NET Framework in our code that it also exists in the .NET Compact Framework. Fortunately, the two versions of the XNA Framework each of our projects has a reference to is utilizing the correct .NET Framework, so as long as we keep those references correctly set up, we will get compile errors in our Xbox 360 game if we try to access functionality that is not in the .NET Compact Framework.
The Xbox 360 version of the .NET Compact Framework actually includes items that are not in the other compact devices framework. The console’s .NET Compact Framework also includes a few things that the .NET Framework doesn’t include. This is mainly due to the type of hardware that is inside of the Xbox 360.
The XNA team at Microsoft worked closely with the Visual Studio team to accomplish the tight integration with Visual C# Express but they also worked very closely with the .NET Compact Framework team to make sure that we could do what we want—make games for the Xbox 360! Without the .NET Compact Framework team, XNA would not work on the Xbox 360.
The .NET Compact Framework team had to add in floating point support as the other hardware the framework previously targeted did not have floating point hardware. They also added support for four of the six hardware threads that map to the Xbox 360’s three cores—the other two threads (0 and 2) are reserved. This is something that is not currently available on the desktop, as there are not currently any workstations that have this type of hardware configuration. This book does not cover multithreading but the concepts from typical .NET programming will apply if you choose to tackle that task. In addition, information about the Thread.SetProcessorAffinitymethod will prove to be beneficial.
Summary
This chapter was all about the Xbox 360. We discussed how to buy an XNA Creators Club subscription through Xbox Live. We saw how to download and run the XNA Game Launcher so we could deploy our games on our console.
We created the Spacewar project to run on the Xbox 360. We then deployed and
debugged the project on the console. We also created a new Xbox 360 demo starting with the most basic template and discussed important attributes in the AssemblyInfo.cs code
Summary 33
inside of the Xbox 360. We also learned about the XBOX360 preprocessor compilation directive and how it can keep the compiler from compiling code for different platforms.
We discussed different ways to set up our projects so we can more easily use the same code base for both our Windows and Xbox 360 projects. Finally, we discussed the .NET Compact Framework that the XNA Framework utilizes on the Xbox 360.
Go play some games and then we can continue our journey into the next chapter, where we discuss ways to make our XNA games perform well in Windows and on the Xbox 360.
CHAPTER 2 XNA and the Xbox 360
IN THIS CHAPTER
.Measure, Measure, Measure
.Managing Memory
.Understanding the Garbage Collector
.Optimization Suggestions
CHAPTER
3
Performance
Considerations
To be successful at writing games we have to be very aware of the expense of the different tasks we want to perform. Before we write our code we need to have an end goal we are striving to reach. As Stephen Covey stated in his book The 7 Habits of Highly Effective People,we need to “Begin with the end in mind.” This is crucial for personal growth, but it is also very important when thinking about perfor-mance. As software engineers we need to have goals and then continue to measure against those goals as we develop our code. The “end” can change and we need to adjust accordingly.
In this chapter we look at ways to measure how fast our code is running. We discuss key elements to performance tuning when running on the .NET Framework and also on the .NET Compact Framework the Xbox 360 uses.
Measure, Measure, Measure
The title of this section really says it all. In real estate they say what matters is location, location, location. In the performance realm, measuring is what really matters. How else can we know if we are meeting our goals if we do not first take the time to measure along the way?
Before we start writing code we need to take a bench-mark measurement. Then we can see as we add functional-ity whether or not we are adversely affecting our perfor-mance goals.