•
•
•
•
•
•
in the iOS World
Developing C# Apps
for
iPhone
and
iPad
using
MonoTouch
iOS Apps Development for .NET Developers
Contents at a Glance
Contents ... v
About the Author ... xiv
About the Technical Reviewer ... xv
Acknowledgments ... xvi
Preface ... xvii
■
Chapter 1: Getting Started with MonoTouch ... 1
■
Chapter 2: Our First Application ... 11
■
Chapter 3: Creating Multi-Screen Applications Using the MVC Pattern ... 43
■
Chapter 4: iPad and Universal (iPhone/iPad) Applications ... 59
■
Chapter 5: More on Views and Controllers ... 73
■
Chapter 6: Introduction to Controls ... 93
■
Chapter 7: Standard Controls ... 107
■
Chapter 8: Content Controls ... 155
■
Chapter 9: Working with Tables ... 193
■
Chapter 10: Working with Keyboards ... 223
■
Chapter 11: Multitasking ... 233
■
Chapter 12: Working with Touch ... 247
■
Chapter 13: Working with Shared Resources ... 271
■
Chapter 14: User and Application Settings ... 303
■
Chapter 15: Working with CoreLocation ... 321
■
Chapter 16: Drawing with CoreGraphics ... 331
■
Chapter 17: Core Animation ... 361
■
Chapter 18: Notifications ... 377
■
Chapter 19: Working with Data ... 393
■
Chapter 20: Publishing to the App Store ... 407
■
Chapter 21: Third-Party Libraries ... 419
■
Chapter 22: Using Objective-C Libraries and Code ... 433
Chapter
Getting Started with
MonoTouch
When most people think about developing applications for the iPhone, iPad, or iPod Touch, they think of writing applications in a low-level language like Objective-C. But the truth is, as the iOS ecosystem has matured, a number of ways to develop apps for it has emerged.
The reason is largely developer-driven. For many developers, learning Objective-C was seen as a huge barrier to entry. For .NET developers, many of whom have never had to worry about memory management, pointers, and other C language concepts,
Objective-C also forced on them many responsibilities that they were unfamiliar with. Many also feel that the tools for developing in Objective-C are lacking. Apple’s XCode Integrated Development Environment (IDE) lacks many of the features found in other modern IDEs, such as Visual Studio.
All this has changed, however, as more players have entered the iOS space. In addition to MonoTouch, Adobe has entered it with Flash CS5, and Unityfor the iOS powers some of the best-selling games available on the iPhone and iPad.
The MonoTouch framework itself is part of Novell’s Mono project. The Mono project is an open-source implementation of the Microsoft .NET platform published standards. It allows you to run .NET applications on nearly any platform, including Apple, FreeBSD, Linux, Unix, and others.
MonoTouch was introduced in the fall of 2009, and extends Mono by allowing you to write applications using C# and the .NET platform Base Class Library (BCL) that run on the iOS, using Cocoa Touch’s UIKit API.
MonoTouch is an extremely powerful way to write applications for the iOS because it combines a number of features:
Ability to call Objective-C, C, and C++:MonoTouch harnesses all the power of low-level languages such as Objective-C, C, and C++. You can use libraries written in Objective-C, et al. from your MonoTouch code.
Modern language constructs:Because MonoTouch is based on the .NET Platform, you get nearly all of the modern language features available from it, such as automatic memory management, typed exceptions, etc.
Modern IDE:The MonoDevelop IDE has all the features you have come to expect in modern development environments, including automatic code completion, an integrated debugger, intregrated source control, and code refactoring tools.
Developing for the iPhone and iPad
The iPhone and iPad are tremendous devices, and MonoTouch goes a long way toward making the transition between traditional .NET applications and applications for the iOS easier. However, it’s important to take in consideration that developing for these devices is very different than working with traditional .NET applications. Let's look at how mobile development for the iOS differs from traditional application development.
Limited Multitasking
While the iOS v4.0 introduced multitasking to the iPhone 3GS (and newer) and the iPad, it’s not true multitasking. In nearly any modern desktop operating system, multiple applications can be running at once without issue. However, in the iOS, if your app needs to keep processing when it’s not the foreground application, it needs to tell the iOS what type of background tasks it wants to perform, and then it is given limited processing time. Because of this, if you wish to support background processing, you have to design your application very carefully. We’ll cover this in greater depth in Chapter 11.
Limited System Resources
The iPhone has a very small amount of RAM (128MB for the 3G, 256MB for the 3GS and iPad, and 512 for the iPhone 4). Because of the complex nature of the graphics that support iPhone applications, and the fact that it’s fairly normal for OS processes to take up more than half of your RAM, you can run out of memory very quickly on the iOS.
let your application know that the system is low on useable memory and you should take steps to clean up unused objects in memory.
Small Screen Size
While the iPad sports a much larger screen (1024x768) than the iPhone (960x640 for the 4G and 320x480 for 3Gs and older models), they’re both small by comparison to the standard screen size many desktop applications are built for.
While the iPad allows some flexibility in how you design screens, in the iPhone it’s especially important to try to simplify screens into one task at a time in the UI. However, this limitation is actually mitigated considerably by Apple’s UI Framework controls, which are designed specifically to provide a pleasant and efficient user experience, even with the small screen.
Device-specific Technology
Each device that runs the iOS may have different features specific to it. For instance, the GPS and/or Compass feature isn’t available on all devices. Some devices have a camera on the front, some devices can shoot video with their camera, some can only do still photos. Some allow multitasking, some don’t. The list goes on and on.
Because of this, it’s important check for the presence of and ability to use a feature before actually trying to use it.
Constrained Response Time
In order to retain the responsive feel that users have come to expect from iOS
applications, several operations in iOS are response-time sensitive. For instance, if your application takes longer than ten seconds to start up, the iOS will abort its launch. When a user clicks the home button to close your application, you have 5 seconds of
processing time to save any settings or state information before it’s terminated. The same goes for multitasking features: your application is given a certain amount of time to perform certain tasks, and if it fails, it can be terminated.
As a result, you need to design your application in such a way as to handle these transitions very quickly in order to prevent the loss of state and/or data.
Constrained Access
MonoTouch Background
Now that we have an understanding of the basics of iOS development, let’s examine some of the basics of developing MonoTouch applications.
iPhone vs. iPod Touch vs iPad?
It’s important to note that developing for the iPod Touch is nearly identical to developing for the iPhone, except for the fact that it doesn’t have a cellular radio. Additionally, both the iPhone and the iPad run iOS and, besides User Interface (UI) concerns, developing for them is nearly identical. We’ll explore the differences between them in Chapter 2.
How Does It Work?
The MonoTouch.dll (the base library that all MonoTouch applications are built against) is equivalent to the Silverlight .NET 4.0 profile with some things added back in, such as System.Data and System.Net. This allows you to write applications using many of the .NET Framework technologies that you’re already familiar with, including Windows Communication Framework (WCF), Workflow Foundation (WF), etc.
It also includes nearly all of the Base Class Library (BCL), including things like garbage collection, threading, math functions, cryptography, and parallel processing framework. For a list of available standard .NET assemblies in MonoTouch see
http://monotouch.net/Documentation/Assemblies.
This is accomplished through a MonoTouch-specific set of base .NET libraries, similar to how Silverlight and Moonlight (Mono’s implementation of Silverlight) work. This means that you can compile standard .NET 4.0 code libraries using the MonoTouch core assemblies and use them in your application. So if, for example, you have a
specialized library that does advanced math functions for engineering problems that you use for other applications, you can simply include the code library in your MonoTouch solution, and reference it. When you build your solution, it will compile it using the MonoTouch libraries, and it will then be available in your application.
MonoTouch also includes wrappers to the native iOS APIs, such as Location (GPS and Compass), the accelerometer, address book, etc. It also gives you the ability to bind to native Objective-C libraries that are not wrapped, so you can interop directly with existing Objective-C code.
You can also create your interface programmatically by instantiating Cocoa Touch objects and adding them to your application’s Views (more on Views later).
You cannot, however, create your MonoTouch interface using traditional .NET
technologies such as Silverlight, WPF, or Winforms. You can, however, build games using Microsoft’s XNA Toolkit that target the Windows 7 phone and port them using the open-source XNA Touch project (we’ll cover this in Chapter 21). Additionally, there are indications from the MonoTouch team that Moonlight will be supported at some point in the future. Time will tell if that bears fruit.
Cocoa Touch uses a rough amalgamation of the Model View Controller (MVC) pattern that we’ll discuss in Chapter 3.
By utilizing the UIKit, developers can make iOS applications using the same familiar control set as applications written in Objective-C. However, if you wish to branch beyond that, you can. MonoTouch also exposes the underlying graphics framework so that you can create rich 2D and 3D applications that allow you to go well beyond the UIKit control framework.
How Do I Distribute My Apps?
MonoTouch applications are distributed the exact same way that traditional iOS applications are distributed, either via the Apple App Store, Enterprise, or ad-hoc deployment.
The App Store is an online repository that allows users to pay for applications (if they’re not free), and download them. It is available from within iTunes, or directly from the iDevice itself. In order to get a license to distribute via the App Store, you must register with Apple, and pay $99/year. For more information, go to http://developer.apple.com and read about their development program.
Enterprise deployment is for those wishing to develop internal applications for a company and distribute them, for example, to employees, without listing them with the App Store.
Ad-hoc deployment allows you to deploy to a limited number of devices mainly for the purpose of testing and development.
What Is the Licensing Model?
Unlike Mono, MonoTouch is not open source—it is a commercial product. That means, if you want to do anything useful with it, you have to purchase a license to use it.
MonoTouch comes in three flavors and prices:
Enterprise ($999):A single corporate developer license that allows you to develop applications and distribute via the App-store, or via enterprise deployment
Enterprise, 5 Seat ($3,999): The same as the Enterprise license, but includes 5 seats
Academic ($99):A single personal developer license that only allows non-commercial distribution via ad-hoc deployment
All three options include a year of free updates.
There is also an evaluation edition that allows you deploy to the simulator only (the simulator is part of the iOS SDK, which I'll talk about later in this chapter). For the purposes of most of this book, the evaluation edition of MonoTouch is all you need. If you wish to try out any of your code on an actual device, you will have to purchase a licensed copy of MonoTouch.
Are There Any Limitations of MonoTouch?
As powerful as MonoTouch is, it has some limations that the larger .NET Framework does not. Let’s examine them.
No Just-in-Time (JIT) Compilation
Per Apple’s iOS policy, no application can include code that requires just-in-time (JIT) compilation. But wait a second, that’s exactly how .NET works, right? This is correct; however, the MonoTouch framework gets around this limitation by compiling your
application down to a native iOS assembly. This, however, introduces several limitations. Generics: Generics are instantiated by the JIT compiler at run-time.
However, Mono has an ahead-of-time (AOT) compilation mode that will generate all the methods and properties for things like List<T>. Other uses of Generics, such as Generic virtual methods, P/Invokes in Generic types, and value types that don’t exist in the core library in Dictionary<TKey, TValue> are not supported (although there is a workaround for Dictionary<TKey, TValue>).
Dynamic code generation:Because dynamic code generation depends on the JIT compiler, there is no support for any dynamic language compilation. This includes System.Reflection.Emit, Remoting, runtime proxy generation for WCF, JIT’d RegEx, JIT’d serializers, and the Dynamic Language Runtime.
C# Is Currently the Only Language
More Information
For a full list of limitations and more information, including workarounds, see http://monotouch.net/Documentation/Limitations.
Getting Started
In order to get started building MonoTouch applications for the iPhone we’ll need a few things:
An Intel Mac computer running 10.6 (Snow Leopard) or better The latest Apple iOS SDK
The current version of Mono The MonoTouch SDK
An IDE such as MonoDevelop or XCode, or a text editor program
Mac Computer Running Snow Leopard
This is an important and easily missed requirement. While theoretically you could build most of your application on other platforms, the iOS SDK (and therefore the iOS device simulator and Interface Builder) are only available for Snow Leopard. Additionally, the compiler itself uses some low-level magic specific to the Intel Mac machines, so having one is an absolute must.
MonoTouch is currently working on tools that will allow you to write in Visual Studio via their MonoTouch Tools for Visual Studio. However, it has yet to be released, and you will still need a Snow Leopard machine to run the simulator and to compile for the actual device.
Apple’s iOS SDK
Available at http://developer.apple.com/devcenter/ios, the iOS SDK is a free download, but you must register with Apple to get access to it. Along the way, Apple may ask you to pay $99 to get an iOS developer account, which allows you to deploy your
applications, but for the purposes of this tutorial, you just need the SDK. The iOS SDK includes Interface Builder, the iOS device simulator, Xcode, and a few other things. After you have installed the iOS SDK, make sure you can launch the iOS Simulator. You can find the simulator by opening Spotlight and typing “iOS Simulator.”
Mono for OSX
on the “intel” link, and not the CSDK. Also, install Mono before you install the MonoTouch SDK. Mono comes in a disk image; double-click the installer package and follow the instructions.
MonoTouch SDK
Next, download and install the latest MonoTouch SDK. You can either buy it at the MonoTouch store, http://monotouch.net/Store, and you’ll receive a link to download, or you can download an evaluation version from http://monotouch.net/DownloadTrial. If you purchase MonoTouch, you can deploy your applications to a properly configured device, but for most of the book, the evaluation version is fine.
Text Editor or Integrated Development Environment
If you want to create MonoTouch applications, all you need are the previous items and a text editor. You could create all your code files and manually compile using the
command line (terminal window). This would be quite a pain, though, so we’re going to use an integrated development environment (IDE) to develop our applications.
You have several options for this, but all of our examples in this book will be based on MonoDevelop. I’ve chosen MonoDevelop for two reasons, first, it’s free, and secondly, it’s the only IDE that completely integrates MonoTouch.
You can find the MonoDevelop install at http://monodevelop.com/Download.
You can also use Visual Studio to write libraries for use in MonoTouch, but it involves converting your standard C# class library projects to MonoTouch iOS class library projects. For more information, and a tool to help automate this, check out: http://manniat.pp-p.net/blog/post/2009/11/18/MonoTouch-in-Visual-Studio.aspx.
You can either modify/hack Xcode (installed with the iOS SDK) to use the MonoTouch libraries and compiler, or you can use MonoDevelop.
If you have installed Mono correctly, MonoDevelop should open up without error.
Documentation
One of the biggest drawbacks to developing for MonoTouch is that, while there is a wealth of documentation for developing for the iOS in general, the MonoTouch documentation itself is lacking. You can access the MonoTouch documentation directly from MonoDevelop in the Help menu, or you can view it online at
Xcode/iOS Documentation
Probably the single most useful source of documentation for developing MonoTouch applications is the iOS documentation. It’s all based on the Objective-C API and includes Objective-C samples, but it should be considered the bible for iOS development.
You can access the iOS documentation either online at http://developer.apple.com, or in Xcode. To view it in Xcode, open Xcode and choose Developer Documentation in the Help menu.
NOTE: I've included a short Objective-C primer in chapter 21, which deserves a once-over. It will significantly help to understand the examples in the iOS documentation.
MonoTouch Rosetta Stone
Additionally, Miguel de Icaza (the creator of Mono) keeps a “Rosetta stone” which maps the MonoTouch API to the underlying iOS API at http://tirania.org/tmp/rosetta.html.
Resources
As you learn and develop with MonoTouch, when you get stuck, and you probably will, there are quite a few resources online to help you work through it:
MonoTouch forums:You can find forums dedicated to MonoTouch development at http://forums.MonoTouch.net
IRC channel:There is a very active IRC community to be found on the #MonoTouch channel on the irc.gnome.org and irc.gimp.net servers. The MonoTouch team themselves are very active on there. You can access the channel directly from the MonoTouch website at
www.MonoTouch.net/chat, if you’re unfamiliar with IRC.
3
rdParty Libraries
There is an active and growing number of open source 3rd party libraries for MonoTouch. Many of the most popular libraries for Objective-C have been wrapped for native use in MonoTouch. We’ll cover 3rd
party libraries in Chapter 21, but you can also find a current list at http://wiki.monotouch.net/.
Summary
Chapter
Our First Application
Once you have everything installed from the first chapter, you’re ready to start building iOS applications. In this chapter, we’re going to build a single-screen “Hello, World” application specifically for the iPhone/iPod Touch. By the end of this chapter, you’ll be familiar with:
Creating MonoTouch projects
Using Interface Builder to create screens
Wiring up controls via outlets and creating actions
Handling UI events in code
Deploying to and running applications in the iOS Simulator
Without further ado, let’s get started.
Starting the Example
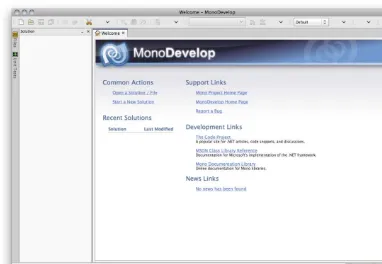
First, launch MonoDevelop. Your screen should show something similar to following (Figure 2–1).
Figure 2–1. MonoDevelop
As a standard IDE, it should look pretty familiar. It’s very similar to such environments as Visual Studio, Eclipse, Visual C# Express, and others.
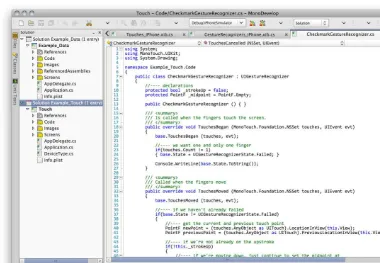
Figure 2–2. MonoDevelop with multiple solutions open
This is a pretty important feature since, in the Mac OS, you cannot have multiple
instances of an application open without terminal or scripting trickery. So, if you need to switch between solutions (for example, if you want one open for sample code), you can simply open more than one at once.
Create a New Solution
Figure 2–3. MonoDevelop new solution dialogue window
Again, this is very similar to Visual Studio’s dialog for creating new solutions. Click OK, and you should now have a solution view that looks something like the one in Figure 2–4 (note, I’ve expanded the arrows in the solution view to show all the files and references).
Examining the Code
Let’s go through these:References: This folder contains the basic references needed for a MonoTouch application. The MonoTouch assembly includes everything needed that is specific to the iOS, including all the wrappers to the Cocoa Touch controls and the core iOS stuff such as Location, Data, etc. The System.* assemblies are the .NET Base Class Library and runtime that have been tailored to run on iOS devices.
Main.cs: This is the same as it would be for a console application, a WPF application, or the like. In here is our static void Main call, which serves as an entry point for the application. We’ll take a look at this in more detail in a second.
MainWindow.xib & MainWindow.xib.designer.cs: This is analogous to a Winforms Window, or a WPF Window. The xib file will actually be edited in Interface Builder (which we’ll examine in just a bit), and the designer.cs file will hold our properties for that form.
Let’s examine the code in the Main.cs file, as shown in Listing 2–1.
Listing 2–1.The code in the Main.cs file
using System;
// The name AppDelegate is referenced in the MainWindow.xib file. public partial class AppDelegate : UIApplicationDelegate
{
// This method is invoked when the application has loaded its UI // and it's ready to run
There are two classes in here: the Application class and the AppDelegate class. This is where things start to get a little different from traditional .NET GUI development.
The way iOS applications work is that your application class contains all your Windows, Views, Controls, Resources, etc., and then you have an application delegate class (derived from UIApplicationDelegate) that handles application lifecycle and runtime events.
Lifecycle events include things like application startup and shutdown, and runtime events include things like low memory warnings and device orientation changes.
By handling these events in your application delegate class, you have an opportunity to respond to them. For instance, when your application is shutting down, the
WillTerminate method is called on your application delegate, and you have an opportunity to save any user data, application state, etc.
In our Application class, we have a Main method. By calling UIApplication.Main, the Objective-C runtime will look for your MainWindow.xib file (which contains the name of your UIApplicationDelegate class), instantiate your Application class (as a Singleton) and then start calling lifecycle events on your AppDelegate class.
NOTE: You don’t have to name your primary window (also known as the Main Interface File) MainWindow.xib. You can name it whatever you want, but you have to tell the build system to look for whatever file you create. If you want it to look for a different file, open up the project options by right-clicking on your project file, click Options, and then in Build iPhone Application Main Interface File, set that to whatever .xib file you want to be your primary window. The Objective-C runtime will then try to load that window when your application runs, and will find your application delegate from the setting in that file.
Additionally, you can name your application delegate class whatever you want. By default it is called AppDelegate. To change it, open your Main Interface File in Interface Builder, and change the name of your Application Delegate.
Furthermore, you don’t even need to define your window in a xib file at all. In fact, as a standard practice, I never define my window in a xib. It’s easier to just do it programmatically. In Chapter 4, we’ll look at how to do exactly that.
We’ll come back to our Main.cs file in a bit, but first let's dig into the actual GUI of the application.
Interface Builder
that define your applications user interface. MonoDevelop then examines those xib files and provides hooks in your code for you to access them.
NOTE: Sometimes people refer to xib (pronounced “zib”) filesas Nibs, and in this book you’ll see lots of references to Nibs as well. For practical purposes, they can be used interchangeably. A xib file is an XML file that defines a user interface in Cocoa Touch, and a Nib file is usually a compiled collection of xib files.
This is similar to creating XAML in WPF/Silverlight. Your interface is represented by XML nodes. When your application is built, that XAML is compiled with your code into one assembly.
In Mac OS, a similar thing happens. Your xib files get compiled into a Nib, which is then packaged with your application bundle into an .app file.
Whether you write Objective-C in XCode, or C# in MonoDevelop, you still use Interface Builder the same way. This is possible because MonoDevelop listens for changes to the xib files, and adds/removes the appropriate code to the designer.cs files that map to the xib files.
You can create your entire GUI programmatically, without ever having to open up Interface Builder, and in fact, some developers choose to do just that. There are many things that Interface Builder can’t do, so at some point you’re likely to wind up doing some things programmatically. Interface Builder hides some of that complexity, though, so in the beginning it’s easier to use Interface Builder to become familiar with some of the concepts of iOS application GUIs. We’ll examine this in more detail in Part 2, when we start looking at controls in more depth.
Exploring Interface Builder
So, with all that said, let’s fire it up. Double-click the MainWindow.xib file. Interface Builder should launch and you should see something like the Figure 2–5.
Let's look at these windows one-by-one. From left to right, these are: the Document window, the Design window, the Inspector window , and the Library window.
Let’s look at the Document window first (Figure 2–6).
Figure 2–6.The Document window
This window shows all of the objects that are in a xib file. This is the default view, and while pretty, you’ll find it isn’t very useful because your objects in your interface are actually a hierarchy, and the icon view only shows one level at a time. As we add controls to our window, they won’t show up in this view like this. So, let’s change it to list view by clicking the center icon in the View Mode toolbar. It should now look something like Figure 2–7.
Figure 2–7. The Document window in list view
Figure 2–8. An empty Designer showing the main window
It is empty right now because we haven’t put any controls onto it.
Figure 2–9. The Library window
Figure 2–10. The Library window in Icons and Labels view
Our final window is the Inspector window, as shown in Figure 2–11.
The Inspector window has four different views, accessible via the tab bar at the top of the window. These views are called Attribute Inspector, Connections Inspector, Size Inspector, and Identity Inspector. The Inspector is roughly analogous to the Property Explorer window in Visual Studio. It shows you all the properties of the currently selected Cocoa Touch object. With it you can set visual properties, layout, and more. In the previous figure, we’ve selected the Window object in the Document window, so it’s displaying the attributes for that object.
Building the Interface
Now that we have an overview of the Interface Builder windows, let's actually build something. Let’s create an interface, as shown Figure 2–12.
Figure 2–12. Main window interface after controls have been added
1. First, drag a Round Rect Button (UIButton) onto the window from the Library window. Then, double-click the button to set the text. You will notice that, as you do this, you’ll start to get little guidelines. These guidelines are based on Apple’s Human Interface Guidelines (you can find them in the iOS Developer Documentation in the Human Interface Guidelines document) and will help you to position your controls on your
2. Resize the button by clicking on the button and then dragging the resize controls.
3. After you’ve got your button on the window, drag a Label (UILabel) control. Resize the label so it takes up nearly the width of the window.
If you’ve done everything correctly, your Document window should look like Figure 2–13 (click the arrow next to Window to see its child controls).
Figure 2–13. The Document window after controls have been added
We’ve now created our first window interface. However, unlike in traditional .NET GUI development, you cannot access your controls programmatically yet. For example, if this were a WPF application, as soon as you drag a control onto the design surface, you could access it from your code via this.ControlName. Right now, if you view the
MainWindow.designer.cs file, you’ll see that it’s empty, except for a property for window.
So, let's see how to access our controls.
Outlets
In order to make our objects accessible to our code-behind, we have to wire them up via outlets. An outlet is just a plumbing construct to make interface elements available to code. When you create an outlet in Interface Builder, MonoDevelop will add a matching property in the designer.cs file for that class, which then allows you to have
programmatic access to the control.
1. Select your AppDelegate in the Document window, as shown in Figure 2–14.
Figure 2–14. The Document window with the AppDelegate class selected
2. Select the Identity Inspector tab of the Inspector window (Figure 2–15).
Figure 2–15. Identity Inspector tab showing the selected class from the Document window
Figure 2–16. The Library window showing the selected class
4. Change the drop-down that says Inheritance to Outlets, as shown in Figure 2–17.
5. Click the + button twice to create two new outlets.
6. Each outlet has a name and a type. Name represents the name of the control property, and is analogous to ID in ASP.NET, or Name in WPF. Type is the actual type of the outlet, such as a UIButton, UILabel, UITextView, etc. To name them, double-click their name and type in a name. For our outlets, we’re going to create btnClickMe and lblResult.
7. Right now, both of their types are id. If you leave the type as is, you can hook the outlet up to anything, because id means the type is dynamic, and is essentially an object in the .NET world. The type of id is fine, but we’re going to give one of them an actual type. We’ll see what
difference this makes in a second. For now, double-click the type of our btnClickMe and type in UIButton for the type. Your Class Outlets window should now look like Figure 2–18.
Figure 2–18. Newly created outlets
8. Now that we have these outlets created, we need to actually assign them to our controls. First, click the second tab in the Inspector window to bring up the Connections Inspector. In the Outlets section, we should now see the two new outlets that we created. However, they’re not hooked up to anything.
Figure 2–19. Newly created outlets
10. We need to do this to both outlets. You can also drag from the Connections Inspector onto the Document window. This is especially helpful if you have overlapping controls.
As we do this, you may notice something interesting. Because we gave btnClickMe a type of UIButton, when we drag the outlet to the window, it will only allow a connection to be created if the object we’re dragging to is of that type—in this case, UIButton. lblClickMe, on the other hand, can be dragged onto anything, because it has the dynamic id type.
Many people strongly type their outlets so that it’s more difficult to accidentally hook them up to the wrong control. It’s not necessary, but can be a good practice to do so. Personally, I find it tedious and not worth the effort, since wiring up outlets is pretty simple.
OK, now that we have our interface created and our outlets hooked up, save your work in IB and head back over to MonoDevelop to wire everything up.
Outlets Exposed to Code
If you open up MainWindow.designer.cs, you’ll now see two more properties in there, as shown in Listing 2–2.
Listing 2–2. MonoTouch auto-generated Designer code showing outlets
[MonoTouch.Foundation.Connect("lblResult")] private MonoTouch.UIKit.UILabel lblResult { get {
this.__mt_lblResult = ((MonoTouch.UIKit.UILabel)(this.GetNativeField("lblResult"))); return this.__mt_lblResult;
} set {
this.__mt_lblResult = value;
this.SetNativeField("lblResult", value); }
}
private MonoTouch.UIKit.UIButton btnClickMe { get {
this.__mt_btnClickMe =
((MonoTouch.UIKit.UIButton)(this.GetNativeField("btnClickMe"))); return this.__mt_btnClickMe;
} set {
this.__mt_btnClickMe = value;
this.SetNativeField("btnClickMe", value); }
}
These two properties now make our label and our button accessible via our code-behind. Notice an interesting thing here—even though we declared our lblResult as a type of id, the property that got created for it is strongly-typed as a UILabel. This is because MonoDevelop is smart enough to look at the actual underlying type of the outlet and create a property of the appropriate type. This is good for us, because it means we don’t have to cast the lblResult property to a UILabel every time we want to use it as one.
Let’s go back now to our Main.cs file, and look at the AppDelegate. Let’s look at the FinishedLaunching method (Listing 2–3).
Listing 2–3. FinishedLaunching method
// This method is invoked when the application has loaded its UI and it's ready to run public override bool FinishedLaunching (UIApplication app, NSDictionary options) {
// If you have defined a view, add it here: // window.AddSubview (navigationController.View);
window.MakeKeyAndVisible ();
return true; }
As the comment suggests, this method is called by the Objective-C runtime after the application is instantiated, and is ready to run. The first call, window.AddSubview, is commented out, and we’ll look into what that actually does in the next chapter when we examine the Model View Controller (MVC) pattern in Cocoa Touch.
NOTE: Ordinarily, when building MonoTouch applications, we would actually have different views that we would add controls to, and then expose them as outlets on the controllers that manage them, but for the sake of this simple application, we’ve created our outlets directly in our AppDelegate class. In Chapter 2, we’ll do this a bit differently, when I introduce controllers.
Let’s change our AppDelegate class to look like Listing 2–4.
Listing 2–4. Our complete AppDelegate class that responds to button clicks and updates the screen
// The name AppDelegate is referenced in the MainWindow.xib file. public partial class AppDelegate : UIApplicationDelegate
{
//---- number of times we've clicked protected int _numberOfClicks;
// This method is invoked when the application has loaded its UI and its ready // to run
public override bool FinishedLaunching (UIApplication app, NSDictionary options) {
// If you have defined a view, add it here: // window.AddSubview (navigationController.View);
window.MakeKeyAndVisible ();
//---- wire up our event handler
this.btnClickMe.TouchUpInside += BtnClickMeTouchUpInside;
return true; }
protected void BtnClickMeTouchUpInside (object sender, EventArgs e) {
//---- increment our counter this._numberOfClicks++; //---- update our label
this.lblResult.Text = "Hello World, [" + this._numberOfClicks.ToString () + "] times";
} }
The first thing we added is a variable to track the number of clicks, _numberOfClicks. Next, we added this line:
this.btnClickMe.TouchUpInside += BtnClickMeTouchUpInside;
NOTE: We use TouchUpInside rather than TouchDown because it allows a user to cancel an accidental click of a button by moving their finger off and releasing the button. In other words, we only want to register a touch if it starts and finishes inside the button. This is in conformance with Apple’s Human Interface Guidelines, and you should follow this pattern in your applications as well.
Then, in our BtnClickMeTouchUpInside method we simply update our label with how many times our button has been clicked.
Running the Application
All right, now that we’ve done all this, let’s build and run the thing. Let’s build first. In the menu, select Build Build All. If you’ve done everything correctly so far, it should build without errors. Next, let’s run it on the iPhone Simulator!
In the toolbar, make sure that Debug|iPhoneSimulator is selected, as in Figure 2–20.
Figure 2–20. Build mode set to Debug|iPhone Simulator
To run this, either select Run Run from the menu, or press + enter on the keyboard.
NOTE: In the evaluation version of MonoTouch, you can only run on the simulator; if you try to run on your device, you’ll get an error.
Figure 2–21. Our Hello World application in the simulator
Clicking the button should result in the label text getting updated, as shown in Figure 2–22.
Congratulations! You’ve just created and run your first iPhone application. Let’s look at two more things, and then we’ll finish this chapter.
Actions
In the application we just created, we have outlets that are accessed via properties in our code. Just like in other .NET GUI paradigms, we can wire up event handlers to them and then respond to events. But MonoTouch offers another way to respond to user input. These are called actions. Actions are similar to commands in WPF, in that they allow multiple controls to invoke the same method, and then decide how you want to handle it, depending on who invoked it.
Adding an Action
Let’s look at this in a little more detail.
1. Make sure you have your Example_HelloWorld_iPhone application open in MonoDevelop.
2. Open up MainWindow.xib in Interface Builder by double-clicking the file. Now add two buttons below our label, similar to Figure 2–23.
3. Actions are added in the same place outlets are: in the Library window, make sure you have your AppDelegate selected, and down below select the Actions tab instead of the Outlets tab. Create a new action called actnButtonClick. Your Library window should look something like Figure 2–24.
Figure 2–24. Action actnButtonClick added
IB automatically appends a colon to the end of your action name. You can ignore this, it’s an Objective-C thing, but our action will work just the same.
What we’ve just done is created a generic action on our AppDelegate called
actnButtonClick. Now what we need to do is associate our buttons’ TouchUpInside events with it, so when they get clicked, our action is called.
Make sure AppDelegate is selected in the Document window, then drag the
actnButtonClick in the Connections Inspector to the Action 1 button, as shown in Figure 2–25.
When we drag to the button, it gives a list of events to trigger the action. Select Touch Up Inside, as shown in Figure 2–26.
Figure 2–26. Choosing an event to call the action
Do this for both of the action buttons. If we view the Connections Inspector for our
AppDelegate, it should have the action wired up to both buttons, as shown in Figure 2–27.
Figure 2–27. Action wired up to multiple controls
Save your work in Interface Builder, and then go back to MonoDevelop.
Actions in Code
If we look at MainWindow.designer.cs, we should see a new line of code: [MonoTouch.Foundation.Export("actnButtonClick:")]
partial void actnButtonClick (MonoTouch.UIKit.UIButton sender);
This is the partial declaration of our action. Notice it’s decorated with the
MonoTouch.Foundation.Export attribute. This allows the Objective-C runtime to find the appropriate method that is associated with our action.
completion when you go to implement the method. If we go back to Main.cs, we’ll see this. In your AppDelegate class, notice that if you type partial, you’ll automatically get the code completion for our actnButtonClick, as shown in Figure 2–28.
Figure 2–28. Code completion for actions
Let’s put the following code in there:
partial void ActionButtonClick (UIButton sender) {
//---- show which button was clicked
this.lblResult.Text = sender.CurrentTitle + " Clicked"; }
Now, if we run the application, and click the action buttons, we should see something like Figure 2–29.
Figure 2–29. Hello World application after the Action 1 button has been clicked
Choosing Which Device to Simulate
To change which device you’d like to deploy to in the simulator, change Project : Active Simulator Target in the application menu. As of writing, you have three options:
Default: The iPhone 3G Simulator with a resolution of 320x480 iPhone Simulator 4.3: The iPhone 4G Simulator with the 640x960 Retina Display
iPad Simulator 4.3:The iPad Simulator with a 1024x768 resolution
For example, if you choose iPad Simulator 4.3 and then debug it, it will launch the iPad Simulator with the application running in it (Figure 2–30).
As you can see, while the application runs in the iPad, it’s definitely non-optimal. In the next chapter, we’re going to take a look at building applications for both the iPhone and the iPad.
NOTE: If you want to debug your application in the iPhone 4G Simulator with Retina Display, you must first launch the iOS Simulator and then choose Device : iPhone (Retina) from the Hardware menu. Then, in MonoDevelop, change your iPhone Simulator Target to iPhone Simulator 4.3 and run/debug it. If you don’t change the device in the iOS simulator first, it will simulate the iPhone 3G, rather than the iPhone 4G. This is an Apple strangeness and also happens if you’re developing in Xcode.
Application Name and Icons
The last thing I want to cover in this chapter is how to specify your application name and icons.
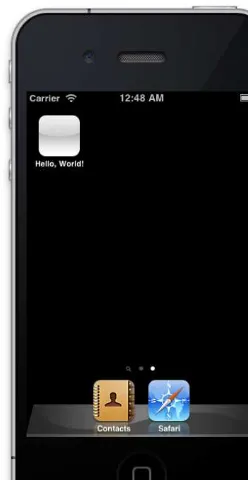
If you run the application as it is, and then click the Home icon on the iOS Simulator, you’ll notice that our application name is displayed as our project name and the icon is blank (Figure 2–31).
Application Name
To specify an application name that’s different from the project, right-click the project and choose Options. Then choose iPhone Application in the left pane, and specify the name in the Display name field, as shown in Figure 2–32.
Figure 2–32. Specifying an application display name
Figure 2–33. Application with a friendly display name
Application Icons
Applications require a number of icons, each of a different size, depending on the device and where the icon is displayed. Icons are standard .png files, and for iOS applications, there are potentially six different icons, depending on whether your application is intended for consumption on the iPhone, iPad, or both:
iPhone Icon: This icon shows up on the home screen of the iPhone 3Gs (and below). It should be 57x57 pixels in size.
iPhone 4 Icon: This icon is the same as the icon, except for Retina Display devices. It should be 114x114 pixels.
Settings/Spotlight Icon:This icon shows up in the iOS Settings Application as well as the Spotlight/Search on the iPhone 3Gs (and below). It should be 29x29 pixels.
iPhone 4 Settings/Spotlight Icon:This icon is the same as the previous, except it’s for the Retina Display devices. It should be 58x58 pixels.
iPad Spotlight:This icon shows up in the iOS Settings Application as well as the Spotlight/Search on the iPad. It should be 50x50 pixels.
The iOS will automatically mask the corners of your icons to make them round and add the glassy effect, so you don’t have to.
To add icons to your application, right-click your project and choose Add Files. Then, navigate to your icons and select them. Finally, check Override default build action, set it to Content, and click Open (Figure 2–34).
Figure 2–34. Adding icons to your application
Setting the build action to Content will make sure that the files are copied into the application package and made accessible to the iOS. We’ll cover including images in more depth in Chapter 6.
Figure 2–35. Specifying the location of your icons
After you specify your icons and run your application, they will show up (Figure 2–36).
Summary
At this point, we’ve gone through making a basic iPhone application using MonoTouch. You should now have an understanding of the iOS application fundamentals including the UIApplication, the UIApplicationDelegate, outlets, and actions. You also know how to run your application on the simulator, set your application display name, and add icons.
However, there are two things fundamentally missing from the application we built in this chapter, namely:
It only has one screen
It’s really just designed for the iPhone, not the iPad
Chapter
Creating Multi-Screen
Applications Using the
MVC Pattern
In the first chapter, we created our first application using MonoTouch for the iOS. We used outlets and actions, got to know the basic application structure, and made a simple user interface. However, it had a couple major flaws, one of which is that it only had one screen. In this chapter, we’re going to look at how to create multi-screened applications in the iOS using Views and View Controllers.
Specifically, we’ll use the UINavigationController to navigate to two different
pages/screens in our application. Before we begin, however, we need to briefly review an important design pattern that Cocoa Touch uses, called the Model-View-Controller (MVC) pattern.
Model-View-Controller (MVC) Pattern
Cocoa Touch uses the MVC pattern to handle the display of their GUI. The MVC pattern has been around for a long time (since 1979, specifically) and is intended to separate the burden of tasks necessary to display a user interface and handle user interaction. As the name implies, the MVC has three main parts, the Model, the View, and the Controller, as shown in Figure 3–1.
Figure 3–1. The constituent parts of the Model, View, Controller pattern
Model
The Model is a domain-specific representation of data. For instance, let’s say we were making a task-list application. You might store these in a DB, an XML file, or even pull them from a Web service. The MVC pattern isn't specifically interested in where/how they're persisted, or even if they are. Rather, it deals specifically with how they’re displayed and how users interact with them.
If we are persisting the Task items to some sort of storage, one approach might be to create a TaskManager class that handles persistence and retrieval of them for us via methods such as TaskManager.Save(Task item) or TaskManager.Get(int itemID). Or perhaps we might take a different approach and simply add the retrieval and persistence logic to the Task items themselves via Task.Save() and Task.Get(int itemID).
In the MVC pattern, it doesn’t matter which approach we choose, the only thing that is important to understanding it is that we have a model representation of our data, in this case, a Task object.
View
The View is the class or item that is responsible for how our data (or Model) is actually displayed. In our hypothetical task application, we might display these tasks on a web page (in HTML), or a WPF page (in XAML), or in a UITableView in an iOS application. If a user clicks a specific task, say to delete it, typically the view raises an event, or makes a callback to our Controller.
iOS is no different in this regard, the main page view is the root view, and it can contain many different controls such as buttons, which are themselves views.
Controller
The Controller is the glue between the Model and the View. It’s the Controller’s job to take the data in the model and tell the View to display it. It is also the Controller’s job to listen to the View when our user clicks the task to delete it, and then either delete that task from the Model, by calling some sort of manager object, or tell the Model to delete the task itself.
Benefits of the MVC Pattern
By separating the responsibilities of displaying data, persisting data, and handling user interaction, the MVC pattern tends to create code that is easily understood.
Furthermore, it encourages the decoupling of the View and the Model, so that the Model can be reused. For example, if in your app you had both a web-based interface and a WPF interface, you could still use the same code for your Model for both.
Views and View Controllers in MonoTouch
In an iOS application, you only ever have one window, but you can have lots of different screens. This is accomplished by creating different views that you display when
appropriate.
In Apple’s Cocoa Touch UI framework (also known as the UIKIT), controllers are usually called ViewControllers, so if you see a class like UIViewController, it’s actually a controller.
A single controller can manage many different root views, but typically, in order to keep controller code manageable, they only manage one root view. If the controller does manage different root views, they’re typically simple derivatives of the other views it manages. For example, you might have a single view controller that manages four different views for the different orientations of the device. We’ll explore that in more depth in Chapter 5 when we examine handling rotation on the device.
In MonoTouch, views are represented by the UIView class, and nearly all controls inherit from this class. Views handle user interaction and notify their controller via events. For example, a button raises a TouchDownInside event when a user puts their finger on it, and a TouchUpInside when the user releases their finger. To make a rough analogy, this relationship is slightly similar, to the ASP.NET or WPF model, in which the user interface is defined in HTML or XAML, and then a code-behind page handles events such as clicks, etc.
The UINavigationController manages a stack of view controllers, each of which
represents a screen. When you want to display a new screen, you push a view controller onto the navigation stack that the navigation controller manages. The navigation
controller then renders a navigation bar control that allows users to click a button to move backwards through the hierarchy, by removing the top most (visible) controller from the navigation stack.
The UINavigationController is seen in many of the stock iOS applications. For
example, when you’re viewing a list of your text messages, if you click one, the top bar gets a left arrow tab at the top that takes you back a view to the message list, as shown in Figure 3–2.
Figure 3–2. The text message application in iOS uses a navigation controller to handle navigation
Sample Application
Now that we understand how multiple screens work in concept, let’s actually create an application that utilizes them.
1. First, create a new MonoTouch iPhone solution in MonoDevelop and name it Example_HelloWorld_iPhone_MultipleScreens (refer to the first chapter if you’ve forgotten how to do this).
2. Next, create create three View Controllers. To do this, right-click your project and choose AddNew File, then select iPhone and View Interface Definition with Controller, as shown in Figure 3–3.
Figure 3–3. New View with Controller
Name your three view controllers: MainScreen
Adding the Navigation Controller to the Main Screen
Once you have your screens created, open up the MainScreen.xib in Interface Builder. This is going to be the main screen of our application and will have our Navigation Controller on it.
1. Navigation controllers need to be the root controllers in a screen, so let’s delete the view from this screen. To do this, select the view object in the document window and either press the delete key or select the view and choose EditDelete from the menu.
2. Next, drag a Navigation Controller item from the library window onto the document. Your document window should look like Figure 3–4 (I’ve expanded the tree to show the full hierarchy).
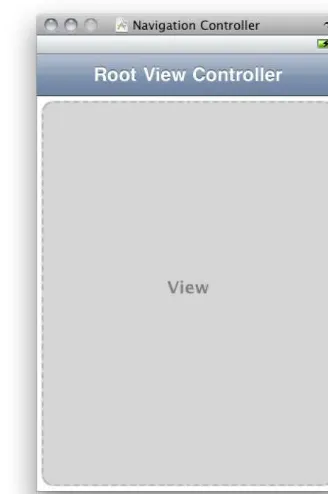
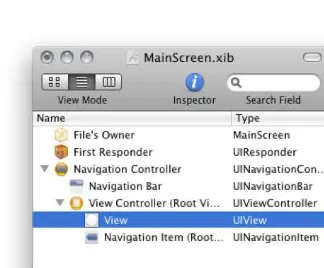
Figure 3–4. Document window showing the Navigation Controller hierarchy
Figure 3–5. Navigation Controller showing a placeholder for your View
Figure 3–6. Navigation Controller after View has been added
Figure 3–7. Document Window showing the added View in the hierarchy
Figure 3–8. Finished MainScreen.xib
6. Next, create three outlets: btnHelloWorld btnHelloUniverse navMain
7. Wire the btn* outlets up to their respective buttons, and wire navMain up to the Navigation Controller. See Chapter 2 if you forgot how to make outlets and wire them up.
8. Once you’ve got your outlets created and wired up, save your work.
HelloWorld and HelloUniverse Screens
Now we're ready to do the two subviews, so let's get started.Figure 3–9. Finished Hello World screen
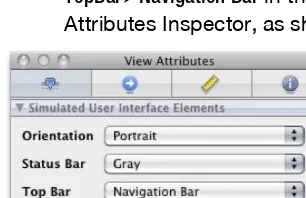
2. Since this screen will actually have a navigation bar at the top, you can make the Designer window show one as well, by selecting
TopBarNavigation Bar in the Simulated User Interface Elements section of the Attributes Inspector, as shown in figure 3–10.
Figure 3–10. Attributes Inspector showing simulation options
Figure 3–11. Simulated navigation bar in the designer
4. Once you’ve finshed the Hello World screen, do the same thing with the Hello Universe screen, except set the text of the label to be Hello Universe!.
5. When you’re done, save your work, and head back over to MonoDevelop.
Showing Different Screens
Now that we’ve got our screens created in Interface Builder, let’s modify the code in the MainScreen controller to handle our button clicks and show our different screens.
MainScreen.xib.cs
Open up the MainScreen.xib.cs file in MonoDevelop. This file is our controller class for our main screen. The first thing we’re going to do is change our default constructor to load our view (as defined in our .xib file) synchronously. The template, in MonoDevelop, for a UIViewController has the following default constructor, shown in Listing 3–1. Listing 3–1. Default UIViewController constructor when the view is defined in a .xib file
public [ControllerClassName] () : base("[ControllerClassName]", null) {
This calls the base class’s default constructor and passes the name of the Nib file where we created our view. The base class then deserializes and loads the view from that file. Unfortunately, however, the base class implementation loads the view asynchronously. That is, the actual controls and content on that view aren’t available immediately. This is typically not a problem, because the UIViewController has a method called ViewDidLoad that is called once the view has fully loaded.
We’ll see in a moment, when we look at our AppDelegate class, why this can be a problem, but for now, replace that constructor with the following, shown in Listing 3–2, which does the same exact thing, but loads the view synchronously (LoadNib doesn’t return until the view is loaded).
Listing 3–2. Default UIViewController constructor that loads the .xib synchronously public MainScreen ()
We made one other change in here that’s important to note as well. If you manually call LoadNib, the ViewDidLoad method will not be called. Instead, we need to call it ourselves, after the view has been loaded.
Next, add the following method, shown in Listing 3–3. Listing 3–3. Wiring up event handlers in the ViewDidLoad method public override void ViewDidLoad ()
{
base.ViewDidLoad ();
this.btnHelloUniverse.TouchUpInside += (s, e) => {
this.navMain.PushViewController (new HelloUniverseScreen (), true); }; this.btnHelloWorld.TouchUpInside += (s, e) => {
this.navMain.PushViewController (new HelloWorldScreen (), true); }; }
The ViewDidLoad method is called by the view controller after the view is loaded and fully initialized. We’ll examine the controller and view lifecycle in more detail in Chapter 5, but ViewDidLoad is a good place to wire up your event handlers because it is only called after your controls are instantiated, and is only called once in a view’s lifecycle. The UINavigationController manages a stack of navigation items, which are typically controllers. To show a new screen, we can simply push a view controller onto the stack via the PushViewController method. Our event handler code does exactly that, when a user clicks one of our buttons.
Listing 3–4. Exposing our navigation controller
public override UINavigationController NavigationController {
get { return this.navMain; } }
You’ll notice this property is an override. That’s because the UIViewController class already exposes a NavigationController property. This property will return a
UINavigationController only if this View Controller is currently on a navigation stack. In our case, our MainScreen.xib actually contains the Navigation Controller. So we override this property for simplicity.
Next, we’re going to change our AppDelegate class to load our main screen when the application starts up.
AppDelegate
Open up the Main.cs file in MonoDevelop and add the following declaration to your AppDelegate class, as shown in Listing 3–5.
Listing 3–5. Declaring a class-level reference to our MainScreen MainScreen _mainScreen;
NOTE: We’ve declared a reference to our MainScreen as a class-level variable. This is extremely important. The garbage collector in MonoTouch is very aggressive, and in a moment we’re going to instantiate our MainScreen in a method and then add it to the navigation stack. If we declared it within the scope of the method, it could get garbage collected when the method returns. If this were to happen, if we were to try to do anything with it (like handle a button click), the application would crash with a null-reference error.
Then, in the FinishedLaunching method, add the code shown in Listing 3–6. Listing 3–6. Declaring our MainScreen as a class-level variable
this._mainScreen = new MainScreen ();
window.AddSubview (this._mainScreen.NavigationController.View);
The UINavigationController is unique, in terms of controllers, in that you can push other controllers onto it. It then adds the view of the controller onto its view hierarchy. However, with most other controllers, and also with the Window, you have to add views instead. The code we added to our AppDelegate class does just that. It creates a new MainScreen controller, and then adds the Navigation Controller’s view onto it.
It's important to note here, if we didn’t change our constructor in our MainScreen class to be synchronous, our NavigationController property would likely be null when we called the window.AddSubview, and the application would error on starting.
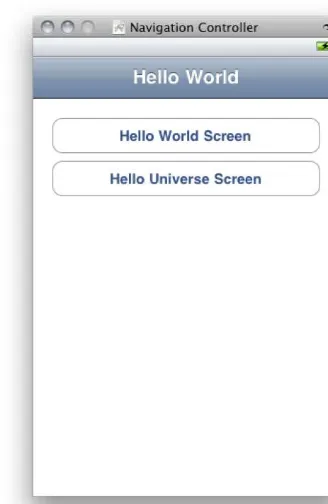
Figure 3–12. Application running, displaying the Main Screen
If you click the Hello World Screen button you should get something like figure 3–13.
Summary
Chapter
iPad and Universal
(iPhone/iPad)
Applications
So far we’ve covered a lot of the basics of making an iPhone application using
MonoTouch, including how the MVC pattern fits in, but what about iPad applications? It turns out, building iPad applications is almost exactly like building iPhone applications, and, in fact, you can even extend your iPhone applications to run on both the iPhone and the iPad, and vice-versa.
iPad applications run exactly the same way iPhone (or iPod Touch) applications do. The only appreciable difference is the form factor. The iPad is nearly the size of a standard American sheet of paper.
This means that you can fit a lot more on screen, which has a tremendous impact on how iPad versions of iPhone OS applications differ from their iPhone counterparts. With the larger screen, you can often combine what would be several screens on the iPhone into a single screen in an iPad application.
Because of the larger screen size, Apple has given us a couple of additional controls that are only available on the iPad, the most significant of which is the
UISplitViewController, which is used to manage a master/detail view configuration. We’ll take a look at that control in more detail in Chapter 8, but other than a couple of controls, building iPad applications is nearly identical to iPhone applications.
There are a few hardware resource differences between the different devices, so I’ve included a table here of the major differences to give you an understanding of how they differ. Most of the time these differences are negligible, but it’s important that, if you intend for your applications to run on older devices, you test your applications on them.
Table 4–1. iOS device comparison
Device Max. OS Version RAM Processor Speed Screen Size + Resolution
iPhone 3.1.3 128MB 412MHZ 480x320 pixels @ 163ppi
iPhone 3G 4.2.1 128MB 412MHZ 480x320 pixels @ 163ppi
iPhone 3GS 4.3+ 256MB 600MHZ 480x320 pixels @ 163ppi
iPhone 4G 4.3+ 512MB ~1GHZ 960x640 pixels @ 326ppi
iPad 4.3+ 256MB ~1GHZ 1024x768 pixels @ 132ppi
There are other capability differences as well, such as the presence of a compass or GPS, which we will examine in later chapters that deal with the particular item. For more information on device particulars, Wikipedia has excellent coverage of the iPhone at en.wikipedia.org/wiki/Iphone, and the iPad at en.wikipedia.org/wiki/Ipad.
In this chapter we’re going to walk through creating an iPad application, and then go through a couple of options for creating universal applications that run on both the iPhone and the iPad.
A Note About Resolution on the iPhone
The iPhone 4G has a high-resolution screen (2x the density of the iPhone 3GS and below) known as the Retina Display. This means that, while the resolution is twice that of the earlier iPhone models, the screen size remains the same. We’ll examine how we account for this in later chapters, but for now, the answer is largely that we don’t have to. Apple has kept the coordinate system the same for both screens, which means that the screen space is still 480x320 “points,” whether you’re on the 4G iPhone or an earlier version.
The most important difference this makes is when it comes to images. In Chapter 6, when we get introduced to controls, we’ll see that when loading images, the iOS will automatically look for images with an “@2x” in the filename suffix and load them (as opposed to images without that suffix) if the current device is a high-density Retina Display.
Creating an iPad-Only Application
Figure 4–1. iPad Window-based project template
The iOS looks for a file named info.plist in your application bundle to determine what iOS versions and devices your application supports. A .plist file is a special type of file called a property list. We’ll cover .plist files in more detail in Chapter 14, but
essentially, a .plist file is a place where application settings and information are stored.
Changing Common Settings in MonoDevelop
Most of the time you don’t have to edit the info.plist file directly, because many of the common settings that you might configure are actually available via the Project Options dialogue in MonoDevelop. We touched briefly on the Project Options dialog in Chapter 2, when we covered how to set your application name and icons.
When you build your application, MonoTouch automatically creates an info.plist file for you if you do not already have one based on your project options, and if you do have one, it will merge the project options settings with it.
Figure 4–2. Build settings for an iPad-only application
It also sets the Main interface file setting, which contains your Window. This setting is actually a little confusing, because there is also an iPad interface file setting, as seen in Figure 4.2. However, if the Target devices setting is set to either iPhone or iPad only, the only interface file setting that is used is Main interface file. If you’re building a universal (iPhone and iPad) application, then the Main interface file setting will be used for the iPhone application, and the iPad interface file setting will be used for the iPad application. You can also load your Window programmatically, and therefore bypass the interface settings altogether. We’ll look at that in just a bit when we talk about universal applications.
iPad Screens in Interface Builder
Figure 4–3. iPad Designer window in Interface Builder
Figure 4–4. iPhone Simulator running an iPad application
You’ll notice, however, that this time, instead of getting a simulated iPhone, the simulator will simulate an iPad.
As you can see, the technical aspect of creating an iPad application is just as easy as it is for creating an iPhone application.
Now let’s take a look at creating applications that run on both the iPhone and the iPad.
Creating a Universal iPhone/iPad Application
There are a couple of ways to create a universal application that will run on both the iPhone and iPad.
The second, and much more powerful way, is to detect which device the application is executing on, and programmatically load the appropriate UI for that device.
Let’s take a look at using the universal project template first.
Method 1: Universal Project Template
The universal project template can be found in the New Solution dialogue with the other templates under Universal Window-based Project, as shown in Figure 4–5.
Figure 4–5. Universal project template