Android Native
Development Kit
Cookbook
A step-by-step tutorial with more than 60 concise recipes
on Android NDK development skills
Feipeng Liu
Android Native Development Kit Cookbook
Copyright © 2013 Packt Publishing
All rights reserved. No part of this book may be reproduced, stored in a retrieval system, or transmitted in any form or by any means, without the prior written permission of the publisher, except in the case of brief quotations embedded in critical articles or reviews.
Every effort has been made in the preparation of this book to ensure the accuracy of the information presented. However, the information contained in this book is sold without warranty, either express or implied. Neither the author, nor Packt Publishing, and its dealers and distributors will be held liable for any damages caused or alleged to be caused directly or indirectly by this book.
Packt Publishing has endeavored to provide trademark information about all of the companies and products mentioned in this book by the appropriate use of capitals. However, Packt Publishing cannot guarantee the accuracy of this information.
First published: March 2013
Production Reference: 1140313
Published by Packt Publishing Ltd. Livery Place
35 Livery Street
Birmingham B3 2PB, UK. ISBN 978-1-84969-150-5
www.packtpub.com
Credits
Author Feipeng Liu
Reviewers Roger Belk
Frank Grützmacher
Sylvain Ratabouil
Acquisition Editor Martin Bell
Commissioning Editor Shreerang Deshpande
Lead Technical Editor Mayur Hule
Technical Editors Lubna Shaikh
Worrell Lewis
Project Coordinator Leena Purkait
Proofreader Aaron Nash
Indexer
Monica Ajmera Mehta
Graphics Aditi Gajjar
Valentina D'silva
Production Coordinator Shantanu Zagade
About the Author
Feipeng Liu
is a technology enthusiast who is focused on multimedia systems and applications. He started mobile applications development in 2008 on Windows Mobile. Since Feb 2010, he has been developing apps for Android with NDK. His Android apps have been used by many users. One of his apps, video converter Android, has reached one million downloads within 10 months. Feipeng received his B.ENG in Electrical and Electronic Engineering degree from Nanyang Technological University, and Master of Computing degree in the Department of Computer Science from National University of Singapore.I would like to thank Shreerang Deshpande for offering me the opportunity to author this book and for helping me throughout the writing, and Leena Purkait for keeping track of its progress and coordination, Mayur Hule, Lubna Shaikh, and Worrell Lewis for editing the book drafts! I would like to express my gratitude to other Packt Publishing staff who helped with the book! My grateful thanks are also extended to Roger, Frank and Sylvain, who offered great suggestions during the review.
I also would like to thank Assoc. Prof. Wei Tsang Ooi in National University of Singapore, the supervisor of my master project. A lot of stuff in this book is based on the things I learnt during the project.
About the Reviewers
Roger Belk
is a 45-year-old self-taught Android developer with 20 + apps in Google’s Play Store under the developer name BigTexApps. He started out using Google’s & MIT’s App Inventor and then after two years of learning to use AI, he taught himself to use Java to build Android apps. He has reviewed two other books, Google App Inventor, Ralph Roberts,Packt Publishing (ISBN 978-1-84969-212-0) and Android 3.0 Animation, Alex Shaw, Packt Publishing (ISBN 978-1-84951-528-3).
Frank Grützmacher
spent some years in the research of distributed electronic design tools and worked for several German blue chip companies such as Deutsche Post and AEG. He was involved in Android platform extensions for a mobile manufacturer. Therefore, on one hand he knows how to build large enterprise apps and on the other hand how to make Android system apps.He is currently working for the IT daughter of the largest German Telco company.
In the past, he has reviewed Corba- and Java-related books for American and German publishers.
Sylvain Ratabouil
is a confirmed IT consultant experienced with C++ and Java technologies. He worked in the space industry and got involved in aeronautic projects at Valtech, where he is now taking part in the digital revolution.www.PacktPub.com
Support files, eBooks, discount offers and more
You might want to visit www.PacktPub.com for support files and downloads related to your book.
Did you know that Packt offers eBook versions of every book published, with PDF and ePub files available? You can upgrade to the eBook version at www.PacktPub.com and as a print book customer, you are entitled to a discount on the eBook copy. Get in touch with us at service@packtpub.com for more details.
At www.PacktPub.com, you can also read a collection of free technical articles, sign up for a range of free newsletters and receive exclusive discounts and offers on Packt books and eBooks.
http://PacktLib.PacktPub.com
Do you need instant solutions to your IT questions? PacktLib is Packt’s online digital book library. Here, you can access, read and search across Packt’s entire library of books.
Why Subscribe?
f Fully searchable across every book published by Packt f Copy and paste, print and bookmark content
f On demand and accessible via web browser Free Access for Packt account holders
Table of Contents
Preface 1
Chapter 1: Hello NDK
7
Introduction 7 Setting up an Android NDK development environment in Windows 8 Setting up an Android NDK development environment in Ubuntu Linux 16 Setting up an Android NDK development environment in Mac OS 19
Updating Android NDK 20
Writing a Hello NDK program 22
Chapter 2: Java Native Interface
27
Introduction 28 Loading native libraries and registering native methods 29 Passing parameters and receiving returns in primitive types 34 Manipulating strings in JNI 39 Managing references in JNI 43 Manipulating classes in JNI 50 Manipulating objects in JNI 53 Manipulating arrays in JNI 57
Accessing Java static and instance fields in the native code 62
Calling static and instance methods from the native code 67
Caching jfieldID, jmethodID, and referencing data to improve performance 73
Checking errors and handling exceptions in JNI 76 Integrating assembly code in JNI 80
Chapter 3: Build and Debug NDK Applications
83
Table of Contents
Debugging an Android NDK application with logging messages 106 Debugging an Android NDK application with CheckJNI 110 Debugging an Android NDK application with NDK GDB 113 Debugging an Android NDK application with CGDB 116 Debugging an Android NDK application in Eclipse 119
Chapter 4: Android NDK OpenGL ES API
123
Introduction 123 Drawing 2D Graphics and applying transforms with the OpenGL ES 1.x API 127 Drawing 3D graphics and lighting up the scene with the OpenGL ES 1.x API 133 Mapping texture to 3D objects with the OpenGL ES 1.x API 140 Drawing 3D graphics with the OpenGL ES 2.0 API 145 Displaying graphics with EGL 152
Chapter 5: Android Native Application API
159
Introduction 159 Creating a native activity with the native_activity.h interface 161 Creating a native activity with the Android native app glue 166 Managing native windows at Android NDK 174 Detecting and handling input events at Android NDK 178 Accessing sensors at Android NDK 181 Managing assets at Android NDK 186
Chapter 6: Android NDK Multithreading
191
Introduction 191 Creating and terminating native threads at Android NDK 192 Synchronizing native threads with mutex at Android NDK 195 Synchronizing native threads with conditional variables at Android NDK 200 Synchronizing native threads with reader/writer locks at Android NDK 206 Synchronizing native threads with semaphore at Android NDK 212 Scheduling native threads at Android NDK 217 Managing data for native threads at Android NDK 228
Chapter 7: Other Android NDK API
233
Table of Contents
Chapter 8: Porting and Using the Existing Libraries with Android NDK 265
Introduction 265 Porting a library as a shared library module with the Android NDK
build system 266
Porting a library as a static library module with the Android NDK
build system 271
Porting a library with its existing build system using the
Android NDK toolchain 275
Using a library as a prebuilt library 280 Using a library in multiple projects with import-module 282
Porting a library that requires RTTI, exception, and STL support 285
Chapter 9: Porting an Existing Application to Android with NDK
293
Introduction 293 Porting a command-line executable to Android with an NDK build system 294 Porting a command-line executable to Android with an NDK
standalone compiler 298
Adding GUI to a ported Android app 305 Using background threads at porting 310
Preface
Since its first release in 2008, Android has become the largest mobile platform in the world. The total number of apps in Google Play is expected to reach 1,000,000 in mid 2013. Most of the Android apps are written in Java with Android Software Development Kit (SDK). Many developers only write Android code in Java even though they are experienced with C/C++, without realizing what a powerful tool they are giving up.
Android Native Development Kit (NDK) was released in 2009 to help developers write and port native code. It offers a set of cross-compiling tools and a few libraries. Programming in NDK offers two main advantages. Firstly, you can optimize your apps in native code and boost performance. Secondly, you can reuse a large number of existing C/C++ code. Android Native Development Kit is a practical guide to help you write Android native code with NDK. We will start with the basics such as Java Native Interface (JNI), and build and debug a native app (chapter 1 to 3). We will then explore various libraries provided by NDK, including OpenGL ES, Native Application API, OpenSL ES, OpenMAX AL, and so on (Chapters 4 to 7). After that, we will discuss porting existing applications and libraries to Android with NDK (Chapters 8 and 9). Finally, we will demonstrate how to write multimedia apps and games with NDK (Bonus chapters 1 and 2).
What this book covers
Chapter 1, Hello NDK, covers how to set up an Android NDK development environment in Windows, Linux, and MacOS. We will write a "Hello NDK" application at the end of the chapter.
Chapter 2, Java Native Interface, describes the usage of JNI in detail. We will call native methods from the Java code and vice versa.
Chapter 3, Build and Debug NDK Applications, demonstrates building native code from a command line and Eclipse IDE. We will also look at debugging native code with gdb, cgdb, eclipse, and so on.
Chapter 5, Android Native Application API, discusses Android native application APIs, including managing native windows, accessing sensors, handling input events, managing assets, and so on. We will see how to write a pure native app in this chapter.
Chapter 6, Android NDK Multithreading, depicts Android multithreading API. We will cover creating and terminating native threads, various thread synchronization techniques (mutex, conditional variables, semaphore, and reader/writer lock), thread scheduling, and thread data management.
Chapter 7, Other Android NDK API, discusses a few more Android libraries, including jnigraphics, the dynamic linker library, the zlib compression library, the OpenSL ES library, and the OpenMAX AL library.
Chapter 8, Porting and Using Existing Libraries with Android NDK, describes various techniques of porting and using existing C/C++ libraries with NDK. We will port the boost library at the end of the chapter.
Chapter 9, Porting Existing Applications to Android with NDK, provides a step-by-step guide for porting an existing application to Android with NDK. We use an open source image resizing program as an example.
Bonus Chapter 1, Developing Multimedia Applications with NDK, demonstrates how to write multimedia applications with the ffmpeg library. We will port the ffmpeg library and use the library APIs to write a frame grabber application.
Bonus Chapter 2, Developing Games with NDK, discusses writing games with NDK. We will port the Wolfenstein 3D game to show how to set up game display, add game control, and enable audio effects for a game.
You can download the bonus chapters from http://www.packtpub.com/sites/default/ files/downloads/Developing_Multimedia_Applications_with_NDK.pdf and http://www.packtpub.com/sites/default/files/downloads/Developing_ Games_with_NDK.pdf.
What you need for this book
A computer with Windows, Ubuntu Linux, or MacOS installed is necessary (Linux or MacOS is preferable). Although we can run Android apps with an emulator, it is slow and inefficient for Android development. Therefore, it is recommended to have an Android device.
The book assumes a basic understanding of C and C++ programming languages. You should also be familiar with Java and Android SDK.
Who this book is for
The book is written for anyone who is interested in writing native code for Android. The chapters are arranged from basic to intermediate to advanced, and they are relatively independent. Readers who are new to NDK are recommended to read from the beginning to the end, while readers who are familiar with NDK can pick up any specific chapters or even specific recipes.
Conventions
In this book, you will find a number of styles of text that distinguish between different kinds of information. Here are some examples of these styles, and an explanation of their meaning. Code words in text are shown as follows: "Windows NDK comes with a new ndk-build.cmd build script."
A block of code is set as follows:
#include <string.h> #include <jni.h>
jstring
Java_cookbook_chapter1_HelloNDKActivity_naGetHelloNDKStr(JNIEnv* pEnv, jobject pObj)
{
return (*pEnv)->NewStringUTF(pEnv, "Hello NDK!"); }
When we wish to draw your attention to a particular part of a code block, the relevant lines or items are set in bold:
LOCAL_PATH := $(call my-dir) include $(CLEAR_VARS)
LOCAL_MODULE := framegrabber LOCAL_SRC_FILES := framegrabber.c #LOCAL_CFLAGS := -DANDROID_BUILD
LOCAL_LDLIBS := -llog -ljnigraphics -lz
LOCAL_STATIC_LIBRARIES := libavformat_static libavcodec_static libswscale_static libavutil_static
include $(BUILD_SHARED_LIBRARY)
$(call import-module,ffmpeg-1.0.1/android/armv5te)
Any command-line input or output is written as follows:
New terms and important words are shown in bold. Words that you see on the screen, in menus or dialog boxes for example, appear in the text like this: "Go to Control Panel | System and Security | System | Advanced system settings."
Warnings or important notes appear in a box like this.
Tips and tricks appear like this.
Reader feedback
Feedback from our readers is always welcome. Let us know what you think about this book—what you liked or may have disliked. Reader feedback is important for us to develop titles that you really get the most out of.
To send us general feedback, simply send an e-mail to feedback@packtpub.com, and mention the book title via the subject of your message.
If there is a topic that you have expertise in and you are interested in either writing or contributing to a book, see our author guide on www.packtpub.com/authors.
Customer support
Now that you are the proud owner of a Packt book, we have a number of things to help you to get the most from your purchase.
Downloading the example code
Errata
Although we have taken every care to ensure the accuracy of our content, mistakes do happen. If you find a mistake in one of our books—maybe a mistake in the text or the code—we would be grateful if you would report this to us. By doing so, you can save other readers from frustration and help us improve subsequent versions of this book. If you find any errata, please report them by visiting http://www.packtpub.com/submit-errata, selecting your book, clicking on the erratasubmissionform link, and entering the details of your errata. Once your errata are verified, your submission will be accepted and the errata will be uploaded on our website, or added to any list of existing errata, under the Errata section of that title. Any existing errata can be viewed by selecting your title from http://www.packtpub.com/support.
Piracy
Piracy of copyright material on the Internet is an ongoing problem across all media. At Packt, we take the protection of our copyright and licenses very seriously. If you come across any illegal copies of our works, in any form, on the Internet, please provide us with the location address or website name immediately so that we can pursue a remedy.
Please contact us at copyright@packtpub.com with a link to the suspected pirated material. We appreciate your help in protecting our authors, and our ability to bring you valuable content.
Questions
1
Hello NDK
In this chapter, we will cover the following recipes:
f Setting up an Android NDK development environment in Windows f Setting up an Android NDK development environment in Ubuntu Linux f Setting up an Android NDK development environment in Mac OS f Updating Android NDK
f Writing a Hello NDK program
Introduction
Android NDK is a toolset that allows developers to implement a part of or an entire Android application in a native language, such as C, C++, and assembly. Before we start our journey to NDK, it is important to understand the advantages of NDK.
First of all, NDK may improve application performance. This is usually true for many processor-bound applications. Many multimedia applications and video games use native code for processor-intensive tasks.
Java code is run by Dalvik VM on Android. Dalvik VM is specially designed for systems with constrained hardware resources (memory space, processor speed, and so on).
The second source for performance improvements at NDK is that native code allows developers to make use of some processor features that are not accessible at Android SDK, such as NEON, a Single Instruction Multiple Data (SIMD) technology, allowing multiple data elements to be processed in parallel. One particular coding task example is the color conversion for a video frame or a photo. Suppose we are to convert a photo of 1920x1280 pixels from the RGB color space to the YCbCr color space. The naive approach is to apply a conversion formula to every pixel (that is, over two million pixels). With NEON, we can process multiple pixels at one time to reduce the processing time.
The third aspect is that we can optimize the critical code at an assembly level, which is a common practice in desktop software development.
The advantages of using native code do not come free. Calling JNI methods introduces extra work for the Dalvik VM and since the code is compiled, no runtime optimization can be applied. In fact, developing in NDK doesn't guarantee a performance improvement and can actually harm performance at times. Therefore, we only stated that it may improve the app's performance.
The second advantage of NDK is that it allows the porting of existing C and C++ code to Android. This does not only speed up the development significantly, but also allows us to share code between Android and non-Android projects.
Before we decide to use NDK for an Android app, it is good to know that NDK will not benefit most Android apps. It is not recommended to work in NDK simply because one prefers programming in C or C++ over Java. NDK cannot access lots of APIs available in the Android SDK directly, and developing in NDK will always introduce extra complexity into your application.
With the understanding of the pros and cons of NDK, we can start our journey to Android NDK. This chapter will cover how to set up Android NDK development in Windows, Ubuntu Linux, and Mac OS. For developers who have set up an Android NDK development environment before, a recipe with detailed steps of how to update an NDK development environment is provided. At the end of the chapter, we will write a Hello NDK program with the environment setup.
Setting up an Android NDK development
environment in Windows
Getting ready
Check the Windows edition and system type. An Android development environment can be set up on Windows XP 32-bit, Windows Vista 32- or 64-bit, and Windows 7 32- or 64-bit.
Android development requires Java JDK 6 or above to be installed. Follow these steps to install and configure Java JDK:
1. Go to the Oracle Java JDK web page at http://www.oracle.com/technetwork/ java/javase/downloads/index.html, and choose JDK6 or above for your platform to download.
2. Double-click on the downloaded executable, and click through the installation wizard to finish the installation.
3. Go to Control Panel | System and Security | System | Advanced system settings. A System Properties window will pop up.
4. Click on the Environment Variables button in the Advanced tab; another Environment Variables window will pop up.
6. Under System variables, scroll to find the PATH (or Path) environment variable. Insert %JAVA_HOME%\bin; at the beginning of the value. If no PATH or Path variable exists, create a new variable with the value set to %JAVA_HOME%\bin. Click on OK all the way through to dismiss all windows.
7. To verify whether JDK is installed and configured correctly, start a new command-line console, and enter javac -version. If JDK is configured correctly, you will get the Java version in the output.
Cygwin is a Linux-like environment for Windows to run software available on Linux. Android NDK development requires Cygwin 1.7 or higher installed to execute some Linux programs; for example, the GNU make.
Since NDK r7, the Windows NDK comes with a new ndk-build.cmd build script, which uses NDK's prebuilt binaries for GNU make, awk, and other tools. Therefore Cygwin is not required for building NDK programs with ndk-build.cmd. However, it is recommended that you still install Cygwin, because ndk-build.cmd is an experimental feature and Cygwin is still needed by the debugging script ndk-gdb.
Follow these steps to install Cygwin:
1. Go to http://cygwin.com/install.html to download setup.exe for Cygwin. Double-click on it after the download is complete in order to start the installation. 2. Click on Next, then select Install from Internet. Keep clicking on Next until you see
3. Look for GNU make under Devel, ensure it is version 3.81 or later, and gawk under Base. Alternatively, you can search for make and gawk using the Search box. Make sure both GNU make and gawk are selected to install, then click on Next. The installation can take a while to finish:
Eclipse is a powerful software Integrated Development Environment (IDE) with an extensible plugin system. It is the recommended IDE to develop Android apps. Go to http://www.eclipse.org/downloads/, and download the Eclipse Classic or Eclipse IDE for Java developers. Extract the compressed file and it will be ready for use. Note that Android development requires Eclipse 3.6.2 (Helios) or greater.
How to do it…
The following steps show you how to set up an Android NDK development environment in Windows. We will first set up an SDK development environment. Steps 1 to 10 can be skipped if SDK is already set up.
1. Start Eclipse. Select Help | Install New Software, and a window titled Install will pop up.
2. Click on the Add… button at the top-right will corner, and another window titled Add Repository will pop up.
3. In the Add Repository window, enter ADT for Name and
https://dl-ssl.google.com/android/eclipse/ for Location. Then click on OK.
4. It may take a few seconds for Eclipse to load the software items from the ADT website. After loading, select Developer Tools and NDK Plugins, then click on Next to proceed:
5. In the next window, a list of tools to be installed will be shown. Simply click on Next. Read and accept all the license agreements, then click on Finish.
6. After installation finishes, restart Eclipse as prompted. 7. Download Android SDK from
http://developer.android.com/sdk/index.html.
8. Double-click on the installer to start the installation. Follow the wizard to finish the installation.
10. Start Android SDK Manager at the Android SDK installation root directory. Select Android SDK Tools, Android SDK Platform-tools, at least one Android platform (the latest is preferred), System Image, SDK Samples, and Android Support. Then click on Install. in the next window, read and accept all the license agreements, then click on Install:
11. Go to http://developer.android.com/tools/sdk/ndk/index.html to download the latest version of Android NDK. Unzip the downloaded file.
Downloading the example code
12. Open Cygwin.bat under the cygwin root directory. It contains the following content by default:
@echo off C:
chdir C:\cygwin\bin bash --login -i
13. Add the following content after @echo off before C: set IS_UNIX=
set JAVA_HOME=<JDK path>
set PATH=<SDK path>\tools;<NDK path> set ANDROID_NDK_ROOT=/cygdrive/<NDK path>
As an example, the file content on my machine is as follows; note that Progra~1 is the short name for the Program Files folder:
set IS_UNIX=
set JAVA_HOME=c:/Progra~1/Java/jdk1.7.0_05
set PATH=C:/Users/Administrator/AppData/Local/Android/android-sdk/ tools;C:/Users/Administrator/Downloads/android-ndk-r8-windows/ android-ndk-r8
set ANDROID_NDK_ROOT=/cygdrive/c/Users/Administrator/Downloads/ android-ndk-r8-windows/android-ndk-r8
14. Start Cygwin by double-clicking on cygwin.bat, then go to the samples/hello-jni directory in NDK. Type the command ndk-build. If the build is successful, it proves that the NDK environment is set up correctly:
How it works…
In this recipe, we first set up an Android SDK development environment and then the NDK development environment.
Android NDK does not require installation. We downloaded NDK, and configured the path to make it more convenient to use.
Cygwin is not required for Android SDK development, but is essential for NDK development because NDK uses some Linux tools that depend on Cygwin.
NDK plugin in ADT: NDK plugin for Eclipse is available in Android Development Tools (ADT), which allows us to build and debug Android NDK applications easily.
The NDK plugin is only available for ADT 20.0.0 or later, which was released on June 2012. You may want to update your Eclipse ADT in order to use the NDK plugin.
There's more…
Setting up an Android NDK development
environment in Ubuntu Linux
This recipe depicts how to set up an Android NDK development environment in Ubuntu Linux.
Getting ready
Check your Ubuntu version and make sure it is version 8.04 or later.
GNU C Library (glibc) 2.7 or above is required. It is usually installed with Linux by default. Two simple methods can check the version of glibc:
1. Start a terminal, and enter ldd --version. This will print the version of ldd and glibc:
2. We can execute the library as an application. Start a terminal, locate the library location, and then enter the following command:
<glibc library location>/<glibc library>.
The following output will be displayed:
3. We need to enable 32-bit application execution if we are using a 64-bit machine. Start a terminal, and enter the following command:
4. Install JDK 6 or above. At a terminal, enter the command sudo apt-get install openjdk-6-jdk, or alternatively we can enter sudo apt-get install sun-java6-jdk. After installation, we need to add the JDK path to the PATH environment variable by adding the following lines to ~/.bashrc: export JDK_PATH=/usr/local/jdk1.7.0/bin
export PATH=$PATH:$JDK_PATH
We will use Eclipse as our IDE. Please refer to the Setting up an Android NDK development environment in Windows recipe for instructions.
How to do it…
The following steps indicate the procedure of setting up an Android NDK development environment on Ubuntu Linux:
1. Follow steps 1 to 6 of the Setting up an Android NDK development environment in Windows recipe to install the ADT plugin for Eclipse.
2. Download Android SDK from http://developer.android.com/sdk/index. html, then extract the downloaded package.
3. Append the following lines to ~/.bashrc:
export ANDROID_SDK=<path to Android SDK directory>
export PATH=$PATH:$ ANDROID_SDK/tools:$ANDROID_SDK/platform-tools
4. Follow steps 9 and 10 of the Setting up an Android NDK development environment in Windows recipe to configure the SDK path at Eclipse, and download
additional packages.
5. Download the latest version of Android NDK from http://developer.android. com/tools/sdk/ndk/index.html, then extract the downloaded file.
6. Change the lines that you appended to ~/.bashrc in step 3: export ANDROID_SDK=<path to Android SDK directory> export ANDROID_NDK=<path to Android NDK directory>
7. Start a new terminal, then go to the samples/hello-jni directory in NDK. Type the command ndk-build. If the build is successful, it proves that the NDK environment is set up correctly:
How it works…
We first set up Android SDK and then Android NDK. Ensure that the path is set properly, so that the tools can be accessed without referring to the SDK and NDK directories. The .bashrc file is a startup file read by the bash shell when you start a new terminal. The export commands appended the Android SDK and NDK directory locations to the environment variable PATH. Therefore, every time a new bash shell starts, PATH is set properly for SDK and NDK tools.
There's more…
The following are a few more tips on setting up an NDK development environment:
f Configure Path at Startup File: We append to the SDK and NDK paths to the PATH environment variable at ~/.bashrc file. This assumes that our Linux system uses the bash shell. However, if your system uses another shell, the startup file used may be different. The startup files used by some commonly used shells are listed as follows:
For C shell (csh), the startup file to use is ~/.cshrc.
For ksh, the startup file to use can be obtained using the command
echo $ENV.
For sh, the startup file to use is ~/.profile. The user needs to log out of
the current session and log in again for it to take effect.
f Switch JDK: In Android development, we can either use Oracle Java JDK or OpenJDK. In case we run into issues with any one of the JDKs, we can switch to another Java JDK, if we have installed both of them.
To check which JDK the system is currently using, use the following command:
$update-java-alternatives -l
To switch between two JDKs, use the following command:
The following is an example for switching to Oracle JDK 1.6.0:
$sudo update-java-alternatives -s java-1.6.0-sun
Setting up an Android NDK development
environment in Mac OS
This recipe describes how to set up an Android NDK development environment in Mac OS.
Getting ready
Android development requires Mac OS X 10.5.8 or higher, and it works on the x86 architecture only. Ensure that your machine meets these requirements before getting started.
Register an Apple developer account, then go to https://developer.apple.com/xcode/ to download Xcode, which contains a lot of developer tools, including the make utility required for Android NDK development. After the download is complete, run the installation package and make sure that the UNIX Development option is selected for installation.
As usual, Java JDK 6 or above is required. Mac OS X usually ships with a full JDK. We can verify that your machine has the required version by using the following command: $javac -version
How to do it…
Setting up an Android NDK development environment on Mac OS X is similar to setting it up on Ubuntu Linux. The following steps explain how we can do this:
1. Follow steps 1 to 6 of the Setting up an Android NDK development environment in Windows recipe to install the ADT plugin for Eclipse.
2. Download Android SDK from http://developer.android.com/sdk/index. html, then extract the downloaded package.
3. Append the following lines to ~/.profile. If the file doesn't exist, create a new one. Save the changes and log out of the current session:
export ANDROID_SDK=<path to Android SDK directory>
export PATH=$PATH:$ ANDROID_SDK/tools:$ANDROID_SDK/platform-tools
5. In a terminal, start the Android SDK Manager at the tools directory by typing the command android. Select Android SDK Tools, Android SDK Platform-tools, at least one Android platform (the latest one is preferred), System Image, SDK Samples, and Android Support. Then click on Install. In the next window, read and accept all the license agreements, then click on Install.
6. Download the latest version of Android NDK from http://developer.android. com/tools/sdk/ndk/index.html, and then extract the downloaded file. 7. Change the lines that you appended to ~/.profile in step 3:
export ANDROID_SDK=<path to Android SDK directory> export ANDROID_NDK=<path to Android NDK directory>
export PATH=$PATH:$ANDROID_SDK/tools:$ANDROID_SDK/platform-tools:$ANDROID_NDK
8. Start a new terminal, then go to the samples/hello-jni directory in NDK. Type the command ndk-build. If the build is successful, it proves that the NDK environment is set up correctly.
How it works…
The steps to set up an Android NDK development environment on Mac OS X are similar to Ubuntu Linux, since both of them are Unix-like operating systems. We first installed Android SDK, then Android NDK.
Updating Android NDK
When there is a new release of NDK, we may want to update NDK in order to take advantage of the new features or bug fixes with the new release. This recipe talks about how to update Android NDK in Windows, Ubuntu Linux, and Mac OS.
Getting ready
Please read the previous recipes in this chapter, depending on the platform of your choice.
How to do it…
In Windows, follow these instructions to update Android NDK:
2. Open Cygwin.bat under the cygwin root directory. The content should be similar to the following code snippet, if you have previously configured NDK on the system: @echo off
set IS_UNIX=
set JAVA_HOME=<JDK path>
set PATH=<SDK path>\tools;<NDK path> set ANDROID_NDK_ROOT=/cygdrive/<NDK path> C:
chdir C:\cygwin\bin bash --login -i
3. Update <NDK path> from the old NDK path to the newly downloaded and decompressed location.
In Ubuntu Linux, follow these instructions to update Android NDK:
1. Download the latest version of Android NDK from http://developer.android. com/tools/sdk/ndk/index.html, then extract the downloaded file.
2. If we have followed the Setting up an Android NDK development environment in Ubuntu Linux recipe, the following content should appear at the end of ~/.bashrc: export ANDROID_SDK=<path to Android SDK directory>
export ANDROID_NDK=<path to Android NDK directory>
export PATH=$PATH:$ANDROID_SDK/tools:$ANDROID_SDK/platform-tools:$ANDROID_NDK
3. Update the ANDROID_NDK path to the newly downloaded and extracted Android NDK folder.
In Mac OS, the steps are almost identical to Ubuntu Linux, except that we need to append the path to ~/.profile instead of ~/.bashrc.
How it works…
NDK installation is completed by simply downloading and extracting the NDK file, and configuring the path properly. Therefore, updating NDK is as simple as updating the configured path to the new NDK folder.
There's more…
At times, we may feel the need to use an old version of NDK to build certain applications because of compatibility issues. Therefore, it may be useful to keep multiple versions of Android NDK and switch between them by changing the path or simply using the full path to refer to a specific version of NDK.
Writing a Hello NDK program
With the environment set up, let's start writing the code in NDK. This recipe walks through a Hello NDK program.
Getting ready
The NDK development environment needs to be set up properly before starting to write the Hello NDK program. Please refer to previous recipes in this chapter, depending upon the platform of your choice.
How to do it…
Follow these steps to write, compile, and run the Hello NDK program:
1. Start Eclipse, and select File | New | Android Project. Enter HelloNDK as the value for Project Name. Select Create new project in workspace. Then click on Next:
3. In the next window, specify your package name as cookbook.chapter1. Select the Create Activity box, and specify the name as HelloNDKActivity. Set the value for Minimum SDK as 5 (Android 2.0). Click on Finish:
5. Right-click on the newly-created jni folder under the HelloNDK project. Select New | File, enter hello.c as the value for File name, then click on Finish. Type the following code in the hello.c file:
#include <string.h> #include <jni.h>
jstring
Java_cookbook_chapter1_HelloNDKActivity_naGetHelloNDKStr(JNIEnv* pEnv, jobject pObj)
{
return (*pEnv)->NewStringUTF(pEnv, "Hello NDK!"); }
6. Right-click on the jni folder. Select New | File, enter Android.mk as the value for File name, then click on Finish. Type the following code in the Android.mk file: LOCAL_PATH := $(call my-dir)
include $(CLEAR_VARS) LOCAL_MODULE := hello LOCAL_SRC_FILES := hello.c include $(BUILD_SHARED_LIBRARY)
7. Start a terminal, go to the jni folder, and type ndk-build to build the hello.c program as a native library.
8. Edit the HelloNDKActivity.java file. The file should contain the following content: public class HelloNDKActivity extends Activity {
@Override
public void onCreate(Bundle savedInstanceState) { super.onCreate(savedInstanceState);
TextView tv = new TextView(this); tv.setTextSize(30);
tv.setText(naGetHelloNDKStr()); this.setContentView(tv);
}
public native String naGetHelloNDKStr(); static {
System.loadLibrary("hello"); }
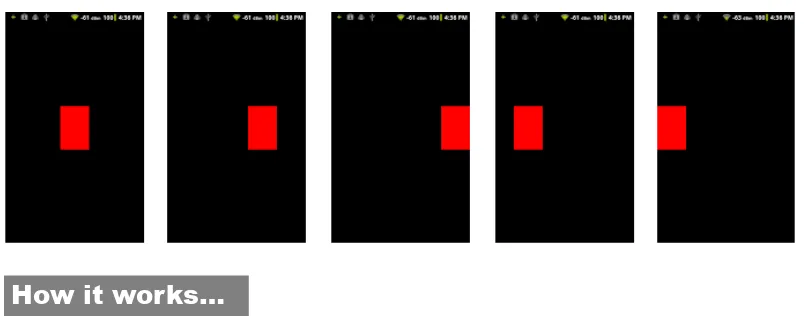
9. Right-click on the HelloNDK project in Eclipse. Select Run As | Android Application. Your Android phone or emulator will be displayed with something similar to the following screenshot:
How it works…
This recipe demonstrated how to write a Hello NDK program on Android.
f Native code: The Hello NDK program consists of both the native C code and Java code. The native function naGetHelloNDKStr returns the Hello NDK string to the caller, as indicated in both the native code function definition and Java code method declaration. The native function name must follow a specific pattern for a package name, class name, and method name. The package and class name must agree with the package and class name of the Java class from which the native method is called, while the method name must be the same as the method name declared in that Java class.
This helps the Dalvik VM to locate the native function at runtime. Failing to follow the rule will result in UnsatisfiedLinkError at runtime.
The native function has two parameters, which are standard for all native functions. Additional parameters can be defined based on needs. The first parameter is a pointer to JNIEnv, which is the gateway to access various JNI functions. The meaning of the second parameter depends on whether the native method is a static or an instance method. If it's a static method, the second parameter is a reference to the class where the method is defined. If it's an instance method, the second parameter is a reference to the object on which the native method is invoked. We will discuss JNI in detail in Chapter 2, Java Native Interface.
f Compilation of the native code: The Android NDK build system frees developers from writing makefile. The build system accepts an Android.mk file, which simply describes the sources. It will parse the file to generate makefile and do all the heavy lifting for us.
We will cover details of how to write the Android.mk file or even write our own makefile in Chapter 3, Build and Debug NDK Applications.
f Java code: Three steps are followed to call the native method: 1. Load the native library: This is done by calling System.
loadLibrary("hello"). Note that instead of libhello, we should use hello. The Dalvik VM will fail to locate the library if libhello is specified. 2. Declare the method: We declare the method with a native keyword to
indicate that it is a native method.
3. Invoke the method: We call the method just like any normal Java method.
There's more…
The name of a native method is lengthy and writing it manually is error-prone. Fortunately, the javah program from JDK can help us generate the header file, which includes the method name. The following steps should be followed to use javah:
1. Write the Java code, including the native method definition.
2. Compile the Java code and make sure the class file appears under the bin/classes/ folder of our project.
3. Start a terminal and go to the jni folder, and enter the following command:
$ javah -classpath ../bin/classes –o <output file name> <java package name>.<java class anme>
In our HelloNDK example, the command should be as follows:
$ javah -classpath ../bin/classes –o hello.h cookbook.chapter1. HelloNDKActivity
This will generate a file named hello.h with its function definition as follows:
JNIEXPORT jstring JNICALL Java_cookbook_chapter1_HelloNDKActivity_ naGetHelloNDKStr
2
Java Native Interface
In this chapter, we will cover the following recipes:
f Loading native libraries and registering native methods f Passing parameters and receiving returns in primitive types f Manipulating strings in JNI
f Managing references in JNI f Manipulating classes in JNI f Manipulating objects in JNI f Manipulating arrays in JNI
f Accessing Java static and instance fields in native code
f Calling static and instance methods from native code
f Caching jfieldID, jmethodID, and reference data to improve performance
Introduction
Programming with Android NDK is essentially writing code in both Java and native
languages such as C, C++, and assembly. Java code runs on Dalvik Virtual Machine (VM), while native code is compiled to binaries running directly on the operating system. Java Native Interface (JNI) acts like the bridge that brings both worlds together. This relationship between Java code, Dalvik VM, native code, and the Android system can be illustrated using the following diagram:
The arrow in the diagram indicates which party initiates the interaction. Both Dalvik VM and Native Code run on top of Android system (Android is a Linux-based OS). They require the system to provide the execution environment. JNI is part of Dalvik VM, which allows Native Code to access fields and invoke methods at Java Code. JNI also allows Java Code to invoke native methods implemented in Native Code. Therefore, JNI facilitates the two-way communication between Native Code and Java Code.
If you are familiar with Java programming and C, or C++, or assembly programming, then learning programming with Android NDK is mostly learning JNI. JNI comes with both primitive and reference data types. These data types have their corresponding mapping data types in Java. Manipulating the primitive types can usually be done directly, since a data type is normally equivalent to a native C/C++ data type. However, reference data manipulation often requires the help of the predefined JNI functions.
In this chapter, we'll first cover various data types in JNI and demonstrate how to
invoke native methods from Java. We then describe accessing the Java fields and calling Java methods from the native code. Finally, we will discuss how to cache data to achieve better performance, how to handle errors and exceptions, and how to use assembly in native method implementation.
JNI is a complex topic, and we tried to cover the most essential parts of it in the context of Android NDK programming. However, a single chapter is not enough to provide all the details. Readers may want to refer to Java
JNI Specification at http://docs.oracle.com/javase/6/docs/ technotes/guides/jni/ or the Java Native Interface: Programmer's Guide and Specification book at http://java.sun.com/docs/ books/jni/. For Android-specific information, you can refer to JNI Tips at https://developer.android.com/guide/practices/jni.html.
Loading native libraries and registering
native methods
Native code is usually compiled into a shared library and loaded before the native methods can be called. This recipe covers how to load native libraries and register native methods.
Getting ready
Please read the recipes in Chapter 1, Hello NDK, to set up the Android NDK development environment if you haven't done so already.
How to do it…
The following steps will show you how to build an Android application that demonstrates loading native libraries and registering native methods:
1. Start Eclipse, select File | New | Android Project. Enter the value for Project Name as NativeMethodsRegister. Select Create new project in workspace. Then, click on Next.
2. In the next window, select the latest version of Android SDK, then click on Next to go to the next window.
3. Specify the package name as cookbook.chapter2. Select the Create Activity checkbox, and specify the name as NativeMethodsRegisterActivity. Set the value for Minimum SDK as 5 (Android 2.0). Then, click on Finish. 4. In Eclipse Package Explorer, right-click on the NativeMethodsRegister
project, then select New | Folder. Enter the name jni in the pop-up window, then click on Finish.
6. Add the following code to nativetest.c: #include <android/log.h>
#include <stdio.h>
jint NativeAddition(JNIEnv *pEnv, jobject pObj, jint pa, jint pb) {
return pa+pb; }
jint NativeMultiplication(JNIEnv *pEnv, jobject pObj, jint pa, jint pb) {
return pa*pb; }
JNIEXPORT jint JNICALL JNI_OnLoad(JavaVM* pVm, void* reserved) {
JNIEnv* env;
if ((*pVm)->GetEnv(pVm, (void **)&env, JNI_VERSION_1_6)) { return -1;
}
JNINativeMethod nm[2];
nm[0].name = "NativeAddition"; nm[0].signature = "(II)I"; nm[0].fnPtr = NativeAddition;
nm[1].name = "NativeMultiplication"; nm[1].signature = "(II)I";
nm[1].fnPtr = NativeMultiplication;
jclass cls = (*env)->FindClass(env, "cookbook/chapter2/ NativeMethodRegisterActivity");
// Register methods with env->RegisterNatives. (*env)->RegisterNatives(env, cls, nm, 2); return JNI_VERSION_1_6;
}
7. Add the following code to load the native shared library and define native methods to NativeMethodRegisterActivity.java:
}
private native int NativeAddition(int a, int b); private native int NativeMultiplication(int a, int b); static {
//use either of the two methods below //System.loadLibrary("NativeRegister");
System.load("/data/data/cookbook.chapter2/lib/ libNativeRegister.so");
} }
8. Change TextView in the res/layout/activity_native_method_register. xml file as follows:
<TextView
android:id="@+id/display_res" android:layout_width="wrap_content" android:layout_height="wrap_content" android:layout_centerHorizontal="true" android:padding="@dimen/padding_medium" android:text="@string/hello_world"
tools:context=".NativeMethodRegisterActivity" />
9. Create a file named Android.mk under the jni folder with the following content: LOCAL_PATH := $(call my-dir)
include $(CLEAR_VARS)
LOCAL_MODULE := NativeRegister LOCAL_SRC_FILES := nativetest.c LOCAL_LDLIBS := -llog
include $(BUILD_SHARED_LIBRARY)
10. Start a terminal, go to the jni folder under our project, and type ndk-build to build the native library.
How it works…
This recipe describes how to load a native library and register native methods:
f Loading Native Library: The java.lang.System class provides two methods to load native libraries, namely loadLibrary and load. loadLibrary accepts a library name without the prefix and file extension. For example, if we want to load the Android native library compiled as libNativeRegister.so in our sample project, we use System.loadLibrary("NativeRegister"). The System. load method is different. It requires the full path of the native library. In our sample project, we can use System.load("/data/data/cookbook.chapter2/lib/ libNativeRegister.so") to load the native library. The System.load method can be handy when we want to switch between different versions of a native library, since it allows us to specify the full library path.
We demonstrated the usage of both the methods in the static initializer of the NativeMethodRegisterActivity.java class. Note that only one method should be enabled when we build and run the sample application.
The JNIEnv interface pointer is the gateway to access all pre-defined JNI functions, including the functions that enable the native code to process Java objects, access Java fields, invoke Java methods, and so on. The RegisterNatives native function we're going to discuss next is also one of them.
The JNIEnv interface pointer points to thread-local data, so it cannot be shared between threads. In addition, JNIEnv is only accessible by a Java thread. A native thread must call the JNI function AttachCurrentThread to attach itself to the VM, to obtain the JNIEnv interface pointer. We will see an example of this in the Manipulating classes in JNI recipe in this chapter.
f Registering Native Methods: JNI can automatically discover the native method implementation if its function name follows a specific naming convention as mentioned in Chapter 1, Hello NDK. This is not the only way. In our sample project, we explicitly called the RegisterNatives JNI function to register the native methods. The RegisterNatives function has the following prototype: jint RegisterNatives(JNIEnv *env, jclass clazz, const JNINativeMethod *methods, jint nMethods);
The clazz argument is a reference to the class in which the native method is to be registered. The methods argument is an array of the JNINativeMethod data structure. JNINativeMethod is defined as follows:
typedef struct { char *name; char *signature; void *fnPtr; } JNINativeMethod;
name indicates the native method name, signature is the descriptor of the method's input argument data type and return value data type, and fnPtr is the function pointer pointing to the native method. The last argument, nMethods of RegisterNatives, indicates the number of methods to register. The function returns zero to indicate success, and a negative value otherwise.
The typical way of using RegisterNatives is in the JNI_OnLoad method as shown in the following template. JNI_OnLoad is called when the native library is loaded, so we can guarantee that the native methods are registered before they're invoked: JNIEXPORT jint JNICALL JNI_OnLoad(JavaVM* pVm, void* reserved) {
JNIEnv* env;
if ((*pVm)->GetEnv(pVm, (void **)&env, JNI_VERSION_1_6)) { return -1;
}
// Get jclass with env->FindClass.
// Register methods with env->RegisterNatives.
return JNI_VERSION_1_6; }
We demonstrated the usage of the preceding template in the JNI_OnLoad method of our sample code, where we registered two native methods to add and multiply two input integers respectively. The execution result shown earlier proves that the Java code can invoke the two registered native methods successfully.
Note that this example uses some JNI features that we're going to cover in later recipes, including the FindClass function and field descriptors. It is alright if don't fully understand the code at this stage. You can always go back to it after learning more about those topics.
Passing parameters and receiving returns in
primitive types
Java code can pass parameters to native methods and receive the processing results returned. This recipe walks through how to pass parameters and receive returns in primitive types.
Getting ready
How to do it…
The following steps create a sample Android application with native methods receiving input parameters from the Java code and returning the processing result back:
1. Create a project named PassingPrimitive. Set the package name as
cookbook.chapter2. Create an activity named PassingPrimitiveActivity. Under this project, create a folder named jni. Please refer to the Loading native libraries and registering native methods recipe in this chapter if you want more detailed instructions.
2. Add a file named primitive.c under the jni folder and implement the native methods. In our sample project, we implemented one native method for each of the eight primitive data types. Following is the code for jboolean, jint, and jdouble. Please refer to the downloaded code for the complete list of methods:
#include <jni.h>
#include <android/log.h>
JNIEXPORT jboolean JNICALL Java_cookbook_chapter2_
PassingPrimitiveActivity_passBooleanReturnBoolean(JNIEnv *pEnv, jobject pObj, jboolean pBooleanP){
__android_log_print(ANDROID_LOG_INFO, "native", "%d in %d bytes", pBooleanP, sizeof(jboolean));
return (!pBooleanP); }
JNIEXPORT jint JNICALL Java_cookbook_chapter2_
PassingPrimitiveActivity_passIntReturnInt(JNIEnv *pEnv, jobject pObj, jint pIntP) {
__android_log_print(ANDROID_LOG_INFO, "native", "%d in %d bytes", pIntP, sizeof(jint));
return pIntP + 1; }
JNIEXPORT jdouble JNICALL Java_cookbook_chapter2_
PassingPrimitiveActivity_passDoubleReturnDouble(JNIEnv *pEnv, jobject pObj, jdouble pDoubleP) {
__android_log_print(ANDROID_LOG_INFO, "native", "%f in %d bytes", pDoubleP, sizeof(jdouble));
3. In the PassingPrimitiveActivity.java Java code, we add code to load the native library, declare the native methods, and call the native methods. Following is that part of the code. The "…" indicates the part that is not shown. Please refer to the source file downloaded from the website for the complete code:
@Override
public void onCreate(Bundle savedInstanceState) { super.onCreate(savedInstanceState);
setContentView(R.layout.activity_passing_primitive); StringBuilder strBuilder = new StringBuilder();
strBuilder.append("boolean: ").append(passBooleanReturnBoo lean(false)).append(System.getProperty("line.separator"))
...
.append("double: ").append(passDoubleReturnDoub le(11.11)).append(System.getProperty("line.separator"));
TextView tv = (TextView) findViewById(R.id.display_res); tv.setText(strBuilder.toString());
}
private native boolean passBooleanReturnBoolean(boolean p); private native byte passByteReturnByte(byte p);
private native char passCharReturnChar(char p); private native short passShortReturnShort(short p); ...
static {
System.loadLibrary("PassingPrimitive"); }
4. Modify the res/layout/activity_passing_primitive.xml file according to step 8 of the Loading native libraries and registering native methods recipe of this chapter or the downloaded project code.
5. Create a file named Android.mk under the jni folder, and add the following content to it:
LOCAL_PATH := $(call my-dir) include $(CLEAR_VARS)
LOCAL_MODULE := PassingPrimitive LOCAL_SRC_FILES := primitive.c LOCAL_LDLIBS := -llog
6. Start a terminal, go to the jni folder, and type ndk-build to build the native library PassingPrimitive.
7. In Eclipse, select Window | Show View | LogCat to show the logcat console. Alternatively, start a terminal and enter the following command in your terminal to show logcat output on it:
$adb logcat -v time
8. Run the project on an Android device or emulator. You should see something similar to the following screenshot:
How it works…
The code illustrates how to pass parameters and receive returns in primitive types from the native method. We created one method for each primitive type. In the native code, we printed the received value to logcat, modified the value, and returned it back.
f JNI primitive type and Java primitive type mapping: The primitive types in JNI and Java have the following mapping:
Java Type JNI Type Number of bytes Sign
boolean jboolean 1 unsigned
byte jbyte 1 signed
char jchar 2 unsigned
short jshort 2 signed
int jint 4 signed
long jlong 8 signed
float jfloat 4
-double jdouble 8
-Note that both Java char and JNI jchar are two bytes, while the C/C++ char type is only one byte long. In fact, C/C++ char are interchangeable with jbyte instead of jchar in JNI programming.
f Android log library: We output the received values to the Android logging system at a native method, by using the following code:
__android_log_print(ANDROID_LOG_INFO, LOG_TAG, __VA_ARGS__);
ANDROID_LOG_INFO is an enum value defined in android/log.h, which indicates that we're using the info-level logging. LOG_TAG can be any strings, and __VA_ ARGS__ is replaced by the parameters passed to the API, in a format similar to the printf method in C.
We must include the android/log.h header in the native code to use the log functions:
#include <android/log.h>
Besides this, we'll need to include the NDK log library in the Android.mk file in order to use the API:
LOCAL_LDLIBS := -llog
Manipulating strings in JNI
Strings are somewhat complicated in JNI, mainly because Java strings and C strings are internally different. This recipe will cover the most commonly used JNI string features.
Getting ready
Understanding the basics of encoding is essential to comprehend the differences between Java string and C string. We'll give a brief introduction to Unicode.
According to the Unicode Consortium, the Unicode Standard is defined as follows:
The Unicode Standard is a character coding system designed to support the worldwide interchange, processing, and display of the written texts of the diverse languages and technical disciplines of the modern world. In addition, it supports classical and historical texts of many written languages.
Unicode assigns a unique number for each character it defines, called code point. There are mainly two categories of encoding methods that support the entire Unicode character set, or a subset of it.
The first one is the Unicode Transformation Format (UTF), which encodes a Unicode code point into a variable number of code values. UTF-8, UTF-16, UTF-32, and a few others belong to this category. The numbers 8, 16, and 32 refer to the number of bits in one code value. The second category is the Universal Character Set (UCS) encodings, which encodes a Unicode code point into a single code value. UCS2 and UCS4 belong to this category. The numbers 2 and 4 refer to the number of bytes in one code value.
Unicode defines more characters than what two bytes can possibly represent.
Therefore, UCS2 can only represent a subset of Unicode characters. Because
Unicode defines fewer characters than what four bytes can represent, multiple
code values of UTF-32 are never needed. Therefore, UTF-32 and UCS4 are functionally identical.
How to do it
The following steps show you how to create a sample Android project that illustrates string manipulation at JNI:
1. Create a project named StringManipulation. Set the package name as
cookbook.chapter2. Create an activity named StringManipulationActivity. Under the project, create a folder named jni. Refer to the Loading native
libraries and registering native methods recipe in this chapter if you want more detailed instructions.
2. Create a file named stringtest.c under the jni folder, then implement the passStringReturnString method as follows:
JNIEXPORT jstring JNICALL Java_cookbook_chapter2_
StringManipulationActivity_passStringReturnString(JNIEnv *pEnv, jobject pObj, jstring pStringP){
__android_log_print(ANDROID_LOG_INFO, "native", "print jstring: %s", pStringP);
const jbyte *str; jboolean *isCopy;
str = (*pEnv)->GetStringUTFChars(pEnv, pStringP, isCopy); __android_log_print(ANDROID_LOG_INFO, "native", "print UTF-8 string: %s, %d", str, isCopy);
jsize length = (*pEnv)->GetStringUTFLength(pEnv, pStringP); __android_log_print(ANDROID_LOG_INFO, "native", "UTF-8 string length (number of bytes): %d == %d", length, strlen(str)); __android_log_print(ANDROID_LOG_INFO, "native", "UTF-8 string ends with: %d %d", str[length], str[length+1]);
(*pEnv)->ReleaseStringUTFChars(pEnv, pStringP, str);
char nativeStr[100];
(*pEnv)->GetStringUTFRegion(pEnv, pStringP, 0, length, nativeStr);
__android_log_print(ANDROID_LOG_INFO, "native", "jstring converted to UTF-8 string and copied to native buffer: %s", nativeStr);
const char* newStr = "hello 安卓";
jstring ret = (*pEnv)->NewStringUTF(pEnv, newStr);
jsize newStrLen = (*pEnv)->GetStringUTFLength(pEnv, ret); __android_log_print(ANDROID_LOG_INFO, "native", "UTF-8 string with Chinese characters: %s, string length (number of bytes) %d=%d", newStr, newStrLen, strlen(newStr));
3. In the StringManipulationActivity.java Java code, add the code to load a native library, declare a native method, and invoke a native method. Refer to downloaded code for the source code details.
4. Modify the res/layout/activity_passing_primitive.xml file according to step 8 of the Loading native libraries and registering native methods recipe in this chapter or the downloaded project code.
5. Create a file called Android.mk under the jni folder. Refer to step 9 of the
Loading native libraries and registering native methods recipe in this chapter or the downloaded code for details.
6. Start a terminal, go to the jni folder, and type ndk-build to build the native library. 7. Run the project on an Android device or emulator. We should see something similar
to the following screenshot:
The following should be seen at the logcat output:
How it works…
This recipe discusses string manipulation at JNI.
f Character encoding: Android uses UTF-8 as its default charset, which is shown in our program by executing the Charset.defaultCharset().name() method. This means that the default encoding in the native code is UTF-8. As mentioned before, Java uses the UTF-16 charset. This infers that an encoding conversion is needed when we pass a string from Java to the native code and vice versa. Failing to do so will cause unwanted results. In our example, we tried printing jstring directly in the native code, but the result was some unrecognizable characters.
f Java string to native string: When a native method is called with an input parameter of string type, the string received needs to be converted to the native string first. Two JNI functions can be used for different cases.
The first function is GetStringUTFChars, which has the following prototype: const jbyte * GetStringUTFChars(JNIEnv *env, jstring string, jboolean *isCopy);
This function converts the Java string into an array of UTF-8 characters. If a new copy of the Java string content is made, isCopy is set to true when the function returns; otherwise isCopy is set to false and the returned pointer points to the same characters as the original Java string.
It is not predictable whether the VM will return a new copy of the Java string. Therefore, we must be careful when converting a large string, as the possible memory allocation and copy may affect the performance and even cause "out of memory" issues. Also note that if isCopy is set to false, we cannot modify the returned UTF-8 native string, because it will modify the Java string content and break the immutability property of the Java string.
Once we've finished all the operations with the converted native string, we should call ReleaseStringUTFChars to inform the VM that we don't need to access the UTF-8 native string anymore. The function has the following prototype, with the second parameter being the Java string and the third parameter being the UTF-8 native string: void ReleaseStringUTFChars(JNIEnv *env, jstring string, const char *utf);
The second function for conversion is GetStringUTFRegion, with the following prototype:
void GetStringUTFRegion(JNIEnv *env, jstring str, jsize start, jsize len, char *buf);
The start and len parameters indicate the start position of the Java UTF-16 string and number of UTF-16 characters for conversion. The buf argument points to the location to store the converted native UTF-8 char array.
Let's compare the two methods. The first method may or may not require allocation of new memory for the converted UTF-8 string depending on whether VM decides to make a new copy or not, whereas the second method made use of a pre-allocated buffer to store the converted content. In addition, the second method allows us to specify the position and length of the conversion source. Therefore, the following rules can be followed:
If we only need a substring of the original Java string, and the substring is
not large, the GetStringUTFRegion should be used
If we're dealing with a large string, and we're not going to modify the
converted UTF-8 native string, GetStringUTFChars should be used
In our example, we used a fixed length buffer when calling the GetStringUTFRegion function. We should make sure it is enough to hold the string, otherwise we should use the dynamic allocated array.
f String length: The JNI function GetStringUTFLength can be used to get the string length of a UTF-8 jstring. Note that it returns the number of bytes and not the number of UTF-8 characters, as shown in our example.
f Native string to Java string: We also need to return string data from the native code to Java code at times. The returned string should be UTF-16 encoded. The JNI function NewStringUTF constructs a jstring from a UTF-8 native string. It has the following prototype:
jstring NewStringUTF(JNIEnv *env, const char *bytes);
f Conversion failure: GetStringUTFChars and NewStringUTF require allocation of memory space to store the converted string. If you run out of memory, these methods will throw an OutOfMemoryError exception and return NULL. We'll cover more about exception handling in the Checking errors and handling exceptions in JNI recipe.
There's more…
More about character encoding in JNI: JNI character encoding is much more complicated than what we covered here. Besides UTF-8, it also supports UTF-16 conversion functions. It is also possible to call Java string methods in the native code to encode/decode characters in other formats. Since Android uses UTF-8 as its platform charset, we only cover how to deal with conversions between Java UTF-16 and UTF-8 native string here.
Managing references in JNI
How to do it…
The following steps create a sample Android project that illustrates reference management in JNI:
1. Create a project named ManagingReference. Set the package name as
cookbook.chapter2. Create an activity named ManagingReferenceActivity. Under the project, create a folder named jni. Refer to the Loading native
libraries and registering native methods recipe in this chapter, if you want more detailed instructions.
2. Create a file named referencetest.c under the jni folder, then implement the localReference, globalReference, weakReference, and referenceAssignmentAndNew methods. This is shown in the following code snippet:
JNIEXPORT void JNICALL Java_cookbook_chapter2_
ManagingReferenceActivity_localReference(JNIEnv *pEnv, jobject pObj, jstring pStringP, jboolean pDelete){
jstring stStr; int i;
for (i = 0; i < 10000; ++i) {
stStr = (*pEnv)->NewLocalRef(pEnv, pStringP); if (pDelete) {
(*pEnv)->DeleteLocalRef(pEnv, stStr); }
} }
JNIEXPORT void JNICALL Java_cookbook_chapter2_
ManagingReferenceActivity_globalReference(JNIEnv *pEnv, jobject pObj, jstring pStringP, jboolean pDelete){
static jstring stStr; const jbyte *str; jboolean *isCopy; if (NULL == stStr) {
stStr = (*pEnv)->NewGlobalRef(pEnv, pStringP); }
str = (*pEnv)->GetStringUTFChars(pEnv, stStr, isCopy); if (pDelete) {
(*pEnv)->DeleteGlobalRef(pEnv, stStr); stStr = NULL;
} }
JNIEXPORT void JNICALL Java_cookbook_chapter2_