FOREWORD . . . xxv
INTRODUCTION . . . .xxvii
CHAPTER 1 Getting Started with ASP.NET 4.5.1 . . . 1
CHAPTER 2 Building an ASP.NET Website . . . 33
CHAPTER 3 Designing Your Web Pages . . . 63
CHAPTER 4 Working with ASP.NET Server Controls . . . 101
CHAPTER 5 Programming Your ASP.NET Web Pages . . . 135
CHAPTER 6 Creating Consistent Looking Websites . . . 195
CHAPTER 7 Navigation . . . 239
CHAPTER 8 User Controls . . . 273
CHAPTER 9 Validating User Input . . . 299
CHAPTER 10 ASP.NET AJAX . . . 337
CHAPTER 11 jQuery . . . 369
CHAPTER 12 Introducing Databases . . . 407
CHAPTER 13 Displaying and Updating Data . . . 439
CHAPTER 14 LINQ and the ADO.NET Entity Framework . . . 485
CHAPTER 15 Working with Data — Advanced Topics . . . 539
CHAPTER 16 Security in Your ASP.NET Website . . . 589
CHAPTER 17 Personalizing Websites . . . 629
CHAPTER 18 Exception Handling, Debugging, and Tracing . . . 663
CHAPTER 19 Deploying Your Website. . . 715
APPENDIX A Exercise Answers . . . 757
APPENDIX B Configuring SQL Server 2012 . . . 781
ASP.NET 4.5.1
IN C# AND VB
10475 Crosspoint Boulevard Indianapolis, IN 46256
www.wiley.com
Copyright © 2014 by John Wiley & Sons, Inc., Indianapolis, Indiana
Published simultaneously in Canada
ISBN: 978-1-118-84677-3 ISBN: 978-1-118-84690-2 (ebk) ISBN: 978-1-118-84696-4 (ebk)
Manufactured in the United States of America
10 9 8 7 6 5 4 3 2 1
No part of this publication may be reproduced, stored in a retrieval system or transmitted in any form or by any means, electronic, mechanical, photocopying, recording, scanning or otherwise, except as permitted under Sections 107 or 108 of the 1976 United States Copyright Act, without either the prior written permission of the Publisher, or authorization through payment of the appropriate per-copy fee to the Copyright Clearance Center, 222 Rosewood Drive, Danvers, MA 01923, (978) 750-8400, fax (978) 646-8600. Requests to the Publisher for permission should be addressed to the Permissions Department, John Wiley & Sons, Inc., 111 River Street, Hoboken, NJ 07030, (201) 748-6011,
fax (201) 748-6008, or online at http://www.wiley.com/go/permissions.
Limit of Liability/Disclaimer of Warranty: The publisher and the author make no representations or warranties with respect to the accuracy or completeness of the contents of this work and specifically disclaim all warranties, including without limitation warranties of fitness for a particular purpose. No warranty may be created or extended by sales or promotional materials. The advice and strategies contained herein may not be suitable for every situation. This work is sold with the understanding that the publisher is not engaged in rendering legal, accounting, or other professional services. If professional assistance is required, the services of a competent professional person should be sought. Neither the publisher nor the author shall be liable for damages arising herefrom. The fact that an organization or Web site is referred to in this work as a citation and/or a potential source of further information does not mean that the author or the publisher endorses the information the organization or Web site may provide or recommendations it may make. Further, readers should be aware that Internet Web sites listed in this work may have changed or disappeared between when this work was written and when it is read.
For general information on our other products and services please contact our Customer Care Department within the United States at (877) 762-2974, outside the United States at (317) 572-3993 or fax (317) 572-4002.
Wiley publishes in a variety of print and electronic formats and by print-on-demand. Some material included with standard print versions of this book may not be included in e-books or in print-on-demand. If this book refers to media such as a CD or DVD that is not included in the version you purchased, you may download this material at http://booksupport .wiley.com. For more information about Wiley products, visit www.wiley.com.
Library of Congress Control Number: 2013958296
IMAR SPAANJAARS graduated in Leisure Management at the Leisure Management School in the Netherlands, but he quickly changed his career path to the Internet world.
After working in the Internet business at various web agencies for over twelve years, he now runs his own company called De Vier Koeden (http://devierkoeden.com), a small Internet agency specializing in consultancy and development of Internet and intranet applications with Microsoft technologies such as ASP.NET 4.5.1. He’s also the CTO of Dynamicweb North America, the U.S. branch of the popular Danish content management, e-commerce, and online marketing platform.
Imar has written books on ASP.NET and Macromedia Dreamweaver, all published under the Wrox brand. He is also one of the top contributors to the Wrox Community Forum at p2p.wrox.com, where he shares his knowledge with fellow programmers.
Imar has received Microsoft’s Most Valuable Professional (MVP) award each year since 2008 for his contributions to the ASP.NET community. In early 2012, Imar joined the ASPInsiders, a small group of international professionals that provide feedback and direction on new features for future versions of ASP.NET.
Imar lives in Utrecht, the Netherlands, with his girlfriend Fleur and his son Niek. You can contact him through his personal website at http://imar.spaanjaars.com or by e-mail at
Acquisitions Editor Mary James
Project Editor Brian Herrmann
Technical Editor Jason Gaylord
Production Editor Daniel Scribner
Editorial Manager Mary Beth Wakefield
Associate Director of Marketing David Mayhew
Marketing Manager Ashley Zurcher
Business Manager Amy Knies
Vice President and Executive Group Publisher
Richard Swadley
Associate Publisher Jim Minatel
Project Coordinator, Cover Katie Crocker
Proofreaders
Josh Chase, Louise Watson, Sarah Kaikini, Word One
Indexer Robert Swanson
Cover Designer Ryan Sneed
Cover Image
ALTHOUGH THE JUMP in version number by only 0.1 seems to suggest that there’s not much new in ASP.NET 4.5.1 or Visual Studio 2013, you’d be surprised at the number of changes — small and large — that made their way into these products. I spent the past couple of months working on updating this book from the .NET 4.5 release to the new .NET 4.5.1 release. I discovered new features and functionality every day. Some of those changes are really small, but could mean a boost in productivity on a day-to-day basis. Others are much bigger and affect the way you build or deploy your websites. I tried to incorporate all the new features found in ASP.NET and Visual Studio that will make sense for you, someone with no or limited experience with ASP.NET.
I have also made a lot of changes to the book based on reader feedback. Just as with the previous versions of the book, I went over all the errata that have been submitted as well as over the hundreds of forum posts that were made, identifying areas in the book that readers had difficulties with, and finding ways to improve it. If you have the previous edition and posted a question in the Wrox forums: thanks for your valuable feedback; you’ve really helped to make this book better.
Besides my readers, I owe a lot to other people who helped me write this book.
First of all, a big thanks goes out to Brian Herrmann for his editorial work. Once again, it was a pleasure to work with you! I also want to thank Jason Gaylord for his many useful suggestions he provided as a technical editor. Both of you really helped shape this book. Many thanks also to the people from Wrox for their support and contributions to this book.
Another person I owe a lot to is my friend Anne Ward from Blue Violet, a UK-based web and graphic design company. Anne has done most of the designs used in this book and I highly appreciate her input. Thanks again, Anne! The concert pictures you see in this book come from Nigel D. Nudds, who kindly let me use pictures from his collection.
FOREWORD xxv
INTRODUCTION xxvii
CHAPTER 1: GETTING STARTED WITH ASP.NET 4.5.1 1
Microsoft Visual Studio Express for Web
2
Getting Visual Studio 3
Installing Visual Studio Express for Web (VSEW) 3
Creating Your First ASP.NET 4.5.1 Website
5
An Introduction to ASP.NET 4.5.1
9
Understanding HTML 10
A First Look at ASP.NET Markup 15
A Tour of the IDE
16
The Main Development Area 16
Informational Windows 22
Customizing the IDE
23
Rearranging Windows 23
Modifying the Toolbox 24
Customizing the Document Window 26
Customizing Toolbars 27
Customizing Keyboard Shortcuts 28
Resetting Your Changes 28
The Sample Application
29
Practical Tips on Visual Studio
30
Summary 31
CHAPTER 2: BUILDING AN ASP.NET WEBSITE 33
Creating Websites with Visual Studio 2013
34
Different Project Types 34
Choosing the Right Website Template 35
Creating and Opening a New Website 37
Working with Files in Your Website
41
The Many File Types of an ASP.NET Website 41
Adding Existing Files 44
Organizing Your Site 45
Special File Types 46
The Different Views on Web Forms 47 Choosing between Code Behind and Pages with Inline Code 49
Adding Markup to Your Page 54
Connecting Pages 59
Practical Tips on Working with Web Forms
61
Summary 61
CHAPTER 3: DESIGNING YOUR WEB PAGES 63
Why Do You Need CSS?
64
Problems with Using HTML Formatting 64
How CSS Fixes Formatting Problems 65
An Introduction to CSS
65
CSS — The Language 69
The Style Sheet 70
Adding CSS to Your Pages 82
Working with CSS in Visual Studio
84
Using the CSS Editor 85
Creating Embedded and Inline Style Sheets 89
Applying Styles 93
Managing Styles 94
Practical Tips on Working with CSS
97
Summary 97
CHAPTER 4: WORKING WITH ASP.NET SERVER CONTROLS 101
Introduction to Server Controls
102
A Closer Look at ASP.NET Server Controls
106
Defining Controls in Your Pages 106
Common Properties for All Controls 106
Types of Controls
109
Standard Controls 109
HTML Controls 122
Data Controls 123
Validation Controls 123
Navigation Controls 123
Login Controls 123
Ajax Extensions 124
WebParts 124
Dynamic Data 124
The ASP.NET State Engine
124
xvii
How the State Engine Works 125
Not All Controls Rely on View State 129
A Note about View State and Performance 130
Practical Tips on Working with Controls
131
Summary 132
CHAPTER 5: PROGRAMMING YOUR ASP.NET WEB PAGES 135
Introduction to Programming
136
Data Types and Variables
137
Converting and Casting Data Types 140
Using Arrays and Collections 142
Statements 147
Operators 147
Making Decisions 155
Loops 162
Organizing Code
167
Methods: Functions and Subroutines 167
The App_Code Folder 169
Organizing Code with Namespaces 173
Writing Comments 176
Object Orientation Basics
178
Important OO Terminology 178
Events 190
Practical Tips on Programming
191
Summary 192
CHAPTER 6: CREATING CONSISTENT LOOKING WEBSITES 195
Consistent Page Layout with Master Pages
196
Creating Master Pages 198
Creating Content Pages 200
Using a Centralized Base Page
206
An Introduction to the ASP.NET Page Life Cycle 207
Implementing the Base Page 208
Creating Reusable Page Templates 212
Themes 216
Different Types of Themes 217
Choosing Between Theme and StyleSheetTheme 217
Applying Themes 218
Extending Themes 222
Skins 232
Creating a Skin File 233
Named Skins 234
Disable Theming for Specific Controls 235
Practical Tips on Creating Consistent Pages
235
Summary 236
CHAPTER 7: NAVIGATION 239
Different Ways to Move Around Your Site
240
Understanding Absolute and Relative URLs 240
Understanding Default Documents 243
Using the Navigation Controls
243
Architecture of the Navigation Controls 244
Examining the Web.sitemap File 244
Using the Menu Control 246
Using the TreeView Control 254
Using the SiteMapPath Control 258
Routing 260
Setting up Extension-less URLs 261
Considerations for Extension-less URLs 263
Programmatic Redirection
263
Programmatically Redirecting the Client
to a Different Page 264
Server-Side Redirects 266
Practical Tips on Navigation
268
Summary 269
CHAPTER 8: USER CONTROLS 273
Introduction to User Controls
274
Creating User Controls 274
Adding User Controls to a Content Page or Master Page 277
Sitewide Registration of User Controls 280
User Control Caveats 282
Adding Logic to Your User Controls
284
Creating Your Own Data Types for Properties 284
Implementing View State Properties 289
View State Considerations 295
Practical Tips on User Controls
295
xix
CHAPTER 9: VALIDATING USER INPUT 299
Gathering Data from the User
300
Validating User Input in Web Forms 301
Understanding Request Validation 320
Processing Data at the Server
321
Sending E-mail from Your Website 321
Reading from Text Files 327
Practical Tips on Validating Data
333
Summary 333
CHAPTER 10: ASP.NET AJAX 337
Introducing Ajax
338
Using ASP.NET AJAX in Your Projects
340
Creating Flicker-free Pages 340
Providing Feedback to Users 345
The Timer Control 350
Using Web Services in Ajax Websites
351
What Are Web Services? 351
Creating Web Services 357
Practical Ajax Tips
365
Summary 366
CHAPTER 11: JQUERY 369
An Introduction to jQuery
370
Introducing NuGet 371
Choosing the Location for Your jQuery Reference 375
Different Ways to Include the jQuery Library 376
jQuery Syntax
380
jQuery Core 380
Selecting Items Using jQuery 381
Modifying the DOM with jQuery
388
CSS Methods 388
Handling Events 390
Miscellaneous jQuery Functionality 391
Common Mistakes When Working with jQuery 392
Effects with jQuery
393
jQuery and Validation
399
Practical Tips on jQuery
403
CHAPTER 12: INTRODUCING DATABASES 407
What Is a Database?
408
Different Kinds of Relational Databases
409
Installing SQL Server 2012 Express 410
Using SQL to Work with Database Data
410
Retrieving and Manipulating Data with SQL
414
Reading Data 414
Creating Data 423
Updating Data 424
Deleting Data 424
Creating Your Own Tables
427
Data Types in SQL Server 427
Understanding Primary Keys and Identities 429
Creating Relationships between Tables 432
Practical Database Tips
436
Summary 436
CHAPTER 13: DISPLAYING AND UPDATING DATA 439
Data Controls
439
Data-bound Controls 440
Data Source Controls 442
Other Data Controls 442
Data Source and Data-bound Controls Working Together
443
Displaying and Editing Data with GridView 443
Inserting Data with DetailsView 449
Storing Your Connection Strings in Web.config 451
Filtering Data 453
Customizing the Appearance of the Data Controls
459
Configuring Columns or Fields of Data-bound Controls 460
Updating and Inserting Data
466
Using DetailsView to Insert and Update Data 466
Practical Tips for Displaying and Updating Data
480
Summary 481
CHAPTER 14: LINQ AND THE ADO.NET ENTITY FRAMEWORK 485
Introducing LINQ
486
LINQ to Objects 487
LINQ to XML 487
xxi
Introducing the ADO.NET Entity Framework
488
Mapping Your Data Model to
an Object Model
489
Introducing Query Syntax
495
Standard Query Operators 495
Shaping Data with Anonymous Types 499
Using Model Binding with LINQ Queries
504
Introducing Model Binding 505
A Note about Performance 535
Practical LINQ and ADO.NET Entity Framework Tips
536
Summary 536
CHAPTER 15: WORKING WITH DATA — ADVANCED TOPICS 539
Formatting Your Controls Using Styles
540
An Introduction to Styles 541
Combining Styles, Themes, and Skins 545
Handling Events
549
The ASP.NET Page and Control Life Cycles Revisited 549 The ASP.NET Page Life Cycle and Events in Data Controls 555 Handling Errors That Occur in the
Data Source Controls 560
Hand-Coding Data Access Code
564
Caching 574
Common Pitfalls with Caching Data 575
Different Ways to Cache Data in ASP.NET
Web Applications 576
Practical Data Tips
585
Summary 586
CHAPTER 16: SECURITY IN YOUR ASP.NET WEBSITE 589
Introducing Security
590
Identity: Who Are You? 590
Authentication: How Can You Prove Who You Are? 590
Authorization: What Are You Allowed to Do? 591
An Introduction to the ASP.NET Application Services 591
Introducing the Login Controls
593
The Login Controls 598
Configuring Your Web Application 609
The Role Manager
612
Managing Users with the WSAT 613 Configuring the Web Application to Work with Roles 618
Programmatically Checking Roles 622
Practical Security Tips
625
Summary 626
CHAPTER 17: PERSONALIZING WEBSITES 629
Understanding Profile
630
Configuring the Profile 631
Using the Profile 637
Other Ways of Dealing with Profile
655
Anonymous Identification 655
Cleaning Up Old Anonymous Profiles 655
Looking at Other Users’ Profiles 657
Practical Personalization Tips
660
Summary 660
CHAPTER 18: EXCEPTION HANDLING, DEBUGGING,
AND TRACING 663
Exception Handling
664
Different Types of Errors 664
Catching and Handling Exceptions 667
Global Error Handling and Custom Error Pages 675
The Basics of Debugging
683
Tools Support for Debugging
686
Moving Around in Debugged Code 686
Debugging Windows 687
Debugging Client-Side Script
693
Debugging with the Page Inspector
696
Introducing the Page Inspector 696
Using the Page Inspector 697
Cross-browser Testing with Browser Link
701
Introducing Browser Link 702
Using Browser Link 702
Tracing Your ASP.NET Web Pages
704
Using the Standard Tracing Capabilities 705
Adding Your Own Information to the Trace 708
Tracing and Performance 710
A Security Warning 710
Practical Debugging Tips
711
xxiii
CHAPTER 19: DEPLOYING YOUR WEBSITE 715
Preparing Your Website for Deployment
716
Avoiding Hard-Coded Settings 716
The Web.config File 717
Expression Syntax 717
The WebConfigurationManager Class 718
Introducing Bundling and Minification
723
Preparing for Deployment
727
Publishing Your Site 727
Introducing Web.config Transformations 730
Running Your Site Under IIS
734
Installing and Configuring the Web Server 735
Installing and Configuring ASP.NET 737
Understanding Security in IIS 741
NTFS Settings for Planet Wrox 742
Troubleshooting Web Server Errors 745
Moving Data to a Remote Server
747
Exporting Your Data to a File 748
Recreating the Database 750
The Deployment Checklist
751
What’s Next
753
Summary 754
APPENDIX A: EXERCISE ANSWERS 757
APPENDIX B: CONFIGURING SQL SERVER 2012 781
The adoption rate of emerging standards like HTML5 and CSS3 grows every day. Things that were only possible on thick client apps are becoming a reality on the web. With browsers getting faster and better each day, with more common tasks becoming available as reusable librar-ies, and with open sourcing of nearly all big web frameworks, our World Wide Web is a happening place. Penetration of mobile devices and the varied mobile app development technologies are making developers further consider the open and accessible web as their medium of expression.
During this time, client side libraries like jQuery and jQuery mobile, Angular.js, Knockout.js and server-side technologies like ASP.NET are making typically difficult and cumbersome tasks approachable. On top of all this, free tools like Visual Web Developer make web development more fun than ever before. It is indeed a joy to be a web developer these days, and it is nice to see this book come out and make becoming a web developer approachable for everyone.
Imar Spaanjaars, the author of this book, has been a Microsoft MVP in ASP.NET since 2008, and this time around we also had him join the ASP.NET Insiders group, in which we bounce feature ideas and pre-release products even before they ever get to public beta. Imar has been a constant source of feedback for the team during the development process and I am certain he will continue to be so even in the future.
In BeginningASP.NET4.5.1: inC# andVB he starts slow, goes deep, builds concepts, and covers the latest features of both ASP.NET 4.5.1 and Visual Studio 2013. Whether you are just starting web development or upgrading to ASP.NET 4.5.1, this book is certainly worth adding to your toolbox.
It is my pleasure to know Imar, and I want to thank him for his contribution to our community. His insights and thoughts were invaluable to the product team behind ASP.NET and Visual Studio. I hope his insights will help you too.
Vishal R. Joshi
TO BUILD EFFECTIVE AND ATTRACTIVE DATABASE-DRIVEN WEBSITES, you need two things: a solid and fast framework to run your web pages on and a rich and extensive environment to create and program these web pages. With ASP.NET 4.5.1 and Visual Studio 2013 you get both. Together they form the platform to create dynamic and interactive websites.
ASP.NET 4.5.1 builds on top of its popular predecessors ASP.NET 2.0, 3.5, 4.0, and 4.5. While maintaining backward compatibility with sites built using these older versions, ASP.NET 4.5.1 and Visual Studio 2013 introduce new, exciting features.
You’ll also find many changes — small and large — in both the ASP.NET Framework and Visual Studio. Some of these changes are the inclusion of Entity Framework 6 (discussed in Chapter 14), the introduction of Browser Link discussed in Chapter 18 and the introduction of the Publish Wizard for Web Site Projects, discussed in Chapter 19.
If you haven’t used Visual Studio 2012 with ASP.NET 4.5 yet, you’ll also appreciate the improved CSS and JavaScript editors (discussed in Chapter 3 and Chapter 10, respectively), the inclusion of NuGet (Chapter 11), and the Page Inspector (Chapter 18), all of which were added in VS 2012 that VS 2013 builds on top of.
If you’re familiar with earlier versions of ASP.NET, you’ll be happy to find many small gems in the new version of the framework that will make your life as a developer easier. I mention and discuss these new features throughout this book where appropriate. For a complete list of all new features in ASP.NET, check out the following white paper at the official ASP.NET website:
www.asp.net/visual-studio/overview/2013/release-notes
If this link no longer works by the time you read this book, search www.asp.net for: “What’s new in ASP.NET 4.5.1.”
Probably the best thing about Visual Studio Express 2013 for Web is its price: it’s available for free. This makes Visual Studio and ASP.NET probably the most attractive and compelling web develop-ment technologies available today.
WHO THIS BOOK IS FOR
This book is for anyone who wants to learn how to build rich and interactive websites that run on the Microsoft platform. With the knowledge you gain from this book, you create a great foundation to build any type of website, ranging from simple hobby-related websites to sites you may be creat-ing for commercial purposes.
the web in general. The book starts at the very beginning of web development by showing you how to obtain and install Visual Studio. The chapters that follow gradually introduce you to new tech-nologies, building on top of the knowledge gained in the previous chapters.
Do you have a strong preference for Visual Basic over C# or the other way around? Or do you think both languages are equally cool? Or maybe you haven’t made up your mind yet and want to learn both languages? Either way, you’ll like this book because all code examples are presented in both languages!
Even if you have some experience with prior versions of ASP.NET, you may gain a lot from this book. Although many concepts from previous versions are brought forward into ASP.NET 4.5.1, you’ll discover there’s a lot of new stuff to be found in this book, including the strongly typed data controls, smarter code editors, new debugging facilities, and more.
WHAT THIS BOOK COVERS
This book teaches you how to create a feature-rich, data-driven, and interactive website called Planet Wrox. Although this is quite a mouthful, you’ll find that with Visual Studio 2013, develop-ing such a website isn’t as hard as it seems. You’ll see the entire process of builddevelop-ing a website, from installing Visual Studio in Chapter 1 all the way up to putting your website on a live server in Chapter 19. The book is divided into 19 chapters, each dealing with a specific subject:
➤ Chapter 1, “Getting Started with ASP.NET 4.5.1.” In this chapter you see how to obtain and install Visual Studio Express 2013 for Web, the free version of Visual Studio 2013 to build ASP.NET websites. You are also introduced to HTML5, the latest standard for defin-ing web pages. The chapter closes with an overview of the customization options that Visual Studio gives you.
➤ Chapter 2, “Building an ASP.NET Website.” This chapter shows you how to create a new website and how to add new items like pages to it. Besides learning how to create a well-structured site, you also see how to use the numerous tools in Visual Studio to create HTML and ASP.NET pages.
➤ Chapter 3, “Designing Your Web Pages.” Visual Studio comes with a host of tools that enable you to create well-designed and attractive web pages. In this chapter, you see how to make good use of these tools. Additionally, you learn about CSS, the language that is used to format web pages.
➤ Chapter 4, “Working with ASP.NET Server Controls.” ASP.NET Server Controls are one of the most important concepts in ASP.NET. They enable you to create complex and feature-rich websites with very little code. This chapter introduces you to the large number of server controls that are available, explains what they are used for, and shows you how to use them.
xxix
to use a programming language to enhance your pages. This chapter serves as an introduc-tion to programming with a strong focus on programming web pages. Best of all: all the examples you see in this chapter (and the rest of the book) are in both Visual Basic and C#, so you can choose the language you like best.
➤ Chapter 6, “Creating Consistent Looking Websites.” Consistency is important to give your website an attractive and professional appeal. ASP.NET helps you create consistent-looking pages through the use of master pages, which enable you to define the global look and feel of a page. Skins and themes help you to centralize the looks of controls and other visual ele-ments in your site. You also see how to create a base page that helps to centralize program-ming code that you need on all pages in your site.
➤ Chapter 7, “Navigation.” To help your visitors find their way around your site, ASP.NET comes with a number of navigation controls. These controls are used to build the navigation structure of your site. They can be connected to your site’s central site map that defines the pages in your website. You also learn how to programmatically send users from one page to another.
➤ Chapter 8, “User Controls.” User controls are reusable page fragments that can be used in multiple web pages. As such, they are great for repeating content such as menus, banners, and so on. In this chapter, you learn how to create and use user controls and enhance them with some programmatic intelligence.
➤ Chapter 9, “Validating User Input.” A large part of interactivity in your site is defined by the input of your users. This chapter shows you how to accept, validate, and process user input using ASP.NET Server Controls. Additionally, you see how to send e-mail from your ASP.NET website and how to read from text files.
➤ Chapter 10, “ASP.NET AJAX.” Microsoft ASP.NET AJAX enables you to create good-looking, flicker-free web pages that close the gap between traditional desktop applications and websites. In this chapter you learn how to use the built-in Ajax features to enhance the presence of your web pages, resulting in a smoother interaction with the website.
➤ Chapter 11, “jQuery.” jQuery is a popular, open source and cross-browser JavaScript library designed to make it easier to interact with web pages in the client’s browser. In this chapter you learn the basics of jQuery and see how to add rich visual effects and animations to your web pages.
➤ Chapter 12, “Introducing Databases.” Understanding how to use a database is critical to building websites, because most modern websites require the use of a database. You learn the basics of SQL, the query language that enables you to access and alter data in a data-base. In addition, you are introduced to the database tools found in Visual Studio that help you create and manage your SQL Server databases.
➤ Chapter 14, “LINQ and the ADO.NET Entity Framework.” LINQ is Microsoft’s solution for accessing objects, databases, XML, and more. The ADO.NET Entity Framework (EF) is Microsoft’s new technology for database access. This chapter shows you what LINQ is all about, how to use the visual EF designer built into Visual Studio, and how to write LINQ to Entities queries to get data in and out of your SQL Server database. You also see how to work with Model Binding and the strongly typed data controls to make it easier to write code with fewer errors.
➤ Chapter 15, “Working with Data— Advanced Topics.” Whereas earlier chapters focus mostly on the technical foundations of working with data, this chapter looks at the same topic from a front-end perspective. You see how to change the visual appearance of your data through the use of control styles. You also see how to interact with the data-bound controls and how to speed up your website by keeping a local copy of frequently accessed data.
➤ Chapter 16, “Security in Your ASP.NET Website.” Although presented quite late in the book, security is a first-class, important topic. This chapter shows you how to make use of the built-in ASP.NET features related to security. You learn about a number of applica-tion services that facilitate security. You also learn how to let users sign up for an account on your website, how to distinguish between anonymous and logged-on users, and how to manage the users in your system.
➤ Chapter 17, “Personalizing Websites.” Building on the security features introduced in Chapter 16, this chapter shows you how to create personalized web pages with content tar-geted at individual users. You see how to configure and use ASP.NET Profile, which enables you to store personalized data for known and anonymous visitors.
➤ Chapter 18, “Exception Handling, Debugging, and Tracing.” You need good debugging tools to understand, improve, and fix the code you write for your ASP.NET web pages. Visual Studio ships with great debugging support that enables you to diagnose the state of your application at run time, helping you find and fix problems before your users do. You also get a good look at the Page Inspector and the new Browser Link feature.
➤ Chapter 19, “Deploying Your Website.” By the end of the book, you should have a website that is ready to be shown to the world. But how exactly do you do that? What are the things you need to know and understand to put your website out in the wild? This chapter gives the answers and provides you with a good look at configuring different production systems in order to run your final website. You also see how to implement bundling and minification to improve the performance of your website.
HOW THIS BOOK IS STRUCTURED
xxxi
At the end of each chapter, you find exercises that help you test the knowledge you gained in this chapter. You can find the answers to each question in Appendix A at the end of this book. Don’t worry if you don’t know all the answers to the questions. Later chapters do not assume you followed and carried out the tasks from the exercise sections of previous chapters.
Because this is a beginner’s book, I can’t go into great detail on a number of topics. For nearly every chapter in this book, you’ll find numerous other books that exclusively deal with the topic discussed. Where appropriate, I have included references to these books so you can easily decide where to go to next if you want to deepen your knowledge on a specific subject.
WHAT YOU NEED TO USE THIS BOOK
This book assumes you have a system that meets the following requirements:
➤ Capable of running Visual Studio. For the exact system requirements, consult the documentation that comes with the software.
➤ Running Windows 7 or Windows 8 (at least the Home Premium edition), or one of the Windows Server 2008 R2 or 2012 editions.
Chapter 1 shows you how to obtain and install Visual Studio 2013, which in turn installs the Microsoft .NET Framework version 4.5.1 and SQL Server Express LocalDB edition; then all you need is a good operating system and the drive to read this book!
CONVENTIONS
To help you get the most from the text and keep track of what’s happening, a number of conventions are used throughout the book.
TRY IT OUT
Conventions
The Try It Out is an exercise you should work through, following the text in the book.
1.
They usually consist of a set of steps.2.
Each step has a number.3.
Follow the steps through with your copy of the code.4.
Then read the How It Works section to find out what’s going on.How It Works
NOTE Boxes like this one hold important, not-to-be forgotten information that is directly relevant to the surrounding text.
COMMON MISTAKES These are easily made while following the exercises and are presented in a box like this. Be sure to read these carefully when you get stuck in an exercise.
As for styles in the text:
➤ New terms and important words are italicized when they are introduced.
➤ Code within the text is presented like this: Request.QueryString.Get("Id")
➤ URLs that do not start with www are prefixed with http:// to make it clear it’s an Internet address. URLs within the text are presented like this: http://imar.spaanjaars.com.
➤ You’ll see many URLs that start with tinyurl.com or bit.ly, which are handy, online services to make URLs shorter (and thus easier to type). Entering a tinyurl.com or bit.ly
address in your browser should take you to its final destination.
➤ Menu items that require you to click multiple submenus have a special symbol that looks like this: File ➪ New ➪ Folder.
➤ Code or content irrelevant to the discussion is either left out completely or replaced with ellipses (three dots) and a comment, like this:
<tr>
<td style="white-space: nowrap;"> ... Menu items go here; not shown </td>
</tr>
The three dots are used regardless of the programming language used in the example, so you’ll see it for C#, Visual Basic, HTML, CSS, and JavaScript. When you see it in code you’re instructed to type into the code editor, you can simply skip the three dots and any-thing that follows them on the same line.
➤ Code shown for the first time, or other relevant code, is in the following format:
xxxiii
To put emphasis on a block of code surrounded by other code, I use a bolded font like this:
<appSettings>
<add key="FromAddress" value="[email protected]"/> </appSettings>
The surrounding code is used to make it easier to see where the bolded code should be placed.
➤ Quite often, white space in code is irrelevant, as is mostly the case with ASP.NET markup and HTML. To fit code within the boundaries of this book, I often wrap code over multiple lines and indent the part that should have been on the previous line like this:
Dim result As String =
WebConfigurationManager.AppSettings.Get("FromAddress")
If you’re typing this code yourself, you can put it all on one line, or use the same line breaks if you prefer. The sample code that comes with this book has the code typically on a single line.
➤ Text that appears on-screen often has Each Word Start With A Capital Letter, even though the original screen text uses a different capitalization. This is done to make the screen text stand out from the rest of the text.
SOURCE CODE
As you work through the examples in this book, you may choose either to type in all the code manually or to use the source code files that accompany the book. All of the source code used in this book is available for download from the book’s own page on the Wrox website at www.wrox.com/ go/begaspnet451. If somehow this link no longer works, go to www.wrox.com and locate the book either by using the Search box or by using one of the title lists. Click the Download Code link on the book’s detail page to obtain all the source code for the book.
NOTE Because many books have similar titles, you may find it easiest to search by ISBN; for this book the ISBN is 978-1-118-84677-3.
You can download the full source for this book as a single file for each programming language used in the book (C# or Visual Basic). You can decompress these files with your favorite decompression tool. If you extract the source, make sure you maintain the original folder structure that is part of the code download. The different decompression tools use different names for this feature, but look for a feature like Use Folder Names or Maintain Directory Structure. Once you have extracted the files from the code download, you should end up with a folder called Source and a folder called
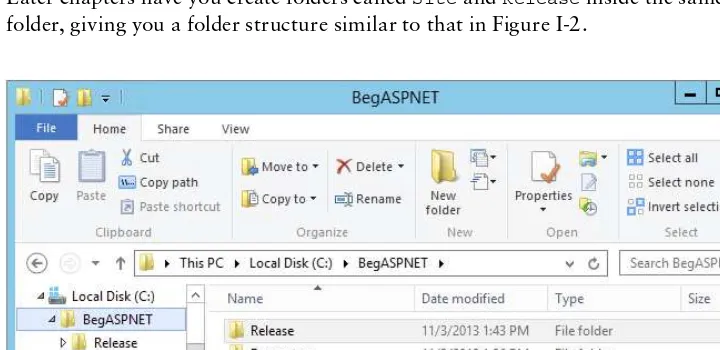
Resources. Then create a new folder in the root of your C drive, call it BegASPNET, and move the
Later chapters have you create folders called Site and Release inside the same C:\BegASPNET
folder, giving you a folder structure similar to that in Figure I-2. FIGURE I-1
xxxv
The Site folder contains the site as you’ll build it throughout this book, and the Release folder will contain your final version at the end of this book. Whenever you’re stuck with some examples in this book, you can take a peek in the Source folder to see how things should have ended up.
If you want to run the site for a specific chapter to see how it works, be sure to open the chapter’s folder in Visual Studio as a website. So, you should open a folder such as C:\BegASPNET\Source\ Chapter12 directly rather than opening its parent folder C:\BegASPNET\Source.
If you want to follow along in both programming languages, create a second folder called C:\ BegASPNETVB or C:\BegASPNETCS to hold the files for the other version. This way, the two sites can coexist without any problems. If you create a folder specifically for the C# language, don’t include the hash symbol (#) because that’s an invalid character in the pathname for a website.
Sticking to this structure ensures a smooth execution of the Try It Out exercises in this book. Incorrectly mixing or nesting these folders makes it harder to carry out the exercises and may even lead to unexpected situations and errors. Whenever you run into an issue or error that is not explained in this book, ensure that your site structure is still closely related to the one presented here.
ERRATA
I have made every effort to ensure that there are no errors in the text or in the code. However, no one is perfect, and mistakes do occur. If you find an error in this book, such as a spelling mistake or a faulty piece of code, I’d be very grateful for your feedback. By sending in errata you may save another reader hours of frustration and at the same time you will be helping me provide even higher quality information.
To find the errata page for this book, go to www.wrox.com/go/begaspnet451 or go to www.wrox .com and locate the title using the Search box or one of the title lists. Then, on the book details page, click the Errata link. On this page you can view all errata that has been submitted for this book and posted by Wrox editors. A complete book list including links to each book’s errata is also available at www.wrox.com/misc-pages/booklist.shtml.
If you don’t spot “your” error on the book’s Errata page, go to www.wrox.com/contact/ techsupport.shtml and complete the form there to send us the error you have found. I’ll check the information and, if appropriate, post a message to the book’s errata page and fix the problem in subsequent editions of the book.
P2P.WROX.COM
At p2p.wrox.com you will find a number of different forums that will help you not only as you read this book, but also as you develop your own applications. To join the forums, just follow these steps:
1.
Go to p2p.wrox.com and click the Register Now link.2.
Read the terms of use and click Agree.3.
Complete the required information to join as well as any optional information you wish to provide and click Submit.4.
You will receive an e-mail with information describing how to verify your account and com-plete the joining process.You can read messages in the forums without joining P2P but in order to post your own messages, you must join (which is free).
After you join, you can post new messages and respond to messages other users post. You’ll find this book’s own forum under the ASP.NET 4.5.1 category that is available from the homepage. You can read messages at any time on the web. If you would like to have new messages from a particu-lar forum e-mailed to you, click the Subscribe to this Forum icon by the forum name in the forum listing.
Getting Started with
ASP.NET 4.5.1
WHAT YOU WILL LEARN IN THIS CHAPTER:
➤ How to acquire and install Visual Studio Express 2013 for Web and
Visual Studio 2013
➤ How to create your first website with Visual Studio Express 2013
➤ How an ASP.NET page is processed by the server and sent to the
browser
➤ How you can use and customize the development environment
Ever since the first release of the .NET Framework 1.0 in early 2002, Microsoft has put a lot of effort and development time into ASP.NET, the part of the .NET Framework that enables you to build rich web applications. This first release meant a radical change from the older Microsoft technology to build websites called ActiveServerPages (ASP), now referred to as
classicASP. The introduction of ASP.NET 1.0 and the associated Visual Studio .NET gave developers the following benefits over classic ASP:
➤ A clean separation between presentation and code. With classic ASP, your
programming logic was often scattered throughout the HTML of the page, making it hard to make changes to the page later.
➤ A development model that was much closer to the way desktop applications are programmed. This made it easier for the many Visual Basic desktop programmers to make the switch to web applications.
➤ A feature-rich development tool (called Visual Studio .NET) that enabled developers to create and code their web applications visually.
➤ A choice between a number of object-orientedprogramming (OOP) languages, of which Visual Basic .NET and C# (pronounced as C-Sharp) are now the most popular.
➤ Access to the entire .NET Framework, which for the first time meant that web developers had a unified and easy way to access many advanced features to work with databases, files, e-mail, networking tools, and much more.
Despite the many advantages of ASP.NET over the older model, using ASP.NET also meant an increase in complexity and the knowledge needed to build applications with it, making it harder for many new programmers to get started with ASP.NET.
After the initial release in 2002, Microsoft released another version of the .NET Framework (called .NET 1.1) and the development IDE (called Visual Studio .NET 2003). Many people saw this as a service pack for the initial release, although it also brought a lot of new enhancements in both the framework and the development tools.
In November 2005, Visual Studio 2005 and ASP.NET 2.0 were released. To the pleasant surprise of many developers around the world, Microsoft had again been able to drastically improve and expand the product, adding many features and tools that helped reduce the complexity that was introduced with ASP.NET 1.0. New wizards and smart controls made it possible to reduce the code required to build an application, decreasing the learning curve for new developers and increasing their productivity.
In November 2007, Microsoft released Visual Studio 2008 and the ASP.NET 3.5 framework, followed by Visual Studio 2010 and ASP.NET 4 in March 2010 and Visual Studio 2012 and ASP .NET 4.5 in September 2012. Each version added a lot of new functionality, including LINQ (discussed in Chapter 14), the integration of the AJAX Framework (which you learn more about in Chapter 10), the ADO.NET Entity Framework (discussed in Chapter 14), the inclusion of jQuery (discussed in Chapter 11), and more.
The current versions, Visual Studio 2013 and ASP.NET 4.5.1, build on top of the successful Visual Studio 2012 and ASP.NET 4.5 releases, leaving many of the beloved features in place while adding new features and tools in other areas. Over the next 19 chapters, you learn how to build full-featured ASP.NET websites using Visual Studio Express 2013 for Web, Microsoft’s free development tool for ASP.NET web applications, which is also part of the full Visual Studio 2013 suite. This book guides you through the process of creating a fully functional, database-driven website, starting with a bare-bones website in the next chapter, all the way down to the deployment of it to a production environment in Chapter 19.
The sample site that comes with this book and all the examples are built with Visual Studio Express 2013 for Web (VSEW), so it’s important that you have it installed on your development machine. The next section shows you how to acquire and install VSEW. Once you have it up and running, you see how to create your first website, followed by an extensive tour through the many features of VSEW.
MICROSOFT VISUAL STUDIO EXPRESS FOR WEB
Visual Studio for Web comes in two flavors: as a standalone and free version called Microsoft Visual Studio Express 2013 for Web, and as part of the larger development suite called Visual Studio 2013, which is also available in different editions, each with its own price tag. With the commercial editions of Visual Studio, the web components are fully integrated. You just start Visual Studio 2013 and then create a Web Site Project or a Web Application Project, which in turn enables the web components of Visual Studio.
Although the Express edition of Visual Studio is free, it contains all the features and tools you need to create complex and feature-rich web applications. All the examples you find in the book can be built with the free Express edition, so there’s no need to shell out big bucks for the commercial versions of Visual Studio 2013 to follow along with this book.
I’ll use the term Visual Studio (VS) to refer to both the commercial and free versions of Visual Studio. When talking about the free edition specifically, I’ll use the terms Express edition or Visual Studio Express 2013 for Web.
Getting Visual Studio is easy. You can download it from the Microsoft site as discussed next.
Getting Visual Studio
You can get the free Visual Studio Express 2013 for Web from the Microsoft site at www
.microsoft.com/express/. On the Express homepage, follow the Downloads link until you reach the page that offers the downloads for the Express products, including VSEW. From this page, you can download VSEW as a Web Install, where you download only the installer, while the remaining files are downloaded during the installation process. Make sure you choose Visual Studio Express 2013 for Web from the page, and not one of the other free Express products or one of the older editions of Visual Studio.
Don’t be fooled by the file size of the Web Install download, which is just a few megabytes. The file you download is just the installer that downloads the required files over the Internet. The total download depends on your current system and will be somewhere between 500MB and 1GB.
If you want to try out the full version of Visual Studio 2013, which also contains the web
components, you can sign up for a free trial on the Microsoft site at http://msdn.microsoft.com/ vstudio. You can choose to download an ISO image that you’ll need to burn on a DVD or choose to download the Web Installer.
Finally, you can download VSEW with the Microsoft Web Platform Installer (WPI) application available for download at www.microsoft.com/web/platform and at www.asp.net/downloads/. Besides VSEW, this tool also gives you easy access to many other web development–related tools and programs. The WPI is an excellent tool to get a whole bunch of web development–related programs and tools in one fell swoop. I often use it to get up and running quickly on a clean development machine.
Installing Visual Studio Express for Web (VSEW)
TRY IT OUT
Installing Visual Studio Express 2013 for Web
This Try It Out exercise guides you through installing VSEW on your computer. It assumes you’re using the web installer, although the process for installing the Express edition from a DVD is almost identical. The steps you need to perform to install the full versions of Visual Studio 2013 are similar as well, although the screens you’ll see will be somewhat different.
1.
Start by browsing to www.microsoft.com/ express/ and follow the instructions to download VSEW 2013. You can install directly by choosing the Download and then the Install Now link or you can download an ISO file that you can burn on a DVD or mount on Windows as a virtual drive. Make sure you download Visual Studio Express 2013 for Web, and not one of the other free Express editions or older versions. If this link is ever changed or no longer provides direct access to the VSEW download, search the web for “install Visual Studio Express 2013 for Web” and you’ll be taken to a download page where you can start the installation.2.
When the download completes, start the installer. You should see a screen similar to Figure 1-1.Check the checkbox for the license terms and pri-vacy policy.
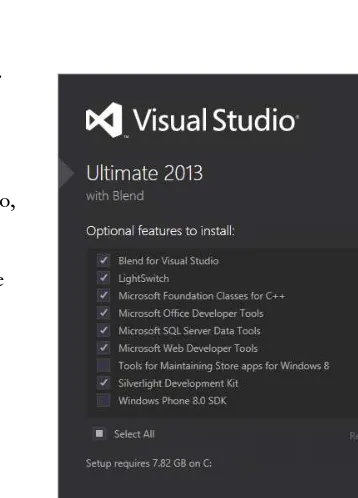
If you’re installing the full version of Visual Studio, click the Next button that appeared when you agreed to the license terms. You see a screen simi-lar to Figure 1-2. Make sure you select at least the Microsoft Web Developer Tools option.
3.
In both cases, click the Install button to start the installation process.4.
After a while you should see a message indicating that Visual Studio has been installed successfully. The installer may need to reboot your machine during or after the installation. Once the installer has finished, Visual Studio is ready for use.How It Works
The straightforward installation process guided you through the setup of Visual Studio. During installation,
FIGURE 1-1
a copy of SQL Server 2012 Express LocalDB, Microsoft’s free version of its SQL Server 2012 database engine, has been installed. SQL Server 2012 is discussed and used a lot in this book, starting with Chapter 12.
Now that Visual Studio is installed, it’s time to fire it up and start working with it. The next section shows you how to create your very first site in VSEW. You see how to create a site, add content to a web page, and view that page in your browser.
CREATING YOUR FIRST ASP.NET 4.5.1 WEBSITE
You probably can’t wait to get started with your first ASP.NET website, so instead of giving you a theoretical overview of websites in VS, the next Try It Out exercise dives right into the action and shows you how to build your first web project. Then, in the How It Works explanation and the section that follows, you get a good look at what goes on behind the scenes when you view an ASP .NET page in your browser.
TRY IT OUT
Creating Your First ASP.NET Website
1.
Start Visual Studio from the Windows Start menu or Start screen. For VSEW, the menu item is called VS Express 2013 for Web. For Windows 8.1, you’ll need to click the down arrow on the Start screen to go to the list of all applications. If you’re using the commercial version of Visual Studio, just start Visual Studio 2013 from the Start screen; all web-related components are accessed from the main VS program.You’ll be greeted by a dialog that lets you sign in to Visual Studio with a Microsoft account. This is useful if you want to synchronize your settings across multiple machines. Click Sign In to enter your credentials or sign up for a new account. If you don’t want to sign in, click Not now, maybe later. The first time you start VS, there might be a delay before you can use it because it’s busy configuring itself. Subsequent starts of the application will go much faster.
2.
If you’re using a commercial version of Visual Studio, you may also get a dialog box that lets you choose between different collections of settings the first time you start Visual Studio. The choice you make on that dialog box influences the layout of windows, toolboxes, menus, and shortcuts. Choose the Web Development settings because those settings are designed specifically for ASP .NET developers. You can always choose a different profile later by resetting your settings, as explained later in this chapter.3.
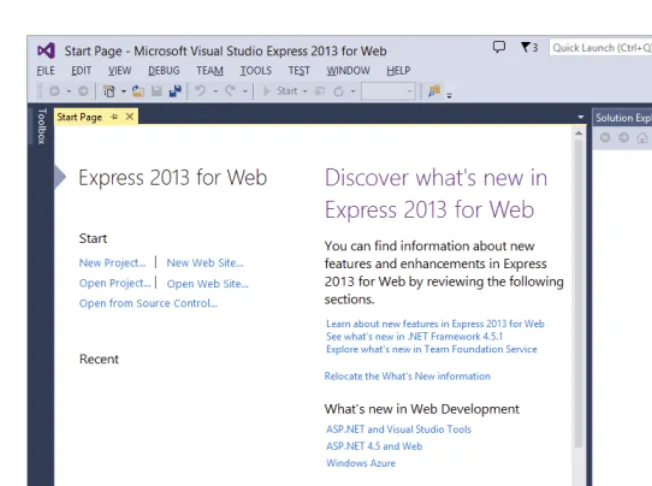
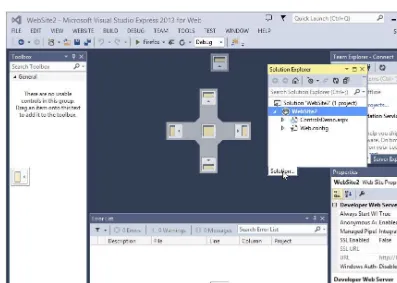
Once VS is fully configured, you see the main screen appear, as shown in Figure 1-3.FIGURE 1-3
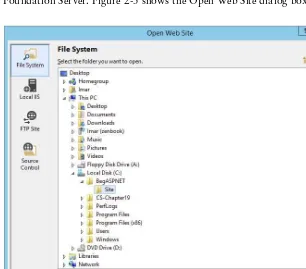
FIGURE 1-4
The New Web Site dialog box appears as shown in Figure 1-4.
5.
In the list of templates in the middle, click ASP.NET Web Forms Site. Verify that File System is the selected option in the Web Location drop-down list at the bottom left. If you want, you could change the location on disk where the website is stored by clicking the Browse button and choosing a new location on your computer’s hard drive. For now, the default location — a folderunder your Documents folder — is fine, so you can leave the location as is.
6.
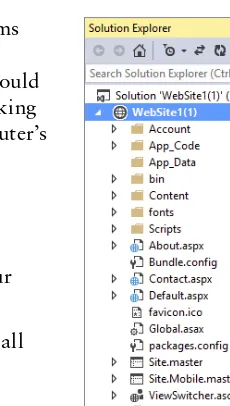
Click OK. VS creates a new website for you that includes a number of files and folders (see Figure 1-5) to jump-start your website.7.
Open the file Default.aspx by double-clicking it and remove all the code inside the <asp:Content> block that has its ID set toBodyContent (it starts with <div> at line 5 and ends with
</div>) all the way at the bottom. Replace it with the following bolded code:
<asp:Content runat="server" ID="BodyContent" ContentPlaceHolderID="MainContent"> <h2>Hello World</h2>
<p>Welcome to Beginning ASP.NET 4.5.1 on <%: DateTime.Now.ToString() %></p> </asp:Content>
You’ll see code formatted like this a lot more in this book. When you are instructed to type in code formatted like this with some code in bold, you only need to type in the bolded code. The other code should already be present in the file.
Don’t worry about the code with the angle brackets (<>) and percentage symbol in the welcome message; these are called tags, and you learn more about them later. Although this code may not look familiar to you now, you can probably guess what it does: It writes out today’s date and time.
8.
Press Ctrl+F5 to open the page in your default web browser. You see a page similar to the one shown in Figure 1-6.FIGURE 1-5
If you already have some experience with Visual Studio you may be used to pressing F5 instead. If you use that option, the site is opened in debug mode and you may get a dialog asking if you want to enable debugging (which you can safely do). Debugging with F5 is discussed in Chapter 18, and you’re advised to use Ctrl+F5 until then.
If you see an information bar warning about intranet settings in Internet Explorer, click Turn on Intranet Settings.
If you don’t see the date and time in the page, or if you get an error, look again at the code in the welcome message. It starts with an angle bracket (<) followed by a percentage symbol and a colon. It closes with a single percentage sign and another angle bracket (>). Also, make sure you typed in the code exactly as shown here, including capitalization. This is especially true when you are using C#, because that language is case sensitive.
9.
Notice how a small icon representing IISExpress has appeared in the tray bar of Windows, visible in Figure 1-7.The icon belongs to the built-in web server called IIS Express. This web server has been started by VS automatically to serve the request for your
page. You learn more about how the web server processes your page later in this chapter.
If you don’t see the icon in the tray, click the arrow near the other icons in the Windows tray and click the Customize option. Then set IIS Express System Tray to Show Icon and Notifications.
That’s it. You just created your very first ASP.NET website with Visual Studio.
How It Works
Although the website you created in this Try It Out is quite simple, the process that eventually results in the page Default.aspx being displayed in your browser isn’t so simple. All by itself, an ASP.NET page (also referred to as an ASPX page because of its extension, or a WebForm) can’t do much. It needs to be processed and served by a webserver before your browser can display it. That’s why VS automati-cally started up IIS Express to handle the request for the page. Next, it started up your default web browser and directed it to the address of the web server (http://localhost:49815/Default in the Try It Out example), although the actual port number in the address may change every time you start the web server because it is randomly chosen by VS.
It’s important to realize that the ASPX file you modified in VS is not the same as the one that eventually gets displayed by the browser.
When you create a page in VS, you add markup to it. The markup in an ASPX page is a combination of HTML, code for ASP.NET Server Controls (which you learn more about in this chapter and in Chapter 4), code written in Visual Basic.NET or C#, and more.
When you request an ASPX page in your browser, the web server processes the page, executes any server-side code it finds in the file, and effectively transforms the ASP.NET markup into plain HTML that it then sends to the browser, where it is displayed. In the preceding Try It Out, the resulting HTML causes the browser to display the current date and time. HTML, or HyperTextMarkupLanguage, is the language that browsers use to display a web page. You learn how HTML looks and how to use it later in this chapter.
To see how the final HTML differs from the original ASPX page, open the source for the page in your browser. In most browsers, you can bring up the source window by right-clicking the page in the browser and choosing View Source or View Page Source. This brings up your default text editor, show-ing the HTML for the page.
If you already closed your browser after the preceding Try It Out, press Ctrl+F5 in VS to open the page and choose View Source.
Scroll down in the source file until you see the line with the Welcome text. Notice how instead of the code between the tags, you now see the actual date and time:
<h2>Hello World</h2>
<p>Welcome to Beginning ASP.NET 4.5.1 on 11/16/2013 4:18:17 PM</p>
When the web server processed the page, it looked up the current date and time from the server and inserted it in the HTML that got sent to the browser. Depending on the language settings of your Windows installation, you may see the date and time formatted differently to accommodate the Windows Regional Settings.
In the following section, you see how ASP.NET works in much more detail.
AN INTRODUCTION TO ASP.NET 4.5.1
When you type a URL like www.wrox.com in your web browser and press Enter, the browser sends a request to the web server at that address. This is done through HTTP, the HyperTextTransferProtocol. HTTP is the protocol by which web browsers and web servers communicate. When you request the URL, you send a request to the server. When the server is active and the request is valid, the server accepts the request, processes it, and then sends the response back to the client browser. The relationship between the request and response is shown in Figure 1-8.
Because you are using IIS Express, the server and the client are really the same machine. However, in a real-world scenario, you’ll host your website on an external web server where it can be accessed by many different clients.
For simple, static files, like HTML files or images, the web server simply reads the file from its local hard drive and sends it to the browser. However, for dynamic files, such as ASPX pages, this is obviously not good enough. If the web server
were to send the ASPX file directly to the browser as a text file, you wouldn’t have seen the current date and time in the browser, but instead you would have seen the actual code (<%: DateTime .Now.ToString() %>). So, instead of sending the file directly, the web server hands over the request to another piece of software that is able to process the page. This is done with a concept called
ApplicationMapping or HandlerMapping, where an extension of a file (.aspx in this example) is mapped to an application that is capable of handling it. In the case of an .aspx page, the request is eventually handled and processed by the ASP.NET run time, part of the Microsoft .NET Framework designed specifically to handle web requests.
NOTE In Figure 1-7 you don’t see the .aspx extension on the page name. However, behind the scenes, the request is still served by Default.aspx. You learn how to create so-called friendly URLs in Chapter 7.
During the processing of the page, three main areas can influence the way the page eventually ends up in the browser:
➤ Static text. Any static text, like HTML, CSS, or JavaScript code you place in a page, is sent to the browser directly. You learn more about HTML, CSS, and JavaScript (a programming language used at the client) in this and subsequent chapters, including Chapter 3, which gives you a detailed look at CSS.
➤ ASP.NET Server Controls. These controls are placed in your ASPX page and when they are processed, they emit HTML that is inserted in the page. You learn more about server controls after the discussion of HTML in this chapter, and Chapter 4 is devoted entirely to ASP.NET Server Controls.
➤ Programming code. You can embed code, like Visual Basic .NET or C#, directly in a page, as you saw in the previous Try It Out. In addition, you can place code in a separate code file. The official term for this code file is Code Beside. However, most developers refer to this as the Code Behind file, which is the term I’ll stick to in this book. This code can be executed by the run time automatically, or based on a user’s action. Either way, execution of the code can greatly influence the way the page is displayed, by accessing databases, performing calculations, hiding or showing specific controls, and much more. You learn more about this Code Behind file in the next chapter, and programming your ASP.NET web pages is discussed in great detail in Chapter 5.
Once the page is done processing, and all the HTML for the page has been collected, the HTML is sent back to the browser. The browser then reads it, parses it, and, finally, displays the page for you to look at.
Because HTML is so critical for displaying web pages, the next section gives you an overview of HTML.
Understanding HTML
really the future of HTML-based applications, and therefore I use it in this book and for the Planet Wrox demo website. Don’t worry about the limited browser support too much. All major browsers support all of the HTML5 features you use in this book, or support can easily be simulated by a script library called Modernizr, which you see later in the book.
HTML Elements and Tags
HTML uses text surrounded by angle brackets to indicate how your content should be rendered (or displayed) in the browser. The text with angle brackets is referred to as a tag; a pair of tags holding some text or other content is referred to as an element. Take another look at the HTML you saw in the previous Try It Out where you opened the source window for the page in the browser:
<h2>Hello World</h2>
<p>Welcome to Beginning ASP.NET 4.5.1 on 11/16/2013 4:18:17 PM</p>
The first line of this example contains an <h2> element with an opening tag (<h2>) and a closing tag (</h2>). This element is used to signify a heading at the second level (if you scroll up a bit in the final source in the browser, you also see an <h1> element). Notice how the element is closed with a similar tag, but with an additional forward slash (/) in it: </h2>. Any text between these opening and closing tags is considered part of the element, and is thus rendered as a heading. In most browsers, this means the text is rendered in a larger font. Similar to the <h2> tag are tags for creating headings up to level six, such as <h1>, <h3>, and so on.
Below the heading element, you see a <p> element, which is used to denote a paragraph. All text within the pair of <p> tags is considered part of the paragraph. By default, a browser renders a paragraph with some additional margin spacing at the bottom, although you can override that behavior.
Many tags are available in HTML, too many to cover them all here. The following table lists some of the most important tags and describes how they can be used. For a complete list of all HTML elements, take a look at the website of the organization that maintains the HTML standard:
www.w3.org/TR/html5/index.html.
TAG DESCRIPTION EX AMPLE
<html> Used to denote the start and end of the entire page.
<html>
...All other content goes here </html>
<head> Used to denote a special section of the page that contains data about the page, including its title and references to external resources. The contents of this element are not directly output on screen but influence the looks and behavior of the page, as you’ll see later. This element is placed inside the <html> element.
<head>
...Content goes here </head>