The
Addison-Wesley Learning Series
is a collection of hands-on programming
guides that help you quickly learn a new technology or language so you can
apply what you’ve learned right away.
Each title comes with sample code for the application or applications built in
the text. This code is fully annotated and can be reused in your own projects
with no strings attached. Many chapters end with a series of exercises to
encourage you to reexamine what you have just learned, and to tweak or
adjust the code as a way of learning.
Titles in this series take a simple approach: they get you going right away and
leave you with the ability to walk off and build your own application and apply
the language or technology to whatever you are working on.
Upper Saddle River, NJ • Boston • Indianapolis • San Francisco New York • Toronto • Montreal • London • Munich • Paris • Madrid
Learning Node.js
A Hands-On Guide to
Building Web Applications in
JavaScript
Mark Taub Marketing Manager Stephane Nakib Managing Editor Kristy Hart Senior Project Editor Lori Lyons Copy Editor Chuck Hutchinson Indexer Tim Wright Proofreader Anne Goebel Technical Reviewer Bill Glover Editorial Assistant Olivia Basegio Cover Designer Chuti Prasertsith Compositor Nonie Ratcliff Manufacturing Buyer Dan Uhrig capital letters or in all capitals.
The author and publisher have taken care in the preparation of this book, but make no expressed or implied warranty of any kind and assume no responsibility for errors or omissions. No liability is assumed for incidental or consequential damages in connection with or arising out of the use of the information or programs contained herein.
The publisher offers excellent discounts on this book when ordered in quantity for bulk purchases or special sales, which may include electronic versions and/or custom covers and content particular to your business, training goals, marketing focus, and branding interests. For more information, please contact:
U.S. Corporate and Government Sales (800) 382-3419
corpsales@pearsontechgroup.com
For sales outside the United States, please contact: International Sales
international@pearsoned.com
Visit us on the Web: informit.com/aw
Library of Congress Control Number: 2013936406 Copyright © 2013 Pearson Education, Inc.
All rights reserved. Printed in the United States of America. This publication is protected by copyright, and permission must be obtained from the publisher prior to any prohibited reproduction, storage in a retrieval system, or transmission in any form or by any means, electronic, mechanical, photocopying, recording, or likewise. To obtain permission to use material from this work, please submit a written request to Pearson Education, Inc., Permissions Department, One Lake Street, Upper Saddle River, New Jersey 07458, or you may fax your request to (201) 236-3290.
ISBN-13: 978-0-321-91057-8 ISBN-10: 0-321-91057-5
Text printed in the United States on recycled paper at RR Donnelley & Sons, Crawfordsville, Indiana.
❖
vii Contents vii Contents
Table of Contents
Introduction 1
Why Node.js? 1
The Web 1
New Technologies 2
What Exactly Is Node.js? 2
Who Is This Book For? 4
How to Use This Book 4
Download the Source Code 5
Part I: Learning to Walk 7
1 Getting Started 9
Installing Node.js 9
Installation on Windows 9
Installation on the Mac 12
Installation on Linux 14
Running Node.js and “Hello World!” 16
The Node Shell 16
Editing and Running JavaScript Files 17
Your First Web Server 17
Debugging Your Node.js Programs 19
Staying Up-to-Date and Finding Help 22
Summary 23
2 A Closer Look at JavaScript 25
Types 25
Type Basics 26
Constants 26
Numbers 27
Booleans 28
Strings 29
Objects 32
Type Comparisons and Conversions 38
Functions 39
Basics 39
Function Scope 42
Language Constructs 43
Classes, Prototypes, and Inheritance 44
Prototypes and Inheritance 45
Errors and Exceptions 47
Some Important Node.js Globals 47
global 47
console 48
process 48
Summary 48
3
Asynchronous Programming 49
The Old Way of Doing Things 49
The Node.js Way of Doing Things 50
Error Handling and Asynchronous Functions 53
The callback Function and Error Handling 54
Who Am I? Maintaining a Sense of Identity 56
Being Polite—Learning to Give Up Control 58
Synchronous Function Calls 61
Summary 61
Part II: Learning to Run 63
4 Writing Simple Applications 65
Your First JSON Server 65
Returning Some Data 67
Node Pattern: Asynchronous Loops 69
Learning to Juggle: Handling More Requests 72
More on the Request and Response Objects 78
Increased Flexibility: GET Params 79
Modifying Things: POST Data 83
Receiving JSON POST Data 84
Receiving Form POST Data 87
ix Contents ix Contents
5 Modules 89
Writing Simple Modules 89
Modules and Objects 91
npm: The Node Package Manager 92
Consuming Modules 93
Searching for Modules 93
Module Caching 94
Cycles 95
Writing Modules 95
Creating Your Module 96
Developing with Your Module 101
Publishing Your Modules 102
A Module So Common It Should Be Built In 103
The Problem 104
The Solution 105
Summary 112
6 Expanding Your Web Server 113
Serving Static Content with Streams 113
Reading a File 114
Serving Static Files in a Web Server with Buffers 116
Serving Up More Than Just HTML 118
Assembling Content on the Client: Templates 120
The HTML Skeleton Page 123
Serving Static Content 124
Modifying Your URL Scheme 124
The JavaScript Loader/Bootstrapper 126
Templating with Mustache 127
Your Home Page Mustache Template 129
Putting It All Together 130
Summary 133
Part III Writing Web Applications 135
7 Building Web Applications with Express 137
Installing Express 137
Routing and Layers in Express 139
Routing Basics 140
Updating Your Photo Album App for Routing 141
REST API Design and Modules 144
API Design 144
Modules 146
Additional Middleware Functionality 148
Usage 148
Configurations 149
Ordering of Middleware 150
Static File Handling 151
POST Data, Cookies, and Sessions 153
Better Browser Support for PUT and DELETE 155
Compressing Output 156
HTTP Basic Authentication 157
Error Handling 158
Summary 159
8 Databases I: NoSQL (MongoDB) 161
Setting Up MongoDB 161
Installing MongoDB 161
Using Mongo DB in Node.js 162
Structuring Your Data for MongoDB 163
It’s All JavaScript 163
Data Types 164
Understanding the Basic Operations 164
Connecting and Creating a Database 165
Creating Collections 165
Inserting Documents into Collections 166
Updating Document Values 167
Deleting Documents from Collections 168
Querying Collections 168
Updating Your Photo Albums App 171
Writing the Low-Level Operations 171
Modifying the API for the JSON Server 177
Updating Your Handlers 177
xi Contents xi Contents
Recapping the App Structure 187
Summary 188
9 Databases II: SQL (MySQL) 189
Getting Ready 189
Installing MySQL 189
Adding the mysql Module from npm 190
Creating a Schema for the Database 190
Basic Database Operations 191
Connecting 191
Adding Queries 192
Adding Authentication to the Application 192
Updating the API to Support Users 193
Examining the Core User Data Operations 193
Updating the Express Application 197
Creating the User Handler 198
Creating the Login and Register Pages 201
Resource Pooling 204
Getting Started 204
Working with Connections 205
Authenticating the API 205
Summary 209
Part IV Getting the Most Out of Node.js 211
10 Deployment and Development 213
Deployment 213
Level: Basic 214
Level: Ninja 216
Multiprocessor Deployment: Using a Proxy 218
Multiple Servers and Sessions 221
Virtual Hosting 224
Built-in Support 225
Proxy Server Support 227
Securing Your Projects with HTTPS/SSL 227
Generating Test Certificates 228
Multiplatform Development 230
Locations and Configuration Files 230
Handling Path Differences 231
Summary 232
11 Command-Line Programming 233
Running Command-Line Scripts 233
UNIX and Mac 233
Windows 235
Scripts and Parameters 236
Working with Files Synchronously 237
Basic File APIs 237
Files and Stats 239
Listing Contents of Directories 240
Interacting with the User: stdin/stdout 240
Basic Buffered Input-Output 240
Unbuffered Input 241
The Readline Module 243
Working with Processes 247
Simple Process Creation 247
Advanced Process Creation with Spawn 248
Summary 251
12 Testing 253
Choosing a Framework 253
Installing Nodeunit 254
Writing Tests 254
Simple Functional Tests 255
Testing Asynchronous Functionality 258
RESTful API Testing 258
Testing Secured Resources 261
Summary 262
Acknowledgments
I’d like to thank all the Marks at PHPTR (it’s a common name, it seems) who have helped me make this book and other projects a reality. The copy editors have been brilliant and helpful. A huge debt of gratitude is due to Bill Glover and Idriss Juhoor for their excellent technical and style reviews.
Introduction
Welcome to Learning Node.js . Node.js is an exciting new platform for writing network and web applications that has created a lot of buzz over the past couple of years and rapidly gathered a sizeable following in the developer community. In this book, I teach you more about it, why it is special, and get you up and writing Node.js programs in short order. You’ll soon find that people are rather flexible with the name of Node.js and will refer to it frequently as just Node or even “node.” I certainly do a lot of that in this book as well.
Why Node.js?
Node.js has arisen for a couple of primary reasons, which I explain next.
The Web
In the past, writing web applications was a pretty standard process. You have one or more servers on your machine that listens on a port (for example, 80 for HTTP), and when a request is received, it forks a new process or a thread to begin processing and responding to the query. This work frequently involves communicating with external services, such as a database, memory cache, external computing server, or even just the file system. When all this work is finally finished, the thread or process is returned to the pool of “available” servers, and more requests can be handled.
It is a reasonably linear process, easy to understand, and straightforward to code. There are, however, a couple of disadvantages that continue to plague the model:
1. Each of these threads or processes carries some overhead with it. On some machines, PHP + Apache can take up as much as 10–15MB per process. Even in environments where a large server runs constantly and forks threads to process the requests, each of these carries some overhead to create a new stack and execution environment, and you frequently run into the limits of the server’s available memory.
Only after the external component has finally sent back its response will that process or thread be free to finish processing, send a response to the client, and then reset to prepare for another incoming request.
So, although it’s pretty easy to understand and work with, you do have a model that can be quite inefficient if your scripts spend most of their time waiting for database servers to finish running a query—an extremely common scenario for a lot of modern web applications. Many solutions to this problem have been developed and are in common use. You can buy ever bigger and more powerful web servers with more memory. You can replace more powerful and feature-rich HTTP servers such as Apache with smaller, lightweight ones such as lighttpd
or nginx. You can build stripped-down or reduced versions of your favorite web programing language such as PHP or Python. (Indeed, Facebook has taken this one step further and built a system that converts PHP to native C++ code for maximal speed and optimal size.) Or you can throw more servers at the problem to increase the number of simultaneous connections you can accommodate.
New Technologies
Although the web developers of the world have continued their eternal struggle against server resources and the limits on the number of requests they can process, a few other interesting things have happened in the meantime.
JavaScript, that old (meaning 1995 or so) language that came to be most well known (and frequently reviled) for writing client-side scripts in the web browser, has been growing in popularity again. Modern versions of web browsers are cleaning up their implementations of it and adding in new features to make it more powerful and less quirky. With the advent of client libraries for these browsers, such as jQuery, script.aculo.us, or Prototype, programming in JavaScript has become fun and productive. Unwieldy APIs have been cleaned up, and fun, dynamic effects have been added.
At the same time, a new generation of browser competition has erupted, with Google’s Chrome, Mozilla’s Firefox, Apple’s Safari, and Microsoft’s Internet Explorer all vying for the crown of browser king. As part of this, all these companies are investing heavily in the JavaScript portion of these systems as modern web applications continue to grow ever-more dynamic and script-based. In particular, Google Chrome’s V8 JavaScript runtime is particularly fast and also open-sourced for use by anybody.
With all these things in place, the opportunity arose for somebody to come along with a new approach to network (web) application development. Thus, the birth of Node.js.
What Exactly Is Node.js?
3 What Exactly Is Node.js?
web applications, similar to how Gmail does it, and found most of what he looked at not quite appropriate. He eventually settled on JavaScript because it lacked a robust input/output (I/O) model (meaning he could write his own new one) and had the fast and fully programmable V8 runtime readily available.
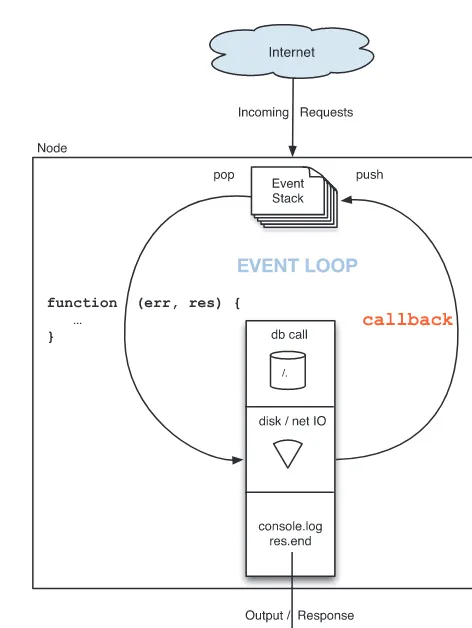
Inspired by some similar projects in the Ruby and Python communities, he eventually took the Chrome V8 runtime and an event-processing library called libev, and came up with the first versions of a new system called Node.js. The primary methodology or innovation in Node.js is that it is built entirely around an event-driven nonblocking model of programming. In short, you never (well, rarely) write code that blocks.
If your web application—in order to process a request and generate a response—needs to run a database query, it runs the request and then tells Node.js what to do when the response returns. In the meantime, your code is free to start processing other incoming requests or, indeed, do any other task it might need, such as cleaning up data or running analyses.
Through this simple change in the way the application handles requests and work, you are able to trivially write web servers that can handle hundreds, if not thousands, of requests simulta-neously on machines without much processing or memory resources. Node runs in a single process, and your code executes largely in a single thread, so the resource requirements are much lower than for many other platforms.
This speed and capacity come with a few caveats, however, and you need to be fully aware of them so you can start working with Node with your eyes wide open.
First and foremost, the new model is different from what you may have seen before and can sometimes be a bit confusing. Until you’ve wrapped your brain fully around some of the core concepts, some of the code you see written in Node.js can seem a bit strange. Much of this book is devoted to discussing the core patterns many programmers use to manage the chal-lenges of the asynchronous, nonblocking way of programming that Node uses and how to develop your own.
Another limitation with this model of programming is that it really is centered around applica-tions that are doing lots of different things with lots of different processes, servers, or services. Node.js truly shines when your web application is juggling connections to databases, caching servers, file systems, application servers, and more. The flip side of this, however, is that it’s actually not necessarily an optimal environment for writing compute servers that are doing serious, long-running computations. For these, Node’s model of a single thread in a single process can create problems if a given request is taking a ton of time to generate a complicated password digest or processing an image. In situations in which you’re doing more computa-tionally intensive work, you need to be careful how your applications use resources, or perhaps even consider farming those tasks out to other platforms and run them as a service for your Node.js programs to call.
To reduce the randomization and troubles caused by these frequent updates, the developers have taken to labeling portions of the system with different degrees of stability , ranging from
Unstable to Stable to Locked . Changes to Stable or Locked portions of the runtime are rare and involve much community discussion to determine whether it will generate too much pain. As you work your way through this book, we point out which areas are less stable than others and suggest ways you can mitigate the dangers of changing APIs.
The good news is that Node.js already has a large and active user community and a bunch of mailing lists, forums, and user groups devoted to promoting the platform and providing help where needed. A simple Google search will get you answers to 99 percent of your questions in a matter of seconds, so never be afraid to look!
Who Is This Book For?
I wrote this book under the assumption that you are comfortable programming computers and are familiar with the functionality and syntax of at least one major programming language such as Java, C/C++, PHP, or C#. Although you don’t have to be an expert, you’ve probably moved beyond “Learn X in Y days” level tasks.
If you’re like me, you have probably written some HTML/CSS/JavaScript and thus have “worked with” JavaScript, but you might not be intimately familiar with it and have just largely
templated heavily off code found on blog posts or mailing lists. Indeed, with its clunky UI and frustrating browser mismatches, you might even frown slightly at the mere mention of JavaScript. Fear not—by the end of the first section of this book, distasteful memories of the language will be a thing of the past and, I hope, you’ll be happily writing your first Node.js programs with ease and a smile on your face!
I also assume that you have a basic understanding of how web applications work: Browsers send HTTP requests to a remote server; the server processes that request and sends a response with a code indicating success or failure, and then optionally some data along with that response (such as the HTML for the page to render or perhaps JavaScript Object Notation, or JSON, containing data for that request). You’ve probably connected to database servers in the past, run queries, and waited for the resulting rows, and so on. When I start to describe concepts beyond these in the samples and programs, I explain and refresh everybody’s memory on anything new or uncommon.
How to Use This Book
5 Download the Source Code
The book is divided into four major sections:
Part 1 . Learning to Walk —You start installing and running Node, take another look at the JavaScript language and the extensions used in V8 and Node.js, and then write your first application.
Part 2 . Learning to Run —You start developing more powerful and interesting application servers in this part of the book, and I start teaching you some of the core concepts and practices used in writing Node.js programs.
Part 3 . Breaking Out the Big Guns —In this part, you look at some of the powerful tools and modules available to you for writing your web applications, such as help with web servers and communication with database servers.
Part 4 . Getting the Most Out of Node.js —Finally, I close out the book by looking at a few other advanced topics such as ways in which you can run your applications on production servers, how you can test your code, and how you can use Node.js to write command-line utilities as well!
As you work your way through the book, take the time to fire up your text editor and enter the code, see how it works in your version of Node.js, and otherwise start writing and developing your own code as you go along. You develop your own little photo-sharing application as you work through this book, which I hope provides you with some inspiration or ideas for things you can write.
Download the Source Code
Source code for most of the examples and sample projects in this book can be found at
github.com/marcwan/LearningNodeJS . You are highly encouraged to download it and play along, but don’t deny yourself the opportunity to type in some of the code as well and try things out. The GitHub code has some fully functioning samples and has been tested to work on Mac, Linux, and Windows with the latest versions of Node.js. If new updates of Node require updates to the source code, I put changes and notes there, so please be sure to pull down new versions every few months.
If you have any questions or problems with the code in this book, feel free to go to
Part I
Learning to Walk
1 Getting Started 9
2 A Closer Look at JavaScript 25
1
Getting Started
I
n this chapter, you dive right into things and get Node.js installed on your machines and make sure it is working correctly before moving further into the language and writing networked applications. By the end of this chapter, you should have Node installed and running on your computer, have entered a few small test programs to play around with it, and know how to use the built-in Node debugger.Installing Node.js
Let’s begin by looking at installation on Windows. Mac and Linux users should feel free to skip ahead to the appropriate sub-section, unless you have both types of machines.
Installation on Windows
To install Node.js on a Windows machine, you can use the handy installer provided on the nodejs.org website. Visit the Download page and then download Windows Installer (.msi) for either 32 bits or 64 bits, depending on what platform you are running. I show the installation for Windows 7/64-bit.
After you download the MSI, double-click on it. You should see a setup program similar to that shown in Figure 1.1 .
Read and accept the License Agreement and then click Install. Because the install is pretty quick and painless, a few seconds later, you can click Finish to complete the installation.
Verifying the Installation
Figure 1.2 Launching the Windows command prompt
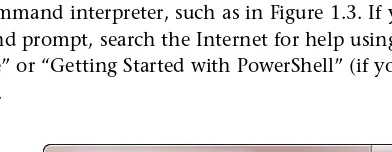
You then see a command interpreter, such as in Figure 1.3 . If you want to learn more about using the command prompt, search the Internet for help using the phrases “Learning to use Windows cmd.exe” or “Getting Started with PowerShell” (if you are running Windows 7) for more information.
11 Installing Node.js
To make sure Node was installed properly, type node -–version in the command window. You should see the output as in Figure 1.4 .
Figure 1.4 Verifying Node is installed correctly. Check the version number.
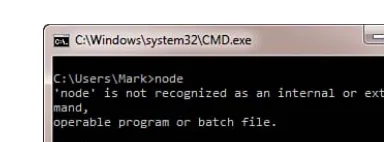
The command prompt window should print out the version number of the Node you just installed a few seconds ago. (Don’t worry if the number doesn’t match what you see—indeed, I’d be surprised if it did!) If you do not see this version number, or if instead you see the output saying that “‘node’ is not recognized as an internal or external command” (see Figure 1.5 ), something has gone wrong and you should do the following:
■ Look in Control Panel / Programs and see whether the installation actually completed.
If not, try the install again, and pay a bit closer attention to what happens. Perhaps something has gone wrong.
■ Look in Program Files\nodejs and make sure node.exe is actually there. If it is not,
try installing again. (Uninstall an old version first, if necessary.)
■ Make sure that node.exe is in your PATH environment variable. In the command
prompt, Windows has a list of directories in which you can search when you type in the name of a program. You can view this by simply typing path in the command prompt window. It should show something similar to that in Figure 1.6 . In particular, look at the two highlighted directory names at the end. Something very similar to both of these should be in your PATH .
■ If Program Files\nodejs and Users\..\AppData\..\npm are not in your PATH , but
these folders definitely do exist, you can add them to your PATH manually by adding them to your PATH environment variable. You do this in the System Control Panel window. Click on Advanced System Settings and then Environment Variables. Then add the path of the npm folder (it is in something like C:\Users\UserName\Local\npm ) to the PATH under User Variables for Username and add the path to the Node.js folder (it is in something like C:\Program Files\nodejs ) to the PATH under System Variables. Note that the npm folder might be in Username\Remote\npm instead of Username\Local\npm , depending on how your computer is configured.
Installation on the Mac
While there are two different ways you can install Node.js on the Mac—either by using the PKG installer or by compiling from source —I’m going to show only the former. It is by far the faster and easier way of doing things. If you are more inclined to build the node distribution from source, I’ve included instructions in the git sources for this book.
Using the PKG Installer
By far the quickest way to install Node.js on your Apple Mac computer running OS X is to download and run the Node PKG installer available from the nodejs.org website.
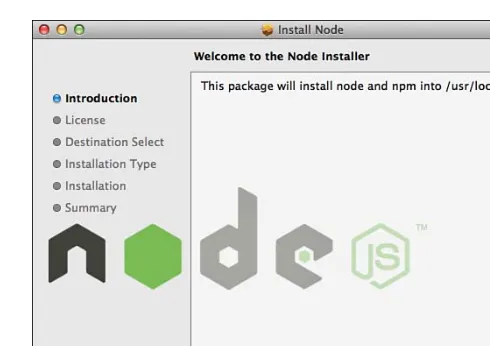
After you download the installer, double-click it, and you should see something similar to that shown in Figure 1.7 . I tend to use just the default installation because I want all the compo-nents, and the default path (/usr/local/bin ) is what I want. I recommend you do the same here.
When the installation is complete, you should see something similar to that shown in Figure 1.8 . As the package installer explains, it is important to make sure that /usr/local/bin is in your PATH environment variable. You can open the Terminal.app program. (Go to
/Applications/Utilities , and launch Terminal.) In the terminal window, type
echo $PATH
Figure 1.5 Node is not recognized as an internal or external command.
13 Installing Node.js
Figure 1.8 Make sure your path is set up correctly.
On my machine, the output is
/usr/bin:/bin:/usr/sbin:/sbin :/usr/local/bin:/Users/marcw/bin:/usr/local/git/bin
You can see that /usr/local/bin is indeed here in the PATH . If it is not, you should edit your
~/.bash_profile file (it’s okay to create this file if it does not exist) and add
PATH=${PATH}:/usr/local/bin
Close the terminal window, launch another, and verify that /usr/local/bin is now in your
PATH . You should be able to type
node --version
and see something like
client:LearningNode marcw$ node --version v0.10.3
client:LearningNode marcw$
Don’t worry if the version number doesn’t match what you have on your computer. After confirming you have the node program installed and working, you can start writing JavaScript.
Installation on Linux
Installing Node.js
Although many different versions of Linux probably have Node.js as a prebuilt and installable package, I almost always roll my own on my Linux machines for full control over the process. The installation tends to be reasonably painless, so I am not really creating much extra work for myself.
Getting the Command-Line Compiler on Linux
To build packages from source on Linux, you first need to make sure that you have the command-line compiler tools installed. To do this, you can type
g++
in a terminal window. If you see something like marcw@hostname:~$ g++
g++: no input files
you have the compiler installed and will be able to build. If instead you see marcw@hostname:~$ g++
-bash: g++: command not found
you need to figure out how to install the build tools on your version of Linux. For most versions of Ubuntu Linux, you can use the apt-get tool as follows. The trick is knowing what packages you need to install on your specific version. For Ubuntu 8, you would need to run
# apt-get install build-essential libssl-dev libxml2-dev autoconf2.13
Whereas for version 10, the following works:
15 Installing Node.js
After this has all run to completion, you should be able to type
g++
again and have it all work.
The following instructions are what have been used on Ubuntu Linux versions for the past few years and assume you are using (ba)sh as your primary shell. Start by creating some scratch space to download and compile from:
cd
mkdir -p src/scratch
cd src/scratch
The next step is to download and unpack the node sources. You can do this using curl or
wget:
curl http://nodejs.org/dist/v0.10.1/node-v0.10.1.tar.gz -o node-v0.10.1.tar.gz tar xfz node-v0.10.1.tar.gz
cd node-v0.10.1
Next, you run the configuration scripts to prepare for the build:
./configure
You can let it use the default /usr/local as the installation point because it’s a good location from which to run this software. If you want to install it somewhere else, you can specify the
--prefix switch to the configure script, as follows:
./configure --prefix =/opt/nodejs
The configure script should execute quickly and print out some JSON when it is done. Now you can build the product. Type in the following command and go get yourself a coffee (or two, depending on how fast or slow your machine is):
make
After the make has completed successfully (if it fails, do a Google search on the problem because you will almost certainly not be the first to see it), you can then install the software to your chosen prefix (/usr/local if you did not choose one):
sudo make install
When you are done, you should be able to just enter
node --version
npm --version
and get output somewhat similar to
Running Node.js and “Hello World!”
There are two primary ways to use Node.js on your machines: by using the Node Shell or by saving JavaScript to files and running those.
The Node Shell
The first way you will run Node.js is the Node shell, which is frequently called the Node REPL — REPL stands for Read-Eval-Print-Loop . It’s a great way to quickly test things in Node. If you don’t remember exactly how a function should be used, you can just quickly use the REPL and type in something to see what happens.
To launch the Node shell, you simply type node in whatever shell you are using:
client:node marcw$ node
>
The > is all the response you get. You can immediately start typing in some code:
> console.log("Hello World!");
Hello World! undefined >
The first line of the output is the result of the code you just executed. In this case, you use the Node global variable console and its log function to print out Hello World! (See the next chapter for more information on console and other globals.) The output of this statement is, predictably, Hello World! , which is printed for you.
The last line of the output is always the resulting value of the preceding statement. Every state-ment, function call, or expression has a value associated with it, which is printed out in the Node shell for you. If there is no evaluated expression value or the called function does not return any particular value, the special value undefined is returned instead.
To exit the REPL, you simply press Ctrl+D (same on Windows).
If you ever see three dots ( ... ) in the Node REPL, that means it is expecting more input from you to complete the current expression, statement, or function. If you do not quite understand why it is giving you the ellipsis, you can just type .break (with the period) to get out of it:
> function () {
... }
... what?
... .break
17 Your First Web Server
Editing and Running JavaScript Files
The other option for running Node.js code is to simply use your favorite text editor to write JavaScript code into a file, and then compile and run that code via the command line using the
node command.
To demonstrate this, save the following to a file called hello.js :
/**
* Let's be sociable. */
console.log("Hello World!");
Now, you can execute this file from the command line with
node hello.js
And you should see this output:
Hello World!
Because you are not in the Node shell, you don’t get any information on the return values of the code executed.
Your First Web Server
You’re ready to write something a bit more interesting now and create a little web server. Fortunately, Node makes this task extremely easy. Enter and save the following into a file called
web.js :
var http = require("http");
function process_request(req, res) { var body = 'Thanks for calling!\n';
var content_length = body.length;
res.writeHead(200, {
'Content-Length': content_length, 'Content-Type': 'text/plain' });
res.end(body); }
var s = http.createServer(process_request);
s.listen(8080);
To run it, simply type
Your computer now has a web server running on port 8080. To test it, you can use the command-line program curl , which most Mac and Linux machines have pre-installed. (Windows users, see “Downloading from the Web on Windows.” You also can just type
http://localhost:8080 into a web browser, but you won’t see the response codes there
unless you open a debug console.)
curl -i http://localhost:8080
You should now see something similar to the following:
HTTP/1.1 200 OK Content-Length: 20 Content-Type: text/plain
Date: Tue, 15 Feb 2013 03:05:08 GMT Connection: keep-alive
Thanks for calling!
Downloading from the Web on Windows
By default, Windows does not ship with any command-line utilities to get the contents of a URL. Because it’s such a useful thing to do, I highly recommend you download cURL (I just refer to it
as curl from now on) or wget for Windows.
Curl:
You can download the Windows binaries for curl by visiting http://curl.haxx.se/download.html and looking there for the “Win32 - Generic” section.
Download one of the highlighted binaries, preferably one with support for SSL and SSH (if it redirects you to another page, download the binary “Download WITH SUPPORT SSL”), unpack it, and put curl.exe somewhere in your PATH or user directory. To launch it, in the command prompt or PowerShell, just type
C:\Users\Mark\curl --help
Wget:
If you cannot get curl working on your Windows machine, wget is a great alternative. You can download it from http://users.ugent.be/~bpuype/wget/ .
It works basically the same as curl , but with some slightly different command-line arguments. To learn more, view the help:
C:\Users\Mark\wget --help
19 Debugging Your Node.js Programs
The createServer function takes only one argument, and that is a function that will be called whenever somebody makes a connection to your server. You pass the process_request
function you wrote earlier, which is given an object representing the incoming request (a
ServerRequest object) and another for the pending response (of type ServerResponse ).
When the server is created, you tell it to start listening for incoming requests on a particular port—here, you use 8080—when you launch the program.
The –i switch you passed to curl earlier tells it to print out the headers along with the response. This lets you learn a little bit more about what exactly Node is doing for you. You can see that the 200 (OK) response you passed to the ServerResponse#writeHead func-tion is returned in the HTTP response headers, and you also see the content length and types are both represented. Node.js, by default, also indicates that HTTP connections to its server are
keep-alive , which allows multiple requests on the same network connection; you don’t need
it for most of the examples early in this book.
To stop the server from running, you simply press Ctrl+C. It is smart enough to clean up every-thing and shut down properly.
Debugging Your Node.js Programs
Now you can rewrite the preceding web server, but this time get a little careless and introduce a smelling pistake—misspell body.length , as follows—and put it into a file called debugging. js :
var http = require("http");
function process_request(req, res) { var body = 'Thanks for calling!\n';
var content_length = body.lenggth;
res.writeHead(200, {
'Content-Length': content_length, 'Content-Type': 'text/plain' });
res.end(body); }
var s = http.createServer(process_request);
s.listen(8080);
You can run this program as before:
node debugging.js
Now, when you connect to http://localhost:8080, you’ll probably see something like this:
client:~ marcw$ curl -i localhost:8080
Content-Type: text/plain
Date: Tue, 30 Oct 2012 04:42:44 GMT
Connection: keep-alive
You no longer get the "Thanks for calling!" message, and you can see that the
Content-Length header is not what you expected.
For a trivial program like this, the error is pretty easy to figure out, but in a bigger program, it can be hard to figure these things out. To help with this issue, Node.js includes a debug-ger right in the node program. To use it, you just add the debug flag before the name of your program:
node debug debugging.js
You should see something like the following:
client:Chapter01 marcw$ node debug debugging.js
< debugger listening on port 5858 connecting... ok
break in debugging.js:1
1 var http = require("http"); 2
3 function process_request(req, res) {
debug>
You use a few key commands in the Node debugger:
■ cont —Continue running.
■ next —Step over the next statement.
■ step —Step into the next statement (if possible; otherwise, just step over). ■ out —Step out of the current executing function.
■ backtrace —Show me the current call execution frame or call stack.
■ repl —Start the Node REPL to allow you to view variable values and execute code. ■ watch(expr) —Add the given expression to the watch list, which is shown whenever you
step or move through anything in the debugger.
■ list( n) —List the n lines of source code before and after the currently stopped line in
the debugger.
Now, suspecting something might be wrong with the Content-Length in the program, you can put a breakpoint on the line var content_length = body.lenggth; , or line 5:
debug> setBreakpoint(5)
1 var http = require("http");
2
21 Debugging Your Node.js Programs
* 5 var content_length = body.lenggth; 6 res.writeHead(200, {
debug>
Line 5 now has a * next to it to indicate there is a breakpoint. When you start the debug-ger, the program is stopped at the first line. You can resume execution by using the cont
command:
debug> cont
debug>
Now, you go to another terminal window or command prompt and type
curl –i http://localhost:8080
You should immediately notice two things:
1. The curl does not return right away.
2. In your node debug session, you now see
break in debugging.js:5
3 function process_request(req, res) { 4 var body = 'Thanks for calling!\n';
* 5 var content_length = body.lenggth;
6 res.writeHead(200, {
7 'Content-Length': content_length,
You can skip over this line:
debug> next
break in debugging.js:7
* 5 var content_length = body.lenggth; 6 res.writeHead(200, {
7 'Content-Length': content_length,
8 'Content-Type': 'text/plain'
9 });
And now start the Node REPL so you can examine some variable values:
debug> repl
Press Ctrl + C to leave debug repl >
Let’s look at the values of body and content_length , respectively:
> body
'Thanks for calling!\n'
> content_length
For body , you can see, as expected, that you get a value. But for content_length , which you expect to be 20 , you see nothing. You now can see that the code that set its value is wrong and have found the problem!
Finally, you can either just shut down the whole system by pressing Ctrl+D to end the debug-ger or you can type cont to continue running the server. Typing cont inside the REPL will not work and results in the following error: ‘ReferenceError: cont is not defined’. You will need to press Ctrl+C to exit the REPL first, and then you can use cont .
Although this introduction to the debugger has been quite brief, it is worth playing around with; it is quite powerful and very useful. There are, additionally, some other browser-based debuggers being written by Node.js community members, the most promising of which so far is
node-inspector . Feel free to search for them and play around with them to see how they can
help you.
In a pinch, there is nothing wrong with inserting a simple console.log(variable_name);
into your code to have the results printed to the terminal window. It can often be a quick and simple way to get the information you need to track down bugs or problems.
Staying Up-to-Date and Finding Help
As mentioned previously, one of the challenges of working with Node.js is its constant state of change. Although more and more APIs and sections of the product are considered Stable or
Locked , some things are still changing with every new release, and these releases are happening on a weekly basis.
Here are some things you can do to keep up-to-date and not miss out on any important changes or news:
■ Join the Node.js mailing list at http://groups.google.com/group/nodejs . Many of the core
Node developers are on this list and post whenever a new release or change is made.
■ If you are on Twitter, follow @nodejs there; you will receive tweets whenever there is a
new release or whenever something else important comes along.
■ Visit nodejs.org on a semiregular basis to make sure you are not falling too far behind.
For help, the nodejs Google group is, of course, invaluable, as is the nodejs.org website. Similarly, StackOverflow.com has a very active community helping out with Node-related ques-tions, and you can find many good answers there.
23 Summary
Summary
2
A Closer Look at JavaScript
C
hances are, if you are reading this book, you have worked with JavaScript in the past. Perhaps you have worked on or written a web application that uses HTML, CSS, and JavaScript, and you have written some code to make the client more dynamic and interactive, either directly by manipulating the browser Document Object Model (DOM) or by using a framework such as jQuery or Prototype to hide some of the messier details for you. You might have even found working with JavaScript a reasonably frustrating experience, spent a lot of time fighting the different browsers’ incompatibilities, and it is also quite possible that you have never reallystudied the JavaScript language apart from the most basic of language features, looking things up on the fly as you go.
The good news is that modern web browsers are slowly driving a much-needed cleanup of the JavaScript language. Additionally, ECMAScript, which is the specification on which modern implementations are based, is also evolving. The Chrome V8 JavaScript engine itself is also improving and cleaning up many frustrating things about the language and adding important features that are missing and need updating.
So, even if you’ve already played around with JavaScript in the past, it is probably worth your while to read through this chapter fully and learn about some of the details you might have overlooked or about some of the new features or those changed by V8 and Node.js. Although most of the discussion in this chapter is applicable to standard JavaScript, sometimes I show you something new and improved in Google’s V8. For such nonstandard features, I mark them with ( V8 JS ).
Types
This section begins the review of JavaScript by looking at the types the language offers. For much of the discussion in this chapter, I use the Node.js Read-Eval-Print-Loop (REPL) to demon-strate how the code works. To help you out, I use bold to indicate things that you type into the interpreter.
Type Basics
Node.js has a few core types: number , boolean , string , and object . The two other types,
function and array , are actually special kinds of object s, but because they have extra
features in the language and runtime, some people refer to these three— object , function , and array —as complex types . The types null and undefined are also special kinds of object s and are also treated specially in JavaScript.
The value undefined means that a value has not been set yet or simply does not exist:
> var x;
undefined
> x = {};
{}
> x.not_valid;
undefined >
null , on the other hand, is an explicit assertion that there “is no value”:
> var y;
undefined
> y
undefined
> y = null;
null >
To see the type of anything in JavaScript, you use the typeof operator:
> typeof 10
'number'
> typeof "hello";
'string'
> typeof function () { var x = 20; }
'function' >
Constants
While Node.js theoretically supports the const keyword extension that some modern JavaScript implementations have implemented, it’s still not widely used. For constants, the standard practice is still to just use uppercase letters and variable declarations:
> var SECONDS_PER_DAY = 86400;
undefined
> console.log(SECONDS_PER_DAY);
27 Types
Numbers
All numbers in JavaScript are 64-bit IEEE 754 double-precision floating-point numbers. For all positive and negative integers that can be expressed in 2 53 bits accurately, the number type in
JavaScript behaves much like integer data types in other languages:
> 1024 * 1024
1048576
> 1048576
1048576
> 32437893250 + 3824598359235235
3824630797128485
> -38423538295 + 35892583295
-2530955000 >
The tricky part of using the number type, however, is that for many numeric values, it is an
approximation of the actual number. For example:
> 0.1 + 0.2
0.30000000000000004 >
When performing floating-point mathematical operations, you cannot just manipulate arbi-trary real numbers and expect an exact value:
> 1 - 0.3 + 0.1 == 0.8
false >
For these cases, you instead need to check if the value is in some sort of approximate range, the size of which is defined by the magnitude of the values you are comparing. (Search the website stackoverflow.com for articles and questions on comparing floating-point numbers for good ideas of strategies on this.)
For those situations in which you absolutely need to represent 64-bit integer values in JavaScript without any chance of approximation errors, you are either stuck using the string
type and manipulating these numbers by hand, or you can use one of the available modules for manipulating big integer values.
JavaScript is a bit different from other languages in that dividing a number by zero returns the value Infinity or -Infinity instead of generating a runtime exception:
> 5 / 0
Infinity
> -5 / 0
Infinity and -Infinity are valid values that you can compare against in JavaScript:
> var x = 10, y = 0;
undefined
> x / y == Infinity
true >
You can use the functions parseInt and parseFloat to convert strings to numbers:
> parseInt("32523523626263");
32523523626263
> parseFloat("82959.248945895");
82959.248945895
> parseInt("234.43634");
234
> parseFloat("10");
10 >
If you provide these functions with something that cannot be parsed, they return the special value NaN (not-a-number):
> parseInt("cat");
NaN
> parseFloat("Wankel-Rotary engine");
NaN >
To test for NaN, you must use the isNaN function:
> isNaN(parseInt("cat"));
true >
Finally, to test whether a given number is a valid finite number (that is, it is not Infinity,
-Infinity , or NaN ), use the isFinite function:
> isFinite(10/5);
true
> isFinite(10/0);
false
> isFinite(parseFloat("banana"));
false >
Booleans
The boolean type in JavaScript is both simple and simple to use. Values can either be true
29 Types
function, you almost never need it because the language converts everything to boolean when needed, according to the following rules:
1. false , 0 , empty strings ( "" ), NaN , null , and undefined all evaluate to false .
2. All other values evaluate to true .
Strings
Strings in JavaScript are sequences of Unicode characters (represented internally in a 16-bit
UCS-2 format) that can represent a vast majority of the characters in the world, including those used in most Asian languages. There is no separate char or character data type in the language; you just use a string of length 1 to represent these. For most of the network applications you’ll be writing with Node.js, you will interact with the outside world in UTF- 8, and Node will handle all the details of conversion for you. Except for when you are manipulating binary data, your experience with strings and character sets will largely be worry-free.
Strings can be wrapped in single or double quotation marks. They are functionally equivalent, and you are free to use whatever ones you want. To include a single quotation mark inside a single-quoted string, you can use \' , and similarly for double quotation marks inside double-quoted strings, you can use \" :
> 'Marc\'s hat is new.'
'Marc\'s hat is new.'
> "\"Hey, nice hat!\", she said."
'"Hey, nice hat!", she said.' >
To get the length of a string in JavaScript, just use the length property:
> var x = "cat";
undefined
> x.length;
3
> "cat".length;
3
> x = null;
null
Attempting to get the length of a null or undefined string throws an error in JavaScript:
> x.length;
TypeError: Cannot read property 'length' of null at repl:1:2
at Interface._onLine (readline.js:200:10) at Interface._line (readline.js:518:8) at Interface._ttyWrite (readline.js:736:14)
at ReadStream.onkeypress (readline.js:97:10)
To add two strings together, you can use the + operator:
> "cats" + " go " + "meow";
'cats go meow' >
If you start throwing other types into the mix, JavaScript converts them as best it can:
> var distance = 25;
undefined
> "I ran " + distance + " kilometres today";
'I ran 25 kilometres today' >
Note that this can provide some interesting results if you start mixing expressions a bit too much:
> 5 + 3 + " is my favourite number";
'8 is my favourite number' >
If you really want “53” to be your favorite number, you can just prefix it all with an empty string to force the conversion earlier:
> "" + 5 + 3 + " is my favourite number";
'53 is my favourite number' >
Many people worry that the concatenation operator + has terrible performance when working with strings. The good news is that almost all modern browser implementations of JavaScript— including Chrome’s V8 that you use in Node.js—have optimized this scenario heavily, and performance is now quite good.
String Functions
Many interesting functions are available to strings in JavaScript. To find a string with another string, use the indexOf function:
> "Wishy washy winter".indexOf("wash");
6 >
31 Types
> "No, they're saying Booo-urns.".substr(19, 3);
'Boo'
> "No, they're saying Booo-urns.".slice(19, 22);
'Boo' >
If you have a string with some sort of separator character in it, you can split that up into component strings by using the split function and get an array as the result:
> "a|b|c|d|e|f|g|h".split("|");
[ 'a', 'b', 'c', 'd', 'e', 'f', 'g', 'h' ] >
Finally, the trim function (V8 JS) does exactly what you would expect—removes whitespace from the beginning and end of a string:
> ' cat \n\n\n '. trim();
'cat' >
Regular Expressions
JavaScript has powerful regular expression support, the full details of which are beyond the scope of this book, but I briefly show how and where you can use them. A certain number of string functions can take arguments that are regular expressions to perform their work. These regular expressions can either be entered in literal format (indicated by putting the regular expression between two forward slash [ / ] characters) or as a call to the constructor of a RegExp
object:
/[aA]{2,}/
new RegExp("[Aa]{2,}")
Both of these are regular expressions that match against a sequence of two or more of the letter
a (upper- or lowercase).
To replace all sequences of two or more a’ s with the letter b on string objects, you can use the
replace function and write either of the following:
> "aaoo".replace(new RegExp("[Aa]{2,}"), "b");
'boo'
Similar to the indexOf function, the search function takes a regular expression and returns the index of the first match against it, or -1 if no such match exists:
> "aaoo".search(/[Aa]{2,}/);
0
> "aoo".search(/[Aa]{2,}/);
-1 >
Objects
Objects are one of the core workhorses of the JavaScript language, and something you will use all the time. They are an extremely dynamic and flexible data type, and you can add and remove things from them with ease. To create an object, you can use either of the following, although the latter, known as object literal syntax , is almost always preferred nowadays:
> var o1 = new Object();
undefined
> var o2 = {};
undefined >
You can also specify the contents of objects using object literal syntax, where you can specify member names and values at initialization time:
var user = {
first_name: "marc",
last_name: "wandschneider", age: Infinity,
citizenship: "man of the world"
};
About JSON
One of the things used quite often in this book (and indeed in all the network and web applica-tions) is JSON, or JavaScript Object Notation . This data exchange format gives you all the flex-ibility of a text-based data format, without the hassle that some of the other formats such as XML bring. (To be fair to the latter, JSON does lack some of the validation features of those formats as well, but I still find it infinitely preferable to use.)
JSON is extremely similar to object literal notation with two key differences: Whereas, in object literal notation, wrapping the property names in single or double quotation marks is optional, in JSON it is mandatory. Furthermore, all strings should be double-quoted as follows:
// valid object literal notation, INVALID JSON:
var obj = {
// JSON strings are supposed to use ", not '
33 Types
// Must wrap property names for JSON
last_name: "Wandschneider"
}
// valid JSON and object literal notation:
var obj = {
"first_name": "Marc",
"last_name": "Wandschneider"
}
A nontrivial number of JSON libraries actually accept single-quoted strings, but to be maximally compatible, you should be careful to use double quotation marks whenever you write or gener-ate JSON.
To generate JSON, you mostly use the V8 functions JSON.parse and JSON.stringify . The former takes a JSON string and converts it to an object (or throws an error if it fails), while the latter takes an object and returns a JSON string representation of it.
When you are writing objects in code, you mostly use object literal notation, but you also work with a lot of JSON in this book as well, so it is important to recognize the difference. I point out whenever JSON is absolutely required.
You can add a new property to your user object by using any of the following methods:
> user.hair_colour = "brown";
'brown'
> user["hair_colour"] = "brown";
'brown'
> var attribute = 'hair_colour';
undefined
> user[attribute] = "brown";
'brown'
> user
{ first_name: 'marc',
last_name: 'wandschneider', age: Infinity,
citizenship: 'man of the world', hair_colour: 'brown' }
>
If you try to access a property that does not exist, you do not receive an error, but instead just get back undefined :
> user.car_make
To remove a property from an object, you can use the delete keyword:
> delete user.hair_colour;
true
> user
{ first_name: 'marc',
last_name: 'wandschneider', age: Infinity,
citizenship: 'man of the world' } >
The flexibility of objects in JavaScript makes them quite similar to various associative arrays, hash maps, or dictionaries seen in other languages, but there is an interesting difference: Getting the size of an object-as-associative-array in JavaScript is a bit tricky. There are no size
or length properties or methods on Object . To get around this, you can write the following
(V8 JS) :
> Object.keys(user).length;
4
Note that this uses a nonstandard extension to JavaScript Object.keys ; although V8 and most browsers (except Internet Explorer) already support it.
Arrays
The array type in JavaScript is actually a special casing of the object type, with a number of additional features that make them useful and powerful. To create arrays, you can either use traditional notation or array literal syntax :
> var arr1 = new Array();
undefined
> arr1
[]
> var arr2 = [];
undefined
> arr2
[] >
As with objects, I almost always prefer the literal syntax version, and rarely use the former. If you use the typeof operator on arrays, you get a surprising result:
> typeof arr2
35 Types
Because arrays are actually objects, the typeof operator just returns that, which is very frequently not what you want! Fortunately, V8 has a language extension to let you test deter-minatively whether or not something is an array: the Array.isArray function (V8 JS) :
> Array.isArray(arr2);
true
> Array.isArray({});
false >
One of the key features of the array type in JavaScript is the length property, used as follows:
> arr2.length
0
> var arr3 = [ 'cat', 'rat', 'bat' ];
undefined
> arr3.length;
3 >
By default, arrays in JavaScript are numerically indexed:
// this:
for (var i = 0; i < arr3.length; i++) { console.log(arr3[i]);
}
// will print out this: cat
rat
bat
To add an item to the end of an array, you can do one of two things:
> arr3.push("mat");
4
> arr3
[ 'cat', 'rat', 'bat', 'mat' ]
> arr3[arr3.length] = "fat";
'fat'
> arr3
[ 'cat', 'rat', 'bat', 'mat', 'fat' ] >
> arr3[20] = "splat"; 'splat'
> arr3
[ 'cat', 'rat', 'bat', 'mat', 'fat', , , , , , , , , , , , , , , , 'splat' ] >
To remove elements from an array, you might try to use the delete keyword again, but the results may surprise you:
> delete arr3[2];
true
> arr3
[ 'cat', 'rat', , 'mat', 'fat', , , , , , , , , , , , , , , , 'splat' ] >
You see that the value at index 2 still “exists” and has just been set to undefined .
To truly delete an item from an array, you probably should use the splice function, which takes an index and the number of items to delete. What it returns is an array with the extracted items, and the original array is modified such that they no longer exist there:
> arr3.splice(2, 2);
[ , 'mat' ] > arr3
[ 'cat', 'rat', 'fat', , , , , , , , , , , , , , , , 'splat' ]
> arr3.length
19
Useful Functions
There are a few key functions you frequently use with arrays. The push and pop functions let you add and remove items to the end of an array, respectively:
> var nums = [ 1, 1, 2, 3, 5, 8 ];
undefined
> nums.push(13);
7
> nums
[ 1, 1, 2, 3, 5, 8, 13 ] > nums.pop();
13
> nums
37 Types
To insert or delete items from the front of an array, use unshift or shift , respectively:
> var nums = [ 1, 2, 3, 5, 8 ];
undefined
> nums.unshift(1);
6
> nums
[ 1, 1, 2, 3, 5, 8 ]
> nums.shift();
1
> nums
[ 1, 2, 3, 5, 8 ] >
The opposite of the string function split seen previously is the array function join , which returns a string:
> var nums = [ 1, 1, 2, 3, 5, 8 ];
undefined
> nums.join(", ");
'1, 1, 2, 3, 5, 8' >
You can sort arrays using the sort function, which can be used with the built-in sorting function:
> var jumble_nums = [ 3, 1, 8, 5, 2, 1];
undefined
> jumble_nums.sort();
[ 1, 1, 2, 3, 5, 8 ] >
For those cases where it doesn’t quite do what you want, you can provide your own sorting function as a parameter:
> var names = [ 'marc', 'Maria', 'John', 'jerry', 'alfred', 'Moonbeam'];
undefined
> names.sort();
[ 'John', 'Maria', 'Moonbeam', 'alfred', 'jerry', 'marc' ]
> names.sort(function (a, b) {
var a1 = a.toLowerCase(), b1 = b.toLowerCase();
if (a1 < b1) return -1;
if (a1 > b1) return 1;
return 0;
});
To iterate over items in arrays, you have a number of options, including the for loop shown previously, or you can use the forEach function ( V8 JS) , as follows:
[ 'marc', 'Maria', 'John', 'jerry', 'alfred', 'Moonbeam'].forEach( function (value) {
console.log(value); });
marc Maria John jerry alfred
Moonbeam
Type Comparisons and Conversions
As alluded to previously, for the most part, types in JavaScript behave as you would expect them and as you have seen in other programming languages. JavaScript has both the equality operator == (do the two operands have the same value?) and the precise equality operator ===
(do the two operands have the same value and are of the same type?):
> 234 == '234'
true
> 234 === '234'
false
> 234234.235235 == 'cat'
false
> "cat" == "CAT"
false
> "cat".toUpperCase() == "CAT";
true
You also saw that a number of different things evaluate to false , despite being quite different:
> '' == false == null == undefined == 0
true
> null === undefined
false >
This saves you some time when doing tasks such as checking arguments to functions:
function fine(param) {
if (param == null || param == undefined || param == '') throw new Error("Invalid Argument");
39 Functions
function better(param) {
if (!param) throw new Error("Invalid Argument");
}
One case where type comparisons can be tricky is if you use object constructors for values instead of just using primitives:
> var x = 234;
undefined
> var x1 = new Number(234);
undefined
> typeof x1
'object'
> typeof x
'number'
> x1 == x
true
> x1 === x
false >
The object constructors are functionally equivalent to the primitive types; all the same opera-tions, operators, and functions produce the same results, but the precise equality operator ===
and typeof operator produce different results. For this reason, it is recommended to just use the primitive types whenever possible.
Functions
Although it does not look like it at first glance (the name doesn’t help either), JavaScript is a
functional programming language, wherein functions are fully typed objects that can be manip-ulated, extended, and passed around as data. Node.js takes advantage of this capability, and you will use it extensively in your network and web applications.
Basics
The simplest kind of function is exactly as you would expect:
function hello(name) {
console.log("hello " + name); }
> hello("marc");
To declare parameters for a function in JavaScript, you simply list them in the parentheses. There is, however, absolutely no checking of these parameters at runtime:
> hello();
hello undefined undefined
> hello("marc", "dog", "cat", 48295);
hello marc undefined >
If too few parameters are passed into a function call, the resulting variables are assigned the value undefined . If too many are passed in, the extras are simply unused.
All functions have a predefined array in the body called arguments . It has all the values that were passed in to this particular function call, and lets you do extra checking on the parameter list. Indeed, you can go a step further and use it to make your functions more powerful and flexible.
Suppose you want to initialize a caching subsystem you wrote. The function to do this takes a size to create the cache and uses default values for other things such as cache location, expira-tion algorithm, maximum cache it