IT’S NE VER DONE
THAT BEFORE!
A G u i d e t o T r o u b l e s h o o t i n g
Wi n d o w s X P
by John Ross
IT’S NEVER DONE THAT BEFORE! Copyright © 2006 by John Ross.
All rights reserved. No part of this work may be reproduced or transmitted in any form or by any means, electronic or mechanical, including photocopying, recording, or by any information storage or retrieval system, without the prior written permission of the copyright owner and the publisher.
Printed on recycled paper in the United States of America 1 2 3 4 5 6 7 8 9 10 – 09 08 07 06
No Starch Press and the No Starch Press logo are registered trademarks of No Starch Press, Inc. Other product and company names mentioned herein may be the trademarks of their respective owners. Rather than use a trademark symbol with every occurrence of a trademarked name, we are using the names only in an editorial fashion and to the benefit of the trademark owner, with no intention of infringement of the trademark.
Publisher: William Pollock
Managing Editor: Elizabeth Campbell Cover and Interior Design: Octopod Studios Developmental Editor: Peter Spear
Copyeditors: Judy Flynn and Publication Services, Inc. Compositor: Riley Hoffman
Proofreader: Stephanie Provines Indexer: Publication Services, Inc.
For information on book distributors or translations, please contact No Starch Press, Inc. directly: No Starch Press, Inc.
555 De Haro Street, Suite 250, San Francisco, CA 94107
phone: 415.863.9900; fax: 415.863.9950; [email protected]; www.nostarch.com
The information in this book is distributed on an “As Is” basis, without warranty. While every precaution has been taken in the preparation of this work, neither the author nor No Starch Press, Inc. shall have any liability to any person or entity with respect to any loss or damage caused or alleged to be caused directly or indirectly by the information contained in it.
Librar y of Congress Cataloging-in-Publication Data Ross, John,
It's never done that before! : a guide to troubleshooting Windows XP / John Ross. p. cm.
Includes index. ISBN 1-59327-076-3
1. Microsoft Windows (Computer file) 2. Operating systems (Computers) I. Title. QA76.76.O63R682 2006
005.4'46--dc22
B R I E F C O N T E N T S
Acknowledgments ...xv
Introduction ...xvii
Chapter 1: Troubleshooting Methods and Tools ...1
Chapter 2: Types of Windows Problems and Failures ...25
Chapter 3: What to Do When Windows Won’t Start ...39
Chapter 4: Black Screens and Blue Screens...55
Chapter 5: Solving Device Driver Problems ...65
Chapter 6: Using the Microsoft Knowledge Base and Other Online Resources...75
Chapter 7: Using System Restore and Other Rollback Techniques...89
Chapter 8: Underneath It All: The BIOS ...97
Chapter 9: The Windows Registry: Here Be Demons ...107
Chapter 10: Dealing with Individual Programs and Files ...117
Chapter 11: Service Packs, Patches, and Other Updates...127
Chapter 12: Viruses, Spyware, and Other Nasties ...133
Chapter 13: Internet Connection Problems ...143
Chapter 14: Local Network Problems ...157
Chapter 15: Dealing with Hardware Problems...165
Chapter 16: Troubleshooting and Replacing Hard Drives ...175
Chapter 17: Troubleshooting and Replacing Other Hardware ...193
Chapter 18: If All Else Fails . . . Call Tech Support ...209
Chapter 20: Things to Do Now, Before Your Computer Crashes ...231
Appendix A: Device Manager Error Codes and BIOS POST Beep Codes...245
Appendix B: Free and Inexpensive Security Programs for Windows XP ...257
C O N T E N T S I N D E T A I L
A C K N O W LE D G M E N T S xv
I NT R O D U C T I O N xvii
1
T R O U B L E SH O O T IN G M E T H O D S A N D T O O L S 1
Troubleshooting Basics ... 2
What May Have Gone Wrong? ... 2
What Has Changed? ... 2
Record Your Steps ... 3
Is This a New Problem? Has It Ever Done This Before? ... 3
Start with a Plan ... 4
1. Identify the Symptoms ... 4
2. Try Restarting the Computer ... 7
3. Look for an Explanation ... 8
4. Places to Look for Help ... 14
5. Try a Fix ... 22
6. Check the Result ... 22
7. Keep a Record of the Fix ... 22
8. Prevent a Repeat ... 23
2 T Y P E S O F W I N D O W S P R O B L E M S A N D FA I LU R E S 25 No Power ... 26
Checking Power on a Desktop Computer ... 26
Checking a Laptop Computer ... 27
Errors During Startup ... 27
Troubleshooting Windows Failures ... 29
Black Screens ... 29
Blue Screens ... 30
Everything Is Frozen in Place ... 30
Nonfatal Error Messages ... 31
Responding to Nonfatal Error Messages ... 31
Error Messages: Finding Translations from the Cryptic ... 32
What to Do When Windows Is Acting Oddly ... 33
Pop-up Ads and Redirected Web Pages: Your Desktop Under Attack ... 34
Hardware Problems ... 36
Memory Problems ... 37
Internet Connection Problems ... 37
Local Network Problems ... 38
3
W H A T T O D O W H E N W I ND O W S W O N ’T S T A R T 39
The Windows Startup Sequence ... 40
Power-on Self Test (POST) ... 40
Beep Codes ... 40
Initial Startup: What Happens When You Push the Button ... 41
Run the Boot Loader ... 41
Detect and Configure Hardware ... 41
Load the Windows Kernel ... 42
Logon ... 42
So What Can Go Wrong? ... 42
Making Sense of Startup Error Messages ... 43
Returning to the Last Known Good Configuration ... 45
Bypassing Windows with the Recovery Console ... 46
Solving Startup Problems with the Recovery Console ... 47
Safe Mode ... 48
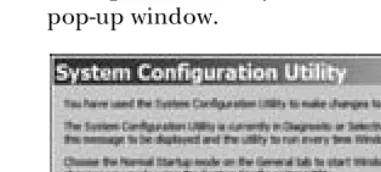
The System Configuration Utility ... 48
Using the Configuration Utility to Streamline Startup ... 51
The Boot Log: A History of Startup Programs ... 52
Solving Those “Did Not Load” Errors ... 53
4 B L A C K SC R E E NS A N D B LU E S C R E E NS 55 Black Screens ... 56
Open Windows in Safe Mode ... 56
Look for a Hardware Problem ... 56
Blue Screens ... 57
How to Read a Stop Message ... 57
Look for More Details ... 58
Replace the Driver File ... 58
Wait, Wait! Don’t Let the Message Disappear! ... 59
Finding a Fix ... 60
The Microsoft Knowledge Base ... 61
Try Other Internet Resources ... 64
5 S O L VI N G D E V I C E D R IV E R P R O B L E M S 65 Device Drivers ... 66
DLL Files ... 68
Diagnosing a Driver Problem ... 68
Where to Find New Drivers ... 70
Installing New Drivers ... 71
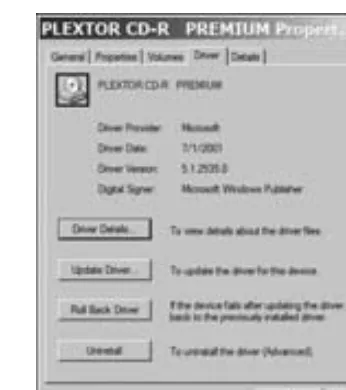
Returning to an Earlier Version ... 72
Storing and Organizing Your Drivers ... 73
C o n t e n ts i n D e t ai l ix 6
U S I N G T H E M I C R O S O F T K N O W L E D G E B A S E A N D
O T H E R O N L IN E R E S O U R C E S 75
Try the Help Screens First ... 76
README Files ... 78
The Microsoft Knowledge Base ... 78
Opening the Knowledge Base ... 79
Reading a Knowledge Base Article ... 80
Buried Treasure in the Knowledge Base ... 82
Hardware and Software Manufacturers’ Websites ... 83
Newsgroups and Independent Support Services ... 84
Search Online for the Symptoms ... 87
Don’t Panic (Yet) ... 87
7 U S I N G S Y S T E M R E ST O R E A ND O T H E R R O LL B A C K T E C H N IQ U E S 89 Before You Try System Restore ... 90
Creating Restore Points ... 92
Returning to a Restore Point ... 94
Starting System Restore in Safe Mode ... 95
8 U N D E R N E A T H I T A LL : T H E B I O S 97 The Power-on Self Test ... 98
Changing the BIOS Settings ... 99
Opening the BIOS Setup Tool ... 100
Changing BIOS Settings ... 100
Date and Time ... 101
Configuring Hard Drives and Other IDE Devices ... 101
Diskette Settings ... 103
Boot Sequence ... 103
Turn Num Lock On or Off ... 104
Other BIOS Settings ... 104
If All Else Fails, Return to the Default ... 104
Updating the BIOS ... 105
9 T H E W I N D O W S R E G I ST R Y : H E R E B E D E M O N S 107 Opening, Reading, and Editing the Registry ... 109
How the Registry Is Organized ... 110
Using the Registry to Repair or Modify Windows ... 111
Deleting a Registry Item ... 112
Adding a New Registry Item ... 113
Editing an Existing Registry Item ... 114
1 0
D E A L I NG W IT H I ND I VI D U A L P R O G R A M S A N D FI L E S 117
The Program Won’t Start ... 118
Have You Used This Program Before? ... 118
Have You Just Upgraded? ... 118
What Else Has Happened Lately? ... 119
Is There Another Way to Open the Program? ... 119
Reinstall the Program ... 120
Delete and Reinstall Again ... 120
A File Opens in the Wrong Program ... 121
The Program Freezes ... 122
I Can’t Read a File ... 124
Try a Different Program ... 124
Check the File Extension ... 124
The File Won’t Print ... 125
1 1 S E R V I C E P A C K S , P A T C H E S, A N D O T H E R U P D A T E S 127 When to Update ... 128
Finding and Installing the Latest Updates ... 128
Installing Microsoft Windows Updates ... 128
Updating Security Software ... 130
What If an Update Creates Problems? ... 130
Updating the BIOS ... 130
Use the Right BIOS ... 131
Follow the Instructions ... 132
1 2 V IR U S E S , S P YW A R E , A N D O T H E R N A S T IE S 133 Protecting Your System ... 134
Viruses, Worms, and Trojan Horses ... 134
Antivirus Programs ... 135
Take Precautions ... 136
Spyware ... 136
Where Did That Come From? ... 136
Protecting Against Spyware ... 137
Finding and Removing Spyware ... 137
Identifying Malware ... 138
C o n t e n ts i n D e t ai l xi
The ISP’s Gateway ... 146
Tracing the Network ... 147
My Computer Can’t Find the Internet ... 149
Does Your ISP Provide Its Own Software? ... 149
Network Configuration Settings ... 150
Troubleshooting a Dial-up Connection ... 151
Troubleshooting a Connection Through a Local Network ... 152
The Computer Can’t Find a Particular Website ... 153
Computer Connects When You Don’t Want It to Connect ... 154
The Internet Disappears ... 154
Firewalls and Gateway Servers ... 155
1 4 L O C A L N E T W O R K P R O B LE M S 157 I Can’t See Other Computers on the LAN ... 158
File Sharing Doesn’t Work ... 160
I Can’t Edit a File ... 162
1 5 D E A L I N G W IT H H A R D W A R E P R O B L E M S 165 Problems with New Hardware ... 166
Hardware Troubleshooting ... 166
Look for a Simple Fix ... 167
Replace and Test Each Component ... 167
Move the Device to Another Computer ... 168
Divide the Circuit ... 168
Repair or Replace? ... 170
Microsoft’s Product Activation: Not a Big Deal ... 171
How Product Activation Works ... 172
What Happens If I Upgrade My Hardware? ... 173
Is This a License to Snoop? ... 174
What About Registration? ... 174
1 6 T R O U B L E SH O O T IN G A N D R E P LA C IN G H A R D D R IV E S 175 Restoring the Computer to Useful Operation ... 176
Installing a New Hard Drive ... 177
Mounting the Drive ... 178
Changing the BIOS Setting ... 179
Formatting the Drive ... 179
Replacing a Drive in a Laptop Computer ... 182
What About USB Drives? ... 182
Recovering Your Data ... 183
Recovering Data from a Laptop Drive ... 185
Troubleshooting Hard Drives ... 186
Jumpers on ATA Drives ... 186
Cable Connections ... 187
Moving a Hard Drive to a New Computer ... 190
What to Tell the Service Guy ... 191
Problems with Other Storage Devices ... 192
A Few Last Words About Drives ... 192
1 7
Cleaning a Mechanical Mouse ... 199
Cleaning an Optical Mouse ... 200
Keyboard Problems ... 200
USB and FireWire Problems ... 202
Printer Problems ... 202
Try Printing Some Test Pages ... 205
Try a Different Program ... 205
Printing to a File ... 206
Printing Through a Network ... 206
Monitor Problems ... 206
Screen Is Completely Dark (No Image) ... 207
The Image Is Squashed ... 207
The Shape of the Image Is Distorted ... 207
Color Is Wrong ... 207
Try Your Help Desk First (If You Have One) ... 210
In-Laws and Other Informal Tech Support ... 212
Dealing with Microsoft Tech Support ... 212
Other Vendors’ Tech Support ... 215
Don’t Be Afraid to Escalate ... 217
Wait! The Last Person Told Me Something Different ... 218
E-mail, Bulletin Boards, and Other Ways to Avoid Talking to You ... 218
C o nt e n t s i n D e t ai l xiii 1 9
C U T T IN G Y O U R LO S S E S : W H A T T O D O W H E N
N O T H IN G E L S E W O R K S 221
Preserving Your Data ... 222
Reinstall Windows ... 225
Using a Windows Recovery CD or a Hidden Partition ... 227
Reformatting the Drive ... 228
2 0 T H IN G S T O D O N O W , B E F O R E Y O U R C O M P U T E R C R A S H E S 231 Back Up Your Data ... 232
What Should I Back Up? ... 232
How Often Should I Back Up My Data? ... 233
What Kind of Media? ... 234
What Backup Method? ... 234
Defragment Your Hard Drives ... 236
Check for Other Disk Problems ... 239
Create a Set of Utility Disks ... 240
Make a Restore Disk ... 240
Make a Boot Disk ... 241
Scan for Viruses and Spyware ... 242
Get Rid of the Dust ... 243
Clean Your Screen ... 244
A D E V I C E M A N A G E R E R R O R C O D E S A N D B I O S P O S T B E E P C O D E S 245 Windows XP Device Manager Error Codes ... 245
POST Beep Codes ... 255
B F R E E A N D I N E X P E N S I V E S E C U R I T Y P R O G R A M S F O R W I N D O W S X P 257 Antivirus Programs ... 257
Antispyware Programs ... 258
Firewall Programs ... 258
A C K N O W L E D G M E N T S
I N T R O D U C T I O N
This book was inspired by the cover of a Datamation
magazine that appeared about 20 years ago. It shows
a man in an office with what used to be a desktop
computer on the table in front of him. The poor guy
has his hands poised over the keyboard, but the rest of the machine is in tiny pieces all over the room. His eyebrows have been burned off, his hair is blown straight back, and his coffee cup has tipped over. There’s a huge cloud of black smoke over his head. It’s obvious that the computer exploded about five seconds earlier. He’s thinking, “It’s never done that before.”There’s not much you can do when your computer explodes except to sweep up the remains and open a window to let the smoke out of the room. But if Windows won’t start, or your hard drive breaks down, or you get a cryptic Blue Screen error message, or any of a jillion other things go wrong, you can almost always restore the machine to useful operation and recover most of your data if you take an organized approach to troubleshooting. The tools for understanding most computer problems are out there on the Internet, in manuals and user guides, and through both on- and offline communities of people who use similar equipment and programs. But they won’t do you any good unless you know where to find them. That’s what this book is for.
This is a book for people who use their computers all the time but who don’t always know how to deal with the major and minor problems that eventually seem to attack most computers. It will tell you how to apply troubleshooting techniques and methods to evaluate and solve computer problems, with an emphasis on computers running Windows XP. It won’t tell you exactly what to do for every possible problem that might appear, but it will tell you where to find detailed explanations of most problems and instruc-tions for fixing them. I will also show you how to recognize specific symptoms and how to understand and use error messages, beep codes, and other diagnostic tools that aren’t always clear on first inspection. I’ll also show you where to find help from Microsoft, from other manufacturers and users, and from the Combined Wisdom of the Internet. And finally, I will tell you how to decide if the time and cost of a repair just isn’t worth the effort.
Equally important, as the book’s author, I’ve made every effort to reassure you. Your computer isn’t haunted (although it might be infected by a virus); computers don’t break without leaving hints about the cause of the failure; and you’re not the first person to have a particular problem. Don’t panic; there are information resources and a huge community of support people and other users out there who are anxious to help you. One way or another, you’ll get your computer working again.
Remind me again; weren’t computers supposed to make our lives easier? Why should using a computer be more complicated than driving a car? The difference between using Windows and driving is that to drive, you have to take a test and convince an examiner from the Department of Motor Vehicles that you know how to operate a car first. But the only thing you have to do to start using a computer is to turn on the power switch. Computer manufacturers don’t tell you where to find the power switch (let alone any of the hidden controls you might need to keep the computer going). And Microsoft doesn’t tell you how to fix Windows when it breaks. You have to know where to look or you might never find that essential but elusive piece of information. Consider this book to be your guide.
In t ro d u c ti o n xix text can often lead you to a document buried in a knowledge base or some other website that reveals everything. This book can help you find that document.
I don’t expect you to read this book from cover to cover, but it won’t hurt to skim the chapter titles and main headings before you encounter a problem. With luck, you will remember that the book includes a section on understanding error messages, or restoring Windows settings, or whatever other information you need to fix your computer, and you’ll come back to find specific advice and information when you need it. I do encourage you to take a close look at the final chapter on preventive maintenance right now and to do what you can to reduce the likelihood of some avoidable problems.
1
T R O U B L E S H O O T I N G M E T H O D S
A N D T O O L S
Windows is pretty good at finding and
diagnosing problems, but it does a lousy
job of explaining how to fix them and what
has gone wrong. The error messages and other
information that appear on your screen when a
problem occurs often make things more confusing
rather than providing clear instructions for solving
the problem.
In spite of appearances, there is some kind of logic to the way Windows XP reports problems. And there’s usually some kind of detailed explanation available if you know where to look.
interface. This could be something as simple as the function of the middle button on a three-button mouse or as complex as a completely different screen layout or an unexpected response to a command. If you (or some-body else using your computer) change a setting, or a new program or component makes the change automatically, you’ll often have to find and reset some hidden option, setting, or menu item to change it back to the original configuration.
Troubleshooting Basics
The first step in troubleshooting Windows is to find as much information as possible about the problem. If an error message appears on the monitor screen, read the whole message; it won’t always tell you exactly how to fix the problem, but it’s usually a good starting point. And even if the message itself doesn’t contain any useful advice, you can often look up the text in Microsoft’s Knowledge Base or in some other online source of information that will offer a better and more detailed explanation.
Troubleshooting Windows is a lot easier when you have access to the Internet because many of the sources of helpful information are websites. If you can’t go online with the computer that has the problem and you don’t have access to a second computer, you might have reached a temporary dead end; you’ll have to either borrow another computer or go someplace where you can use one—such as the home or office of a friend or colleague, an Internet café, or the public library.
Even better, try to borrow a laptop or other portable and set it up near the one you’re trying to fix. You will save a lot of time and aggravation if you can read instructions for possible repairs on the screen of the second com-puter and immediately try them without the need to copy or print them and carry them back to your own home or office or from one room to another.
What May Have Gone Wrong?
Windows does not suffer from completely random failures. There’s always a cause or a combination of causes when Windows goes haywire. If your com-puter has been operating more or less correctly and then it fails, something has changed: it might be a new piece of software, two different programs fighting for the same segment of memory, or a hardware component that has failed. That’s why many problems occur just after you load a new program (or a new version of an existing program) or install a new piece of hardware: the thing that you tried to add doesn’t work properly with all the stuff that was already running. This is why Microsoft has included a “restore” function in Windows XP that returns the computer to an earlier configuration.
What Has Changed?
T r oub lesh oot in g Met h ods a n d T ool s 3 network interface or loaded the newest update to your antivirus program? Did you connect a new sound card or mouse to the computer? Has some kind of software loaded itself through the Internet without your knowledge? Has somebody turned off the power switch on the printer? If you can find the thing that has changed, you can almost always fix the problem. The general rule is to look for as much information about the problem’s symptoms as possible.
Here’s a real-world example: One of my computers would crash with-out warning after it had been running for an hour or more. Windows displayed a Blue Screen error message that identified the problem as a hardware failure, but none of the usual sources of information—Microsoft tech support, the hardware manufacturers’ websites, and the combined wisdom of the Internet—could tell me exactly what was going wrong. I hadn’t added or removed anything, so I didn’t think the computer’s configuration had changed. None of the usual tests came up with anything. The best anybody could tell me was that the Stop codes indicated that it had something to do with hardware rather than Windows and maybe something was warmer than usual.
After several weeks of pain, I figured out what had changed: the com-puter began to fail shortly after the floor in another room of the house had been sanded and refinished. When I opened up the computer, I discovered that the cooler that was supposed to keep the central processor from over-heating was full of sawdust. Because the heat could not escape, the processor would fail when the temperature increased. Five minutes with an air hose and a soft brush was all it took to solve the problem. Yup, it was the dreaded “Floor Sanding Screen of Death.”
Record Your Steps
As you try to repair a problem and restore your computer to normal opera-tion, keep track of what you’re doing. Even if something doesn’t work, you will want to tell a help desk person (or your neighbor’s daughter the com-puter expert) that you tried it and how the comcom-puter responded. Sometimes a failed fix might contain the seeds of success for somebody with more experience. And if you stumble onto something that does solve the problem, you might want to know exactly what you did in order to fix it again later.
Is This a New Problem? Has It Ever Done This Before?
It’s always useful to ask whether you’re dealing with a new problem or one that has appeared before or existed for a long time. It’s often easier to just restart a program or reboot the computer and get back to work rather than to take the time to find the source of the underlying problem, but that does nothing toward preventing the problem from occurring again.
the problem without knowing the cause. But when that happens, there’s always the danger that the same problem will come back at the most inconvenient time. So it’s a good idea to spend some time looking for the cause rather than simply working around it.
Start with a Plan
A formal troubleshooting plan may itself seem like a lot of trouble, but it’s almost always the most effective way to move from a problem to a solution. A typical troubleshooting plan might include the steps presented here.
1. Identify the Symptoms
Any unexpected behavior can be considered a “problem,” even if the com-puter does not actually fail. The troubleshooting methods are the same for minor irritations and catastrophic failures.
First, define the problem. Does an error message appear on the screen? Has some hardware component stopped working? Is some element of the computer’s behavior different from what you’re expecting? Just exactly what is wrong?
Changes in Performance
The most obvious problems are the ones that cause the computer to crash. If the keyboard or mouse stops working, if the monitor screen goes dark, or if Windows won’t start, you have a pretty clear indication that something has gone wrong. Other problems are more subtle: A program takes forever to start, or a network link that worked yesterday won’t work today. Or maybe your web browser is taking you to a site that you didn’t request.
When you discover that something isn’t working the way you expect it to work, try to describe the problem to yourself in detail. If the problem seems connected to a particular program, identify the program by name and release number. If you’re seeing a strange website, note the web address and anything else that might identify the site. If the computer crashed, try to remember exactly what you did and what the computer was doing before it stopped working.
The point of this exercise is to provide as much information as possible to the people and other resources that will help you to solve the problem. Whether it’s a human tech support representative (or your brother-in-law) or an online list of problems and solutions, you will have to describe the problem before you can find a way to fix it.
Error Messages
T r oub lesh oot in g Met h ods a n d T ool s 5 include the exact language of the error message in your notes, including all the cryptic codes. We’ll talk more about Windows error messages and screens in Chapter 4.
NOTE Unfortunately, the Print Screen function won’t work when Windows produces a Blue Screen error following a catastrophic failure. In that case, you’ll have to copy the text by hand.
Follow these steps to capture an error message window:
1. Make the window that contains the error message the active window. 2. Hold down the ALT key and press the PRINTSCREEN key to the right of the
regular keyboard.
3. Open the Windows Paint program (in the Start Programs
Accessories or Start Programs All Programs Accessories menu) or some other graphics program.
4. Choose Edit Paste to display an image of the window. 5. Print the image.
Don’t forget the digital readout or the LED indicators on your printer and some other external devices. There are generally more and better diagnostic displays on more expensive printers than on low-end units, but even a flashing LED can sometimes provide some kind of useful information. If an error message or some other unfamiliar display appears anywhere in the system, make a note of it. For network problems, look at the lights on the interface card’s back panel and on the router or data switch; some network devices identify problems with specific displays.
Event Logs
Windows and other programs often use log files to store lists of specific events. Most of the entries in the Event Viewer are routine actions, but the Viewer also lists some types of errors that can be useful as troubleshooting tools.
To open the Event Viewer, use the Start Run command and type
eventvwr.msc. Figure 1-1 shows the Event Viewer.
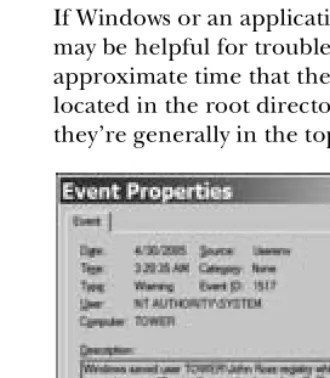
For details about a log entry, double-click the listing for that entry. The Event Properties window, shown in Figure 1-2, contains information about the event, including a description that can be useful for troubleshooting.
When you find an entry that corresponds to the problem you’re trying to fix, make a note of the codes and other information in the Event Properties window.
Power-on Self Test Errors
Figure 1-1: The Event Viewer displays information about Windows events and errors.
Other Log Files
If Windows or an application program creates a log, the data in the log file may be helpful for troubleshooting. Look for entries that correspond to the approximate time that the problem or failure occurred. Most log files are located in the root directory of your primary hard drive; in other words, they’re generally in the top-level directory on the C: drive.
T r oub lesh oot in g Met h ods a n d T ool s 7 What Else Was Happening?
Look for other elements that might be related to the problem. For example:
If other users have their own accounts on this computer, do they see the same problem?
If the computer is connected to a network, do other computers on the same network have the same problem?
Have you recently installed an update to Windows or to one of the other programs installed on your computer? How about a new driver?
Is the problem related to a particular activity? Does it occur every time you try to run a specific program or when you enter a specific command? Does it happen at startup or at shutdown? When you try to print or use some other peripheral device? Make a note of all the symptoms that appear to be related to the problem and anything else that seems to be different from the performance you’re expecting. The more information you can provide, the easier it will be to find a way to solve the problem.
2. Try Restarting the Computer
Before you try anything else, try shutting down the computer and all the external components, and then turn them back on. Sometimes that’s all that it takes to fix a problem. This might happen when a badly designed program has grabbed a chunk of the computer’s memory and not released it or when some internal software switch or setting has latched itself in the wrong posi-tion. When that occurs, returning the computer and its peripheral devices to their startup configuration can be all it takes to get back to normal operation.
NOTE Don’t dive for the power switch or the reset button until you have copied the text of the error message or noted the other symptoms of the problem. Sometimes a problem will pro-duce a different message or another symptom the next time it appears, and knowing that can be another valuable troubleshooting tool.
When you restart the computer, don’t just use the Restart option in the Turn Off Computer window; try the Turn Off or Shutdown option, and then either disconnect the power cable or use the power switch on the back of the computer to turn off the power supply. Count to 10, and then reconnect the power plug or turn the power switch back on. The idea is to completely remove power from all of the computer’s internal circuits for long enough to remove any residual charge and return to the startup condition.
Restarting doesn’t always work, but it’s a common enough fix that you should try it before moving on to other possible methods. If it’s a one-time glitch (or it occurs very rarely), that might be all you ever need to do; but if the problem returns frequently, you will want to continue with the trouble-shooting process to fix the underlying problem.
3. Look for an Explanation
Eliminate the simple reasons for a failure first. For example, if the printer won’t print, make sure the power cable and the signal cable are still connected, the ink or toner supply hasn’t dried up, the power switch is turned on, and the printer is On Line before you start running diagnostics. When power to the computer disappears, make sure your cat hasn’t walked across the power outlet strip and turned it off or the person polishing your floor didn’t cut the power cord. If no sound comes out of the speakers, open the Volume Control window and the control for your audio program and make sure none of the Mute options are active, and check the physical cables and volume control on the speaker box.
NOTE In general, look for the quick fixes before you spend a lot of time searching for something more complicated. Problems like that are quick and easy to check, and even easier to repair, so you should get them out of the way before you waste a lot of time looking for something more serious and complex.
Sometimes an apparent problem can occur because somebody else on your network is running tests or installing new software or hardware or some program is running a scheduled event such as a virus scan or it’s downloading and installing an automatic software upgrade. If you can’t connect to the Internet from your office computer, call the system administrator to make sure the whole network isn’t down before you tear into your own computer; if there’s some kind of unknown activity on your own computer, open the Task Manager to see if a scheduled program is running. Even if you’re using a stand-alone computer, it’s possible that some program is running in the background.
When the simple answers don’t solve the problem, it’s time to perform a more systematic search.
Examine the System
If a hardware component appears to have failed, look for some obvious reason for the failure. In particular, check these possibilities:
Make sure that all the cables and plugs are securely connected at both ends.
Confirm that all the power switches are turned on and any other controls (such as an On Line switch on a printer or the Brightness and Contrast controls on a monitor) are set correctly.
T r oub lesh oot in g Met h ods a n d T ool s 9 Look for a configuration window or menu. Make sure all the settings and options are set correctly.
Turn off the computer, unplug the power cable, and remove the cover. Make sure all the expansion cards and both ends of all the internal cables are firmly seated in their sockets. If you’ve just installed a device, confirm that the ribbon cables are not upside down: the red stripe on the ribbon cable should be closest to the No. 1 pin on the sockets at both the motherboard and the drive or other devices. If you have a copy of the user manual for the motherboard, confirm that all of the switches and jumpers are in the right positions.
If the computer produced beep codes or other error messages related to system memory (according to your user manual or your BIOS manufac-turer’s help), make sure that all of the memory modules are firmly seated in their sockets.
While the computer is open, use an air hose, a vacuum cleaner, or a soft brush to remove any dust that may have settled inside. Pay particular attention to the motherboard and other circuit boards, the heat sinks on the central processor chip, and all of the grilles and ventilation holes in the computer’s case that are supposed to allow air to move through the box. Get that floor dust out of there.
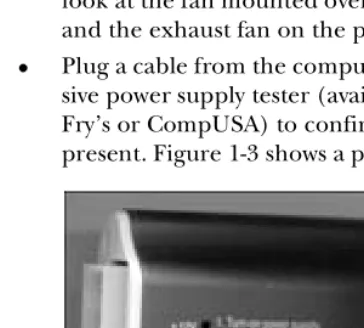
Before you replace the cover, plug in the power cable and any other external cables that you may have disconnected, turn on the computer, and confirm that all of the fans and blowers are operating. In particular, look at the fan mounted over the central processor on the motherboard and the exhaust fan on the power supply.
Plug a cable from the computer’s internal power supply into an inexpen-sive power supply tester (available from a computer supply retailer like Fry’s or CompUSA) to confirm that all of the necessary voltages are present. Figure 1-3 shows a power supply tester.
If the computer or any other components run on batteries, make sure the battery has not run down. Try replacing the battery with a new one, or use a voltmeter to measure the voltage at the battery’s terminals. If there’s a power socket that allows you to use the computer on house cur-rent, see if it will run with external power.
U S I N G A V O L T M E T E R
An inexpensive voltmeter is often helpful for testing the outputs of power supplies and batteries. You can spend hundreds of dollars for a durable, high-precision test instrument, but that’s more than you will need for computer troubleshooting. If you have a meter and you know how to use it, you can use it to measure the voltages. If you’re not comfortable using a voltmeter, let a qualified technician do it for you.
Most voltmeters are actually volt-ohm-millimeters that can measure electrical potential (volts), impedance (ohms), and current (amperes or amps). The selector switch at the front of the meter chooses the type of measurement.
Voltmeters are either digital (with numbers in the display) or analog (with a needle that moves to show the measured value); either type is fine for our purposes. Your meter should come with two test cables that plug into the meter and have metal probes at the other end.
Follow these steps to measure voltage:
1. If your meter has a power switch, turn the meter on.
2. Set the selector switch to one of the DC Volts settings. Use the range that is the next setting higher than the voltage you’re measuring; to measure the +5 VDC and +12 VDC voltages from a computer power supply on the meter shown in Figure 1-4, set the switch to the 60 DC V range. To measure the power from a battery or external power supply, look at the label on the power supply to find the voltage.
3. Insert the test cables into the + and – sockets (or the COM and VDC sockets) on the front of the meter.
4. If you’re measuring a power supply, turn it on.
5. Touch one of the test probes to the + terminal or connector on the device you want to measure; touch the other probe to the – terminal or connector. Figure 1-5 shows the correct voltage on each pin in the cable connector.
6. Look at the meter’s display. The needle or the digital display should show the voltage of the device. If the needle on your analog meter moves to the left, reverse the two test leads.
Figure 1-4: Set the meter to one of the DC V ranges.
T ro ubl esh oot in g Met hod s a nd T ool s 11 Sometimes a laptop computer will work with external power only when there’s no internal battery in place. This may mean that the battery is completely drained or that the external power supply isn’t strong enough to run the computer and charge the battery at the same time. Compare the power requirement (in volts and amps) specified for your computer (in the user manual or at the manufacturer’s website) with the capacity marked on the power unit. If the computer needs more amps than the power supply can provide, find a different power unit.
If the computer’s clock or calendar doesn’t display the current time and date, replace the coin-size battery on the computer’s motherboard. You will have to reset the computer’s BIOS settings after you remove and replace the battery.
Try running a complete virus scan and a scan for spyware. If you don’t already have antivirus and antispyware programs installed on your com-puter, see Chapter 11 for more information.
For problems with Windows or other software, look for a configuration setting that might be the source of the problem. There is no universal standard for finding settings and options in Windows programs, but the Tools menu in the toolbar at the top of most program windows is a good place to start. Many programs include a menu item called Options, while others offer one or more separate settings. Look in each configuration window and dialog box to see if there’s a setting that might be causing the problem.
Anytime you change either hardware or software, note what you have done and test the system to see if you have solved the problem before you move on to something else. If the attempted fix didn’t work, return the setting to its original state before you move on to something else. Obviously, that doesn’t mean that you should replace the dust that you removed from inside the computer or loosen the plugs and circuit boards that you inserted firmly into their sockets, but when you change a configuration setting or a software option, change it back if it doesn’t solve the problem. Otherwise, you run the risk of creating new problems before you solve the original one.
Isolate the Problem: Hardware
For hardware problems, it can often be helpful to isolate the problem by replacing individual components and cables one at a time until the problem disappears. If you don’t have your own set of spares, ask your friends and colleagues if they have a junk box full of cables, video cards, modems, net-work interface cards, and other parts to try. If there’s another computer nearby, try swapping major components like the video monitor, keyboard, or printer.
If the bad component is something more expensive, such as a printer, you might want to either try to repair it yourself or take it to a service center. But don’t be surprised if it costs more to repair the original unit than to buy a new one. Technicians’ time is often a lot more expensive than hardware, and the price of many computer components is dropping, so it’s often not worth the time and trouble to spend an hour or more fixing something like a $15 network interface or a $25 keyboard.
Monitors are especially notorious for costing more to repair than to replace. The price of old-fashioned video displays with cathode ray tubes (CRTs) has dropped through the floor as the newer flat-panel displays have taken over the market. You can find new high-quality brand-name 17-inch CRT monitors for less than $150; it could cost that much or more to repair an old one, if your technician can find the parts. I’ve also seen decent used 15-inch units for as little as $5. At that kind of price, you’re ahead of the game if the thing lasts more than three or four months.
NOTE Don’t try to repair a monitor yourself unless you know exactly what you’re doing. Unlike the low voltages inside a computer, a video display can contain high-voltage capacitors that can kill, even if the power is disconnected.
Isolate the Problem: Software
Similar techniques can also work with software. When a problem appears, try closing each active program, one at a time. If the problem disappears once a particular program has been shut down, that program could be the source of the problem.
If you recently installed a new device driver, a software patch, or a com-pletely new program, try uninstalling the new software and reinstalling the original version.
Software problems can occur when there’s a conflict between two pro-grams that try to use the same portion of the computer’s memory at the same time. To identify the program that is causing trouble, use the Services tool to disable the active background software services, one at a time. Follow these steps to use the Services tool:
1. From the Start menu, open Run and enter services.msc.
2. The line for each active service includes the word Started in the Status column. To turn it off, right-click the name of a service, and select Stop from the pop-up menu.
If the problem goes away when you shut down a service, that service could be related the problem. If stopping a service makes no difference, turn it back on and try the next one.
Use Safe Mode to Simplify the System
T ro ubl esh oot in g Met hod s a nd T ool s 13 some problem with your Windows installation. If the problem is gone in Safe Mode, you can assume that it’s caused by some other program or service that loads when Windows boots normally.
To start Windows in Safe Mode, follow these steps:
1. Shut down and restart Windows.
2. When the computer restarts, press F8 a few times. A list of startup options will appear on your screen.
3. Choose one of the Safe Mode options and press ENTER. The computer will open Windows in Safe Mode.
NOTE Don’t be alarmed if the screen doesn’t look the same as it did before. One of the “extra” services that Safe Mode ignores is the display setting. It will return to normal when you leave Safe Mode.
Retrace Your Steps
Even if a computer problem seems to appear without warning, it was prob-ably caused by something that has changed within the hardware or software. Therefore, trying to reproduce the problem by repeating your steps can often help identify and solve it.
Your troubleshooting routine should include asking these questions:
What programs were running when the problem occurred?
Have you recently installed or removed a program, device driver, or other software?
Have you recently tried to update or upgrade Windows or some other program?
Have you changed any settings or options?
Have you added or removed any hardware devices?
Is anybody else using this computer? Have they made any changes? Did the computer receive a command or message through its network connection?
Don’t forget about external events that might have caused a computer problem. For example, has there been a change to your power source (are you using a different power outlet?), or have you moved the computer to a new location?
Check for Updates
4. Places to Look for Help
Whenever you encounter a problem with Windows, remember this: It’s extremely likely that somebody else has had to deal with exactly the same problem that you’re trying to fix. Somebody someplace has almost certainly come up against the same kind of failure or unexpected behavior before. And there’s probably a description of the problem someplace on the Internet, in the Microsoft Knowledge Base or elsewhere. If you’re lucky, you may even find an online forum where several people who have suffered from the same problem shared their experience trying to solve it.
NOTE Working with a second computer will make troubleshooting a lot easier, even if the bro-ken machine does have access to the Internet. With a single screen, you’ll find yourself constantly switching between the web page or help screen that contains a procedure and the program or dialog box where you must enter commands, select options, or read text. And when the troubleshooting procedure tells you to restart the computer, your informa-tion page will disappear. If you can’t move a second computer next to the one you’re trying to fix, the next best approach is to print the web pages and other information sources that contain the possible fix before you start to step through the procedure and work from a paper copy.
Describe the Problem
If you can describe the specific symptoms of your problem, you can probably find help fixing it. But before you go online or pick up the telephone in search of help, make a list of specific facts related to the problem, including the names and version numbers of the software that was running when it occurred, a complete description of the symptoms, and the things you have already tried. The more useful the information you can offer to the people trying to help you, the better the chances that they’ll know how to solve the problem.
To identify the version of Windows XP currently running on your computer, choose Start Control Panel Performance And Main-tenance System (in the Windows XP menu), or Start Settings Control Panel System (in the Classic Start menu) and look at the General tab. The version of Windows XP is listed under the System heading.
To identify the version of most Windows programs, open the Help menu (at the right end of the program’s menu bar), and choose About Name Of Program.
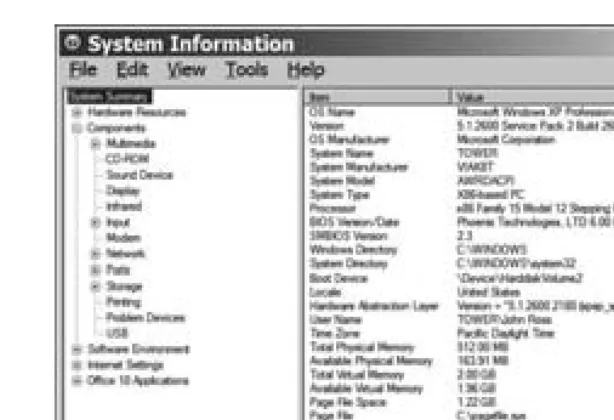
T ro ubl esh oot in g Met hod s a nd T ool s 15 Figure 1-6: Use the System Information tool to identify the BIOS version and date.
NOTE If you’re using an external device connected to the computer through a USB, SATA, FireWire, or other port, or a network adapter, you may have to consult the device man-ual or the manufacturer’s website to identify the firmware version.
Look for a Solution
Once you have defined the problem in detail, you’re ready to look for an explanation of its cause and a way to fix it. Many of the best sources of problem-solving information are literally at your fingertips—they include the Help and Support Center built into Windows, the printed manuals and text files supplied with your computer’s hardware and software, formal computer help desks and support services that you can reach with a telephone call or an e-mail message, and a variety of resources that you can find on the Internet.
As that old TV show kept telling us, “The truth is out there.” An expla-nation of your problem is indeed out there someplace; it’s just a matter of knowing where to look.
Here are some places to find information that can help identify and solve the source of a problem.
Open the Built-in Help Screens
NOTE Some programs use an interactive help system with links to the manufacturer through
the Internet. This can be a great way to provide the latest information about new fea-tures, functions, and fixes.
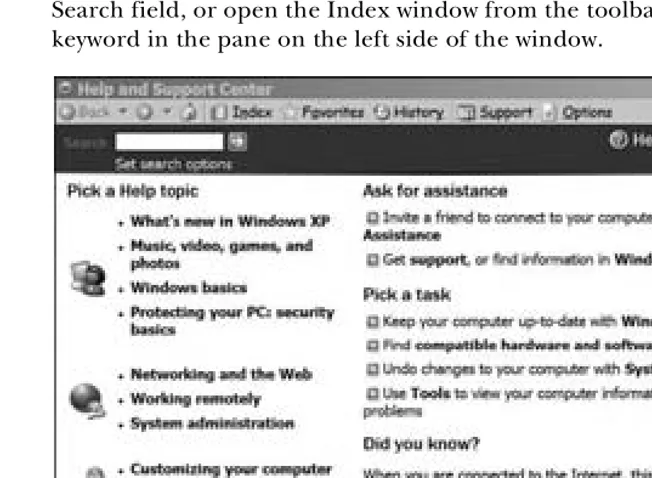
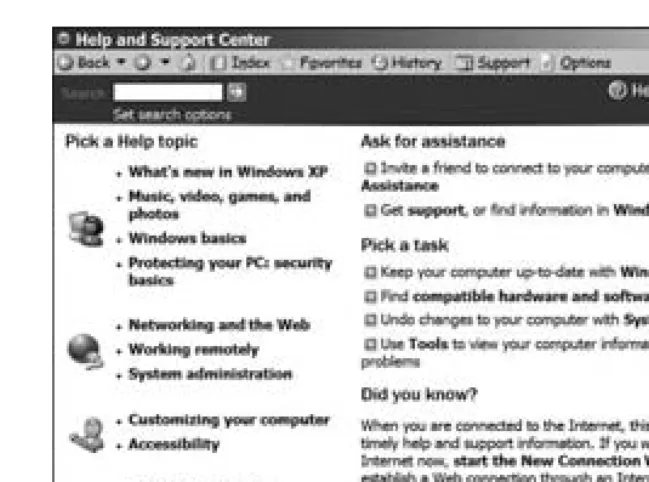
To open the Help and Support Center in Windows XP, choose the
Help And Support option in the Start menu. When the window shown in Figure 1-7 appears, type a keyword that describes your problem in the Search field, or open the Index window from the toolbar and look for a keyword in the pane on the left side of the window.
Figure 1-7: The Windows XP Help And Support Center window contains links to many troubleshooting resources.
In most other programs, you should find a Help menu in the toolbar at the top of the program window. When the Help window opens, type a one- or two-word description of the problem into the Index or Search tool. If that doesn’t produce anything useful, try scrolling through the list of keywords until you find something close to the problem you’re trying to solve.
Open the Windows Help and Support Center
The Help and Support Center in Windows XP includes both the local help screens and other tools, such as System Restore and several diagnostic screens, as well as links to Microsoft’s online support center and Windows newsgroups. The help screens in Windows XP are the closest thing to a user manual supplied with the software. When you’re looking for instructions for finding and changing any of the settings and options, start here.
T ro ubl esh oot in g Met hod s a nd T ool s 17 To go to the help screens, choose the Index button in the toolbar at the top of the window. Type a keyword or use the list of keywords in the Index pane to find the specific information you need.
Most of the time, your initial keyword search will open a page that contains a lot of text but not the specific information that you want. It’s often quite astonishing how well and how often Microsoft’s help writers can avoid answering the most obvious questions at the top layer of a help hierarchy. But don’t give up yet. If the initial help screen linked to a keyword doesn’t tell you what you want to know, scroll to the bottom of the text and click the
Related Topics link. You may well find that the pop-up menu that lists other topics often includes more useful information than the original page.
Look for README Files
README files are text files that contain last-minute information, such as descriptions of compatibility problems with other hardware or software, changes since the manual was published, and workaround instructions for bugs. It’s always worth the time to look for a README file on the CD or floppy disk or in the download directory that contains new software or updates to an existing product.
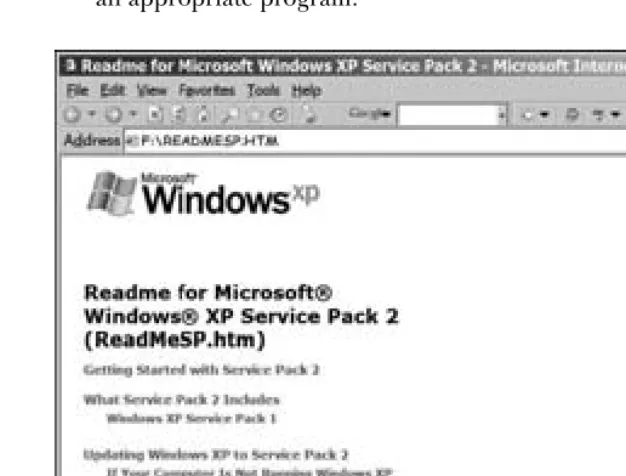
Unfortunately, there’s no standard format for README files. They can be text files, formatted documents, web pages, or PDFs. Sometimes, the Install or Setup routine will place a link to the README file on the Windows desktop or the Programs menu. Rarely, they are printed pages inserted in the box along with the software, or they are links to an online site. The file might be called readme.txt (or .doc or .pdf or .htm), or read.me, or something else entirely.
Regardless of their exact name and format, a README file is often the very last thing that a manufacturer or software developer adds to the product before releasing the package to manufacture or posting it on the Internet. So it’s the last opportunity to tell you about problems that appeared late in the development and testing process. For example, the README file on the Windows XP Service Pack 2 CD is called READMESP.HTM (shown in Figure 1-8). It’s a document formatted as a web page, with links to other files on the CD and additional information on Microsoft’s website. The file includes a list of the updates supplied in the service pack, instructions for installing and removing the new software, and links to online resources that can be updated more easily than the CD itself.
Many software products that are distributed on CDs include a README file that does not show up on the autostart menu that appears when you insert the disk into a CD drive. To find and open one of these files, follow these steps:
1. From the Windows desktop, open My Computer.
2. Right-click the icon for the CD drive. A pop-up menu will appear. 3. Choose the Open or Explore item from the menu to view the contents of
4. Look for a file called readme.txt or something similar. If there’s nothing in the main directory, try looking in each subdirectory. When you find a README file, double-click the filename to open it. It should display in an appropriate program.
Figure 1-8: The README file on the Windows XP Service Pack 2 CD is an HTML document.
Read the User Manuals and Other Printed Matter
In the early days of computing, the manuals that came with a computer and its associated software would fill an entire bookcase. Of course, the computer itself filled a whole room, and probably cost several hundred thousand dollars or more, so the cost of the documentation was a relatively small part of the total package.
Today, the typical software product comes in an “air box” that contains nothing but a CD and maybe a single sheet of paper with installation instruc-tions and half a dozen advertisements for other products. A hardware package often includes some cables and a little package of screws and jumpers along with the CD and the product itself.
T ro ubl esh oot in g Met hod s a nd T ool s 19 Look on the CD for .pdf, .txt, or .doc files in the main directory or in a folder called Manual, Documents, or something similar. If there’s more than one program on the CD, look for manuals in the folders or directories for each program.
NOTE While you can, of course, read a manual on-screen, it’s not always easy to do so,
espe-cially when you have to flip back and forth between two or more pages. To reduce the pain, print copies of each page or chapter that applies to the problem you are trying to solve. If the manual contains less than a couple of dozen pages, consider printing the whole thing and placing the pages in a loose-leaf binder.
The quality of the manuals supplied with modern computer hardware and software varies. Some manuals are excellent, with full details about how the product works and instructions for installing, using, and trouble-shooting every feature. But many others seem to have been an afterthought, assembled at the last minute by an outside contractor who may or may not have ever used the product. And some products, including Windows XP itself, don’t include any manuals at all.
NOTE Some manufacturers might offer a complete printed manual as an extra-cost add-on
item. If you use a program or device a lot, try calling its tech support line and asking about obtaining a printed manual. Don’t bother asking Microsoft for a Windows man-ual; they’ll point you to the books about Windows published by Microsoft Press and other publishers.
If you do have manuals for any of the programs or hardware related to a problem, read them. Look for descriptions of the configuration settings and explanations of specific features that might be the source of the trouble. If there’s a troubleshooting section, there’s a good chance that you might find a fix for your problem. Don’t forget to look in the back of the book for appendixes that contain lists of error messages, settings for switches and jumpers, and other essential information.
Find Your Symptoms Online
The alternative to reading the manual is to consult the Collective Wisdom of the Internet. This is where the specific description of the problem (discussed earlier in this chapter) becomes important. Use Google or some other Internet search tool to look for specific answers to your questions and solutions to your problems. Include the name of the program in the search field, along with one or more keywords that describe the problem (such as “XP can’t find USB scanner” or “Whizz-com 643A smoke”).
Ask Your Help Desk for . . . um, Help
If you can’t find the solution to a problem on your own, your help desk is the first place to call for assistance. The people who work there are probably familiar with the specific combination of hardware and software that you’re using, and they will know how to fix common problems for you. If there’s a virus or other intruder going around your network or workgroup, they will know about it, and they’ll be able to cut through a lot of the usual diagnostic methods to focus in on the current local plague.
Different help desks offer different levels of support. Some work entirely by telephone or e-mail, while others will send a live expert to your site. If it’s possible to solve the problem by talking you through the fix, that’s often the fastest way to get your computer up and running again, but when the com-puter is suffering from a hardware failure, or if you’re in the same building as the help desk, it might be easier for a technician to come to you.
Some help desks may want to use the Remote Assistance feature in Windows XP or a similar third-party program that allows a technician to take control of your computer through the network. If your technician or help desk advisor wants to use Remote Assistance, they will tell you exactly how to make the feature active on your computer.
Ask the Family Expert
If you don’t have access to a formal help desk, a knowledgeable friend or relative can sometimes be the next best thing. If your daughter or brother-in-law or a family friend is a computer expert, it might be possible to call them for help when your computer breaks down. This kind of unofficial technical support can be a great resource, but it’s important to remember that you’re asking for a personal favor. Depending on the other demands on their time, they might not always be able to drop whatever they’re doing when you call and take the time to help you.
When you call a help desk, or a helpful friend or relative, try to give them as much information as possible about the problem, including all of the things described in the first part of this chapter. The symptoms, the text of any error messages that you have received, and the things you were doing when the problem occurred are all important hints that will help an advisor identify the problem and tell you how to solve it.
NOTE If you call a particular help desk or informal advisor often, consider some kind of
light-weight bribery after they take your fourth call in one week or when they spend two hours talking you through a particularly nasty problem—a pot of flowers from your garden or a batch of fresh-baked cookies can do wonders in convincing someone that they should continue taking your calls. They might even move your next request for assistance to the top of the stack.
Consult the Microsoft Knowledge Base
T ro ubl esh oot in g Met hod s a nd T ool s 21
code and descriptions of potential problems that were discovered during prerelease testing. When a user tells Microsoft about a new and previously unknown problem, that problem gets added to the Knowledge Base, so the next person who calls with the same problem doesn’t have to start from scratch. There are full-time groups of people at Microsoft who spend their time keeping the Knowledge Bases for various products up to date.
When you call or e-mail Microsoft’s technical support center or your local help desk, the technician who takes your request for help uses the Knowledge Base to find and help solve your problem. However, it’s not necessary to go through a technician to get to the information in the Knowledge Base; you can read most Knowledge Base articles on Microsoft’s website at www.microsoft.com. Chapter 6 of this book explains how to use the Knowledge Base and other Microsoft resources.
Try a Manufacturer’s Tech Support Center
Microsoft is not the only company that offers technical support for its prod-ucts. Most major hardware and software manufacturers will answer questions from users who are having trouble installing or using their products. Some companies prefer to take technical support questions by telephone, but others will accept them only via e-mail or though an interactive website.
Unfortunately, requesting tech support is not always particularly effective. Too often, it involves spending a lot of time waiting for somebody to answer the telephone or reply to an e-mail, only to receive nonspecific answers that don’t help solve the problem. Worse, many companies now charge for access to their support services. Therefore, alternative source of information are often a better choice.
Chapter 18 of this book contains more information about finding and using manufacturers’ technical support services.
Join an Online Newsgroup
The tradition of sharing information among computer users is older than the Internet. Starting back when online computer discussions used store-and-forward bulletin board systems that sometimes took days or weeks to move messages from one location to another, people who were looking for help would post their questions to online conferences and complete strangers would respond with detailed advice.
Today, there are thousands of newsgroups, forums, and mailing lists distributed through the Internet devoted to just about every imaginable computer-related subject. Some are sponsored by hardware and software manufacturers, and others are operated by independent user groups. Still others are part of the worldwide Usenet newsgroup system.
NOTE And of course, the generosity of Internet users isn’t limited to help with computer prob-lems. Newsgroups and e-mail lists devoted to other technical subjects can be equally valuable when you’re trying to restore an antique radio or find a part for your 1959 DeSoto.
Look for Other Websites
In addition to the official sites maintained by hardware and software suppliers, the Internet also offers a wealth of sites created by user groups and self-appointed experts, and a web search using a search tool like Google can frequently produce useful results. If you see an error message, try searching for the exact text of the message, the first few words of the text, the error code number, or anything in the message that seems to make it unique. If that doesn’t work, try searching for one or two keywords that describe the product and the problem. Some of the hits will be more valuable than others, but keep looking through the first hundred or more search hits.
Again, Chapter 6 contains more information about searching for symptoms online.
5. Try a Fix
When you find a possible solution to your problem, go ahead and try it. Follow the instructions as closely as possible, and keep careful notes that describe exactly what you have done. If the first things you try don’t solve the problem, remember to undo any changes before you move on to another possible approach.
6. Check the Result
Once you have applied whatever fix your research has told you will solve your problem, take a close look at your system to confirm that the problem has in fact gone away. This might be as simple as observing that the computer is no longer frozen, but it’s often more subtle than that. If the problem occurred after you entered a particular set of keystrokes or when you turned on an external device, try to reproduce the failure by repeating the same actions.
Of course, the first repair you try, or even the first six things you try, may not produce the results you want. In some cases, they might even make matters worse than they were before you started. That’s the reason to keep track of each attempted fix: Before moving on to the next possible solution, do what you can to restore the computer to the condition it was in before you tried to fix it. Otherwise, the negative effect of a failed solution might get in the way of solving the original problem.
7. Keep a Record of the Fix
T ro ubl esh oot in g Met hod s a nd T ool s 23
finding the right solution. Slogging through help screens, websites, and the Microsoft Knowledge Base can take up the better part of a whole day. On the other hand, when a friend or colleague comes up against the same problem that you have already fixed, you can become the hero of the day by knowing exactly what to do.
The last thing you want to do is to waste another day trying to remember exactly where the @#$%! you found the specific information that solved the problem. If the same problem happens again, you should know what to do about it. It’s easy to tell yourself, “I’ll remember how to fix this,” but it’s not always true. Six months from now, will you know where to find that obscure setting that’s buried under three layers of configuration windows? Or which website has the downloadable patch that repairs the bug in the original software or deletes a particular type of spyware? Don’t count on it.
The best way to deal with this is to keep a simple log or notebook that describes each problem and how you fixed it, complete with web addresses, configuration settings, and everything else that will help you go directly to a solution without any of the dead ends that waste so much time. You can create and store the log as a text file in your computer, but remember that the computer might not be accessible when you’re trying to solve the problem. So it’s a better idea to print each description and store them in a file folder or a loose-leaf binder near the computer. Or stick your notes between the covers of this book to keep everything in one place.
NOTE If you consulted an online forum or newsgroup to find help solving the problem, remember to post a message to let the other readers of the same thread know that you have found a solution. Even a simple message like, “Hey guys! It worked! I tried x, y, and z, and now my hard drive works again. Thanks for all your help,” will tell the next person facing the problem that somebody was able to fix it.
8. Prevent a Repeat
Remember the old joke about the man who goes to see his doctor? The guy holds up his left arm and says, “It hurts when I do this with my arm.” The doctor tells him, “So stop doing that.”
That’s not always possible with a computer problem. A cure may not be the same thing as preventing its return. For example, a virus or spyware program could reappear after you’ve deleted it, or some other person using your computer might change the configuration settings without your knowl-edge. So just because you stopped doing whatever caused the problem doesn’t mean you won’t see the same problem again.