You'll experience this partnership in action in the online version, which lives on your peachpit.com account page. Your purchase of this product in any format includes access to the corresponding Web version located at peachpit.com. To work with the projects in this product, you will first need to download the tutorial files from peachpit.com.
Adobe Illustrator Learning and Support: helpx.adobe.com/illustrator/topics.html is where you can find and browse Help and Support content on Adobe.com. Adobe Forums: forums.adobe.com allows you to use peer-to-peer discussions, questions and answers about Adobe products.
Chapter ObjeCtives
Click the buttons in the application bar (Figure 1.2) to quickly switch to the Adobe Bridge application or to access the Adobe Stock website. In the Color panel (Figure 1.9), first click the Fill or Stroke box so that Illustrator knows what to do. Options and settings in the Stroke panel (Figure 1.11) determine the appearance of an object's path (edge).
To collapse a panel or an entire dock (Figure 1.14), click the Collapse to Icons button at the top of the panel or dock. Drag the left edge of a collapsed dock to display panel names and icons (Figure 1.16).
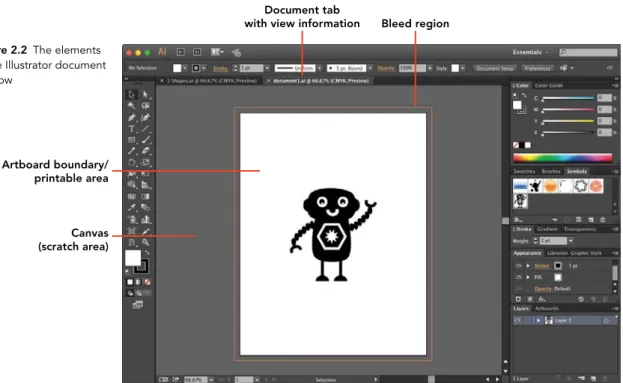
Use non-printing design tools in the interface, such as rulers, guides, bleeds,
Export digital graphics and illustration to various file formats
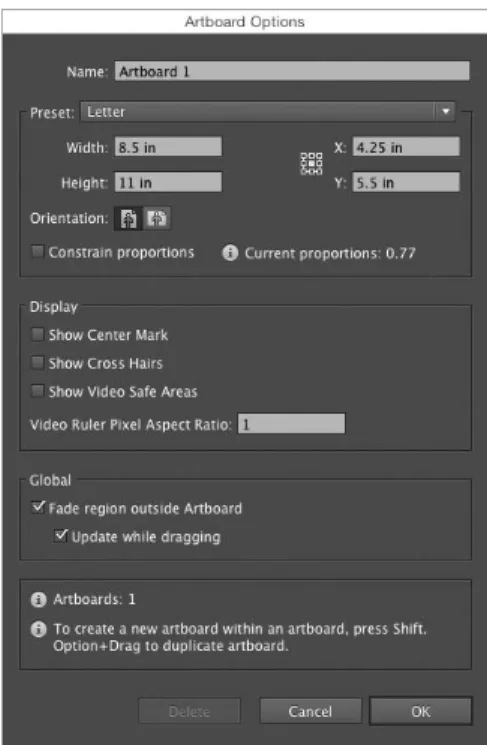
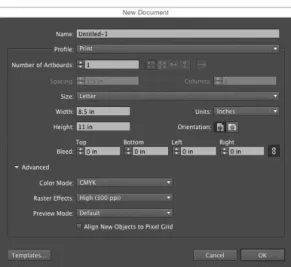
Each Illustrator document contains at least one artboard with the dimensions specified in the New Document dialog box. Using the Artboards panel: On the Artboards panel, click a list to select the artboard you want to duplicate. Click the Delete icon in the upper-right corner of a selected artboard, or press Delete (Mac OS) or Backspace (Windows) on the keyboard.
In the Artboards panel, double-click to the right of an artboard list to quickly fit that artboard in the document window. Select a number from the artboard navigation menu in the lower left of the document window; or click the First, Previous, Next or Last arrow to quickly move between multiple artboards.
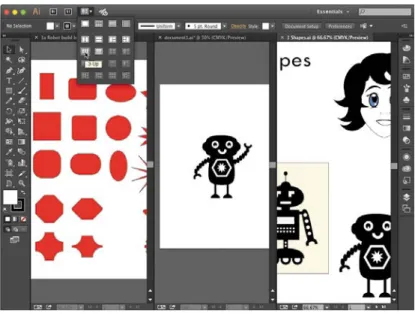
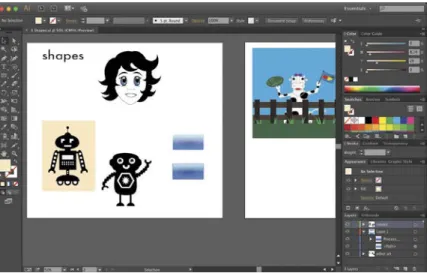
In this chapter you will create basic shapes and change the corners of the shapes. In Illustrator CC, you use the drawing tools in the Tools panel to create shapes.
A shape is a path that consists of straight and/or curved lines connected to anchor points. A rectangular or oval shape is created with the current fill and stroke settings (Figure 3.1). Once you create an item, it remains selected so you can further modify it.
Demonstrate knowledge of layers and masks
Create and manage layers
6 Drag the selection to the right side of the face and then cancel it (Figure 5.9). 3 For the eyebrow shape, drag the anchor point on the right side of the object to move it inward and reverse the curvature of the right side of the oval (Figure 5.11). 2 Using the Direct Selection Tool (A), click an anchor point at one end of the object.
In the Corners dialog box, click the Bevel (Straight) button to create straight segments at the ends of the object (Figure 5.14). 4 Drag both anchor points above and to the left of the object to the left.
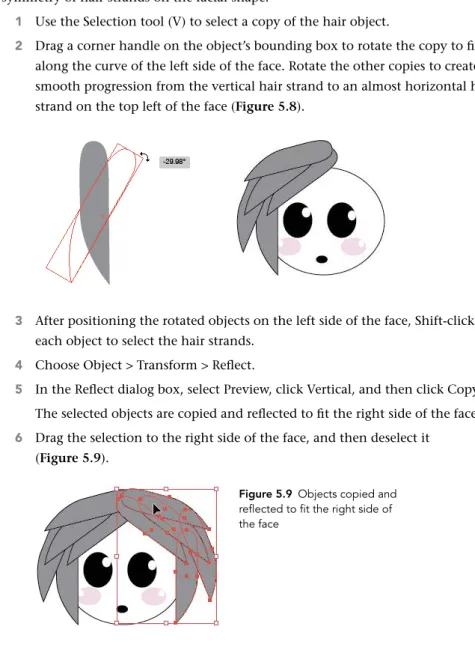
ASSEMBLE THE HAIR
Demonstrate an understanding of vector drawing tools
You can either click with the tool to create corner points and straight segments or drag with the tool to create smooth points and curved segments. The easiest way to draw with the Pen tool is to click to create an equilateral object. Note The Pen tool pointer displays an asterisk to indicate that the tool is ready to create a new path.
As you draw, you can click to create vertices, then click and drag to create smooth points. Without releasing the mouse, hold down Option (Mac OS) or Alt (Windows), then reposition the direction handle below the pointer to create a V shape with its paired handle. Click on the highlighted point to create a vertex, then move the cursor and click to create another vertex.
Click and drag and Option-drag (Mac OS) or Alt-drag (Windows) the directional handle to create a non-smooth curve. After locking the raster image layer, use the Pen tool to create closed paths that follow the edges of areas of color in the image. You can drag the Pencil tool to create a freehand sketch consisting of open or closed paths.
4 To create a closed path with the Pencil tool, draw a path that returns to the starting point and release the mouse when a small circle indicator appears from the tool pointer. The Pencil tool pointer will display an asterisk (*) to indicate that the tool is ready to create a new path. You can also use the Pencil tool to quickly reshape a portion of any selected path, regardless of which tool or command was used to create the path.

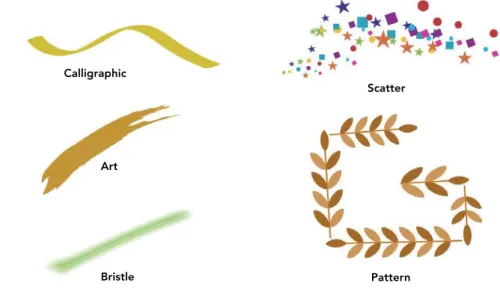
2 To select a brush, click one in the Brushes panel or choose one from the Brush Definition menu in the Control Panel. 2 Click a brush in the Brushes panel, or select one from the Brush Definition menu in the Control panel. On the Brushes panel, click the Remove Brush Strokes icon at the bottom of the panel (Figure 14.5).
On the Brushes panel or in the Brush Definition (Control Panel) menu, select the Basic Brush option. Select the object(s), then click the New Brush icon at the bottom of the Brushes panel. You can also place text on the path (edge) of an object or in object shapes.
Change the font size value on the Character panel or select a preset size from the menu. The type will remain editable and settings on the Character panel (including font family and font style) can still be modified. To reposition the start point of the type on the path, drag the left bracket, which is near the start of the type (Figure 15.14).
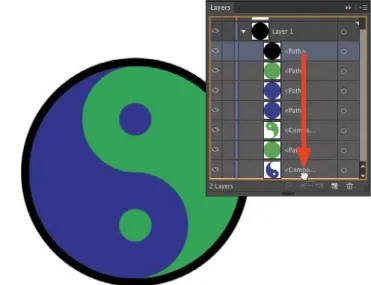
Use this method to place text on the inside of a curved or circular path (Figure 15.15). In the Paragraph panel, click the Center Align button at the top of the panel to center the type in the object. 2 Use the Type on a Path tool to type first on the top semicircular object and then on the bottom semicircular object (Figure 15.19).
Demonstrate knowledge of how and why illustrators employ different views and
Import assets into a project
Create digital graphics and illustrations using 3D and perspective tools in
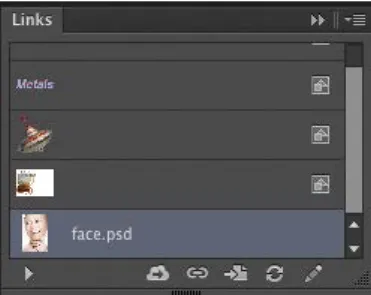
Click Unembed in the control panel to convert a selected embedded image to a linked image in PSD or TIFF format. You can use commands in the links or control panel to manage your posted linked images. Click the filename of the linked image to display a menu with the same options as in the Links panel.
A new clipping group appears on the Layers panel containing the objects in the clipping mask. The top object in the group will be converted to a clipping path and listed as such on the Layers panel. Its position in the clipping group stack on the Layers panel will determine its stack position among the objects in the clipping mask.
To remove an object from a clipping mask, drag its list out of the clipping group on the Layers panel. The control panel also provides access to some of the essential options found on the Image Trace panel. Drag the symbol in the light/shadow preview to place it on the sphere (Figure 16.13).
To do this, select the Perspective Selection Tool, click a plane on the Change Plane widget, and then drag an existing object to that side of the grid (Figure 16.14). On the bottom level, click the Plane Change widget to place an object on the ground level in the drawing. Once on the plane, you can drag to move the object, scale it using the selection handles, or recolor it using any of Illustrator's color editing panels (Figure 16.15).
Demonstrate knowledge of image resolution, image size, and image file
Prepare images for web, print, and video
Export digital graphics and illustrations to various file formats
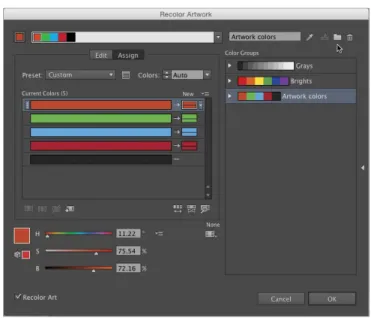
For printing, these tasks involve verifying that colors are defined correctly as process or spot, previewing color separations, and specifying appropriate settings in the Print dialog box. In this chapter, you'll learn how to work with spot colors for printing, how to work with the Separations Preview panel, what the essential settings are in the Print dialog box, and how to export an Illustrator file to the JPEG, PNG, and SVG formats. Go to the Video Project 05 page in the web edition of the book to see the entire project from start to finish.
In this section, we'll go over some features that can help take the guesswork out of getting quality prints. The higher the resolution of the device, the higher the quality of the edges of the shapes in the printed image. Commercial printing prints the colors on the artwork as process colors, which are a combination of the four CMYK ink colors.
For this type of printer, make sure the File > Document Color Mode submenu is set to CMYK Color. Commercial printing is used when tens (if not hundreds) of copies of the file are needed. For this type of printer, make sure the File > Document Color Mode submenu is set to RGB Color.
The printer will convert the Illustrator file from RGB color mode to CMYK color mode and produce a print with four CMYK color inks. When printing with a composite printer, make sure that the size of each drawing plate is smaller than or equal to the size of the print media (paper). The printing term separation refers to the process of separating the color in the artwork onto one of the four CMYK printing plates.