Before proceeding, remove any older PHP installations you may have made in the past. For example, in this part of the file you can see that we have set the application name, debug flag, URL, settings related to logging, database connection, sending email and much more. Each file in the folder contains many configuration options that you can set and are very well documented.
Before we look at changing any configuration options, let's change what you see in the browser. This URL is handled in the routes/web.php file, which contains a router dedicated to handling HTTP requests coming from the browser. In this file, as shown in the screenshot, we tell Laravel to return a welcome.
You didn't have to do anything more than create the file because Laravel has this set of conventions, so adding a file in the right place with the right name will do something specific.
Blade
But you can do a lot of interesting things in Blade templates: insert data, add conditions, do loops, display something if the user is authenticated or not, or show different information depending on the environment variables (eg if it's in production or development) , and much more. Inside that you can also use any PHP function you like, and Blade will display the return value of that execution. As in most programming languages, we have guidelines for playing with loops like @continue and @break.
Inside a loop, a very convenient $loop variable is always available to tell us information about the loop, for example whether it is the first or last iteration, whether it is even or odd, how many iterations have been done and how many are left.
Dynamic routes
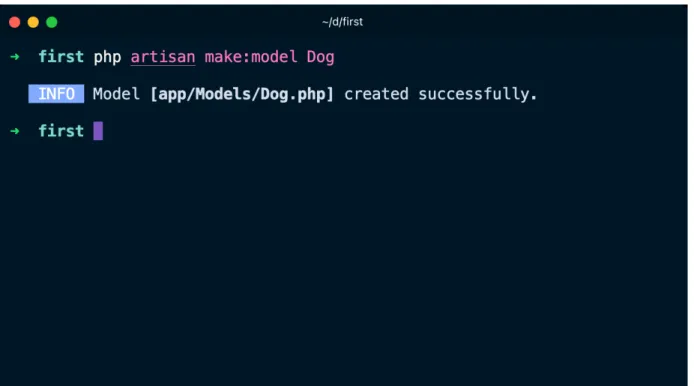
Adding a database
How to use migrations to create and modify the database schema
Let's create a dogs table with 3 columns, an id, a name string, and the timestamp utility columns (created_at and updated_at, as we'll see).
Using forms to accept user input and store it into the database
We will show the user a form and they can add the dog's name, then click "Add" and the dog will be added to the database. First, we add the name field we added to the table to the name array. Inside the controller, we write methods that perform actions such as adding data to the database or updating it.
We'll start by adding a create method to the controller to handle the data coming from the form so we can store it in the database. Before we do that, in routes/web.php we add the POST /dogs route handle controller and we name it dog.create. You will be redirected to /dogs after the new dog has been saved to the database.
Then in the route we call Dog::all(); to get all the dogs saved and we assign them to a variable $dogs that we pass to the template:.
Adding a better layout
In routes/web.php we will show the dog view at / , which we call the index route, and we show the form to add a new dog at /newdog. Now you should see the list of dogs on the / route:. use Illuminate\Support\Facades\Route;. Here you can register web routes for your application. routes are loaded by the RouteServiceProvider and all will.
In resources/views/dogs.blade.php we now have a super simple one. which doesn't even contain HTML. Here's a start: we add the appropriate HTML structure and we wrap the dog list into an unordered list:. The next thing we're going to do is configure Vite so we can enable styling using.
This will create tailwind.config.js and postcss.config.js files. see my npx tutorial if you're new to it, it's automatically installed with Node.js, like npm. Finally, go back to the terminal, run npm run dev and let it run while developing the site as a php artisan service (run both in 2 different terminal windows). Note that changes are automatically applied when you save the file in VS Code, without refreshing the page.
Adding the form at the bottom of the list
Now, we don't want the shape to have its own path anymore, because we have it open.
Allow users to delete dogs from the list
This method uses the Dog model to find a dog with a specific id, passed by the form, and deletes it by calling the delete() method.
Adding authentication using Laravel Breeze
To make it even easier, it offers Breeze, an application starter kit that will allow you to create what we need in no time. For more advanced needs we also have JetStream, but Breeze is easier to set up. The first one was mentioned first, so to continue the tradition we'll mention this second project second.
Easily days of work for a developer, and this is battle-tested code that you don't want to write yourself, as it is a very important and well-tested for security issues. I recommend looking at the file structure and comparing it to the first project. But before we can continue, we need to set up the database for this project and do what we did in the first one.
In another terminal folder, run npm install followed by npm run dev , which is a long process that you will keep running along with php artisan serve (⚠ just make sure you run that in the second folder and not the first project, I just spent 15 minutes trying to figure out why I had a problem). The Blade templates provided by Breeze use Tailwind CSS, and the setup of Tailwind was done automatically when we ran php artisan breeze:install. Now you can open resources/views/welcome.blade.php and look at all that content.
Only authenticated users can add items to the database
If you refresh the home, you won't see anything changed because we don't have a dog listed. Now, when we're logged in, I want to show the form to add a new dog, and the delete button for each dog in the list. Add use App\Models\Dog; at the top and add the 2 methods to the class.
Push the app code to GitHub
Deployment
That's all fun and all, but now we want to deploy the application to a real server, on the Internet, for people to use. When it comes to servers, and unless you love running servers and you're actually an expert, I'm a fan of investing money and saving time instead. But it's a service that connects to DigitalOcean and other VPS - virtual private server - providers like Hetzner, AWS, Vultr and more and it creates a server for you on that platform.
If you're unsure, DigitalOcean gives you free credits so you can try it out. Choose a region near you and choose a modest server size, so you can save on server costs until someone actually uses your app (you can always upgrade the server later via the DigitalOcean panel). This will take a few minutes, after which you will have your server up and running.
Ideally, you would create a new website with an assigned domain/subdomain. But it's getting complicated in this guide, so instead we'll use the default website running on an IP address. Now enter the name of the repository you want to deploy, prefixed with your GitHub account name, in my case flaviocopes/second, select a branch (usually main ) and click Install Repository.
To find out the problem, let's go back to the panel, open Logs and you will see that the error is related to the connection to the database. If you look carefully in the GitHub repository, you will see that the .env file has not been pushed to GitHub, and this is correct because you do not want to store the environment variables in Git. If the build fails you will get a warning and also an email, very nice.
The build seems to work fine, but if you reload the browser, we now have another error. We could spend more time on this topic, but there is so much more to explore. We've seen how to create a web application, as simple as it gets, just a form that stores a field in a database, but complete with out-of-the-box authentication provided by the Breeze starter kit.
We've seen the basic routing, and how models, views, and controllers interact to store and retrieve data through the Eloquent ORM.
Dynamic routes
Now suppose you want to create a page for every single dog, maybe you'll fill it with a description, a picture, whatever. You can't create a static route for every dog in the database because you don't know the name of the dog. Imagine you have 2 dogs Max and Daisy, this will display a "dog" view (which we don't have yet) on the /dogs/max and /dogs/daisy.
We have the slug, which we can imagine will be saved to the database when we add the dog.
Non-web routes
Creating commands
To see how to use the command, run php artisan
Within a command you have access to all the goodness Laravel has to offer, including your code, classes and more. The server can be configured to run Laravel schedules, and then any schedule configured in Laravel will run as needed.
Where to go from here
Conclusion
