This book is available for free download from www.syncfusion.com by completing a registration form. If you obtained this book from another source, please register and download a free copy from www.syncfusion.com. The authors and copyright holders are not responsible for any claims, damages, or other liabilities arising out of, out of, or in connection with the information contained in this book.
Many thanks to all the people on the amazing Syncfusion team who helped make this book a reality - especially Jacqueline Bieringer, Tres Watkins and Graham High.
App Fundamentals
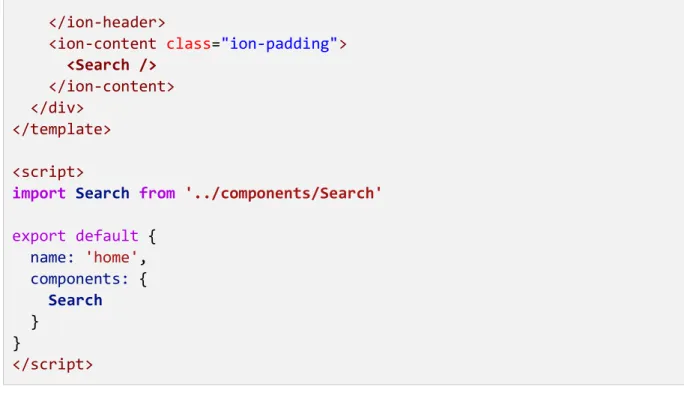
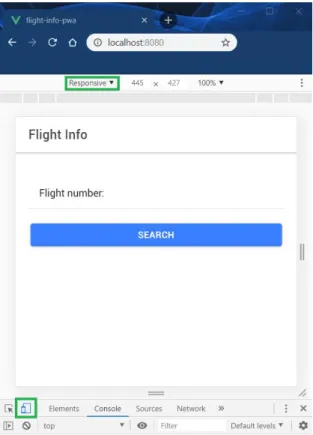
To see the changes, we need to edit App.vue—that's what we'll do next. Now let's modify the App.vue code, so we can see Ionic in action later. First, let's look at the out-of-the-box code contained in Home.vue.
We laid the foundation of the application by modifying the main application files .vue and .js.
Basic App and API Logic
If the result of that test, which is the value of the isvf variable, is true, then it is a valid flight number. Then, inside the methods object, in the header of the flightDetails method, flight is passed as a variable. This way we can focus on the logic of the PWA itself, which is within the scope of this book.
The real-time flight information retrieval API I created retrieves flight data from non-proprietary sources, then manages and validates the accuracy of the data. This is what I call the first part of the API, which is responsible for retrieving and validating data. This is what I call the second part of the API, which is what the PWA will call and consume.
The data consumption part of the API is actually very simple, and Code Listing 2-e shows all the code needed for it (this does not apply to the data retrieval and validation part, which we will not cover). The PWAs we're building will only call the second part of the API, which returns a JSON response that the app can use. The last part of the query (highlighted in green) corresponds to the flight number for which PWA will retrieve details.
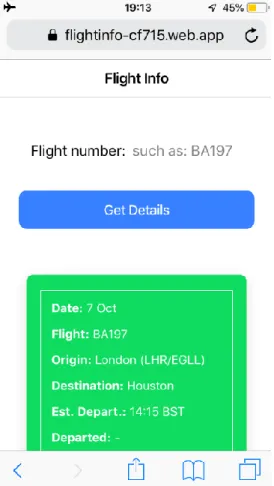
First, look at the Flightradar24 website, select one of the aircraft and then copy the flight number, which in the example below is RAM505. Note: If you call the first part of the API (URL listed previously) and pass in an existing (stored) flight number (also shown previously), then the existing flight data will be refreshed with the latest and updated information for that particular flight number and updated within Cloud Firestore.
PWA Essentials
Manifest file: Used by an application to indicate features that the original application would have, such as the application icon and home screen. A PWA must be able to adapt and meet the requirements of the device it is being used on – this is known as responsive design. A PWA must allow users to interact with it despite a broken internet connection – so the app must be able to work offline.
This is achieved by the PWA, by caching the app data in advance with the help of a service agent. The main page of the PWA must be able to be added to the device's home screen so that the user can access it in the same way as a native app. Provide users with a consistently fast experience from the moment they download the app until they start using it.
Providing a reliable experience, meaning that if the internet connection fails, the app is still able to do its job properly, if it has the data to do it. Another advantage of PWAs is that they can be easily updated by developers, and these updates can be deployed to users without requiring reinstallation of any application, since the application itself resides on a web server and not on the user's device. Another great thing about PWAs is that they eliminate the fear of not having enough space for the app.
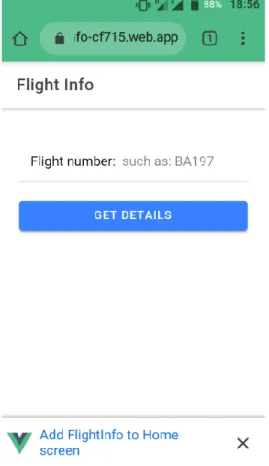
Due to these reasons, PWAs are undoubtedly the next step in web application development, interaction and functionality, making the process of accessing the app convenient for users. Note how the app, when it runs for the first time, prompts the user to add the app to the home screen.
Scaffolding the PWA
One of the great things about the @vue/pwa package is that by using a configuration file called vue.config.js, we can easily define various parameters so that when we run or build the application, it will automatically generate the application's service worker - without us having to write the code for it. This option literally means that the service worker (SW) will be automatically generated during the process of building the application, which is done by the Workbox webpack plugin. The GenerateSW value will create a service worker file for you and add it to the webpack asset pipeline when the application is built.
On the other hand, using the InjectManifest value will create a list of URLs to pre-cache and add, but we will have to create the service worker code ourselves. The handler property with the value of networkFirst is used to indicate that the service worker implements a network-first request strategy, which simply means that by default online users will get the most recent content, and offline users will get a cached version of the content if it was previously downloaded and stored. Now that we know how we can use the vue.config.js file to generate the service worker using the Workbox webpack plugin, let's understand how we can register it when the PWA is running.
Code Dump 4-d: Contents of file registerServiceWorker.js import { register } from 'register-service-worker'. The application is served from the cache by a Service Worker.\n' + 'For more details, visit https://goo.gl/AFskqB'. There are two if statements that are responsible for performing service worker registration when the application is in production mode and if the browser supports service workers - which is checked by 'serviceWorker' in the navigator.
Then, there are specific events that are evoked in, during, and after the service worker. Next, let's update the babel.config.js file with the polyfill settings - it should look like the following.
Building the PWA
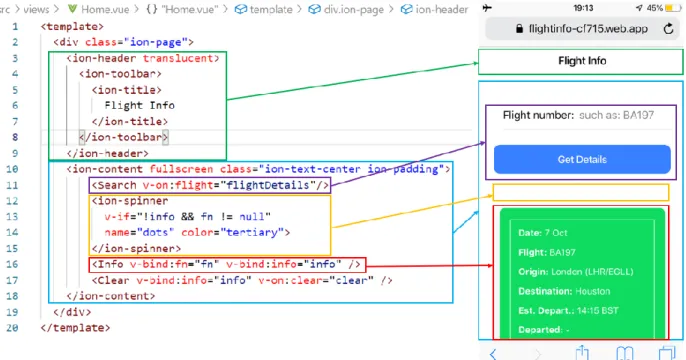
The App.vue file is the main HTML markup file of the application and the only thing it does is contain a reference to the ion-vue-router component - which we can see as follows. Given that the App.vue file references the ion-vue-router component, the next thing we need to do is look at the router.js file. As its name implies, the router.js file handles application routing, which in the case of this PWA, is limited to Home.vue.
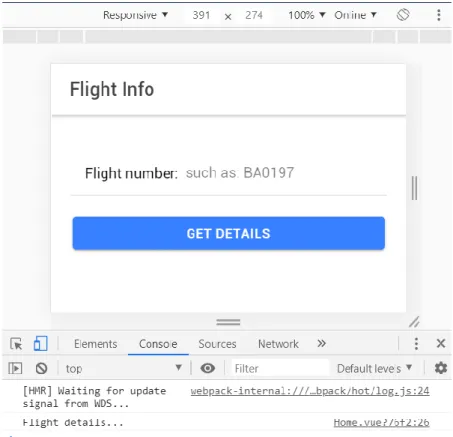
The Home.vue functional component is not only responsible for rendering most of the application interface, but also for calling the API and parsing and displaying the results. This is what will make the call to the API and retrieve the flight details that are passed to the Info component using the info object (which contains the flight details retrieved from the API). The ion-spinner component only appears when the flight number (fn) is entered by the user and the info object contains no data—which means the application still needs to get the flight data from the API.
Next we have the data function, which returns an object containing the info and fn. As you can see, it calls the getJson method by passing the flight and waits for its response - the result that the API returns. That JSON response (represented by the variable d, which stands for data) is mapped to the info property.
The ion-input component, which is in the ion-item and ion-col components, captures the year number entered by the user, and that value is assigned to the year variable. Inside the method object we have an onSubmit method that emits a flight event that is intercepted inside Home.vue to make an API call when the user enters a flight number. Then inside the tbody we loop through each itm (corresponding to the data row) for all the flight details contained in info.data.flights which represents the object structure of the JSON API response.
The button is only displayed when the info property containing the flight data is not empty (null).
Deploying the PWA
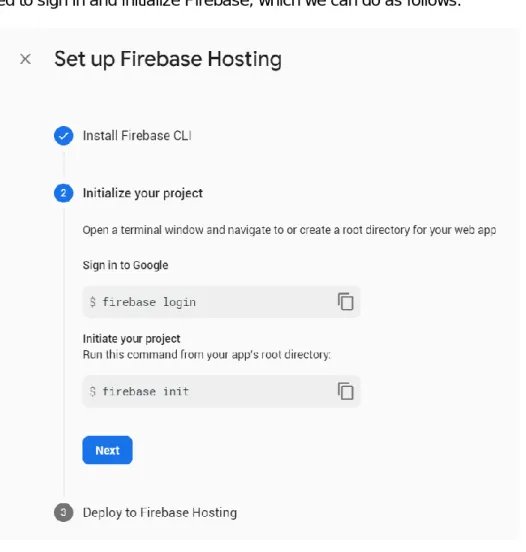
When you execute the firebase login command, you will be prompted to login, which we can see as follows. Once logged in, we can run the firebase init command, which will guide us through the initialization of our project with Firebase. You will notice that some additional files have been added to the project, such as .firebaserc (project alias list) and firebase.json.
Let's make a small change to the firebase.json file so that when we deploy the app, we do it with the files in the dist folder. Set the public parameter in the firebase.json file to ./dist. This means that when we build and deploy the application, the files that will be deployed to the server will be the files in the dist folder. If you have installed the Lighthouse Chrome extension, open your Chrome browser, navigate to the app's public URL, and click Generate Report, as shown in Figure 6-k.
We can easily solve this by making a small change to the firebase.json file as follows. Code Listing 6-e shows the full contents of the firebase.json settings file after these modifications. By making a simple change to the firebase.json settings file, we drastically improved the app's performance.
If we execute the npm run build command followed by firebase deploy and browse to the app's public URL, we can start using our PWA. If you enter any of these flight numbers while connected to the internet, the app will download and cache this flight information.