Getting Started with
Amazon Redshift
Enter the exciting world of Amazon Redshift for big
data, cloud computing, and scalable data warehousing
Stefan Bauer
BIRMINGHAM - MUMBAI
Copyright © 2013 Packt Publishing
All rights reserved. No part of this book may be reproduced, stored in a retrieval system, or transmitted in any form or by any means, without the prior written permission of the publisher, except in the case of brief quotations embedded in critical articles or reviews.
Every effort has been made in the preparation of this book to ensure the accuracy of the information presented. However, the information contained in this book is sold without warranty, either express or implied. Neither the author, nor Packt Publishing, and its dealers and distributors will be held liable for any damages caused or alleged to be caused directly or indirectly by this book.
Packt Publishing has endeavored to provide trademark information about all of the companies and products mentioned in this book by the appropriate use of capitals. However, Packt Publishing cannot guarantee the accuracy of this information.
First published: June 2013
Production Reference: 2100613
Published by Packt Publishing Ltd. Livery Place
35 Livery Street
Birmingham B3 2PB, UK.
ISBN 978-1-78217-808-8
www.packtpub.com
Credits
Author Stefan Bauer
Reviewers Koichi Fujikawa
Matthew Luu
Masashi Miyazaki
Acquisition Editors Antony Lowe
Erol Staveley
Commissioning Editor Sruthi Kutty
Technical Editors Dennis John
Dominic Pereira
Copy Editors Insiya Morbiwala Alfida Paiva
Project Coordinator Sneha Modi
Proofreader Maria Gould
Indexer Tejal Soni
Graphics Abhinash Sahu
Production Coordinator Pooja Chiplunkar
Cover Work Pooja Chiplunkar
About the Author
Stefan Bauer has worked in business intelligence and data warehousing since
the late 1990s on a variety of platforms in a variety of industries. Stefan has worked with most major databases, including Oracle, Informix, SQL Server, and Amazon Redshift as well as other data storage models, such as Hadoop. Stefan provides insight into hardware architecture, database modeling, as well as developing in a variety of ETL and BI tools, including Integration Services, Informatica, Analysis Services, Reporting Services, Pentaho, and others. In addition to traditional development, Stefan enjoys teaching topics on architecture, database administration, and performance tuning. Redshift is a natural extension fit for Stefan's broad understanding of database technologies and how they relate to building enterprise-class data warehouses.About the Reviewers
Koichi Fujikawa is a co-founder of Hapyrus a company providing web services
that help users to make their big data more valuable on the cloud, and is currently focusing on Amazon Redshift. This company is also an official partner of Amazon Redshift and presents technical solutions to the world.He has over 12 years of experience as a software engineer and an entrepreneur in the U.S. and Japan.
To review this book, I thank our colleagues in Hapyrus Inc.,
Lawrence Gryseels and Britt Sanders. Without cooperation from our family, we could not have finished reviewing this book.
Matthew Luu is a recent graduate of the University of California, Santa Cruz. He
started working at Hapyrus and has quickly learned all about Amazon Redshift.I would like to thank my family and friends who continue to support me in all that I do. I would also like to thank the team at Hapyrus for the essential skills they have taught me.
Amazon Redshift since the end of 2012, and has been developing a web application and Fluent plugins for Hapyrus's FlyData service.
His background is in the Java-based messaging middleware for mission critical systems, iOS application for iPhone and iPad, and Ruby scripting.
www.PacktPub.com
Support files, eBooks, discount offers and
more
You might want to visit www.PacktPub.com for support files and downloads related to your book.
Did you know that Packt offers eBook versions of every book published, with PDF and ePub files available? You can upgrade to the eBook version at www.PacktPub.com and as a print book customer, you are entitled to a discount on the eBook copy. Get in touch with us at [email protected] for more details.
At www.PacktPub.com, you can also read a collection of free technical articles, sign up for a range of free newsletters and receive exclusive discounts and offers on Packt books and eBooks.
TM
http://PacktLib.PacktPub.com
Do you need instant solutions to your IT questions? PacktLib is Packt's online digital book library. Here, you can access, read and search across Packt's entire library of books.
Why Subscribe?
• Fully searchable across every book published by Packt • Copy and paste, print and bookmark content
• On demand and accessible via web browser
Free Access for Packt account holders
If you have an account with Packt at www.PacktPub.com, you can use this to access PacktLib today and view nine entirely free books. Simply use your login credentials for immediate access.
Instant Updates on New Packt Books
Get notified! Find out when new books are published by following @PacktEnterprise on Twitter, or the Packt Enterprise Facebook page.
Table of Contents
Preface 1
Chapter 1: Overview
7
Pricing 9
Configuration options 10
Data storage 12
Considerations for your environment 14
Summary 17
Chapter 2: Transition to Redshift
19
Cluster configurations 20
Cluster creation 21
Cluster details 24
SQL Workbench and other query tools 27
Unsupported features 28
Command line 33
The PSQL command line 36
Connection options 36
Output format options 36
General options 37
API 37
Summary 38
Chapter 3: Loading Your Data to Redshift
39
Datatypes 40
Schemas 42
Table creation 44
Connecting to S3 48
The copy command 51
Load troubleshooting 54
ETL products 57
Performance monitoring 59
Indexing strategies 62
Sort keys 62
Distribution keys 63
Summary 64
Chapter 4: Managing Your Data
65
Backup and recovery 66
Resize 69
Table maintenance 72
Workload Management (WLM) 74
Compression 82
Streaming data 85
Query optimizer 86
Summary 86
Chapter 5: Querying Data
87
SQL syntax considerations 87
Query performance monitoring 89
Explain plans 94
Sequential scan 98
Joins 98 Sorts and aggregations 100
Working with tables 100
Insert/update 102 Alter 106
Summary 107
Chapter 6: Best Practices
109
Security 111
Cluster configuration 111
Database maintenance 112
Cluster operation 112
Database design 113
Monitoring 115
Data processing 120
[ iii ]
Appendix: Reference Materials
123
Cluster terminology 123
Compression 125 Datatypes 126
SQL commands 127
System tables 129
Third-party tools and software 131
Preface
Data warehousing as an industry has been around for quite a number of years now. There have been many evolutions in data modeling, storage, and ultimately the vast variety of tools that the business user now has available to help utilize their quickly growing stores of data. As the industry is moving more towards self service business intelligence solutions for the business user, there are also changes in how data is being stored. Amazon Redshift is one of those "game-changing" changes that is not only driving down the total cost, but also driving up the ability to store even more data to enable even better business decisions to be made. This book will not only help you get started in the traditional "how-to" sense, but also provide background and understanding to enable you to make the best use of the data that you already have.
What this book covers
Chapter 1, Overview, takes an in-depth look at what we will be covering in the book, as well as a look at what Redshift provides at the current Amazon pricing levels.
Chapter 2, Transition to Redshift, provides the details necessary to start your Redshift cluster. We will begin to look at the tools you will use to connect, as well as the kinds of features that are and are not supported in Redshift.
Chapter 3, Loading Your Data to Redshift, will takes you through the steps of creating tables, and the steps necessary to get data loaded into the database.
Chapter 4, Managing Your Data, provides you with a good understanding of the day-to-day operation of a Redshift cluster. Everything from backup and recover, to managing user queries with Workload Management is covered here.
Chapter 6, Best Practices, will tie together the remaining details about monitoring your Redshift cluster, and provides some guidance on general best practices to get you started in the right direction.
Appendix, Reference Materials, will provide you with a point of reference for terms, important commands, and system tables. There is also a consolidated list of links for software, and other utilities discussed in the book.
What you need for this book
In order to work with the examples, and run your own Amazon Redshift cluster, there are a few things you will need, which are as follows:.
• An Amazon Web Services account with permissions to create and manage Redshift
• Software and drivers (links in the Appendix, Reference Materials) • Client JDBC drivers
• Client ODBC drivers (optional)
• An Amazon S3 file management utility (such as Cloudberry Explorer) • Query software (such as EMS SQL Manager)
• An Amazon EC2 instance (optional) for the command-line interface
Who this book is for
This book is intended to provide a practical as well as a technical overview for everyone who is interested in this technology. There is something here for everyone interested in this technology. The CIOs will gain an understanding of what their technical staff is talking about, and the technical implementation personnel will get an in-depth view of the technology and what it will take to implement their own solutions.
Conventions
In this book, you will find a number of styles of text that distinguish between different kinds of information. Here are some examples of these styles, and an explanation of their meaning.
[ 3 ] A block of code is set as follows:
CREATE TABLE census_data (
fips VARCHAR(10), pop_estimate BIGINT, pop_estimate_base BIGINT,
pop_estimate_chg DECIMAL(5, 1), pop_total BIGINT
...
When we wish to draw your attention to a particular part of a code block, the relevant lines or items are set in bold:
CREATE TABLE census_data (
fips VARCHAR(10), pop_estimate BIGINT, pop_estimate_base BIGINT,
pop_estimate_chg DECIMAL(5, 1),
pop_total BIGINT ...
Any command-line input or output is written as follows:
# cexport AWS_CONFIG_FILE=/home/user/cliconfig.txt
New terms and important words are shown in bold. Words that you see on the screen, in menus or dialog boxes for example, appear in the text like this: "Launch the cluster creation wizard by selecting the Launch Cluster option from the Amazon Redshift Management console."
Warnings or important notes appear in a box like this.
Tips and tricks appear like this.
Reader feedback
To send us general feedback, simply send an e-mail to [email protected], and mention the book title via the subject of your message.
If there is a topic that you have expertise in and you are interested in either writing or contributing to a book, see our author guide on www.packtpub.com/authors.
Customer support
Now that you are the proud owner of a Packt book, we have a number of things to help you to get the most from your purchase.
Downloading the example code
You can download the example code files for all Packt books you have purchased from your account at http://www.packtpub.com. If you purchased this book elsewhere, you can visit http://www.packtpub.com/support and register to have the files e-mailed directly to you.
Errata
[ 5 ]
Piracy
Piracy of copyright material on the Internet is an ongoing problem across all media. At Packt, we take the protection of our copyright and licenses very seriously. If you come across any illegal copies of our works, in any form, on the Internet, please provide us with the location address or website name immediately so that we can pursue a remedy.
Please contact us at [email protected] with a link to the suspected pirated material.
We appreciate your help in protecting our authors, and our ability to bring you valuable content.
Questions
Overview
In this chapter, we will take an in-depth look at the topics we will be covering throughout the book. This chapter will also give you some background as to why Redshift is different from other databases you have used in the past, as well as the general types of things you will need to consider when starting up your first Redshift cluster.
This book, Getting Started with Amazon Redshift, is intended to provide a practical as well as technical overview of the product for anyone that may be intrigued as to why this technology is interesting as well as those that actually wish to take it for a test drive. Ideally, there is something here for everyone interested in this technology. The Chief Information Officer (CIO) will gain an understanding of what their technical staff are talking about, while the technical and implementation personnel will get an insight into the technology they need to understand the strengths and limitations of Redshift product. Throughout this book, I will try to relate the examples to things that are understandable and easy to replicate using your own environment. Just to be clear, this book is not a cookbook series on schema design and data warehouse implementation. I will explain some of the data warehouse specifics along the way as they are important to the process; however, this is not a crash course in dimensional modeling or data warehouse design principles.
Redshift is a brand new entry into the market, with the initial preview beta release in November of 2012 and the full version made available for purchase on February 15, 2013. As I will explain in the relevant parts of this book, there have been a few early adoption issues that I experienced along the way. That is not to say it is not a good product. So far I am impressed, very impressed actually, with what I have seen. Performance while I was testing has, been quite good, and when there was an occasional issue, the Redshift technical team's response has been stellar. The performance on a small cluster has been impressive; later, we will take a look at some runtimes and performance metrics. We will look more at the how and why of the performance that Redshift is achieving. Much of it has to do with how the data is being stored in a columnar data store and the work that has been done to reduce I/O. I know you are on the first chapter of this book and we are already talking about things such as columnar stores and I/O reduction, but don't worry; the book will progress logically, and by the time you get to the best practices at the end, you will be able to understand Redshift in a much better, more complete way. Most importantly, you will have the confidence to go and give it a try.
In the broadest terms, Amazon Redshift could be considered a traditional data warehouse platform, and in reality, although a gross oversimplification, that would not be far from the truth. In fact, Amazon Redshift is intended to be exactly that, only at a price, having scalability that is difficult to beat. You can see the video and documentation published by Amazon that lists the cost at one-tenth the cost of traditional warehousing on the Internet. There are, in my mind, clearly going to be some savings on the hardware side and on some of the human resources necessary to run both the hardware and large-scale databases locally. Don't be under the illusion that all management and maintenance tasks are taken away simply by moving data to a hosted platform; it is still your data to manage. The hardware, software patching, and disk management (all of which are no small tasks) have been taken on by Amazon. Disk management, particularly the automated recovery from disk failure, and even the ability to begin querying a cluster that is being restored (even before it is done) are all powerful and compelling things Amazon has done to reduce your workload and increase up-time.
[ 9 ]
Pricing
As you think about your own ever-expanding universe of data, there are two basic options to choose from: High Storage Extra Large (XL) DW Node and High Storage Eight Extra Large (8XL) DW Node. As with most Amazon products, there is a menu approach to the pricing. On-Demand, as with most of their products, is the most expensive. It currently costs 85 cents per hour per node for the large nodes and $6.80 per hour for the extra-large nodes. The Reserved pricing, with some upfront costs, can get you pricing as low as 11 cents per hour for the large nodes. I will get into further specifics on cluster choices in a later section when we discuss the actual creation of the cluster. As you take a look at pricing, recognize that it is a little bit of a moving target. One can assume, based on the track record of just about every product that Amazon has rolled out, that Redshift will also follow the same model of price reductions as efficiencies of scale are realized within Amazon. For example, the DynamoDB product recently had another price drop that now makes that service available at 85 percent of the original cost. Given the track record with the other AWS offerings, I would suggest that these prices are really "worst case". With some general understanding that you will gain from this book, the selection of the node type and quantity should become clear to you as you are ready to embark on your own journey with this technology. An important point, however, is that you can see how relatively easily companies that thought an enterprise warehouse was out of their reach can afford a tremendous amount of storage and processing power at what is already a reasonable cost. The current On-Demand pricing from Amazon for Redshift is as follows:
The three-year pricing affords you the best overall value, in that the upfront costs are not significantly more than the one year reserved node and the per hour cost per node is almost half of what the one year price is. For two XL nodes, you can recoup the upfront costs in 75 days over the on-demand pricing and then pay significantly less in the long run. I suggest, unless you truly are just testing, that you purchase the three-year reserved instance.
Configuration options
As you saw outlined in the pricing information, there are two kinds of nodes you can choose from when creating your cluster.
The basic configuration of the large Redshift (dw.hs1.xlarge) node is as follows: • CPU: 2 Virtual Cores (Intel Xeon E5)
• Memory: 15 GB
• Storage: 3 HDD with 2 TB of locally attached storage • Network: Moderate
• Disk I/O: Moderate
The basic configuration of the extra-large Redshift (dw.hs1.8xlarge) node is as follows:
• CPU: 16 Virtual Cores (Intel Xeon E5) • Memory: 120 GB
• Storage: 24 HDD with 16 TB of locally attached storage • Network: 10 GB Ethernet
• Disk I/O: Very high
[ 11 ]
An important point to note; if you are interested in a single-node configuration, the only option you have is the smaller of the two options. The 8XL extra-large nodes are only available in a multi-node configuration. We will look at how data is managed on the nodes and why multiple nodes are important in a later chapter. For production use, we should have at least two nodes. There are performance reasons as well as data protection reasons for this that we will look at later. The large node cluster supports up to 64 nodes for a total capacity of anything between 2 and 128 terabytes of storage. The extra-large node cluster supports from 2 to 100 nodes for a total capacity of anything between 32 terabytes and 1.6 petabytes. For the purpose of discussion, a multi-node configuration with two large instances would have 4 terabytes of storage available and therefore would also have four terabytes of associated backup space. Before we get too far ahead of ourselves, a node is a single host consisting of one of the previous configurations. When I talk about a cluster, it is a collection of one or more nodes that are running together, as seen in the following figure. Each cluster runs an Amazon Redshift database engine.
CLIENT VPC
SQL Tools
Business Intelligence
Tools ETL Tools
LEADER NODE
AMAZON S3 Input/Backup/Restore
DATA NODE
DATA NODE
Data storage
As you begin thinking about the kinds of I/O rates you will need to support your installation, you will be surprised (or at least I was) with the kind of throughput you will be able to achieve on a three-drive, 2 TB node. So, before you apply too many of your predefined beliefs, I suggest estimating your total storage needs and picking the node configuration that will best fit your overall storage needs on a reasonably small number of nodes. As I mentioned previously, the extra-large configuration will only start as multi-node so the base configuration for an extra-large configuration is really 32 TB of space. Not a small warehouse by most peoples' standards. If your overall storage needs will ultimately be in the 8 to 10 terabyte range, start with one or two large nodes (the 2 terabyte per node variety). Having more than one node will become important for parallel loading operations as well as for disk mirroring, which I will discuss in later chapters. As you get started, don't feel you need to allocate your total architecture and space requirements right off. Resizing, which we will also cover in detail, is not a difficult operation, and it even allows for resizing between the large and extra-large node configurations. Do note however that you cannot mix different node sizes in a cluster because all the nodes in a single cluster, must be of the same type. You may start with a single node if you wish; I do, however, recommend a minimum of two nodes for performance and data protection reasons. You may consider the extra-large nodes if you have very large data volumes and are adding data at a very fast pace. Otherwise, from a performance perspective, the large nodes have performed very well in all of my testing scenarios.
If you have been working on data warehouse projects for any length of time, this product will cause you to question some of your preconceived ideas of hardware configuration in general. As most data warehouse professionals know, greater speed in a data warehouse is often achieved with improved I/O. For years I have discussed and built presentations specifically on the SAN layout, spindle configuration, and other disk optimizations as ways of improving the overall query performance. The methodology that Amazon has implemented in Redshift is to eliminate a large percentage of that work and to use a relatively small number of directly attached disks. There has been an impressive improvement with these directly attached disks as they eliminate unnecessary I/O operations. With the concept of "zone mapping," there are entire blocks of data that can be skipped in the read operations, as the database knows that the zone is not needed to answer the query. The blocks are also considerably larger than most databases at 1 MB per block. As I have already mentioned, the data is stored in a column store. Think of the column store as a physical layout that will allow the reading of a single column from a table without having to read any other part of the row. Traditionally, a row would be placed on disk within a block (or multiple blocks). If you wanted to read all of the first_name fields in a given table, you would read them block by block, picking up the first_
[ 13 ]
Think of a vinyl record, in this example, Data Greatest Hits Vol-1 (refer to the following figure). The needle starts reading the record, and you start listening for
first_name; so, you will hear first_name (remember that), then you will hear last_ name and age (you choose to forget those two, as you are only interested in first_ name), and then we'll get to the next record and you'll hear first_name (remember that), last_name, age (forget those), and so on.
In a column store, you would query the database in the same way, but then you would start reading block by block only those blocks containing the first_name data. The album Data Greatest Hits Vol-2 (refer to the following figure) is now configured differently, and you'll put the needle down on the section of the record for first_ name and start reading first_name, first_name, first_name, and so on. There was no wasted effort in reading last_name and age at all.
Likewise, if you were reading the age column, you would start with the age data, ignoring all of the data in the first_name and last_name columns. Now apply compression (which we will cover later as well) to the blocks. A single targeted read operation of a large 1 MB block will retrieve an incredible amount of usable data. All of this is being done while going massively parallel across all available nodes. I am sure that without even having started your cluster yet, you can get a sense of why this is going to be a different experience from what you are used to.
Considerations for your environment
[ 15 ]
In the most general terms, there are no changes necessary for the schema that you are migrating out of and the one that you will build in Redshift to receive the data. As with all generalizations, there are a few caveats to that statement, but most of these will also depend on what database architecture you are migrating from. Some databases define a bit as a Boolean; others define it as a bit itself. In this case, things need to be defined as Boolean. You get the idea; as we delve further into the migration of the data, I will talk about some of the specifics. For now, let's just leave it at the general statement that the database structure you have today can, without large efforts, be converted into the database structures in Redshift. All the kinds of things that you are used to using (private schemas, views, users, objects owned by users, and so on) still apply in the Redshift environment. There are some things, mainly for performance reasons, that have not been implemented in Redshift. As we get further into the implementation and query chapters, I will go into greater detail about these things.
When the cluster is created, there is a single database in the cluster. Don't worry; if your environment has some other databases (staging databases, data marts, or others), these databases can be built on the same Redshift cluster if you choose to do so. Within each database, you have the ability to assign permissions to users as you would in the primary database that has been created. Additionally, there are parameter groups that you can define as global settings for all the databases you create in a cluster. So, if you have a particular date format standard, you can set it in the parameter group and it will automatically be applied to all the databases in the cluster.
So, taking a huge leap forward, you have loaded data, you are happy with the number of nodes, and you have tuned things for distribution among the nodes (another topic I will cover later); the most obvious question now to anyone should be: how do I get my data back out? This is where this solution shines over some of the other possible big-data analytical solutions. It really is simple. As the Redshift engine is built on a Postgres foundation, Postgres-compliant ODBC or JDBC drivers will get you there. Beyond the obvious simplicity in connecting with ODBC, there are also a variety of vendors, such as Tableau, Jaspersoft, MicroStrategy, and others, that are partnering with Amazon to optimize their platforms to work with Redshift specifically. There will be no shortage of quality reporting and business intelligence tools that will be available, some of which you likely already have in-house. You can continue to host these internally or on an Amazon EC2 instance. Others will be available as add-on services from Amazon. The main point here is that you will have the flexibility in this area to serve your business needs in the way you think is best. There is no single option that you are required to use with the Redshift platform.
[ 17 ]
As a parting thought in this overview, I would like to provide my thoughts on the future direction the industry in general is taking. I think it is far more than just hype the attention cloud computing, big data, and distributed computing are getting. Some of these are not truly new and innovative ideas in the computing world;
however, the reality of all our data-driven environments is one that will require more data to make better, faster decisions at a lower cost. As each year goes by, the data in your organization undergoes its own astronomical "redshift" and rapidly expands (this happens in every other organization as well). The fact that the competitive advantage of better understanding your data through the use of business intelligence will require larger, faster computing is a reality that we will all need to understand. Big data, regardless of your definition of big, is clearly here to stay, and it will only
get bigger, as will the variety of platforms, databases, and storage types. As with any decision related to how you serve your internal and external data clients, you will need to decide which platform and which storage methodology will suit their needs best. I can say with absolute confidence that there is no single answer to this problem. Redshift, although powerful, is just another tool in your toolbox, and it is not the only answer to your data storage needs. I am certain that if you have spent any amount of time reading about cloud-based storage solutions, you'll surely have come across the term polyglot. This term is almost overused at this point; however, the reality is that there are many languages (and by extension, databases and storage methodologies). You will likely not find a single database technology that will fulfill all of your storage and query needs. Understanding this will bring you much closer to embracing your own polyglot environment and using each technology for what it does best.
Summary
In this chapter, we have already covered quite a bit of ground together. From the history of the Redshift implementation to its astronomical roots, you should have a good idea of what your plan is for your initial node configuration and what your choices for encryption are when you allocate a cluster. You should be able to explain to someone why a column store is different from a standard RDBMS storage model. There are many more details for a number of topics that we have touched upon in this overview; however, at this point you should feel like you are not only ready to create your cluster, but to also have an intelligent conversation about Redshift and its capabilities. In the next chapter, we will begin to look at some of the specific things you will need to understand and configure to run your first Redshift cluster.
Transition to Redshift
Cluster configurations
[ 21 ]
You will also need to have a parameter group. A parameter group applies to every database within the cluster, so whatever options you choose, think of them as global settings. If there are things that you would like to adjust in these settings, you need to create your own parameter group (you may not edit the default). The creation of the new group may be done before you create your cluster. You will see where you associate the parameter group to the cluster in the next section. If you don't need to change anything about the default values, feel free to simply use the parameter group that is already created, as shown in the following screenshot:
Cluster creation
In this section, we will go through the steps necessary to actually create your cluster. You have already made the "hard" decisions about the kinds of nodes, your initial number of nodes, and whether you are going to use encryption or not. Really, you only have a couple of other things to decide, such as what you want to name your cluster. In addition to the cluster name, you will need to pick your master username and password. Once you have those things decided, you are (quite literally) four simple pages away from having provisioned your first cluster.
Don't forget, you can resize to a different number of nodes and even a different cluster type later.
This will bring you to the first screen, CLUSTER DETAILS, as shown in the following screenshot. Here you will name your cluster, the primary database, your username, and password. As you can see, there are clear onscreen instructions for what is required in each field.
[ 23 ]
Believe it or not, that really is everything. On the REVIEW screen, as shown in the next screenshot, you can now confirm your selections and actually start the cluster. Once you select the Launch Cluster button here, it will take a few minutes for your cluster to initialize. Once initialization is complete, your cluster is ready for you to use.
Cluster details
We will take a look at some of the options you have to manage the cluster you have just created in ways other than using the Redshift Management console; however, since we just used the console to create the cluster, we will continue on with that tool for now.
[ 25 ]
Along the left-hand side of the screen, as shown in the following screenshot, you can see some of the high-level management functions related to backups, security groups, and so on.
Once you have selected your cluster, there are some tabs across the top. For now, you can familiarize yourself with these, particularly the Configuration screen that you can access from the tab shown in the next screenshot. There is a wealth of information there. Most important (for now), because surely you want to get connected, is the endpoint information.
[ 27 ]
SQL Workbench and other query tools
Since you are able to connect to the database with native or ODBC PostgreSQL drivers, your choice of query tools is really and exactly that, your choice. It is recommended that you use the PostgreSQL 8.x JDBC and ODBC drivers. Amazon makes a recommendation for a SQL Workbench tool, which for the (free) price will certainly work, having come from environments that have more fully-featured query tools. I was a little frustrated by that product. It left me wanting for more functionalities than is provided in that product. I tried out a few others and finally settled on the SQL Manager Lite tool from the EMS software (a Windows product). Links to this product and other tools are listed in the Appendix, Reference Materials. I know it sounds counterintuitive to the discussion we just had about all the features that are not needed or are not supported; so, there are clearly going to be some things in the query tool that you simply will never use. You are after all not managing a traditional PostgreSQL database. However, the ability to have multiple connections, script objects, doc windows, to run explain plans, and to manage the results with the "pivot" type functionality is a great benefit. So, now that I have talked you out of the SQL Workbench tool and into the EMS tool, go and download that. Just to limit the confusion and to translate between tools, the screenshots, descriptions, and query examples from this point forward in this book will be using the EMS tool. Once you have the SQL tool of your choice installed, you will need some connection information from your configuration screen, as shown in the next screenshot. There is a unique endpoint name and a port number. You will also need the master user ID and password. This is your sysadmin account that we will be using to create other users, schemas, and so on.Now that you have everything you need, select the option to create a database connection, plug in the info, and you are now connected to your cluster. If this is really your first remote database, it may be a bit early to declare total victory; however, you have now joined the ranks of the companies that talk about their cloud computing capabilities! I will go into greater detail about schemas and permissions when we discuss the management of your data.
Before we get into loading your data, we will talk about accessing your data with third-party products. There are a variety of ETL tools, and depending on which product you are currently using, you may simply be able to continue with the product you are using. Additionally, there have been some recent partnership announcements from Informatica about providing an Amazon service-based option to use their PowerCenter product. If your native expertise is in SSIS, it is possible to connect using ODBC database connections; however, you will have performance issues with large quantities of data without using some data copy options from files. There are other options, such as Pentaho, that also have a tremendous amount of promise as well.
As you start to think about your transition to this new environment, you will have a variety of decisions to make that will be unique to the current location of your source data and the in-house expertise that you have for ETL products. The good news is that most of the types of processes you currently support will translate well to Amazon Redshift. There are certain functions in SQL that are not supported; however, for the most part, the insert, update, and delete functionality, right down to creating temp tables in your queries are supported and will translate without major changes. As we get into the next chapter and begin exploring the options you have to load your data, I am confident that you will quickly be up and running with a proof of concept of your own.
Unsupported features
[ 29 ]
• Create table: This is a standard SQL statement that will allow you to build objects in the database.
° Tablespaces: These are not supported.
° Table partitioning: This is not supported; however, there is the distribution key, which is different from traditional partitioning.
° Inheritance: This is not supported.
° Unique constraint: This constraint can be created; however, it is used only to inform the optimizer when creating the query plan to access the data. We will review these constraints later as we discuss loading data.
° Exclusion constraint: This is not supported.
° Foreign Key: This is informational to the optimizer only.
° Primary Key: This is informational to the optimizer only.
• Alter table: This is a standard SQL statement that will allow you to change the structure of tables.
° ALTER COLUMN: This is not supported.
• Copy: This feature is highly optimized for load purposes and will connect to an Amazon S3 bucket or an Amazon DynamoDB database.
• Order by: This standard SQL keyword will affect the order in which the data is output by a query.
° Nulls: (order by nulls) is not supported.
° First/Last: (order by first/last) is not supported.
• VACUUM: If you are familiar with the Postgres VACUUM function to reorganize tables, this is similar, but with new options to support the Redshift functionality.
• Insert/Update/Delete: No worries, these are supported! However, the WITH syntax is not supported.
• Indexes: You will find this as one of the management (particularly space management) items that you will not miss. My only concern early on, which as of yet has not been a problem, is the ability to affect a particularly poorly performing query with the help of a well-placed index. This will remain on my "watch list" of things to look out for, but as I said, so far it has not posed any problems.
• Array and Row constructor value expressions: These are not supported. • User-defined functions: This seems to be a limitation that at some point will
need to be addressed. I don't see a technical reason why this was eliminated (but then again, I am not one of the engineers that built Redshift).
• Stored procedures: Why this was eliminated is also not clear to me. Building stored procedures, thus incorporating complicated logic into a centralized stored process, seems like it would be something that an analytical database would be able to do.
• Triggers: These are not supported.
• Table functions: These are not supported and are one of those items based on the column store functionality that may not prove to be necessary. Keep this item in mind as you review your queries for what will be impacted as you move to Redshift.
• Sequences: These are not supported. • Full text search: This is not supported.
Without getting too bogged down with the specifics, there are certain SQL related datatypes that are supported on the leader node, where that part of the query will not be passed to the data nodes. There are also datatypes that fall into the category of "unsupported features" that we are discussing here. Some of the unsupported datatypes are slightly more obscure datatypes, such as object identifier types and network address types. Those and a few others, for the sake of clarity,
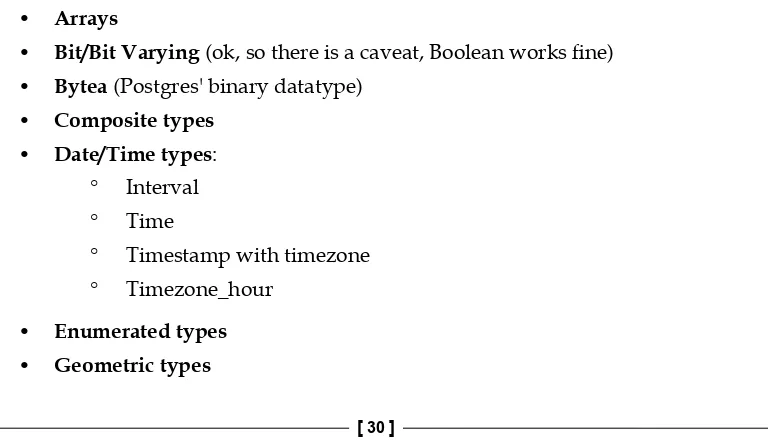
I am leaving off this list. For our purposes here, we will review those datatypes that are simply not available. No caveats here, so you do need to review your SQL. For these, the create table statements are not available to you in Redshift.
• Arrays
• Bit/Bit Varying (ok, so there is a caveat, Boolean works fine) • Bytea (Postgres' binary datatype)
[ 31 ] • JSON
• XML
• Numeric types:
° Serial, Bigserial, Smallserial
° Money (careful here! You will likely have something somewhere in your database defined as money)
Now that we have looked at some of the things that are different as well as the unsupported datatypes that you need to look at in your tables and SQL, there is just one remaining section of unsupported features and those are functions. Similar to the other parts of this section, this is not a complete listing. There are quite a number of these unsupported functions. Please don't be discouraged at this point. Most of these are not likely to impact much of your SQL, particularly standard end user queries. I am simply trying to paint an accurate picture of the things you need to consider.
• Access privilege inquiry functions
• Database management functions:
° Backup/Restore (these are handled by Redshift snapshots)
° Database object location functions
° Database object size functions
• Date/Time functions: These are mostly related to the lack of timestamp support that we have already discussed:
° clock_timestamp()
° justify_days()/hours()/interval()
° transaction_timestamp()
° to_timestamp() • Greatest()
• Least()
• JSON functions (as the JSON datatype is not supported) • XML functions (as the XML datatype is not supported) • Mathematical functions:
° div()
° setseed()
• Range functions and operators • Sequence manipulation functions
• String functions: There are really only a couple of string functions that you will likely come across with any kind of regularity. Please note that convert() and substr() are on the list of unsupported functions:
° bit_length()
° overlay()
° convert()
° convert_from()
° convert_to()
° encode()
° format()
° quote_nullable()
° regexp_matches()
[ 33 ]
• Trigger functions (as triggers themselves are not supported)
• Window functions (depending on the types of queries you currently have, the following may be found in your SQL):
° row_number()
° percent_rank()
° cume_dist()
• Text search functions (as text search is not supported)
• System Catalog Functions: As I have already mentioned, we will cover the use of system tables shortly.
I have tried to give you a sense of the kinds of things that are different. Review the complete listings in the Amazon documentation before you formulate a migration plan for your environment.
Command line
There are a variety of cluster management options that are available to you in addition to the online Redshift Management console. Something many of you will be very quickly comfortable with is the command line. The command-line interface (CLI) is currently a developer preview product as a GitHub project. Just as with the other options, I am not going to try to replace the available Amazon documentation here. This is just to serve as a highlight of the steps needed to get you going and to show you some of the kinds of things you can do with the help of some basic examples. The Amazon command line utilizes Python (2.6 or greater) and will run on any operating system that supports Python. If you need assistance with Python, there are many great resources at www.python.org. To install the command-line interface, detailed instructions can be found at http://aws.amazon.com/cli. I will describe the basic steps if you are installing on an existing Amazon EC2 instance. First of all, if you are running on an Amazon EC2 instance, you already have Python installed. To get the command-line packages, run the installation with the following command from an account that has permissions to install software on the server:
Next, you will need to create a file with your Amazon credentials on the EC2 server. Make this file read-only to the user that is executing the commands, as it will contain your private and public Amazon keys. For this example, I called the file cliconfig. txt; however, you may call it anything you wish. [default] is for the profile. If you use [default], you do not need to specify the profile on the command line. This will allow you different configurations within the same file and you can then specify which profile you wish to use. Keep it simple for now and just use [default].
[default]
aws_access_key_id = <Your Access Key> aws_secret_access_key = <Your Secret Key> region = us-east-1
As we noted earlier when we looked at security, you will need your own credentials to be able to fill in the necessary parts here, and you will also need to pick the region that you have your cluster running in. Once you have that file, export the environmental variable necessary for the command line to understand where the configuration file is (add this to your profile as well, so the next time you connect to the host, this will be set for you already).
export AWS_CONFIG_FILE=/home/user/cliconfig.txt
Once you have the command-line interface installed, your configuration file created, and the environmental variable set, the following command will confirm whether the command line has been properly installed:
asw help
To verify that you have everything working for your cluster's connectivity, run the following command:
aws redshift help
Now that you have the technical parts of the command-line interface working, the basic syntax of the command line for Redshift is as follows:
aws redshift operation
[ 35 ]
Again, this is not intended as a replacement for the available documentation. There are currently over 30 command line operations, each with extensive documentation. Clearly, each of these commands will have a unique set of options that are both required and optional. For our purposes here, I just want you to get a feel of the kinds of things that are possible.
• create-cluster • delete-cluster • modify-cluster • describe-clusters • reboot-cluster
• create-cluster-snapshot • delete-cluster-snapshot • describe-cluster-snapshot • restore-from-cluster-snapshot • describe-resize
The same output can be produced as text by adding the –output text to the command line. I am confident that if you have a Unix-scripting background, you will be up and running very quickly with the functionality you find in the command-line interface.
The PSQL command line
If you are interested in running commands other than those available in the CLI interface, you can install the standard Postgres PSQL command-line tools. The Amazon CLI tool is clearly focused on management functionality and not on the execution of queries. To connect using the psql command line, you need three values: -h (hostname), -p (port), and -U (user). You will then be prompted for the password as shown in the following command:
# psql -h <Endpoint> -p 5439 -U <user>
There are many other options to pass in files, how you wish to have the output formatted, or setting variables as described here.
Connection options
The following are the connection options:
• -h, --host=HOSTNAME: This is the database server host or socket directory (default is local socket)
• -p, --port=PORT: This is the database server port (default is 5432)
• -U, --username=USERNAME: This is the database username (default is root) • -w, --no-password: This never prompts for a password
• -W, --password: This forces a password prompt (this should happen automatically)
Output format options
The following are the output format options:
• -A, --no-align: Denotes the unaligned table output mode
• -F, --field-separator=STRING: Sets the field separator (default is |) • -H, --html: Denotes the HTML table output mode
• -P, --pset=VAR[=ARG]: Sets the printing option VAR to ARG (see the \pset command)
[ 37 ] • -t, --tuples-only: Prints only rows
• -T, --table-attr=TEXT: Sets the HTML table tag attributes (for example width and border)
• -x, --expanded: Turns on the expanded table's output
General options
The following are general options:
• -c, --command=COMMAND: Runs only a single command (SQL or internal) and exits
• -d, --dbname=DBNAME: Denotes the database name to connect to (default is root)
• -f, --file=FILENAME: Executes the commands from a file and then exits • -l, --list: Lists the available databases and then exits
• -v, --set=, --variable=NAME=VALUE: Sets the psql variable NAME to VALUE • -X, --no-psqlrc: Prevents the startup file from being read
• -1, --single-transaction: Executes the command file as a single transaction
API
Along the same lines as the command-line interface, there is a rich list of over 70 API calls. Just like the command line options, the API functions have a well-defined section in the Amazon documentation. As I noted with the command line, you can see that the same ability to create a cluster exists within the API functions as well as the other cluster management tools you would expect to find.
The thing to understand at this point is one of flexibility. You have choices on how to connect to the cluster as well as what kinds of tools you wish to use to manage that cluster.
Summary
Loading Your Data
to Redshift
This is where the fun starts, particularly for all of the data warehouse professionals who are reading this book. We will work out some of the details around database permissions, and most importantly, get some data loaded.
From your current environment, script out a basic fact table and a simple dimension table to join to. Don't worry, you will need to load everything at some point. In order to get some gratification of seeing your familiar queries, with your familiar data running, quickly start with something simple. If you are unable to use your own tables and data, you can download sample files from the U.S. Census database that I will be using as samples from http://quickfacts.census.gov/qfd/
download_data.html. These are good (freely available) data sources to illustrate the load processes, as well as to build some queries against. I will be using the DataSet. txt and FIPS_CountyName.txt data files in this chapter. As I have said previously, I recommend using your own table structures and data, if possible, as you will more quickly be able to realize the benefits of the proof of concept, and besides, seeing your familiar data in queries will give you a great sense of actual runtimes. I found there were a few minor changes to the scripted tables that I needed to make coming out of my environment. Depending on what database engine you are running and what tools you are using to script the create table statements, there may be a few other changes you need to apply before you can execute the SQL. For me, I had to convert bit to Boolean and remove the square brackets. Other than that, there was nothing for my basic table structures that I had to change. There is no reason you should not feel right at home at this point with normal create table as... syntax. From your perspective, if the database is physically present on the desktop that you are working on, on a server down the hall in the server room, or running on Amazon somewhere else in the world, your connect strings may be different; but once you are connected, there is no real difference to how you run things.
Downloading the example code
You can download the example code files for all Packt books you have purchased from your account at http://www.packtpub.com . If you purchased this book elsewhere, you can visit http://www.packtpub. com/support and register to have the files e-mailed directly to you
Datatypes
[ 41 ]
This next screenshot shows the storage requirements and allowable ranges used by the integer datatypes:
Schemas
For this proof of concept, we are going to keep the implementation simple and not worry about schemas and views yet. Clearly, when you are ready to work out your production database schema, you will need to give some thought to those details. This point also brings me to an "early adoption issues" story. Don't worry, this story has a happy ending too. However, this little trick lead to me losing my data and learning about cluster restores early in my testing. My initial configuration, to get things up and running for a proof of concept at the lowest cost, was a single node extra-large cluster. As I saw schemas were supported, I thought, why not go through the handful of extra steps to create the schema and build my target configuration. So, after loading, testing, and making sure I had things the way I wanted them, I resized my cluster to a larger number of nodes to do some performance testing, which is where the story part of this comes in. The resize, because I used private schemas, apparently decided to preserve my schema when my cluster came up in the new configuration, not the data. Now, being a "data guy" this seems like one of those things that any database should do well, as losing data is not a good thing. The silver lining in all of this, through that experience as well as a couple of other minor things that I have run into in my testing, is that I have actually gotten to know some of the fine engineers and project management staff at Amazon, and as I have said before, they have been fantastic in supporting me through these issues. My recovery in the end was simply the restore of my cluster back to the prior single-node snapshot, and I was right back to where I was before the resize. It is through this experience and the absolutely stellar response from the Amazon team that I learned a few lessons about resizing and restoring. In the end, those lessons were valuable for me and and helped Amazon identify some issues, which were quickly addressed and resolved. But now back to the subject at hand—schemas. It is really not as a result of this experience that I am suggesting to use the public schema, because those are issues that are in the rear-view mirror and were immediately patched by Amazon. Getting something running with the least number of steps is really simple. If you choose to use a private schema, there are a few things to consider. Let's take a brief look at those here. The syntax to create the schema is as follows:
CREATE SCHEMA schema_name [ AUTHORIZATION username ] [ schema_ element(s) ]
The name of the schema is schema_name, with username being the owner of the schema, and schema_elements are the objects you wish to associate with the schema at the time of creation.
[ 43 ]
If you choose the schema approach, you will also need to grant permissions to your users to be able to select from that schema. I would suggest, rather than assigning individual user permissions, you should associate your users to a group and then grant the necessary permissions to the group. Individual user permissions get messy, quickly.
CREATE GROUP group_name
[ [ WITH ] [ USER username (s)]]
The syntax CREATE GROUP reporting_users will create a group called reporting_ users. You can use the WITH USER syntax to associate users to the group at the time you create the group. You may then assign permissions at the group level, which will allow users to come and go from the group and not need additional permission management. Don't create so many groups that you lose track of what each is for; however, as a general rule, do not assign permissions at the individual user level.
To grant select on dw_schema to the reporting_users, group that contains all of your read-only reporting users use the following statement:
grant usage on dw_schema to reporting_users;
There is also a system parameter, search_path, that will control the order in which schemas are searched for an object. If identical objects are found in multiple schemas, you can control which one has priority in terms of what order the objects will be searched for. An additional note about schemas is one of default permissions. By default, all users have CREATE and USAGE privileges on the PUBLIC schema. If you wish to prevent users from creating objects in the PUBLIC schema, you need to REVOKE that permission from the user.
Use the following statement to remove the ability to create objects in the PUBLIC schema:
revoke create on dw_schema_schema from public;
Table creation
Starting with a dimension that you have selected from your environment (or the following code), make the necessary datatype changes. Take a stab at your sort key. I will go into some of the additional rules to apply when creating sort keys; however, for now, pick a column or two that are most likely to be involved in joins and add them to the sort key. As this is a dimension, it may simply be the key from the dimension, but it can be more than that; think about how you will be joining to the table. Once you have the create table syntax the way you want it, execute it. And as simple as that, your first (of many) tables has been built.
CREATE TABLE all_fips_codes (
fips VARCHAR(10), state_country_state VARCHAR(80) ) sortkey(fips);
Fact tables are no different, with the exception of the distribution key. You can define a distribution key on a dimension if you wish; however, generally dimensions are not large enough to warrant a distribution key. Unlike sortkey where you can have multiple (up to 400 columns for reasons I cannot fathom) columns to form a compound key, this particular option operates on a single column. You can define the distribution key and the sort key as the same column if you wish. For the
moment, think about how you are likely to join the data, and what will be the largest quantity of data that you will be joining together (it could be a customer key or it could be a year). Don't perform a huge amount of analysis at this point. You know your data, so pick something logical. If you are unsure, go with what you currently have in your environment as your primary partitioning column. Go through the same mental "how do I join to this table" exercise that you did for the dimension, and create a sort key that covers those columns. If you do not have your own fact table to work with, you can use the following create table statement:
[ 45 ] median_value_owner_occupied BIGINT,
As we look further at objects and monitoring, I will discuss quite a number of system tables. In keeping with the "getting started" nature of this book, I will not turn this entirely into a technical manual of system table queries. Amazon has a wealth of detailed information on each system table and what each column contains. I will mention in each of the sections the relevant tables and the kinds of data you can find there. I hope to expose you to the tables you will need and to provide you with enough contexts to understand what you should be looking for. I am sure, as you start to work and understand the environment better, you will find them to be an invaluable resource. Before we dive into our first system table queries, there are a few table naming conventions to be aware of. STL_ is a Redshift system physical table. STV_ is a Redshift system view or "virtual table". These views contain data from the current state of the cluster, and generally only contain data since the last restart. SVV_ are Redshift system views that will combine some of the STL_ and STV_ tables together for commonly used queries. Some of these tables and views are restricted to the superuser group; however, for the purposes of clarity in this book, I will assume that the person running these kinds of queries and setting up the cluster will have superuser permissions. There are certain queries that you will want to expose through reporting, or otherwise, to your end users. Queries about the health and status of the cluster are an administrative function.
[ 47 ]
To be able to see all the system tables in the EMS SQL Manager object explorer, you will need to set the Show system object option in the database registration properties, as you can see in the following screenshot, which is not set by default:
Now that you have run a create table statement or two, take a look in the stl_ ddltext table. In this table, you can see who did what with the following DDL in the database:
Select * from stl_ddltext where userid > 1
order by pid,starttime,sequence
Connecting to S3
[ 49 ]
Beyond the use of compression for your data files, there are some clear advantages to splitting the data files into logical sections of data. They don't need to match your distribution key or anything else that you set up in the database. However, multiple files for a given table will help you load in parallel. Multiple files will also assist you in isolating failures into particular files. We will look at troubleshooting and the system tables involved shortly. As I mentioned previously, when you were creating your tables, having some reasonably sized files to load will also enable you to perform side-by-side comparison on some of the distribution key options by reloading portions of tables into different configurations.
If you are not working with the sample files, and if you have the kind of luck that I do, you will run into characters in your data that will not fit into the target code page. As you look at the kind of data that you are storing, you will find (or at least I did) some characters that need to be removed. You can handle them on export. As you think about your load processes that you need to build, depending on your sources, you will need to account for these situations in the Extract Transform and Load (ETL) process that you build. I had exported almost 60 million records into each of several files using a bulk export process out of my current database. Rather than slowing down that entire process and building a custom extract to handle these, I fell back to a process that works very well on files and wrote a quick Perl script (as shown in the following code) to remove the non-ASCII characters. So, while I was reading and re-writing the files, I took the opportunity to split the files into 10 million row chunks. This provided me files that for testing purposes were right at 3 GB per file (which via normal
compression levels end up below 500 MB). Perl is available for any operating system; ActivePerl (http://www.activestate.com/activeperl) for Windows is fine. You can simply run the installer, and you don't need additional modules or anything else to make this work. The script found in this example takes in a file as an argument, opens an output file with the same name, an incremented number, and splits the file while removing extra carriage returns (015) as well as non-ASCII characters. I am in no way saying that this will be necessary for your data, I am just trying to give you a starting point should you find your back up against a wall and you are looking for a way to get your proof of concept running quickly.
#!/usr/bin/perl -w
$file=$ARGV[0];
if(!$file) {
print "$0 <file> \n"; exit(1);
}
$headers=<$fh>; # Read
$rc=0; $file_cnt=1;
$file_out = $file . "_" . $file_cnt;
while($line=<$fh>) {
open($fho, "> $file_out") or die "Unable to open $file_out";
while ($rc < 10000000) { $line=~s/\015//g;
$line=~s/[^[:ascii:]]//g; $rc++;
print $fho $line; $line=<$fh>;
if (eof($fh)) {
close ($fh); close ($fho); exit(0); }
}
close ($fho); $rc = 0;
$file_cnt= $file_cnt + 1;
$file_out = $file . "_" . $file_cnt; }
close ($fh); close ($fho);
[ 51 ]
I know by now it might feel like you have done a lot of work to get to this point; however, with the exception of the table creation, we have not really spent a lot of time running things directly in the database. That is about to change! Now that you have built data files and you are connected to your S3 bucket, we will copy a few files. You are ready to move on to the part of the chapter that will be most satisfying; copying data into your tables. If you are not working with your own data files, download the DataSet.txt and FIPS_CountyName.txt data files from http:// quickfacts.census.gov/qfd/download_data.html if you have not already done so. These files will match the layouts of the tables you built with the create table scripts for the all_fips_codes dimension as well as the census_data fact table. You can (optionally) compress the file with gzip before you copy it to your S3 bucket. For simplicity, and the small size of the file, you can simply copy the file without compressing it first. If you do compress it, you will need to add the -gzip option to the copy command.
Before you upload the DataSet.txt file to your S3 bucket, remove the header row that contains the column names.
The copy command
Now that you have copied the sample data files to your S3 bucket, we can actually copy the data into the tables. There are two copy commands that we will now review, the first one of which will load the dimension. I have used a fixed layout definition for this data file.
copy all_fips_codes from 's3://testing/redshift/FIPS_CountyName.txt' credentials
'aws_access_key_id=<yourkey>;aws_secret_access_key=<yourkey>' fixedwidth '0:5,1:50';
As this is the first copy command, let's take it a little slow and walk through the command and the options I have supplied:
• copy: The copy command
• all_fips_codes: This is the target table