Visual Web Developer
TM2005 Express Edition
FOR
by Alan Simpson
Visual Web Developer
TM2005 Express Edition
FOR
Hoboken, NJ 07030-5774
www.wiley.com
Copyright © 2006 by Wiley Publishing, Inc., Indianapolis, Indiana Published by Wiley Publishing, Inc., Indianapolis, Indiana Published simultaneously in Canada
No part of this publication may be reproduced, stored in a retrieval system or transmitted in any form or by any means, electronic, mechanical, photocopying, recording, scanning or otherwise, except as permit-ted under Sections 107 or 108 of the 1976 Unipermit-ted States Copyright Act, without either the prior written permission of the Publisher, or authorization through payment of the appropriate per-copy fee to the Copyright Clearance Center, 222 Rosewood Drive, Danvers, MA 01923, (978) 750-8400, fax (978) 646-8600. Requests to the Publisher for permission should be addressed to the Legal Department, Wiley Publishing, Inc., 10475 Crosspoint Blvd., Indianapolis, IN 46256, (317) 572-3447, fax (317) 572-4355, or online at
http://www.wiley.com/go/permissions.
Trademarks:Wiley, the Wiley Publishing logo, For Dummies, the Dummies Man logo, A Reference for the Rest of Us!, The Dummies Way, Dummies Daily, The Fun and Easy Way, Dummies.com, and related trade dress are trademarks or registered trademarks of John Wiley & Sons, Inc. and/or its affiliates in the United States and other countries, and may not be used without written permission. Visual Web Developer is a trademark of Microsoft Corporation in the United States and/or other countries. All other trademarks are the property of their respective owners. Wiley Publishing, Inc., is not associated with any product or vendor mentioned in this book.
LIMIT OF LIABILITY/DISCLAIMER OF WARRANTY: THE PUBLISHER AND THE AUTHOR MAKE NO REP-RESENTATIONS OR WARRANTIES WITH RESPECT TO THE ACCURACY OR COMPLETENESS OF THE CON-TENTS OF THIS WORK AND SPECIFICALLY DISCLAIM ALL WARRANTIES, INCLUDING WITHOUT LIMITATION WARRANTIES OF FITNESS FOR A PARTICULAR PURPOSE. NO WARRANTY MAY BE CRE-ATED OR EXTENDED BY SALES OR PROMOTIONAL MATERIALS. THE ADVICE AND STRATEGIES CON-TAINED HEREIN MAY NOT BE SUITABLE FOR EVERY SITUATION. THIS WORK IS SOLD WITH THE UNDERSTANDING THAT THE PUBLISHER IS NOT ENGAGED IN RENDERING LEGAL, ACCOUNTING, OR OTHER PROFESSIONAL SERVICES. IF PROFESSIONAL ASSISTANCE IS REQUIRED, THE SERVICES OF A COMPETENT PROFESSIONAL PERSON SHOULD BE SOUGHT. NEITHER THE PUBLISHER NOR THE AUTHOR SHALL BE LIABLE FOR DAMAGES ARISING HEREFROM. THE FACT THAT AN ORGANIZATION OR WEBSITE IS REFERRED TO IN THIS WORK AS A CITATION AND/OR A POTENTIAL SOURCE OF FUR-THER INFORMATION DOES NOT MEAN THAT THE AUTHOR OR THE PUBLISHER ENDORSES THE INFOR-MATION THE ORGANIZATION OR WEBSITE MAY PROVIDE OR RECOMMENDATIONS IT MAY MAKE. FURTHER, READERS SHOULD BE AWARE THAT INTERNET WEBSITES LISTED IN THIS WORK MAY HAVE CHANGED OR DISAPPEARED BETWEEN WHEN THIS WORK WAS WRITTEN AND WHEN IT IS READ.
For general information on our other products and services, please contact our Customer Care Department within the U.S. at 800-762-2974, outside the U.S. at 317-572-3993, or fax 317-572-4002. For technical support, please visit www.wiley.com/techsupport.
Wiley also publishes its books in a variety of electronic formats. Some content that appears in print may not be available in electronic books.
Library of Congress Control Number: 2005927626 ISBN-13: 978-0-7645-8360-5
ISBN-10: 0-7645-8360-3
Manufactured in the United States of America 10 9 8 7 6 5 4 3 2 1
About the Author
Dedication
Author’s Acknowledgments
Writing a book is always a team effort, and this book is no exception. I’d like to take this opportunity to thank all the folks who made this book possible, and contributed to its completion. At Wiley Publishing, many thanks to Katie Feltman for providing the opportunity (and reminders to get on schedule). Thanks to Christopher Morris, Barry Childs-Helton, and Dan DiNicolo for their superior editing.
Thanks to David Fugate at Waterside Productions, my literary agency, for getting the ball rolling and ironing out the details.
Some of the people who helped bring this book to market include the following:
Acquisitions, Editorial, and Media Development
Project Editor:Christopher Morris
Acquisitions Editor:Katie Feltman
Senior Copy Editor:Barry Childs-Helton
Technical Editor:Dan DiNicolo
Editorial Manager:Kevin Kirschner
Media Development Manager:
Laura VanWinkle
Media Development Supervisor:
Richard Graves
Editorial Assistant:Amanda Foxworth
Cartoons:Rich Tennant (www.the5thwave.com)
Composition Services
Project Coordinator: Adrienne Martinez
Layout and Graphics: Carl Byers, Andrea Dahl, Lauren Goddard, Barbara Moore,
Barry Offringa
Proofreaders: Laura Albert, Dwight Ramsey, TECHBOOKS Production Services
Indexer:Sherry Massey
Publishing and Editorial for Technology Dummies
Richard Swadley,Vice President and Executive Group Publisher
Andy Cummings,Vice President and Publisher
Mary Bednarek,Executive Acquisitions Director
Mary C. Corder,Editorial Director
Publishing for Consumer Dummies
Diane Graves Steele,Vice President and Publisher
Joyce Pepple,Acquisitions Director
Composition Services
Gerry Fahey,Vice President of Production Services
Contents at a Glance
Introduction ...1
Part I: Planning a Web Site ...7
Chapter 1: Getting Started ...9
Chapter 2: Creating a Web Site ...21
Chapter 3: Configuring a Membership Site ...39
Chapter 4: Creating Master Pages ...53
Part II: Building Your Web Site ...73
Chapter 5: Creating Web Pages ...75
Chapter 6: Designing with Styles ...97
Chapter 7: Working with ASP.NET Controls ...123
Chapter 8: Easy Site Navigation ...153
Part III: Personalization and Databases ...169
Chapter 9: Using Personalization ...171
Chapter 10: Using Themes ...199
Chapter 11: SQL Server Crash Course ...221
Chapter 12: Using Data in Web Pages ...261
Part IV: The Part of Tens ...319
Chapter 13: Ten Terms to Make You Look Smart ...321
Chapter 14: Ten Alternatives to Being Helpless ...327
Appendix: Publishing Your Site ...331
What’s on the CD-ROM? ...337
Table of Contents
Introduction ...1
About This Book ...2
Foolish Assumptions ...2
Conventions Used in This Book ...3
What You’re Not to Read ...3
How This Book Is Organized ...4
Part I: Planning a Web Site ...4
Part II: Building Your Web Site ...4
Part III: Personalization and Databases ...4
Part IV: The Part of Tens ...4
Icons Used in This Book ...5
Where to Go from Here ...5
Part I: Planning a Web Site ...7
Chapter 1: Getting Started . . . .9
Who VWD Is For ...9
Installing Visual Web Developer ...10
Getting Around in VWD ...10
Using panes ...11
Getting panes back to normal ...12
Don’t forget the View menu ...13
About the Start Page ...14
Using VWD Help ...14
Closing Help pages and panes ...16
Online resources ...16
Being Compatible with Web Browsers ...17
Publishing Your Web Site ...19
Chapter 2: Creating a Web Site . . . .21
Creating a Web Site ...21
Closing and Opening Pages ...23
Creating and Using Folders ...24
Copying files to folders ...25
Editing Pages ...26
Adding text to a page ...27
Selecting and formatting text ...27
Undoing changes ...28
Adding pictures ...28
Changing properties ...29
Switching views ...30
Editing in Source view ...31
Saving your work ...32
Dealing with code-behind files ...33
Titling Pages ...34
Viewing Pages in a Web Browser ...35
Opening and Closing Web Sites ...37
Chapter 3: Configuring a Membership Site . . . .39
Creating a Folder for Members-Only Content ...39
Using the Web Site Administration Tool ...40
Choosing an authentication type ...42
Creating Roles to Categorize People ...43
Creating Access Rules ...45
Managing access rules ...46
Creating a User Account ...48
Managing user accounts ...50
Closing the Web Site Administration tool ...51
What the Web Site Administration Tool Did ...51
Chapter 4: Creating Master Pages . . . .53
Creating a Folder for Master Pages ...54
Creating a Master Page ...54
Designing your page layout ...55
Styling Master Page panes ...57
Styling the left pane ...60
Styling the ContentPlaceHolder pane ...61
Using a Master Page ...63
Editing a Master Page ...66
Adding a Master Page to Existing Pages ...69
Part II: Building Your Web Site ...73
Chapter 5: Creating Web Pages . . . .75
Creating a New Blank Page ...75
Creating HTML Tables ...77
Adding a table to a page ...77
Working with HTML Tables ...78
Selecting rows and columns ...79
Selecting cells ...80
Merging cells ...80
Styling cells ...81
Adding controls to table cells ...84
Adding Hyperlinks to Pages ...84
Quick links to pages in your site ...85
Creating bookmarks ...86
Linking to bookmarks ...86
Adding and Styling Pictures ...87
Sizing a picture ...88
Styling pictures ...88
Adding Lines ...92
Editing in Source View ...92
Selecting in Source view ...93
Typing tags and attributes ...93
Debugging HTML ...95
Chapter 6: Designing with Styles . . . .97
Understanding CSS ...97
Creating a CSS Style Sheet ...100
Creating Style Rules ...101
Creating CSS element styles ...101
Creating CSS class selectors ...102
Defining Rules with Style Builder ...104
Styling fonts ...105
Styling the background ...107
Styling text alignment and spacing ...108
Styling position ...110
Styling layout ...112
Styling boxes and borders ...113
Saving Style Builder choices ...114
Saving a CSS style sheet ...115
Linking to a Style Sheet ...115
Using Styles in a Page ...116
Applying CSS element selectors ...116
Applying CSS class selectors ...117
Applying element class selectors ...119
Using DIV styles ...120
The CSS 2.1 Specification ...122
Chapter 7: Working with ASP.NET Controls . . . .123
What Is ASP.NET? ...123
Adding a Server Control to a Page ...125
Tweaking server controls in Design view ...126
Using the Common Tasks menu ...127
ASP.NET Login Controls ...130
Allowing Users to Create an Account ...131
Assigning new users to a role ...133
Testing the control ...134
Creating a Login Page ...135
Providing a Login Link ...136
The LoginStatus control ...137
The LoginName control ...138
The LoginView control ...138
Letting Users Manage Passwords ...141
Using the PasswordRecovery control ...141
The ChangePassword control ...145
Testing Membership ...146
Server Controls in Source View ...148
Relaxing Password Constraints ...149
Chapter 8: Easy Site Navigation . . . .153
Getting Organized ...153
Using Site-Navigation Controls ...154
Using the TreeView and Menu Controls ...155
Creating a Site Map ...158
Customizing navigation for roles ...161
Binding a control to Web.sitemap ...163
Adding an Eyebrow Menu ...164
Creating Web User Controls ...165
Creating a Web User Control ...166
Using a Web User Control ...167
Part III: Personalization and Databases ...169
Chapter 9: Using Personalization . . . .171
Creating a User Profile ...171
Setting up user profiles ...173
Letting Users Enter Properties ...176
Adding a button ...178
Writing some code ...179
Tying code to an event ...180
Determining where to put the profile information ...183
Letting users edit their profiles ...184
Using profile properties with Visual Basic ...187
Using Validation Controls ...188
RequiredFieldValidator ...189
RegularExpressionValidator ...190
CompareValidator ...191
CustomValidator ...192
ValidationSummary ...192
Using the Forms Designer ...193
Stacking absolutely-positioned objects ...194
Aligning absolutely-positioned objects ...195
Sizing objects equally ...196
Spacing absolutely-positioned objects ...197
Chapter 10: Using Themes . . . .199
Creating Themes ...199
Creating Theme Folders ...200
What’s in a Theme? ...201
Using Pictures in Themes ...201
Creating a Theme Style Sheet ...202
Creating Skins ...204
Creating a skin file ...204
Default vs. named skins ...207
Using Themes in Pages ...209
Letting Members Choose a Theme ...210
Creating a page for viewing themes ...211
Creating a control for choosing a theme ...212
Storing the preferred theme ...213
Applying a theme ...214
A theme tester page ...216
Applying Themes to Master Pages ...217
Other Ways to Apply Themes ...218
Defining a Site-Wide Default Theme ...219
Chapter 11: SQL Server Crash Course . . . .221
Crash Course in Database Design ...222
Tables, rows, and columns ...222
One-to-many, many-to-many ...223
SQL Server Tables ...227
Assigning GUIDs automatically ...233
Creating Your Own Tables ...236
Defining a primary key ...237
Creating text fields ...238
Adding a money field ...240
Saving the new table ...240
Creating the Transactions table ...241
A Primary Key for Transactions ...243
Populating Tables ...244
Linking Tables ...247
Creating a view ...248
A more detailed view ...251
Creating a Table of Pictures ...254
Creating a Table of HyperLinks ...257
Chapter 12: Using Data in Web Pages . . . .261
Binding Data to Controls ...262
Using the Data Configuration Wizard ...262
Data controls in Design view ...273
Formatting Dates and Numbers ...274
Some Security Considerations ...275
Using the GridView Control ...276
An instant GridView control ...276
Formatting the GridView control ...278
Binding to DropDownList Controls ...280
Using a DropDownList to filter records ...282
Viewing and editing user properties ...284
Using the DetailsView Control ...287
Binding a DetailsView control ...287
Formatting a DetailsView control ...289
Creating Master-Details Forms ...291
Master-Details DropDownList control ...292
Master-Details GridView control ...293
The Master-Details DetailsView control ...294
General GridView and DetailsView considerations ...295
Using the DataList Control ...296
Formatting a DataList control ...298
Formatting dates and numbers in a DataList ...300
Showing a DataList in columns ...301
Using DataList to show pictures ...302
Using a DataList to show HyperLinks ...309
The FormView Control ...312
Showing subtotals ...314
Part IV: The Part of Tens ...319
Control ...323
Code ...323
Programmatic ...324
Database ...325
Chapter 14: Ten Alternatives to Being Helpless . . . .327
Microsoft Developer Network (MSDN) ...327
HTML Home Page ...327
Cascading Style Sheets Home Page ...328
XML Home Page ...328
ASP.NET ...328
ASP.NET Starter Kits ...328
ASP.NET Forums ...329
SQL Server Developer Center ...329
dotnetjunkies ...329
Microsoft Technical Communities ...329
Appendix: Publishing Your Site ...331
Choosing a Hosting Provider ...331
Preparing Your Site for Uploading ...332
Copying the Site ...334
What’s on the CD-ROM? ...337
Visual Basic 2005 Express ...337
Visual Web Developer 2005 Express ...338
Index ...341
End-User License Agreement ...Back of Book
Introduction
W
elcome to Visual Web Developer 2005 Express Edition For Dummies.Visual Web Developer is a tool for developing dynamic, data-driven Web sites. The dynamicpart refers to the fact that each page your site sends out can be tailored — on the spot and even on the fly — for whatever person happens to be viewing the page at that moment. The data-drivenpart stems from the fact that the information needed to create pages dynamically is stored in a database.
Historically, creating a data-driven Web site was an enormous task, requiring countless hours of tedious programming and debugging. Visual Web Developer (VWD) changes all that — allowing you to create dynamic Web sites in a quicker, easier, and more intuitive visual mode where simple drag-and-drop replaces hours of typing code.
That’s not to say that Visual Web Developer is soeasy that you can just “think” a Web site into existence. There’s still plenty of knowledge and skill required to develop a Web site. You just don’t need as muchknowledge and skill as was required in the pre-VWD olden days.
If you’ve spent much time online trying to figure out how to work Visual Web Developer, you’ve probably been overwhelmed by countless buzzwords and confusing computer code that looks like something written by aliens from another planet. Much of what you’ve seen probably comes from people com-paring the VWD way of doing things to the old way of doing things (and that can get obscure in a hurry).
This book takes a different approach: I don’t talk about the old way of doing things at all. There are two reasons for that. The first is, if you don’t know about the old way of doing things, then the comparisons don’t help one bit. And if you doknow the old way of doing things, then you can see for yourself how the new way is different without my telling you.
About This Book
The main goal of this book is simple: To cover everything you really needto know about Visual Web Developer to create data-driven Web sites. And I do mean “need.” You won’t catch me wandering off into irrelevant product com-parisons or advanced topics that few people need.
Another key ingredient of this book is its coverage of things that most other resources assume you already know — in fact, it’s okay if you don’t already know them. Everybody has to start somewhere, and Web-site development is tricky enough without having to fight a feeling of being left out. You won’t get, “Sorry, you didn’t learn our secret language umpteen years ago when we did, so you can’t play.” Here, just about everyone gets to play.
It’s important, especially for newbies, to understand that there’s a big differ-ence between “everything you need to know (just to get in the game),” and everything there isto know. This book makes no attempt to cover everything there is to know about Visual Web Developer (as you’ll notice right away because one person can actually carry the book). The reason is simple: Ten books the size of this one couldn’t cover everything there is to know about Visual Web Developer. So you may need to rely on other resources from time to time. And that’s okay too.
Finally, though I’d like to be able to write this book in such a way that even a fresh-minted PC newbie could follow along, such a goal is unrealistic. Covering everything from your first mouse click to publishing your dynamic data-driven Web site would take too much space — so I have to make some assumptions about who is going to read this book. Which brings us to . . .
Foolish Assumptions
Creating dynamic data-driven Web sites, even with Visual Web Developer, is not a topic for absolute computer beginners. If you just got your first PC a few weeks ago, and so far have mastered only the art of e-mail, you may need to spend quite a bit more time learning Windows basics before you can tackle some of the terms used in this book without getting a headache.
It would be best if you already had some experience creating Web pages on your own. There isn’t really room in this book to discuss things like HTML and CSS in depth. So if those two acronyms are completely foreign to you, then you might want to study up on them before you start using this book.
On the bright side, you don’t really need to know anything, well, technical
in how to boss them around. You don’t have to be a mechanic to drive; like-wise, you don’t have to be a programmer or database developer already before you use this book.
Conventions Used in This Book
As you browse through this book you might notice some unfamiliar symbols or odd-looking text in gray boxes. Don’t worry about ’em. The ➪symbol you’ll see in the text just separates individual menu options (commands) that you choose in sequence. For example, rather than saying “Choose New from the File menu” or “Click File in the menu bar, then click New in the drop-down menu,” I just say something like this:
Choose File ➪New from the menu bar.
Creating VWD Web sites doesn’t take much programming. What little code is actually required to perform some task is shown in a monospacefont, like this:
if (!Page.IsPostBack) {
txtFirstName.Text = Profile.FirstName; txtLastName.Text = Profile.LastName; txtAddress1.Text = Profile.Address1; txtAddress2.Text = Profile.Address2; txtCity.Text = Profile.City;
txtStateProv.Text = Profile.StateProvince; txtZipPostalCode.Text = Profile.ZIPPostalCode; txtPrefTheme.Text = Profile.PreferredTheme; }
When there are a few little chunks of code to show in text, like this — Profile.FirstName— I show them that way so you can see what is and what isn’t code.
What You’re Not to Read
Reading computer books is not most people’s idea of fun. (though it can be a great cure for insomnia, should the need ever arise). Any text that doesn’t clearly fit into the need-to-know category of using VWD will be marked with Technical Stuff icons (more about those in a minute) or placed in gray side-bars. If you’re in a hurry, or just feel overwhelmed by the need-to-know stuff, you can skip the Technical Stuff and sidebar text. (They’ll still be there when you sneak up on them later.)
How This Book Is Organized
Building a dynamic, data-driven Web site is a process; certain things must be done in a certain order. (A simple example: If you want people to be able to set up accounts on your site and log in, first you have to create some means of storing data about users.) For that reason, this book is divided into parts and chapters that present information in the exactly the same order you need to follow when creating your own Web site. The following subsections tell you what to expect from those parts and chapters.
Part I: Planning a Web Site
Right off the bat, you need to decide whether to have your Web site support capabilities such as site membership, and whether to use the Master Pages feature of Visual Web Developer to give your site a consistent look and feel. This first part covers all the stuff you need to know if you want to build those features into your site.
Part II: Building Your Web Site
After you have the basic components for site membership and Master Pages in place, you can start focusing on specific content. In this part you’ll discover the Visual Web Developer ways of defining content.
Part III: Personalization and Databases
Chances are, if you use Visual Web Developer to create your Web site, you’ll want to offer more than just basic logins and simple static content. Part III covers topics you need to beef up your site with personalization, themes, and your own custom database tables.Part IV: The Part of Tens
Icons Used in This Book
As you flip through this book, you’ll notice little icons like these sprinkled about its pages. They point out little chunks of text that either deserve a little extra attention or (if they’re obscure) deserve very little attention. For exam-ple, a Warning icon points out places where being careless could cause real problems, whereas a Technical Stuff icon points out facts nice to know but not super-important. The icons are
Tips point out handy tricks or techniques that can make things easier for you.
These icons point out techniques where you really need to watch what you’re doing. The world won’t end if you mess up, but fixing the problem won’t be easy.
These icons point out tools and techniques that you’ll use often in VWD, and hence should be high on your priority list of Things to Keep in Mind.
These icons point out text that isn’t desperately relevant to all readers, though useful in an arcane way. You can skip these for now, if you like. They’ll wait.
Where to Go from Here
There’s a definite start-to-finish process to go through if you want to build a data-driven Web site. So if you’re new to Visual Web Developer and are just starting your first site, starting at Chapter 1 is your best bet. Those of you who already have some experience with VWD and have already laid out some components of your sites can jump in anywhere.
Part I
Chapter 1
Getting Started
In This Chapter
䊳Getting your Web feet wet
䊳Getting around in Visual Web Developer
䊳Getting the help you need, when you need it
䊳Being compatible
䊳Finding someone to host your site
V
isual Web Developer (VWD) is a tool for building dynamic, data-driven Web sites. The Express edition, which is the subject of this book, is specifically designed for non-professionals who want to learn to use VWD and related technologies without having to spring for the tools used by large corporations and professional programmersThat’s not to say you can’t create a “real” Web site with the Visual Web Developer Express. On the contrary, you can build a Web site of any com-plexity, and copy it to any Web server that supports ASP.NET 2.0 and other related technologies. It’s just that the Express edition doesn’t have some advanced features needed for very large commercial Web sites.
But, as a beginner, you’re probably a long way from developing a large, busy commercial Web site. There’s no need to spring for a more expensive version of the product until after you’ve mastered the Express edition.
Who VWD Is For
Of course, each said tool or technology is a book-length topic in itself. Total coverage of all that is beyond the scope of a single book written about Visual Web Developer. By way of a quick look, however, I describe what they are, how you use them, and where you find online resources with more information.
Installing Visual Web Developer
One of the biggest challenges beginners face when trying to use a large, com-plex program like Visual Web Developer is knowing whatto do, howto do it, and whento do it. Technical documentation and “theory” don’t help with that. To really get your feet wet and understand the big picture, you need to spend some time using the program in a hands-on way.
Getting that hands-on experience is what this book is about. And to make sure you can get that experience, we’ve included a free copy of Visual Web Developer Express on the CD that comes with this book.
Like any program, you have to install Visual Web Developer Express before you can use it. So before you go any further here, take a moment to complete the installation instructions presented in Appendix B.
Getting Around in VWD
Once installed, starting Visual Web Developer is no different from starting any other program. Assuming VWD is properly installed on your computer, just click the Start button and choose All Programs➪Visual Web Developer 2005 Express Edition. Figure 1-1 shows (roughly) how the program looks when it first opens. Don’t worry if yours looks different — it’s easy to move and size things to your liking.
The list given here briefly describes the purposes of the main panes pointed out in Figure 1-1. (If some of the terms are new to you, don’t worry about it; save the definitions for later when you start creating your site.)
⻬Toolbox:When you open a page or other item to edit, the Toolbox offers tools that allow you to add controls to the page.
⻬Solution Explorer/Database Explorer:Each Web site you create is orga-nized as a group of folders that shows up in the Solution Explorer. Any database you create for the site appears in the Database Explorer. Use the tabs at the bottom of the pane to switch between the two Explorer programs.
⻬Properties: Shows properties associated with the page or object with which you’re currently working.
Using panes
You can move, size, show, and hide panes as needed to take advantage of your available screen space. To widen or narrow a pane, drag its innermost border left or right. If you have two or more panes stacked up along the edge of a screen, you can make the lower pane taller or shorter by dragging its top border up or down. The two-headed mouse pointers in Figure 1-2 show where you’d drag a couple of sample borders. (Ever see a two-headed mouse?)
Solution Explorer/Database Explorer
Toolbox Design surface Properties
Figure 1-1: VWD main program window.
As pointed out in Figure 1-2, the title bar of a pane contains three buttons titled Window Position, Auto Hide, and Close. Clicking the Window Position option gives you the following choices on a drop-down menu:
⻬Floating:Converts the pane to a free-floating window that you can move and size independently of the program window.
⻬Dockable:Docks a pane that is currently showing as a tabbed document.
⻬Tabbed Document:Moves the pane into the Editing area, identified by a tab at the top of the area. Click the tab to make the pane visible. Right-click the tab and choose Dockable to re-dock the pane to the program window.
⻬Auto Hide:Converts open panes to hidden panes along the border of the program window, as in the example shown in Figure 1-3. To bring a pane out of hiding, point to (or click) its name.
⻬Hide:Hides a pane immediately so only its name appears along the border. To bring the pane out of hiding, click (or just point to) its name.
To quickly put all of the visible panes into hiding, choose Window➪Auto Hide All.
When you bring a hidden pane out of hiding, you’ll notice that the Auto Hide “pushpin” is horizontal. Clicking that pushpin keeps the pane open.
Getting panes back to normal
With so many optional panes, and so many ways to move and size things, it’s easy to make a real mess of your program window. But don’t worry; to whip everything back into shape, all you have to do is choose Window➪Reset Window Layout from the menu bar.
Window position Auto Hide
Close
Drag to size Figure 1-2:
Don’t forget the View menu
The View option in the menu bar, shown in Figure 1-4, provides access to all optional panes (also called windowsbecause they can be free-floating). If you close a pane by clicking its Close (X) button, you can always bring the pane back into view by choosing its name from the View menu.
Figure 1-4: The View menu. Figure 1-3: Hidden panes along the right border.
Some options on the View menu, like Object Browser and Error List, won’t play any significant role until you start building your Web site. In most cases, these panes appear automatically when needed. I’ll discuss those other panes as the need arises in this, and later, chapters.
The View menu also offers a Toolbars option you can use to show and hide various toolbars. As with many of the optional panes, toolbars appear — and disappear — as appropriate to whatever task you’re performing at the moment. So don’t fret about which toolbars are (or aren’t) visible right now.
About the Start Page
The Start Page, shown in Figure 1-5, appears each time you open VWD. Under Recent Projects you’ll see a list of Web sites you’ve worked on recently (if any). To open one of those Web sites, just click its name.
The Start page doesn’t contain anything that’s required to build a Web site. In fact, after you’ve created or opened a Web site, you can close the Start page by clicking the Close (X) button in its upper-right corner. If you change your mind and want to bring the Start page back to the screen, just choose View➪
Other Windows➪Start Page from the menu.
Using VWD Help
Quick, easy access to information is key to using VWD well. There’s too much information for anyone to memorize. Visual Web Developer offers many ways of getting the information you need when you need it. The Help command on the menu bar, and the Help toolbar shown at the bottom of Figure 1-6, pro-vide many ways to look up information, as summarized below.
If the Help toolbar isn’t visible, choose View➪Toolbars➪Help from the menu bar. The navigation buttons at the left side of the Help toolbar will be enabled when you have some Help content visible on your screen.
It’s probably no stretch to assume you can find your way around the Help system and figure things out from the options available to you. But just so you know what’s available, I’ll briefly summarize the main Help options:
⻬How Do I:Opens the “How Do I?” page in the Design Surface. The page contains links to topics that describe how to perform various common tasks in VWD.
⻬Search:Provides many options for searching both local and online help for a specific word or phrase.
⻬Index:Provides an index, like the index at the back of a book, where you can look up a term alphabetically.
⻬Contents:Opens the Help Table of Contents in the right pane. Use it as you would the Table of Contents at the start of a book.
⻬Help Favorites:Opens the Help Favorites pane at the right side of the program window. When you’re viewing a Help page, you click the “Add to Help Favorites Button” in the Help toolbar (just to the right of the Help Favorites button) to add the current page to your Help Favorites.
⻬Dynamic Help:(Help menu only) Opens the Dynamic Help pane in the lower-right corner of the screen (Figure 1-7). As you create a page and click different types of controls, links to information about the context in which you’re working automatically appear in this pane.
⻬Help on Help:(Help menu only) Offers detailed information on all the built-in help available to you.
If you’re new to Web development, much of the help may be over your head and not very helpful at all. Try not to let that intimidate you. Everyone has to be a beginner at some point. A major goal of this book is to get you from that absolute-beginner point to a more experienced level where the technical documentation can actually be helpful.
Help toolbar Figure 1-6:
The Help toolbar (bottom).
Closing Help pages and panes
Most Help pages open up in the Design surface. You can switch among open pages using the tabs at the top of the surface. To close a pane, click its tab and then click the Close (X) button at the top of the Design surface (Figure 1-8). Or right-click the tab and then choose Hide.
Panes, like the Dynamic Help pane shown back in Figure 1-7, can be handled like any other pane, using tools and techniques described near Figure 1-2.
Online resources
No matter what your level of expertise coming into this book, sometimes you need specific information about the technologies that VWD supports. That includes the .NET Framework 2.0, ASP.NET, CSS, HTML, XML, SQL Server 2005, and the C# programming language. You don’t need to master all these topics right off the bat. Heck, the printed documentation for the .NET Framework alone is over 8,000 pages. Not may people will be interested in learning or using everything it has to offer. It’s just too darn much information, most of which has nothing to do with building Web sites.
The trick is being able to find the information you need when you need it. Certainly the Help resources described in the previous sections have much to offer. But it never hurts to have a few extra resources at your fingertips.
A good first resource is the Visual Web Developer section of my own personal Web site at www.coolnerds.com. (You can browse straight to that section using www.coolnerds.com/vwd). For more technical information, consider the following Web sites:
Tabs Close button
⻬.NET Framework Developer Center:http://msdn.microsoft.com/ netframework/
⻬ASP.NET QuickStart Tutorials:www.asp.net/tutorials/quickstart. aspx
⻬Cascading Style Sheets (CSS) — W3C:www.w3.org/Style/CSS/
⻬SQL Server Developer Center:http://msdn.microsoft.com/SQL/
⻬Visual C# Developer Center:http://msdn.microsoft.com/vcsharp/
⻬XHTML Home Page: www.w3.org/TR/xhtml1/
⻬XML (Extensible Markup Language): www.w3.org/XML/
Being Compatible with Web Browsers
Every Web author has to make a trade-off decision between Web browser compatibility and fancy features. If you want to ensure that virtually every-one can visit your site, then you want to be compatible with very early ver-sions of Web browsers — say, Internet Explorer 3 and Netscape Navigator 3. However, those older browsers don’t support the better, fancier stuff you can use with modern Web browsers.
If you want to use the capabilities of modern browsers, you have to limit your Web site to using only those. This is not as big a sacrifice as it might seem; almost everyone has more recent browsers. Few sites gear their new content to version 4 and earlier browsers anymore, and most browser manu-facturers are keeping up with current XHTML specifications. And since XHTML is the future for browsers anyway, most Web authors lean toward those specifications.
Anyway, I’m sure one could debate browser compatibility ad infinitum — but here’s the bottom line: Make that decision early on so you’re better prepared to create consistent pages for the site and match what your visitors are most likely using. You use the Options dialog box in VWD to set browser compati-bility; here are the steps:
1. Choose Tools➪Options from VWD’s menu bar. The Options dialog box opens.
2. Click the + sign (if any) next to Text Editor HTML.
3. Click Validation.
4. Choose your preferred browser compatibility from the Target drop-down list.
In Figure 1-9, I chose “XHTML 1.0 Transitional (Netscape 7, Opera 7, Internet Explorer 6).”
5. Click OK.
In case you’re wondering why the option in the Options dialog box is named Validation, it’s because VWD automatically validatesyour page each time you open it — that is, it makes sure everything in the page works properly when a visitor opens the page from a Web browser. If VWD finds a problem, it alerts you via an error message.
The Options dialog box has a whole slew of other options. You can see ’em if you choose the Show All Settings check box at the bottom of the dialog box. There are a ton of other options to choose from, but the only one worth bothering with at the moment would likely be the General tab under HTML Designer.
As you’ll discover in Chapter 2, you can edit pages either in a WYSIWYG graphi-cal view, or a more textual Source view. You can switch views at any time with a single mouse click, which is no big deal. But if you choose Design View rather than Source View from the HTML Designer General options, as in Figure 1-10, your pages will initially open in Design view.
When you’ve finished making your choices in the Options dialog box, just click OK to save your choices and return to VWD.
Publishing Your Web Site
As you may already know, simply creating a Web site on your own PC is only a first step; you can admire it while it sits there, but that doesn’t make your site available to the public at large. That can happen only after you’ve obtained a domain name and published your site to a Web server located at that domain name.
The company that provides the space on which you publish your site is often referred to as a hosting service,a hosting provider,a Web presence provider,or even a WPPfor short. The hosting services that specifically support the tech-nologies you use in VWD to develop your Web site are ASP.NET 2.0 Hosters.
Eventually you’ll need a hosting service that supports ASP.NET 2.0 and SQL Server 2005. You can find a list of such hosting services at www.asp.net/ hosters/. There’s no reason to sign up right this minute, especially if your site isn’t built yet. But you can certainly shop around as time permits.
Chapter 2
Creating a Web Site
In This Chapter
䊳Creating a new Web site
䊳Defining and using folders
䊳Creating and editing Web pages
䊳Viewing pages in a Web browser
T
he first step to using Visual Web Developer is to create a new, empty Web site. The phrase Web sitein this context does not mean a Web site that people can browse to on the Web — that would be a live Web siteor a produc-tion Web site.The Web site you create is initially just a bunch of files and fold-ers on your computer that nobody except yourself can get to.After you’ve created your new Web site, you can then start designing and cre-ating the site. Doing so involves crecre-ating folders and pages, putting things on pages, seeing how pages look when viewed in a Web browser, and so forth. Such things fall under the heading of “everyday basic skills” because you’ll do them every time you use Visual Web Developer. They are also the topic of this chapter.
Creating a Web Site
From the standpoint of Visual Web Developer, a Web siteis basically a folder that contains still more folders and all the files that make up a single, com-plete Web site. Unlike a live Web site, the empty one you create will be in your file system, or, in less technical terms, your own computer’s hard disk, where nobody except you can get to it.
instead. But given that you probably won’t be writing much code, and given that these languages are so similar, you shouldn’t have any problems using C# even if you’re not familiar with the language.
To create a new Web site that uses C# as its default programming language, follow these steps:
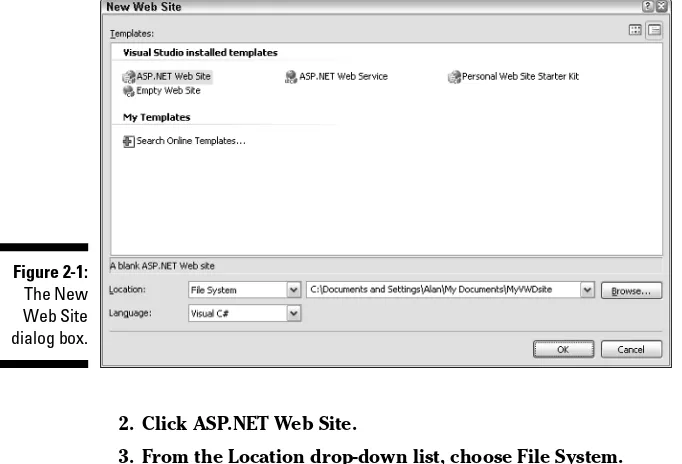
1. From VWD’s menu bar, choose File➪New Web Site. The New Web Site dialog box (shown in Figure 2-1) appears.
2. Click ASP.NET Web Site.
3. From the Location drop-down list, choose File System.
4. From the Language drop-down list, choose a preferred programming language.
As mentioned, I use Visual C# throughout this book.
5. Optionally, change the location and name of the Web site.
The site name is at the end of the lengthy path to the right of the Location drop-down list. In the example shown in Figure 2-1, I’ve opted to create a site named MyVWDsitein the My Documents folder.
6. Click OK.
It takes a few seconds for VWD to create the site. When the site is ready, you end up with an empty page named Default.aspx, which is the Web site’s home page. You also get a folder named App_Data, which is where your site’s database will be stored (eventually). These are both listed under the site’s root folder in Solution Explorer at the right side of the program window.
The Default.aspxpage also opens automatically in the Design surface. You’ll see its name in a tab at the top of the Design surface. In Design view, the page just looks like a big white sheet of paper. In Source view, you’ll see some HTML and other stuff that isn’t visible to people who visit the site, as in Figure 2-2.
Speaking of Design view and Source view, notice the two little buttons titled Source and Design near the bottom of the window (Figure 2-3). Use those but-tons to switch from one view to the other. Note that these are just two differ-ent ways of looking at the page, as follows:
⻬Design:In this view, the page looks much as it will in a Web browser. Use this view for normal WYSIWYG (what you see is what you get) editing.
⻬Source:This view shows the HTML and other tags for the page — “instructions” that tell the page how to behave and how to look in a Web browser.
Closing and Opening Pages
As mentioned, when you create a new Web site, VWD automatically creates one blank page, named Default.aspx, for the site. Your site will likely con-tain many pages. Typically you only want to work on one page at a time
Figure 2-3: The Design and Source buttons. Figure 2-2: A new Web site as shown in Solution
Explorer, and an open page in Source view.
(or perhaps a few pages) — and that means opening and closing pages for editing. Right now there’s only one page in the site, and it’s open. To close a page:
⻬Click the Close (X) button in the upper-right corner of the Design surface (near the mouse pointer in Figure 2-4).
⻬Or choose File ➪Close from the menu bar.
If you made any changes to the page since you last opened it, a dialog box asks if you want to save those changes. Choose Yes (unless you made a mess of things and don’t want to save your changes). The page disappears from the Design surface, but its name remains visible in Solution Explorer.
To open a page, just double-click its name in Solution Explorer. When the page is open, use the Design and Source buttons to choose how you want to view the page.
Creating and Using Folders
You can use folders to organize pages and other components in your Web site in much the same way you use folders in Windows to organize files. For exam-ple, you might want to create a folder for storing all the site’s pictures. To create a folder, follow these steps:
1. Make sure your site is open and go to the Solution Explorer pane.
2. Right-click the site name at the top of the Solution Explorer tree and choose New Folder, as shown in Figure 2-5.
3. Type in a new name for the folder, and then press Enter.
Figure 2-6 shows an example I created — a new folder named Images. I’ll use that folder to store some of the pictures for my Web site.
To rename a folder, right-click its icon in Solution Explorer, choose Rename, type in the new name, and press Enter.
Copying files to folders
You can create pages in any folder you wish within your site. But what about files you may have already created, such as pictures you intend to use on your site? Well, you can move or copy those from their current location into folders in Solution Explorer, using the drag-and-drop method.
For example, to copy a picture from your My Pictures folder into a folder, leave VWD open with your site folder open in Solution Explorer. Then just drag-and-drop any icon, or selected group of icons, from your My Pictures folder to the site folder in Solution Explorer.
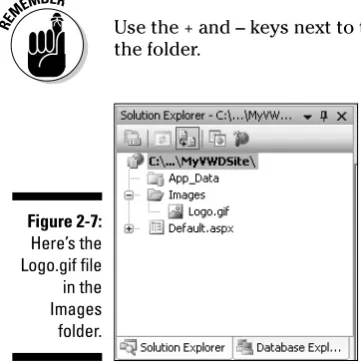
Figure 2-7 shows an example where I dragged a file named logo.giffrom the My Pictures folder to the Images folder in Solution Explorer. When the Images folder is expanded (showing a –mark instead of a +mark), the logo.giffile within that folder is visible.
Figure 2-6: A new regular folder named Images. Figure 2-5: Creating a folder.
Use the + and – keys next to the folder name to show or hide the contents of the folder.
If drag-and-drop isn’t your thing, you can copy and paste instead. For exam-ple, if you have some pictures in a folder that you need to use in a Web site, open that folder in Windows. To copy multiple pictures, select their icons using standard Windows techniques. Then right-click the picture’s icon (or any selected icon) and choose Copy. Then, in Solution Explorer, right-click the name of the folder into which you want to place the picture(s) and choose Paste.
Renaming and deleting folders
You can rename or delete any regular folder by using techniques similar to those in Windows:
⻬To rename a folder, right-click the folder, choose Rename, enter the new name, and press Enter.
⻬To delete a folder, right-click the folder name and choose Delete.
Editing Pages
To edit an existing page in VWD, you first need to open the page so it’s visible on the Design surface. To open a page, double-click its icon in Solution Explorer. When you open an .aspxpage (such as Default.aspx), you see the Design and Source buttons at the bottom of the Design surface, so you can switch between the two views.
Adding text to a page
As mentioned briefly in the preceding section, VWD allows you to edit an .aspxpage in either Design view (which shows what the page looks like in a browser) or Source view (raw HTML and ASP.NET). Typing and editing text in Design view is like typing and editing in Microsoft Word, FrontPage, or just about any other text editor or word processor: You click the page to get the cursor into position, and then type your text. Figure 2-8 shows an example where I typed the text Welcome to my siteon the (otherwise empty) Default.aspxpage.
All the standard text-editing tools and techniques work on the Design surface. For example, you can delete with the Backspace and Delete keys. You can select text by dragging the mouse pointer through the text, or by holding down the Shift key while positioning the cursor with the navigation keys. You can copy and paste text to or from the Design surface.
Selecting and formatting text
Selecting and formatting text works the same in VWD as it does in word pro-cessing programs. To format a chunk of text, first select(highlight) the text you want to format by dragging the mouse pointer through that text. Then choose a format option from the Formatting toolbar.
In Figure 2-9, for example, I selected the text Welcome to my siteso it’s highlighted. Then I clicked the Block Format button at the left side of the Formatting toolbar; the figure shows how the screen looks just before I click the Heading1 <H1>option.
Figure 2-8: Here’s some text
added to Default. aspx.
Undoing changes
As in most modern applications, you can undo the most recent changes you made to a page by using either of these methods:
⻬Choose Edit ➪Undo from the menu bar. ⻬Press Ctrl+Z.
⻬Click the Undo button in the Standard toolbar.
VWD has multiple levels of undo and redo, so you’re not limited to undoing only your most recent change. However, when you save a page, you “commit” all changes up to that point. Undo actually only reaches back as far as your last save.
Adding pictures
To add a picture to a page, first make sure you move or copy the original pic-ture into a folder in Solution Explorer. Make sure all the files that make up your Web site — including pictures — are in folders within Solution Explorer. Otherwise, when you upload your finished site to a Web server, the pictures won’t be included in the upload, which means that anyone trying to view a page that contains a picture will just see a red X where the picture should be.
To add a picture to a page, just drag its icon from its folder in Solution Explorer onto the page. Figure 2-10 shows an example where I dragged a picture named Logo.gifonto the page, from a folder named Images in Solution Explorer.
Block Format Formatting toolbar
Selected text Figure 2-9:
On the Design surface, the picture shows dragging handles(small squares along the border). If you don’t see the handles, click the picture to select it; they’ll show up. Then you can size the image by dragging any handle.
Changing properties
If you look around the room you’re in right now, you’ll probably see many physical objects — PC, keyboard, mouse, desk, and whatever else is in the room. No two objects are exactly alike. Instead each object has certain prop-erties such as size, shape, weight, purpose, and so forth that makes it unique.
Just about anything you add to a Web page is also an object.And (like objects in the real world) objects on Web pages have properties. An object’s proper-tiesare settings that define its characteristics — such as size, shape, location on the page, and so forth.
To see, and perhaps change, an object’s properties, just select (click) the object of interest and look at the Properties pane. Or, right-click the object and choose Properties. The item’s properties appear in its properties sheet,
which always shows in Visual Web Developer’s Properties pane.
Figure 2-11 shows an example where I’m viewing the properties for a picture. The <IMG>tag near the top of the Properties sheet is a reflection of the fact that, like all pictures in all Web sites, this particular picture is displayed by an HTML <IMG>tag.
To make the Properties sheet free-floating (as in Figure 2-11), choose Floating from its Window Position button. (See Chapter 1 for more details.)
Drag Handles
Figure 2-10: Dragging a picture’s icon onto the page.
HTML (Hypertext Markup Language) is a set of tags used to define the gen-eral format of items on a Web page. Visual Web Developer is a tool for people who already know that, and know what the HTML tags are. That’s why when you click on a picture and look at its Properties sheet, you see the term <IMG>in the properties sheet rather than the word picture.The assumption is you already know that <IMG>tags show pictures.
Different types of objects have different properties. The list of properties for an object may be long, so you may need to use the scrollbar at the right side of the list to see them all. Most properties can be changed by clicking the column to the right of the property name.
An object’s properties sheet provides ameans of tweaking optional settings for the object, but not the onlymeans. In fact, any settings that relate to the look and feel of the object on the page are best dealt with outside the proper-ties sheet through the Style Builder or CSS (Cascading Style Sheets), which are covered in Chapters 5 and 6.
To get to the Style Builder, right-click the item you want to style and choose Style.
Switching views
The Design view shown in the previous figures allows you to edit a Web page in a WYSIWYG (pronounced wizzy-wig— “what you see is what you get”) mode. In other words, what you see in the Design view is very similar to what a person visiting the page with a Web browser would see. That’s the way most people like to work.
Selected object
Properties Figure 2-11:
As mentioned earlier, there’s also a Source view for editing Web pages. To switch to Source view, click the Source button at the bottom of the Design surface. (To switch back to Design view, click the Design button at the bottom of the Design surface.)
The Source view shows the HTML tags (and other stuff) that VWD is creating behind the scenes as you create the page in the Design view. Whether or not any of that looks familiar depends on your familiarity with HTML.
Those of you who are familiar with HTML will recognize similarities between the tags and the content of the page. For example, if you switch to Source view while viewing the page in Figure 2-11, you might recognize the tags shown here:
<img src=”Images/Logo.gif” /> <h1>Welcome to my site</h1>
Dragging the logo.giffile onto the page created the <IMG>tag. Welcome to my siteis typed text. The <H1>and </H1>tags were added by selecting the typed text and choosing Heading 1 <H1>from the Block Format menu on the toolbar.
There’s rarely any need to work directly with HTML tags. So don’t get too uncomfortable looking at all the gibberish in the Source view. But for those of you who are familiar with HTML, I offer the following section.
Editing in Source view
If you’re familiar enough with HTML to work directly in the Source view, you’ll be able to take advantage of VWD’s IntelliSensetechnology. IntelliSense “looks at” what you’re typing, or have already typed, and provides menus of options representing valid HTML keywords relevant to the context in which you’re typing. I think an example will best illustrate.
Suppose you’re working in the Source view and want to insert an HTML tag. As soon as you type the opening angle bracket, <, a menu appears listing valid words you can type after the opening bracket, as in Figure 2-12.
When the IntelliSense menu appears, you have two choices. You can ignore it and just keep typing. Or you can scroll through the menu and double-click the word you want to insert next into the brackets.
If you enter the first tag of a pair, IntelliSense will usually add the closing tag for you automatically. For example, if you type <p>into the page in Source view, you’ll get <p></p>. The cursor lands between the two tags so you can type within the tags immediately.
When you use XHTML for validation, unpaired tags such as <img>and <br>must end with a slash and a closing angle bracket (/>). For example, <img.../>and <br/>. When you edit in the Design surface, the correct tags are created automatically. If you plan on writing HTML yourself, make sure you’re up on XHTML rules, which you can find online at www.w3.org/MarkUp.
If you’re not familiar with HTML and don’t quite get what value IntelliSense offers, don’t worry about it. For the most part, you can create Web sites in VWD by using simple drag-and-drop techniques and properties without typing any HTML at all.
All Web pages contain some HTML, even though you never see HTML tags in pages. That’s because your browser rendersthe HTML into what you see in your browser. For example, the HTML <b>Hello</b>renders as the word Helloin boldface, without the tags. If you use Internet Explorer as your Web browser, you can choose View➪Source from its menu bar to see the unren-dered HTML source page.
Saving your work
As soon as you start editing a page, you’ll notice that the tab that shows the page name at the top of the Design surface is boldfaced and shows an aster-isk, as in the example shown in Figure 2-13. The asterisk means “you’ve changed this page since you last saved it, and those changes have not yet been saved.” To save the page with your most recent edits, use whichever technique below is most convenient:
⻬Click the Save button in the toolbar (shown near the mouse pointer in Figure 2-13).
⻬Press Ctrl+S.
⻬Choose File ➪Save Pagenamefrom the menu bar (where Pagenameis the name of the page you’re editing).
Clicking the Save All button next to the Save button will do the trick too. As its name indicates, the Save All button saves all open pages.
If you attempt to close an edited page without saving it first, you’ll see a prompt asking whether you want to save your changes. You should choose Yes unless you’re sure you want to abandon all changes you’ve made since you last saved the page.
Dealing with code-behind files
Many .aspxpages have a corresponding code-behind file. These pages con-tain programming code that defines the behavior of the page, as opposed to any kind of visible content. The code in a code-behind page is written in whatever programming language you choose when first creating the Web site. In this book’s examples, that will always be the C# programming language.
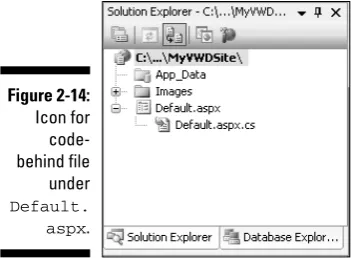
In Solution Explorer, any page that has a code-behind file shows a + sign next to its icon, or a minus sign with an icon for the code-behind file. The name of the code-behind file is the same as the name of the .aspxpage with a .cs extension added on, as in Figure 2-14. (The .csis for C#. If you use a different programming language, the extension will adjust accordingly, for example, .vbfor Visual Basic.)
Figure 2-14: Icon for code-behind file under Default. aspx.
Save button Asterisk
Figure 2-13: Changed page and Save button.
When you open a code-behind file you see code.There is no Design view for code, because a code-behind file can only contain code — computer instruc-tions written in a programming language like C# or Visual Basic. The code may look something like this:
using System; using System.Data;
using System.Configuration; using System.Web;
using System.Web.Security; using System.Web.UI;
using System.Web.UI.WebControls;
using System.Web.UI.WebControls.WebParts; using System.Web.UI.HtmlControls;
public partial class _Default : System.Web.UI.Page {
protected void Page_Load(object sender, EventArgs e) {
} }
The meaning of the code isn’t important at the moment. Suffice it to say that the code file is where the logicof a Web page resides, whereas HTML controls what appearson-screen when someone views the page through a Web browser. You’ll see examples of how that works in Chapter 9. Whether or not you’ll ever have to deal with code-behind pages depends on what you want your Web site to do — so don’t let all that gibberish in the code-behind page worry you.
To close a code-behind page, just click its Close (X) button near the upper-right corner of the Design surface.
Titling Pages
Every Web page has a page title that appears in the Web browser’s title bar when someone is viewing the page. That same title also shows up in links to the page from most search engines, like Google. In HTML, the title must be placed between <title>...</title>tags, which in turn must be inside the page’s <head>...</head>tags.
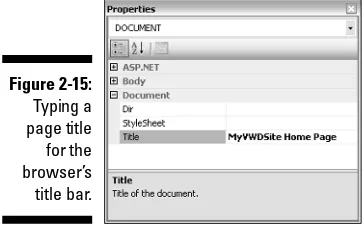
1. From the drop-down list at the top of the Properties sheet, choose
<DOCUMENT>.
2. Scroll to the bottom of the Properties sheet and type your page title as the Title property.
For example, in Figure 2-15, I’ve given the page the general title MyVWDSite Home Page.
You won’t see anything in the Design view of the page, because this title doesn’t show up on the Web page. In Source view, you’ll see the HTML required to show the page title:
<title>MyVWDSite Home Page</title>
The only other time you’ll see that title is when you view the page in a Web browser, where it appears in the title bar at the top of the Web browser’s pro-gram window. Which brings us to . . .
Viewing Pages in a Web Browser
The Design view of a page gives you a good sense of how the page will look in a Web browser. But it doesn’t always provide an exact view. To put your page to a real test, view the page in a Web browser. After all, when the site is up and running on a Web server, everyone who visits the site will be doing so through a Web browser.
To view, in a Web browser, the page you’re currently working on in Design or Source view in VWD, use whichever method below is most convenient for you:
⻬Right-click some empty space on the page and choose View In Browser.
⻬Click the View in Browser button in the toolbar (left side of Figure 2-16).
⻬Press Ctrl+F5.
Figure 2-15: Typing a page title
for the browser’s title bar.
If you want to view in a Web browser a page that isn’t currently open, right-click its name in Solution Explorer and choose View in Browser, as shown at the right side of Figure 2-16.
The page opens in a Web browser, mostly likely Microsoft Internet Explorer. Figure 2-17 shows the Default.aspxpage open in Internet Explorer. Note the page title, MyVWDSite Home Page, in the upper-left corner of the figure. That’s the only place that page title is actually visible on the screen.
The browser window will likely cover Visual Web Developer’s program window. To go back to designing your page, just close the Web browser by clicking the Close (X) button in its upper-right corner.
Opening and Closing Web Sites
Creating a Web site is no small feat, and it’s pretty unusual to accomplish much in a single sitting. So before I end this chapter, let’s take a quick look at managing Web sites as a whole.
When you’re in Visual Web Developer and working on a site, you can close the site without closing the program — handy if you’re working on multiple sites. To close the current Web site, choose File➪Close Project from VWD’s menu bar. (VWD often uses projectto mean Web site.)
When you first open VWD, you won’t be taken to your Web site automatically. Even so, you can easily open your site by any of the following methods:
⻬Click your site’s name under Recent Projects on the VWD Start Page.
⻬Choose File➪Recent Projects from the menu bar. Then click the name of the Web site you want to open.
⻬Choose File➪Open Web Site from the menu bar. When you choose this option, the Open Web Site dialog box opens. Click File System, then use the directory tree to navigate to the folder in which you placed your pro-ject (look for a regular folder icon with whatever name you entered when you created the site).
Whichever method you use to open your Web site, the folders and files appear in Solution Explorer exactly as you left them.
Chapter 3
Configuring a Membership Site
In This Chapter
䊳Configure your Web site for membership
䊳Create folders for members-only content
䊳Prevent anonymous users from accessing members-only content
䊳Create and manage user accounts
O
ne of Visual Web Developer’s best features is its ability to create a membership Web site with minimal fuss and muss. As the owner of a membership Web site, you can control who has access to what content. For example, you can have general content for anonymous users,people who just happen to wander into the site, and then you can have premium content for members only, where membersare people who have set up an account on your site.The basic idea is pretty simple. You create a folder, perhaps named Member-Pages, where you put all members-only content. Then you set up a role, per-haps named SiteMembers. Finally, you create a rule that says “anonymous users cannot access content in the MemberPages folder; only people in the SiteMember role can access pages in the MemberPages folder.” In other words, if someone who just happens to visit your site wants to see your spe-cial content, that person must first join your site by setting up a user account.
Creating a Folder for Members-Only
Content
The first step to setting up a membership site is to decide how you’re going to organize your content. You’ll likely want some of your site’s content to be available to anonymous users.An anonymous user is anyone who visits the site without creating or logging into an account on your site.
To keep the privileged members-only content separate from the general con-tent, you need a folder, perhaps named MemberPages. Keep all your privi-leged content in the MemberPages folder. Keep general content out of that folder. The MemberPages folder can be just a regular folder in which you store pages.
To create a folder in Visual Web Developer, right-click the site name at the top of Solution Explorer and choose New Folder. Then type the folder name and press Enter. Figure 3-1 shows an example where I’ve added a new, regular folder named MemberPages. As its name implies, the MemberPages folder will (eventually) contain pages that only site members can access.
There is nothing special about the MemberPages folder. It’s just an empty folder in which you can store pages. If you want to use that MemberPages folder to store privileged members-only content, you need some means of distinguishing between site members and the general riff-raff (anonymous users). In other words, your site needs an infrastructure that can store information about site members, allow site members to log into their user accounts, and so forth. To create that infrastructure, you use the Web Site Administration Tool.
Using the Web Site Administration Tool
The Web Site Administration tool, often abbreviated WAT, is the tool you use to administer access to pages within your Web site. To start the tool, follow these steps:
1. If you haven’t already done so, start Visual Web Developer and open your Web site.
2. Choose Website➪ASP.NET Configuration from the menu bar. The tool opens in a Web browser like the one in Figure 3-2.