Implementing Splunk: Big Data
Reporting and Development for
Operational Intelligence
Learn to transform your machine data into valuable
IT and business insights with this comprehensive
and practical tutorial
Vincent Bumgarner
Implementing Splunk: Big Data Reporting and
Development for Operational Intelligence
Copyright © 2013 Packt Publishing
All rights reserved. No part of this book may be reproduced, stored in a retrieval system, or transmitted in any form or by any means, without the prior written permission of the publisher, except in the case of brief quotations embedded in critical articles or reviews.
Every effort has been made in the preparation of this book to ensure the accuracy of the information presented. However, the information contained in this book is sold without warranty, either express or implied. Neither the author, nor Packt Publishing, and its dealers and distributors will be held liable for any damages caused or alleged to be caused directly or indirectly by this book.
Packt Publishing has endeavored to provide trademark information about all of the companies and products mentioned in this book by the appropriate use of capitals. However, Packt Publishing cannot guarantee the accuracy of this information.
First published: January 2013
Production Reference: 1140113
Published by Packt Publishing Ltd. Livery Place
35 Livery Street
Birmingham B3 2PB, UK.
ISBN 978-1-84969-328-8
www.packtpub.com
About the Author
Vincent Bumgarner
has been designing software for nearly 20 years, working in many languages on nearly as many platforms. He started using Splunk in 2007 and has enjoyed watching the product evolve over the years.While working for Splunk, he helped many companies, training dozens of users to drive, extend, and administer this extremely flexible product. At least one person at every company he worked with asked for a book on Splunk, and he hopes his effort helps fill their shelves.
About the Reviewers
Mathieu Dessus
is a security consultant for Verizon in France and acts as the SIEM leader for EMEA. With more than 12 years of experience in the security area, he has acquired a deep technical background in the management, design, assessment, and systems integration of information security technologies. He specializes in web security, Unix, SIEM, and security architecture design.Cindy McCririe
is a client architect at Splunk. In this role, she has worked with several of Splunk's enterprise customers, ensuring successful deployment of the technology. Many of these customers are using Splunk in unique ways. Sample use cases include PCI compliance, security, operations management, business intelligence, Dev/Ops, and transaction profiling.www.PacktPub.com
Support files, eBooks, discount offers and
more
You might want to visit www.PacktPub.com for support files and downloads related to your book.
Did you know that Packt offers eBook versions of every book published, with PDF and ePub files available? You can upgrade to the eBook version at www.PacktPub. com and as a print book customer, you are entitled to a discount on the eBook copy. Get in touch with us at [email protected] for more details.
At www.PacktPub.com, you can also read a collection of free technical articles, sign up for a range of free newsletters and receive exclusive discounts and offers on Packt books and eBooks.
http://PacktLib.PacktPub.com
Do you need instant solutions to your IT questions? PacktLib is Packt's online digital book library. Here, you can access, read and search across Packt's entire library of books.
Why Subscribe?
• Fully searchable across every book published by Packt • Copy and paste, print and bookmark content
• On demand and accessible via web browser
Free Access for Packt account holders
Table of Contents
Preface 1
Chapter 1: The Splunk Interface
7
Logging in to Splunk 7
The Home app 8
The top bar 11
Search app 13
Data generator 13
The Summary view 14
Search 16 Actions 17 Timeline 18
The field picker 19
Fields 19
Search results 21
Options 22
Events viewer 23
Using the time picker 25
Using the field picker 26
Using Manager 27
Summary 29
Chapter 2: Understanding Search
31
Using search terms effectively 31
Boolean and grouping operators 32
Clicking to modify your search 34
Event segmentation 34
Field widgets 34
Using fields to search 35
Using the field picker 35
Using wildcards efficiently 36
Only trailing wildcards are efficient 36
Wildcards are tested last 36
Supplementing wildcards in fields 37
All about time 37
How Splunk parses time 37
How Splunk stores time 37
How Splunk displays time 38
How time zones are determined and why it matters 38
Different ways to search against time 39
Specifying time in-line in your search 41
_indextime versus _time 42
Making searches faster 42
Sharing results with others 43
Saving searches for reuse 46
Creating alerts from searches 48
Schedule 49
Actions 51 Summary 52
Chapter 3: Tables, Charts, and Fields
53
About the pipe symbol 53
Using top to show common field values 54
Controlling the output of top 56
Using stats to aggregate values 57
Using chart to turn data 61
Using timechart to show values over time 63
timechart options 65
Working with fields 66
A regular expression primer 66
Commands that create fields 68
eval 68
rex 69
Extracting loglevel 70
Using the Extract Fields interface 70
Using rex to prototype a field 73
Using the admin interface to build a field 75
Indexed fields versus extracted fields 77
Chapter 4: Simple XML Dashboards
81
The purpose of dashboards 81
Using wizards to build dashboards 82
Scheduling the generation of dashboards 91
Editing the XML directly 91
UI Examples app 92
Building forms 92
Creating a form from a dashboard 92
Driving multiple panels from one form 97
Post-processing search results 104
Post-processing limitations 106
Chapter 5: Advanced Search Examples
111
Using subsearches to find loosely related events 111
Subsearch 111
Subsearch caveats 112
Nested subsearches 113
Using transaction 114
Using transaction to determine the session length 115 Calculating the aggregate of transaction statistics 117
Combining subsearches with transaction 118
Determining concurrency 122
Using transaction with concurrency 122
Using concurrency to estimate server load 123
Calculating concurrency with a by clause 124
Calculating events per slice of time 129
Using timechart 129
Calculating average requests per minute 131
Calculating average events per minute, per hour 132
Rebuilding top 134
Summary 141
Chapter 6: Extending Search
143
Using tags to simplify search 143
Using event types to categorize results 146
Using lookups to enrich data 150
Defining a lookup definition 152
Defining an automatic lookup 154
Troubleshooting lookups 157
Using macros to reuse logic 157
Creating a simple macro 158
Creating a macro with arguments 159
Using eval to build a macro 160
Creating workflow actions 160
Running a new search using values from an event 161
Linking to an external site 163
Building a workflow action to show field context 165
Building the context workflow action 165
Building the context macro 167
Using external commands 170
Extracting values from XML 170
xmlkv 170 XPath 171
Using Google to generate results 172
Summary 172
Chapter 7: Working with Apps
173
Defining an app 173
Included apps 174
Installing apps 175
Installing apps from Splunkbase 175
Using Geo Location Lookup Script 176
Using Google Maps 178
Installing apps from a file 178
Building your first app 179
Editing navigation 182
Customizing the appearance of your app 184
Customizing the launcher icon 185
Using custom CSS 185
Using custom HTML 187
Custom HTML in a simple dashboard 187
Using ServerSideInclude in a complex dashboard 188
Object permissions 191
How permissions affect navigation 192
How permissions affect other objects 192
Correcting permission problems 193
Adding your app to Splunkbase 196
Preparing your app 196
Confirming sharing settings 196
Cleaning up our directories 197
Packaging your app 198
Uploading your app 199
Summary 200
Chapter 8: Building Advanced Dashboards
201
Reasons for working with advanced XML 201
Reasons for not working with advanced XML 202
Development process 202
Advanced XML structure 203
Converting simple XML to advanced XML 205
Module logic flow 210
Understanding layoutPanel 213
Panel placement 214
Reusing a query 215
Using intentions 217
stringreplace 217 addterm 218
Creating a custom drilldown 219
Building a drilldown to a custom query 219
Building a drilldown to another panel 222
Building a drilldown to multiple panels using HiddenPostProcess 224
Third-party add-ons 228
Google Maps 228
Sideview Utils 230
The Sideview Search module 231
Linking views with Sideview 232
Sideview URLLoader 232
Sideview forms 235
Summary 241
Chapter 9: Summary Indexes and CSV Files
243
Understanding summary indexes 243
Creating a summary index 244
When to use a summary index 245
When to not use a summary index 246
Populating summary indexes with saved searches 247
Using summary index events in a query 249
How latency affects summary queries 254
How and when to backfill summary data 256
Using fill_summary_index.py to backfill 256
Using collect to produce custom summary indexes 258
Reducing summary index size 261
Using eval and rex to define grouping fields 262
Using a lookup with wildcards 264
Using event types to group results 267
Calculating top for a large time frame 269
Storing raw events in a summary index 273
Using CSV files to store transient data 275
Pre-populating a dropdown 276
Creating a running calculation for a day 276
Summary 278
Chapter 10: Configuring Splunk
279
Locating Splunk configuration files 279
The structure of a Splunk configuration file 280
Configuration merging logic 281
Merging order 281
Merging order outside of search 281
Merging order when searching 282
Configuration merging logic 283
Configuration merging example 1 284
Configuration merging example 2 284
Configuration merging example 3 285
Configuration merging example 4 (search) 288
Using btool 290
An overview of Splunk .conf files 292
props.conf 292
Common attributes 292
Stanza types 296
Priorities inside a type 298
Attributes with class 299
inputs.conf 300
Common input attributes 300
Files as inputs 301
Network inputs 306
Native Windows inputs 308
Scripts as inputs 309
transforms.conf 310
Creating indexed fields 310
Modifying metadata fields 312
Lookup definitions 315
Chaining transforms 320
User interface resources 326
Views and navigation 326
Appserver resources 327
Metadata 328 Summary 331
Chapter 11: Advanced Deployments
333
Planning your installation 333
Splunk instance types 334
Splunk forwarders 334
Splunk indexer 336
Splunk search 337
Common data sources 337
Monitoring logs on servers 337
Monitoring logs on a shared drive 338
Consuming logs in batch 339
Receiving syslog events 340
Receiving events directly on the Splunk indexer 340
Using a native syslog receiver 341
Receiving syslog with a Splunk forwarder 343
Consuming logs from a database 343
Using scripts to gather data 345
Sizing indexers 345
Planning redundancy 348
Indexer load balancing 348
Understanding typical outages 349
Working with multiple indexes 350
Directory structure of an index 350
When to create more indexes 351
Testing data 351
Differing longevity 351
Differing permissions 352
The lifecycle of a bucket 354
Sizing an index 355
Using volumes to manage multiple indexes 356
Deploying the Splunk binary 358
Deploying from a tar file 359
Deploying using msiexec 359
Adding a base configuration 360
Configuring Splunk to launch at boot 360
Using apps to organize configuration 361
Separate configurations by purpose 361
Configuration distribution 366
Using your own deployment system 366
Using Splunk deployment server 367
Step 1 – Deciding where your deployment server will run 367 Step 2 – Defining your deploymentclient.conf configuration 368
Step 3 – Defining our machine types and locations 368
Step 4 – Normalizing our configurations into apps appropriately 369 Step 5 – Mapping these apps to deployment clients in serverclass.conf 369 Step 6 – Restarting the deployment server 373 Step 7 – Installing deploymentclient.conf 373
Using LDAP for authentication 374
Using Single Sign On 375
Load balancers and Splunk 376
web 376 splunktcp 376
deployment server 377
Multiple search heads 377
Summary 378
Chapter 12: Extending Splunk
379
Writing a scripted input to gather data 379
Capturing script output with no date 380
Capturing script output as a single event 382
Making a long-running scripted input 384
Using Splunk from the command line 385
Querying Splunk via REST 387
Writing commands 390
When not to write a command 390
When to write a command 392
Configuring commands 392
Adding fields 393
Transforming data 396
Generating data 401
Writing a scripted lookup to enrich data 403
Writing an event renderer 406
Using specific fields 406
Table of fields based on field value 408
Pretty print XML 411
Writing a scripted alert action to process results 413
Summary 416
Preface
Splunk is a powerful tool for collecting, storing, alerting, reporting, and studying machine data. This machine data usually comes from server logs, but it could also be collected from other sources. Splunk is by far the most flexible and scalable solution available to tackle the huge problem of making machine data useful.
The goal of this book is to serve as an organized and curated guide to Splunk 4.3. As the documentation and community resources available for Splunk are vast, finding the important pieces of knowledge can be daunting at times. My goal is to present what is needed for an effective implementation of Splunk in as concise and useful a manner as possible.
What this book covers
Chapter 1, The Splunk Interface, walks the reader through the user interface elements.
Chapter 2, Understanding Search, covers the basics of the search language, paying particular attention to writing efficient queries.
Chapter 3, Tables, Charts, and Fields, shows how to use fields for reporting, then covers the process of building our own fields.
Chapter 4, Simple XML Dashboards, first uses the Splunk web interface to build our first dashboards. It then examines how to build forms and more efficient dashboards.
Chapter 5, Advanced Search Examples, walks the reader through examples of using Splunk's powerful search language in interesting ways.
Chapter 7, Working with Apps, covers the concepts of an app, helps you install a couple of popular apps, and then helps you build your own app.
Chapter 8, Building Advanced Dashboards, explains the concepts of advanced XML dashboards, and covers practical ways to transition from simple XML to advanced XML dashboards.
Chapter 9, Summary Indexes and CSV Files, introduces the concept of summary indexes, and how they can be used to increase performance. It also discusses how CSV files can be used in interesting ways.
Chapter 10, Configuring Splunk, explains the structure and meaning of common configurations in Splunk. It also explains the process of merging configurations in great detail.
Chapter 11, Advanced Deployments, covers common questions about multimachine Splunk deployments, including data inputs, syslog, configuration management, and scaling up.
Chapter 12, Extending Splunk, demonstrates ways in which code can be used to extend Splunk for data input, external querying, rendering, custom commands, and custom actions.
What you need for this book
To work through the examples in this book, you will need an installation of Splunk, preferably a non-production instance. If you are already working with Splunk, then the concepts introduced by the examples should be applicable to your own data.
Splunk can be downloaded for free from http://www.splunk.com/download, for most popular platforms.
Who this book is for
This book should be useful for new users, seasoned users, dashboard designers, and system administrators alike. This book does not try to act as a replacement for the official Splunk documentation, but should serve as a shortcut for many concepts.
For some sections, a good understanding of regular expressions would be helpful. For some sections, the ability to read Python would be helpful.
Conventions
In this book, you will find a number of styles of text that distinguish between different kinds of information. Here are some examples of these styles, and an explanation of their meaning.
Code words in text are shown as follows: "If a field value looks like key=value in the text of an event, you will want to use one of the field widgets."
A block of code is set as follows:
index=myapplicationindex
When we wish to draw your attention to a particular part of a code block, the relevant lines or items are set in bold:
<searchPostProcess>
timechart span=1h sum(count) as "Error count" by network
</searchPostProcess>
<title>Dashboard - Errors - errors by network timechart</title>
Any command-line input or output is written as follows:
New terms and important words are shown in bold. Words that you see on the screen, in menus or dialog boxes for example, appear in the text like this: "Quickly create a simple dashboard using the wizard interface that we used before, by selecting Create | Dashboard Panel."
Warnings or important notes appear in a box like this.
Tips and tricks appear like this.
Reader feedback
Feedback from our readers is always welcome. Let us know what you think about this book—what you liked or may have disliked. Reader feedback is important for us to develop titles that you really get the most out of.
To send us general feedback, simply send an e-mail to [email protected], and mention the book title via the subject of your message.
If there is a topic that you have expertise in and you are interested in either writing or contributing to a book, see our author guide on www.packtpub.com/authors.
Customer support
Now that you are the proud owner of a Packt book, we have a number of things to help you to get the most from your purchase.
Downloading the example code
Errata
Although we have taken every care to ensure the accuracy of our content, mistakes do happen. If you find a mistake in one of our books—maybe a mistake in the text or the code—we would be grateful if you would report this to us. By doing so, you can save other readers from frustration and help us improve subsequent versions of this book. If you find any errata, please report them by visiting http://www.packtpub. com/support, selecting your book, clicking on the erratasubmissionform link, and entering the details of your errata. Once your errata are verified, your submission will be accepted and the errata will be uploaded on our website, or added to any list of existing errata, under the Errata section of that title. Any existing errata can be viewed by selecting your title from http://www.packtpub.com/support.
Piracy
Piracy of copyright material on the Internet is an ongoing problem across all media. At Packt, we take the protection of our copyright and licenses very seriously. If you come across any illegal copies of our works, in any form, on the Internet, please provide us with the location address or website name immediately so that we can pursue a remedy.
Please contact us at [email protected] with a link to the suspected pirated material.
We appreciate your help in protecting our authors, and our ability to bring you valuable content.
Questions
The Splunk Interface
This chapter will walk you through the most common elements in the Splunk interface, and will touch upon concepts that are covered in greater detail in later chapters. You may want to dive right into search, but an overview of the user interface elements might save you some frustration later. We will walk through:
• Logging in and app selection
• A detailed explanation of the search interface widgets • A quick overview of the admin interface
Logging in to Splunk
The Splunk interface is web-based, which means that no client needs to be installed. Newer browsers with fast Javascript engines, such as Chrome, Firefox, and Safari, work better with the interface.
As of Splunk Version 4.3, no browser extensions are required. Splunk Versions 4.2 and earlier require Flash to render graphs. Flash can still be used by older browsers, or for older apps that reference Flash explicitly.
The default port for a Splunk installation is 8000. The address will look like
Once you determine the address, the first page you will see is the login screen.
The default username is admin with the password changeme. The first time you log in, you will be prompted to change the password for the admin user. It is a good idea to change this password to prevent unwanted changes to your deployment.
By default, accounts are configured and stored within Splunk. Authentication can be configured to use another system, for instance LDAP.
The Home app
The Your Apps section shows the apps that have GUI elements on your instance of Splunk.
App is an overloaded term in Splunk. An app doesn't necessarily have
a GUI at all; it is simply a collection of configurations wrapped into a
directory structure that means something to Splunk. We will discuss apps in a more detailed manner in Chapter 7, Working with Apps.
Under Do more with Splunk, we find:
• Add data: This links to the Add Data to Splunk page. This interface is a great start for getting local data flowing into Splunk. The new Preview data
interface takes an enormous amount of complexity out of configuring dates and line breaking. We won't go through those interfaces here, but we will go through the configuration files that these wizards produce in Chapter 10, Configuring Splunk.
• Find more apps: This allows you to find and install more apps from Splunkbase. Splunkbase (http://splunk-base.splunk.com/) is a very useful community-driven resource where Splunk users and Splunk employees post questions, answers, code snippets, and apps.
Manage Splunk takes the user to the Manager section of Splunk. The Manager
section is used to configure most aspects of Splunk. The options provided change depending on the capabilities of the user. We will use the Manager section throughout the book as we learn about different objects.
Getting started tutorial provides a quick but thorough overview of the major functionality of Splunk.
Splunk documentation takes you to the official Splunk documentation.
Two quick notes about the Splunk documentation:
To get to documentation for search and reporting commands, quick help is provided while searching, and a link to the documentation for that command is provided through the interface.
When working directly with configuration files, the fastest route to the documentation for that file is to search for splunk name.conf
using your favorite search engine. The documentation is almost
always the first link.
Splunk answers goes to the Splunkbase site we just mentioned. Splunkbase and Splunk Answers used to be different sites but were merged into one site.
The top bar
The bar across the top of the window contains information about where you are as well as quick links to preferences, other apps, and administration.
The current app is specified in the upper-left corner.
The upper-right corner of the window contains action links that are almost always available:
• The name of the user that is currently logged in appears first. In this case, the user is Administrator. Clicking on the username takes you to the Your account page.
• The App menu provides quick links to installed apps and to app administration. Only apps with GUI components that the current user has permissions to see will be listed in this menu.
• The Manager link is always available at the top of the window. The availability of options on the Manager page is controlled by the role of the user.
• The Jobs link pops up the Jobs window. The Jobs window provides a listing of current and past search jobs that have been run on this Splunk instance. It is useful for retrieving past results as well as determining what searches are using resources. We will discuss this interface in detail in Chapter 2, Understanding Search.
• Logout ends the session and forces the user to log in again.
This form presents the global preferences that a user is allowed to change. Other settings that affect users are configured through permissions on objects and settings on roles.
• Full name and Email address are stored for the administrator's convenience. • Time zone can be changed for each user. This is a new feature in Splunk 4.3.
Setting the time zone only affects the time zone used to display the data. It is very important that the date is parsed properly when events are indexed. We will discuss this in detail in Chapter 2, Understanding Search.
• Default app controls where you first land after login. Most users will want to change this to search.
• Restart backgrounded jobs controls whether unfinished queries should
run again if Splunk is restarted.
• Set password allows you to change your password. This is only relevant if Splunk is configured to use internal authentication. For instance, if the system is configured to use Windows Active Directory via LDAP (a very common configuration), users must change their password in Windows.
Search app
The search app is where most actions in Splunk start.
Data generator
If you want to follow the examples that appear in the next few chapters, install the ImplementingSplunkDataGenerator demo app by following these steps:
1. Download ImplementingSplunkDataGenerator.tar.gz from the code bundle available on the site http://www.packtpub.com/support.
2. Choose Manage apps… from the Apps menu. 3. Click on the button labeled Install app from file.
4. Click on Choose File, select the file, and then click on Upload.
This data generator app will produce about 16 megabytes of output per day. The app can be disabled so that it stops producing data by using Manage apps…, under the
The Summary view
The user is initially presented with the Summary view, which contains information about what data that user searches by default. This is an important distinction—in a mature Splunk installation, not all users will always search all data by default.
Let's start below the app name and discuss all the new widgets. The first widget is the navigation bar.
Next we find the search bar. This is where the magic starts. We'll go into great detail shortly.
The All indexed data panel shows statistics for all indexed data. Remember that this only reflects indexes that this particular user searches by default. There are other events that are indexed by Splunk, including events Splunk indexes about itself. We will discuss indexes in Chapter 9, Building Advanced Dashboards.
The next three panels give a breakdown of your data using three important pieces of metadata—source, sourcetype, and host.
A source in Splunk is a unique path or name. In a large installation, there may be thousands of machines submitting data, but all data at the same path across these machines counts as one source. When the data source is not a file, the value of the source can be arbitrary, for instance the name of a script or network port.
A host is a captured hostname for an event. In majority of the cases, the host field is
set to the name of the machine where the data originated. There are cases where this is not known, so the host can also be configured arbitrarily.
Search
We've finally made it to search. This is where the real power of Splunk lies.
For our first search, we will search for the word error. Click in the search bar, type the word error, and then either press Enter or click on the magnifying glass on the right of the bar.
Note that the URL in the browser has changed to flashtimeline.
You may see references to flashtimeline from time to time. It is
simply another name for the search interface.
See the Using the time picker section for details on changing the time frame of your search.
Actions
Let's inspect the elements on this page. Below the search bar itself, we have the event count, actions icons, and menus.
Starting at the left, we have:
• The number of events matched by the base search. Technically, this may not be the number of results pulled from disk, depending on your search. Also, if your query uses commands, this number may not match what is shown in the event listing.
• Send to background ( ), which sends the currently running search to the background, where it will continue to run. Jobs sent to the background and past jobs can be restored from the Jobs window.
• Pause ( ), which causes the current search to stop locating events but keeps the job open. This is useful if you want to inspect the current results to determine whether you want to continue a long running search.
• Finalize ( ), which stops the execution of the current search but keeps the results generated so far. This is useful when you have found enough and want to inspect or share the results found so far.
• Cancel ( ), which stops the execution of the current search and immediately deletes the results.
• Job Inspector ( ), which opens the Search job inspector window, which provides very detailed information about the query that was run.
• Save, which provides different options for saving the search or the results. We will discuss this later in this chapter.
• Create, which provides wizard-like interfaces for building different objects from this search. We will discuss these options in Chapter 4, Simple XML Dashboards.
Timeline
Below the actions icons, we have the timeline.
Along with providing a quick overview of the event distribution over a period of time, the timeline is also a very useful tool for selecting sections of time. Placing the pointer over the timeline displays a pop up for the number of events in that slice of time. Clicking on the timeline selects the events for a particular slice of time.
Clicking and dragging selects a range of time.
Once you have selected a period of time, clicking on Zoom to selection changes the time frame and re-runs the search for that specific slice of time. Repeating this process is an effective way to drill down to specific events.
Deselect shows all events for the time range selected in the time picker.
The field picker
To the left of the search results, we find the field picker. This is a great tool for discovering patterns and filtering search results.
Fields
The fields list contains two lists:
• Selected fields, which have their values displayed under the search event in the search results
Search results
We are almost through all of the widgets on the page. We still have a number of items to cover in the search results section though, just to be thorough.
Starting at the top of this section, we have the number of events displayed. When viewing all results in their raw form, this number will match the number above the timeline. This value can be changed either by making a selection on the timeline or by using other search commands.
Next, we have actions that affect these particular results. Starting at the left we have:
• Events List ( ), which will show the raw events. This is the default view when running a simple search, as we have done so far.
• Results Chart ( ), which shows a chart, if the data allows. For simple searches, charts don't make sense, but they are very useful for reporting. • Export, which allows you to export these particular results to CSV,
Raw events, XML, or JSON. New to Splunk 4.3 is the ability to export an unlimited number of results from the web interface.
• Options presents display options for the event viewer. See the following section for a discussion about these options.
• To the right, you can choose a page of results and change the number of events per page.
Options
• Wrap results controls whether events are wrapped at the right edge of the browser window.
• Display row numbers toggles the display of the row number to the left of each event.
• Lines per event changes the maximum number of lines of an event displayed in the browser per event. There are a few things to note here:
° All lines of the event are indexed and searchable
° If the value for this setting is too large, and if a search returns many large messages, your browser may have trouble rendering what it is told to display
° Events with many lines will have a link at the bottom to see more lines in the event
• The most interesting option here is Event segmentation. This setting changes what text is highlighted as you mouse over events. We will discuss this further in Chapter 2, Understanding Search.
Events viewer
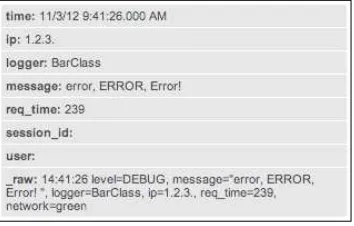
Finally, we make it to the actual events. Let's examine a single event.
Starting at the left, we have:
• The event number: Raw search results are always returned in the order "most recent first".
• The event options menu ( ): This menu contains workflow actions, a few of which are always available.
° Build Eventtype: Event types are a way to name events that match a certain query. We will dive into event types in Chapter 6, Extending Search.
° Extract Fields: This launches an interface for creating custom field extractions. We will cover field extraction in Chapter 3, Tables, Charts, and Fields.
° Next appear any workflow actions that have been configured. Workflow actions let you create new searches or links to other sites using data from an event. We will discuss workflow actions in Chapter 6, Extending Search.
• Next comes the parsed date from this event, displayed in the time zone selected by the user. This is an important and often confusing distinction. In most installations, everything is in one time zone—the servers, the user, and the events. When one of these three things is not in the same time zone as the others, things can get confusing. We will discuss time in great detail in Chapter 2, Understanding Search.
• Next, we see the raw event itself. This is what Splunk saw as an event. With no help, Splunk can do a good job finding the date and breaking lines appropriately, but as we will see later, with a little help, event parsing can be more reliable and more efficient.
• Below the event are the fields that were selected in the field picker. Clicking on the value adds the field value to the search. Each field value also has a menu:
° Tag fieldname=value allows you to create a tag that can be used for classification of events. We will discuss tags in Chapter 6, Extending Search.
° Report on field launches a wizard showingv the values of this field over time.
Using the time picker
Now that we've looked through all of the widgets, let's use them to modify our search. First we will change our time. The default setting of All time is fine when
there are few events, but when Splunk has been gathering events for weeks or months, this is less than optimal. Let's change our search time to one hour.
The search will run again, and now we only see results for the last hour. Let's try a custom time. Date is the first option.
If you know specifically when an event happened, you can drill down to whatever time range you want here. We will examine the other options in Chapter 2, Understanding Search.
Using the field picker
The field picker is very useful for investigating and navigating data. Clicking on any field in the field picker pops open a panel with a wealth of information about that field in the results of your search.
Looking through the information, we observe:
• Appears in X% of results tells you how many events contain a value for this field.
• Show only events with this field will modify the query to only show events that have this field defined.
• Select and show in resultsis a shortcut for adding a field to your
selected fields.
• Top values by time and Top values overall present graphs about the data in this search. This is a great way to dive into reporting and graphing. We will use this as a launching point later.
• The chart below the links is actually a quick representation of the top values overall. Clicking on a value adds that value to the query. Let's click on mary.
Using Manager
The Manager section, in a nutshell, is an interface for managing configuration files.
The number of files and options in these configuration files is truly daunting, so the web interface concentrates on the most commonly used options across the different configuration types.
Splunk is controlled exclusively by plain text configuration files. Feel free to take a look at the configuration files that are being modified as you make changes in the admin interface. You will find them in $SPLUNK_ HOME/etc/system/local/ and $SPLUNK_HOME/etc/apps/.
You may notice configuration files with the same name in different locations. We will cover, in detail, the different configuration files, their purposes, and how these configurations merge together, in Chapter 10,
Configuring Splunk. Don't start modifying the configurations directly until
you understand what they do and how they merge.
The options are organized into logical groupings, as follows:
• Apps: This interface allows you to easily add new apps and manage apps that are currently installed. If you installed the ImplementingSplunkDataGenerator app, you have already seen this interface.
• Knowledge: Each of the links under Knowledge allows you to control one of the many object types that are used at search time. The following screenshot shows an example of one object type, workflow actions.
Let's cover the administration of each object type that we will cover in later chapters:
• System: The options under this section control system-wide settings.
° System settings covers network settings, the default location to store indexes, outbound e-mail server settings, and how much data Splunk logs about itself
° Server controls contains a single page that lets you restart Splunk from the web interface
° Licensing lets you add license files or configure Splunk as a slave to a Splunk license server
• Data: This section is where you manage data flow.
° Data Inputs: Splunk can receive data by reading files (either in batch mode or in real time), listening to network ports, or running scripts • Forwarding and receiving: Splunk instances don't typically stand
° Indexes: An Index is essentially a datastore. Under the covers, it is simply a set of directories, created and managed by Splunk. For small installations, a single index is usually acceptable. For larger installations, using multiple indexes allows flexibility in security, retention, and performance tuning, and better use of hardware. We will discuss this further in Chapter 10, Configuring Splunk.
• Deployment: The two options here relate to distributed deployments. (we will cover these options in detail in Chapter 11, Advanced Deployments):
° Distributed Search: Any Splunk instance running searches can utilize itself and other Splunk instances to retrieve results. This interface allows you to configure access to other Splunk instances.
° Deployment: Splunk includes a deployment server component to aid in distributing configurations to the many instances that can be involved in a distributed installation. There is no need to use the deployment server, particularly if you already have something to manage configurations.
• Users and authentication: This section provides authentication controls and an account link.
° Access controls: This section is for controlling how Splunk authenticates users and what users are allowed to see and do. We will discuss this further in Chapter 10, Configuring Splunk.
° Your account: We saw this earlier when we clicked on the name of the user currently logged in on the top bar.
Summary
As you have seen in this chapter, the Splunk GUI provides a rich interface for working with search results. We have really only scratched the surface and will cover more elements as we use them in later chapters.
Understanding Search
To successfully use Splunk, it is vital that you write effective searches. Using the index efficiently will make your initial discoveries faster, and the reports you create will run faster for you and others. In this chapter, we will cover:
• How to write effective searches • How to search using fields • Understanding time
• Saving and sharing searches
Using search terms effectively
The key to creating an effective search is to take advantage of the index. Splunk's index is effectively a huge word index, sliced by time. The single most important factor for the performance of your searches is how many events are
pulled from disk. The following few key points should be committed to memory:
• Search terms are case insensitive: Searches for error, Error, ERROR, and ErRoR are all the same thing.
• Search terms are additive: Given the search item mary error, only events that contain both words will be found. There are Boolean and grouping operators to change this behavior; we will discuss these later.
• Only the time frame specified is queried: This may seem obvious, but it's a big difference from a database, which would always have a single index across all events in a table. Since each index is sliced into new buckets over time, only the buckets that contain events for the time frame in question need to be queried.
With just these concepts, you can write fairly effective searches. Let's dig a little deeper, though:
• A word is anything surrounded by whitespace or punctuation: For instance, given the log line 2012-02-07T01:03:31.104-0600 INFO AuthClass Hello world. [user=Bobby, ip=1.2.3.3], the "words" indexed are 2012, 02, 07T01, 03, 31, 104, 0600, INFO, AuthClass, Hello, world, user, Bobby, ip, 1, 2, 3, and 3. This may seem strange, and possibly a bit wasteful, but this is what Splunk's index is really really good at—dealing with huge numbers of words across huge numbers of events.
• Splunk is not grep with an interface: One of the most common questions is whether Splunk uses regular expressions for search. Technically, the answer is no, but most of what you would do with regular expressions is available in other ways. Using the index as it is designed is the best way to build fast searches. Regular expressions can then be used to further filter results or extract fields.
• Numbers are not numbers until after they have been parsed at search time: This means that searching for foo>5 will not use the index as the value of foo is not known until it has been parsed out of the event at search time. There are different ways to deal with this behavior, depending on the question you're trying to answer.
• Field names are case sensitive: When searching for host=myhost, host must be lowercase. Likewise, any extracted or configured fields have case sensitive field names, but the values are case insensitive.
° Host=myhost will not work
° host=myhost will work
° host=MyHost will work
• Fields do not have to be defined before indexing data: An indexed field is a field that is added to the metadata of an event at index time. There are legitimate reasons to define indexed fields, but in the vast majority of cases it is unnecessary and is actually wasteful. We will discuss this in Chapter 3, Tables, Charts, and Fields.
Boolean and grouping operators
There are a few operators that you can use to refine your searches (note that these operators must be in uppercase to not be considered search terms):
• OR allows you to specify multiple values. error OR mary means "find any event that contains either word".
• NOT applies to the next term or group. error NOT mary would find events that contain error but do not contain mary.
• "" identifies a phrase. "Out of this world" will find this exact sequence of words. Out of this world would find any event that contains all of these words, but not necessarily in that order.
• ( ) is used for grouping terms. Parentheses can help avoid confusion in logic. For instance, these two statements are equivalent:
° bob error OR warn NOT debug
° (bob AND (error OR warn)) AND NOT debug
• = is reserved for specifying fields. Searching for an equal sign can be accomplished by wrapping it in quotes.
• [ ] is used to perform a subsearch. We will discuss this in Chapter 5, Advanced Search Examples.
You can use these operators in fairly complicated ways, if you want to be very specific, or even to find multiple sets of events in a single query. The following are a few examples:
• error mary NOT jacky
• error NOT (mary warn) NOT (jacky error)
• index=myapplicationindex ( sourcetype=sourcetype1 AND ( (bob NOT error) OR (mary AND warn) ) ) OR ( sourcetype=sourcetype2 (jacky info) )
This can also be written with some whitespace for clarity:
Downloading the example code
You can download the example code files for all Packt books you have
purchased from your account at http://www.PacktPub.com. If you purchased this book elsewhere, you can visit http://www.PacktPub. com/support and register to have the files e-mailed directly to you.t
Clicking to modify your search
Though you can probably figure it out by just clicking around, it is worth discussing the behavior of the GUI when moving your mouse around and clicking.
• Clicking on any word or field value will add that term to the search. • Clicking on a word or field value that is already in the query will remove
it from the query.
• Clicking on any word or field value while holding down Alt (option on the Mac) will append that search term to the query, preceded by NOT. This is a very handy way to remove irrelevant results from query results.
Event segmentation
In Chapter 1, The Splunk Interface, we touched upon this setting in the Options dialog. The different options change what is highlighted as you mouse over the text in the search results, and therefore what is added to your query when clicked on. Let's see what happens to the phrase ip=10.20.30.40 with each setting:
• inner highlights individual words between punctuation. Highlighted items would be ip, 10, 20, 30, and 40.
• outer highlights everything between whitespace. The entire phrase
ip=10.20.30.40 would be highlighted.
• full will highlight everything from the beginning of the block of text as you move your mouse. Rolling from left to right would highlight ip, then ip=10, then ip=10.20, then ip=10.20.30, and finally ip=10.20.30.40. This is the default setting and works well for most data.
• raw disables highlighting completely, allowing the user to simply select the text at will. Some users will prefer this setting as it takes away any unexpected behavior. It is also slightly faster as the browser is doing less work.
Field widgets
If a field value looks like key=value in the text of an event, you will
want to use one of the field widgets instead of clicking on the raw text
of the event. Depending on your event segmentation setting, clicking on the word will either add value or "key=value". The former will not
take advantage of the field definition; instead, it will simply search for
the word. The latter will work for events that contain the exact quoted
text but not for other events that actually contain the same field value
extracted in a different way.
Time
Clicking on the time next to an event will change the search to only find events that happened in that second.
To zoom in to a short time frame, one convenient approach is to click on the time of an event to search only that second, then click on Zoom out above the timeline until the appropriate time frame is reached.
Using fields to search
When we explored the GUI in Chapter 1, The Splunk Interface, you probably noticed fields everywhere. Fields appear in the field picker on the left and under every event. Where fields actually come from is transparent to the user, who simply searches for key=value. We will discuss adding new fields in Chapter 3, Tables, Charts, and Fields, and in Chapter 10, Configuring Splunk.
Using the field picker
As we go through the following items in this widget, we see a wealth of information right away:
• Appears in X% of results is a good indication of whether we are getting the results we think we're getting. If every event in your results should contain this field, and this is not 100 percent, either your search can be made more specific or a field definition needs to be modified.
• Show only events with this field adds fieldname="*" to your existing search to make sure you only get events that have this field.
If the events you are searching for always contain the name of the field, in this case network, your query will be more efficient if you also add the field name to the query. In this case, the query would look like this: sourcetype="impl_splunk_ gen" network="*" network.
• Select and show in results adds the field to the selected fields list at the top of the field picker and displays the field value under each event.
• Charts contains the following links, which we will use as starting points for examples in Chapter 3, Tables, Charts, and Fields:
1. Top values by time shows a graph of the most common values occurring in the time frame searched.
2. Top values overall shows a table of the most common values for this field for the time frame searched.
• Values shows a very useful snapshot of the top ten most common values.
Using wildcards efficiently
Though the index is based on words, it is possible to use wildcards when needed, although some care must be taken.
Only trailing wildcards are efficient
Stated simply, bob* will find events containing Bobby efficiently, but *by or *ob* will not. The latter cases will scan all events in the time frame specified.
Wildcards are tested last
Supplementing wildcards in fields
Given the following events, a search for world would return both events:
2012-02-07T01:04:31.102-0600 INFO AuthClass Hello world. [user=Bobby, ip=1.2.3.3]
2012-02-07T01:23:34.204-0600 INFO BarClass Goodbye. [user=Bobby, ip=1.2.3.3, message="Out of this world"]
What if you only wanted the second event, but all you know is that the event contains world somewhere in the field message? The query message="*world*" would work but is very inefficient because Splunk must scan every event looking for *world* and then determine whether world is in the field message.
You can take advantage of the behavior mentioned before—wildcards are tested last. Rewriting the query as world message="*world*" gives Splunk a chance to find all records with world, then inspect those events for the more specific wildcard condition.
All about time
Time is an important and confusing topic in Splunk. If you want to skip this section, absorb one concept—time must be parsed properly on the way into the index as it cannot be changed later without indexing the raw data again.
How Splunk parses time
Given the date 11-03-04, how would you interpret this date? Your answer probably depends on where you live. In the United States, you would probably read this as November 3, 2004. In Europe, you would probably read this as March 11, 2004. It would also be reasonable to read this as March 4, 2011.
Luckily, most dates are not this ambiguous, and Splunk makes a good effort. It is absolutely worth the trouble to give Splunk a little help by configuring the time format. We'll discuss the relevant configurations in Chapter 10, Configuring Splunk.
How Splunk stores time
Once the date is parsed, the date stored in Splunk is always stored as GMT epoch.
How Splunk displays time
The text of the original event, and the date it contains, is never modified. It is always displayed as it was received. The date displayed to the left of the event is determined by the time zone of the Splunk instance or the user's preference as specified in
Your account.
How time zones are determined and why it
matters
Since all events are stored according to their GMT time, the time zone of an event only matters at parse time, but it is vital to get it right. Once the event is written into the index, it cannot be changed without re-indexing the raw data.
The time zone can come from a number of places, in this order of precedence:
• The time zone specified in the log. For instance, the date 2012-02-07T01:03:23.575-0600, -0600 indicates that the zone is 6 hours behind GMT. Likewise, Tue 02 Feb, 01:03:23 CST 2012 represents the same date.
• The configuration associated with a source, host, or source type, in that order. This is specified in props.conf. This can actually be used to override the time zone listed in the log itself, if needed. We will discuss this in Chapter 10, Configuring Splunk.
• The time zone of the Splunk instance forwarding the events. The time zone is relayed along with the events, just in case it is not specified elsewhere. This is usually an acceptable default. The exception is when different logs are written with different time zones on the same host, without the time zone in the logs. In that case, it needs to be specified in props.conf.
• The time zone of the Splunk instance parsing the events. This is sometimes acceptable and can be used in interesting ways in distributed environments.
Different ways to search against time
Now that we have our time indexed properly, how do we search against time? The time picker provides a neat set of defaults for relative time.
These options search back from the present to a relative point in time, but sometimes, you need to search over a specific period of time.
The last option, Custom time…, provides an interface that helps specify specific times.
• Date is the first option.
• Relative lets you choose a time in the past.
The end of the search will always be the current time. The Snap to option lets you choose a unit to round down to. For instance, if the current time is 4:32 and you choose 2 for the Hour(s) ago option, and Hour for the Snap to
option, the earliest time for the search will be 2:00. Effective range will tell you what time range is being searched.
Note the text under Search language equivalent. This is the way you express relative times in Splunk. We will see this often as we move forward.
• Lastly, we have Advanced search language.
If you noticed, we have selected the 2 for the Hour(s) ago option, and Minute for the
Snap to option in the Relative tab. The search language equivalent for this selection is -2h@m, which means "go back 2 hours (7,200 seconds) from this moment, and then snap to the beginning of the minute that second falls in". So, given the time 15:11:23, the relative time would 13:11:00. The language is very powerful and can be used whenever a search is specified.
Specifying time in-line in your search
You can also directly use relative and exact times in your searches. For instance, given the search item bob error, you can specify directly in the search the time frame you want to use, using the fields earliest and latest.
• To search for errors affecting bob in the last 60 minutes, use earliest=-60m bob error
• To search for errors affecting bob in the last 3 hours, snap to the beginning of the hour using earliest=-3h@h bob error
• To search for errors affecting bob yesterday, use earliest=-1d@d latest=-0d@d bob error
You cannot use different time ranges in the same query; for instance, in a Boolean search, (earliest=-1d@d latest=-0d@d bob error) OR (earliest=-2d@d latest=-1d@d mary error) will not work. The append command provides a way of accomplishing this.
_indextime versus _time
It is important to note that events are generally not received at the same time as stated in the event. In most installations, the discrepancy is usually of a few seconds, but if logs arrive in batches, the latency can be much larger. The time at which an event is actually written in the Splunk index is kept in the internal field _indextime. The time that is parsed out of the event is stored in _time.
You will probably never search against _indextime, but you should understand that the time you are searching against is the time parsed from the event, not the time at which the event was indexed.
Making searches faster
We have talked about using the index to make searches faster. When starting a new investigation, following a few steps will help you get results faster:
1. Set the time to the minimum time that you believe will be required to locate relevant events. For a chatty log, this may be as little as a minute. If you don't know when the events occurred, you might search a larger time frame and then zoom in by clicking on the timeline while the search is running. 2. Specify the index if you have multiple indexes. It's good to get into
the habit of starting your queries with the index name, for example, index=myapplicationindex error bob.
3. Specify other fields that are relevant. The most common fields to specify are sourcetype and host, for example, index=myapplicationindex sourcetype="impl_splunk_gen" error bob.
4. Add more words from the relevant messages as and when you find them. This can be done simply be clicking on words or field values in events or field values in the field picker, for example, index=myapplicationindex sourcetype="impl_splunk_gen" error bob authclass OR fooclass. 5. Expand your time range once you have found the events that you need, and
then refine the search further.
6. Disable Field discovery (at the top of the field picker). This can greatly
improve speed, particularly if your query retrieves a lot of events. Extracting all of the fields from events simply takes a lot of computing time, and disabling this option prevents Splunk from doing all of that work when not needed.
If the query you are running is taking a long time to run, and you will be running this query on a regular basis—perhaps for an alert or dashboard—using a summary index may be appropriate. We will discuss this in Chapter 9, Summary Indexes and CSV Files.
Sharing results with others
This opens the Save and Share Results panel.
The URL under Link to the results can be copied and sent to other users. A user visiting this URL will see exactly the same results you did, assuming the job has not expired.
The App menu, Owner menu, Status menu, and search bar let you filter what jobs
are displayed.
The table has the following columns:
• Dispatched at is the time at which the search started.
• Owner is the user that started the job. Sometimes jobs will appear with
system as the user if the saved search is configured in an application but not
owned by a particular user.
• Application specifies the application in which the search was started. This is
useful for locating your searches as well as unfamiliar searches being fired off by other apps.
• Size is the amount of disk space being used to store the results of this query. • Events shows the number of events that were matched by the search. In a
complicated search or report, the results returned may be different from this number.
• Run time is how long a search took to run or the elapsed time if the search is still running.
• Expires is the time at which the results will be removed from disk.
• Status lets you see and sort searches based on whether they are still running.
One simple way to find running jobs is to change the Status
menu to Running and click the magnifying glass.
• Actions provides the following links to affect a search or its results:
° Inspect shows detailed information about the query. We will cover the search job inspector in Chapter 5, Advanced Search Examples.
° Save keeps the search results indefinitely.
° Pause pauses the execution of a job.
° Finalize stops the execution but keeps the results located up to this point.
° Delete removes the results from the disk immediately. It is generally not necessary to delete search results as they will expire on their own.
Saving searches for reuse
Let's build a query, save it, and make an alert out of it.
First, let's find errors that affect mary, one of our most important users. This can simply be the query mary error. Looking at some sample log messages that match this query, we see that some of these events probably don't matter (the dates have been removed to shorten the lines).
ERROR LogoutClass error, ERROR, Error! [user=mary, ip=3.2.4.5] WARN AuthClass error, ERROR, Error! [user=mary, ip=1.2.3.3] ERROR BarCLass Hello world. [user=mary, ip=4.3.2.1]
WARN LogoutClass error, ERROR, Error! [user=mary, ip=1.2.3.4] DEBUG FooClass error, ERROR, Error! [user=mary, ip=3.2.4.5]
ERROR AuthClass Nothing happened. This is worthless. Don't log this. [user=mary, ip=1.2.3.3]
We can probably skip the DEBUG messages; the LogoutClass messages look harmless; and the last message actually says that it's worthless.
mary error NOT debug NOT worthless NOT logoutclass limits the results to:
WARN AuthClass error, ERROR, Error! [user=mary, ip=1.2.3.3] ERROR BarCLass Hello world. [user=mary, ip=4.3.2.1]
For good measure, let's add the sourcetype field and some parentheses.
sourcetype="impl_splunk_gen" (mary AND error) NOT debug NOT worthless NOT logoutclass
Another way of writing the same thing is as follows:
sourcetype="impl_splunk_gen" mary error NOT (debug OR worthless OR logoutclass)
First, choose Save search… from the Save menu.
The Save Search window appears.
The search is then available in the Searches & Reports menu under Errors.
Selecting the search from the menu runs the search using the latest data available.
Note the small square next to errors affecting mary. This indicates that this search is not shared and is only viewable by its owner.
Creating alerts from searches
Any saved search can also be run on a schedule. One use for scheduled searches is firing alerts. To get started, choose Alert… from the Create menu.
Schedule
The Schedule step provides the following options:
• Trigger in real-time whenever a result matches: This option will leave a real-time search running all the time and will immediately fire an alert whenever an event is seen.
This option will create an alert every time an event that matches your search occurs. There is an important throttling option in the next step.