Project Editor Andres Marti
Project Administrator Brady Golden
Consulting Editors
Christian Aviles-Scott, Elizabeth DeCarli, Kendra Lockman, Ladie Malek
Mathematics Reviewers
Larry Copes, Inner Grove Heights, Minnesota
Michael de Villiers, Ph.D., University of Durban, Westville, Pinetown, South Africa
David Rasmussen, Neil’s Harbour, Nova Scotia Abby Tanenbaum, Naperville, Illinois Teacher Reviewers
Rich Crandall, Skyline High School, Oakland, California Genie Dunn, Miami Killian Senior High School, Miami, Florida
Judy Hicks, Ralston Valley High School, Arvada, Colorado Susan May, University of Texas, Austin, Texas
Steve Phelps, Madeira High School, Cincinnati, Ohio Adella Pietrzyk, Center Line High School, Center Line, Michigan
Multicultural and Equity Reviewers
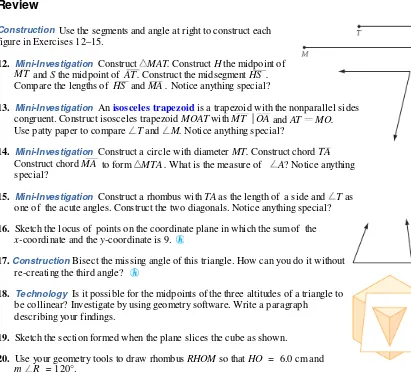
David Keiser, Montclair State University, Upper Montclair, New Jersey
Swapna Mukhopadhyay, Ph.D., San Diego State University, San Diego, California
Accuracy Checkers
Dudley Brooks, Marcia Ellen Olmstead Editorial Production Manager Christine Osborne
Print Production Supervisor Ann Rothenbuhler Production Editor Angela Chen Production Coordinator Jennifer Young Copyeditor Jill Pellarin Cover Designers
Jill Kongabel, Marilyn Perry, Jensen Barnes Text Designer
Marilyn Perry Illustrators
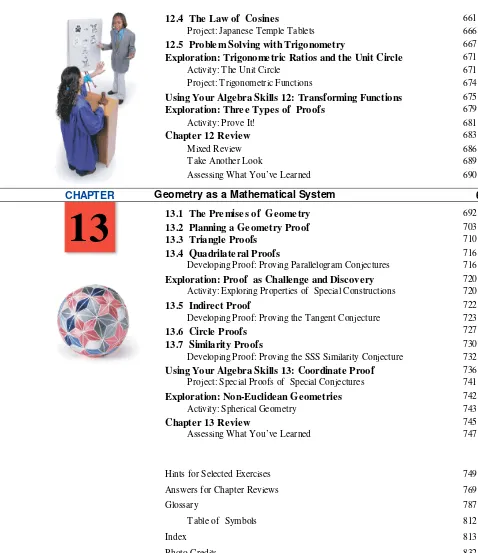
Juan Alvarez, Andy Levine, Claudia Newell, Bill Pasini, William Rieser, Sue Todd, Rose Zgodzinski
Compositor and Technical Art Interactive Composition Corporation Printer
Von Hoffmann Corp.
Text book Product Manager James Ryan
Executive Editor Casey FitzSimons Publisher Steven Rasmussen
© 2008 by Michael Serra. All rights reserved.
No part of this publication may be reproduced, stored in a retrieval system, or transmitted, in any form or by any means, electronic, photocopying, recording, or otherwise, without the prior written permission of the publisher. ®The Geometer’s Sketchpad, Dynamic Geometry, and Key Curriculum Press are registered trademarks of Key Curriculum Press.™The Discovering Mathematics logo and Sketchpad are trademarks of Key Curriculum Press. ™Fathom Dynamic Data is a trademark of
KCP Technologies.
All other trademarks are held by their respective owners. Key Curriculum Press
1150 65th Street Emeryville, CA 94608 [email protected] www.keypress.com
Printed in the United States of America 10 9 8 7 6 5 4 3 2 1 11 10 09 08 07 ISBN 978-1-55953-882-4
iii
F
irst, to all the teachers who have used Discovering Geometry, a sincere thank youfor your wonderful support and encouragement. I wish to thank my always delightful and ever-so-patient students for their insight, humor, and hard work. I also wish to thank the many students across the country who have written to me with their kind words, comments, and suggestions. And thanks to the marketing and sales staff at Key Curriculum Press for their successful efforts in bringing the first three editions into so many classrooms.
There are three people who have added their touch to earlier editions of Discovering Geometry: Steve Rasmussen was editor on the first edition; Dan Bennett was editor on the second edition; and Ladie Malek was editor on the third edition. Thank you , Steve, Dan , and Ladie.
While working on this fourth edition of Discovering Geometry, I was fortunate to have the assistance of Andres Marti as project editor. Thank you, Andres, for your commitment to the pedagogy in Discovering Geometry, your cooperative temperament in the editorial process, and your patience with me. To the editorial and production staff and managers at Key, the field testers, the advisors, the consultants, and the reviewers Rich Crandall, Genie Dunn, Judy Hicks, Susan May, Steve Phelps, and Adella Pietrzyk, I am grateful for your quality work.
Michael Serra
iv
Y
ou probably know from your experience in school that you learn best when you understand the concepts and are actively engaged in the learning process. Studies confirm that understanding concepts and getting involved are important in every subject at every grade level. This is the foundation that Discovering Geometryis built on, and investigations are at its heart.
If you are a student, you’ll discover many important mathematical principles by working together with other students in supportive, small groups doing
investigations. First you’ll explore concepts visually, looking for patterns, and then you’ll learn to explain why these patterns exist. This approach is both challenging and fun, and will make you believe in your ability to succeed at mathematics. Rather than memorizing theorems and formulas, you’ll learn how to build what you need from what you already know. You’ll find that Discovering Geometry is easy to follow, and the design includes many interesting photographs and illustrations that connect geometry with art, architecture, science, history, culture, and recreation. If you are a parent, you’ll appreciate that Discovering Geometry continues to be the leader in providing a successful, discovery-based approach. You’ll know that your student is actively engaged in the process of learning and constructing his or her own understanding of concepts, developing insight, confidence, and increasingly sophisticated mathematical understanding along the way. The effectiveness of
Discovering Geometry’s approach has been substantiated in thousands of classrooms by millions of students, and has changed the way geometry is taught today. If you go to www.keymath.com/DG, you’ll find Dynamic Geometry Explorations that explore important geometry concepts interactively, condensed lessons for when your student is absent, downloadable worksheets to help your student practice his or her skills, and resources designed especially for you as a parent.
If you are a teacher, you’ll see that this new edition balances the investigative approach that is at the heart of the Discovering Mathematics series with an emphasis on developing students’ ability to reason deductively. You’ll be supported by a deliberate pedagogy based on educational research that carefully develops your students’ ability to make sound logical arguments. Discovering Geometry introduces students to reasoning strategies that help them explain their discoveries and enable them to justify their conjectures through proof. There are also more opportunities to review algebra, more ways to use technology, especially The Geometer’s Sketchpad®, and there is an enhanced online textbook and other computer-based resources. If you are familiar with earlier editions of Discovering Geometry, you’ll still find the original and hallmark features, plus improvements based on feedback from many of your colleagues in geometry classrooms.
If you are a student, we believe that as you work through this course you’ll gain knowledge for a lifetime. If you are a parent, we believe you’ll enjoy watching your student develop mathematical power. If you are a teacher, we believe you’ll find that Discovering Geometry makes a significant positive impact in your classroom. Whether you are learning, guiding, or teaching, we wish you success and urge you to continue your involvement and interest in mathematics.
Steve Rasmussen, President Key Curriculum Press
v
A Note to Students from the Author xiv
0.1 Geometry in Nature and in Art 2
0.2 Line Designs 7
0.3 Circle Designs 10
0.4 Op Art 13
0.5 Knot Designs 16
Project: Symbolic Art 19
0.6 Islamic Tile Designs 20
Project: Photo or Video Safari 23
Chapter 0 Review 24
Assessing What You’ve Learned 26
1.1 Building Blocks of Geometry 28
Investigation: Mathematical Models 32
Project: Spiral Designs 35
Using Your Algebra Skills 1: Midpoint 36
1.2 Poolroom Math 38
Investigation: Virtual Pool 41
1.3 What’s a Widget? 47
Investigation: Defining Angles 49
1.4 Polygons 54
Investigation: Special Polygons 56
1.5 Triangles 59
Investigation: Triangles 60
1.6 Special Quadrilaterals 64
Investigation: Special Quadrilaterals 64
Project: Drawing the Impossible 68
1.7 Circles 69
Investigation: Defining Circle Terms 70
1.8 Space Geometry 75
Investigation: Space Geometry 77
1.9 A Picture Is Worth a Thousand Words 81
Exploration: Geometric Probability I 88
Activity: Chances Are 88
Chapter 1 Review 90
Assessing What You’ve Learned 94
CHAPTER I nt r oducing Ge om e t r y 27
CHAPTER Geometric Art 1
0
1
vi
2.1 Inductive Reasoning 96
Investigation: Shape Shifters 98
2.2 Finding the nth Term 102
Investigation: Finding the Rule 102
Project: Best-Fit Lines 107
2.3 Mathematical Modeling 108
Investigation: Party Handshakes 108
2.4 Deductive Reasoning 114
Investigation: Overlapping Segments 116
Exploration: The Seven Bridges of Königsberg 120
Activity: Traveling Networks 120
2.5 Angle Relationships 122
Investigation 1: The Linear Pair Conjecture 122 Investigation 2: Vertical Angles Conjecture 123
2.6 Special Angles on Parallel Lines 128
Investigation 1: Which Angles Are Congruent? 128
Investigation 2: Is the Converse True? 130
Project: Line Designs 134
Using Your Algebra Skills 2: Slope 135
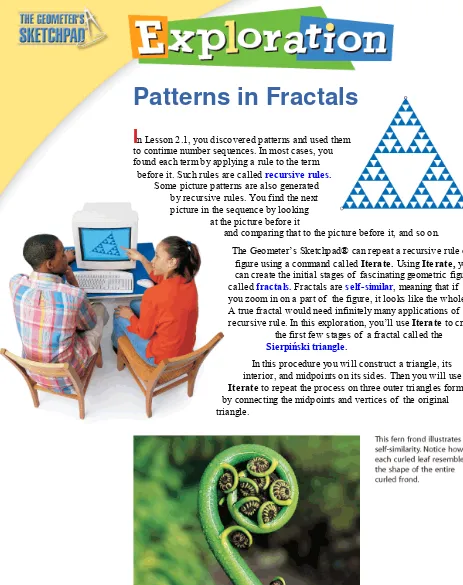
Exploration: Patterns in Fractals 137
Activity: The Sierpin´ski Triangle 138
Chapter 2 Review 140
Assessing What You’ve Learned 142
3.1 Duplicating Segments and Angles 144
Investigation 1: Duplicating a Segment 145
Investigation 2: Duplicating an Angle 146
3.2 Constructing Perpendicular Bisectors 149
Investigation 1: Finding the Right Bisector 149 Investigation 2: Constructing the Perpendicular Bisector 150 3.3 Constructing Perpendiculars to a Line 154
Investigation 1: Finding the Right Line 154
Investigation 2: Patty-Paper Perpendiculars 155
Project: Constructing a Tile Design 158
3.4 Constructing Angle Bisectors 159
Investigation 1: Angle Bisecting by Folding 159 Investigation 2: Angle Bisecting with Compass 160
3.5 Constructing Parallel Lines 163
Investigation: Constructing Parallel Lines by Folding 163 Using Your Algebra Skills 3: Slopes of Parallel and
Perpendicular Lines 167
3.6 Construction Problems 170
Exploration: Perspective Drawing 174
Activity: Boxes in Space 175
CHAPTER
3
Using Tools of Geometry 143
CHAPTER
2
Reasoning in Geometry 95
vii CHAPTER
4
Discovering and Proving Triangle Properties 199
3.7 Constructing Points of Concurrency 178
Investigation 1: Concurrence 178
Investigation 2: Circumcenter 179
Investigation 3: Incenter 180
3.8 The Centroid 185
Investigation 1: Are Medians Concurrent? 185
Investigation 2: Balancing Act 186
Exploration: The Euler Line 191
Activity: Three Out of Four 191
Project: Is There More to the Orthocenter? 192
Chapter 3 Review 193
Mixed Review 196
Assessing What You’ve Learned 198
4.1 Triangle Sum Conjecture 200
Investigation: The Triangle Sum 200
4.2 Properties of Isosceles Triangles 206
Investigation 1: Base Angles in an Isosceles Triangle 207
Investigation 2: Is the Converse True? 208
Using Your Algebra Skills 4: Solving Equations 212
4.3 Triangle Inequalities 215
Investigation 1: What Is the Shortest Path from A to B? 216 Investigation 2: Where Are the Largest and Smallest Angles? 217 Investigation 3: Exterior Angles of a Triangle 217
Project: Random Triangles 220
4.4 Are There Congruence Shortcuts? 221
Investigation 1: Is SSS a Congruence Shortcut? 222 Investigation 2: Is SAS a Congruence Shortcut? 223 Investigation 3: Is SSA a Congruence Shortcut? 223
4.5 Are There Other Congruence Shortcuts? 227
Investigation 1: Is ASA a Congruence Shortcut? 227 Investigation 2: Is SAA a Congruence Shortcut? 228 Investigation 3: Is AAA a Congruence Shortcut? 228
4.6 Corresponding Parts of Congruent Triangles 232
Project: Polya’s Problem 236
4.7 Flowchart Thinking 237
4.8 Proving Special Triangle Conjectures 243
Investigation: The Symmetry Line in an Isosceles Triangle 244
Exploration: Napoleon’s Theorem 249
Activity: Napoleon Triangles 249
Project: Lines and Isosceles Triangles 250
Chapter 4 Review 251
Take Another Look 255
Assessing What You’ve Learned 256
viii
CHAPTER
6
Discovering and Proving Circle Properties 309 CHAPTER
5
Discovering and Proving Polygon Properties 257
5.1 Polygon Sum Conjecture 258
Investigation: Is There a Polygon Sum Formula? 258
5.2 Exterior Angles of a Polygon 262
Investigation: Is There an Exterior Angle Sum? 262
Exploration: Star Polygons 266
Activity: Exploring Star Polygons 266
5.3 Kite and Trapezoid Properties 268
Investigation 1: What Are Some Properties of Kites? 268 Investigation 2: What Are Some Properties of Trapezoids? 270
5.4 Properties of Midsegments 275
Investigation 1: Triangle Midsegment Properties 275 Investigation 2: Trapezoid Midsegment Properties 276
Project: Building an Arch 280
5.5 Properties of Parallelograms 281
Investigation: Four Parallelogram Properties 281
Project: Drawing Regular Polygons 286
Using Your Algebra Skills 5: Writing Linear Equations 287
5.6 Properties of Special Parallelograms 291
Investigation 1: What Can You Draw with the
Double-Edged Straightedge? 291
Investigation 2: Do Rhombus Diagonals Have
Special Properties? 292
Investigation 3: Do Rectangle Diagonals Have
Special Properties? 293
5.7 Proving Quadrilateral Properties 298
Investigation: Finding the Square Route 300
Project: Japanese Puzzle Quilts 303
Chapter 5 Review 304
Take Another Look 307
Assessing What You’ve Learned 308
6.1 Tangent Properties 310
Investigation 1: Going Off on a Tangent 311
Investigation 2: Tangent Segments 312
6.2 Chord Properties 317
Investigation 1: Defining Angles in a Circle 317 Investigation 2: Chords and Their Central Angles 318 Investigation 3: Chords and the Center of the Circle 319 Investigation 4: Perpendicular Bisector of a Chord 319
6.3 Arcs and Angles 324
Investigation 1: Inscribed Angle Properties 324 Investigation 2: Inscribed Angles Intercepting the Same Arc 325
ix Investigation 3: Angles Inscribed in a Semicircle 325
Investigation 4: Cyclic Quadrilaterals 326
Investigation 5: Arcs by Parallel Lines 326
6.4 Proving Circle Conjectures 330
6.5 The Circumference/Diameter Ratio 335
Investigation: A Taste of Pi 336
Project: Needle Toss 340
6.6 Around the World 341
Using Your Algebra Skills 6: Solving Systems of Linear Equations 345
6.7 Arc Length 349
Investigation: Finding the Arcs 350
Project: Racetrack Geometry 354
Exploration: Intersecting Lines Through a Circle 355
Activity 1: Exploring Secants and Chords 355
Activity 2: Exploring Tangents 357
Chapter 6 Review 359
Mixed Review 362
Take Another Look 365
Assessing What You’ve Learned 366
7.1 Transformations and Symmetry 368
Investigation: The Basic Property of a Reflection 370
7.2 Properties of Isometries 376
Investigation 1: Transformations on a Coordinate Plane 377
Investigation 2: Finding a Minimal Path 377
7.3 Compositions of Transformations 383
Investigation 1: Reflections across Two Parallel Lines 384 Investigation 2: Reflections across Two Intersecting Lines 385
7.4 Tessellations with Regular Polygons 389
Investigation: The Semiregular Tessellations 390
7.5 Tessellations with Nonregular Polygons 394
Investigation 1: Do All Triangles Tessellate? 394 Investigation 2: Do All Quadrilaterals Tessellate? 395
Project: Penrose Tilings 398
7.6 Tessellations Using Only Translations 399
Project: Kaleidoscopes 402
7.7 Tessellations That Use Rotations 403
Exploration: Tessellating with the Conway Criterion 408
Activity: Conway Hexagons 408
7.8 Tessellations That Use Glide Reflections 410
Using Your Algebra Skills 7: Finding Points of Concurrency 413
Chapter 7 Review 416
Take Another Look 419
Assessing What You’ve Learned 420
CHAPTER
7
Transformations and Tessellations 367
x
8.1 Areas of Rectangles and Parallelograms 422 Investigation: Area Formula for Parallelograms 424
Project: Random Rectangles 428
8.2 Areas of Triangles, Trapezoids, and Kites 429 Investigation 1: Area Formula for Triangles 429 Investigation 2: Area Formula for Trapezoids 429
Investigation 3: Area Formula for Kites 430
Project: Maximizing Area 433
8.3 Area Problems 434
Investigation: Solving Problems with Area Formulas 434 Using Your Algebra Skills 8: Products, Factors, and
Quadratic Equations 438
8.4 Areas of Regular Polygons 442
Investigation: Area Formula for Regular Polygons 442
Exploration: Pick’s Formula for Area 446
Activity: Dinosaur Footprints and Other Shapes 447
8.5 Areas of Circles 449
Investigation: Area Formula for Circles 449
8.6 Any Way You Slice It 453
Exploration: Geometric Probability II 458
Activity: Where the Chips Fall 458
Project: Different Dice 460
8.7 Surface Area 461
Investigation 1: Surface Area of a Regular Pyramid 464
Investigation 2: Surface Area of a Cone 465
Exploration: Alternative Area Formulas 469
Activity: Calculating Area in Ancient Egypt 469
Chapter 8 Review 471
Take Another Look 475
Assessing What You’ve Learned 476
9.1 The Theorem of Pythagoras 478
Investigation: The Three Sides of a Right Triangle 478
Project: Creating a Geometry Flip Book 483
9.2 The Converse of the Pythagorean Theorem 484
Investigation: Is the Converse True? 484
Using Your Algebra Skills 9: Radical Expressions 489
9.3 Two Special Right Triangles 491
Investigation 1: Isosceles Right Triangles 491
Investigation 2: 30°-60°-90° Triangles 492
Exploration: A Pythagorean Fractal 496
Activity: The Right Triangle Fractal 497
9.4 Story Problems 498
CHAPTER
9
The Pythagorean Theorem 477
CHAPTER
8
Area 421
xi
9.5 Distance in Coordinate Geometry 502
Investigation: The Distance Formula 502
Exploration: Ladder Climb 507
Activity: Climbing the Wall 507
9.6 Circles and the Pythagorean Theorem 508
Chapter 9 Review 512
Mixed Review 515
Take Another Look 517
Assessing What You’ve Learned 518
10.1 The Geometry of Solids 520
Exploration: Euler’s Formula for Polyhedrons 528
Activity: Toothpick Polyhedrons 528
10.2 Volume of Prisms and Cylinders 530
Investigation: The Volume Formula for Prisms and Cylinders 531
Project: The Soma Cube 537
10.3 Volume of Pyramids and Cones 538
Investigation: The Volume Formula for Pyramids and Cones 538
Project: The World’s Largest Pyramid 543
Exploration: The Five Platonic Solids 544
Activity: Modeling the Platonic Solids 544
10.4 Volume Problems 547
10.5 Displacement and Density 551
Project: Maximizing Volume 554
Exploration: Orthographic Drawing 555
Activity: Isometric and Orthographic Drawings 557
10.6 Volume of a Sphere 558
Investigation: The Formula for the Volume of a Sphere 558
10.7 Surface Area of a Sphere 562
Investigation: The Formula for the Surface Area of a Sphere 562 Using Your Algebra Skills 10: Solving for Any Variable 567 Exploration: Sherlock Holmes and Forms of Valid Reasoning 569
Activity: It’s Elementary! 570
Chapter 10 Review 572
Take Another Look 575
Assessing What You’ve Learned 576
CHAPTER
10
Volume 519
xii
Using Your Algebra Skills 11: Proportion and Reasoning 578
11.1 Similar Polygons 581
Investigation 1: What Makes Polygons Similar? 582 Investigation 2: Dilations on the Coordinate Plane 585
Project: Making a Mural 588
11.2 Similar Triangles 589
Investigation 1: Is AA a Similarity Shortcut? 589 Investigation 2: Is SSS a Similarity Shortcut? 590 Investigation 3: Is SAS a Similarity Shortcut? 591 Exploration: Constructing a Dilation Design 595
Activity: Dilation Creations 595
11.3 Indirect Measurement with Similar Triangles 598
Investigation: Mirror, Mirror 598
11.4 Corresponding Parts of Similar Triangles 603
Investigation 1: Corresponding Parts 603
Investigation 2: Opposite Side Ratios 604
11.5 Proportions with Area 608
Investigation 1: Area Ratios 608
Investigation 2: Surface Area Ratios 609
Project: In Search of the Perfect Rectangle 613
11.6 Proportions with Volume 614
Investigation: Volume Ratios 615
Exploration: Why Elephants Have Big Ears 620
Activity: Convenient Sizes 620
11.7 Proportional Segments Between Parallel Lines 623 Investigation 1: Parallels and Proportionality 624 Investigation 2: Extended Parallel/Proportionality 626 Exploration: Two More Forms of Valid Reasoning 631
Activity: Symbolic Proofs 633
Chapter 11 Review 634
Take Another Look 637
Assessing What You’ve Learned 638
12.1 Trigonometric Ratios 640
Investigation: Trigonometric Tables 642
12.2 Problem Solving with Right Triangles 647
Project: Light for All Seasons 651
Exploration: Indirect Measurement 652
Activity: Using a Clinometer 652
12.3 The Law of Sines 654
Investigation 1: Area of a Triangle 654
Investigation 2: The Law of Sines 655
CHAPTER
12
Trigonometry 639 CHAPTER11
Similarity 577xiii
12.4 The Law of Cosines 661
Project: Japanese Temple Tablets 666
12.5 Problem Solving with Trigonometry 667
Exploration: Trigonometric Ratios and the Unit Circle 671
Activity: The Unit Circle 671
Project: Trigonometric Functions 674
Using Your Algebra Skills 12: Transforming Functions 675
Exploration: Three Types of Proofs 679
Activity: Prove It! 681
Chapter 12 Review 683
Mixed Review 686
Take Another Look 689
Assessing What You’ve Learned 690
13.1 The Premises of Geometry 692
13.2 Planning a Geometry Proof 703
13.3 Triangle Proofs 710
13.4 Quadrilateral Proofs 716
Developing Proof: Proving Parallelogram Conjectures 716
Exploration: Proof as Challenge and Discovery 720
Activity: Exploring Properties of Special Constructions 720
13.5 Indirect Proof 722
Developing Proof: Proving the Tangent Conjecture 723
13.6 Circle Proofs 727
13.7 Similarity Proofs 730
Developing Proof: Proving the SSS Similarity Conjecture 732
Using Your Algebra Skills 13: Coordinate Proof 736
Project: Special Proofs of Special Conjectures 741
Exploration: Non-Euclidean Geometries 742
Activity: Spherical Geometry 743
Chapter 13 Review 745
Assessing What You’ve Learned 747
Hints for Selected Exercises 749
Answers for Chapter Reviews 769
Glossary 787
Table of Symbols 812
Index 813
Photo Credits 832
CHAPTER
13
Geometry as a Mathematical System 691
xiv
Michael Serra
What Makes Discovering Geometry Different?
Discovering Geometry is designed so that you can be actively engaged as you learn geometry. In this book you “learn by doing.” You will learn to use the tools of geometry and to perform geometry investigations with them. Many of the investigations are carried out in small cooperative groups in which you jointly plan and find solutions with other students. Your investigations will lead you to the discovery of geometry properties. In addition, you will gradually learn about proof, a form of reasoning that will help you explain why your discoveries are true, through Developing Proof group activities and exercises.
Discovering Geometry is designed so that both you and your teacher can have fun while you learn geometry. It has a lot of “extras.” Each lesson begins with a quote that I hope you will find funny or thought provoking. I think you’ll enjoy the extra challenges in the Improving Your…Skills puzzles at the end of most lessons. To solve each puzzle, you’ll need clever visual thinking skills or sharp reasoning skills or both. I hope you will find some of the illustrated word problems humorous. In the explorations you will build geometric solids, find the height of your school building, and discover why elephants have big ears. In the projects you will draw the impossible, make kaleidoscopes, design a racetrack, and create a mural. The online Dynamic Geometry Explorations help you visualize important geometry concepts by putting them in motion, and there are graphing calculator projects, Fathom Dynamic Data™ projects, The Geometer’s Sketchpad explorations, and web links that will allow you to practice and improve your skills.
Suggestions for Success
It is important to be organized. Keep a notebook with a section for definitions, a section for your geometry investigations, a section for discoveries, and a section for daily notes and exercises. Develop the habit of writing a summary page when you have completed each chapter. Study your notebook regularly.
You will need four tools for the investigations: a compass, a protractor, a straightedge, and a ruler. Some investigations use patty paper, small squares of waxed paper usually used between burger patties, that can be used as a unique geometry tool. Keep a calculator handy, too.
You will find hints for some exercises in the back of the book. Those exercises are marked with an . Try to solve the problems on your own first. Refer to the hints as a last resort if you can’t solve a problem. Solutions are provided for chapter reviews so you can check your understanding and prepare for tests.
Discovering Geometry will ask you to work cooperatively with your classmates. When you are working cooperatively, always be willing to listen to each other, to actively participate, to ask each other questions, and to help each other when asked. You can accomplish much more cooperatively than you can individually. And, best of all, you’ll experience less frustration and have much more fun.
Michael Serra
CHAPTER
0
My subjects are often playful....It is, for example, a pleasure to deliberately mix together objects of two and of three dimensions, surface and spatial relationships, and to make fun of gravity.
M.C.ESCHER
Print Gallery, M.C. Escher, 1956
©2002 Cordon Art B.V.–Baarn–Holland. All rights reserved.
Geometric Art
O B J E C T I V E S In this chapter you will
see examples of geometry in nature
study geometric art forms of cultures around the world
study the symmetry in flowers, crystals, and animals
see geometry as a way of thinking and of looking at the world
practice using a compass and straightedge
A work by Dutch graphic artist M.C. Escher (1898–1972) opens each chapter in this book. Escher used geometry in creative ways to make his interesting and unusual works of art. As you come to each new chapter,see whether you can connect the Escher work to the content of the chapter.
2 CHAPTER 0 Geometric Art
There is one art, no more no less, To do all things with artlessness.
PIET HEIN
L E S S O N
0.1
Geometry in Nature
and in Art
N
ature displays a seemingly infinite variety of geometric shapes, from tiny atoms to great galaxies. Crystals, honeycombs, snowflakes, spiral shells, spiderwebs, and seed arrangements on sunflowers and pinecones are just a few of nature’s geometric masterpieces.Geometry includes the study of the properties of shapes such as circles, hexagons, and pentagons. Outlines of the sun, the moon, and the planets appear as circles. Snowflakes, honeycombs, and many crystals are hexagonal (6-sided). Many living things, such as flowers and starfish, are pentagonal (5-sided).
People observe geometric patterns in nature and use them in a variety of art forms. Basket weavers, woodworkers, and other artisans often use geometric designs to make their works more interesting and beautiful. You will learn some of their techniques in this chapter.
LESSON 0.1 Geometry in Nature and in Art 3
Artists rely on geometry to show perspective and proportion, and to produce certain optical effects. Using their understanding of lines, artists can give depth to their drawings. Or they can use lines and curves to create designs that seem to pop out of the page. You will create your own optical designs in Lesson 0.4.
Symmetryis a geometric characteristic of both nature and art. You may already know the two basic types of symmetry, reflectional symmetry and rotational symmetry. A design has reflectional symmetryif you can fold it along a line of symmetry so that all the points on one side of the line exactly coincide with (or match) all the points on the other side of the line.
You can place a mirror on the line of symmetry so that half the figure and its mirror image re-create the original figure. So, reflectional symmetry is also called
line symmetry or mirror symmetry. Biologists say an organism with just one line of symmetry, like the human body or a butterfly, has bilateral
symmetry. An object with reflectional symmetry looks balanced.
A design has rotational symmetryif it looks the same after you turn it around a point by less than a full circle. The number of times that the design looks the same as you turn it through a
complete 360° circle determines the type of rotational symmetry. The Apache basket has 3-fold rotational symmetry because it looks the same after you rotate it 120° (a third of a circle), 240° (two-thirds of a circle), and 360° (one full circle).
4 CHAPTER 0 Geometric Art
A starfish has 5-fold symmetry. It looks the same after you rotate it 72°, 144°, 216°, 288°, or 360°.
Countries throughout the world use symmetry in their national flags. Notice that the Jamaican flag has rotational symmetry in addition to two lines of reflectional symmetry. You can rotate the flag 180° without changing its appearance. The origami boxes, however, have rotational symmetry, but not reflectional symmetry. (The Apache basket on page 3 almost has reflectional symmetry. Can you see why it doesn’t?)
Consumer
Many products have eye-catching labels, logos, and designs. Have you ever paid more attention to a product because the geometric design of its logo was familiar or attractive to you?
E
XERCISES
1. Name two objects from nature whose shapes are hexagonal. Name two living organisms whose shapes have five-fold rotational symmetry.
2. Describe some ways that artists use geometry.
3. Name some objects with only one line of symmetry. What is the name for this type of symmetry?
4. Which of these objects have reflectional symmetry (or approximate reflectional symmetry)?
A. B. C.
D. E. F.
5. Which of the objects in Exercise 4 have rotational symmetry (or approximate rotational symmetry)?
6. Which of these playing cards have rotational symmetry? Which ones have reflectional symmetry?
7. British artist Andy Goldsworthy (b 1956) uses materials from nature to create beautiful outdoor sculptures. The artful arrangement of sticks below might appear to have rotational symmetry, but instead it has one line of reflectional symmetry. Can you find the line of symmetry?
If an exercise has an at the end, you can find a hint to help you in Hints for Selected Exercises at the back of the book.
8. Shah Jahan, Mughal emperor of India from 1628 to 1658, had the beautiful Taj Mahal built in memory of his wife, Mumtaz Mahal. Its architect, Ustad Ahmad Lahori, designed it with perfect symmetry. Describe two lines of symmetry in this photo. How does the design of the building’s grounds give this view of the Taj Mahal even more symmetry than the building itself has?
9. Create a simple design that has two lines of reflectional symmetry. Does it have rotational symmetry? Next, try to create another design with two lines of reflectional symmetry, but without rotational symmetry. Any luck?
10. Bring to class an object from nature that shows geometry. Describe the geometry that you find in the object as well as any symmetry the object has.
11. Bring an object to school or wear something that displays a form of handmade or manufactured geometric art. Describe any symmetry the object has.
Line Designs
T
he symmetry and patterns in geometric designs make them very appealing. You can make many designs using the basic tools of geometry—compass and straightedge.You’ll use a straightedge to construct straight lines and a compass to construct circles and to mark off equal distances. A straightedge is like a ruler but it has no marks. You can use the edge of a ruler as a straightedge. The straightedge and the compass are the classical construction tools used by the ancient Greeks, who laid the foundations of the geometry that you are studying.
LESSON 0.2 Line Designs 7
We especially need imagination in science.It is not all mathematics,nor all logic,but it is somewhat beauty and poetry.
MARIA MITCHELL
L E S S O N
0.2
8 CHAPTER 0 Geometric Art
You can create many types of designs using only straight lines. Here are two line designs and the steps for creating each one.
E
XERCISES
1. What are the classical construction tools of geometry?
2. Create a line design from this lesson. Color your design.
3. Each of these line designs uses straight lines only. Select one design and re-create it on a sheet of paper.
4. Describe the symmetries of the three designs in Exercise 3. For the third design, does color matter?
5. Many quilt designers create beautiful geometric patterns with reflectional symmetry. One-fourth of a 4-by-4 quilt pattern and its reflection are shown at right. Copy the designs onto graph paper, and complete the 4-by-4 pattern so that it has two lines of reflectional symmetry. Color your quilt.
6. Geometric patterns seem to be in motion in a quilt design with rotational symmetry. Copy the quilt piece shown in Exercise 5 onto graph paper, and complete the 4-by-4 quilt pattern so that it has 4-fold rotational symmetry. Color your quilt.
7. Organic molecules have geometric shapes. How many different lines of reflectional symmetry does this benzene molecule have? Does it have rotational symmetry? Sketch your answers.
LESSON 0.2 Line Designs 9
Architecture
Frank Lloyd Wright (1867–1959) is often called America’s favorite architect. He built homes in 36 states— sometimes in unusual settings.
Fallingwater, located in Pennsylvania, is a building designed by Wright that displays his obvious love of geometry. Can you describe the geometry you see? Find more information on Frank Lloyd Wright at
www.keymath.com/DG
10 CHAPTER 0 Geometric Art
Its where we go,and what we do when we get there, that tells us who we are.
JOYCE CAROL OATES L E S S O N
0.3
Circle Designs
P
eople have always been fascinated by circles. Circles are used in the design of mosaics, baskets, and ceramics, as well as in the architectural design of buildings.You can make circle designs with a compass as your primary tool. For example, here is a design you can make on a square dot grid.
Begin with a 7-by-9 square dot grid. Construct three rows of four circles.
Construct two rows of three circles using the points between the first set of circles as centers. The result is a set of six circles overlapping the original 12 circles. Decorate your design.
Here is another design that you can make using only a compass. Start by constructing a circle, then select any point on it. Without changing your compass setting, swing an arc centered at the selected point. Swing an arc with each of the two new points as centers, and so on.
See the Dynamic Geometry Exploration Daisy Designs at
Notice the shape you get by connecting the six petal tips of the daisy. This is a
regular hexagon, a 6-sided figure whose sides are the same length and whose angles are all the same size.
You can do many variations on a daisy design.
www.keymath.com/DG
LESSON 0.3 Circle Designs 11
keymath.com/DG
Dynamic Geometry Explorations at
show geometric concepts visually using interactive sketches.
www.keymath.com/DG
12 CHAPTER 0 Geometric Art
E
XERCISES
For Exercises 1–5, use your construction tools.
1. Use square dot paper to create a 4-by-5 grid of 20 circles, and then make 12 circles overlapping them. Color or shade the design so that it has reflectional symmetry.
2. Use your compass to create a set of seven identical circles that touch but do not overlap. Draw a larger circle that encloses the seven circles. Color or shade your design so that it has rotational symmetry.
3. Create a 6-petal daisy design and color or shade it so that it has rotational symmetry, but not reflectional symmetry.
4. Make a 12-petal daisy by drawing a second 6-petal daisy between the petals of the first 6-petal daisy. Color or shade the design so that it has reflectional symmetry, but not rotational symmetry.
5. Using a 1-inch setting for your compass, construct a central regular hexagon and six regular hexagons that each share one side with the original hexagon. Your hexagon design should look similar to, but larger than, the figure at right. This design is called a tessellation, or tiling, of regular hexagons.
You will need
Everything is an illusion, including this notion.
STANISLAW J. LEC
L E S S O N
0.4
LESSON 0.4 Op Art 13
Op Art
O
p art, or optical art, is a form of abstract art that uses lines or geometric patterns to create a special visual effect. The contrasting dark and light regions sometimes appear to be in motion or to represent a change in surface, direction, and dimension. Victor Vasarely was one artist who transformed grids so that spheres seem to bulge from them. Recall the series Tsiga I, II, III that appears in Lesson 0.1. Harlequin, shownat right, is a rare Vasarely work that includes a human form. Still, you can see Vasarely’s trademark sphere in the clown’s bulging belly.
Op art is fun and easy to create. To create one kind of op art design, first make a design in outline. Next, draw horizontal or vertical lines, gradually varying the space between the lines or each pair of lines, as shown below, to create an illusion of hills and valleys. Finally, color in or shade alternating spaces.
To create the next design, first locate a point on each of the four sides of a square. Each point should be the same distance from a corner, as shown. Your compass is a good tool for measuring equal lengths. Connect these four points to create another square within the first. Repeat the process until the squares appear to converge on the center. Be careful that you don’t fall in!
Here are some other examples of op art.
You can create any of the designs on this page using just a compass and straightedge (and doing some careful coloring). Can you figure out how each of these op art designs was created?
LESSON 0.4 Op Art 15
E
XERCISES
1. What is the optical effect in each piece of art in this lesson?
2. Nature creates its own optical art. At first the black and white stripes of a zebra appear to work against it, standing out against the golden brown grasses of the African plain. However, the stripes do provide the zebras with very effective protection from predators. When and how?
3. Select one type of op art design from this lesson and create your own version of it.
4. Create an op art design that has reflectional symmetry, but not rotational symmetry.
5. Antoni Gaudí (1852–1926) designed the Bishop’s Palace in Astorga, Spain. List as many geometric shapes as you can recognize on the palace (flat, two-dimensional shapes such as rectangles as well as solid, three-dimensional shapes such as cylinders). What type of symmetry do you see on the palace?
16 CHAPTER 0 Geometric Art L E S S O N
0.5
Knot Designs
K
not designs are geometric designs that appear to weave or to interlace like a knot. Some of the earliest known designs are found in Celtic art from the northern regions of England and Scotland. In their carved stone designs, the artists imitated the rich geometric patterns of three-dimensional crafts such as weaving and basketry. The Book of Kells (8th and 9th centuries) is the most famous source of Celtic knot designs.Here are the steps for creating two examples of knot designs. Look them over before you begin the exercises.
You can use a similar approach to create a knot design with rings.
In the old days, a love-sick
sailor might send his
sweetheart a length of
fishline loosely tied in a love
knot. If the knot was returned
pulled tight, it meant the
passion was strong. But if the
knot was returned untied—
ah, matey, time to ship out.
OLD SAILOR’S TALE
Today a very familiar knot design is the set of interconnected rings (shown at right) used as the logo for the Olympic Games.
LESSON 0.5 Knot Designs 17
Here are some more examples of knot designs.
n
18 CHAPTER 0 Geometric Art
E
XERCISES
1. Name a culture or country whose art uses knot designs.
2. Create a knot design of your own, using only straight lines on graph paper.
3. Create a knot design of your own with rotational symmetry, using a compass or a circle template.
4. Sketch five rings linked together so that you could separate all five by cutting open one ring.
5. The coat of arms of the Borromeo family, who lived during the Italian Renaissance (ca. 15th century), showed a very interesting knot design known as the Borromean Rings. In it, three rings are linked together so that if any one ring is removed the remaining two rings are no longer connected. Got that? Good. Sketch the Borromean Rings.
6. The Chokwe storytellers of northeastern Angola are called Akwa kuta sona (“those who know how to draw”). When they sit down to draw and to tell their stories, they clear the ground and set up a grid of points in the sand with their fingertips, as shown below left. Then they begin to tell a story and, at the same time, trace a finger through the sand to create a lusona design with one smooth, continuous motion. Try your hand at creating sona (plural of lusona). Begin with the correct number of dots. Then, in one motion, re-create one of the sona below. The initial dot grid is shown for the rat.
7. In Greek mythology, the Gordian knot was such a complicated knot that no one could undo it. Oracles claimed that whoever could undo the knot would become the ruler of Gordium. When Alexander the Great (356–323 B.C.E.) came upon the knot, he simply cut it with his sword and claimed he had fulfilled the prophecy, so the throne was his. The expression “cutting the Gordian knot” is still used today. What do you think it means?
You will need
Science
Mathematician DeWitt Sumners at Florida State University and biophysicist Sylvia Spenger at the University of California, Berkeley, have discovered that when a virus attacks DNA, it creates a knot on the DNA.
LESSON 0.5 Knot Designs 19 8. The square knot and granny knot are very similar but do very different things.
Compare their symmetries. Use string to re-create the two knots and explain their differences.
9. Cut a long strip of paper from a sheet of lined paper or graph paper. Tie the strip of paper snugly, but without wrinkles, into a simple knot. What shape does the knot create? Sketch your knot.
SYMBOLIC ART
Japanese artist Kunito Nagaoka (b 1940) uses geometry in his work. Nagaoka was born in Nagano, Japan, and was raised near the active volcano Asama. In Japan, he
experienced earthquakes and typhoons as well as the human tragedies of Hiroshima and Nagasaki. In 1966, he moved to Berlin, Germany, a city rebuilt in concrete from the ruins of World War II. These experiences clearly influenced his work.
You can find other examples of symbolic art at
Look at the etching shown here or another piece of symbolic art. Write a paragraph describing what you think might have happened in the scene or what you think it might represent. What types of geometric figures do you find?
Use geometric shapes in your own sketch or painting to evoke a feeling or to tell a story. Write a one- or two-page story related to your art.
Your project should include A paragraph describing the shapes found in the art shown
here or in another piece of symbolic art.
(If you use a different piece of art, include a copy of it.) Your own symbolic art that uses geometric figures. A one- or two-page story that relates to your art.
www.keymath.com/DG
20 CHAPTER 0 Geometric Art
Patience with small details makes perfect a large work, like the universe.
JALALUDDIN RUMI
L E S S O N
0.6
Islamic Tile Designs
I
slamic art is rich in geometric forms. Early Islamic, or Muslim, artists became familiar with geometry through the works of Euclid, Pythagoras, and other mathematicians of antiquity, and they used geometric patterns extensively in their art and architecture.Islam forbids the representation of humans or animals in religious art. So, instead, the artists use intricate geometric patterns.
One striking example of Islamic architecture is the Alhambra, a Moorish palace in Granada, Spain. Built over 600 years ago by Moors and Spaniards, the Alhambra is filled from floor to ceiling with marvelous geometric patterns. The designs you see on this page are but a few of the hundreds of intricate geometric patterns found in the tile work and the inlaid wood ceilings of buildings like the Alhambra and the Dome of the Rock. Carpets and hand-tooled bronze plates from the Islamic world also show geometric designs. The patterns often elaborate on basic grids of regular hexagons, equilateral triangles, or squares. These complex Islamic patterns were constructed with no more than a compass and a straightedge. Repeating patterns like these are called
tessellations.You’ll learn more about tessellations in Chapter 7.
The two examples below show how to create one tile in a square-based and a hexagon-based design. The hexagon-based pattern is also a knot design.
LESSON 0.6 Islamic Tile Designs 21
22 CHAPTER 0 Geometric Art
E
XERCISES
1. Name two countries where you can find Islamic architecture.
2. What is the name of the famous palace in Granada, Spain, where you can find beautiful examples of tile patterns?
3. Using tracing paper or transparency film, trace a few tiles from the 8-Pointed Star design. Notice that you can slide, or translate, the tracing in a straight line horizontally, vertically, and even diagonally to other positions so that the tracing will fit exactly onto the tiles again. What is the shortest translation distance you can find, in centimeters?
4. Notice that when you rotate your tracing from Exercise 3 about certain points in the tessellation, the tracing fits exactly onto the tiles again. Find two different points of rotation. (Put your pencil on the point and try rotating the tracing paper or transparency.) How many times in one rotation can you make the tiles match up again?
You will need
LESSON 0.6 Islamic Tile Designs 23 5. Currently the tallest twin towers in the
world are the Petronas Twin Towers in Kuala Lumpur, Malaysia. Notice that the floor plans of the towers have the shape of Islamic designs. Use your compass and straightedge to re-create the design of the base of the Petronas Twin Towers, shown at right.
6. Use your protractor and ruler to draw a square tile. Use your compass, straightedge, and eraser to modify and decorate it. See the example in this lesson for ideas, but yours can be different. Be creative!
7. Construct a regular hexagon tile and modify and decorate it. See the example in this lesson for ideas, but yours can be different.
8. Create a tessellation with one of the designs you made in Exercises 6 and 7. Trace or photocopy several copies and paste them together in a tile pattern. (You can also create your tessellation using geometry software and print out a copy.) Add finishing touches to your tessellation by adding, erasing, or whiting out lines as desired. If you want, see if you can interweave a knot design within your tessellation. Color your tessellation.
Architecture
After studying buildings in other Muslim countries, the architect of the Petronas Twin Towers, Cesar Pelli (b 1926), decided that geometric tiling patterns would be key to the design. For the floor plan, his team used a very traditional tile design, the 8-pointed star—two intersecting squares. To add space and connect the design to the traditional “arabesques,” the design team added arcs of circles between the eight points.
24 CHAPTER 0 Geometric Art
I
n this chapter, you described the geometric shapes and symmetries you see in nature, in everyday objects, in art, and in architecture. You learned that geometry appears in many types of art—ancient and modern, from every culture—and you learned specific ways in which some cultures use geometry in their art. You also used a compass and straightedge to create your own works of geometric art.E
XERCISES
1. List three cultures that use geometry in their art.
2. What is the optical effect of the op art design at right?
3. Name the basic tools of geometry you used in this chapter and describe their uses.
4. With a compass, draw a 12-petal daisy.
5. Construction With a compass and straightedge, construct a regular hexagon.
6. List three things in nature that have geometric shapes. Name their shapes.
7. Draw an original knot design.
8. Which of the wheels below have reflectional symmetry? How many lines of symmetry does each have?
9. Which of the wheels in Exercise 8 have only rotational symmetry? What kind of rotational symmetry does each of the four wheels have?
The end of a chapter is a good time to review and organize your work. Each chapter in this book will end with a review lesson.
You will need
CHAPTER 0 REVIEW 25 10. A mandala is a circular design arranged in rings that radiate from the center.
(See the Cultural Connection below.) Use your compass and straightedge to create a mandala. Draw several circles using the same point as the center. Create a geometric design in the center circle, and decorate each ring with a symmetric geometric design. Color or decorate your mandala. Two examples are shown below.
11. Create your own personal mandala. You might include your name, cultural symbols, photos of friends and relatives, and symbols that have personal meaning for you. Color it.
12. Create one mandala that uses techniques from Islamic art, is a knot design, and also has optical effects.
Cultural
The word mandala comes from Sanskrit, the classical language of India, and means “circle” or “center.” Hindus use mandala designs for meditation. The Indian rug at right is an example of a mandala, as is the Aztec calendar stone below left. Notice the symbols are arranged symmetrically within each circle. The rose windows in many gothic cathedrals, like the one below right from the Chartres Cathedral in France, are also mandalas. Notice all the circles within circles, each one filled with a design or picture.
26 CHAPTER 0 Geometric Art
13. Before the Internet, “flags” was the most widely read topic of the World Book
Encyclopedia. Research answers to these questions. More information about flags is available at
a. Is the flag of Puerto Rico symmetric? Explain.
b. Does the flag of Kenya have rotational symmetry? Explain.
c. Name a country whose flag has both rotational and reflectional symmetry. Sketch the flag.
www.keymath.com/DG
An essential part of learning is being able to show yourself and others how much you know and what you can do. Assessment isn’t limited to tests and quizzes. Assessment isn’t even limited to what your teacher sees or what makes up your grade. Every piece of art you make and every project or exercise you complete gives you a chance to demonstrate to somebody—yourself, at least—what you’re capable of.
BEGIN A PORTFOLIOThis chapter is primarily about art, so you might organize your work the way a professional artist does—in a portfolio. A portfolio is different from a notebook, both for an artist and for a geometry student. An artist’s
notebook might contain everything from scratch work to practice sketches to random ideas jotted down. A portfolio is reserved for an artist’s most significant or
best work. It’s his or her portfolio that an artist presents to the world to
demonstrate what he or she is capable of doing. The portfolio can also show how an artist’s work has changed over time.
Review all the work you’ve done so far and choose one or more examples of your best art projects to include in your portfolio. Write a paragraph or two about each piece, addressing these questions:
What is the piece an example of ?
Does this piece represent your best work? Why else did you choose it? What mathematics did you learn or apply in this piece?
How would you improve the piece if you redid or revised it?
Portfolios are an ongoing and ever-changing display of your work and growth. As you finish each chapter, update your portfolio by adding new work.
This section suggests how you might review, organize, and communicate to others what you’ve learned. Whether you follow these suggestions or directions from your teacher, or use study strategies of your own, be sure to reflect on all you’ve learned.
28 CHAPTER 1 Introducing Geometry
Nature’s Great Book is written in mathematical symbols.
GALILEO GALILEI
L E S S O N
1.1
Building Blocks
of Geometry
T
hree building blocks of geometry are points, lines, and planes. A point is the most basic building block of geometry. It has no size. It has only location. You represent a point with a dot, and you name it with a capital letter. The point shown below is called P.A line is a straight, continuous arrangement of infinitely many points. It has infinite length, but no thickness. It extends forever in two directions. You name a line by giving the letter names of any two points on the line and by placing the line symbol above the letters, for example, .
A plane has length and width, but no thickness. It is like a flat surface that extends infinitely along its length and width. You represent a plane with a four-sided figure, like a tilted piece of paper, drawn in perspective. Of course, this actually illustrates only part of a plane. You name a plane with a script capital letter, such as .
A B P
LESSON 1.1 Building Blocks of Geometry 29 It can be difficult to explain what points, lines, and planes are even though you may recognize them. Early mathematicians tried to define these terms.
The ancient Greeks said, “A point is that which has no part. A line is breadthless length.” The Mohist philosophers of ancient China said, “The line is divided into parts, and that part which has no remaining part is a point.” Those definitions don’t help much, do they?
A definition is a statement that clarifies or explains the meaning of a word or a phrase. However, it is impossible to define point, line, and plane without using words or phrases that themselves need definition. So these terms remain undefined. Yet, they are the basis for all of geometry.
Using the undefined terms point, line, and plane, you can define all other geometry terms and geometric figures. Many are defined in this book, and others will be defined by you and your classmates.
Here are your first definitions. Begin your list and draw sketches for all definitions.
Collinearmeans on the same line.
Coplanarmeans on the same plane.
Keep a definition list in your notebook, and each time you encounter new geometry vocabulary, add the term to your list. Illustrate each definition with a simple sketch.
30 CHAPTER 1 Introducing Geometry
A line segment consists of two points called the endpoints of the segment and all the points between them that are collinear with the two points.
You can write line segment AB, using a segment symbol, as AB or BA . There are two ways to write the length of a segment. You can write AB = 2 in., meaning the distance from A to B is 2 inches. You can also use an m for “measure” in front of the segment name, and write the distance as mAB = 2 in. If no measurement units are used for the length of a segment, it is understood that the choice of units is not important or is based on the length of the smallest square in the grid.
LESSON 1.1 Building Blocks of Geometry 31 Two segments are congruent if and only if they have equal measures, or lengths.
When drawing figures, you show congruent segments by making identical markings.
The midpoint of a segment is the point on the segment that is the same distance from both endpoints. The midpoint bisects the segment, or divides the segment into two congruent segments.
Study the diagrams below.
a. Name each midpoint and the segment it bisects.
b. Name all the congruent segments. Use the congruence symbol to write your answers.
Look carefully at the markings and apply the midpoint definition.
CF = FD, so F is the midpoint of CD; JK KL , so K is the midpoint of JL.
CF FD, HJ HL, and JK KL.
Even though EF and FG appear to have the same length, you cannot assume they are congruent without the markings. The same is true for MN and NP.
a.
b.
EXAMPLE
Solution
Ray AB is the part of AB that contains point A and all the points on AB that are on the same side of point A as point B. Imagine cutting off all the points to the left of point A.
In the figure above, AY and AB are two ways to name the same ray. Note that AB is not the same as BA !
A ray begins at a point and extends infinitely in one direction. You need two letters to name a ray. The first letter is the endpoint of the ray, and the second letter is any other point that the ray passes through.
32 CHAPTER 1 Introducing Geometry
Mathematical Models
In this lesson, you encountered many new geometry terms. In this investigation you will work as a group to identify models from the real world that represent these terms and to identify how they are represented in diagrams.
Step 1 Look around your classroom and identify examples of each of these terms: point, line, plane, line segment, congruent segments, midpoint of a segment, and ray.
Step 2 Identify examples of these terms in the photograph at right.
Step 3 Identify examples of these terms in the figure above.
Step 4 Explain in your own words what each of these terms means.
AN>
LESSON 1.1 Building Blocks of Geometry 33
E
XERCISES
1. In the photos below identify the physical models that represent a point, segment, plane, collinear points, and coplanar points.
For Exercises 2–4, name each line in two different ways.
2.
3.
4.
For Exercises 5–7, draw two points and label them. Then use a ruler to draw each line. Don’t forget to use arrowheads to show that the line extends indefinitely.
5. AB 6. KL 7. DE with D(−3, 0) and E (0, −3)
For Exercises 8–10, name each line segment.
8. 9. 10.
For Exercises 11 and 12, draw and label each line segment.
11. AB 12. RSwith R(0, 3) and S(−2, 11)
For Exercises 13 and 14, use your ruler to find the length of each line segment to the nearest tenth of a centimeter. Write your answer in the form mAB = .
13.
14.
For Exercises 15–17, use your ruler to draw each segment as accurately as you can. Label each segment.
15. AB = 4.5 cm 16. CD = 3 in. 17. EF = 24.8 cm
18. Name each midpoint and the segment it bisects.
19. Draw two segments that have the same midpoint. Mark your drawing to show congruent segments.
20. Draw and mark a figure in which M is the midpoint of ST, SP = PT,and T is the midpoint of PQ.
For Exercises 21–23, name the ray in two different ways.
21. 22. 23.
For Exercises 24–26, draw and label each ray.
24. AB 25. YX 26. MN
27. Draw a plane containing four coplanar points A, B, C, and D, with exactly three collinear points A, B, and D.
28. Given two points A and B, there is only one segment that you can name: WithAB. three collinear points A, B, and C, there are three different segments that you can name: AB, AC, and BC. With five collinear points A, B, C, D, and E, how many different segments can you name?
For Exercises 29–31, draw axes on graph paper and locate point A (4, 0) as shown.
29. Draw AB where point B has coordinates (2, −6).
30. Draw OM with endpoint (0, 0) that goes through point M (2, 2).
31. Draw CD through points C ( −2, 1) and D ( −2, −3).
34 CHAPTER 1 Introducing Geometry
Career
Woodworkers use a tool called a plane to shave a rough wooden surface to create a perfectly smooth planar surface. The smooth board can then be made into a tabletop, a door, or a cabinet.
Woodworking is a very precise process. Producing high-quality pieces requires an understanding of lines, planes, and angles as well as careful measurements.
For help, see the Dynamic Geometry Exploration Spiral Designs at www.keymath.com/DG
LESSON 1.1 Building Blocks of Geometry 35 32. If the signs of the coordinates of collinear points P(−6, −2), Q(−5, 2), and
R(−4, 6) are reversed, are the three new points still collinear? Draw a picture and
explain why.
33. Draw a segment with midpoint N(−3, 2). Label it PQ.
34. Copy triangle TRY shown at right. Use your ruler to find the midpoint A of side TRand the midpoint G of side TY.Draw AG.
35. Use your ruler to draw a triangle with side lengths 8 cm and 11 cm.
Explain your method. Can you draw a second triangle with these two side lengths that looks different from the first?
keymath.com/DG
A completed spiral.
Coloring or decorations that make the spiral stand out.
SPIRAL DESIGNS
T
he circle design shown below is used in a variety of cultures to create mosaic decorations. The spiral design may have been inspired by patterns in nature. Notice that the seeds on the sunflower also spiral out from the center.Create and decorate your own spiral design. Here are the steps to make the spirals. The more circles and radii you draw, the more detailed your design will be.
36 CHAPTER 1 Introducing Geometry
Midpoint
A
midpoint is the point on a line segment that is the same distance from both
endpoints.
You can think of a midpoint as being halfway between two locations. You know how to mark a midpoint. But when the position and location matter, such as in navigation and geography, you can use a coordinate grid and some algebra to find the exact location of the midpoint. You can calculate the coordinates of the midpoint of a segment on a coordinate grid using a formula.
History
Surveyors and mapmakers of ancient Egypt, China, Greece, and Rome used various coordinate systems to locate points. Egyptians made extensive use of square grids and used the first known rectangular coordinates at Saqqara around 2650 B.C.E. By the 17th century, the age of European exploration, the need for accurate maps and the development of easy-to-use algebraic symbols gave rise to modern coordinate geometry. Notice the lines of latitude and longitude in this 17th-century map.
If and are the coordinates of the endpoints of a segment, then the coordinates of the midpoint are
The midpoint is not on a grid intersection point, so we can use the coordinate midpoint property.
The midpoint of AB is (−2.5, −0.5).
USING YOUR ALGEBRA SKILLS 1 Midpoint 37
E
XERCISES
For Exercises 1–3, find the coordinates of the midpoint of the segment with each pair of endpoints.
1. (12, −7) and ( −6, 15) 2. ( −17, −8) and ( −1, 11) 3. (14, −7) and ( −3, 18)
4. One endpoint of a segment is (12, −8). The midpoint is (3, 18). Find the coordinates of the other endpoint.
5. A classmate tells you, “Finding the coordinates of a midpoint is easy. You just find the averages.” Is there any truth to it? Explain what you think your classmate means.
6. Find the two points on AB that divide the segment into three congruent parts. Point A has coordinates (0, 0) and point B has coordinates (9, 6). Explain your method.
7. Describe a way to find points that divide a segment into fourths.
8. In each figure below, imagine drawing the diagonals and AC BD.
a. Find the midpoint of AC and the midpoint of BDin each figure.
b. What do you notice about the midpoints?
EXAMPLE
Solution
Segment AB has endpoints (−8, 5) and (3, −6). Find the coordinates of the midpoint of AB.
38 CHAPTER 1 Introducing Geometry
Poolroom Math
P
eople use angles every day. Plumbers measure the angle between connecting pipes to make a good fitting. Woodworkers adjust their saw blades to cut wood at just the correct angle. Air traffic controllers use angles to direct planes. And good pool players must know their angles to plan their shots.You can use the terms that you defined in Lesson 1.1 to write a precise definition of angle. An angle is formed by two rays that share a common endpoint, provided that the two rays are noncollinear. In other words, the rays cannot lie on the same line. The common endpoint of the two rays is the vertex of the angle. The two rays are the sides of the angle. You can name the angle in the figure below angle TAP or angle PAT, or use the angle symbol and write TAP or PAT. Notice that the vertex must be the middle letter, and the first and last letters each name a point on a different ray. Since there are no other angles with vertex A, you can also simply call this A
Inspiration is needed in geometry, just as much as in