Lift Cookbook
by Richard Dallaway
Copyright © 2013 Richard Dallaway. All rights reserved. Printed in the United States of America.
Published by O’Reilly Media, Inc., 1005 Gravenstein Highway North, Sebastopol, CA 95472.
O’Reilly books may be purchased for educational, business, or sales promotional use. Online editions are also available for most titles (http://my.safaribooksonline.com). For more information, contact our corporate/ institutional sales department: 800-998-9938 or [email protected].
Editor: Meghan Blanchette Production Editor: Kara Ebrahim Copyeditor: Kiel Van Horn Proofreader: Linley Dolby
Indexer: Judy McConville Cover Designer: Randy Comer Interior Designer: David Futato Illustrator: Rebecca Demarest
June 2013: First Edition
Revision History for the First Edition: 2013-06-21: First release
See http://oreilly.com/catalog/errata.csp?isbn=9781449362683 for release details.
Nutshell Handbook, the Nutshell Handbook logo, and the O’Reilly logo are registered trademarks of O’Reilly Media, Inc. Lift Cookbook, the image of an American lobster, and related trade dress are trademarks of O’Reilly Media, Inc.
Many of the designations used by manufacturers and sellers to distinguish their products are claimed as trademarks. Where those designations appear in this book, and O’Reilly Media, Inc., was aware of a trade‐ mark claim, the designations have been printed in caps or initial caps.
While every precaution has been taken in the preparation of this book, the publisher and author assume no responsibility for errors or omissions, or for damages resulting from the use of the information contained herein.
Table of Contents
Preface. . . vii
1. Installing and Running Lift. . . 1
1.1. Downloading and Running Lift 1
1.2. Creating a Lift Project from Scratch Using SBT 4
1.3. Developing Using a Text Editor 8
1.4. Incorporating JRebel 9
1.5. Developing Using Eclipse 12
1.6. Developing Using IntelliJ IDEA 13
1.7. Viewing the lift_proto H2 Database 15
1.8. Using the Latest Lift Build 16
1.9. Using a New Version of Scala 17
2. HTML. . . 19
2.1. Testing and Debugging CSS Selectors 19
2.2. Sequencing CSS Selector Operations 20
2.3. Setting Meta Tag Contents 22
2.4. Setting the Page Title 23
2.5. HTML Conditional Comments 24
2.6. Returning Snippet Markup Unchanged 26
2.7. Snippet Not Found When Using HTML5 27
2.8. Avoiding CSS and JavaScript Caching 28
2.9. Adding to the Head of a Page 30
2.10. Custom 404 Page 33
2.11. Other Custom Status Pages 34
2.12. Links in Notices 36
2.13. Link to Download Data 37
2.14. Test on a Req 39
2.15. Rendering Textile Markup 43
3. Forms Processing in Lift. . . 45
3.1. Plain Old Form Processing 45
3.2. Ajax Form Processing 47
3.3. Ajax JSON Form Processing 50
3.4. Use a Date Picker for Input 55
3.5. Making Suggestions with Autocomplete 58
3.6. Offering Choices with Radio Buttons 64
3.7. Conditionally Disable a Checkbox 69
3.8. Use a Select Box with Multiple Options 70
3.9. File Upload 75
4. REST. . . 79
4.1. DRY URLs 79
4.2. Missing File Suffix 80
4.3. Missing .com from Email Addresses 83
4.4. Failing to Match on a File Suffix 84
4.5. Accept Binary Data in a REST Service 85
4.6. Returning JSON 86
4.7. Google Sitemap 88
4.8. Calling REST Service from a Native iOS Application 90
5. JavaScript, Ajax, and Comet. . . 95
5.1. Trigger Server-Side Code from a Button 95
5.2. Call Server When Select Option Changes 100
5.3. Creating Client-Side Actions in Your Scala Code 103
5.4. Focus on a Field on Page Load 104
5.5. Add a CSS Class to an Ajax Form 105
5.6. Running a Template via JavaScript 106
5.7. Move JavaScript to End of Page 107
5.8. Run JavaScript on Comet Session Loss 109
5.9. Ajax File Upload 111
5.10. Format a Wired Cell 114
6. Request Pipeline. . . 117
6.1. Debugging a Request 117
6.2. Running Code When Sessions Are Created (or Destroyed) 119
6.3. Run Code When Lift Shuts Down 120
6.4. Running Stateless 121
6.5. Catch Any Exception 122
6.7. Serving a File with Access Control 127
6.8. Access Restriction by HTTP Header 128
6.9. Accessing HttpServletRequest 130
6.10. Force HTTPS Requests 131
7. Relational Database Persistence with Record and Squeryl. . . 133
7.1. Configuring Squeryl and Record 133
7.2. Using a JNDI DataSource 135
7.3. One-to-Many Relationship 136
7.4. Many-to-Many Relationship 140
7.5. Adding Validation to a Field 147
7.6. Custom Validation Logic 150
7.7. Modify a Field Value Before It Is Set 152
7.8. Testing with Specs 153
7.9. Store a Random Value in a Column 158
7.10. Automatic Created and Updated Timestamps 159
7.11. Logging SQL 161
7.12. Model a Column with MySQL MEDIUMTEXT 162
7.13. MySQL Character Set Encoding 163
8. MongoDB Persistence with Record. . . 165
8.1. Connecting to a MongoDB Database 165
8.2. Storing a Hash Map in a MongoDB Record 167
8.3. Storing an Enumeration in MongoDB 170
8.4. Embedding a Document Inside a MongoDB Record 171
8.5. Linking Between MongoDB Records 172
8.6. Using Rogue 175
8.7. Storing Geospatial Values 177
8.8. Running Queries from the Scala Console 180
8.9. Unit Testing Record with MongoDB 181
9. Around Lift. . . 187
9.1. Sending Plain-Text Email 187
9.2. Logging Email Rather than Sending 189
9.3. SMTP Authentication 191
9.4. Sending Authenticated Email 193
9.5. Sending Email with Attachments 194
9.6. Run a Task Later 196
9.7. Run Tasks Periodically 197
9.8. Fetching URLs 198
10. Production Deployment. . . 203
10.1. Deploying to CloudBees 203
10.2. Deploying to Amazon Elastic Beanstalk 209
10.3. Deploying to Heroku 212
10.4. Distributing Comet Across Multiple Servers 217
11. Contributing, Bug Reports, and Getting Help. . . 223
11.1. You’d Like Some Help 223
11.2. How to Report Bugs 224
11.3. Contributing Small Code Changes and ScalaDoc 225
11.4. Contributing Documentation 226
11.5. How to Add a New Recipe to This Cookbook 226
11.6. Sharing Code in Modules 227
Preface
This is a collection of solutions to questions you might have while developing web applications with the Lift Web Framework.
The aim is to give a single, short answer to a specific question. When there are multiple approaches, or styles, we’ll give you one solution, but will point you at alternatives in the discussion.
Chapter 1 will get you up and running with Lift, but in other respects, this cookbook is aimed at practitioners and the questions they have asked. If this is the first time you’ve heard of Lift, you’ll want to look at:
• Simply Lift
• Torsten Uhlmann’s Instant Lift Web Applications How-to (PACKT Publishing) • Timothy Perrett’s Lift in Action (Manning Publications)
Contributors
I’ve mined the Lift mailing list for these recipes, but I’m not the only one. Recipes have been contributed by:
• Jono Ferguson, who’s a Scala consultant based in Sydney, Australia. He can be found lurking on the Lift mailing list and occasionally helps out with Lift modules. Find him at https://twitter.com/jonoabroad and http://underscoreconsulting.com. • Franz Bettag, who’s been an enthusiastic Scala hacker for several years now. He
joined the Lift team in January 2012 and actively tweets and blogs about his newest Scala adventures. Find him at https://twitter.com/fbettag.
• Marek Żebrowski.
• Peter Robinett, who’s a web and mobile developer and a Lift committer. He can be found on the Web and on Twitter.
• Kevin Lau, who’s a founder of a few web apps with a focus in AWS cloud, iOS, and Lift.
• Tony Kay.
You should join them: Recipe 11.5 tells you how.
Source
The text of this cookbook is at https://github.com/d6y/lift-cookbook. You’ll find projects for each chapter on GitHub.
Updates
Follow @LiftCookbook on Twitter.
Software Versions
Except where otherwise indicated, the examples use Lift 2.5 with SBT 0.12 and Scala 2.9.
Lift 2.5 is also available for Scala 2.10.
Conventions Used in This Book
The following typographical conventions are used in this book:
Italic
Indicates new terms, URLs, email addresses, filenames, and file extensions.
Constant width
Used for program listings, as well as within paragraphs to refer to program elements such as variable or function names, databases, data types, environment variables, statements, and keywords.
Constant width bold
Shows commands or other text that should be typed literally by the user.
Constant width italic
This icon signifies a tip, suggestion, or general note.
This icon indicates a warning or caution.
Using Code Examples
This book is here to help you get your job done. In general, if this book includes code examples, you may use the code in this book in your programs and documentation. You do not need to contact us for permission unless you’re reproducing a significant portion of the code. For example, writing a program that uses several chunks of code from this book does not require permission. Selling or distributing a CD-ROM of examples from O’Reilly books does require permission. Answering a question by citing this book and quoting example code does not require permission. Incorporating a significant amount of example code from this book into your product’s documentation does require permission.
We appreciate, but do not require, attribution. An attribution usually includes the title, author, publisher, and ISBN. For example: “Lift Cookbook by Richard Dallaway (O’Reil‐ ly). Copyright 2013 Richard Dallaway, 978-1-449-36268-3.”
If you feel your use of code examples falls outside fair use or the permission given above, feel free to contact us at [email protected].
Safari® Books Online
Safari Books Online is an on-demand digital library that delivers expert content in both book and video form from the world’s lead‐ ing authors in technology and business.
Technology professionals, software developers, web designers, and business and crea‐ tive professionals use Safari Books Online as their primary resource for research, prob‐ lem solving, learning, and certification training.
Safari Books Online offers a range of product mixes and pricing programs for organi‐ zations, government agencies, and individuals. Subscribers have access to thousands of books, training videos, and prepublication manuscripts in one fully searchable database from publishers like O’Reilly Media, Prentice Hall Professional, Addison-Wesley Pro‐ fessional, Microsoft Press, Sams, Que, Peachpit Press, Focal Press, Cisco Press, John Wiley & Sons, Syngress, Morgan Kaufmann, IBM Redbooks, Packt, Adobe Press, FT Press, Apress, Manning, New Riders, McGraw-Hill, Jones & Bartlett, Course
Technology, and dozens more. For more information about Safari Books Online, please visit us online.
How to Contact Us
Please address comments and questions concerning this book to the publisher:
O’Reilly Media, Inc.
1005 Gravenstein Highway North Sebastopol, CA 95472
800-998-9938 (in the United States or Canada) 707-829-0515 (international or local)
707-829-0104 (fax)
We have a web page for this book, where we list errata, examples, and any additional information. You can access this page at http://oreil.ly/lift-cookbook.
To comment or ask technical questions about this book, send email to bookques [email protected].
For more information about our books, courses, conferences, and news, see our website at http://www.oreilly.com.
Find us on Facebook: http://facebook.com/oreilly Follow us on Twitter: http://twitter.com/oreillymedia Watch us on YouTube: http://www.youtube.com/oreillymedia
Acknowledgments
These recipes exist because of the many contributions on the Lift mailing list, where
Liftafarians, as they are known, generously give their time to ask questions, put together example projects, give answers, share alternatives, and chip in with comments. Thank you.
I am indebted to the contributors who have taken the trouble to write new recipes, and to those who have provided corrections and suggestions.
It’s been a pleasure working with the O’Reilly team, and they have immensely improved the text. Thank you, especially Meghan Blanchette, Kara Ebrahim, and Kiel Van Horn. Many thanks to Jono for all the encouragement and help.
To Jane, Mum, Dad: thank you. It’s amazing what you can do with a supportive family.
CHAPTER 1
Installing and Running Lift
This chapter covers questions regarding starting development with Lift: running a first Lift application and setting up a coding environment. You’ll find answers regarding production deployment in Chapter 10.
1.1. Downloading and Running Lift
Problem
You want to install and run Lift on your computer.
Solution
The only prerequisite for installing and running Lift is to have Java 1.5 or later installed. Instructions for installing Java can be found at http://java.com/.
You can find out if you have Java from the shell or command prompt by asking for the version you have installed:
$ java -version
java version "1.7.0_13"
Java(TM) SE Runtime Environment (build 1.7.0_13-b20)
Java HotSpot(TM) 64-Bit Server VM (build 23.7-b01, mixed mode)
Once you have Java, the following instructions will download, build, and start a basic Lift application.
For Mac and Linux
• Visit http://liftweb.net/download and download the most recent Lift 2.5 ZIP file. • Unzip the file.
• Start Terminal or your favourite shell tool.
• Navigate into the unzipped folder and into the scala_29 subfolder and then into the
lift_basic folder. • Run ./sbt.
• Required libraries will be downloaded automatically. • At the SBT prompt (>), type container:start. • Open your browser and go to http://127.0.0.1:8080/.
• When you’re done, type exit at the SBT prompt to stop your application from running.
For Windows
• Visit http://liftweb.net/download and locate the link to the most recent ZIP version of Lift 2.5 and save this to disk.
• Extract the contents of the ZIP file.
• Navigate in Explorer to the extracted folder, and once inside, navigate into sca‐ la_29 and then lift_basic.
• Double-click sbt.bat to run the build tool; a Terminal window should open. • Required libraries will be downloaded automatically.
• At the SBT prompt (>), type container:start.
• You may find Windows Firewall blocking Java from running. If so, opt to “allow access.”
• Start your browser and go to http://127.0.0.1:8080/.
• When you’re done, type exit at the SBT prompt to stop your application from running.
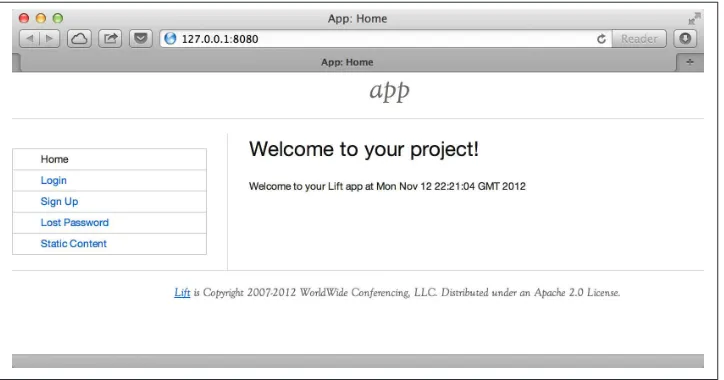
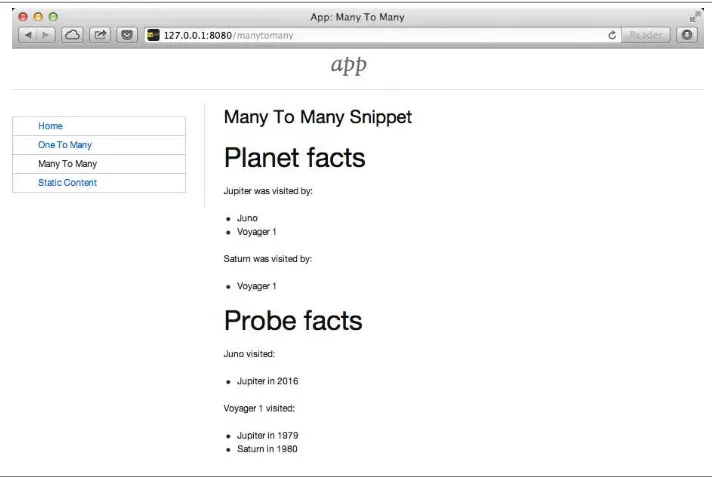
Expected result
Figure 1-1. The basic Lift application home page
Discussion
Lift isn’t installed in the usual sense of “installing software.” Instead, you use standard build tools, such as SBT or Maven, to assemble your application with the Lift framework. In this recipe, we downloaded a ZIP file containing four fairly minimal Lift applications, and then started one of them via the build tool.
Simple Build Tool
Typing sbt starts a Simple Build Tool used by Scala projects (it’s not specific to Lift). SBT will check the project definition and download any libraries required, which will include the Lift framework.
This download happens once, and the downloaded files are stored on disk in .ivy2 under your home folder.
Your application build is configured by build.sbt. Looking inside, you’ll see:
• Basic information about your application, including a name and version • Resolvers, which inform SBT where to fetch dependencies from
• Settings for plugins and the Scala compiler
• A list of dependencies required to run your application, which will include the Lift framework
Running your application
The SBT command container:start starts the web server on the default port of 8080 and passes requests to your Lift application. The word container refers to the software you deploy your application into. There are a variety of containers (Jetty and Tomcat
are probably the best known) all of which conform to a standard for deployment. The upshot is you can build your application and deploy to whichever one you prefer. The
container:start command uses Jetty.
Source code
The source code of the application resides in src/main/webapp and src/main/scala. If you take a look at index.html in the webapp folder, you’ll see mention of lift:hello World. That’s a reference to the class defined in scala/code/snippet/HelloWorld.scala. This is a snippet invocation and an example of Lift’s view first approach to web applica‐ tions. That is, there’s no routing set up for the index page to collect the data and forward it to the view. Instead, the view defines areas of the content that are replaced with func‐ tions, such as those functions defined in HelloWorld.scala.
Lift knows to look in the code package for snippets, because that package is declared as a location for snippets in scala/bootstrap/liftweb/Boot.scala. The Boot class is run when starting your application, and it’s where you can configure the behaviour of Lift.
See Also
The Simple Build Tool documentation is at http://www.scala-sbt.org.
Tutorials for Lift can be found in Simply Lift, Instant Lift Web Applications How-to
(PACKT Publishing), and in Lift in Action (Manning Publications Co.).
1.2. Creating a Lift Project from Scratch Using SBT
Problem
You want want to create a Lift web project from scratch without using the ZIP files provided on the official Lift website.
Solution
You will need to configure SBT and the Lift project yourself. Luckily, only five small files are needed.
First, create an SBT plugin file at project/plugins.sbt (all filenames are given relative to the project root directory):
libraryDependencies <+= sbtVersion(v => v match {
case "0.11.1" => "com.github.siasia" %% "xsbt-web-plugin" % "0.11.1-0.2.10" case "0.11.2" => "com.github.siasia" %% "xsbt-web-plugin" % "0.11.2-0.2.11" case "0.11.3" => "com.github.siasia" %% "xsbt-web-plugin" % "0.11.3-0.2.11.1" case x if x startsWith "0.12" =>
"com.github.siasia" %% "xsbt-web-plugin" % "0.12.0-0.2.11.1" })
This file tells SBT that you will be using the xsbt-web-plugin and chooses the correct version based upon your version of SBT.
Next, create an SBT build file, build.sbt:
organization:= "org.yourorganization"
name:= "liftfromscratch"
version := "0.1-SNAPSHOT"
scalaVersion:= "2.10.0"
seq(com.github.siasia.WebPlugin.webSettings :_*)
libraryDependencies ++= { val liftVersion = "2.5" Seq(
"net.liftweb" %% "lift-webkit" % liftVersion % "compile", "org.eclipse.jetty" % "jetty-webapp" % "8.1.7.v20120910" % "container,test",
"org.eclipse.jetty.orbit" % "javax.servlet" % "3.0.0.v201112011016" % "container,compile" artifacts Artifact("javax.servlet", "jar", "jar") )
}
Feel free to change the various versions, though be aware that certain versions of Lift are only built for certain versions of Scala.
Now that you have the basics of an SBT project, you can launch the sbt console. It should load all the necessary dependencies, including the proper Scala version, and bring you to a prompt.
Next, create the following file at src/main/webapp/WEB-INF/web.xml:
<!DOCTYPE web-app SYSTEM "http://java.sun.com/dtd/web-app_2_3.dtd"> <web-app>
<filter>
<filter-name>LiftFilter</filter-name> <display-name>Lift Filter</display-name>
<description>The Filter that intercepts Lift calls</description> <filter-class>net.liftweb.http.LiftFilter</filter-class>
</filter> <filter-mapping>
<filter-name>LiftFilter</filter-name> <url-pattern>/*</url-pattern>
</filter-mapping> </web-app>
The web.xml file tells web containers, such as Jetty as configured by xsbt-web-plugin, to pass all requests on to Lift.
Next, create a sample index.html file at src/main/webapp/index.html for our Lift app to load. For example:
<!DOCTYPE html> <html>
<head>
<title>Lift From Scratch</title> </head>
<body>
<h1>Welcome, you now have a working Lift installation</h1> </body>
</html>
Finally, set up the basic Lift boot settings by creating a Boot.scala file at src/main/scala/ bootstrap/Boot.scala. The following contents will be sufficient:
package bootstrap.liftweb
import net.liftweb.http.{Html5Properties, LiftRules, Req} import net.liftweb.sitemap.{Menu, SiteMap}
/**
* A class that's instantiated early and run. It allows the application * to modify lift's environment
*/
class Boot { def boot {
// where to search snippet
LiftRules.addToPackages("org.yourorganization.liftfromscratch") // Build SiteMap
def sitemap(): SiteMap = SiteMap( Menu.i("Home") / "index" )
// Use HTML5 for rendering
LiftRules.htmlProperties.default.set((r: Req) => new Html5Properties(r.userAgent))
} }
Congratulations, you now have a working Lift project!
listening at http://localhost:8080. You should be able to go to the address in your web browser and see the rendered index.html file you created earlier.
Discussion
As shown previously, creating a Lift project from scratch is a relatively simple process. However, it can be a tricky one for newcomers, especially if you are not used to the Java Virtual Machine (JVM) ecosystem and its conventions for web containers. If you run into problems, make sure the files are in the correct locations and that their contents were not mistakenly modified. If all else fails, refer to the sample project next or ask for help on the Lift mailing list.
Lift projects using SBT or similar build tools follow a standard project layout, where Scala source code is in src/main/scala and web resources are in src/main/webapp. Your Scala files must be placed either directly at src/main/scala or in nested directories matching the organization and name you defined in build.sbt, in our case giving us src/ main/scala/org/yourorganization/liftfromscratch/. Test files match the directory struc‐ ture but are placed in src/test/ instead of src/main/. Likewise, the web.xml file must be placed in src/main/webapp/WEB-INF/ for it to be properly detected.
Given these conventions, you should have a directory structure looking quite, if not exactly, like this:
See Also
There is a sample project created using this method.
1.3. Developing Using a Text Editor
Problem
You want to develop your Lift application using your favourite text editor, hitting reload in your browser to see changes.
Solution
Run SBT while you are editing, and ask it to detect and compile changes to Scala files. To do that, start sbt and enter the following to the SBT prompt:
~; container:start; container:reload /
When you save a source file in your editor, SBT will detect this change, compile the file, and reload the web container.
Discussion
An SBT command prefixed with ~ makes that command run when files change. The first semicolon introduces a sequence of commands, where if the first command suc‐ ceeds, the second will run. The second semicolon means the reload command will run if the start command ran OK. The start command will recompile any Scala source files that have changed.
When you run SBT in this way, you’ll notice the following output:
1. Waiting for source changes... (press enter to interrupt)
And indeed, if you do press Enter in the SBT window, you’ll exit this triggered execu‐ tion mode and SBT will no longer be looking for file changes. However, while SBT is watching for changes, the output will indicate when this happens with something that looks a little like this:
[info] Compiling 1 Scala source to target/scala-2.9.1/classes... [success] Total time: 1 s, completed 15-Nov-2012 18:14:46
[pool-301-thread-4] DEBUG net.liftweb.http.LiftServlet - Destroyed Lift handler. [info] stopped o.e.j.w.WebAppContext{/,[src/main/webapp/]}
[info] NO JSP Support for /, did not find org.apache.jasper.servlet.JspServlet [info] started o.e.j.w.WebAppContext{/,[src/main/webapp/]}
Edits to HTML files don’t trigger the SBT compile and reload commands. This is because SBT’s default behaviour is to look for Scala and Java source file changes, and also changes to files in src/main/resources/. This works out just fine, because Jetty will use your modified HTML file when you reload the browser page.
Restarting the web container each time you edit a Scala file isn’t ideal. You can reduce the need for restarts by integrating JRebel into your development environment, as de‐ scribed in Recipe 1.4.
However, if you are making a serious number of edits, you may prefer to issue a con tainer:stop command until you’re ready to run you application again with contain er:start. This will prevent SBT compiling and restarting your application over and
over. The SBT console has a command history, and using the up and down keyboard arrows allows you to navigate to previous commands and run them by pressing the Return key. That takes some of the tedium out of these long commands.
One error you may run into is:
java.lang.OutOfMemoryError: PermGen space
The permanent generation is a Java Virtual Machine concept. It’s the area of memory used for storing classes (amongst other things). It’s a fixed size, and once it is full, this PermGen error appears. As you might imagine, continually restarting a container causes many classes to be loaded and unloaded, but the process is not perfect, effectively leaking memory. The best you can do is stop and then restart SBT. If you’re seeing this error often, check the setting for -XX:MaxPermSize inside the sbt (or sbt.bat) script, and if you can, double it.
See Also
Triggered execution has a number of settings you can adjust, as described in the SBT documentation.
See the SBT Command Line Reference for an overview of available commands. Commands and configuration options for the SBT web plugin are described on the GitHub wiki.
1.4. Incorporating JRebel
Problem
You want to avoid application restarts when you change a Scala source file by using JRebel.
Solutions
There are three steps required: install JRebel once; each year, request the free Scala license; and configure SBT to use JRebel.
First, visit https://my.jrebel.com/plans and request the free Scala license.
Second, download the “Generic ZIP Archive” version of JRebel, unzip it to where you like. For this recipe, I’ve chosen to use /opt/zt/jrebel/.
When you have received your account confirmation email from JRebel, you can copy your “authentication token” from the “Active” area of ZeroTurnaround’s site. To apply the token to your local install, run the JRebel configuration script:
$ /opt/zt/jrebel/bin/jrebel-config.sh
For Windows, navigate to and launch bin\jrebel-config.cmd.
In the “Activation” setting, select “I want to use myJRebel” and then in the “License” section, paste in your activation token. Click the “Activate” button, and once you see the license status change to “You have a valid myJRebel token,” click “Finish.”
Finally, configure SBT by modifying the sbt script to enable JRebel. This means setting the -javaagent and -noverify flags for Java, and enabling the JRebel Lift plugin. For Mac and Linux, the script that’s included with the Lift downloads would become:
java -Drebel.lift_plugin=true -noverify -javaagent:/opt/zt/jrebel/jrebel.jar \ -Xmx1024M -Xss2M -XX:MaxPermSize=512m -XX:+CMSClassUnloadingEnabled -jar \ `dirname $0`/sbt-launch-0.12.jar "$@"
For Windows, modify sbt.bat to be:
set SCRIPT_DIR=%~dp0
java -Drebel.lift_plugin=true -noverify -javaagent:c:/opt/zt/jrebel/jrebel.jar \ -XX:+CMSClassUnloadingEnabled -XX:MaxPermSize=256m -Xmx1024M -Xss2M \
-jar "%SCRIPT_DIR%\sbt-launch-0.12.jar" %*
There’s nothing else to do to use JRebel. When you start SBT, you’ll see a large banner stating something like this:
#############################################################
JRebel 5.1.1 (201211271929)
(c) Copyright ZeroTurnaround OU, Estonia, Tartu.
Over the last 30 days JRebel prevented
at least 335 redeploys/restarts saving you about 13.6 hours. ....
[2012-12-16 23:15:44] JRebel: Reloading class 'code.snippet.HelloWorld'.
That change is live, without having to restart the container.
Discussion
JRebel is very likely to speed up your development. It updates code in a running Java Virtual Machine, without having to stop and restart it. The effect is that, on the whole, you can compile a class, then hit reload in your browser to see the change in your Lift application.
Even with JRebel you will need to restart your applications from time to time, but JRebel usually reduces the number of restarts. For example, Boot.scala is run when your ap‐ plication starts, so if you modify something in your Boot.scala, you’ll need to stop and start your application. JRebel can’t help with that.
But there are also other situations that JRebel cannot help with, such as when a superclass changes. Generally, JRebel will emit a warning about this in the console window. If that happens, stop and start your application.
The -Drebel.lift_plugin=true setting adds Lift-specific functionality to JRebel. Specifically, it allows JRebel to reload changes to LiftScreen, Wizard, and RestHelp er. This means you can change fields or screens, and change REST serve code.
Purchased licenses
This recipe uses a free Scala license for a service called myJRebel. This communicates with JRebel servers via the activation code. If you have purchased a license from Zero‐ Turnaround, the situation is slightly different. In this case, you will have a license key that you store in a file called jrebel.lic. You can place the file in a .jrebel folder in your home directory, or alongside jrebel.jar (e.g., in the /opt/zt/jrebel/ folder, if that’s where you installed JRebel), or you can specify some other location. For the latter option, modify the sbt script and specify the location of the file by adding another Java setting:
-Drebel.license=/path/to/jrebel.lic
See Also
Details about how JRebel works can be found in the ZeroTurnaround FAQ.
The Lift support was announced in a blog post in 2012, where you’ll find more about the capabilities of the plugin.
1.5. Developing Using Eclipse
Problem
You want to develop your Lift application using the Eclipse IDE, hitting reload in your browser to see changes.
Solution
Use the “Scala IDE for Eclipse” plugin to Eclipse, and the sbteclipse plugin for SBT. This will give Eclipse the ability to understand Scala, and SBT the ability to create project files that Eclipse can load.
The instructions for the Eclipse plugin are given at http://scala-ide.org. There are a number of options to be aware of when picking an update site to use: there are different sites for Scala 2.9 and 2.10, and for different versions of Eclipse. Start with the stable
version of the plugin rather than a nightly or milestone version. This will give you an Eclipse perspective that knows about Scala.
Once the Eclipse plugin is installed and restarted, you need to create the project files to allow Eclipse to load your Lift project. Install sbteclipse by adding the following to
projects/plugins.sbt in your Lift project:
addSbtPlugin("com.typesafe.sbteclipse" % "sbteclipse-plugin" % "2.1.2")
You can then create Eclipse project files (.project and .classpath) by entering the fol‐ lowing into the SBT prompt:
eclipse
Open the project in Eclipse by navigating to “File → Import…” and selecting “General → Existing Projects into Workspace.” Browse to and choose your Lift project. You are now set up to develop your application in Eclipse.
To see live changes as you edit and save your work, run SBT in a separate terminal window. That is, start sbt from a terminal window outside of Eclipse and enter the following:
~; container:start; container:reload /
The behaviour of this command is described in Recipe 1.3, but if you’re using JRebel (see Recipe 1.4), then you just need to run container:start by itself.
Discussion
One of the great benefits of an IDE is the ability to navigate source, by Cmd+click (Mac) or F3 (PC). You can ask the SBT eclipse command to download the Lift source and Scaladoc, allowing you to click through to the Lift source from methods and classes, which is a useful way to discover more about Lift.
To achieve this in a project, run eclipse with-source=true in SBT, but if you want this to be the default behaviour, add the following to your build.sbt file:
EclipseKeys.withSource := true
If you find yourself using the plugin frequently, you may wish to declare it in your global SBT configuration files so it applies to all projects. To do that, create a ~/.sbt/plugins/ plugins.sbt file containing:
resolvers += Classpaths.typesafeResolver
addSbtPlugin("com.typesafe.sbteclipse" % "sbteclipse-plugin" % "2.1.2")
Note the blank line between the resolvers and the addSbtPlugin. In .sbt files, a blank line is required between statements.
Finally, set any global configurations (such as withSource) in ~/.sbt/global.sbt.
See Also
There are other useful settings for sbteclipse. You’ll also find the latest version number for the plugin on that site.
The SBT ~/.sbt/ structure is described in the guide to using plugins and in the wiki page for global configuration.
1.6. Developing Using IntelliJ IDEA
Problem
You want to use the IntelliJ IDEA development environment when writing your Lift application.
Solution
You need the Scala plugin for IntelliJ, and an SBT plugin to generate the IDEA project files.
The IntelliJ plugin you’ll need to install only once, and these instructions are for IntelliJ IDEA 12. The details may vary between releases of the IDE, but the basic idea is to find the JetBrains Scala plugin, and download and install it.
From the “Welcome to IntelliJ IDEA” screen, select “Configure” and then “Plugins.” Select “Browse repositories…” In the search box, top right, type “Scala.” You’ll find on the left a number of matches: select “Scala.” On the right, you’ll see confirmation that this is the “Plugin for Scala language support” and the vendor is JetBrains, Inc. Select the “Download and Install” icon from the top of the window, or right-click to download and install. “Close” the dialog, and OK out of the plugins window. You’ll be prompted to restart IntelliJ IDEA.
With the IDE configured, you now need to include the SBT plugin inside your Lift project by adding the following to the file projects/plugins.sbt:
addSbtPlugin("com.github.mpeltonen" % "sbt-idea" % "1.4.0")
Start SBT, and at the SBT prompt, create the IDEA project files by typing:
gen-idea
This will generate the .idea and .iml files that IntelliJ uses. Inside IntelliJ you can open the project from the “File” menu, picking “Open…” and then navigating to your project and selecting the directory.
To see live changes as you edit and save your work, run SBT in a separate Terminal window. That is, start sbt from a Terminal window outside of IntelliJ and enter the following:
~; container:start; container:reload /
This behaviour of this command is described in Recipe 1.3, but if you’re using JRebel (see Recipe 1.4), then you just need to run container:start by itself.
Each time you compile or make the project, the container will pick up the changes, and you can see them by reloading your browser window.
Discussion
By default, the gen-idea command will fetch source for dependent libraries. That means out of the box you can click through to Lift source code to explore it and learn more about the framework.
If you want to try the latest snapshot version of the plugin, you’ll need to include the snapshot repository in your plugin.sbt file:
resolvers += "Sonatype snapshots" at
"http://oss.sonatype.org/content/repositories/snapshots/"
See Also
The sbt-idea plugin doesn’t have a configuration guide yet. One way to discover the features is to browse the release notes in the notes folder of that project.
JetBrains has a blog for the Scala plugin with feature news and tips.
1.7. Viewing the lift_proto H2 Database
Problem
You’re developing using the default lift_proto.db H2 database, and you would like to use a tool to look at the tables.
Solution
Use the web interface included as part of H2. Here are the steps:
1. Locate the H2 JAR file. For me, this was: ~/.ivy2/cache/com.h2database/h2/jars/ h2-1.2.147.jar.
2. Start the server from a Terminal window using the JAR file: java -cp /path/to/ h2-version.jar org.h2.tools.Server.
3. This should launch your web browser, asking you to log in. 4. Select “Generic H2 Server” in “Saved Settings.”
5. Enter jdbc:h2:/path/to/youapp/lift_proto.db;AUTO_SERVER=TRUE for “JDBC URL,” adjusting the path for the location of your database, and adjusting the name of the database (lift_proto.db) if different in your Boot.scala.
6. Press “Connect” to view and edit your database.
Discussion
The default Lift projects that include a database, such as lift_basic, use the H2 relational database, as it can be included as an SBT dependency and requires no external instal‐ lation or configuration. It’s a fine product, although production deployments typically use standalone databases, such as PostgreSQL or MySQL.
Even if you’re deploying to a non–H2 database, it may be useful to keep H2 around because it has an in-memory mode, which is great for unit tests. This means you can create a database in memory, and throw it away when your unit test ends.
If you don’t like the web interface, the connection settings described in this recipe should give you the information you need to configure other SQL tools.
See Also
The H2 site lists the features and configuration options for database engine.
If you’re using the console frequently, consider making it accessible from your Lift ap‐ plication in development node. This is described by Diego Medina in a blog post. The example Lift project for Chapter 7 has the H2 console enabled.
1.8. Using the Latest Lift Build
Problem
You want to use the latest (“snapshot”) build of Lift.
Solution
You need to make two changes to your build.sbt file. First, reference the snapshot repository:
resolvers += "snapshots" at
"http://oss.sonatype.org/content/repositories/snapshots"
Second, change the liftVersion in your build to be the latest version. For this example, let’s use the 2.6 snapshot version of Lift:
val liftVersion = "2.6-SNAPSHOT"
Restarting SBT (or issuing a reload command) will trigger a download of the latest build.
Discussion
Production releases of Lift (e.g., 2.4, 2.5), as well as milestone releases (e.g., 2.5-M3) and release candidates (e.g., 2.5-RC1) are published into a releases repository. When SBT downloads them, they are downloaded once.
Snapshot releases are different: they are the result of an automated build, and change often. You can force SBT to resolve the latest versions by running the command clean
and then update.
See Also
1.9. Using a New Version of Scala
Problem
A new Scala version has just been released and you want to immediately use it in your Lift project.
Solution
You may find that the latest snapshot of Lift is built using the latest Scala version. Failing that, and assuming you cannot wait for a build, you may still be in luck. Providing that the Scala version is binary compatible with the latest version used by Lift, you can change your build file to force the Scala version.
For example, let’s assume your build.sbt file is set up to use Lift 2.5 with Scala 2.9.1:
scalaVersion := "2.9.1"
libraryDependencies ++= { val liftVersion = "2.5" Seq(
"net.liftweb" %% "lift-webkit" % liftVersion % "compile->default" )
}
Suppose you now want to use Scala 2.9.3 but Lift 2.5 was only built against Scala 2.9.1. Replace %% with % for the net.liftweb resources and explicitly include the Scala version that Lift was built against for each Lift component:
scalaVersion := "2.9.3"
libraryDependencies ++= { val liftVersion = "2.5" Seq(
"net.liftweb" % "lift-webkit_2.9.1" % liftVersion % "compile->default" )
}
What we’ve done here is change the scalaVersion to the new version we want to use, but explicitly specified we want the 2.9.1 Scala version for Lift. This works because the two different Scala versions are binary compatible.
Discussion
Dependencies have a particular naming convention. For example, the lift-webkit
library for Lift 2.5 is called lift-webkit_2.9.1-2.5.jar. Normally, in build.sbt we simply refer to "net.liftweb" %% "lift-webkit", and SBT turns that into the name of a file that can be downloaded.
However, in this recipe, we have forced SBT to explicitly fetch the 2.9.1 version of the Lift resources rather than allow it to compute the URL to the Lift components. This is the difference between using %% and % in a dependency: with %% you do not specify the Scala version, as SBT will append the scalaVersion number automatically; with % this automatic change is not made, so we have to manually specify more details for the name of the library.
Please note this only works for minor releases of Scala: major releases break compati‐ bility. For example, Scala 2.9.1 is compatible with Scala 2.9.0, but not 2.10.
See Also
Binary compatibility in Scala is discussed on the Scala user mailing list.
CHAPTER 2
HTML
Generating HTML is often a major component of web applications. This chapter is concerned with Lift’s View First approach and use of CSS Selectors. Later chapters focus more specifically on form processing, REST web services, JavaScript, Ajax, and Comet. Code for this chapter is at https://github.com/LiftCookbook/cookbook_html.
2.1. Testing and Debugging CSS Selectors
Problem
You want to explore or debug CSS selectors interactively.
Solution
You can use the Scala REPL to run your CSS selectors.
Here’s an example where we test out a CSS selector that adds an href attribute to a link. Start from within SBT and use the console command to get into the REPL:
> console
[info] Starting scala interpreter... [info]
Welcome to Scala version 2.9.1.final Type in expressions to have them evaluated. Type :help for more information.
scala> import net.liftweb.util.Helpers._ import net.liftweb.util.Helpers._
scala> val f = "a [href]" #> "http://example.org"
f: net.liftweb.util.CssSel =
(Full(a [href]), Full(ElemSelector(a,Full(AttrSubNode(href)))))
scala> val in = <a>click me</a>
in: scala.xml.Elem = <a>click me</a>
scala> f(in)
res0: scala.xml.NodeSeq =
NodeSeq(<a href="http://example.org">click me</a>)
The Helpers._ import brings in the CSS selector functionality, which we then exercise by creating a selector, f, calling it with a very simple template, in, and observing the result, res0.
Discussion
CSS selector transforms are one of the distinguishing features of Lift. They succinctly describe a node in your template (lefthand side) and give a replacement (operation, the righthand side). They do take a little while to get used to, so being able to test them at the Scala REPL is useful.
It may help to know that prior to CSS selectors, Lift snippets were typically defined in terms of a function that took a NodeSeq and returned a NodeSeq, often via a method called bind. Lift would take your template, which would be the input NodeSeq, apply the function, and return a new NodeSeq. You won’t see that usage so often anymore, but the principle is the same.
The CSS selector functionality in Lift gives you a CssSel function, which is NodeSeq => NodeSeq. We exploit this in the previous example by constructing an input NodeSeq
(called in), then creating a CSS function (called f). Because we know that CssSel is defined as a NodeSeq => NodeSeq, the natural way to execute the selector is to supply the in as a parameter, and this gives us the answer, res0.
If you use an IDE that supports a worksheet, which both Eclipse and IntelliJ IDEA do, then you can also run transformations in a worksheet.
See Also
The syntax for selectors is best described in Simply Lift.
See Recipe 1.5 and Recipe 1.6 for how to work with Eclipse and IntelliJ IDEA.
2.2. Sequencing CSS Selector Operations
Problem
Solution
Use andThen rather than & to compose your selector expressions.
For example, suppose we want to replace <div id="foo"/> with <div id="bar">bar content</div> but for some reason we need to generate the bar div as a separate step in the selector expression:
sbt> console
[info] Starting scala interpreter... [info]
Welcome to Scala version 2.9.1.final (Java 1.7.0_05). Type in expressions to have them evaluated.
Type :help for more information.
scala> import net.liftweb.util.Helpers._ import net.liftweb.util.Helpers._
scala> def render = "#foo" #> <div id="bar"/> andThen "#bar *" #> "bar content"
render: scala.xml.NodeSeq => scala.xml.NodeSeq scala> render(<div id="foo"/>)
res0: scala.xml.NodeSeq = NodeSeq(<div id="bar">bar content</div>)
Discussion
When using &, think of the CSS selectors as always applying to the original template, no matter what other expressions you are combining. This is because & is aggregating the selectors together before applying them. In contrast, andThen is a method of all Scala functions that composes two functions together, with the first being called before the second.
Compare the previous example if we change the andThen to &:
scala> def render = "#foo" #> <div id="bar" /> & "#bar *" #> "bar content"
render: net.liftweb.util.CssSel
scala> render(<div id="foo"/>)
res1: scala.xml.NodeSeq = NodeSeq(<div id="bar"></div>)
The second expression will not match, as it is applied to the original input of <div id="foo"/>—the selector of #bar won’t match on id=foo, and so adds nothing to the results of render.
See Also
The Lift wiki page for CSS selectors also describes this use of andThen.
2.3. Setting Meta Tag Contents
Problem
You want to set the content of an HTML meta tag from a snippet.
Solution
Use the @ CSS binding name selector. For example, given:
<meta name="keywords" content="words, here, please" />
The following snippet code will update the value of the content attribute:
"@keywords [content]" #> "words, we, really, want"
Discussion
The @ selector selects all elements with the given name. It’s useful in this case to change the <meta name="keyword"> tag, but you may also see it used elsewhere. For example, in an HTML form, you can select input fields such as <input name="address"> with
"@address".
The [content] part is an example of a replacement rule that can follow a selector. That’s to say, it’s not specific to the @ selector and can be used with other selectors. In this
example, it replaces the value of the attribute called “content.” If the meta tag had no “content” attribute, it would be added.
There are two other replacement rules useful for manipulating attributes:
• [content!] to remove an attribute with a matching value. • [content+] to append to the value.
Examples of these would be:
scala> import net.liftweb.util.Helpers._ import net.liftweb.util.Helpers._
scala> val in = <meta name="keywords" content="words, here, please" />
in: scala.xml.Elem = <meta name="keywords" content="words, here, please"></meta>
scala> val remove = "@keywords [content!]" #> "words, here, please"
remove: net.liftweb.util.CssSel = CssBind(Full(@keywords [content!]), Full(NameSelector(keywords,Full(AttrRemoveSubNode(content)))))
scala> remove(in)
scala> val add = "@keywords [content+]" #> ", thank you"
add: net.liftweb.util.CssSel = CssBind(Full(@keywords [content+]), Full(NameSelector(keywords,Full(AttrAppendSubNode(content)))))
scala> add(in)
res1: scala.xml.NodeSeq = NodeSeq(<meta content="words, here, please, thank you" name="keywords"></meta>)
Appending to a class attribute
Although not directly relevant to meta tags, you should be aware that there is one con‐ venient special case for appending to an attribute. If the attribute is class, a space is added together with your class value. As a demonstration of that, here’s an example of appending a class called btn-primary to a div:
scala> def render = "div [class+]" #> "btn-primary"
render: net.liftweb.util.CssSel
scala> render(<div class="btn"/>)
res0: scala.xml.NodeSeq = NodeSeq(<div class="btn btn-primary"></div>)
See Also
The syntax for selectors is best described in Simply Lift. See Recipe 2.1 for how to run selectors from the REPL.
2.4. Setting the Page Title
Problem
You want to set the <title> of the page from a Lift snippet.
Solution
Select the content of the title element and replace it with the text you want:
"title *" #> "I am different"
Assuming you have a <title> tag in your template, this will result in:
<title>I am different</title>
Discussion
This example uses an element selector, which picks out tags in the HTML template and replaces the content. Notice that we are using "title *" to select the content of the
title tag. If we had left off the *, the entire title tag would have been replaced with text.
As an alternative, it is also possible to set the page title from the contents of SiteMap, meaning the title used will be the title you’ve assigned to the page in the site map. To do that, make use of Menu.title in your template directly:
<title data-lift="Menu.title"></title>
The Menu.title code appends to any existing text in the title. This means the following will have the phrase "Site Title - " in the title, followed by the page title:
<title data-lift="Menu.title">Site Title - </title>
If you need more control, you can of course bind on <title> using a regular snippet.
This example uses a custom snippet to put the site title after the page title:
<title data-lift="MyTitle"></title>
object MyTitle {
def render = <title><lift:Menu.title /> - Site Title</title> }
Notice that our snippet is returning another snippet, <lift:Menu.title/>. This is a
perfectly normal thing to do in Lift, and snippet invocations returned from snippets will be processed by Lift as normal.
See Also
Recipe 2.7 describes the different ways to reference a snippet, such as data-lift and
<lift: ... />.
At the Assembla website, there’s more about SiteMap and the Menu snippets.
2.5. HTML Conditional Comments
Problem
You want to make use of Internet Explorer HTML conditional comments in your templates.
Solution
Put the markup in a snippet and include the snippet in your page or template.
For example, suppose we want to include the HTML5 Shiv (a.k.a. HTML5 Shim) Java‐ Script so we can use HTML5 elements with legacy IE browsers. To do that, our snippet would be:
package code.snippet
object Html5Shiv {
def render = Unparsed("""<!--[if lt IE 9]>
<script src="http://html5shim.googlecode.com/svn/trunk/html5.js"> </script><![endif]-->""")
}
We would then reference the snippet in the <head> of a page, perhaps even in all pages via templates-hidden/default.html:
<script data-lift="Html5Shiv"></script>
Discussion
The HTML5 parser used by Lift does not carry comments from the source through to the rendered page. If you just tried to paste the html5shim markup into your template you’d find it missing from the rendered page.
We deal with this by generating unparsed markup from a snippet. If you’re looking at
Unparsed and are worried, your instincts are correct. Normally, Lift would cause the markup to be escaped, but in this case, we really do want unparsed XML content (the comment tag) included in the output.
If you find you’re using IE conditional comments frequently, you may want to create a more general version of the snippet. For example:
package code.snippet
import xml.{NodeSeq, Unparsed} import net.liftweb.http.S
object IEOnly {
private def condition : String = S.attr("cond") openOr "IE" def render(ns: NodeSeq) : NodeSeq =
Unparsed("<!--[if " + condition + "]>") ++ ns ++ Unparsed("<![endif]-->") }
It would be used like this:
<div data-lift="IEOnly"> A div just for IE </div>
and produces output like this:
<!--[if IE]><div> A div just for IE </div><![endif]-->
Notice that the condition test defaults to IE, but first tries to look for an attribute called
cond. This allows you to write:
<divdata-lift="IEOnly?cond=lt+IE+9"> You're using IE 8 or earlier </div>
The + symbol is the URL encoding for a space, resulting in:
<!--[if lt IE 9]><div>
You're using IE 8 or earlier </div><![endif]-->
See Also
The IEOnly example is derived from a posting on the mailing list from Antonio Salazar Cardozo.
The html5shim project can be downloaded from its Google Code site.
2.6. Returning Snippet Markup Unchanged
Problem
You want a snippet to return the original markup associated with the snippet invocation.
Solution
Use the PassThru transform.
Suppose you have a snippet that performs a transform when some condition is met, but if the condition is not met, you want the snippet to return the original markup. Starting with the original markup:
<h2>Pass Thru Example</h2>
<p>There's a 50:50 chance of seeing "Try again" or "Congratulations!":</p>
<divdata-lift="PassThruSnippet">
Try again - this is the template content. </div>
We could leave it alone or change it with this snippet:
package code.snippet
import net.liftweb.util.Helpers._ import net.liftweb.util.PassThru
import xml.Text
class PassThruSnippet {
private def fiftyFifty = Random.nextBoolean def render =
if (fiftyFifty) "*" #> Text("Congratulations! The content was changed") else PassThru
}
Discussion
PassThru is an identity function of type NodeSeq => NodeSeq. It returns the input it is given:
object PassThru extends Function1[NodeSeq, NodeSeq] { def apply(in: NodeSeq): NodeSeq = in
}
A related example is ClearNodes, defined as:
object ClearNodes extends Function1[NodeSeq, NodeSeq] { def apply(in: NodeSeq): NodeSeq = NodeSeq.Empty
}
The pattern of converting one NodeSeq to another is simple, but also powerful enough to get you out of most situations, as you can always arbitrarily rewrite the NodeSeq.
2.7. Snippet Not Found When Using HTML5
Problem
You’re using Lift with the HTML5 parser and one of your snippets is rendering with a “Class Not Found” error. It even happens for <lift:HelloWorld.howdy />.
Solution
Switch to the designer-friendly snippet invocation mechanism. For example:
<div data-lift="HellowWorld.howdy"></div>
Discussion
In this Cookbook, we use the HTML5 parser, which is set in Boot.scala:
// Use HTML5 for rendering
LiftRules.htmlProperties.default.set( (r: Req) => new Html5Properties(r.userAgent) )
The HTML5 parser and the traditional Lift XHTML parser have different behaviours. In particular, the HTML5 parser converts elements and attribute names to lowercase when looking up snippets. This means Lift would take <lift:HelloWorld.howdy />
and look for a class called helloworld rather than HelloWorld, which would be the cause of the “Class Not Found” error.
Switching to the designer-friendly mechanism is the solution here, and you gain vali‐ dating HTML as a bonus.
There are three popular ways of referencing a snippet:
As an HTML5 data attribute: data-lift="MySnippet"
This is the style we use in this book, and is valid HTML5 markup.
Using the lift attribute, as in: lift="MySnippet"
This won’t strictly validate against HTML5, but you may see it used.
The XHTML namespace version: <lift:MySnippet />
You’ll see the usage of this tag in templates declining because of the way it interacts with the HTML5 parser. However, it works just fine outside of a template, for ex‐ ample when embedding a snippet invocation in your server-side code (Recipe 2.4 includes an example of this for Menu.title).
See Also
The key differences between the XHTML and HTML5 parsers are outlined on the mailing list.
2.8. Avoiding CSS and JavaScript Caching
Problem
You’ve modified CSS or JavaScript in your application, but web browsers have cached your resources and are using the older versions. You’d like to avoid this browser caching.
Solution
Add the with-resource-id attribute to script or link tags:
<script data-lift="with-resource-id" src="/myscript.js" type="text/javascript"></script>
The addition of this attribute will cause Lift to append a resource ID to your src (or
href), and as this resource ID changes each time Lift starts, it defeats browser caching.
<script src="/myscript.js?F619732897824GUCAAN=_" type="text/javascript" ></script>
Discussion
The random value that is appended to the resource is computed when your Lift appli‐ cation boots. This means it should be stable between releases of your application.
If you need some other behaviour from with-resource-id, you can assign a new func‐ tion of type String => String to LiftRules.attachResourceId. The default imple‐ mentation, shown previously, takes the resource name, /myscript.js in the example, and returns the resource name with an ID appended.
You can also wrap a number of tags inside a <lift:with-resource-id>...<lift:with-resource-id> block. However, avoid doing this in the <head> of your page, as the HTML5 parser will move the tags to be outside of the head section.
Note that some proxies may choose not to cache resources with query parameters at all. If that impacts you, it’s possible to code a custom resource ID method to move the random resource ID out of the query parameter and into the path.
Here’s one approach to doing this. Rather than generate JavaScript and CSS links that look like /assets/style.css?F61973, we will generate /cache/F61973/assets/style.css. We then will need to tell Lift to take requests that look like this new format, and render the correct content for the request. The code for this is:
package code.lib
import net.liftweb.util._ import net.liftweb.http._
object CustomResourceId { def init() : Unit = {
// The random number we're using to avoid caching val resourceId = Helpers.nextFuncName
// Prefix with-resource-id links with "/cache/{resouceId}" LiftRules.attachResourceId = (path: String) => {
"/cache/" + resourceId + path }
// Remove the cache/{resourceId} from the request if there is one LiftRules.statelessRewrite.prepend( NamedPF("BrowserCacheAssist") {
caseRewriteRequest(ParsePath("cache" :: id :: file, suffix, _, _), _, _) => RewriteResponse(file, suffix)
}) } }
This would be initialised in Boot.scala:
CustomResourceId.init()
or you could just paste all the code into Boot.scala, if you prefer.
With the code in place, we can, for example, modify templates-hidden/default.html and add a resource ID class to jQuery:
<script id="jquery" data-lift="with-resource-id"
src="/classpath/jquery.js" type="text/javascript"></script>
At runtime, this would be rendered in HTML as:
<script type="text/javascript" id="jquery"
src="/cache/F352555437877UHCNRW/classpath/jquery.js"></script>
Most of the work for this is happening in the statelessRewrite, which is working at a low level inside Lift. The two parts to it are:
• A RewriteRequest that is the pattern we’re matching on
• A RewriteResponse that is the result we want if the request matches
Looking at the RewriteRequest first, this expects three arguments: the path, which we care about, and then the method (e.g., GetRequest, PutRequest) and the HTTPRe quest itself, neither of which concern us in this instance. In the path part, we’re matching on patterns that start with cache followed by something (we don’t care what), and then the rest of the path, represented by the name file. In that situation, we rewrite to the original path, which is just the file with the suffix, effectively removing the /cache/ F352555437877UHCNRW part. This is the content that Lift will serve.
See Also
http://bit.ly/14BfNYJ shows the default implementation of attachResourceId. Google’s “Optimize caching” notes are a good source of information about browser behaviour.
You can learn more about URL rewriting at the Lift wiki. Rewriting is used rarely, and only for special cases. Most problems that look like rewriting problems are better solved with a Menu Param.
2.9. Adding to the Head of a Page
Problem
Solution
Use the head snippet so Lift knows to merge the contents with the <head> of your page. For example, suppose you have the following contents in templates-hidden/default.html:
<html lang="en" xmlns:lift="http://liftweb.net/"> <head>
<meta charset="utf-8"></meta>
<title data-lift="Menu.title">App: </title> <script id="jquery" src="/classpath/jquery.js" type="text/javascript"></script>
<script id="json" src="/classpath/json.js" type="text/javascript"></script>
</head> <body>
<div id="content">The main content will get bound here</div> </body>
</html>
Also suppose you have index.html on which you want to include red-titles.css to change the style of just this page.
Do so by including the CSS in the part of the page that will get processed, and mark it with the head snippet:
<!DOCTYPE html> <html>
<head>
<title>Special CSS</title> </head>
<body data-lift-content-id="main">
<div id="main" data-lift="surround?with=default;at=content"> <link data-lift="head" rel="stylesheet"
href="red-titles.css" type="text/css" /> <h2>Hello</h2>
</div> </body> </html>
Note that this index.html page is validated HTML5, and will produce a result with the custom CSS inside the <head> tag, something like this:
<!DOCTYPE html> <html lang="en">
<head>
<meta charset="utf-8">
<title>App: Special CSS</title> <script type="text/javascript"
src="/classpath/jquery.js" id="jquery"></script> <script type="text/javascript"
src="/classpath/json.js"id="json"></script>
<link rel="stylesheet" href="red-titles.css" type="text/css"> </head>