Creating Apps in Kivy by Dusty Phillips
Copyright © 2014 Dusty Phillips. All rights reserved.
Printed in the United States of America.
Published by O’Reilly Media, Inc., 1005 Gravenstein Highway North, Sebastopol, CA 95472.
O’Reilly books may be purchased for educational, business, or sales promotional use. Online editions are also available for most titles (http://my.safaribooksonline.com). For more information, contact our corporate/ institutional sales department: 800-998-9938 or [email protected].
Editors: Meghan Blanchette and Rachel Roumeliotis Production Editor: Nicole Shelby
Copyeditor: Rachel Monaghan Proofreader: Rachel Head
Indexer: Judy McConville Cover Designer: Randy Comer Interior Designer: David Futato Illustrator: Rebecca Demarest April 2014: First Edition
Revision History for the First Edition: 2014-04-08: First release
See http://oreilly.com/catalog/errata.csp?isbn=9781491946671 for release details.
Nutshell Handbook, the Nutshell Handbook logo, and the O’Reilly logo are registered trademarks of O’Reilly Media, Inc. Creating Apps in Kivy, the image of a kiang, and related trade dress are trademarks of O’Reilly Media, Inc.
Many of the designations used by manufacturers and sellers to distinguish their products are claimed as trademarks. Where those designations appear in this book, and O’Reilly Media, Inc. was aware of a trademark claim, the designations have been printed in caps or initial caps.
While every precaution has been taken in the preparation of this book, the publisher and author assume no responsibility for errors or omissions, or for damages resulting from the use of the information contained herein.
Table of Contents
Preface. . . vii
1. Introducing Kivy. . . 1
Dependencies: The Hard Part 2
Installing on Mac OS 3
Installing on Windows 4
Writing Code: The Easy Part 5
Introducing the KV Language 6
User Interface Design 7
Widgets 9
The KV Language Root Widget 10
Creating a Custom Widget 12
Adjusting Widget Size 13
File It All Away 18
2. Events and Properties. . . 21
What Is an Event? 21
Adding Logic to a Custom Widget 22
Responding to Events 23
Accessing Properties of KV Language Widgets 24
Populating the Search Result List 27
File It All Away 32
3. Manipulating Widgets. . . 35
A More Extensible Root Widget 35
ListView Adapters 36
Responding to ListView Item Events 39
Swappable Widgets 41
Switching Forms 43
File It All Away 44
4. Iterative Development. . . 45
Improving the Add Location Form 46
Caching Widgets 46
Storing Actual Locations and Converting Arguments 49
Retrieving Weather Data 53
File It All Away 56
5. Kivy Graphics. . . 59
A Conditions Widget 59
Dynamic Conditions 61
Abstracting Common Widgets 65
Basic Animation 67
Using Icons Instead 70
File It All Away 71
6. Kivy Storage. . . 73
Maintaining a List of Locations 73
Storing the Location List 75
The User Settings Dialog 77
File It All Away 82
7. Gestures. . . 83
The Forecast Tab 83
Recording Gestures 87
Touch Events 89
Recognizing Gestures 91
Firing Events 92
File It All Away 93
8. Advanced Widgets. . . 95
Carousel 95
The ModalView Widget 97
Completing the Refactor 99
Adding an Action Bar 101
File It All Away 103
9. Releasing to Android and iOS. . . 105
Getting Buildozer 105
Deploying Your Application 106
Android Bonus: Accessing the GPS 115
Keeping It Running 117
File It All Away 117
Index. . . 119
Preface
This book introduces Kivy, an exciting new graphical user interface library that finally allows Python to be used to code cross-platform applications on most traditional and mobile operating systems. I’m happy you’re here to study Kivy with me and hope that you’ll enjoy reading it as much as I have enjoyed writing it. I am confident that you will be happy with the App you develop and deploy in this book and that it will lead you to develop many new applications of your own design. I look forward to seeing your Kivy Apps on the Android and iTunes market in the near future!
Who Should Read This Book
This book is primarily targeted to fairly new programmers who have read the Python tutorial, but haven’t done a lot of real-world coding. In addition to instructing you in Kivy, this book introduces you to the programming workflow. Each chapter builds on the previous chapter to help you create a fully functional mobile application. You will learn the steps you need to follow to design and implement your own apps.
It will also be applicable to programmers who have not worked with Python before but want to use Kivy for its amazing API, integrated multitouch support, or cross-platform deployment. You will probably want to review the Python tutorial to get a leg up on the language’s syntax before reading this book. You may be able to skim some sections of the text if you already understand the culture of coding.
Technology Used in This Book
The examples in this book all target Python 3. All but three of them also run seamlessly on Python 2.7. Those three examples have been highlighted in sidebars that include simple workarounds you can use to make the code run on both Python 2.7 and Python 3. Then, any future examples that use the same code will always use the version that works on both Pythons.
I encourage you to use Python 3 if possible, as it is a more enjoyable language to work with, provides nicer APIs, and is slowly being adopted by the entire Python community. That said, depending on what operating system you use, Python 2 may be easier to deploy and develop against at this time. You will have no trouble using Python 2.7 with the examples in this book if you prefer it.
This book was written entirely against Kivy 1.8, which is the first version of Kivy to support Python 3. The examples have been tested somewhat against Kivy 1.7, and it works with all the chapters except Chapter 6. Please use Kivy 1.8 or later if you can. The Kivy developers move very fast, and the newest version is always far better than the previous one in all dimensions: speed, stability, and features.
Conventions Used in This Book
The following typographical conventions are used in this book: Italic
Indicates new terms, URLs, email addresses, filenames, and file extensions.
Constant width
Used for program listings, as well as within paragraphs to refer to program elements such as variable or function names, databases, data types, environment variables, statements, and keywords. Also used for commands and command-line options.
Constant width bold
Shows commands or other text that should be typed literally by the user.
Constant width italic
Shows text that should be replaced with user-supplied values or by values deter‐ mined by context.
This element signifies a tip or suggestion.
This element indicates a warning or caution.
Using Code Examples
Supplemental material (code examples, exercises, etc.) is available for download at https://github.com/oreillymedia/creating_apps_in_kivy.
This book is here to help you get your job done. In general, if example code is offered with this book, you may use it in your programs and documentation. You do not need to contact us for permission unless you’re reproducing a significant portion of the code. For example, writing a program that uses several chunks of code from this book does not require permission. Selling or distributing a CD-ROM of examples from O’Reilly books does require permission. Answering a question by citing this book and quoting example code does not require permission. Incorporating a significant amount of ex‐ ample code from this book into your product’s documentation does require permission. We appreciate, but do not require, attribution. An attribution usually includes the title, author, publisher, and ISBN. For example: “Creating Apps in Kivy by Dusty Phillips (O’Reilly). Copyright 2014 Dusty Phillips, 978-1-491-94667-1.”
If you feel your use of code examples falls outside fair use or the permission given above, feel free to contact us at [email protected].
Safari® Books Online
Safari Books Online is an on-demand digital library that delivers expert content in both book and video form from the world’s leading authors in technology and business.
Technology professionals, software developers, web designers, and business and crea‐ tive professionals use Safari Books Online as their primary resource for research, prob‐ lem solving, learning, and certification training.
Safari Books Online offers a range of product mixes and pricing programs for organi‐ zations, government agencies, and individuals. Subscribers have access to thousands of books, training videos, and prepublication manuscripts in one fully searchable database from publishers like O’Reilly Media, Prentice Hall Professional, Addison-Wesley Pro‐ fessional, Microsoft Press, Sams, Que, Peachpit Press, Focal Press, Cisco Press, John Wiley & Sons, Syngress, Morgan Kaufmann, IBM Redbooks, Packt, Adobe Press, FT Press, Apress, Manning, New Riders, McGraw-Hill, Jones & Bartlett, Course Technol‐
ogy, and dozens more. For more information about Safari Books Online, please visit us online.
How to Contact Us
Please address comments and questions concerning this book to the publisher:
O’Reilly Media, Inc.
1005 Gravenstein Highway North Sebastopol, CA 95472
800-998-9938 (in the United States or Canada) 707-829-0515 (international or local)
707-829-0104 (fax)
We have a web page for this book, where we list errata, examples, and any additional information. You can access this page at http://oreil.ly/apps-kivy.
To comment or ask technical questions about this book, send email to bookques [email protected].
For more information about our books, courses, conferences, and news, see our website at http://www.oreilly.com.
Find us on Facebook: http://facebook.com/oreilly Follow us on Twitter: http://twitter.com/oreillymedia Watch us on YouTube: http://www.youtube.com/oreillymedia
Acknowledgments
My editor at O’Reilly, Meghan Blanchette, has been a dream to work with. I’ve read acknowledgments in many other books in which authors thanked their editors “first and foremost.” My experience with other editors has often made me wonder why. Meg’s support has been terrific throughout the process of writing this book.
Please heap gratitude on the entire Kivy development team. I’ve been doing GUI pro‐ gramming for years and have touched many toolkits in Python and other languages. Kivy is the first of the many user interface toolkits I have used that I truly enjoy. De‐ signing a good UI API is extremely challenging (or someone would have got it right before now), and the Kivy developers deserve many, many accolades for their amazing work. Please tip them profusely using Gittip!
it is. Jennifer Pierce also tech-reviewed the book from a beginner’s perspective and highlighted the areas where I was confusing my readers.
Finally, I want to thank every person who has ever spoken publicly about dealing with mental illness. The wall of silence around all mental illnesses is doing society a huge disservice. Every time someone speaks about this topic, the mentally ill are perceived as somewhat more acceptable and contributing members of society. I’ve done many incredible things since dealing with a near-terminal form of my illness three years ago. Others have not been so fortunate. We need to talk so that brilliant minds can discover that treatment is available before they succumb to their illness, as Aaron Swartz and Ilya Zhitomirskiy did.
CHAPTER 1
Introducing Kivy
Kivy is a modern graphical user interface toolkit. It allows you to easily develop natural interfaces for a wide selection of devices. It is attractive to a variety of developers for a few key reasons:
• Kivy has elegant built-in support for multitouch devices. • Kivy is the only viable way to code in Python on mobile devices.
• Kivy replaces the horrible APIs of earlier graphical interfaces like HTML and CSS. • Kivy allows you to maintain a single application for numerous operating systems.
Whatever your reasons for studying Kivy, I’m glad you found this book. You’ll be going step by step through Kivy basics to create and deploy a fully functional application. Each chapter presents a working program that you will expand on in subsequent chapters. I’ve chosen to develop a weather application with you, partially because it’s at the right complexity level, but mostly because there aren’t any decent open source weather ap‐ plications in the F-Droid open source Android market!
While I hope this book appeals to a diverse array of developers, I have a specific audience in mind as I write it. As with any job description, you don’t have to completely fit this profile, but it will help you to understand who I’m thinking about and how you might differ. My intended audience:
• Has beginner to intermediate programming skills and has read the Python tutorial • Is not intimately acquainted with advanced Python concepts, but is eager to learn • Wants to learn about programming workflow, not just Kivy
• Has a good sense of humor • Owns an Android or iOS device
Regardless of who you are, if you’re interested in creating a working application in Kivy, you’re in the right place! I’ll be showing you how to develop a weather application step by step. You’ll start with setting up a Kivy development environment and end up with an application running on your Android device or iPhone.
Dependencies: The Hard Part
It’s an unfortunate truth in the programming world that the fun part has to come after a lot of work. Getting Kivy up and running is not a terribly complicated process, but I wouldn’t call it enjoyable. “I got a programming library installed after half an hour of effort” just doesn’t have the same ring as, “I made a program window pop up after 20 seconds!” So, to boost your excitement, let me tell you that 20 seconds after you get all these dependencies set up, you’ll have written and run a small Kivy application. Ready? Let’s go!
Python 2 Versus Python 3
There are currently two active versions of Python: Python 2 and Python 3. The syntax and standard library have changed between the two versions, and both are quite popular. You may be wondering which one you should use.
As of version 1.8, which is used for the examples in this book, Kivy supports both Python 2 and Python 3 interpreters. From a developer’s point of view, I recommend using Python 3, as it is a simpler syntax, has a cleaner standard library, and will be more useful knowledge going into the future.
However, from an ease-of-use perspective, you are more likely to find that Python 2 is already installed on your computer and ready to go. Further, the tools used to deploy to both Android and iOS currently run only on Python 2.
I wrote the examples in this book to run in Python 3. However, most of them can be run unmodified on Python 2, and I have noted any differences in sidebars.
Regardless of which version of Python you choose, make sure you’re using Kivy version 1.8 or later.
Frankly, writing about dependency setup is frustrating for me as well. I don’t know what operating system you’re using. I don’t know what libraries you already have installed or how they conflict with each other. I can’t predict the myriad ways that things might go wrong for you.
aches later when things break and you don’t know what’s going on. However, Kivy takes good care of its users, so it will probably be quite a long time before you have to work out the details.
While I use and recommend the Linux operating system (all the code in this book was first written and tested on Linux), I don’t provide Linux installation instructions. In‐ stalling dependencies in Linux tends to be much more straightforward than on other operating systems. However, the instructions for doing so vary completely depending on which Linux distribution you are using, and as a Linux user, you probably know better than I how to go about getting them for your distribution of choice (unless you use Arch Linux, for which I’ve written a ton of documentation). Kivy has terrific in‐ structions for most popular Linux distributions on its downloads page.
Installing on Mac OS
You can download an all-inclusive .dmg file that includes a compiled version of Kivy, all the libraries it depends on, a shell command to run it from a terminal window (this is necessary to see debugging output), and all the examples that Kivy supplies in case you get stuck.
To install it, simply download the latest (version 1.8 or higher) .dmg file from Kivy’s
download page. Double-click the file in your downloads folder or stack to open it. Then drag and drop the Kivy.app file into the Applications folder shortcut inside the volume. Before you close the .dmg volume, also double-click the Make Symlinks file. This will allow you to run Kivy as a script on the terminal. This script is kind of a wrapper for the Python executable. After you’ve run Make Symlinks, you can open a terminal and
type kivy. You’ll be presented with a standard Python prompt as if you had run the
python command directly.
In Mac OS Mavericks (10.9), Apple introduced a new antideveloper feature to prevent running “unlicensed” programs. It will pop up a warning that you can’t run the script downloaded from the Internet and doesn’t provide an obvious way for you to get in on the debate. There is a hidden workaround, though (I guess Apple just wants you to prove you know what you are doing). In Finder, open the folder containing the script. Then Control-click the icon and click Open in the shortcut menu. This will override the security settings and allow the script to run.
This prompt is your system Python with some paths modified to ensure that all the libraries it requires are installed. If you’re an experienced Python coder, you’re likely wondering why you wouldn’t just use a virtualenv. Virtual environments are great when your dependencies are Python libraries that you can install from pypi or Git reposito‐
ries. However, many of Kivy’s dependencies are C libraries that have complicated in‐ terdependencies. These have been bundled into Kivy.app as a bunch of dynamic libraries that are loaded when you run the kivy script.
Note that Kivy.app uses the default Python that comes with Mac OS. That means you’ll be using Python 2 instead of Python 3. You will have to adapt a couple of the examples in this book to make them work, but I’ve highlighted those so you won’t have any trouble. For the most part, you will be using Kivy from the terminal in this book. Your file will be named main.py. I may tell you to run python main.py, but if you’re using the Mac
OS Kivy.app, you’ll want to run kivy main.py instead.
Installing on Windows
Windows can be pretty quirky for software development. It doesn’t have a terrific command-line interface, and there can be bizarre conflicts between software libraries or software and the heterogeneous collection of hardware that Windows supports. That said, the Kivy developers have done a great job of bundling the dependencies into a single ZIP file. The archive contains the minimum dependencies you need to run Kivy. This portable package should integrate well with the operating system and isolate you from conflicting libraries on the same system.
Download the Kivy for Windows ZIP file from Kivy’s download page. Extract (right-click the file and (right-click “Extract all”) the ZIP file to a known directory on your system; I recommend the folder C:\utils\kivy.
Now you can open a Windows command prompt. Type the command cd C:\utils
\kivy and then just kivy. This will activate the Kivy environment, which includes the libraries you need. It also bundles a Python executable (you can choose between Python 2 and Python 3 from the downloads page). You will have to perform this activation step each time you open a new terminal.
Note that you can also install msysgit to get a programmer-friendly command-line interface (the same command shell used by default on Linux and Mac OS). If you are using this package, you’ll need to run source kivyenv.sh instead of the kivy script. I
Writing Code: The Easy Part
Now create a directory somewhere to host your project and open a new file called main.py in your preferred text editor.
Program Editors
I’m assuming you’ve done some basic Python development before diving into Kivy. That probably means you’ve explored the world of Python editors already. All Python pro‐ grams are simple text that is organized into the structure expected by the Python inter‐ preter. There are numerous tools for editing Python programs, and even more opinions on which one is best.
If you already have such an opinion, then stick with it, by all means. However, if you’re feeling confused by the array of program editing choices, I can recommend Sublime Text. It is very easy for novices, with no more of a learning curve than the basic Microsoft Notepad. However, it is also an advanced editor that professionals, including myself, use for their daily programming. The best part is that if Sublime doesn’t do something that you need it to do, you can easily extend it using plug-ins written in Python!
The starting Python module for all Kivy applications should be named main.py, as the build tools you’ll use later to automate deployment to mobile devices will look for that file. Now add a couple of lines of code to this new file, as shown in Example 1-1.
Example 1-1. The most basic Kivy app
from kivy.app import App
App().run()
That is it: the most basic Kivy code you could possibly write. It imports an App class,
instantiates it, and then calls the run method. Run this code by activating your Kivy
environment in a terminal and typing python main.py (or kivy main.py on Mac OS). It will pop up a blank window with a black background. Close it.
The Kivy App object does an impressive amount of work on your behalf. That is the
beauty of object-oriented programming. This object does something, and all you have to do is tell it to do its job by invoking the run method. It takes care of all sorts of stuff:
interacting with the screen hardware; talking to input devices such as multitouch dis‐ plays, keyboards, and accelerometers; scheduling tasks; and more. We’ll get into some of that later, but for now, just know that if you don’t have an App object, you don’t get a
window.
If you aren’t familiar with the basics of object-oriented programming, you might want to review the relevant section of the Python Tutorial. If you’d like in-depth coverage of the topic, see my book Python 3 Object Oriented Programming (Packt, 2010).
In Kivy, your use of object-oriented principles is largely to extend Kivy’s built-in objects through inheritance. This is a fairly easy paradigm to understand, so you don’t need to be well versed in classes to get there.
If a blank window with a black background is exactly the kind of application you were looking to write, then you’re done! Congratulations. Perhaps you can skip to the chapter on deploying so you can get that black background onto your mobile device (or just use the power button; black goes with anything).
Personally, I’d like something a little more interesting. So let’s try again. Edit the file to look like Example 1-2.
Example 1-2. A slightly less basic Kivy app
from kivy.app import App
class WeatherApp(App):
pass
if __name__ == '__main__':
WeatherApp().run()
This version uses inheritance to create a new subclass of App called WeatherApp. This is
the application you’ll be developing in this book. You didn’t actually add anything to the new class, so it behaves exactly the same as the previous version. However, you’ll be extending it a lot in subsequent chapters. It also wraps the call to App.run in an if
statement to make sure that this file can be imported from inside other files later in the book. More importantly, you can now use the KV language to add some real user in‐ terface elements to that black window.
Introducing the KV Language
The KV language, often referred to as kvlang, is a simple markup syntax that I think of as “what HTML would look like if HTML looked like Python.” It’s a very clean syntax and makes Kivy interface design much more enjoyable than any other toolkit I’ve worked with, including the Web.,
You’ll be creating a new file to store the KV language in. Call it weather.kv and save it in the same directory as main.py. Your .kv file should always have the same name as your app class, but with the word App stripped from the end, and converted to lowercase.
I’ll be explaining more about the KV language throughout the book. Start by putting Example 1-3 in your weather.kv file.
Example 1-3. Simple KV language file
Label:
text: "Hello World"
This is a very simple KV language file that creates a new Label object and sets its text
to the infamous Hello World string. If you now run the python main.py command,
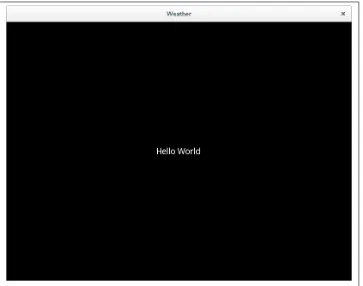
you will see the window pop up, still with a black background, but also with the text displayed in its center, as shown in Figure 1-1.
Figure 1-1. Hello World label
User Interface Design
Each chapter in this book builds on the results of the chapter preceding it. At the end of the book, you will have created a weather application that runs on your desktop computer, Android, and iOS. It’s a good idea, before you write an application, to know
what kind of application you want to write. Therefore, let’s spend a few minutes dis‐ cussing what features the app will support and how it will look.
Weather apps tend to have the same set of features. Here are some capabilities I want to cover in this project:
• Render weather for multiple locations, with a selector to switch between them. • Store the list of locations between App invocations so they don’t have to be searched
again.
• Switch between current conditions and long-term forecast. • Include settings for users to choose metric or imperial units. • Incorporate gestures for users to switch between screens.
Given these features, it’s fairly easy to imagine the set of views the application will re‐ quire:
• A form for adding new locations • A list of previously searched locations • The current conditions screen • The forecast screen
• The settings screen
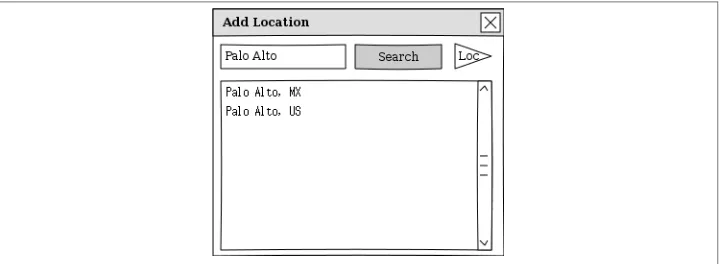
These will, of course, be composed of other interface components. I’ll introduce the widgets you require as they come up. The remainder of this chapter will focus on the form for adding a new location. This form is pretty simple, requiring only a text entry field in which to type a city name, and a button to search for that location (see Figure 1-2 for a mockup).
I’ll also add a button to search for the current location, assuming the device has a GPS. Finally, there needs to be a list of results so users can choose which of multiple matching cities is the one they want.
Mockups
Mockups are an essential component of user interface design. They give quick insights into how to lay out visual application components. Normally, the first mockup you create will indicate flaws in the design (especially if you show it to an experienced user interface designer… or your client) that you can address before putting any effort into actually coding an inappropriate interface.
I personally tend to do my mockups using a pencil and plain paper. One of my far too many hobbies is sketching, and paper puts me into a more creative frame of mind than the computer screen, which I spend too much time staring at as it is.
However, my sketches are not professional enough to show to clients (or render in a book). There are plenty of online and desktop applications for creating mockups. I enjoyed the closed source Balsamiq when my company provided a license for it. I am loath to pay for software, though, so the mockups in this book were all done using the open source Pencil.
Whatever you choose, you should have, at the very least, a mental picture of what you want your interface to look like. The KV language is awesome for implementation and prototyping, but for the initial design phase, you’ll want more freedom and feedback.
Widgets
Kivy uses the word widget to describe any user interface element. Just a few examples of widgets include:
• The label you rendered in Example 1-3
• The text input field and buttons you’ll render shortly
• Layout classes that comprise other widgets and determine where they should be displayed
• Complicated tree views such as file pickers • Movie and photo renderers
• Tabbed boxes that display different widgets depending on the selected tab
I find it convenient to think of a widget as a sort of box that has behaviors and can contain other boxes. The Widget class is the most basic such box. It is empty. However,
all other widgets extend this class in a beautiful inheritance hierarchy. The Label widget
is a very simple widget that displays text. The Button widget is more interactive and
responds to touch or click events. The TextInput widget knows how to deal with key‐
board events.
The more advanced widgets, such as TabbedPanel or FileChooser, are composed of
multiple other widgets. There is really no conceptual difference between an advanced and a primitive widget other than the difficulty of drawing them on the screen. Advanced widgets are normally composed of Layout widgets, which are essentially boxes that
know enough about the widgets inside them to determine how they should be sized and positioned relative to one another. There are several different Layout subclasses. I per‐
sonally use BoxLayout unless I have very specific needs that require a GridLayout or
FloatLayout. BoxLayout, which renders widgets in a vertical or horizontal line, tends
to be better suited to adapting its size to the display on which it is currently rendering. Finally, you can make custom widgets of your own by extending the Widget class (or,
often, a Layout subclass) and applying KV language rules to describe how the widget
should look. There are two ways to do this. One is to create custom drawing commands to render graphics directly to the widget canvas. The other is to compose multiple primitive widgets into something more complicated; that’s what you’ll be doing in this chapter.
The KV Language Root Widget
The KV language is a special domain-specific language that is ideal for laying out user interfaces. It has a Pythonesque syntax and borrows heavily from Python’s notions of simplicity and elegance. The KV language file uses indentation to indicate which “boxes” go inside other boxes.
The outermost box in a KV language file is called the root widget. There can only be one root widget per KV language file. In Example 1-3, there was only one widget, a Label,
and it is the root widget. You can tell it is the root widget because it is the leftmost indented line, and doesn’t have any funny brackets or angle brackets around it to indicate that it is something else.
There is an indented block below the root widget’s Label: specifier. Inside this block,
you can define other child widgets (except Label doesn’t typically have children), and
you can specify properties about that widget. I’ll tell you more about properties in Chapter 2, including how to create your own custom properties on custom widgets. For now, understand that the Label widget has a text property. That property takes a string
Example 1-4. Basic container widget
BoxLayout:
Label:
text: "Hello"
Label:
text: "Beautiful"
Label:
text: "World"
The root widget, in this case, is a BoxLayout object. As I mentioned before, Layout
widgets are essentially containers that know how to hold other widgets and position them in some way. There are three labels supplied, indented, as children of the BoxLay out. Each of these Labels has an indented block of its own where that widget’s properties
are configured; in this example, a different value for text is supplied for each.
KV Syntax Errors
If your KV language file doesn’t compile correctly, you’ll get a Python traceback. De‐ bugging syntax errors is a common task in programming, as it is rare to type code correctly the first time. You will probably even make mistakes and omissions as you type the examples from this book.
The KV parser will typically give you a ParseException if it encounters a line it doesn’t
like. It will mention the line number in the KV language file that is at fault and normally includes a short description of what’s wrong in the file.
You will eventually encounter these regularly (at least, if you type like I do). I suggest you force one now so you know what to look for. Try deleting the colon after text in
one of the labels in Example 1-4 and see what happens when you try to run the app.
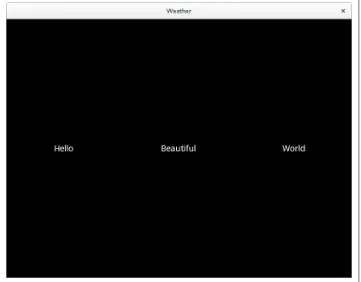
By default, the BoxLayout places each of its child widgets side by side, from left to right,
giving each one an equal amount of space. Since you haven’t done anything to change the defaults, this is what happens when you render the KV file. If you now run python main.py, it will render three labels, as shown in Figure 1-3.
Figure 1-3. Rendering of basic container widget
Creating a Custom Widget
It would not be difficult to change the labels in the root widget to some buttons and text boxes to create the Add Location form I have in mind. But that would make things rather complicated later, when you need to remove all those widgets from the view to put other data (for example, a forecast) on display. Further, if the user later wanted to add another location, it would be tricky to restore all the Add Location widgets.
Instead, create a custom AddLocationForm widget that encapsulates the text entry,
search button, location button, and search results into a single widget. Then set the root widget to be an instance of that custom widget instead. Example 1-5 does all of this.
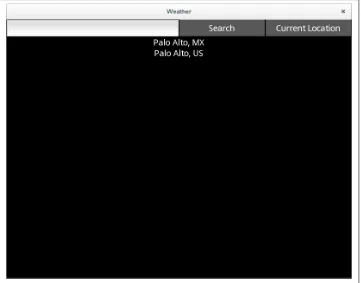
Example 1-5. Custom AddLocationForm widget
AddLocationForm: #
<AddLocationForm@BoxLayout>: # orientation: "vertical" # BoxLayout:
Button:
text: "Search"
Button:
text: "Current Location"
ListView:
item_strings: ["Palo Alto, MX", "Palo Alto, US"] #
The root widget is now a custom widget named AddLocationForm. It doesn’t
have an indented block below it, so there are no properties or child widgets defined.
The new custom class is defined here. The @ symbol in the KV language indicates
that the class is extending BoxLayout using inheritance. This means that the new
widget is a BoxLayout and can do all the things a BoxLayout can do, such as lay
out its children. The angle brackets tell the KV language that this is a new class rule, not a root widget.
AddLocationForm is a BoxLayout like in the previous example, but you are setting
its orientation property to vertical. This will force its child elements to appear
one above the other. The child elements in this case are another BoxLayout (this
one is horizontal), and a ListView.
I’ll tell you a lot more about the ListView widget later. For now, because search
isn’t implemented yet, just hardcode a couple of values so you can see what the rendered ListView looks like.
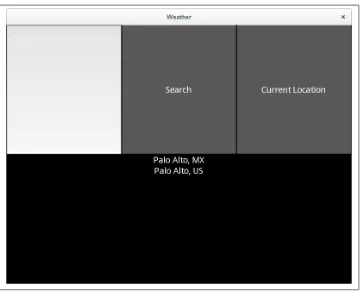
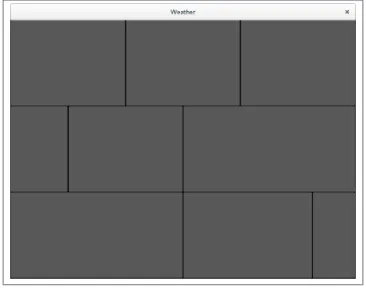
The rendering of this code is shown in Figure 1-4. It’s already looking a lot like I want it to look, but the widget proportions are all wonky.
Adjusting Widget Size
There are a couple of proportion problems with the rendering in Figure 1-4. First, the text box and two buttons are way too tall. And second, the text box doesn’t take enough of the available width. This is fairly easy to take care of in terms of lines of code. However, I find setting proportions on Kivy widgets to be confusing. I hope to spare you that frustration by giving a thorough explanation in this section!
It is up to the Layout object to determine what size its child widgets should be. It is
allowed to take two types of advice from its children, should the children choose to provide it, but it is also free to ignore that advice. For example, a horizontal BoxLay out will always make its children the same height as itself, no matter what the child
requests (this can cause extensive problems if the child widget is in its teens).
Figure 1-4. Rendering of AddLocationForm
The two types of advice the child can give its parent layout are size hints and absolute sizes. For each type of advice, the child widget can set properties in the x dimension
(horizontally) and the y dimension (vertically). In addition, it is possible to combine
the horizontal and vertical settings in the case where you need to explicitly set both of them. This is unecessary with BoxLayout, since it always uses maximum space in one
direction, but can be useful with other layouts. Thus, there are technically six different proportion advice properties that you can set on any given widget class:
• size_hint_x
• size_hint_y
• size_hint (tuple of size_hint_x, size_hint_y)
• width
• height
Of course, if you use the tuple version, you shouldn’t use the individual dimension version.
Size hint advice
The size_hint is a proportional measure. If three widgets have the same size_hint
(and the layout chooses not to ignore that information), they will all be the same size. If one widget’s size_hint is twice as big as another widget’s, then it will be rendered at
double the size.
The main thing to bear in mind is that the size of a widget is calculated based on the sum of the size_hint values for all the widgets. A single widget having a size_hint of 1 has no meaning unless you also know that its sibling widget has a size_hint of 2 (the
first widget will be smaller than the second) or 0.5 (the first widget will be larger). Have
a look at Example 1-6, rendered in Figure 1-5.
The first button in each row has a size_hint_x value of 1. However, its size is different
in each row because the sibling buttons in each row have size_hint_x values that are
bigger or smaller.
Figure 1-5. Size hints
Size advice
Sometimes having widget sizes calculated relative to the sizes of other widgets is exactly what you need. Other times, you need to control the size in one or both dimensions a little more accurately. This is where the width and height properties come in.
One of the most frustrating layout issues for Kivy newbies is that size properties (including width and height) are ignored unless the rele‐
vant size_hint properties are set to None. The default value for a size_hint is 1.0.
Thus, as a rule of thumb, any time you choose to set a height on a
widget, you must also set size_hint_y to None. Similarly, any time
you set a width, you must set size_hint_x to None if you want to get
the expected results. And, of course, if you set the size property
The width and height values themselves are pretty easy to interpret. They can be integer
values, in which case they refer to the pixel size of the widget on the screen. However, you can also pass string values such as "1cm", "0.75in", or "100dp" to render the widget
relative to the resolution of the display. This is almost always a good idea, because modern devices can have an extremely wide variety of pixel densities. A pixel on a cheap laptop might be three times the size of a pixel on a high-end smartphone, and the disparity is even larger for so-called retina displays.
Personally, unless I have a good reason to do otherwise, I always use Kivy’s concept of display pixels by passing a suffix of dp to my height and width properties. A display
pixel is a resolution-independent value that roughly maps to “the size of a pixel on a typical laptop at 72 dots per inch.” On a lower-end screen, 1 display pixel is equivalent to 1 pixel. On top-end displays, a display pixel might be 3 or 4 real pixels wide. The display pixel will be roughly the same size on all the devices; it’s the pixels themselves that are smaller. It’s not guaranteed, but I find that a display pixel on mobile devices is a bit bigger than on desktops and laptops. This is useful, since touch interfaces need to provide a bit more room for widgets to accommodate the clumsy size of the human finger.
Remember that a given layout is free to ignore the width and height properties if it so
chooses. Also remember that most Layouts will ignore those properties no matter what,
if the size_hint has not been set to None in that dimension. Keep this knowledge close
to hand, and you should (I hope) never have to go through the trauma that I did to figure out Kivy sizing! It’s really quite elegant; I don’t know why I once found it so difficult.
See it in action
After all that reading, you’re probably eager to see some KV language code. Hopefully Example 1-7 will satisfy you.
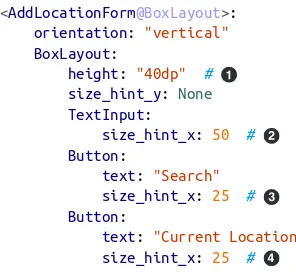
Example 1-7. Setting widget sizes on AddLocationForm
AddLocationForm:
ListView: #
item_strings: ["Palo Alto, MX", "Palo Alto, US"]
Pay close attention to the indentation so you can tell what size property has been set on which widget. Remember, there are two BoxLayout objects. The outer
AddLocationForm, a type of BoxLayout, is vertical. You are setting the inner (by
default, horizontal) BoxLayout to have an explicit height of 40 display pixels.
This means the TextInput and two button widgets inside will be constrained to
that height, since they expand to fill the full height of the parent. Note the explicit setting of size_hint_y to None!
The TextInput is given a size_hint_x of 50 to make it take up half the width
of the window, since the parent widget takes up the full window size.
The two Button objects are assigned a size_hint_x of 25 so they each take up
a quarter of the width. The size_hint_x values for the three widgets total 100,
making it easy for us to think of them as percentages.
The ListView has not been given any additional size information. Its size_hint
defaults to (1, 1). It’s in a vertical BoxLayout, so its width will be the full width
of the parent. The only other widget in that BoxLayout has a size_hint_y of None, so the ListView will take up all remaining vertical space after the 40dp for
the other BoxLayout is deducted.
The result is rendered in Figure 1-6. It was clearly coded by a programmer, not a user interaction designer, but it does the job and beautifully illustrates the concepts you’ve learned in this chapter.
File It All Away
Programming is a task that is best learned by doing, not reading, studying, watching, or listening. Take some time to try things and mess up. I close each chapter with a set of explorations you can use to guide your study. Don’t think of them as exercises. Think of them as topics. Programming is best facilitated by a sense of wonder. Never be afraid to ask, “What happens if I do this?” (unless you are testing on live code deployed to a nuclear facility, moving vehicle, or my personal mobile phone). Here are a few ideas to get you started:
• Check out Kivy’s extensive API documentation, focusing on the kivy.uix modules,
which describe the widgets shipped with Kivy. Pay special attention to the different types of Layout classes. BoxLayout is usually the best choice unless you’re doing
something specific.
even allows you to interactively change KV language code to see what happens. It’s pretty awesome (I wrote it).
• Try coming up with several toy layout projects using the widgets you encountered in this chapter and any others that tickle your fancy. If you’re having trouble coming up with ideas, try a basic login form (TextInput has a Boolean password property)
or a web browser toolbar.
• Experiment a lot with different size_hint and size combinations on a BoxLay out until you understand what works and what doesn’t.
• Experiment with the other built-in Layout classes that come with Kivy. FloatLay out and GridLayout are popular for certain specific tasks. AnchorLayout and
StackLayout have, in my opinion, less common utility. Figure out how each inter‐
prets size_hint and size.
Figure 1-6. AddLocationForm with reasonable widget proportions
CHAPTER 2
Events and Properties
In this chapter, you’ll learn what Kivy means, specifically, by the words event and prop‐ erty. You’ll also learn how to respond to events using event handlers and how changing properties automatically fires events on those properties. I’ll include a digression on choosing client libraries. By the end of the chapter, you will be able to search for weather locations anywhere in the world.
What Is an Event?
Dictionary.com defines an event as “something that happens, especially something im‐ portant.” That’s a perfect description of events in Kivy. Kivy is firing events all the time, but you only have to pay attention to those that you consider important. Every graphical toolkit has some concept of events. The difference between Kivy and those other toolkits is that in Kivy, event dispatch and handling are sane and uncomplicated.
Like most user interface toolkits, Kivy provides an event loop. This is executed by your Python code when you call the run method on WeatherApp. Underneath the hood, this
method is constantly cycling through events such as touch or mouse motion, clock ticks, keyboard entry, accelerometer input, and more. When something interesting happens, it does the necessary processing to make sure that your code knows the event has hap‐ pened and has a chance to respond.
So if an event is something that happens, an event handler is something that responds to something that happens. In Kivy, an event handler is just a function or method. By the end of this chapter, your event handler is going to search for potential locations to retrieve weather for and add them to the ListView. But you can start a bit smaller: how
about just printing a message to the console from which your Kivy app is running?
Adding Logic to a Custom Widget
I have a guideline. It’s a strict guideline—you might call it a rule—but there are legitimate reasons to break it. The guideline is this: layout and graphical information should always go in the KV language file. Logic (the calculations and activities that make up a program) should always go in a Python file. Keeping these two types of information separate will save hours in the long-term maintenance of your app.
You may have noticed in the previous chapter that I didn’t touch the Python file at all. All the changes happened in the KV language file. This is because that chapter was entirely related to the user interface. This chapter is going to do some logic. Granted, that logic is going to change the user interface (for example, by updating the values in the ListView), but such activity still belongs in the Python file.
The Python file, therefore, needs to know about the AddLocationForm custom widget
that you defined in Chapter 1. I kind of cheated in that chapter by allowing the KV language file to create a class dynamically using the @BoxLayout syntax. Take that out
first, as shown in Example 2-1.
Example 2-1. Making AddLocationForm into a normal, rather than dynamic, class
AddLocationForm:
The @BoxLayout was removed, changing this into a normal class.
You won’t be able to run this KV language file because you took out the Kivy magic that allows it to know what kind of class it’s supposed to be. Dynamic classes are a shortcut in Kivy that are most often useful if you want to reuse the same widget layout settings —without logic—in multiple locations. For example, if you had a group of buttons that all needed to be styled similarly, you could create a dynamic class that extends @But ton and set the relevant properties on them. Then you could use instances of that class
However, AddLocationForm is a rather normal class that needs logic attached to it. Start
by adding a class definition to the main.py file, as shown in Example 2-2.
Example 2-2. Adding a class to main.py
from kivy.app import App
from kivy.uix.boxlayout import BoxLayout #
class AddLocationForm(BoxLayout): # pass
class WeatherApp(App):
pass
if __name__ == '__main__':
WeatherApp().run()
Remember to import the class you are extending.
Inheritance is used to create a new subclass of BoxLayout with no extra logic
just yet. The rule in the KV language file, which matches this class based on the class name, will apply all the additional styling for this form. This styled class is then set as the root class in the KV language file.
If you now run python main.py, it will behave exactly the same as at the end of Chap‐
ter 1. Not much gain, since all you’ve done is make the code more verbose, but you’ll be adding logic to this class right away.
Responding to Events
Quickly add a method to the new class that prints a short maxim to the console when it is called, as shown in Example 2-3.
Example 2-3. Adding some very simple logic
class AddLocationForm(BoxLayout):
def search_location(self):
print("Explicit is better than implicit.")
The method doesn’t accept any arguments. This is just a normal method; it’s not an event handler.
You’ll be adding an event handler to the KV language file now. It’s just one line of code. The boundary between user interface and logic should, in my opinion, always be one line of code in the KV language file. That single line of code can, and should, call a
method in the Python file that does as much processing as is required. Have a look at the modified code for the search button in Example 2-4.
Example 2-4. Hooking up the event handler
Button:
text: "Search"
size_hint_x: 25
on_press: root.search_location()
The event handler is accessed as a property on the Button object with a prefix
of on_. There are specific types of events for different widgets; for a button, the
press event is kicked off by a mouse press or touch event. When the press event
happens, the code following the colon—in this case, root.search_location()
—is executed as regular Python code.
When you run this code, you should see the phrase Explicit is better than im
plicit display in the console every time you press the Search button in the interface.
But what is actually happening?
When the press event fires, it triggers the event handler, which is essentially just a method on the Button class named on_press. Then it executes the contents of that method,
which has been defined in the KV language file to contain the single line of code
root.search_location().
Assume, for a second, that the root variable points at an instance of the class that is
leftmost indented in this KV language block—that is to say, the <AddLocationForm>
class rule. This object has a search_location method, since you added it just a few
moments ago, and that method is being called. So, each time you touch the button, the print statement inside search_location is executed.
In fact, that assumption is correct. When the KV language executes anything as raw Python code, as in these event handlers, it makes a few “magic” variables available. You just saw root in action; it refers to the leftmost indented object: the current class rule.
The self variable refers to the rightmost indented object. If you accessed the self.size
property from inside the on_press handler, you’d know how big the button was. Finally,
the app variable refers to the subclass of App on which your code originally called the run method. In this code, it would be an instance of WeatherApp. This isn’t that useful
in your current code, but when you start adding methods to WeatherApp, the app magic
variable will be the way to access them.
Accessing Properties of KV Language Widgets
the widget in question an identifier, and then provide a way for the Python file to access that named object.
This is a good time to delve into the Kivy concept of properties. Kivy properties are somewhat magical beings. At their most basic, they are special objects that can be at‐ tached to widgets in the Python code and have their values accessed and set in the KV language file. But they add a few special features.
First, Kivy properties have type-checking features. You can always be sure that a String
property does not have an integer value, for example. You can also do additional vali‐ dation, like ensuring that a number is within a specific range.
More interestingly, Kivy properties can automatically fire events when their values change. This can be incredibly useful, as you will see in later chapters. It’s also possible to link the value of one property directly to the value of another property. Thus, when the bound property changes, the linked property’s value can be updated to some value calculated from the former.
Finally, Kivy properties contain all sorts of knowledge that is very useful when you’re interfacing between the KV language layout file and the actual Python program. For now, just know that the ObjectProperty property can be bound to any Python
object. Your KV language file will be set up to attach this property to the TextInput
object. First, though, set up your main.py code to import ObjectProperty and add an
instance of it with an empty value to AddLocationForm, as shown in Example 2-5.
Example 2-5. Adding a property to point at the search input widget
from kivy.properties import ObjectProperty
class AddLocationForm(BoxLayout):
search_input = ObjectProperty()
def search_location(self):
print("Explicit is better than Implicit") Remember to import the class.
The property is created at the class level as an instance of the ObjectProperty
class.
Next, modify the weather.kv file to do two things. First, you want to give the TextIn put an id property so that it can be internally referenced from other parts of the KV
language file. Note that these ids aren’t useful outside of the KV language rules. That
means you’ll also have to set the value of the search_input property you just created
to this id. The KV language will take care of setting the value in your Python code to
point directly at the TextInput widget object. Make the two modifications shown in
Example 2-6.
Example 2-6. Setting the search input id and property value
AddLocationForm:
First, add an id attribute to the TextInput so it can be referenced by name
elsewhere in the KV language file.
Then set the value of the property, which was defined in Example 2-5, to that id.
The Difference Between Kivy Properties and Python Properties
Kivy and the Python language both have concepts they call properties. In both cases, properties sort of represent named values on objects, but they are not the same thing, and you have to be careful to distinguish between them. They are not interchangeable at all. In the context of Kivy development, Kivy properties are more useful, but there is nothing stopping you from using Python properties as well, for other purposes. A Python property is a method (or set of methods) that can be accessed as if it were an attribute. Different methods are called if the property is retrieved or set. This can be a useful form of encapsulation.Kivy will take care of making sure that the ObjectProperty in the Python code directly
references the TextInput widget object, with all the properties and methods that the
TextInput has. Specifically, you can now access the value the user entered from inside
the search_location method using the text property, as shown in Example 2-7.
Example 2-7. Accessing a widget attribute via ObjectProperty
def search_location(self):
print("The user searched for '{}'".format(self.search_input.text))
Access the text property on the search_input widget. In this example, just print
it out.
Populating the Search Result List
Now that you can access the value the user searched for, the next step is to look up possible matching cities. To do this, you need weather data to query.
One option, of course, would be to invest millions of dollars into setting up weather stations across the world; then you’d have your own private network of data to query. Unfortunately, that’s slightly outside the scope of this book. Instead, you can take ad‐ vantage of other services that have already done this part and have made their data publicly available.
I had a look around the vast reserves of the Internet and discovered Open Weather Map, which supplies an international API for looking up weather data. I don’t know how accurate it is, but this is what you’ll be using to create your Kivy interface. It is free, allows essentially unlimited requests, and doesn’t require an API key (though it is rec‐ ommended for production systems). It’s also founded on “open” principles like Wiki‐ pedia, OpenStreetMaps, Creative Commons, Open Source, and Gittip. I believe strongly in these principles.
Choosing APIs and Libraries
I just arbitrarily told you what API you are going to use to access weather data. This took a huge amount of effort out of the programming process for you. This is unfortu‐ nate, as determining what libraries to base your program on is a major part of the de‐ velopment effort. Programming books tend to introduce the subject as if you will be writing all of your work from scratch. This isn’t true. The success of any new application is strongly impacted by what third-party libraries or APIs are used to create it. I spend a vast amount of time up front researching available options and trying to figure out which one will maximize the effectiveness of my app.
For any given problem that you need to solve, search the Web to see what existing libraries are available. Programmers hate duplicating work, and you’ll find most tasks
have already been completed! Once you have a list of available libraries, study each one, paying attention to questions such as these:
• Is the license compatible with the license you want to use for your application? • If not open source, how much does it cost to license the library?
• If open source, does the source code for the library look well maintained and easy to read?
• Does the library appear to be actively developed and has there been a recent release? • Is there an active user community talking about the library?
• Does the library appear to have useful (readable, up-to-date, complete) documen‐ tation?
• What avenues of support are available if you have trouble? • If Python-based, does the library boast Python 3 support?
Open Weather Map is a web service that returns data in JavaScript Object Notation (JSON). Python has a superb built-in JSON parsing library that converts the incoming data to Python dictionaries and lists. However, you still need a way to retrieve that incoming data. There are built-in tools to handle this in the Python standard library, but you’re much better off using the UrlRequest class that Kivy provides. This class
supplies a fully asynchronous API, which means that you can initiate a request and allow the user interface to keep running while you wait for a response.
Since this book is about Kivy, I’m not going to give you a lot of detail about the structure of the Open Weather Map data. Its website explains this in detail. The examples include all the code you’ll need to actually perform these tasks.
The next step is to connect to the weather map service when the user clicks the Search button and retrieve a list of cities that match those search results. As Example 2-8 illustrates, this is not a difficult task.
Example 2-8. Retrieving map data using requests and printing the list of cities to the console
def search_location(self):
search_template = "http://api.openweathermap.org/data/2.5/" +
"find?q={}&type=like"
search_url = search_template.format(self.search_input.text)
request = UrlRequest(search_url, self.found_location)
def found_location(self, request, data):
cities = ["{} ({})".format(d['name'], d['sys']['country'])
The {} in the URL is a placeholder for the user’s query. The str.format method
is used in the next line to replace this value with the value that the user actually searched for.
You’ll need from kivy.network.urlrequest import UrlRequest at the top of
the file. This line is doing a lot of work on your behalf. It connects to the Open Weather Map URL and downloads the response. It then returns control to the UI, but when the response comes back from the network, it will call the
found_location method, which is passed in as an argument.
The data passed by UrlRequest is a parsed dictionary of JSON code.
This list comprehension is also doing a huge amount of work. This command is iterating over one list and translating it into a different list, where the elements are in the same order but contain different data. The data, in this case, is a string with the name of the city and the country in which it’s located.
There is a bug in Kivy 1.8.0 under Python 3. When you are using Kivy 1.8.0 and Python 3, UrlRequest fails to convert the incoming
data to JSON. If you are using this combination, you’ll need to add
import json and put data = json.loads(data.decode()) at the
top of found_location.
Comprehensions
Comprehensions can be pretty incomprehensible to the uninitiated (and are therefore poorly named). However, they are one of Python’s strongest language features, in my opinion. Newer Python users tend to overlook them, so I thought I’d give you a crash course here.
Python has built-in support for iterators; that is, container items that can have their elements looped over one by one. Built-in iterators include lists, tuples, strings, dic‐ tionaries, sets, and generators. It’s trivial to extend these objects or create new objects that can be iterated over. The for loop is the traditional method of iteration.
However, one of the most common tasks of a for loop is to convert a sequence of objects
into another, transformed sequence. Comprehensions allow us to do this in a compact and easy-to-read syntax. The transformations that can happen inside a comprehension include:
• Changing the container to a different type of sequence. For example, you can iterate over a set and store the results in a list or dictionary.
• Altering each value into a different format. For example, you can convert a list of strings containing numbers into a list of integers, or you can convert a list of strings into a list of strings with newlines on the end.
• Filtering out values that don’t conform to a specific condition. For example, you can convert a list of integers into a list of only the even integers in the list, or you can convert a list of strings into a list of nonempty strings.
You’ll see examples of comprehensions throughout this book, but if you want more information, search the Web for list comprehensions, dictionary comprehensions, or set comprehensions in Python.
Now all you need to do is figure out how to update the list of results on the screen instead of printing to the console. This is also surprisingly simple since the data is stored in a Kivy property on the ListView widget.
First, add an id to the ListView and set it up as an assigned property in the weath‐
You don’t have an ObjectProperty in main.py yet, but assign it here anyway. Set an id on the ListView so it can be referenced in the property assignment
above.
Then, add the search_resultsObjectProperty to the AddLocationForm class and up‐
date the contents of the property in the found_location method instead of printing
results to the screen, as shown in Example 2-10.
Example 2-10. Updating the list of search results on search click
def found_location(self, request, data):
data = json.loads(data.decode()) if not isinstance(data, dict) else data cities = ["{} ({})".format(d['name'], d['sys']['country'])
for d in data['list']]
self.search_results.item_strings= cities
Work around the aforementioned bug in which UrlRequest doesn’t parse JSON
under Python 3. This line of code works on both Python 2 and Python 3 and should also work with future versions of Kivy that fix the bug. It is an ugly workaround, but at least the ugliness is constrained to one line. This line uses Python’s ternary operator to check if the data has been converted to a dict
already, and if not, it loads it using the JSON module. You’ll need to add an
import json at the top of the file.
End the chapter with the easiest line of code imaginable: set the item_strings
property on the self.search_results list to the list of cities.
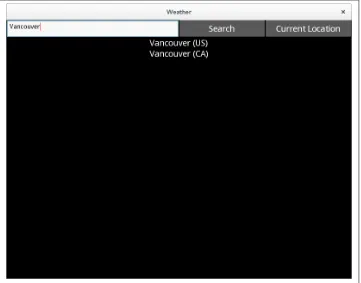
And that’s it. If you now run python main.py, you can search for Vancouver and get
two expected results, as shown in Figure 2-1.
When you test this search form, you can crash the application by searching for a place with no matches. Search for a real place. You’ll explore error checking in the exercises.
Figure 2-1. Rendering of search results in the basic container widget
File It All Away
We covered two important Kivy topics in this chapter: events and properties. I didn’t get into a great deal of detail about either of them yet. You might want to try some of the following tasks to enhance and lock in your new knowledge:
• Accessing the GPS device in Android is covered in Chapter 9, but for now, you could invite users to enter a latitude,longitude pair into the text field. If they
click the Current Location button, it could signify that they intended to search by latitude and longitude instead of city name. If you look at the documentation for the Open Weather Map database, you can see that it allows searching by latitude and longitude. Try hooking up this button.
• This app crashes if your search doesn’t have any matches. I had a great internal debate about this, but I have left error checking out of most of the examples to make sure the code you see is comprehensible. However, that makes the code unrealistic. All real-world code needs to have solid error checking. Try to make the search_lo
don’t exist, transient network failures, and as many other problems as you can come up with.
• You’ve only seen the on_press event for buttons. See if you can figure out how to
make on_enter on the TextInput object call the same function and perform a
similar search.
• Read through the Kivy documentation for some of the basic widgets you’ve heard about to see what kinds of properties and events are supported for each.
• Try making a new toy app that links the text of a label to the text of an input, such that typing into the input changes the label. Hint: this is easier than you might guess and does not require setting up an on_text handler. It can be done with just a
boilerplate main.py file; all the connections can happen in the KV language.
CHAPTER 3
Manipulating Widgets
It’s time to think about widgets again. In this chapter, you’ll see how to dynamically change what widgets are displayed in the widget tree. You’ll mainly be implementing searching and the rendering of search results. This will give you a good understanding of the intricacies of the Kivy ListView widget and its adapters, and you’ll also learn how
to create widgets and update the display dynamically in response to user or system events.
A More Extensible Root Widget
While the user will find it useful for the Add Location form to be rendered the first time the application is run, it’s not actually appropriate to set it as the root widget on the app. It’s better to have a custom root widget that knows how to manage the widgets that are displayed on it, such as the various forms I mentioned in Chapter 1.
I expect the root widget to have several methods for manipulating the display of child widgets. Start by adding an empty class to the main.py file. Make it extend BoxLayout,
but for now, the class can be otherwise empty (meaning it will behave exactly like a normal BoxLayout). See Example 3-1.
Example 3-1. Empty root class
class WeatherRoot(BoxLayout):
pass
For now, set up the KV language file to render an instance of this as the root widget. Then set up a new rule for it to include AddLocationForm as a child, as demonstrated
in Example 3-2.