Other resources from O’Reilly
Related titles Essential PHP Security Learning PHP 5 Learning MySQL Mastering Regular
Expressions MySQL Cookbook™ MySQL in a Nutshell
MySQL Pocket Reference PHP Cookbook™
PHP Hacks™ Programming PHP
Web Database Applications with PHP and MySQL
oreilly.com oreilly.comis more than a complete catalog of O’Reilly books. You’ll also find links to news, events, articles, weblogs, sample chapters, and code examples.
oreillynet.comis the essential portal for developers interested in open and emerging technologies, including new platforms, pro-gramming languages, and operating systems.
Conferences O’Reilly brings diverse innovators together to nurture the ideas that spark revolutionary industries. We specialize in document-ing the latest tools and systems, translatdocument-ing the innovator’s knowledge into useful skills for those in the trenches. Visit con-ferences.oreilly.com for our upcoming events.
Learning PHP and MySQL
SECOND EDITION
Michele E. Davis and Jon A. Phillips
Learning PHP and MySQL, Second Edition
by Michele E. Davis and Jon A. Phillips
Copyright © 2007, 2006 Michele E. Davis and Jon A. Phillips. All rights reserved. Printed in the United States of America.
Published by O’Reilly Media, Inc., 1005 Gravenstein Highway North, Sebastopol, CA 95472.
O’Reilly books may be purchased for educational, business, or sales promotional use. Online editions are also available for most titles (safari.oreilly.com). For more information, contact our
corporate/institutional sales department: (800) 998-9938 or[email protected]. Editor: Simon St.Laurent
Production Editor: Marlowe Shaeffer Copyeditor: Reba Libby
Proofreader: Sohaila Abdulali
Indexer: Ellen Troutman Zaig Cover Designer: Karen Montgomery Interior Designer: David Futato Illustrator: Jessamyn Read
Printing History:
June 2006: First Edition.
August 2007: Second Edition.
Nutshell Handbook, the Nutshell Handbook logo, and the O’Reilly logo are registered trademarks of O’Reilly Media, Inc.Learning PHP and MySQL, the image of kookaburra birds, and related trade dress are trademarks of O’Reilly Media, Inc.
Many of the designations used by manufacturers and sellers to distinguish their products are claimed as trademarks. Where those designations appear in this book, and O’Reilly Media, Inc. was aware of a trademark claim, the designations have been printed in caps or initial caps.
While every precaution has been taken in the preparation of this book, the publisher and authors assume no responsibility for errors or omissions, or for damages resulting from the use of the information contained herein.
This book uses RepKover™, a durable and flexible lay-flat binding.
v
Table of Contents
Preface
. . . .ix
1. Dynamic Content and the Web
. . .1
HTTP and the Internet 1
PHP and MySQL’s Place in Web Development 2
The Components of a PHP Application 4
Integrating Many Sources of Information 7
Requesting Data from a Web Page 11
2. Installation
. . .15
Developing Locally 15
Working Remotely 35
3. Exploring PHP
. . .39
PHP and HTML Text 39
Coding Building Blocks 43
4. PHP Decision-Making
. . .62
Expressions 62
Operator Concepts 64
Conditionals 71
Looping 77
5. Functions
. . .85
Calling Functions 87
Defining Functions 89
6. Arrays
. . .107
Array Fundamentals 107
7. Working with MySQL
. . .122
MySQL Database 122
Managing the Database 125
Using phpMyAdmin 126
Database Concepts 131
Structured Query Language 132
8. Database Best Practices
. . .146
Database Design 146
Backing Up and Restoring Data 155
Advanced SQL 159
9. Getting PHP to Talk to MySQL
. . .179
The Process 180
Querying the Database with PHP Functions 180
Using PEAR 190
10. Working with Forms
. . .199
Building a Form 199Templates 218
11. Practical PHP
. . .223
String Functions 223
Date and Time Functions 233
File Manipulation 238
Calling System Calls 249
12. XHTML
. . .251
Why XHTML? 253
XHTML and XML Namespaces 254
XHTML Versions 254
Generating XHTML with PHP 261
13. Modifying MySQL Objects and PHP Data
. . .263
Changing Database Objects from PHP 263
Manipulating Table Data 266
Table of Contents | vii
Presenting a Form to Add and Process in One File 270
Updating Data 276
Deleting Data 277
Performing a Subquery 282
14. Cookies, Sessions, and Access Control
. . .285
Cookies 285
PHP and HTTP Authentication 288
Sessions 294
Using Auth_HTTP to Authenticate 301
15. Security
. . .307
Session Security 316
16. Validation and Error Handling
. . .325
Validating User Input with JavaScript 325
Pattern Matching 329
Redisplaying a Form After PHP Validation Fails 333
17. Sample Application
. . .339
Configuration File 340
Page Framework 340
Database 343
Displaying a Postings Summary 346
Displaying a Posting and Its Comments 349
Adding and Changing Posts 352
Adding and Changing Comments 358
18. Finishing Your Journey
. . .366
PHP Coding Standards 366
PEAR 371
Frameworks 372
Ajax 373
Wikis 373
Finding Help on the Web 373
Appendix. Solutions to Chapter Questions
. . .377
ix
Preface
1PHP and MySQL are a powerful combination that makes it easy to create web appli-cations. If you’ve been creating web pages but want to build more sophisticated sites that can grow and interact with users, PHP and MySQL let you get started easily and then build complex applications on those foundations.
Our goal is to help you learn the ins and outs of PHP and MySQL and to save you some of the “Why doesn’t that work?” moments that we’ve already been through. We’ll show you what to watch for and how to fix these issues without pulling out your hair.
Audience
This book is for people who want to know how to create dynamic web sites. That could include graphic designers who are already working in an IT or advertising firm creating static web sites, and who may need to move forward with coding database-driven web sites. It might also include people who already know, say, Flash develop-ment and HTML markup, but need to expand their repertoire of skills to databases and programming.
Assumptions This Book Makes
This book assumes you understand how web browsers work and have a basic under-standing of HTML. Some underunder-standing of JavaScript may be useful (for Chapter 16) but isn’t generally required.
Organization of This Book
This book starts out with an overview of how all of the pieces you’ll be working with fit together. Because there are multiple languages and technologies that interact to formdynamic web pages, it’s best to start with a solid understanding of how the pieces work together. The PHP that you’ll learn works as an integration package for dynamic web sites.
Next, we’ll walk through installing the core software packages on your local com-puter. This book focuses on PHP and MySQL, but making this work also usually requires the Apache web server. The PHP interpreter works with the web server when processing dynamic content. Finally, you’ll install the MySQL database. Instal-lation is covered for PC, Mac, and Linux systems. You can also use a hosted Internet service provider (ISP) account to develop your pages, if you don’t want to install everything locally.
Since PHP plays an important role in pulling everything together, we next explain the basics of working with the PHP language. This includes language essentials such as data types, programflow logic, and variables. Functions, arrays, and forms each get their own chapter to fully explore them.
Because you may be new to databases in general, we ease into MySQL by first explaining concepts that apply to designing and using any relational database. Then we give specific examples of using MySQL to interact with your data. Once you can get data in and out of the database, you’ll need to work with PHP to integrate that data into your dynamic content.
Security and access control get their own chapters. While security may sound like a dull subject, it’s still a huge issue if you store any private information on your web page. We’ll guide you around several common security pitfalls.
We also touch on how XHTML, the next generation of HTML, works with PHP and your web sites.
Finally, we close with sample applications that demonstrate how the technologies work together to rapidly build workable, fast web sites. You’ll also be provided with web sites and forums to gain additional information on the topics covered in the book.
Supporting Books
Even if you feel you are ready for this book, you may want to explore some of the technologies in greater depth than is possible here. The following list offers some good places to start:
Preface | xi
• MySQL in a Nutshell, First Edition, by Russell Dyer (O’Reilly). • CSS Cookbook, Second Edition, by Christopher Schmitt (O’Reilly).
There are also several good online resources for dynamic web development, including http://onlamp.com, part of the O’Reilly Network. LAMP stands for Linux, Apache, MySQL, PHP. LAMP is the de facto standard for serving dynamic web pages.
Conventions Used in This Book
The following font conventions are used in this book: Italic
Indicates pathnames, filenames, and program names; Internet addresses, such as domain names and URLs; and new items where they are defined.
Constant width
Indicates command lines; names and keywords in programs, including method names, variable names, and class names; HTML element tags; values; and data-base engines.
Constant width italic
Indicates text that should be replaced with user-supplied values.
Constant width bold
Indicates emphasis in program code lines and user input options that should be typed verbatim.
This icon signifies a tip, suggestion, or general note.
This icon indicates a warning or caution.
Using Code Examples
We appreciate, but do not require, attribution. An attribution usually includes the title, author, publisher, and ISBN. For example: “Learning PHP and MySQL, Second Edition, by Michele E. Davis and Jon A. Phillips. Copyright 2007 Michele E. Davis and Jon A. Phillips, 978-0-596-51401-3.”
If you feel your use of code examples falls outside fair use or the permission given above, feel free to contact the publisher at[email protected].
How to Contact Us
We have tested and verified the information in this book to the best of our ability, but mistakes and oversights do occur. Please let us know about any errors you find, as well as your suggestions for future editions, by writing to:
O’Reilly Media, Inc.
1005 Gravenstein Highway North Sebastopol, CA 95472
800-998-9938 (in the United States or Canada) 707-829-0515 (international or local)
707-829-0104 (fax)
We have a web page for this book, where we list errata, examples, and any addi-tional information. You can access this page at:
http://www.oreilly.com/catalog/9780596514013
There is also a blog for this book located at: http://www.krautgrrl.com/learningphp/
To comment or ask technical questions about this book, send email to: [email protected]
For more information about our books, conferences, Resource Centers, and the O’Reilly Network, see our web site at:
http://www.oreilly.com
Safari® Books Online
When you see a Safari® Books Online icon on the cover of your favorite technology book, that means the book is available online through the O’Reilly Network Safari Bookshelf.
Preface | xiii
Acknowledgments
We are happy to have this newly improved and expanded Second Edition out for our audience. We’d like to thank our wonderful agent, Matt Wagner of Fresh Books, along with Simon St.Laurent at O’Reilly for getting this Second Edition rolling; with-out them, this book wouldn’t be in your hands.
1
Chapter 1
CHAPTER 1
Dynamic Content and the Web
1To the average user, a web page is a web page. It opens in the browser and provides information. Looking closer, though, some pages stay mostly the same, while other pages change regularly. Pages that don’t change—staticpages—are relatively simple to create. Someone has to create an HTML document, by hand or with tools, and upload it to a site where web browsers can visit. One of the most common tools to create HTML documents is Adobe Dreamweaver. When changes are needed, you just replace the old file with a new one.Dynamicpages are also built with HTML, but instead of a simple build-and-post approach, the pages are updated regularly, sometimes every time that they are requested.
Static sites provide hyperlinked text and perhaps a login screen, but beyond that, they don’t offer much interaction. By contrast, Amazon.com (http://www.amazon.com) demonstrates much of what a dynamic web site can do: your ordering data is logged, and Amazon offers recommendations based on your purchasing history when you access their page. In other words, dynamic means that the user interacts with the web site beyond just reading pages, and the web site responds accordingly. Every page is a personalized experience.
Creating dynamic web pages—even a few years ago—meant writing a lot of code in the C or Perl languages, and then calling and executing those programs through a process called a Common Gateway Interface (CGI). Having to create executable files wasn’t much fun, and neither was learning a whole new complicated language. Thankfully, PHP and MySQL make creating dynamic web sites easier and faster.
HTTP and the Internet
The World Wide Web Consortium(W3C) and the Internet Engineering Task Force coordinated the development of HTTP, which is a request-and-response protocol that connects clients and servers. The originating client, usually a web browser, is referred to as theuser agent. The destination server, which stores or creates resources and can contain HTML files and images, is called theorigin server. Between the user agent and origin server, there may be several intermediaries, such as proxies.
An HTTP client initiates a request by establishing a Transmission Control Protocol (TCP) connection to a particular port on a remote host (port 80 is the default). An HTTP server listening on that port waits for the client to send a request message. Upon receiving the request, the server sends back a status line, like “HTTP/1.1 200 OK,” and its own response. Depending on the status, this response could be the requested file, an error message, or some other information.
HTTP is built on top of TCP, which is itself layered on top of Internet Protocol (IP). The two are often referred to together as TCP/IP. Applications on networked hosts can use TCP to create connections to one another, and then exchange streams of data. The protocol guarantees reliable delivery of data fromsender to receiver. TCP supports many of the Internet’s most popular application protocols and applica-tions, including the Web, email, and Secure Shell (SSH).
PHP and MySQL’s Place in Web Development
PHP is a programming language designed to generate web pages interactively on the computer serving them, which is called aweb server. Unlike HTML, where the web browser uses tags and markup to generate a page, PHP code runs between the requested page and the web server, adding to and changing the basic HTML output. PHP makes web development easy because all the code you need is contained within the PHP framework. This means that there’s no reason for you to reinvent the wheel each time you sit down to develop a PHP program; it comes with web functionality built-in.
While PHP is great for web application development, it doesn’t store information by itself. For that, you need a database. The database of choice for PHP developers is MySQL, which acts like a filing clerk for PHP-processed user information. MySQL automates the most common tasks related to storing and retrieving specific user information based on your supplied criteria.
Consider the Amazon.com example: the recommendations Amazon offers are based on a database that records your prior order information.
PHP and MySQL’s Place in Web Development | 3
Advantages of Using PHP with MySQL
There are several factors that make using PHP and MySQL together a natural choice: PHP and MySQL work well together
PHP and MySQL have been developed with each other in mind, so they are easy to use together. The programming interfaces between them are logically paired up. Working together wasn’t an afterthought when the developers created the PHP and MySQL interfaces.
PHP and MySQL have open source power
As they are both open source projects, PHP and MySQL can both be used for free. MySQL client libraries are no longer bundled with PHP. Advanced users have the ability to make changes to the source code, and therefore change the way the language and programs work.
PHP and MySQL have community support
Both tools active communities on the Web in which you can participate, and the participants will help you answer your questions. You can also purchase profes-sional support for MySQL if you need it.
PHP and MySQL are fast
Their simple and efficient designs enable faster processing. PHP and MySQL don’t bog you down with unnecessary details
You don’t need to know all of the low-level details of how the PHP language interfaces with the MySQL database, as there is a standard interface for calling MySQL procedures from PHP. Online application programming interfaces (APIs) athttp://www.php.net offer unlimited resources.
The Value of Open Source
We’ll armyou with open source user forums later in this book so you can check themout yourself. We’ll include listservs and web sites so that you have numerous resources if you run into a snafu.
The Components of a PHP Application
In order to process and develop dynamic web pages, you’ll need to use and under-stand several technologies. There are three main components of creating dynamic web pages: a web server, a server-side programming language, and a database. It’s a good idea to have an understanding of these three basic components for web devel-opment using PHP. We’ll start with some rudimentary understanding of the history and purpose of Apache (your web server), PHP (your server-side programming lan-guage), and MySQL (your database). This can help you to understand how they fit into the web development picture.
Remember that dynamic web pages pull information from several sources simulta-neously, including Apache, PHP, MySQL, and Cascading Style Sheets (CSS), which we’ll talk about later.
PHP
PHP grew out of a need for people to develop and maintain web sites containing dynamic client-server functionality. In 1994, Rasmus Lerdorf created a collection of open source Perl scripts for his personal use, and these eventually were rewritten in C and turned into what PHP is today. By 1998, PHP was released in its third version, turning it into a web development tool that could compete with similar products such as Microsoft’s Active Server Pages (ASP) and Sun’s Java Server Pages (JSP). PHP also is an interpreted language, rather than a compiled one. The real beauty of PHP is simplicity coupled with power.
Compiled languages create a binary file such as an.exe, while inter-preted languages work directly with the source code when executing, as opposed to creating a standalone file.
The Components of a PHP Application | 5
Apache
Apache is a web server that turns browser requests into resulting web pages and knows how to process PHP code. PHP is only a programming language, so without the power of a web server like Apache behind it, there would be no way for web users to reach your pages containing the PHP language code.
Apache is not the only web server available. Another popular web server is Microsoft’s Internet Information Services (IIS), which is supplied with Windows 2000 and all later versions. Apache has the decided advantages of being free, provid-ing full source code, and usprovid-ing an unrestricted license. Apache 2.0 is the current ver-sion you would most likely be using, though 1.3 is often still used. IIS is easier to integrate with Active Directory, Microsoft’s latest authentication system, but this applies mostly to internal company web sites.
According to the Netcraft web server survey, Apache has been the most popular web server on the Internet since April 1996.
Because web servers like Apache and IIS are designed to serve up HTML files, they need a way to know how to process PHP code. Apache usesmodulesto load exten-sions into its functionality. IIS uses a similar concept called Internet Server Applica-tion ProgramInterface (ISAPI). These both allow for faster processing of the PHP code than the old-school process of calling PHP as a separate executable each time the web server had a request for a page containing PHP. We’ll discuss how the Apache module is set up in Chapter 2.
Apache has only two major versions in use today: 1.3 and 2. Apache 2 is a major rewrite and supportsthreading. Threads allow a single process to manage more than one thing at a time. This increases speed and reduces the resources needed. Unfortu-nately, PHP isn’t totally compatible with threading yet. Apache 2 has been out long enough to be considered stable for use in development and production environ-ments.
Apache 2 also supports more powerful modules. Some additional modules can be found at http://www.cri.ensmp.fr/~coelho/mod_macro/. However, shared module DLLs that don’t come with the official Apache source files, such asmod_php4,mod_ ssl, mod_auth_mysql, andmod_auth_ntsec, can be found on the Web.
SQL and Relational Databases
Structured Query Language (SQL) is the most popular language used to create, retrieve, update, and delete data from relational database management systems. A relationaldatabase conforms to the relational model and refers to a database’s data and schema. Theschemais the database’s structure of how data is arranged. Common usage of the term “Relational Database Management System” technically refers to the software used to create a relational database, such as Oracle or Microsoft SQL Server. A relational database is a collection of tables, but other items are frequently consid-ered part of the database, as they help organize and structure the data in addition to forcing the database to conform to a set of requirements.
MySQL
MySQL is a free yet full-featured relational database. MySQL was developed in the 1990s to fill the ever-growing need for computers to manage information intelli-gently. The original core MySQL developers were trying to solve their needs for a database by using mSQL, a small and simple database. It become clear that mSQL couldn’t solve all the problems they wanted it to, so they created a more robust data-base that turned into MySQL.
MySQL supports several differentdatabase engines. Database engines determine how MySQL handles the actual storage and querying of the data. Because of that, each storage engine has its own set of abilities and strengths. Over time, the database engines available are becoming more advanced and faster. Table 1-1 lists when vari-ous features have been added to MySQL.
Table 1-1. Major MySQL releases
Version Features
3.23 The MyISAM database engine is added and is the default engine. It handles large amounts of data efficiently. The InnoDB database engine debuts for transaction safe database processing and support forforeign keys. Foreign keys allow the relationships between tables to be explicitly designated in the database.
4.0 Queries supportunions. Unions allow merging the results of two queries into one result. Configuration changes can be made without restarting the database.
4.1 Ahelp command is included for the database client. There is support forunnamed views, also known as subqueries. Unnamed views allow you to treat a query like a separate table within a query. There is support for Unicode character sets (local languages).
Integrating Many Sources of Information | 7
The current production release of MySQL is the 5.0xversion. MySQL 5.0 provides performance that is comparable to any of the much more expensive enterprise data-bases such as Oracle, Informix, DB2 (IBM), and SQL Server (Microsoft). The devel-opers have achieved this level of performance by leveraging the talents of many open source developers, along with community testing. For general web-driven database tasks, the defaultMyISAM database engine works perfectly fine.
The newest advanced features of MySQL 5.1 are not as stable as fea-tures introduced in prior releases. MySQL 5.0 is the current stable general release. Download the latest minor release (the largest of the third portion of the version number) for whichever major version you choose. It has the most bug fixes for that version included.
Don’t worry too much about the latest and greatest features, as the bulk of what you’ll probably need has been included in MySQL for a very long time.
Compatibility
Web browsers such as Safari, Firefox, Netscape, and Internet Explorer are made to process HTML, so it doesn’t matter which operating system a web server runs on. Apache, PHP, and MySQL support a wide range of operating systems (OS), so you aren’t restricted to a specific OS on either the server or the client. While you don’t have to worry much about software compatibility, the sheer variety of file formats and different languages that all come together does take some getting used to.
Integrating Many Sources of Information
In the early days of the Web, life was simple. There were files that contained HTML, and binary files such as images. Several technologies have since been developed to organize the look of web pages. For example,Cascading Style Sheets(CSS) pull pre-sentation information out of your HTML and into a single spot so that you can make formatting changes across an entire set of pages all at once; you don’t have to manu-ally change your HTML markup one HTML page at a time.
You can potentially have information coming from HTML files that reference CSS, PHP templates, and a MySQL database all at once. PHP templates make it easier to
5.1 Partitioning, Scheduling, a Plug-in API, and Row-based replication are added. Partitioning is used to split up the physical storage of large tables based on a defined rule. It’s commonly used to increase the performance of large tables such as older data that is considered historical. Scheduling allows for database code to be executed at defined times. The plug-in API paves the way to add and remove functionality to the MySQL server without restarting it. Row-based replication copies data from one server to another at the row level.
Table 1-1. Major MySQL releases (continued)
change the HTML in a page when it contains fields populated by a database query. We’ll take a quick look at how these pieces come together.
Just to give you a taste of what your code will look like, Example 1-1 shows MySQL code called from PHP for inserting a comment into a MySQL database. This exam-ple contains PHP code that generates HTML froma MySQL database, and that HTML itself refers to a CSS stylesheet.
Example 1-1. A PHP function to insert a comment into a comments database table
<?php
//A function to insert a comment into a comments table based on //the $comment parameter.
//The database name is also a parameter
function add_comment($comment,$database){ // Add a comment
// As a security measure, escape any special characters in the user_name. $comment=mysql_real_escape_string($comment);
// This is the SQL command
$sql_insert = "INSERT INTO `comments` (body) VALUES ('$comment')";
// Select the database mysql_select_db($database);
$success = mysql_query($sql_insert) or die(mysql_error( ));
// print the page header print('
<html> <head>
<title>Remove User</title>
<link rel="stylesheet" type="text/css" href="example.css" /> </head>
<body>
<div class="comments">');
// Check to see if the insert was successful if ($success){
// Tell the user it was successful
print("The comment $comment was inserted successfully."); }
else {
// Tell the user it was not successful
print("The comment $comment could not be inserted. Please try again later."); }
Integrating Many Sources of Information | 9
Don’t worry about understanding precisely what’s happening in Example 1-1. The idea is simply to realize that there’s PHP code, database code, and a link to a stylesheet.
To simplify the maintenance of sites that have many different pages, but all share a common look, the header and footer of each page can be placed in a separate file and included in each PHP page. This allows changes to be made to the header or footer in one location that change the look of every page automatically. This frees the devel-oper from having to modify every single page on the web site.
PHP developers have learned that separating the PHP code fromHTML can make life easier for both developers and business users who know how to modify HTML but don’t understand PHP very well. By creating separate PHP template files that have placeholders for dynamic data, you can separate the HTML markup from the PHP code.
Example 1-2 shows an example template file using the Smarty template engine for-mat. The template engine is required to substitute the values into the template. Smarty is discussed in Chapter 10.
When the template engine processes the page, the placeholders are replaced with their associated values, as shown in Example 1-3.
Example 1-2. A PHP Smarty template
<html>
Example 1-3. The resulting HTML code after template substitution and processing
The result is that while you’ve added another file to the mix, you’ve made the HTML markup easier to read, and the PHP code is less cluttered with extraneous HTML. A web developer who’s not skilled in PHP can modify the look of the page without worrying about breaking the PHP code.
The last type of information shown here, CSS, also comes from a desire to separate the presentation styles such as colors and spacing from the core content.
Cascading Style Sheets (CSS) supplements HTML to give web developers and users more control over the way their web pages display. Designers and users can create stylesheets that define how different elements, such as headers and links, appear on the web site. The termcascadingderives fromthe fact that multiple stylesheets at dif-ferent levels can be applied to the same web page with definitions inheriting from one level to the next. To apply CSS code, the example code shown is placed within the head of your HTML file.
<html> <head>
<title>CSS Example</title> <style type="text/css">
h4, b {color: #80D92F; font-family: arial; }
p { text-indent: 2cm; background: yellow; font-family: courier;} </style>
</head>
<body>
<h3>Learn how to use CSS on your web sites!</h3>
<h4>It's cool, it's amazing, it even saves you time!</h4> <p>Isn't this <b>nifty</b>?</p>
</body> </html>
In the CSS, you can either designate a color by naming it, as we did here with the background designation, “background: yellow”, or you can assign it with a numeric color code, as we did here, “color #80D92F”. The code that begins withstyleis the CSS code. The document renders as shown in Figure 1-1.
Although we include the CSS in the file in this example, it could come from a sepa-rate file as it did in Example 1-1, where it was referenced asuser_admin.css.
For more information on CSS, see Eric Meyer’sCascading Style Sheets: The Definitive Guide (O’Reilly).
Of course, we also have plain old HTML files in the mix.
Requesting Data from a Web Page | 11
lowercase (though XHTML recommends all lowercase). But really, it’s a matter of style. We use uppercase in our web sites so we can see the HTML better and put a carriage return between each markup line. Tags typically occur in begin-end pairs. These pairs are in the form:
<tag>Isn't this nifty?</tag>
The first<tag>indicates the beginning of a tag-pair, and the last</tag>indicates the end. This complete pair of tags is called anelement. Any content within an element has the rules of the element applied to it. In the earlier example, the text “Learn how to use CSS on your web sites!” is contained by anh3 element:
<h3>Learn how to use CSS on your web sites!</h3>
It’s also good practice (and it’s required by XHTML) that your tags nest cleanly to produce elements with clear boundaries. Always use end tags when you reach the end of an element, and avoid having pairs of tags that overlap. (Instead of<b>bold<i> italic</i></b>, you should close the code like this: </b></i>.) In other words, you should open and close items at the same level. So, if you open a bold and then italic, you should close the italic before you close the bold.
Requesting Data from a Web Page
It can be tricky to understand how all of these pieces integrate. When a web server detects PHP code, it turns over the processing of the page to the PHP interpreter. The server processes the PHP file and sends the resulting HTML file to the browser. If that result includes an external CSS stylesheet, the browser issues a separate request for that stylesheet before displaying the page.
Processing PHP on the server is called server-side processing. When you request a web page, you trigger a whole chain of events. Figure 1-2 illustrates this interaction between your computer and the web server, which is the host of the web site.
Here’s the breakdown of Figure 1-2:
1. You enter a web page address in your browser’s location bar.
2. Your browser breaks apart that address and sends the name of the page to the web server. For example, http://www.phone.com/directory.html would request the pagedirectory.htmlfromwww.phone.com.
3. A programon the web server, called theweb server process, takes the request for directory.htmland looks for this specific file.
4. The web server reads thedirectory.html file from the web server’s hard drive. 5. The web server returns the contents ofdirectory.html to your browser.
6. Your web browser uses the HTML markup that was returned from the web server to build the rendition of the web page on your computer screen.
The HTML file called directory.html(requested in Figure 1-2) is called a static web page because everyone who requests the directory.html page gets exactly the same page.
For the web server to customize the returned page, PHP and MySQL are added to the mix. Figure 1-3 illustrates the extra steps that occur in the chain of events on the web host.
Each step in the chain is listed here:
Figure 1-2. While the user only types in a URL and hits Enter, there are several steps that occur behind the scenes to handle that request
Your computer
Word
http://www.phone.com/directory.html
Web host
Web server process
Hard disk Request
Internet
Request
Response Response 1
6
2
3
Requesting Data from a Web Page | 13
1. You enter a web page address in your browser’s location bar.
2. Your browser breaks apart that address and sends the name of the page to the host. For example, http://www.phone.com/login.php requests the pagelogin.php fromwww.phone.com.
3. The web server process on the host receives the request forlogin.php. 4. The web server reads thelogin.php file from the host’s hard drive.
5. The web server detects that the PHP file isn’t just a plain HTML file, so it asks another process—the PHP interpreter—to process the file.
6. The PHP interpreter executes the PHP code that it finds in the text it received fromthe web server process. Included in that code are calls to the MySQL data-base.
7. PHP asks the MySQL database process to execute the database calls. 8. The MySQL database process returns the results of the database query.
9. The PHP interpreter completes execution of the PHP code with the data from the database and returns the results to the web server process.
10. The web server returns the results in the form of HTML text to your browser. 11. Your web browser uses the returned HTML text to build the web page on your
screen.
This may seem like a lot of steps, but all of this processing happens automatically every time a web page with PHP code is requested. In fact, this process may happen several times for a single web page, since a web page can contain many image files and the CSS definition, which must all be retrieved from the web server.
Figure 1-3. The PHP interpreter, MySQL, and the web server cooperate to return the page
When developing dynamic web pages, you work with a variety of variables and server components, which are all important to having an attractive, easy-to-navigate, and maintainable web site. In Chapter 2 we show you how to install the three major cogs needed to make this work: Apache, PHP, and MySQL.
Chapter 1 Questions
Question 1-1What three components do you need to create a dynamic web page? Question 1-2
What does Apache use to load extensions? Question 1-3
What does SQL (as in MySQL) stand for? Question 1-4
What are angle brackets (<>) used for? Question 1-5
What does the PHP Interpreter do?
15
Chapter 2
CHAPTER 2
Installation
2Developers working with PHP and MySQL often find it more convenient to work on a local computer rather than a remote web server. In general, it is also safer to create and test your applications on a local—preferably private—computer and then deploy themto a public server where others can enjoy your work. Typically, you need to install Apache, PHP, and MySQL on the local computer, while your ISP handles installation on the public server.
Developing Locally
Developing your web applications on your local computer is a good way to learn, because you can interact with all of the components on your own machine and not risk causing problems on a production server. That way, if there are problems in the local environment, you can fix them immediately without exposing them to your site’s visitors. Working with local files means that you don’t have to FTP them to a server, you don’t have to be connected to the Internet, and you know exactly what’s installed, since you did it yourself.
There are three components to install: • Apache
• PHP • MySQL
The easiest way to install Apache, PHP, and MySQL on most Linux systems is to download a packaged distribution. All popular Linux dis-tributions have prebuilt packages fromApache, PHP, and MySQL. For example, Redhat Linux uses.rpm packages, while Debian uses .deb
packages. Consult your distribution’s installation instructions for installing additional packages. Many Linux distributions install Apache, PHP, and MySQL by default, so you may not even need to install them. If this looks too daunting, try XAMPP.
Bundled or Full Installations
When just starting out, it can be easier to install a bundled set of Apache, MySQL, phpMyAdmin, and PHP. There are several packages available that install all of these at the same time as a single installer within one directory on your computer. These packages also provide a control panel to start and stop individual components and administer them. In other words, it’s a great way for a beginner to start out. The downside is that they’re not meant for production use, as they are often configured with minimal security to make them easier to use. We’ll discuss one of the more popular packages, called XAMPP. First, we’ll discuss installing everything the old-fashioned way.
Installing Apache
Apache needs to be installed and operational before PHP and MySQL can be installed, or else they won’t work correctly. Any computer can be turned into a web server by installing server software and connecting the machine to the Internet, which is why you need to install Apache. To keep the installation as simple as possi-ble, we’ll address only the latest versions of Apache, PHP, and MySQL. Although you can use older versions, they’re more difficult to install and get to work together.
1. Download the Apache 2.x Win32 MSI installer binary. It’s downloadable from http://httpd.apache.org/. Select the “Download froma mirror” link on the left side of the page and download the best available version. Amirror is a down-load location. The file that you save to your desktop will be named similarly to apache_2.2.4-win32-x86-no_ssl.msi (the exact version number will vary).
If you are on Mac OS X, you already have Apache installed. Open Sys-temPreferences, select the Sharing panel, and click to activate Per-sonal Web Sharing (which is actually Apache). Mac OS X 10.2, 10.3, and 10.4 all come with different versions of Apache, but each works perfectly fine.
Developing Locally | 17
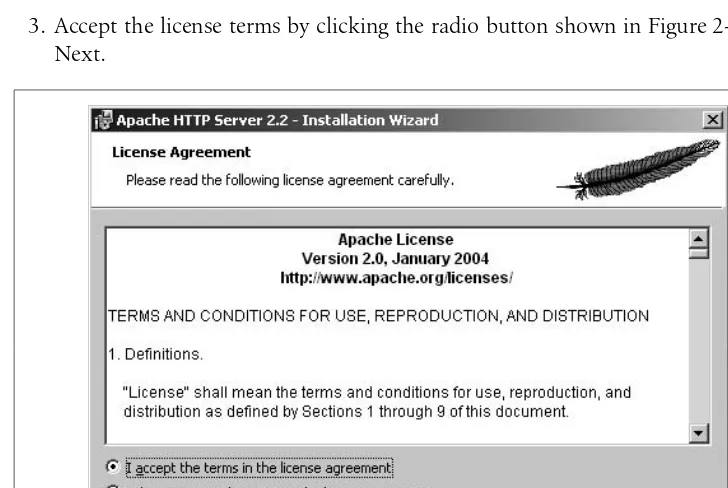
3. Accept the license terms by clicking the radio button shown in Figure 2-2. Click Next.
Figure 2-1. The Installation Wizard prompts you for basic configuration
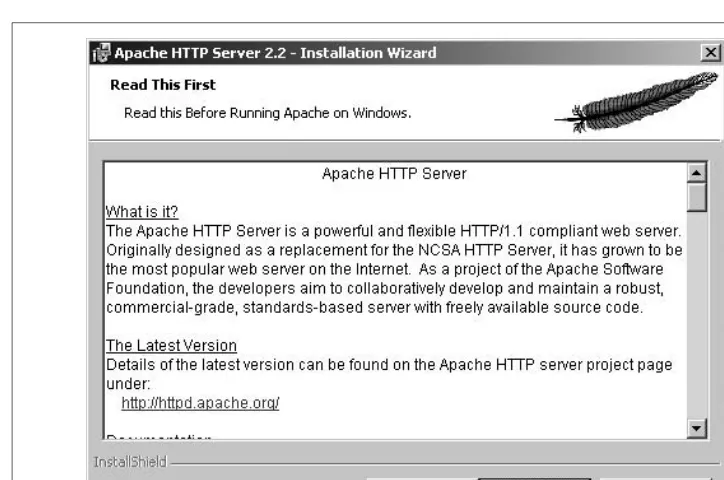
4. You’ll see a Read This First box, as shown in Figure 2-3. Additionally, this win-dow offers a number of excellent resources related to the web server. Click Next.
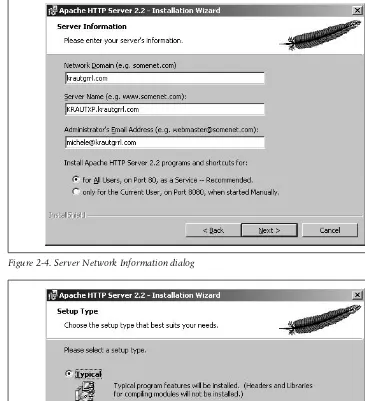
5. In the dialog shown in Figure 2-4, enter all pertinent network information. Click Next.
Port 80 is the default HTTP port. In other words, when you request
http://www.oreilly.com, you’re implicitly requesting port 80. By accept-ing this port, your web requests can be made without specifyaccept-ing a nondefault port. Your computer’s web server can always be accessed using theloopbackaddresshttp://localhostor the IP addresshttp:// 127.0.0.1. They can be used interchangeably.
6. In the next screen, shown in Figure 2-5, select the setup type. The Typical install will work for your purposes. Click Next.
7. Accept the default installation directory, as shown in Figure 2-6. Click Next.
The default installation directory, C:\Program Files\Apache Software Foundation\Apache2.2\, is both standard and easy to find, especially when you need to make changes to your configuration.
Developing Locally | 19 Figure 2-4. Server Network Information dialog
8. As Figure 2-7 shows, it’s time to begin the installation. Click Install. The installer installs a variety of modules, and you will see some DOS windows appear and disappear.
9. Click Finish when the installer is done.
10. Test your installation by enteringhttp://localhost/in your browser’s location field. Remember, localhost is just the name that translates to the IP address 127.0.0.1, which is always the address of the local computer.
11. After entering the URL in your browser, the default Apache page displays, which is similar to the one shown in Figure 2-8. The installation was successful if you see the text “It works!” This page may be different depending on which version of Apache you install. Generally, if you see text that doesn’t mention an error, the installation was successful.
Now that you can serve up web pages, you’re ready to add PHP.
Figure 2-6. Destination Folder dialog for the Apache installation files
Developing Locally | 21
Installing PHP
Go tohttp://www.php.net/downloads.phpto download the latest version of PHP; both binaries and source code can be found on this web site. Under Windows Binaries, select the PHP 5.x installer where x is the latest available version. Select a mirror site in your country from the list of mirrors to download the file:
1. The file that you save to your desktop will be named similarly to php-5.2.1-win32-installer.msi (the exact version number will vary).
2. Install PHP using the Installation Wizard. Double-click the MSI installer file on your desktop, and you’ll see the installer shown in Figure 2-9.
Figure 2-8. Apache’s default index page after installation
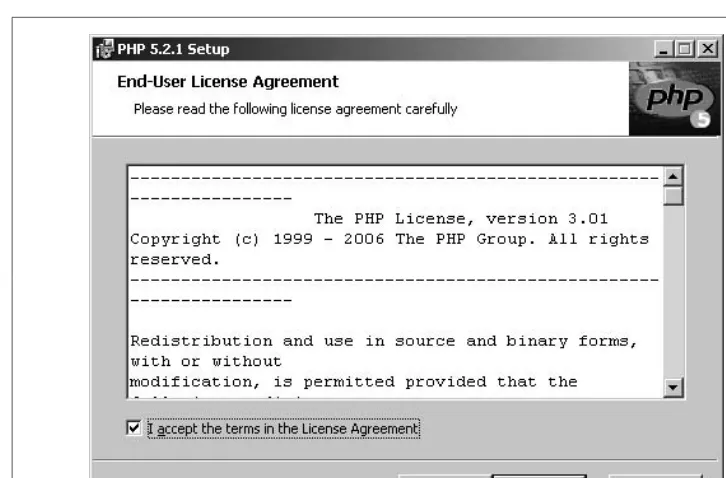
3. Click Next. The License Terms dialog appears as shown in Figure 2-10.
4. Click the checkbox to accept the licensing terms. Click Next.
5. The Destination Folder dialog appears (see Figure 2-11). Select the destination folder. You may use the default ofC:\Program Files\PHPorC:\PHP(examples in this book that modify the PHP configuration files assumeC:\PHP). Click Next.
Developing Locally | 23
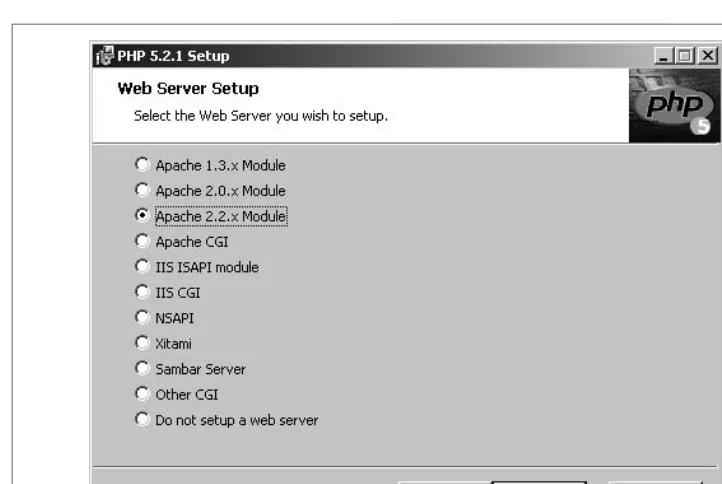
6. The Web Server Setup dialog appears as shown in Figure 2-12. Select “Apache 2.2.x Module” and click Next. Naturally, if you were using a different web server, such as IIS, you could select that option here.
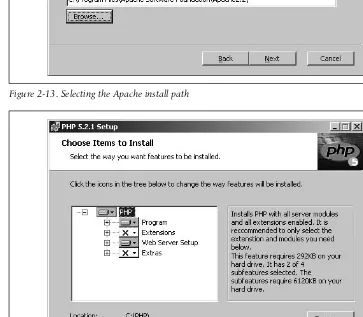
7. The Apache Configuration Directory dialog specifies where you installed Apache so that the installer can set up the Apache configuration to use PHP for you. It should be similar to C:\Program Files\Apache Software Foundation\Apache2.2\, as shown in Figure 2-13.
8. Figure 2-14 shows the “Choose Items to Install” dialog. The defaults on this dia-log are all OK. If you changed the base install directory, you may also need to change it here. Click Next.
9. Click Install on the “Ready to install” screen to confirm the installation.
10. Click Yes to confirmconfiguring Apache when the dialog shown in Figure 2-15 appears.
11. Click OK on the Apache Config dialog to acknowledge the successful Apache update forhttpd.conf.
12. Click OK on the Apache Config dialog to acknowledge the successful Apache update formime.types.
13. The Successful Installation dialog appears.
Statements prefixed by the hash sign (#) in HTML and PHP are con-sidered commented out and can be seen only by you—never your end user—in a browser window.
Figure 2-13. Selecting the Apache install path
Developing Locally | 25
14. Restart the Apache server by selecting Start ➝ All Programs ➝ Apache HTTP
Server 2.x.x➝Control Apache Server➝Restart, so that it can read the new
con-figuration directives that the PHP installer placed in thehttpd.confconfiguration file. This file tells Apache to load the PHP process as a module. Alternatively, in the system tray, double-click the Apache icon and click the Restart button. To test the installation, do the following:
1. Create a PHP file in any text editor with the following line: <?php phpinfo( ); ?>
2. Save the file asphpinfo.php, and then save it under the Apachehtdocsdirectory, usually located atC:\Program Files\Apache Software Foundation\Apache2.2\htdocs. It must have a file extension of.php or it won’t be processed as a PHP file. 3. Open your browser of choice.
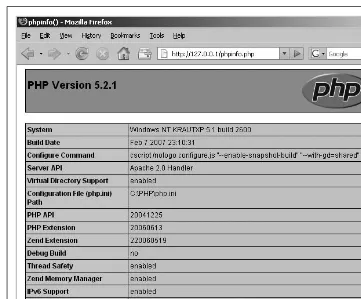
4. Access the file you just created by typing http://127.0.0.1/phpinfo.php into your browser’s location bar. You should see a page of information about your PHP setup, as shown in Figure 2-16.
Enabling PHP on Mac OS X
If you are on Mac OS X, you have PHP preinstalled on your computer, but it’s not enabled. You need to edit the Apache configuration file to enable PHP.
The built-in search utilities for Mac OS X won’t find the configuration file you need to edit, as it’s considered a systemfile and hidden from novice users. You’ll need to use the Terminal to access this file.
1. Open Terminal from theApplications/Utilities folder. 2. Type:
sudo vi /etc/httpd/httpd.conf
3. Enter your Mac OS X password for an Administrator account (or simply the first account set up on the Mac).
4. To uncomment the line that loads the PHP module (by removing the hash [#] character at the beginning of the line), type:
%s/#LoadModule php/LoadModule php/
Press Enter after the last slash. The%s command in vi performs a search and replace.
5. To uncomment the line that loads the PHP module, type: %s/#AddModule php/addModule php/
Skip steps 6 and 7 if you’re using Panther (10.3) or Tiger (10.4), as the required lines are already present in these versions.
6. Mac OS X 10.2 needs to map PHP index files by adding index.php to the
DirectoryIndex directive by typing the following to replace index.html with
index.html index.php:
:%s/index.html/index.html index.php/
7. Mac OS X 10.2 also needs to add this block of text to tell Apache that the PHP extensions must be processed as PHP files. The block of text must be added after the line:
Developing Locally | 27
TypeGo to add this text to the end of the file: <IfModule mod_php4.c>
AddType application/x-httpd-php .php AddType application/x-httpd-php .php4 AddType application/x-httpd-php-source .phps </IfModule>
8. To save the changes, type: <escape>:wq
where<escape> is the Escape key that exits the editing mode.
9. Restart Apache (Personal Web Sharing) fromthe SystemPreferences Sharing panel.
10. To create atest.php file to test your installation at the Terminal, type: vi ~/Sites/test.php
o
<?php phpinfo( ) ?> <escape>:wq
where<escape> is the Escape key. This creates a file with the elusive .php file extension, since the built-in Mac OS X text editor likes to add.rtf to text files. 11. Navigate to the URLhttp://localhost/~username/test.phpwhereusernameis your
short Mac OS X account name. If you’re unsure of your short name, select About This Mac fromthe Apple menu and click the More Info button. The short name appears in parentheses at the end of the username row.
12. Thetest.phppage (similar to the PC installation) displays in your browser with a MySQL section. This indicates a successful installation.
PHP should now be running on your Mac.
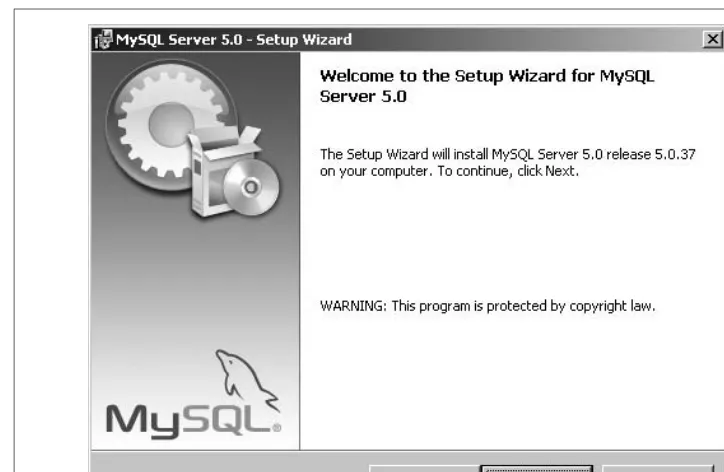
Installing MySQL 5.0
The final component you need to develop and test pages on your local computer is MySQL. Now you’ll download the MySQL Installer:
1. Download the MySQL binaries. Both the binaries and the source code can be found at http://dev.mysql.com/downloads/. Under MySQL Community Server, click the Download button.
2. Click Windows.
3. Click the download link for Windows Essentials (x86). This file is a Windows MSI installer.
4. The link takes you to a page where you can either enter your personal info or just click No Thanks to download the file. A number of download locations are available; select one. Download the recommended latest version, currently 5.0. Save the installer file to your desktop.
6. Select the typical installation by clicking the Typical radio button shown in Figure 2-18, and then click Next.
Developing Locally | 29
7. The “Ready to Install Program” dialog appears. Click Install.
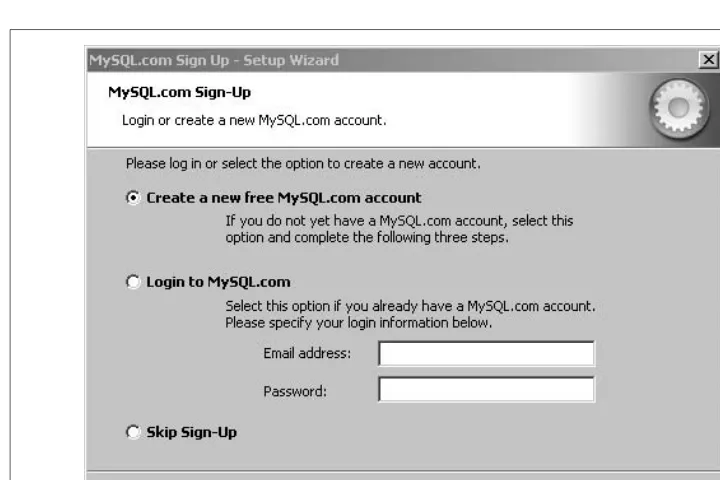
8. MySQL installs files and then displays the MySQL.comSign-Up dialog shown in Figure 2-19. Select “Skip Sign-Up” and click Next, or sign up for an account, which provides access to a monthly newsletter as well as the ability to post bugs and comments on the online forums.
9. Click the “Configure the MySQL Server now” checkbox shown in Figure 2-20. Click Finish.
10. This brings up the MySQL Server Instance Configuration Wizard. Click Next. 11. Select the Standard Configuration radio button fromthe dialog shown in
Figure 2-21. Click Next.
12. In the dialog shown in Figure 2-22, check both “Install As Window Service” and “Include Bin Directory in Windows PATH.” The second option allows you to run the MySQL command-line tools from the command prompt without being in the MySQL bin directory. Click Next.
13. Enter a password for the root user in the password and confirmfields shown in Figure 2-23. Click Next. You don’t need the Anonymous Account, since you can do everything with named accounts. Leave “Enable root access from remote machines” unchecked.
14. Click Execute on the MySQL Server Instance Configuration dialog.
Figure 2-20. The Configuration Wizard customizes the database settings
Developing Locally | 31 Figure 2-22. How to start MySQL and set up the system path
15. Click Finish, as shown in Figure 2-24. MySQL is now configured and running on your computer.
At this point, all critical components—Apache, PHP, and MySQL—are installed.
The wizard will informyou of basic problems during installation, such as running out of free disk space or not having proper permissions on your system to install MySQL.
Installing the MySQL Connector
There’s one last piece that you’ll need to download and install in order for PHP to be able to talk to MySQL. The Connector/PHP download provides two.dllfiles for PHP that are required to use MySQL:
1. Download the MySQL PHP Connector from http://dev.mysql.com/downloads/ connector/php/.
2. Unzip the file with a name similar tophp_5.2.0_mysql_5.0.27-win32.zip. 3. Create a directory calledC:\php\extensions.
4. Copy the two.dll files to this directory.
5. Also, copy thelibmysql.dllfile toC:\windows\system32(or any other directory in the system path).
Developing Locally | 33
6. Verify that the fileC:\php\php.inicontains the following lines (the first line may not need any modification, while the second line may just need to be uncom-mented):
extension_dir = C:\php\extensions extension=php_mysql.dll
7. Restart the Apache service.
8. Navigate to yourphpinfo.phptest page (http://localhost/phpinfo.php). You should now see a section with the heading MySQL in the middle of the page. That sec-tion confirms that PHP can talk to MySQL.
Mac OS X MySQL installation
If you are running 10.3 or 10.4, you have the much easier option of installing the standalone.dpkgfile fromthe MySQL web site. The installation for Mac OS X 10.2 is slightly more complex, as the binaries for 10.2 are no longer available from the MySQL web site. Instead, you’ll use a collection of software called Fink for the Mac. There are many Unix tools and services available through Fink that are preconfig-ured to work on your version of Mac OS X. To install MySQL using Mac OS X 10.2 and Fink:
1. Download Fink fromhttp://www.finkproject.org/download/. 2. Double-click on the installer package.
3. Accept the license terms. 4. Select the installation drive.
5. Accept the dialogs to modify your shell profile.
6. You’re now ready to use Fink to download and install MySQL. At the Terminal prompt, type:
sudo apt-get install mysql sudo apt-get install mysql-client daemonic enable mysql
7. MySQL is now installed on your Mac.
For 10.3 and 10.4, you may download and install the.dpkgfiles fromthe MySQL download page athttp://dev.mysql.com/downloads/mysql/5.0.html#macosx-dmg. Fol-low the directions in the installer to accept the license terms and a disk on which to install.
XAMPP
1. Download the Basic Package XAMPP MSI installer found at http://www. apachefriends.org/en/xampp-windows.html.
2. Double-click the MSI installer file on your desktop, and you’ll see the installer shown in Figure 2-25.
3. Select English and click the OK button.
4. The Setup Wizard appears as shown in Figure 2-26. Click Next.
5. The dialog shown in Figure 2-27 is displayed. Click Next to accept the default installation directory.
Figure 2-25. The Language selection dialog
Working Remotely | 35
6. The XAMPP Options dialog displays, as shown in Figure 2-28. Leave the Service Section checkboxes unchecked so you don’t install the components as services; instead, you’ll start them from the Control Panel. Click Install.
7. The Completing the XAMPP Setup Wizard displays. Click Finish.
8. The option to start the Control Panel displays as shown in Figure 2-29. Click Yes.
9. The Control Panel launches, as shown in Figure 2-30.
The Control Panel can start and stop the services, as well as aid in their configu-ration.
Working Remotely
Although we recommend that you start out working locally, you can use an ISP account as long as it supports PHP and MySQL.
You need login information to the remote server, and you may need to use your ISP’s web-based tool to create your database.
To transfer your files and directories, you need to activate a File Transfer Protocol (FTP) account at your ISP, usually through your account control panel. Once you have an FTP login, upload your HTML and PHP files using an FTP client.
Your provider may require you to use Secure FTP (SFTP) instead of FTP. Check with your provider for details. Many FTP programs also support SFTP.
While your computer likely has the command-line version of the FTP client, it can be cryptic to use. Graphical FTP clients make using FTP much easier. FTP Voyager, available fromhttp://sourceforge.net/projects/filezilla/, is one FTP client you can use to upload files to your ISP. Your initial login screen looks similar to Figure 2-31. Fetch is a good FTP program for Mac.
After connecting using Voyager, you’ll see a dialog similar to Figure 2-32. You can drag and drop the.phpfiles you created. Remember, for your PHP files to run, you need to save themwith an extension of.phpinstead of.htmlbecause the web server needs to know it’s a PHP file in order to run the PHP interpreter.
Figure 2-28. Choose your installation options
Working Remotely | 37
PHP files must be accessed through a web server, since your web browser doesn’t have the ability to interpret the PHP code. A PHP interpreter is used to process the PHP files.
Figure 2-30. The Control Panel starts and stops the components
You’re ready to start learning all about basic facts, integration, and how to get your dynamic web page up and running as quickly and smoothly as possible. In Chapter 3 we’ll give you basic information about PHP and simple coding principles that apply to using PHP.
Chapter 2 Questions
Question 2-1What three components must be installed to create a dynamic web site? Question 2-2
What OS has Apache installed already? Question 2-3
Where should you create a PHP directory for downloads? Question 2-4
What does the hash (#) sign mean? Question 2-5
How do you work remotely? Question 2-6
How do you transfer files to your ISP? Question 2-7
How must PHP files be accessed?
39
Chapter 3
CHAPTER 3
Exploring PHP
3With PHP, MySQL, and Apache installed, you’re ready to begin writing code. Unlike many languages, PHP doesn’t require complex tools such as compilers and debug-gers. In fact, you’ll soon see that you can enter PHP directly into your existing HTML documents, and with just a few tweaks, you’ll be off and running.
In this chapter, we’ll start by showing you how PHP handles simple text, and then move on to basic decision-making. Some really cool things you can do include show-ing an image based on the current user’s browser, and printshow-ing a warnshow-ing message if the user is browsing froman operating systemthat makes your web site look crummy. All this and more is possible with PHP, which makes these tricks simple.
PHP and HTML Text
It’s simple to output text using PHP; in fact, handling text is one of PHP’s special-ties. We’ll begin with detailing where PHP is processed, then look at some of the basic functions to output text, and fromthere go right into printing text based on a certain condition being true.
Text Output
You’ll want to be able to display text easily and often. PHP lets you do that, though you’ll need to use proper PHP syntax when creating the code. Otherwise, your browser assumes that everything is HTML and outputs the PHP code directly to the browser. Everything looks like text and code mixed up. This will certainly confuse your users! You can use whichever text editor you like to write your PHP code, including Notepad or DevPHP (http://sourceforge.net/projects/devphp/).
Example 3-1 is a simple HTML file.
Nothing is special here; it’s just your plain-vanilla HTML file. However, you can enter PHP right into this file; for example, let’s try to use PHP’s echoconstruct to output some text, as shown in Example 3-2.
Separating PHP from HTML
Although this example looks pretty simple, it actually wouldn’t work as it is, so there are some problems. There’s no way to tell in this file which part is standard HTML and which part is PHP. Therefore, the echo( ) command must be handled differ-ently. The fix is to surround your PHP code with<?php ?> tags.
When you start writing PHP code, you’ll be working with simple text files that con-tain PHP and HTML code. HTML is a simple markup language that designates how your page looks in a browser, but it is simply that:text only. The server doesn’t have to process HTML files before sending themto the user’s browser. Unlike HTML code, PHP code must be interpreted before the resulting page is sent to the browser. Otherwise, the result will be one big mess on the user’s screen.
To set apart the PHP code to informthe web server what needs to be processed, the PHP code is placed between formal or informal tags mixed with HTML. Example 3-3 uses print constructs to achieve this. Theecho and print constructs work almost exactly the same, exceptechocan take more than one argument but doesn’t return any value, whileprinttakes one argument. We chosehello.phpas the filename; how-ever, you can choose any name you like as long as the filename has the extension.php. This tells the web server to process this file’s PHP code.
Example 3-1. All you need to start with PHP is a simple HTML document
<html> <head>
<title>Hello World</title> </head>
<body>
<p>I sure wish I had something to say.</p> </body>
</html>
Example 3-2. A wrong way to add some PHP code to the HTML file
<html> <head>
<title>Hello World</title> </head>
<body>
echo "<p>Now I have something to say.</p>"; </body>
PHP and HTML Text | 41
When a browser requests this file, PHP interprets it and produces HTML markup. Example 3-4 is the HTML produced from the code in Example 3-3.
Save your HTML document to your document root, as discussed in Chapter 2. Open the file in a web browser, and you see something like Figure 3-1. The code in Example 3-4 is the same code that you see if you select View ➝ Page Source from
your browser’s menu. Make sure that you have the.phpextension instead of an.html extension in the filename.
Example 3-3. Correctly calling print in hello.php
<html> <head>
<title>Hello World</title> </head>
<body> <?php
print "Hello world!<br />"; print "Goodbye.<br />"; print "Over and out.";
?> </body> </html>
Example 3-4. The HTML markup produced by the PHP code in Example 3-3
<html> <head>
<title>Hello World</title> </head>
<body>
Hello world!<br />Goodbye.<br />Over and out. </body>
</html>
While writing PHP code, it’s crucial to add comments so that your code is easier to read and support. Most people don’t remember exactly what they were thinking when they look at the code a year or more later, so let comments permeate your code, and you’ll be a happier PHPer in the future. PHP supports two styles of com-ments. We suggest using single-line comments for quick notes about a tricky part, and multiline comments when you need to describe something in greater depth; both are shown in Example 3-5.
Comments are retained in the PHP file, but the interpreter doesn’t output the PHP comments. The interpreter outputs only the HTML comments.
In Example 3-5, two comment styles are used://for single-line comments;/*...*/
for multiline comments. Keep in mind that if you want to place a comment in HTML markup, you need to use the open comment<!— — and close comment— —> tags. A semicolon (;) ends all code statements in PHP. Because of this, semicolons can’t be used in names. It’s good style as well as practical to also start a new line after your semicolon so the code is easier to read.
Since PHP files tend to switch back and forth between PHP code and HTML markup, using an HTML comment in the middle of PHP or a PHP comment in the middle of HTML makes a mess of your page, so be extra vigilant not to do this!
Example 3-5. Using comments to make your code easier to read
<html> <head>
<title>Hello World</title> </head>
<body> <?php
// A single line comment could say that we are going to // print hello world.
/* This is how to do a
multiline comment and could be used to comment out a block of code */
echo "Hello world!<br />"; echo "Goodbye.<br />";