Training courses from the book’s author:
http://courses.coreservlets.com/
• Personally developed and taught by Marty Hall • Available onsite at your organization (any country) • Topics and pace can be customized for your developers • Also available periodically at public venues
• Topics include Java programming, beginning/intermediate servlets and JSP, advanced servlets and JSP, Struts, JSF/MyFaces, Ajax, GWT, Ruby/Rails and more. Ask for custom courses!
Topics in This Chapter
• The basic structure of servlets
• A simple servlet that generates plain text
• A servlet that generates HTML
• Servlets and packages
• Some utilities that help build HTML
• The servlet life cycle
Training courses from the book’s author:
http://courses.coreservlets.com/
• Personally developed and taught by Marty Hall • Available onsite at your organization (any country) • Topics and pace can be customized for your developers • Also available periodically at public venues
• Topics include Java programming, beginning/intermediate servlets and JSP, advanced servlets and JSP, Struts, JSF/MyFaces, Ajax, GWT, Ruby/Rails and more. Ask for custom courses!
3
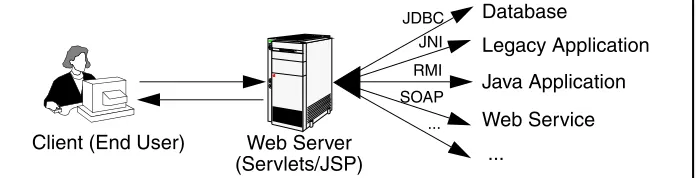
As discussed in Chapter 1, servlets are programs that run on a Web or application server and act as a middle layer between a request coming from a Web browser or other HTTP client and databases or applications on the HTTP server. Their job is to perform the following tasks, as illustrated in Figure 3–1.
Figure 3–1 The role of Web middleware.
1. Read the explicit data sent by the client.
The end user normally enters this data in an HTML form on a Web page. However, the data could also come from an applet or a custom HTTP client program.
2. Read the implicit HTTP request data sent by the browser.
Figure 3–1 shows a single arrow going from the client to the Web server (the layer in which servlets and JSP pages execute), but there
Legacy Application
Java Application
Web Service
... Database
Web Server Client (End User)
JDBC JNI RMI SOAP ...
a form and the behind-the-scenes HTTP information. Both types of data are critical to effective development. The HTTP information includes cookies, media types and compression schemes the browser understands, and so forth; it is discussed in Chapter 5.
3. Generate the results.
This process may require talking to a database, executing an RMI or CORBA call, invoking a Web service, or computing the response directly. Your real data may be in a relational database. Fine. But your database probably doesn’t speak HTTP or return results in HTML, so the Web browser can’t talk directly to the database. The same argu-ment applies to most other applications. You need the Web middle layer to extract the incoming data from the HTTP stream, talk to the application, and embed the results inside a document.
4. Send the explicit data (i.e., the document) to the client.
This document can be sent in a variety of formats, including text (HTML or XML), binary (GIF images), Excel, or even a compressed format like gzip that is layered on top of some other underlying for-mat.
5. Send the implicit HTTP response data.
Figure 3–1 shows a single arrow going from the Web middle layer (the servlet or JSP page) to the client, but there are really two varieties of data sent: the document itself and the behind-the-scenes HTTP infor-mation. Both types of data are critical to effective development. Send-ing HTTP response data involves tellSend-ing the browser or other client what type of document is being returned (e.g., HTML), setting cook-ies and caching parameters, and other such tasks. These tasks are dis-cussed in Chapters 6–8.
In principle, servlets are not restricted to Web or application servers that handle HTTP requests but can be used for other types of servers as well. For example, serv-lets could be embedded in FTP or mail servers to extend their functionality. In prac-tice, however, this use of servlets has not caught on, and we discuss only HTTP servlets.
3.1 Basic Servlet Structure
3.1 Basic Servlet Structure 67
a METHOD or specifies METHOD="GET". Servlets can also easily handle POST requests, which are generated when someone submits an HTML form that specifies METHOD="POST". For details on the use of HTML forms and the distinctions between GET and POST, see Chapter 19 (Creating and Processing HTML Forms).
Servlets typically extend HttpServlet and override doGet or doPost, depend-ing on whether the data is bedepend-ing sent by GET or by POST. If you want a servlet to take the same action for both GET and POST requests, simply have doGet call doPost, or vice versa.
Both doGet and doPost take two arguments: an HttpServletRequest and an HttpServletResponse. The HttpServletRequest lets you get at all of the
incoming data; the class has methods by which you can find out about information such as form (query) data, HTTP request headers, and the client’s hostname. The HttpServletResponse lets you specify outgoing information such as HTTP status codes (200, 404, etc.) and response headers (Content-Type, Set-Cookie, etc.). Most importantly, HttpServletResponse lets you obtain a PrintWriter that you use to send document content back to the client. For simple servlets, most of the effort is spent in println statements that generate the desired page. Form data, HTTP request headers, HTTP responses, and cookies are all discussed in the
follow-Listing 3.1
ServletTemplate.java
import java.io.*; import javax.servlet.*; import javax.servlet.http.*;
public class ServletTemplate extends HttpServlet { public void doGet(HttpServletRequest request, HttpServletResponse response) throws ServletException, IOException {
// Use "request" to read incoming HTTP headers // (e.g., cookies) and query data from HTML forms.
// Use "response" to specify the HTTP response status // code and headers (e.g., the content type, cookies).
PrintWriter out = response.getWriter(); // Use "out" to send content to browser. }
Since doGet and doPost throw two exceptions (ServletException and IOException), you are required to include them in the method declaration. Finally, you must import classes in j a v a . i o (for P r i n t W r i t e r, etc.), javax.servlet (for HttpServlet, etc.), and javax.servlet.http (for HttpServletRequest and HttpServletResponse).
However, there is no need to memorize the method signature and import state-ments. Instead, simply download the preceding template from the source code archive at http://www.coreservlets.com/ and use it as a starting point for your servlets.
3.2 A Servlet That
Generates Plain Text
Listing 3.2 shows a simple servlet that outputs plain text, with the output shown in Figure 3–2. Before we move on, it is worth spending some time reviewing the pro-cess of installing, compiling, and running this simple servlet. See Chapter 2 (Server Setup and Configuration) for a much more detailed description of the process.
First, be sure that you’ve already verified the basics:
• That your server is set up properly as described in Section 2.3 (Configure the Server).
• That your development CLASSPATH refers to the necessary three entries (the servlet JAR file, your top-level development directory, and “.”) as described in Section 2.7 (Set Up Your Development Environment).
• That all of the test cases of Section 2.8 (Test Your Setup) execute successfully.
Second, type “javac HelloWorld.java” or tell your development environ-ment to compile the servlet (e.g., by clicking Build in your IDE or selecting Com-pile from the emacs JDE menu). This step will comCom-pile your servlet to create HelloWorld.class.
Third, move HelloWorld.class to the directory that your server uses to store serv-lets that are in the default Web application. The exact location varies from server to server, but is typically of the form install_dir/.../WEB-INF/classes (see Section 2.10 for details). For Tomcat you use install_dir/webapps/ROOT/WEB-INF/classes, for JRun you use install_dir/servers/default/default-ear/default-war/WEB-INF/classes, and for Resin you use install_dir/doc/WEB-INF/classes. Alternatively, you can use one of the techniques of Section 2.9 (Establish a Simplified Deployment Method) to automati-cally place the class files in the appropriate location.
3.2 A Servlet That Generates Plain Text 69
Finally, invoke your servlet. This last step involves using either the default URL of http://host/servlet/ServletName or a custom URL defined in the web.xml file as described in Section 2.11 (Web Applications: A Preview). During initial develop-ment, you will almost certainly find it convenient to use the default URL so that you don’t have to edit the web.xml file each time you test a new servlet. When you deploy real applications, however, you almost always disable the default URL and assign explicit URLs in the web.xml file (see Section 2.11, “Web Applications: A Preview”). In fact, servers are not absolutely required to support the default URL, and a few, most notably BEA WebLogic, do not.
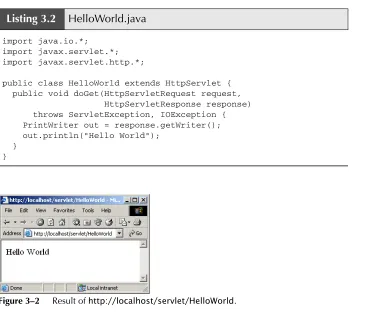
Figure 3–2 shows the servlet being accessed by means of the default URL, with the server running on the local machine.
Figure 3–2 Result of http://localhost/servlet/HelloWorld.
Listing 3.2
HelloWorld.java
import java.io.*; import javax.servlet.*; import javax.servlet.http.*;
public class HelloWorld extends HttpServlet { public void doGet(HttpServletRequest request, HttpServletResponse response) throws ServletException, IOException { PrintWriter out = response.getWriter(); out.println("Hello World");
3.3 A Servlet That Generates HTML
Most servlets generate HTML, not plain text as in the previous example. To generate HTML, you add three steps to the process just shown:
1. Tell the browser that you’re sending it HTML.
2. Modify the println statements to build a legal Web page. 3. Check your HTML with a formal syntax validator.
You accomplish the first step by setting the HTTP Content-Type response header to text/html. In general, headers are set by the setHeader method of HttpServletResponse, but setting the content type is such a common task that there is also a special setContentType method just for this purpose. The way to designate HTML is with a type of text/html, so the code would look like this:
response.setContentType("text/html");
Although HTML is the most common kind of document that servlets create, it is not unusual for servlets to create other document types. For example, it is quite com-mon to use servlets to generate Excel spreadsheets (content type application/ vnd.ms-excel—see Section 7.3), JPEG images (content type image/jpeg—see Section 7.5), and XML documents (content type text/xml). Also, you rarely use servlets to generate HTML pages that have relatively fixed formats (i.e., whose lay-out changes little for each request); JSP is usually more convenient in such a case. JSP is discussed in Part II of this book (starting in Chapter 10).
3.3 A Servlet That Generates HTML 71
Core Warning
You must set the content type before transmitting the actual document.
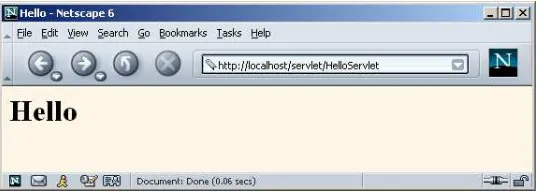
The second step in writing a servlet that builds an HTML document is to have your println statements output HTML, not plain text. Listing 3.3 shows HelloServlet.java, the sample servlet used in Section 2.8 to verify that the server is functioning properly. As Figure 3–3 illustrates, the browser formats the result as HTML, not as plain text.
Listing 3.3
HelloServlet.java
import java.io.*; import javax.servlet.*; import javax.servlet.http.*;
/** Simple servlet used to test server. */
public class HelloServlet extends HttpServlet { public void doGet(HttpServletRequest request, HttpServletResponse response) throws ServletException, IOException { response.setContentType("text/html");
PrintWriter out = response.getWriter(); String docType =
"<!DOCTYPE HTML PUBLIC \"-//W3C//DTD HTML 4.0 " + "Transitional//EN\">\n";
out.println(docType + "<HTML>\n" +
"<HEAD><TITLE>Hello</TITLE></HEAD>\n" + "<BODY BGCOLOR=\"#FDF5E6\">\n" +
"<H1>Hello</H1>\n" + "</BODY></HTML>");
Figure 3–3 Result of http://localhost/servlet/HelloServlet.
The final step is to check that your HTML has no syntax errors that could cause unpredictable results on different browsers. See Section 3.5 (Simple HTML-Build-ing Utilities) for a discussion of HTML validators.
3.4 Servlet Packaging
In a production environment, multiple programmers can be developing servlets for the same server. So, placing all the servlets in the same directory results in a massive, hard-to-manage collection of classes and risks name conflicts when two developers inadvertently choose the same name for a servlet or a utility class. Now, Web applica-tions (see Section 2.11) help with this problem by dividing things up into separate directories, each with its own set of servlets, utility classes, JSP pages, and HTML files. However, since even a single Web application can be large, you still need the standard Java solution for avoiding name conflicts: packages. Besides, as you will see later, custom classes used by JSP pages should always be in packages. You might as well get in the habit early.
When you put your servlets in packages, you need to perform the following two additional steps.
1. Place the files in a subdirectory that matches the intended package name. For example, we’ll use the coreservlets package for most of the rest of the servlets in this book. So, the class files need to go in a subdirectory called coreservlets. Remember that case mat-ters for both package names and directory names, regardless of what operating system you are using.
3.4 Servlet Packaging 73
package somePackage;
For example, Listing 3.4 presents a variation of the HelloServlet class that is in the coreservlets package and thus the coreserv-lets directory. As discussed in Section 2.8 (Test Your Setup), the class file should be placed in install_dir/webapps/ROOT/WEB-INF/classes/ coreservlets for Tomcat, install_dir/servers/default/default-ear/ default-war/WEB-INF/classes/coreservlets for JRun, and install_dir/ doc/WEB-INF/classes/coreservlets for Resin. Other servers have similar installation locations.
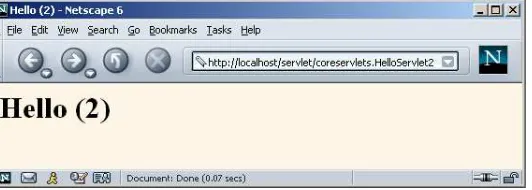
Figure 3–4 shows the servlet accessed by means of the default URL.
Listing 3.4
coreservlets/HelloServlet2.java
package coreservlets;
import java.io.*; import javax.servlet.*; import javax.servlet.http.*;
/** Simple servlet for testing the use of packages. */
public class HelloServlet2 extends HttpServlet { public void doGet(HttpServletRequest request, HttpServletResponse response) throws ServletException, IOException { response.setContentType("text/html"); PrintWriter out = response.getWriter(); String docType =
"<!DOCTYPE HTML PUBLIC \"-//W3C//DTD HTML 4.0 " + "Transitional//EN\">\n";
out.println(docType + "<HTML>\n" +
"<HEAD><TITLE>Hello (2)</TITLE></HEAD>\n" + "<BODY BGCOLOR=\"#FDF5E6\">\n" +
"<H1>Hello (2)</H1>\n" + "</BODY></HTML>"); }
Figure 3–4 Result of http://localhost/servlet/coreservlets.HelloServlet2.
3.5 Simple HTML-Building Utilities
As you probably already know, an HTML document is structured as follows:
<!DOCTYPE ...> <HTML>
<HEAD><TITLE>...</TITLE>...</HEAD>
<BODY ...>...</BODY> </HTML>
When using servlets to build the HTML, you might be tempted to omit part of this structure, especially the DOCTYPE line, noting that virtually all major browsers ignore it even though the HTML specifications require it. We strongly discourage this practice. The advantage of the DOCTYPE line is that it tells HTML validators which version of HTML you are using so they know which specification to check your document against. These validators are valuable debugging services, helping you catch HTML syntax errors that your browser guesses well on but that other browsers will have trouble displaying.
3.5 Simple HTML-Building Utilities 75
Core Approach
Use an HTML validator to check the syntax of pages that your servlets generate.
Admittedly, it is sometimes a bit cumbersome to generate HTML with println statements, especially long tedious lines like the DOCTYPE declaration. Some people address this problem by writing lengthy HTML-generation utilities, then use the utilities throughout their servlets. We’re skeptical of the usefulness of such an exten-sive library. First and foremost, the inconvenience of generating HTML program-matically is one of the main problems addressed by JavaServer Pages (see Chapter 10, “Overview of JSP Technology”). Second, HTML generation routines can be cum-bersome and tend not to support the full range of HTML attributes (CLASS and ID for style sheets, JavaScript event handlers, table cell background colors, and so forth). Despite the questionable value of a full-blown HTML generation library, if you find you’re repeating the same constructs many times, you might as well create a sim-ple utility class that simplifies those constructs. After all, you’re working with the Java programming language; don’t forget the standard object-oriented programming prin-ciple of reusing, not repeating, code. Repeating identical or nearly identical code means that you have to change the code lots of different places when you inevitably change your approach.
For standard servlets, two parts of the Web page (DOCTYPE and HEAD) are unlikely to change and thus could benefit from being incorporated into a simple util-ity file. These are shown in Listing 3.5, with Listing 3.6 showing a variation of the HelloServlet class that makes use of this utility. We’ll add a few more utilities throughout the book.
Listing 3.5
coreservlets/ServletUtilities.java
package coreservlets;
import javax.servlet.*; import javax.servlet.http.*;
/** Some simple time savers. Note that most are static methods. */
public class ServletUtilities {
public static final String DOCTYPE =
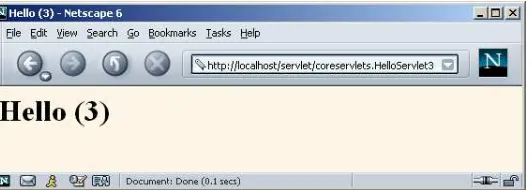
After you compile HelloServlet3.java (which results in ServletUtilities.java being compiled automatically), you need to move the two class files to the coreservlets sub-directory of the server’s default deployment location (.../WEB-INF/classes; review Section 2.8 for details). If you get an “Unresolved symbol” error when compiling HelloServlet3.java, go back and review the CLASSPATH settings described in Section 2.7 (Set Up Your Development Environment), especially the part about including the top-level development directory in the CLASSPATH. Figure 3–5 shows the result when the servlet is invoked with the default URL.
public static String headWithTitle(String title) { return(DOCTYPE + "\n" +
"<HTML>\n" +
"<HEAD><TITLE>" + title + "</TITLE></HEAD>\n"); }
... }
Listing 3.6
coreservlets/HelloServlet3.java
package coreservlets;
import java.io.*; import javax.servlet.*; import javax.servlet.http.*;
/** Simple servlet for testing the use of packages * and utilities from the same package.
*/
public class HelloServlet3 extends HttpServlet { public void doGet(HttpServletRequest request, HttpServletResponse response) throws ServletException, IOException { response.setContentType("text/html"); PrintWriter out = response.getWriter(); String title = "Hello (3)";
out.println(ServletUtilities.headWithTitle(title) + "<BODY BGCOLOR=\"#FDF5E6\">\n" +
"<H1>" + title + "</H1>\n" + "</BODY></HTML>");
} }
3.6 The Servlet Life Cycle 77
Figure 3–5 Result of http://localhost/servlet/coreservlets.HelloServlet3.
3.6 The Servlet Life Cycle
In Section 1.4 (The Advantages of Servlets Over “Traditional” CGI) we referred to the fact that only a single instance of each servlet gets created, with each user request resulting in a new thread that is handed off to doGet or doPost as appropriate. We’ll now be more specific about how servlets are created and destroyed, and how and when the various methods are invoked. We summarize here, then elaborate in the following subsections.
When the servlet is first created, its init method is invoked, so init is where you put one-time setup code. After this, each user request results in a thread that calls the service method of the previously created instance. Multiple concurrent requests normally result in multiple threads calling service simultaneously, although your servlet can implement a special interface (SingleThreadModel) that stipulates that only a single thread is permitted to run at any one time. The service method then calls doGet, doPost, or another doXxx method, depending on the type of HTTP
request it received. Finally, if the server decides to unload a servlet, it first calls the servlet’s destroy method.
The service Method
Now, if you have a servlet that needs to handle both POST and GET requests iden-tically, you may be tempted to override service directly rather than implementing both doGet and doPost. This is not a good idea. Instead, just have doPost call doGet (or vice versa), as below.
public void doGet(HttpServletRequest request, HttpServletResponse response) throws ServletException, IOException { // Servlet code
}
public void doPost(HttpServletRequest request, HttpServletResponse response) throws ServletException, IOException {
doGet(request, response);
}
Although this approach takes a couple of extra lines of code, it has several advan-tages over directly overriding service. First, you can later add support for other HTTP request methods by adding doPut, doTrace, etc., perhaps in a subclass. Overriding service directly precludes this possibility. Second, you can add support for modification dates by adding a getLastModified method, as illustrated in Listing 3.7. Since getLastModified is invoked by the default service method, overriding service eliminates this option. Finally, service gives you automatic support for HEAD, OPTION, and TRACE requests.
Core Approach
If your servlet needs to handle both GET and POST identically, have your
doPost method call doGet, or vice versa. Don’t override service.
The doGet, doPost, and doXxx Methods
These methods contain the real meat of your servlet. Ninety-nine percent of the time, you only care about GET or POST requests, so you override doGet and/or doPost. However, if you want to, you can also override doDelete for DELETE requests, doPut for PUT, doOptions for OPTIONS, and doTrace for TRACE. Recall, however, that you have automatic support for OPTIONS and TRACE.
3.6 The Servlet Life Cycle 79
to implement doHead so that you can generate responses to HEAD requests (i.e., requests from custom clients that want just the HTTP headers, not the actual docu-ment) more quickly—without building the actual document output.
The init Method
Most of the time, your servlets deal only with per-request data, and doGet or doPost are the only life-cycle methods you need. Occasionally, however, you want to perform complex setup tasks when the servlet is first loaded, but not repeat those tasks for each request. The init method is designed for this case; it is called when the servlet is first created, and not called again for each user request. So, it is used for one-time initializations, just as with the init method of applets. The servlet is nor-mally created when a user first invokes a URL corresponding to the servlet, but you can also specify that the servlet be loaded when the server is first started (see the chapter on the web.xml file in Volume 2 of this book).
The init method definition looks like this:
public void init() throws ServletException { // Initialization code...
}
The init method performs two varieties of initializations: general initializations and initializations controlled by initialization parameters.
General Initializations
With the first type of initialization, init simply creates or loads some data that will be used throughout the life of the servlet, or it performs some one-time computation. If you are familiar with applets, this task is analogous to an applet calling getImage to load image files over the network: the operation only needs to be performed once, so it is triggered by init. Servlet examples include setting up a database connection pool for requests that the servlet will handle or loading a data file into a HashMap.
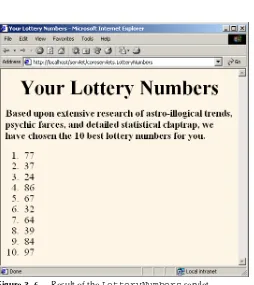
Listing 3.7 shows a servlet that uses init to do two things.
First, it builds an array of 10 integers. Since these numbers are based upon com-plex calculations, we don’t want to repeat the computation for each request. So, doGet looks up the values that init computed, instead of generating them each time. The results of this technique are shown in Figure 3–6.
compares the specified date to that returned by getLastModified, returning the page only if it has been changed after the specified date. Browsers frequently make these conditional requests for pages stored in their caches, so supporting conditional requests helps your users (they get faster results) and reduces server load (you send fewer complete documents). Since the Last-Modified and If-Modified-Since headers use only whole seconds, the getLastModified method should round times down to the nearest second.
Listing 3.7
coreservlets/LotteryNumbers.java
package coreservlets;
import java.io.*; import javax.servlet.*; import javax.servlet.http.*;
/** Example using servlet initialization and the * getLastModified method.
*/
public class LotteryNumbers extends HttpServlet { private long modTime;
private int[] numbers = new int[10];
/** The init method is called only when the servlet is first * loaded, before the first request is processed.
*/
public void init() throws ServletException {
// Round to nearest second (i.e., 1000 milliseconds) modTime = System.currentTimeMillis()/1000*1000; for(int i=0; i<numbers.length; i++) {
numbers[i] = randomNum(); }
}
/** Return the list of numbers that init computed. */
public void doGet(HttpServletRequest request, HttpServletResponse response) throws ServletException, IOException { response.setContentType("text/html"); PrintWriter out = response.getWriter(); String title = "Your Lottery Numbers"; String docType =
3.6 The Servlet Life Cycle 81
out.println("</OL>" +
"</BODY></HTML>"); }
/** The standard service method compares this date against * any date specified in the If-Modified-Since request header. * If the getLastModified date is later or if there is no * If-Modified-Since header, the doGet method is called * normally. But if the getLastModified date is the same or * earlier, the service method sends back a 304 (Not Modified) * response and does <B>not</B> call doGet. The browser should * use its cached version of the page in such a case.
*/
public long getLastModified(HttpServletRequest request) { return(modTime);
}
// A random int from 0 to 99.
private int randomNum() {
return((int)(Math.random() * 100)); }
}
Figure 3–6 Result of the LotteryNumbers servlet.
3.6 The Servlet Life Cycle 83
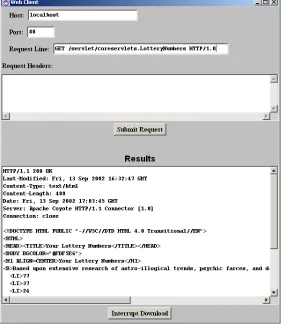
Figure 3–7 Accessing the LotteryNumbers servlet results in normal response (with the document sent to the client) in two situations: when there is an unconditional GET request or when there is a conditional request that specifies a date before servlet
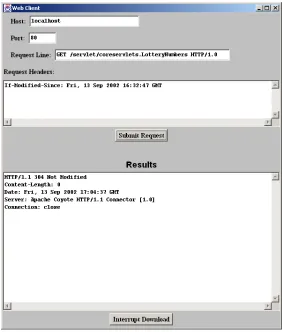
Figure 3–8 Accessing the LotteryNumbers servlet results in a 304 (Not Modified) response with no actual document in one situation: when a conditional GET request is received that specifies a date at or after servlet initialization.
Initializations Controlled by Initialization Parameters
In the previous example, the init method computed some data that was used by the doGet and getLastModified methods. Although this type of general initialization is quite common, it is also common to control the initialization by the use of initial-ization parameters. To understand the motivation for init parameters, you need to understand the categories of people who might want to customize the way a servlet or JSP page behaves. There are three such groups:
3.6 The Servlet Life Cycle 85
Developers change the behavior of a servlet by changing the code. End users change the behavior of a servlet by providing data to an HTML form (assuming that the developer has written the servlet to look for this data). But what about deployers? There needs to be a way to let administrators move servlets from machine to machine and change certain parameters (e.g., the address of a database, the size of a connection pool, or the location of a data file) without modifying the servlet source code. Providing this capability is the purpose of init parameters.
Because the use of servlet initialization parameters relies heavily on the deploy-ment descriptor (web.xml), we postpone details and examples on init parameters until the deployment descriptor chapter in Volume 2 of this book. But, here is a brief preview:
1. Use the web.xmlservlet element to give a name to your servlet. 2. Use the web.xmlservlet-mapping element to assign a custom
URL to your servlet. You never use default URLs of the form http://.../servlet/ServletName when using init parameters. In fact, these default URLs, although extremely convenient during initial development, are almost never used in deployment scenarios. 3. Add init-param subelements to the web.xmlservlet element to
assign names and values of initialization parameters.
4. From within your servlet’s init method, call getServletConfig to obtain a reference to the ServletConfig object.
5. Call the getInitParameter method of ServletConfig with the name of the init parameter. The return value is the value of the init parameter or null if no such init parameter is found in the web.xml file.
The destroy Method
3.7 The SingleThreadModel Interface
Normally, the system makes a single instance of your servlet and then creates a new thread for each user request. This means that if a new request comes in while a pre-vious request is still executing, multiple threads can concurrently be accessing the same servlet object. Consequently, your doGet and doPost methods must be care-ful to synchronize access to fields and other shared data (if any) since multiple threads may access the data simultaneously. Note that local variables are not shared by multiple threads, and thus need no special protection.
In principle, you can prevent multithreaded access by having your servlet imple-ment the SingleThreadModel interface, as below.
public class YourServlet extends HttpServlet
implements SingleThreadModel { ...
}
If you implement this interface, the system guarantees that there is never more than one request thread accessing a single instance of your servlet. In most cases, it does so by queuing all the requests and passing them one at a time to a single servlet instance. However, the server is permitted to create a pool of multiple instances, each of which handles one request at a time. Either way, this means that you don’t have to worry about simultaneous access to regular fields (instance variables) of the servlet. You do, however, still have to synchronize access to class variables (static fields) or shared data stored outside the servlet.
Although SingleThreadModel prevents concurrent access in principle, in prac-tice there are two reasons why it is usually a poor choice.
First, synchronous access to your servlets can significantly hurt performance (latency) if your servlet is accessed frequently. When a servlet waits for I/O, the server cannot handle pending requests for the same servlet. So, think twice before using the SingleThreadModel approach. Instead, consider synchronizing only the part of the code that manipulates the shared data.
The second problem with SingleThreadModel stems from the fact that the specification permits servers to use pools of instances instead of queueing up the requests to a single instance. As long as each instance handles only one request at a time, the pool-of-instances approach satisfies the requirements of the specification. But, it is a bad idea.
3.7 The SingleThreadModel Interface 87
On the other hand, suppose that you are using static instance variables to refer to the shared data. In that case, the pool-of-instances approach to SingleThreadModel provides no advantage whatsoever; multiple requests (using different instances) can still concurrently access the static data.
Now, SingleThreadModel is still occasionally useful. For example, it can be used when the instance variables are reinitialized for each request (e.g., when they are used merely to simplify communication among methods). But, the problems with SingleThreadModel are so severe that it is deprecated in the servlet 2.4 (JSP 2.0) specification. You are much better off using explicit synchronized blocks.
Core Warning
Avoid implementing SingleThreadModel for high-traffic servlets. Use it with great caution at other times. For production-level code, explicit code synchronization is almost always better. SingleThreadModel is deprecated in version 2.4 of the servlet specification.
For example, consider the servlet of Listing 3.8 that attempts to assign unique user IDs to each client (unique until the server restarts, that is). It uses an instance variable (field) called nextID to keep track of which ID should be assigned next, and uses the following code to output the ID.
String id = "User-ID-" + nextID; out.println("<H2>" + id + "</H2>"); nextID = nextID + 1;
Now, if you are familiar with multithreaded programming, the problem was very obvious to you. The question is, what is the proper solution? Here are three possibilities.
1. Shorten the race. Remove the third line of the code snippet and change the first line to the following.
String id = "User-ID-" + nextID++;
Boo! This approach decreases the likelihood of an incorrect answer, but does not eliminate the possibility. In many scenarios, lowering the probability of a wrong answer is a bad thing, not a good thing: it merely means that the problem is less likely to be detected in testing, and more likely to occur after being fielded.
2. Use SingleThreadModel. Change the servlet class definition to the following.
public class UserIDs extends HttpServlet
implements SingleThreadModel {
Will this work? If the server implements SingleThreadModel by queueing up all the requests, then, yes, this will work. But at a perfor-mance cost if there is a lot of concurrent access. Even worse, if the server implements SingleThreadModel by making a pool of servlet instances, this approach will totally fail because each instance will have its own nextID field. Either server implementation approach is legal, so this “solution” is no solution at all.
3. Synchronize the code explicitly. Use the standard synchronization construct of the Java programming language. Start a synchronized block just before the first access to the shared data, and end the block just after the last update to the data, as follows.
synchronized(this) {
String id = "User-ID-" + nextID; out.println("<H2>" + id + "</H2>"); nextID = nextID + 1;
}
3.7 The SingleThreadModel Interface 89
Listing 3.8
coreservlets/UserIDs.java
package coreservlets;
import java.io.*; import javax.servlet.*; import javax.servlet.http.*;
/** Servlet that attempts to give each user a unique * user ID. However, because it fails to synchronize * access to the nextID field, it suffers from race * conditions: two users could get the same ID. */
public class UserIDs extends HttpServlet { private int nextID = 0;
public void doGet(HttpServletRequest request, HttpServletResponse response) throws ServletException, IOException { response.setContentType("text/html"); PrintWriter out = response.getWriter(); String title = "Your ID";
String docType =
"<!DOCTYPE HTML PUBLIC \"-//W3C//DTD HTML 4.0 " + "Transitional//EN\">\n";
out.println(docType + "<HTML>\n" +
"<HEAD><TITLE>" + title + "</TITLE></HEAD>\n" + "<CENTER>\n" +
"<BODY BGCOLOR=\"#FDF5E6\">\n" + "<H1>" + title + "</H1>\n"); String id = "User-ID-" + nextID;
out.println("<H2>" + id + "</H2>"); nextID = nextID + 1;
out.println("</BODY></HTML>"); }
Figure 3–9 Result of the UserIDs servlet.
3.8 Servlet Debugging
Naturally, when you write servlets, you never make mistakes. However, some of your colleagues might make an occasional error, and you can pass this advice on to them. Seriously, though, debugging servlets can be tricky because you don’t execute them directly. Instead, you trigger their execution by means of an HTTP request, and they are executed by the Web server. This remote execution makes it difficult to insert break points or to read debugging messages and stack traces. So, approaches to serv-let debugging differ somewhat from those used in general development. Here are 10 general strategies that can make your life easier.
1. Use print statements.
3.8 Servlet Debugging 91
2. Use an integrated debugger in your IDE.
Many integrated development environments (IDEs) have sophisti-cated debugging tools that can be integrated with your servlet and JSP container. The Enterprise editions of IDEs like Borland JBuilder, Oracle JDeveloper, IBM WebSphere Studio, Eclipse, BEA WebLogic Studio, Sun ONE Studio, etc., typically let you insert breakpoints, trace method calls, and so on. Some will even let you connect to a server running on a remote system.
3. Use the log file.
The HttpServlet class has a method called log that lets you write information into a logging file on the server. Reading debugging mes-sages from the log file is a bit less convenient than watching them directly from a window as with the two previous approaches, but using the log file is an option even when running on a remote server; in such a situation, print statements are rarely useful and only the advanced IDEs support remote debugging. The log method has two variations: one that takes a String, and the other that takes a String and a Throwable (an ancestor class of Exception). The exact location of the log file is server-specific, but is generally clearly documented or can be found in subdirectories of the server installation directory. 4. Use Apache Log4J.
Log4J is a package from the Apache Jakarta Project—the same project that manages Tomcat (one of the sample servers used in the book) and Struts (an MVC framework discussed in Volume 2 of this book). With Log4J, you semi-permanently insert debugging state-ments in your code and use an XML-based configuration file to control which are invoked at request time. Log4J is fast, flexible, convenient, and becoming more popular by the day. For details, see http://jakarta.apache.org/log4j/.
5. Write separate classes.
One of the basic principles of good software design is to put com-monly used code into a separate function or class so you don’t need to keep rewriting it. That principle is even more important when you are writing servlets, since these separate classes can often be tested inde-pendently of the server. You can even write a test routine, with a main, that can be used to generate hundreds or thousands of test cases for your routines—not something you are likely to do if you have to submit each test case by hand in a browser.
6. Plan ahead for missing or malformed data.
you
process data that comes directly or indirectly from a client, be sure to consider the possibility that it was entered incorrectly or omitted altogether.
7. Look at the HTML source.
If the result you see in the browser looks odd, choose View Source from the browser’s menu. Sometimes a small HTML error like <TABLE> instead of </TABLE> can prevent much of the page from being viewed. Even better, use a formal HTML validator on the serv-let’s output. See Section 3.5 (Simple HTML-Building Utilities) for a discussion of this approach.
8. Look at the request data separately.
Servlets read data from the HTTP request, construct a response, and send it back to the client. If something in the process goes wrong, you want to discover if the cause is that the client is sending the wrong data or that the servlet is processing it incorrectly. The EchoServer class, discussed in Chapter 19 (Creating and Processing HTML Forms), lets you submit HTML forms and get a result that shows you exactly how the data arrived at the server. This class is merely a simple HTTP server that, for all requests, constructs an HTML page showing what was sent. Full source code is online at http://www.coreservlets.com/.
9. Look at the response data separately.
Once you look at the request data separately, you’ll want to do the same for the response data. The WebClient class, discussed in the init example of Section 3.6 (The Servlet Life Cycle), lets you connect to the server interactively, send custom HTTP request data, and see every-thing that comes back—HTTP response headers and all. Again, you can download the source code from http://www.coreservlets.com/.
10. Stop and restart the server.