Contents at a Glance
Contents ... v
About the Authors ... ix
About the Technical Reviewer ... x
Acknowledgments ... xi
Introduction ... xii
■
Chapter 1: Harnessing the Power of the Mobile Web ... 1
■
Chapter 2: Twitter Applications: Who's That Tweet? ... 21
■
Chapter 3: Twitter Applications: I Love Ham ... 39
■
Chapter 4: Basic Planning and Structuring of Your Application ... 49
■
Chapter 5: Handling Multiple Screen Resolutions with CSS 3 ... 65
■
Chapter 6: Handling Different Browser Platforms ... 85
■
Chapter 7: Building an Impressive User Experience with jQuery Mobile ... 99
■
Chapter 8: Building Visually Rich Internet Applications ... 121
■
Chapter 9: HTML5 Location-Based Applications ... 145
■
Chapter 10: Using Cloud Services: A Transport Application ... 167
■
Chapter 11: Pushing the Limits with Audio and Video ... 187
■
Chapter 12: Supercharging the User Experience with AJAX ... 211
■
Chapter 13: PackagingYour Applications ... 233
Introduction
Both of the first author’s (Jon’s) parents were artists. They each could draw fantastical pictures that resembled real life, and were shocked to see that their son could barely muster up a stick figure. If you’ve always felt that your inner artist was best expressed through what you could build with the help of a computer and the Internet, then this book can guide your virtual paintbrush. The finished product? A mobile web application for Android devices, which can in turn inspire creativity and productivity in millions of prospective users. It is our hope that this book will give you all that you need to get up and running and creating your masterpieces in no time.
Who This Book Is For
This book is written at a beginner’s level. For the most part, we assume nothing as we write about everything from what HTML is to how to apply CSS to querying databases and displaying content using JavaScript. For some, this may mean that they would like to skim certain introductory materials (and assuredly miss many bad jokes). However, even advanced users will likely gain something from the tricks we unroll our sleeves to reveal.
How This Book Is Structured
We’ve split the content in this book into several chapters, with three “unofficial” parts.
In the first part, we introduce you (Chapter 1) to the basic languages of the web: HTML, CSS, JavaScript, and more. We then jump into two applications (Chapters 2–3) quickly to get your feet wet, and then back out to discuss planning concerns you might need to address when designing your own apps (Chapters 4–6)
In the second part, we start to jazz things up a bit. We go into building impressive user interfaces (Chapter 7) and working with visual content (Chapter 8). We then show you two more applications (Chapters 9–10) that speak to the unique nature of mobile applications: Using location information to guide your apps (and users), as well as tapping into the cloud for information and data.
Finally, in the last part, we talk about the next level of interactivity to add to your
applications. We touch on adding audio and video (Chapter 11), doing things behind the user’s back to provide impressive functionality (Chapter 12) and wrapping it all up and uploading to the web or building a full app for your formerly browser-bound creation (Chapter 13).
■CONTENTS
Downloading the code
The code for the examples shown in this book is available on GitHub at https://github.com/jonwestfall/Beginning-Android-Web-Apps-Development.
Contacting the Author
We’re always happy to hear from our readers, and if you have questions, comments, or thoughts about the book (or life in general), you can contact any of us through our personal websites or social media.
Chapter
Harnessing the Power of
the Mobile Web
Welcome to the first chapter of this book. In this chapter, we’ll endeavor to not only tell you about what you’ll find in this book, but to also compare it to what has come before. You see, quite simply, it is only now that the true power of mobile web applications and mobile-optimized websites is being realized, despite the existence of the “web” on mobile phones in some form for 10 years.
Before we show off the neat stuff we have planned for this book, it’s probably best to make sure everyone is on the same page, lingo-wise. So we’ll start talking about the basic terms in web design. In the second section, we’ll talk about the precursors to today’s mobile web. And finally, in the last section, we’ll talk about the concepts that will guide this book and give you a sneak peek at some of the applications we’ll be
developing!
Basics of Web Design
There are a few concepts that it’s best to discuss up front. Forgive us if you’ve heard this all before. However, if you’re completely new to web design (i.e., you’ve never written a single web page or blog), then this should be a good place to start. And, if we’re starting at the beginning, then we should start with the lingua franca of the web: HTML.
Getting Started: HyperText Markup Language (HTML)
In the late 1980s, the computer language we know today as HTML was born. HTML isn’t a true programming language, per se, in that it isn’t compiled. Rather, HTML is
interpreted by special software called a web browser. Browsers, such as Microsoft Internet Explorer, Mozilla Firefox, and Google Chrome on your Desktop computer, and Dolphin HD, Opera Mini, and Skyfire on your Android device, download HTML files from a web server, interpret them, and display them. This entire process is fairly simple. A
CHAPTER 1: Harnessing the Power of the Mobile Web
2
web server can be any sort of computer that makes a list of files available to other computers on the network over something called HyperText Transport Protocol (HTTP, as in http:// at the beginning of web addresses, which are also called URLs). Browsers download these HTML files over HTTP and read them, looking for special features known as tags. These tags function in the same way as tags in older word processor programs did—specifying how text and other elements of the page should look when displayed in the viewer. Consider the web page in Figure 1–1.
Figure 1–1. An example web page named hello.html
Let’s look at the HTML code that made up the page shown in Listing 1–1: Listing 1–1. hello.html
<html> <head>
<title>This is the text that appears in the browser's Title bar!</title> </head>
<body>
This is normal text. However let's get fancy and make <strong>this bold</strong> (this is <em>italicized</em>).
<br /> The tag to the left just made this a new line.
<p> The tag to the left here just made this a new paragraph.</p> </body>
</html>
The code might look a bit strange, but let’s walk through it line by line. The first line, which simply reads <html>, lets the browser know that it’s reading an HTML document. You’ll notice that the last line of the document, </html>, is similar. This line “finishes” the HTML object—closing the tag and telling the browser that the page is over. By having sets of tags like this, the browser knows what formatting to apply and where to stop applying it.
The second through fourth lines of the code are known as the page header. This is where programmers store important information that the browser needs to know in order to format the page properly. In this case, the only tag I’ve placed within the header is a title tag, which specifies what should be shown in the title bar of the user’s web browser. The header would be the location where one would most commonly finds certain documents, such as Cascading Style Sheets, JavaScript, and META information for search engine optimization, special instructions for different browsers, favicons (those little icons that appear next to a bookmark entry in your browser), and other important information about the page that is not related to the documents’content, which brings us to line 5 - the bodytag.
stronger visual oomph. A second tag, <em>, does the same by emphasizing the content orby making the content italic.1 A third tag, <br />, starts a new line (br stands for line break!). The <br /> tag is a little different than most HTML tags. Since the tag does not require itself to enclose content on the page in the same thatthe <strong> and <em> tags do, this tag closes on itself. Finally, the <p> tag starts a new paragraph.
At their cores, all web pages are some form of HTML, although most we’ll discuss in this book are much more complicated. Thankfully, we’ll walk you through them, so you won’t be overwhelmed!
If this is your first outing into the world of HTML and web applications, then it would probably be a good idea to familiarize yourself with the basics of HTML before jumping full on into the book. One of the best resources on the Internet for learning HTML and browsing through basic code examples can be found at the W3Schools
(http://www.w3schools.com/). Once you've gotten your feet a little wet with HTML, or in case you're already soaked from the neck down, it would be time to move on to some of the more intermediate portions of web application design and technologies that we will be using in this book.
Getting Stylish: Cascading Style Sheets (CSS)
Imagine that you’re writing up a simple web page to aid in your parenting—a family chore list. It might look something like the list in Figure 1–2.
Figure 1–2.Family Chore List
By just glancing at the finished product, there does not appear to be a lot going on here.We have a standard boring black and white document that completely lacks any style or individuality. Let us take a look at the code behind the scenes shown in Listing 1–2. Listing 1–2. chores.html
<html> <head>
<title> Family Chore List </title> </head>
<body>
<h1>Family Chore List</h1>
1
It’s worth noting that the <b> and <i> tags you may be used to were used in HTML 4 for the same purpose as <strong> and <em> respectively. Their use has been
CHAPTER 1: Harnessing the Power of the Mobile Web
4
<ul>
<li><strong>Tommy</strong>: Take out the trash</li> <li><strong>Beth</strong>: Clean out the fridge. </li> <li><strong>Mittens</strong>: catch mice. </li> </ul>
</body> </html>
Let us break down the teensy morsel of code within the bodyelement. Here, the unordered list on the page is created using the ul tag. An unordered list is great to use anytime you want to create a bulleted list of items. If your list requires a little more order,you might opt to use the ol, or ordered list,HTML tag.
While the page is fairly nice and simple, you might want to spice it up. Perhaps around Christmas time, you’d like splash some color on your family chores page that would make even the most bah humbug elf smile with glee (see Figure 1–3).
Figure 1–3.Christmas Chore List with green and red adding a holiday feel
Perhaps on the Fourth of July, you might want to fill your family with patriotic gusto (see Figure 1–4).
Figure 1–4. Patriotic Chore List with the red, white, and blue
Each time we change the colors, we modify the HTML source code by adding in appropriate tags. Take a look at the patriotic version of chores.html in Listing 1–3. Listing 1–3. patriotic chores.html
<html> <head>
<title> Family Chore List </title> </head>
<body bgcolor=blue>
<font color=red><h1>Family Chore List</h1></font> <font color=white>
<ul>
</font> </body> </html>
Making modifications straight to the HTML is fine for small pages. However, imagine how much time adding those font tags might take if there were 12 children and countless pets to coordinate. Or perhaps you have multiple pages, one for each child and you don’t want them to feel left out if their sibling has nice color combinations and they don’t. Never fear–we can use something called a Cascading Style Sheet, or CSS, to keep it all in check. Basically, a CSS file is a small document consisting of a set of styles to be applied to an HTML document that can be changed at anytime, affecting every page it is connected to, without ever having to edit the original HTML document(s). Listing 1–4 provides an example CSS file.
Listing 1–4. patriotic.css
body {background-color: blue} h1 {color: white}
li {color: red}
Notice how the format of the file is simply the HTML tag you wish to edit (H1 for example and the attributes you’d like to give it). In this case, we want the color of text within h1 to be white.We can simplify chores.html to include a link to this CSS file, as shown in the code of Listing 1–5.
Listing 1–5. chores.html with CSS reference
<html> <head>
<title> Family Chore List </title>
<link rel="stylesheet" type="text/css" href="patriotic.css" /> </head>
<body>
<h1>Family Chore List</h1> <ul>
<li><strong>Tommy</strong>: Take out the trash</li> <li><strong>Beth</strong>: Clean out the fridge. </li> <li><strong>Mittens</strong>: catch mice. </li> </ul>
</body> </html>
CHAPTER 1: Harnessing the Power of the Mobile Web
6
Getting Interactive: JavaScript
Sometimes great design isn’t enough to make your point. Sometimes you want to do something a bit flashy, or something unique, or something downright useful. One of the simplest ways to do that is by using JavaScript. JavaScript is a scripting language that runs inside the viewer’s web browser. For example, perhaps you’ve gone to a site before and gotten a pop-up message like the one in Figure 1–5.
Figure 1–5.A JavaScript warning
The code that creates these messages is remarkably simple. Listing 1–6 integrated the code into the chores.html page we saw in the CSS example above.
Listing 1–6. chores.html with JavaScript reference
<html> <head>
<title> Family Chore List </title>
<link rel="stylesheet" type="text/css" href="patriotic.css" /> <script type="text/javascript">
function ShowWarning() {
alert("Mittens - your mousing numbers are down this week - NO CATNIP FOR YOU"); }
<li><strong>Tommy</strong>: Take out the trash</li> <li><strong>Beth</strong>: Clean out the fridge. </li> <li><strong>Mittens</strong>: catch mice. </li> </ul>
</body> </html>
Let’s start by talking about the new section of code right below the CSS link, inside the headsection, with the tag script. The scripttag tells the browser that a section of scripting code (in this case, of the type text/javascript) is about to be given. The browser then interprets the code. Since it’s in the headsection, the browser simply stores this code for later use. This piece of code is called a function, which you can think of as a list of commands wrapped up in a “shortcut”. Here the command is another function named alert. As you can imagine, JavaScript functions can get quite complex, with functions including other functions and interacting with user input.
Once the function is loaded into the browser’s menu, we need to tell the browser when we want to execute it. In this case, I’ve changed the bodytag to include the line
onload=ShowWarning();. This tells the browser that, when the page is loaded, I want it to run the function ShowWarning. The two parentheses indicate a spot where I could include information to pass to the function. This becomes useful for creating things like
calculators or for checking input in a form. For example, I could write up something like Listing 1–7.
Listing 1–7. chores.html with JavaScript reference passing a variable
<html> <head>
<title> Family Chore List </title>
<link rel="stylesheet" type="text/css" href="patriotic.css" /> <script type="text/javascript">
function ShowWarning(catname) {
alert(catname + " - your mousing numbers are down this week - NO CATNIP FOR YOU"); }
</script> </head>
CHAPTER 1: Harnessing the Power of the Mobile Web
8
<ul>
<li><strong>Tommy</strong>: Take out the trash</li> <li><strong>Beth</strong>: Clean out the fridge. </li> <li><strong>Mittens</strong>: catch mice. </li> </ul>
</body> </html>
The code in Listing 1–7 will produce the exact same message as the code in Listing 1–6. However, in Listing 1–7, I’ve passed the feline’s name as a variable. The function
ShowWarning now expects that I’ll pass a variable to be named “catname”, and it can use that information in its code. When I call ShowWarning() in the bodytag, I simply add the cat’s name to be passed to the function. I can pass more than one thing, if I want to. As mentioned, this could get quite complex, depending on how much I want to chastise poor Mittens.
As you can see, coupling JavaScript along with HTML and CSS can produce pages that look good, are easy to update, and can interact with the user. But sometimes you might need to produce a document that doesn’t give style information–it just gives general information. A prime example of this is given in the next section, as we start to get into the wonderful world of XML!
Getting Informative: Extensible Markup Language (XML)
If you spend any time on the Web, you may have noticed an odd little icon on some pages that looks something like this.Figure 1–7.An RSS icon
Figure 1–8.The start of a blog’s RSS feed, showing new entries
For example, Figure 1–9 is the beginning of the RSS feed for my personal blog. Each element contains a variety of data that isn’t very pretty to look at but provides all the information one might want to view my blog in a special piece of software called an RSS reader. While certain applications, like Microsoft Outlook, have built-in RSS readers, many prefer to use a dedicated reader client. One popular RSS reader is Google Reader, which can take the link to my RSS feed and produce a nice view of my blog so that the Google Reader user can quickly see` what articles I’ve posted recently.
CHAPTER 1: Harnessing the Power of the Mobile Web
10
Now, you might be asking why I’d want people to view my website somewhere other than at its usual web address. The simple answer is that it might be more convenient for my users to view all the blogs they read (mine and others) within one piece of software. Software, such as Google Reader, can keep track of hundreds of RSS feeds, from news sources, blogs, and even just simple status updates like my Twitter feed. All of these pieces of information are retrieved by Google Reader in a format known as Extensible Markup Language (XML). XML isn’t a format you’d want to have your human viewers see, but it is one that you’d want to use if you were sharing information between web pages or between web services.
While the example above shows XML as an output, the web application that powers my blog (WordPress) produces the XML so other sites like Google Reader can use it. XML can also be used as an input. For example, I might want to take data (such as sports scores) and display them on my webpage. Most likely, those sports scores will be available in XML, which my web page can then open and parse. Parsing is simply a fancy term that means “read, interpret, and display”. My webpage will read the scores, interpret them if necessary (i.e., calculate something, aggregate something), and then display them to the user in some meaningful way.
So to recap, we’ve now seen how to build a basic webpage, how to make it look pretty (easily), and how to make it interact with a user. Finally, we talked about how webpages and programs get data between each other by using XML. As we move through the book, we’ll talk in depth about each of these areas and give you plenty of examples of how to use them. In fact, coming up in Chapter 2, we’ll discuss how to get data from a very popular web service and display it in the first full application we’ll create!
JSON: Human-Readable Data Interchange
If you have a brilliant idea for a mobile web application that relies on the application programming interface, or API, of other services, such as Twitter or Foursquare, then chances are you will be quickly introduced to JSON (JavaScript Object Notation), which is one of my favorite technologies.
Figure 1–10. Rocco Augusto's portfolio in JSON format from nerdofsteel.com
The Mobile Web, Yesterday and Today
Many of us first started using the Internet in the late 1990s or, if you weren’t alive in the late 1990s, perhaps you’ve used it your whole life! While we might be very familiar with the Internet on our desktop, getting it onto a small screen that can fit in our pocket might seem a bit strange, especially with different jargon and marketing-speak that is often heard when it comes to the Web. We’ll start by discussing how fast the data arrives on your phone and then what sorts of data can be sent.
Knowing the Speeds (Or “What is 3G anyway?”)
CHAPTER 1: Harnessing the Power of the Mobile Web
12
iPhone (Released in 2007), you only had 2G speed, using protocols including GPRS, EDGE, and 1X. Data coming to you over 2G was just about twice as fast as a dial-up modem, around 115KbpsSo while email and text-based web pages would load
reasonably fast, anything with too many images or multimedia would take approximately eternity2
.
Around 2001, the initial designs for what we consider 3G (or third generation) data networks were drafted andcould reach theoretical speeds of over 7Mbps These networks, which include protocols like UMTS, WCDMA, and EV-DO, can move data much faster than their 2G counterparts. For the first time, thisallowed forinnovations such as streaming movies and music directly to a phone. The limiting factor in showing complex web pages was no longer the speed of the data connection but the speed of the phone. By 2007, most telecom providers had adopted and “rolled-out” a 3G network and devices, such as mobile broadband cards, became common.
In the past few years (2008-2010), new and approved versions of current 3G
technologies have become available. While there is considerable argument about what exactly the differences between the 3G technologies we were privy to before and this newer 3G-based technology that is being dubbed "4G" are, it is obvious that newer protocols, such asHSPA, HSPA+, WiMAX, and LTE, are faster than their 3G
predecessors. Unfortunately, while all of the major carriers are gradually moving forward with their plans to increase data speeds and network capacity, those updates and changes will not become immediately apparent to the end user until they purchase a phone with the right internal hardware to take advantage of these numerous changes. One common trap that many web developers who target mobiles may fall into, at least early on, is the notion that speed is all one needs to consider when developing a mobile app. If I know my users will need a 3G network to use the feature I’m developing, it might be tempting to skip streamlining other areas of the app, given the fact I know I’ll have a faster data connection. However, as mentioned above, speed isn’t the only factor one needs to consider.The actual processing and software power of the device (i.e., the capabilities of its web browser) can also slow down an app. If you want evidence of this, use your own Smartphone or Tablet on Wi-Fi instead of cellular data and observe how certain sites and apps still lag when connecting to the Internet, despite a connection much faster (generally) than 3G or 4G. We’ll discuss how to avoid programming bloated unresponsive apps as we continue through the book.
Languages and Protocols, Yesterday and Today
Now that we know how fast we can go, we should probably talk a bit about how web pages were shown to handheld users over the past 10 years and the current state of the mobile world.
In the beginning, handheld devices, such as the earliest modern personal digital
the user wanted to read from the web needed to be downloaded first and then stored on the device or cached. A very popular service for this, AvantGo, operated for a little over a decade before closing up shop in 2009. While these services were somewhat
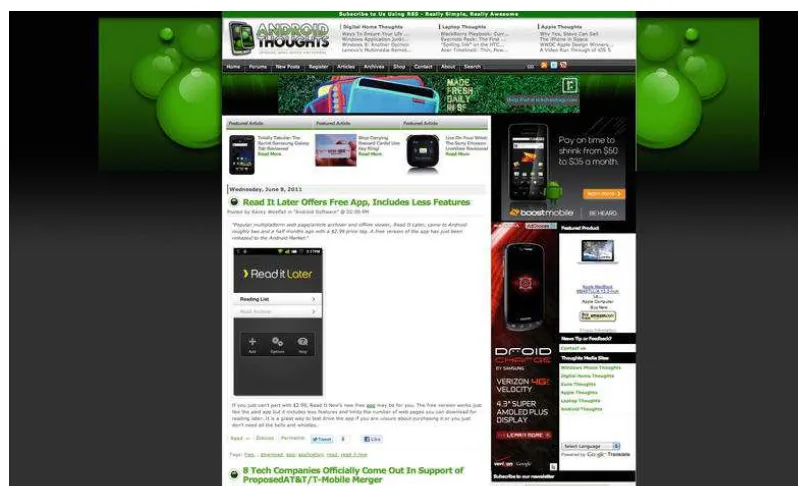
annoying (in that you needed to manually synchronize your PDA physically to your computer regularly to get the content you wanted), they generally presented content in a very basic and easy to read manner. Ironically enough, this type of presentation has experienced a bit of a revival as users today find content while online and otherwise busy (i.e. at work) and wish to save it to read later. One popular service, Read It Later (http://readitlaterlist.com/), even has a mobile client that shows these saved web pages in a similar format to the old “offline cache” system popular in the late 1990s! Figure 1–11 shows a cached article on Read It later.
Figure 1–11. Read It Later, on Android, shows the cached version of a Yahoo! Sports article
CHAPTER 1: Harnessing the Power of the Mobile Web
14
view it wherever they had cell coverage, as opposed to downloading it and reading it offline.
A similar concept to WAP was the Java Platform, Micro Edition, and often abbreviated j2me. j2me allowed users to load small java applets on their phone that could connect to specific services in the same way WAP did, providing a similar experience. While j2me (Java Platform, Micro Edition) was available on phones 2-3 years ago, along with the ever–popular feature phone–friendly Brew MP operating system from Qualcomm, it was limited by odd security settings and precautions that providers might put on a phone. Oddly enough, it was available on phones that already had working web browsers that could go anywhere. This madeone wonder why you might load up a special Gmail j2me applet when you could simply visit the mobile version of Gmail.
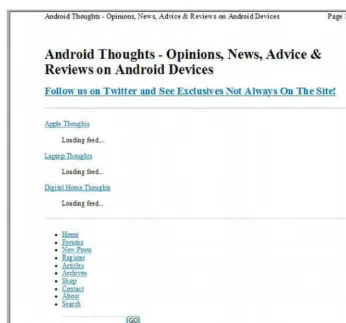
Mobile versions, on the other hand, are generally easier to navigate, as they are specially designed for smaller screens using variants of the HTML language like XHTML or
CHTML. These pages look nice and are very usable, but usually lack specific content.
Figure 1–13. My personal blog, displayed in a mobile view, in a mobile browser
The goal of this book is to help you create mobile optimized versions of a website that contain much the same content as the desktop version might, while still being useable. As you might expect, users who find your page easy to use will be more likely to overlook some missing pieces. However, users who need 20 minutes (or as one of our editors pointed out, 20 seconds!) to find the latest game score or weather report will likely flock elsewhere.
Concepts We Like—And What’s Ahead!
CHAPTER 1: Harnessing the Power of the Mobile Web
16
Concept 1: Think Like A User
Think about a website you own, one you’ve contributed to, or just one that you visit frequently, and ask yourself this: What do most people do when they visit this site? The answer might come quickly. However, it might be worth thinking deeper about just how “average” that answer is.
For example, a friend of mine recently published a few blog posts on The Huffington Post, a site known for the rapidity and outspoken way in which comments are quickly posted on an article. When he sent me the link to his article, I pulled it up and read through it. When I was done, I closed my browser and went about my day. Later in the week, my friend asked me if I saw the article and after I said I had, he asked “What did you think of all those comments?” The answer was simple. I didn’t think anything about those comments, certainly not even enough to read them. However, in his mind, since they were feedback on his own work, the comments were much more interesting than the article itself (after all, to an author, their own work seems pretty familiar and uninteresting). Now imagine if my friend had designed the website on which his work was published. You might not be surprised if you saw user comments highlighted, perhaps even displayed prominently to the side of the article or somewhere else other than at the bottom, in smaller print. For my friend, the “average” user would be more interested in the comments than the article, when in fact, the opposite is likely true. Thankfully, my friend isn’t a programmer. But as programmers, we must keep track of what our users are doing with our website or application. If we focus all of our attention on a feature a user finds trivial, while ignoring needed updates or enhancements to core features users find essential, we may lose those users en masse.
Concept 2: Don’t Annoy the User
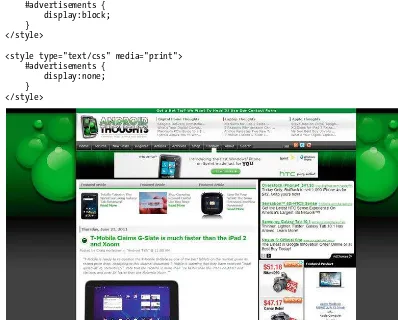
The best example of concept 2 that I can give comes from the evil word “monetization”, or simply the idea that “Hey, I did a lot of work, I’d like some sort of repayment in the form of legal tender!” Monetization typically comes from selling advertising; something that users understand is a fact of life. If you want something for free, you expect that in some way you might be subjected to an ad every now and then to keep it free. Most find this preferable to paying for content and, indeed, many publishers report earning more money through advertising than through sales of their paid products!
However, just because you’re advertising to people doesn’t mean you need to jam advertisements in their face! You need to use tasteful ads, ads thatpique the user’s interest, and ads that don’t annoy the user. Ads in every paragraph or on the top, sides, and bottom of every page are rarely effective.
moving my finger, I got it to log in. The problem would have been solved, if the author of such a page had simply done one of the following:
1. Tested the page with a mobile browser
2. Used a standard web form button
In this instance, form took precedence over function. Don’t get me wrong, fancy designs are fine, as long as they don’t detract from usability.
Concept 3: Test-Retest Reliability
In my (Jon’s) day job, I research how individuals make decisions and the effects of those decisions. In my research life, the concept of test-retest reliability means that results from one run through of a given task should be the same as the second time through (and subsequent). I’ll borrow that concept from research methodology to discuss a view on testing your content.
Similar to Concept 1, users are all different. Most of them will have a slightly different setup than you have when designing a web page or an app. For example, right now I’m using a 27’’ monitor, something that as a designer I find very useful, but wouldn’t expect most people to have. Thus, if I design a web page, I probably shouldn’t assume that people’s browser window is 1565 pixels wide and 912 pixels high, like mine is right now. This becomes especially important when working with smaller screens. Some Android phones and tablets have relatively large screens, while others have smaller screens. Testing your app or web page on a variety of devices (perhaps with the help of friends) ensures that your users get the best and most optimal experience every time they visit the site. One must also be careful about repeat visits, since browsers may cache content it should update. On the other hand, some of the techniques we’ll highlight in future chapters make use of templates or frameworks that will make the browser cache your friend. These techniques reuse content the user has already downloaded!
Concept 4: Keep it Simple Stupid!
Nowadays, you cannot walk down the street without seeing some parent shove their smartphone in front of their toddler’s face to keep them busy on long car rides or while at the store. Before this time of magical touch–based, Internet–enabled phones and tablets and before the time of broadband Internet, which I (Rocco) also like to refer to as "the time before time," it was considered a great privilege to get into a basic computer class. It was one of those things that was expected of someone in primary school to do if they ever wanted to have any sort of successful spreadsheet loving job when they graduated from high school.
CHAPTER 1: Harnessing the Power of the Mobile Web
18
commands?! This is why that entire summer before school started was spent going to the library checking out every computer book I could find to prepare for what I
thoughtmight be in store for my upcoming beginner’s class to computers. That
excitement quickly turned to disappointmentwhen I learned that the world of computers was not as glamorous and exciting as Star Trek and every movie with a computer hacker in it made it appear to be. Instead, the most I learned out of that class was how to make a copy of the Beverly Hills Cop theme song and put it on a floppy disk, as well as how to open a HyperCard application (though strangely enough we never learned to write a HyperCard application.)
That first year, as much of a disappointmentas it was, became the catalyst to my determination/obsession with computersthat lead me to sign up for a computer class again during my seventh grade year. Unbeknownst to me,this computer class, this minuscule hour a day out of my lifewould eventually lead to what has been a lifelong obsession. See, this was the year that AOL was starting to get really popular in the United States.Most importantly, this yearsaw the birth of HTML 2.0. My teacher at the time saw where this technology was going and embraced a vision of a future where information was exchanged freely. Every day in class, he would hammer home that one day the "people that create the Internet pages" (this was before the term Web Developer was coined) would one day be paid as much as doctors and lawyers and would be just as valuable and important. Of course, we all thought he was a crazy old man but his excitement for this future that he envisioned was enough to get me hooked and eventually I started believing in it and preaching it as well. He believed in this vision so much that the only work we had to do all year was create the school’s entire website.
Out of everything I learned from that class, the most important rule I learned was the KISS principle, an acronym for "Keep it Simple Stupid." As much as I loved this teacher for what he gave me in terms of knowledge, there was no denying that he was a grouchy old jerk. Every time we had a brilliant idea for our school's website, such as adding animated GIF flames and sprites of Beavis and Butthead, he would always just say "Keep it simple stupid!" As annoying as it was as a child to constantly be shot down and basically called an idiot daily, it did wonders in teaching me the art of patience and restraint. It made me realize that even though Feature X, Y, and Z would be awesome on any given project I was working on, it was more important to put them on the
backburner so I can get Feature A, B, and C coded and delivered. Now when I am working on a project, I sit down and map out exactly what I need to do to launch my project. I set aside any cool ideas I have for extra features that are not mandatory to a launch so I can work on them later whenthe task at hand will not sidetrack me.
as Twitter. When Twitter was released a few years back, it was a very sparse program built around the very simple idea of "What are you doing now?" As time went on, more new and exciting features were added as needed. Twitter has now developed from a silly little site where you could tell the world what you were eating for lunch into a heavily invested in web application that breaks such newsworthy events as the death of Michael Jackson and even played a vital role in getting information out of Internet–deprived countries in the midst of civil war.
Remember that Rome was not built overnight. It was a constantly evolving empire that was building upon itself everyday and you should look at your next web project the same way. Start small and add on as you can while not overwhelming yourself in the process. In essence—Keep it simple, Stupid!
Coming Up
Now that we’ve talked about the nuts and bolts of web design, the acronyms, the odd stories, and the concepts, let’s talk a little bit about what you’ll find in this book. Starting off in the next chapter (just pages away!), we’ll develop a simple application utilizing one of the most popular services on the Web today, Twitter. Twitter is a great web phenomenon so we’ll stick with it for another small application in Chapter 3. Then we’ll take a step back and look at the bigger picture—issues like how you develop an app in the first place (Chapter 4), and how to deal with different screen resolutions and browser platforms (Chapters 5 & 6). In Chapter 7 we’re going to show off jQuery
Mobile—and importantly, show you how to make your app look professional and ‘pretty’ with it. Chapter 8 will continue with this theme by showing off some nice resources to use in your user interface design. With that out of the way, we’ll play around with location based and cloud based applications, and then finish the book with discussions on using audio and video, Ajax, and prepping your product to ‘ship’. It’s a lot of material to cover, but we know you’re up for the trip! Also, if you haven’t noticed, our trend is to give you a lot of information by example, then move back into a more textbook–like narrative. This way, hopefully, you’ll stay engaged through this nail–biter of a computer book! (OK, that was a bit sarcastic, although we truly hope this approach will make for “fun” reading.)
Chapter
Twitter Applications:
Who's That Tweet?
Now that we have covered what we will be learning throughout the course of this book, it’s time to get our hands dirty by jumping in and creating our first mobile web
applications. Both of these applications will be very simple applications that interact with the Twitter API. An API, or an application programming interface, is an interface used to interact with a specific application based off a set of rules or parameters given to the application by the user. More often than not, one would use an API to gather and parse data from the application’s infrastructure without ever needing to directly connect to the application’s database to fetch that information.
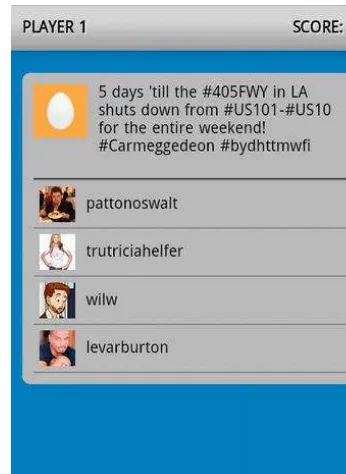
The first application we will build is the application “Who's That Tweet?”, which will parse through a small predefined list of verified Twitter users and display a random tweet on the page, as well as a list of four possible individuals that might have created that tweet.
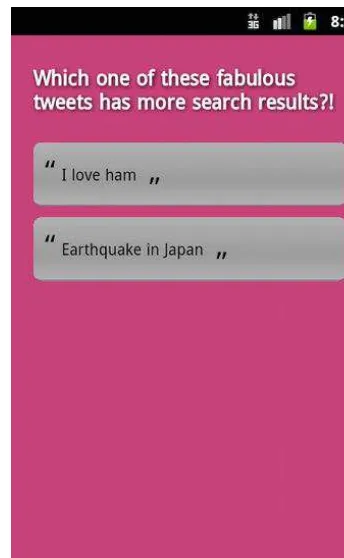
The second small web application we will build is called “I Love Ham”, which will also be borrowing Twitter's fire hose of data to create a quick and fun form of entertaining for mobile users on the go. “I Love Ham” will focus on very basic game mechanics. The user is presented with two predefined rhyming Twitter searches to choose from. If they choose the Twitter search that receives the most results back, then they are the winners. Both of these mobile web games will rely heavy on HTML5, JavaScript, and a fantastic piece of technology called JSONP.
In this chapter, we’ll get you up and running with a development environment on your own personal computer (think of it as your own mini-Internet, which will connect to Twitter on the real Internet, but mostly live just on your computer) and discuss the Who’s That Tweet? application. In the next chapter, we’ll continue by discussing the I Love Ham application. Let’s get started!
JSONP
You might remember us talking about JSON in chapter one. JSON is a wonderful piece of technology and chances are if you have worked in the web development field in the past few years, then you have probably run across it once or twice. If you’ve surfed the web in the past day, you’ve also probably run across a website using it! If you have ever worked with the APIs of Flickr, Twitter, or Gowalla, then chances are you are also very familiar with JSON. For those that skipped over chapter one completely, JSON is a human readable data interchange technology that is made to be lightweight and is also an open standard. As a technology, JSON is fairly young with its usage being traced back originally to a little after the turn of the century with the JSON.org
(http://www.json.org) website launching in 2002.
If you are familiar using JavaScript and creating objects, then JSON should look relatively familiar to you. However, JSON is to not be confused with a JavaScript object as they are not the same. As much as I love JSON, there is one tiny little annoying thing that most developers are not aware of until they spend hours ripping out their own hair prematurely making themselves go bald and that is a really nasty, little, pesky thing called cross-domain scripting.
To understand what cross-domain scripting is and why there are hardcoded rules in place in your browser to prevent you from doing it, you have to first understand what cross-site scripting (XSS) is. XSS is a type of vulnerability in web sites and applications that allows an attacker or intruder to basically inject their own scripts and content into the site or system. An intruder might use an XSS vulnerability to upload a script to your server that would allow them to simulate a Bash shell (a common UNIX shell or
command-line interface) for your server in their very own browser, or worse yet, possibly use that vulnerability to steal thousands of usernames and passwords from your
database.
Due to these concerns, your browser will not load JSON data from a domain outside of your site’s server in most cases. In order to grab and use that data, it would have to be grabbed on the backend server side before the page is loaded and then served to the user. This doesn’t seem like that big of a deal until you start building applications that have thousands upon thousands of users. Then parsing that external data can end up impacting the performance of your server. To get around this performance issue and delegate some of those external data parsing requirements to the end user, we will use JSONP or “JSON with padding”, which will allow our application to request the JSON data we need because it will be wrapped (or padded) within a JavaScript object.
Setting Up Your Development Environment
CHAPTER 1: Twitter Applications: Who's That Tweet?
23
Windows–based systems but chances are, if you are using Linux or OS X, then you are already familiar with setting up an *AMP environment for testing.
For our testing environment, we will be using the open source and freely available WAMP server called Uniform Server (http://www.uniformserver.com/). You can download the WAMP server from their website. The version I am using, and the version that will be shown in the screenshots in this chapter, will be from version “7.1.2–Orion.” Setting up the test environment is fairly simple. Just find the downloaded file that you grabbed from the website and run the self-extracting EXE file. Once you do that, open the folder. Before running the server, I wanted to go over a few helpful programs that the Uniform Server team included to make our lives easier. The first application is called Pre-Check (Run_pre_check.exe).1
Let’s run this application and look at the results in Figure 2–1.
Figure 2–1. Uniform Server’s Pre-Check application showing that ports 80 and 443 are currently in use
As you can see, if I tried to run the server at this moment in time, it would fail. I currently have Skype open and it is running on the classic HTTP ports (Ports 80 and 443) that I need to run the server. There’s a one program to port rule in networking, so we need to do a bit of simple tweaking. While you do have the ability to edit some configuration files to change which ports you will use, for the sake of simplicity, I will just shut down Skype so we can run on a default set up.
Now that we have freed up our ports, we can run the “Start.exe” application that will open up and place an icon in your system tray. Right click the Uniform Server icon in your system tray. It looks like a blue box with the numeral 1 in it as seen in Figure 2–2 below. Choose the “Install and Run All Services” option at the top of the menu. Now, if you open up your web browser and point it toward http://localhost/, you should be
1
presented with the default Uniform Server starter page (localhost is simply another name for the computer you’re currently working on, as is the IP address 127.0.0.1).
Figure 2–2. Uniform Server menu as seen in your system tray
CHAPTER 1: Twitter Applications: Who's That Tweet?
25
Figure 2–3. The default WWW folder view that will house your application project files
Now that you have managed to set up your own web server for local development and cleaned up the root folder, it is time to start some coding! If you need any help with your Uniform Server or just want to dig around a little deeper to see what you can do with this server, you can run the “help.bat” batch file in the Uniform Server directory and that will present you with some very in-depth documentation (see Figure 2–4).
Your First Mobile Web Application
Grab yourself some coffee and do a little stretching because now it is time to start some coding. The first application we are building, “Who’s That Tweet?”, will be a small and simple game that takes a collection of verified Twitter users and celebrities and
randomly displays one of their tweets. The user will then be presented with a list of four Twitter users that could have possibly created that Twitter post. If the end user chooses the right Twitter user to go along with that post, then they will get 100 points added to their score and move on to the next random post. If not, they will be presented with a visual cue that their guessing skills were inferior and will move on to the next random Twitter post.
The first thing we are going to do is create a very basic HTML layout, or foundation, for our game. After that, we will move on to styling that bland skeleton layout with a little CSS3 and, once it looks pretty, we will finally move on to writing our JavaScript, which will tie everything together in our first mobile web application.
The HTML
Listing 2–1 contains the basic HTML for our game. Listing 2–1. Basic HTML for Who’s That Tweet?
<!DOCTYPE HTML> <html>
<head>
<meta charset="utf-8">
<meta name="viewport" content=" initial-scale=1.0; maximum-scale=1.0; minimum-scale=1.0; user-scalable=0;" />
<div class="score"><strong>Score:</strong> <span>0</span></div> <h2>Player 1</h2>
CHAPTER 1: Twitter Applications: Who's That Tweet?
27
web development is the use of the meta element with the name “viewport”. This element is extremely important when it comes to mobile design and development, and we’ll talk more about it in Chapter 10. With it, you can control whether or not a user can zoom the content on your page or even how much the user can zoom into your page. Here we have the zoom of our viewport set to the default value and have turned off the option to let the user zoom in and out of the page so we do not have to worry about an end user accidentally double tapping the display causing your soon-to-be web application to zoom in or out while frustrating your user.
Once inside the body element, you might notice that we are using several of the “new” HTML5 elements such as header and section. The header element is a newer tag that is used to semantically structure your code to indicate the introduction to a page or article on the web. In our header area, we are using it to house the current score of the player, which we will update after each round with JavaScript, as well as the player’s name. Keeping simplicity in mind for the sake of this demo, we will leave the player named Player 1.
Next up we have the section element, which is used to house the main content of our demo. Like header, the section element is a new HTML5 tag that is used to semantically mark the section of a document or a page. Back in the old xHTML days, we would usually designate sections of a page with a tidal wave of endless div tags, which could be extremely confusing to search engines and screen readers for the visually impaired. Now, with the proper use of the section tag, it should be fairly trivial for search engines and screen readers to better guess at what information on the page is the important information that should be read aloud or searched.
Inside the main content section of the page, we have a div container with the ID of tweet, which will be used to house the random tweet that we pull from the array of verified users, as well as an empty ul (unordered list) element that will be used to contain the four random verified Twitter users that we will display to the end user.
Inside of the #tweets container, we see two div containers–.avatar and .content. For those who are unfamiliar with CSS, anytime you see the hash tag (#) when referring to code in this book, it means that we are referring to the ID of an element. If we are referring to a tag by its class attribute, it will have a period sign in front of it as, such as .avatar above.
Now that we have the basic structure setup, it is time for one of my favorite parts of the whole process–styling the page with CSS!
The CSS
With the CSS here, we are not going to do anything super fancy. However, we will take advantage of Android's Webkit2
rendering engine to use some of the newer CSS3 features that have become popular over the past couple years. Let us start off with some basic styling resetting and general layout styles and then crawl through our CSS file section by section. In Listing 2–2, we will comb through the basic HTML elements on the page and reset their margin and padding, or how they are spaced apart from each other on the page, as well as reset the size of fonts and the type of font used throughout the document.
Listing 2–2. Who’s That Tweet? CSS File – Part 1
/*** RESET ***/
font-family: 'Droid Sans', Arial, Helvetica, sans-serif; background:#06c;
} h2 {
font-size:14px; }
If you have written any CSS in the past, this first bit of styling code should look very basic and familiar. We start off by resetting the margin and padding of several of the page elements to zero to guarantee that whatever styles we assign to the page will be positioned correctly across the vast array of Android–powered devices. This can be important especially when you keep in mind that Android is a rapidly developing platform with newer versions being released two times a year or more.
Next thing we are doing is removing any bullets that might be attached to unordered lists (ul) and list items (li) elements and then setting the pages default font and font size, as well as the applications background color.
Last but now least, we will be utilizing the “Droid Sans” web font. See, over the past couple years as the web has been evolving, designers and developers alike have been screaming and begging for a new and easier way to use those gorgeous fonts you see time and again in print advertisements on their applications and web sites they are working on. I mean seriously, who wants to stare of Arial or Times New Roman all day
2
CHAPTER 1: Twitter Applications: Who's That Tweet?
29
long? One of the incredible features of CSS3 is the use of including True Type fonts in your project. From now on, you don't have to rely on poorly compressed images or horribly intrusive Flash solutions to utilize beautiful typography.
Google has even gone out of their way to do us a favor by creating a free and open database of web safe fonts to be used to your heart's content. You can visit the Google Web Fonts website at http://www.google.com/webfonts. Once you find a font that you would like to use, Google will give you some HTML code to add to your layout to load the fonts into your browser and call it from your CSS file, as we have called “Droid Sans” as our page’s default font (see Figure 2–5).
Figure 2–5. Viewing the Droid Sans font on the Google Web Fonts website
In Listing 2–3, we will provide the user with a stylish header that will rest on the top of their browser and will house the player's fake name as well as their score.
Listing 2–3. Who’s That Tweet? CSS File, Part 2
/*** HEADER ***/ header {
width:100%; font-weight:bold;
text-transform:uppercase;
text-shadow: 1px 1px 1px rgba(255,255,255,0.5); line-height:40px;
background-image: -webkit-gradient( linear,
left bottom, left top,
color-stop(0, rgb(135,135,135)), color-stop(0.8, rgb(201,201,201)) );
-webkit-box-shadow:0 0 15px rgba(0,0,0,0.5); box-shadow:0 0 15px rgba(0,0,0,0.5);
} .score {
float:right; margin-right:10px; }
The HEADER section of the CSS is where we will have a little fun and utilize some of the magic of CSS3. Before the widespread use of CSS3, if you wanted to create a section of your page that made use of a gradient background, then you would have to rely on creating images in a graphics design program and splice them to suite your needs. Now, just like magic, you can add some not-as-simple-as-it-should-be code to your CSS to create the same gradient effects you would get with Photoshop with just a few lines of code. On top of those new nifty gradients, we can also add in a drop shadow to our header with only one tiny little line of CSS code. It’s like magic!
Listing 2–4 could be considered the entree of our CSS file in that it contains a majority of the properties that will be used to make our page look awesome.
Listing 2–4. Who’s That Tweet? CSS File, Part 3
/*** SECTION ***/
-webkit- box-shadow:0 0 20px rgba(0,0,0,0.5); box-shadow:0 0 20px rgba(0,0,0,0.5);
section.fail li, section.win li { border-bottom:1px solid #fff; }
CHAPTER 1: Twitter Applications: Who's That Tweet?
31
section li .avatar img { width:32px;
The section portion of the CSS, like the HTML document before it, is where most of the magic happens. The first thing you should notice is another new nifty feature of CSS3 created by the Powers That Be to make our lives easier–border–radius. Now, instead of spending hours trying to splice together images correctly to have rounded corners in your document, or worse, relying on bloated JavaScript libraries to take care of our border radius needs, we can pass off that work to the browser’s rendering engine and be done with it.
Here we utilize the border-radius CSS property to give our section container a nice modern smartphone look and then top it off with a nice drop shadow. Afterward, we define two sets of styles for the .win and .fail classes that we will call each round via JavaScript as a visual indicator of whether the user chose correctly.
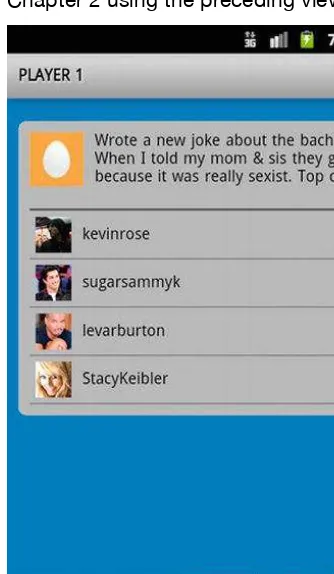
Figure 2–6. Who's That Tweet? running in an Android 2.3 web browser
CHAPTER 1: Twitter Applications: Who's That Tweet?
33
Figure 2–8. Who's That Tweet? display after selecting the right poster of the tweet
The JavaScript
Now that we have our page laid out and styled, it is time to make it dynamic with some JavaScript. All of the application demos throughout this book will make use of the jQuery JavaScript framework. If you are unfamiliar with jQuery, it is a fantastic, JavaScript library that is used the world over and makes cross-platform JavaScript development trivial when compared to the olden days of Internet Explorer 6’s dominance.
There is a bit of JavaScript here, so I will break it up as I did with the CSS before it and explain what is going on one section at a time. When coding up this demo, I added a slew of helpful comments in the code along the way that should further help those new developers amongst us in understanding what is going on.
Listing 2–5 will walk us through a set of default variables that will be used in our application, as well as give us a very meaty array filled with some of Twitter's most popular verified users.
Listing 2–5. Who’s That Tweet? Javascript File, Part 1
/**
Twitter accounts that we will use
Here we define a few global variables that will be used throughout the application. The first being the defaultIcon variable which contains a long URL for the image of the default user Twitter avatar we will be using throughout the script. We could have done without the variable and just added the code to our script when we needed it but it is always good practice when coding to cache as much of your code for reuse as possible. Now when we want to add the defaultIcon anywhere in our script, we do not have to remember some big long complicated URL that in most cases will just visually muck up our code.
Next we create an empty array called currentRound which will house all of the data we pull in from Twitter for the round we are on. We create a predefined array of verified users to randomly choose from. For this list, I just did a Google search for verified Twitter users and copied the names of all the users I found on the first page of the Google search.
If this were a real game based off of the Twitter API and not a demo, we would want to utilize an online server with a list of all Twitter verified accounts but, since we are starting small, an array will work just fine for now.
CHAPTER 1: Twitter Applications: Who's That Tweet?
35
Listing 2–6. Who’s That Tweet? Javascript File, Part 2
// this function will grab a random user from // the tweets array.
function getRandom() {
var l = tweets.length; // grab length of tweet array var ran = Math.floor(Math.random()*l); // grab random user
// check if randomly selected user is in list if(currentRound.indexOf(tweets[ran]) == -1) { if(currentRound.length == 0)
In Listing 2–7, our next function will go through and select a random user from our tweets array and then grab three other random users for the user to choose between as seen in the function getRandom(). In this function, we use the JavaScript Math object to do the heavy lifting in choosing our random user.
Listing 2–7. Who’s That Tweet? Javascript File, Part 3
// grab the user avatars for users in currentRound array function buildQuiz() {
var l = currentRound.length; for(i=0;i<l;i++) {
currentRound = [];
$('ul, section').removeClass(); $('ul').empty();
getRandom();
//display the default twitter account icon
$('#tweet .avatar').html('<img src="' + defaultIcon + '" alt="" />');
//grab a random tweet from the correct user
$.getJSON('https://twitter.com/status/user_timeline/' + correct + '.json?count=10&callback=?', function(data) { currentRound.sort(function() {return 0.5 - Math.random()});
// grab avatars and display usernames buildQuiz();
}); }
In our next two functions, we will initiate the application by calling the function init(). This function resets all the variables to start a fresh new game, parses the JSONP Twitter API feed for the randomly selected verified Twitter account, and then passes everything off to be built and displayed to the user through the buildQuiz() function.
Once the document loads into the browser and the DOM (Document Object Model - a cross-platform representation of all of the objects in an HTML document) is ready to be manipulated, the code below (Listing 2–8) runs. In jQuery, you can run your code when the document is ready–the ondocumentready event in JavaScript land–by using the following shorthand $(function() { ... code goes here });
Once the document is ready, we will call the init() function, which will reset everything on the page, grab a random user, and build the quiz as we went through before. We will also assign the click event to all list items that will be written to the page so they end up working like buttons. Once a user clicks a list item, the application will replace the defaultIcon with the correct avatar from the user that posted the Tweet, update the score if the user chooses correctly, and assign the gameover class to the game, which will then tell the application to start a new round if the screen is tapped again.
Listing 2–8. Who’s That Tweet? Javascript File, Part 4
CHAPTER 1: Twitter Applications: Who's That Tweet?
37
var img = $('li[rel="' + correct + '"] img').attr('src'); var score = $('.score span');
// restart the game if game over if($('ul').hasClass('gameover')) { init();
} else {
// swap out default avatar for correct avatar $('#tweet .avatar img').attr('src', img);
if(name == correct) {
score.text(parseInt(score.text())+100); $('section').addClass('win');
} else {
$('section').addClass('fail'); }
// add gameover class to page $('ul').addClass('gameover'); }
}); });
And there you have it! For those of you coding along, congratulations, you have officially completed your first mobile web application. You can fire up your trusted Android device now (if you haven't already done so already), connect to the same network that your computer is on, and view your new application on it. To do so, just point your device’s browser to the IP address of your computer. You can find your IP address by opening a command prompt (Windows) and running the ipconfig command (see Figure 2–9) or by opening a terminal (OS X/Linux) and running the ifconfig command.
Summary
Chapter
Twitter Applications:
I Love Ham
Now that we have one mobile web application under our belt, I want us to explore using the Twitter API to do something a little different from the same old classic “displaying Twitter messages applications” that are cropping up left and right. As we discussed in Chapter 2, using the Twitter API gives you access to the alwaysplentiful “fire hose” of data that can be used for all types of applications and games—basically anything you can imagine.
One idea for which I have always loved using Twitter came from a series of old web shows that were around a few years ago. While the name of this game changed from show to show, the main principle behind the game was always the same. A user is presented with two different search terms that rhyme and would have to guess which term results in a higher number of tweets. While the rules are simple, this little game, which we will build and call “I Love Ham,” can yield hours of fun. So without further ado, let’s fire up our local development environments and start writing some code!
The HTML
The following, Listing 3–1, sets up the basic HTML document that will become the basis for our application.
Listing 3–1. HTML for I Love Ham <!DOCTYPE HTML>
<html> <head>
<meta charset="utf-8"> <title>I Love Ham</title>
<linkhref='http://fonts.googleapis.com/css?family=Droid+Sans&v1' rel='stylesheet' type='text/css'>
<linkrel="stylesheet" type="text/css" href="css/style.css">
<script type="text/javascript" src="js/jquery-1.6.1.min.js"></script>
<meta name="viewport" content="width=320, height=device-height, user-scalable=no, initial-scale=1.0, maximum-scale=1.0, minimum-scale=1.0" />
</head> <body> <section>
<h2>Which one of these fabulous tweets has more search results?!</h2> <ul id="choices">
</ul> </section> </body> </html>
The HTML markup that we are using in this application is going to be a bit sparser than it was in “Who's That Tweet?”, the previous application we built, and it looks pretty similar too! For the sake of simplicity, I left the naming convention of the folder tree layout pretty much the same (see Figure 3–1):
/index.html
/css/styles.css
/js/main.js
Figure 3–1.A clean and easy to read file structure, as seen in Adobe Dreamweaver CS 5.5, will save you plenty of time and frustration down the road!
CHAPTER 3: Twitter Applications: I Love Ham
41
glance, and consistent throughout projects. If you end up naming files
“supercooldocument12-667.html,” you make the documents harder for your end users to find, and it can cause issues down the road if you ever come back to your application to make future updates and edits.(Trust us: you’ll completely forget what those files do.) Another tip would be to name files with the current date or to use a version control system to keep things straight. So remember, when it comes to naming files, keep it simple and/or meaningful!
The CSS
Our CSS is going to look similar to the previous application we built, as well. There are a few key differences here and there and a few neat CSS properties that we are
showcasing in this application, such as the text-shadowCSS property, which allows you to apply some pretty fantastic shadow effects to your text live in the client’s browser. This doesn’t rely on having a designer to whip up some overly compressed image with the new fancy text as we would have done back in the old days (and by old days, I mean a few years ago!).
Listing 3–2 covers the basic resetting of spacing and font sizes of common elements that will be used throughout our application.
Listing 3–2. CSS for I Love Ham -Part 1
Our h2 tag is going to be the lucky recipient of our text-shadow. If you look in the HTML markup for this application, you can see that this h2 tag houses a blurb of text that will be presented to the user. Depending on the current state of the game, the text will change up to four times and will be updated by the application’sJavaScript. As previouslymentioned, if we were doing this the old way, we would have had to create four separate images containing the text we wanted and either manually inject those images into the page when needed or assign them as background images to CSS classes to be assigned to our blurb container as needed. While that would not have been hard to do, it would have required more code to be written as well as more graphical resources to be loaded on the device, which if the user is in an area with a slow data connection, can cause a noticeable moment of lag or cause the user to become emotionally disconnected fromyour app!
In Listing 3–3, we’re going to set up the list items:
Listing 3–3. CSS for I Love Ham– Part 2
background:-webkit-gradient(linear, 0% 0%, 0% 100%, from(#a1a1a1), to(#A1A1A1), color-stop(.6,#8A8A8A));
-webkit- box-shadow:0 0 20px rgba(0,0,0,0.5); box-shadow:2px 2px 10px rgba(0,0,0,0.8); }
CHAPTER 3: Twitter Applications: I Love Ham
43
Now, these selectors are neat, as they allow you to add content either before or after the element they are attached to. Here, I am attaching them to the blockquote element, which is an older HTML element used to semantically mark that content as a quote that should stand out from the rest on thepage.
Now, if you look at the content property, you might be a little confused. In most cases, people usually add something meaningful to this field like a “>” in place of bullets on an unordered list, or an ellipsis after a blurb of content that links back to an article. Not a lot of people are aware, however, that you can also include Hex code in this property to display characters that are not commonly found on the keyboard, such as the quotation marks I want to add at the beginning and end of my blockquote content!