Ruby Best Practices
Gregory Brown
foreword by Yukihiro “Matz” Matsumoto
Ruby Best Practices
by Gregory Brown
Copyright © 2009 Gregory Brown. All rights reserved. Printed in the United States of America.
Published by O’Reilly Media, Inc., 1005 Gravenstein Highway North, Sebastopol, CA 95472.
O’Reilly books may be purchased for educational, business, or sales promotional use. Online editions are also available for most titles (http://my.safaribooksonline.com). For more information, contact our corporate/institutional sales department: 800-998-9938 or [email protected].
Editor: Mike Loukides
Production Editor: Sarah Schneider
Copyeditor: Nancy Kotary
Proofreader: Sada Preisch
Indexer: Ellen Troutman Zaig
Cover Designer: Karen Montgomery
Interior Designer: David Futato
Illustrator: Robert Romano
Printing History:
June 2009: First Edition.
O’Reilly and the O’Reilly logo are registered trademarks of O’Reilly Media, Inc. Ruby Best Practices, the image of a green crab, and related trade dress are trademarks of O’Reilly Media, Inc.
Many of the designations used by manufacturers and sellers to distinguish their products are claimed as trademarks. Where those designations appear in this book, and O’Reilly Media, Inc. was aware of a trademark claim, the designations have been printed in caps or initial caps.
While every precaution has been taken in the preparation of this book, the publisher and author assume no responsibility for errors or omissions, or for damages resulting from the use of the information con-tained herein. In March 2010, this work will be released under the Creative Commons Attribution-Noncommercial-Share Alike 3.0 License. To view a copy of this license, visit http://creativecommons.org/ licenses/by-nc-sa/3.0/ or send a letter to Creative Commons, 171 2nd Street, Suite 300, San Francisco, California, 94105, USA.
ISBN: 978-0-596-52300-8
[M]
Table of Contents
Foreword . . . ix
Preface . . . xi
1. Driving Code Through Tests . . . 1
A Quick Note on Testing Frameworks 2
Designing for Testability 2
Testing Fundamentals 10
Well-Focused Examples 10
Testing Exceptions 11
Run the Whole Suite at Once 13
Advanced Testing Techniques 14
Using Mocks and Stubs 14
Testing Complex Output 22
Keeping Things Organized 26
Embedding Tests in Library Files 27
Test Helpers 27
Custom Assertions 29
Conclusions 30
2. Designing Beautiful APIs . . . 31
Designing for Convenience: Ruport’s Table( ) feature 31 Ruby’s Secret Power: Flexible Argument Processing 35
Standard Ordinal Arguments 36
Ordinal Arguments with Optional Parameters 36
Pseudo-Keyword Arguments 37
Treating Arguments As an Array 38
Ruby’s Other Secret Power: Code Blocks 40
Working with Enumerable 41
Using Blocks to Abstract Pre- and Postprocessing 43
Blocks As Dynamic Callbacks 45
Blocks for Interface Simplification 47
Avoiding Surprises 48 Use attr_reader, attr_writer, and attr_accessor 48
Understand What method? and method! Mean 50
Make Use of Custom Operators 53
Conclusions 55
3. Mastering the Dynamic Toolkit . . . 57
BlankSlate: A BasicObject on Steroids 57
Building Flexible Interfaces 62
Making instance_eval( ) Optional 63
Handling Messages with method_missing( ) and send( ) 65
Dual-Purpose Accessors 69
Implementing Per-Object Behavior 70
Extending and Modifying Preexisting Code 74
Adding New Functionality 75
Modification via Aliasing 79
Per-Object Modification 81
Building Classes and Modules Programmatically 84
Registering Hooks and Callbacks 88
Detecting Newly Added Functionality 89
Tracking Inheritance 91
Tracking Mixins 93
Conclusions 96
4. Text Processing and File Management . . . 99
Line-Based File Processing with State Tracking 99
Regular Expressions 103
Don’t Work Too Hard 105
Anchors Are Your Friends 105
Use Caution When Working with Quantifiers 106
Working with Files 109
Using Pathname and FileUtils 109
The tempfile Standard Library 112
Automatic Temporary Directory Handling 113
Collision Avoidance 113
Same Old I/O Operations 114
Automatic Unlinking 114
Text-Processing Strategies 115
Advanced Line Processing 116
Atomic Saves 118
5. Functional Programming Techniques . . . 121
Laziness Can Be a Virtue (A Look at lazy.rb) 121
Minimizing Mutable State and Reducing Side Effects 129
Modular Code Organization 133
Memoization 138
Infinite Lists 145
Higher-Order Procedures 149
Conclusions 152
6. When Things Go Wrong . . . 153
A Process for Debugging Ruby Code 153
Capturing the Essence of a Defect 157
Scrutinizing Your Code 160
Utilizing Reflection 160
Improving inspect Output 162
Finding Needles in a Haystack 166
Working with Logger 168
Conclusions 176
7. Reducing Cultural Barriers . . . 177
m17n by Example: A Look at Ruby’s CSV Standard Library 178
Portable m17n Through UTF-8 Transcoding 182
Source Encodings 183
Working with Files 183
Transcoding User Input in an Organized Fashion 185
m17n in Standalone Scripts 188
Inferring Encodings from Locale 189
Customizing Encoding Defaults 191
m17n-Safe Low-Level Text Processing 193
Localizing Your Code 195
Conclusions 204
8. Skillful Project Maintenance . . . 205
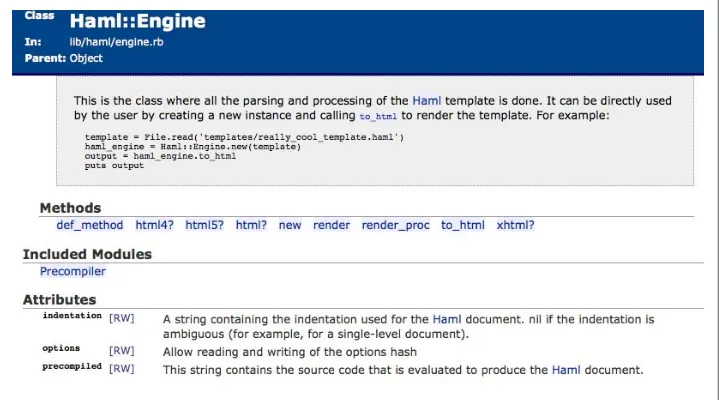
Exploring a Well-Organized Ruby Project (Haml) 205
Conventions to Know About 210
What Goes in a README 211
Laying Out Your Library 213
Executables 216
Tests 216
Examples 217
API Documentation via RDoc 219
Basic Documentation Techniques and Guidelines 220
Controlling Output with RDoc Directives 222
The RubyGems Package Manager 227
Writing a Gem::Specification 228
Working with Dependencies 231
Rake: Ruby’s Built-in Build Utility 234
Conclusions 237
A. Writing Backward-Compatible Code . . . 239
B. Leveraging Ruby’s Standard Library . . . 251
C. Ruby Worst Practices . . . 283
Foreword
In 1993, when Ruby was born, Ruby had nothing. No user base except for me and a few close friends. No tradition. No idioms except for a few inherited from Perl, though I regretted most of them afterward.
But the language forms the community. The community nourishes the culture. In the last decade, users increased—hundreds of thousands of programmers fell in love with Ruby. They put great effort into the language and its community. Projects were born. Idioms tailored for Ruby were invented and introduced. Ruby was influenced by Lisp and other functional programming languages. Ruby formed relationships between technologies and methodologies such as test-driven development and duck typing. This book introduces a map of best practices of the language as of 2009. I’ve known Greg Brown for years, and he is an experienced Ruby developer who has contributed a lot of projects to the language, such as Ruport and Prawn. I am glad he compiled his knowledge into this book.
His insights will help you become a better Ruby programmer.
—Yukihiro “Matz” Matsumoto June 2009, Japan
Preface
Some programming languages excel at turning coders into clockwork oranges. By enforcing rigid rules about how software must be structured and implemented, it is possible to prevent a developer from doing anything dangerous. However, this comes at a high cost, stifling the essential creativity and passion that separates the masterful coder from the mediocre. Thankfully, Ruby is about as far from this bleak reality as you can possibly imagine.
As a language, Ruby is designed to allow developers to express themselves freely. It is meant to operate at the programmer’s level, shifting the focus away from the machine and toward the problem at hand. However, Ruby is highly malleable, and is nothing more than putty in the hands of the developer. With a rigid mindset that tends to overcomplicate things, you will produce complex Ruby code. With a light and unen-cumbered outlook, you will produce simple and beautiful programs. In this book, you’ll be able to clearly see the difference between the two, and find a clear path laid out for you if you choose to seek the latter.
A dynamic, expressive, and open language does not fit well into strict patterns of proper and improper use. However, this is not to say that experienced Rubyists don’t agree on general strategies for attacking problems. In fact, there is a great degree of com-monality in the way that professional Ruby developers approach a wide range of chal-lenges. My goal in this book has been to curate a collection of these techniques and practices while preserving their original context. Much of the code discussed in this book is either directly pulled from or inspired by popular open source Ruby projects, which is an ideal way to keep in touch with the practical world while still studying what it means to write better code.
If you were looking for a book of recipes to follow, or code to copy and paste, you’ve come to the wrong place. This book is much more about how to go about solving problems in Ruby than it is about the exact solution you should use. Whenever some-one asks the question “What is the right way to do this in Ruby?”, the answer is always “It depends.” If you read this book, you’ll learn how to go with the flow and come up with good solutions even as everything keeps changing around you. At this point, Ruby stops being scary and starts being beautiful, which is where all the fun begins.
Audience
This book isn’t really written with the Ruby beginner in mind, and certainly won’t be very useful to someone brand new to programming. Instead, I assume a decent technical grasp of the Ruby language and at least some practical experience in developing soft-ware with it. However, you needn’t be some guru in order to benefit from this book. The most important thing is that you actually care about improving the way you write Ruby code.
As long as you have at least an intermediate level of experience, reading through the book should be enjoyable. You’ll want to have your favorite reference book handy to look things up as needed. Either The Ruby Programming Language by David Flanagan and Yukihiro Matsumoto (O’Reilly) or Programming Ruby, Third Edition, by Dave Thomas (Pragmatic Bookshelf) should do the trick.
It is also important to note that this is a Ruby 1.9 book. It makes no attempt to provide notes on the differences between Ruby 1.8 and 1.9 except for in a brief appendix de-signed specifically for that purpose. Although many of the code samples will likely work with little or no modifications for earlier versions of Ruby, Ruby 1.9 is the way forward, and I have chosen to focus on it exclusively in this book. Although the book may still be useful to those maintaining legacy code, it is admittedly geared more toward the forward-looking crowd.
About This Book
This book is designed to be read by chapter, but the chapters are not in any particular order. The book is split into two parts, with eight chapters forming its core and three appendixes included as supplementary material. Despite the fact that you can read these topics in any order that you’d like, it is recommended that you read the entire book. Lots of the topics play off of each other, and reading through them all will give you a solid base in some powerful Ruby techniques and practices.
Each of the core chapters starts off with a case study that is meant to serve as an intro-duction to the topic it covers. Every case study is based on code from real Ruby projects, and is meant to provide a practical experience in code reading and exploration. The best way to work through these examples is to imagine that you are working through a foreign codebase with a fellow developer, discussing the interesting bits as you come across them. In this way, you’ll be able to highlight the exciting parts without getting bogged down on every last detail. You are not expected to understand every line of code in the case studies in this book, but instead should just treat them as useful exercises that prepare you for studying the underlying topics.
the latter when necessary to keep things easy to understand. Some code samples will be easy to run as they are listed; others might only be used for illustration purposes. This should be easy enough to figure out as you go along based on the context. I wholeheartedly recommend running examples when they’re relevant and stopping fre-quently to conduct your own explorations as you read this book. The sections are kept somewhat independent of one another to make it easy for you to take as many breaks as you need, and each wraps up with some basic reminders to refresh your memory of what you just read.
Although the core chapters are the essential part of this book, the appendixes should not be overlooked. You’ll notice that they’re slightly different in form and content from the main discussion, but maintain the overall feel of the book. You’ll get the most out of them if you read them after you’ve completed the main part of the book, as they tend to assume that you’re already familiar with the rest of the content.
That’s pretty much all there is to it. The key things to remember are that you aren’t going to get much out of this book by skimming for content on a first read, and that you should keep your brain engaged while you work your way through the content. If you read this entire book without writing any code in the process, you’ll probably rob yourself of the full experience. So pop open your favorite editor, start with the topic from the chapter listing that interests you most, and get hacking!
Conventions Used in This Book
The following typographical conventions are used in this book:
Italic
Indicates new terms, URLs, email addresses, filenames, and file extensions.
Constant width
Used for program listings, as well as within paragraphs to refer to program elements such as variable or function names, databases, data types, environment variables, statements, and keywords.
Constant width bold
Shows commands or other text that should be typed literally by the user. Constant width italic
Shows text that should be replaced with user-supplied values or by values deter-mined by context.
Using Code Examples
This book is here to help you get your job done. In general, you may use the code in this book in your programs and documentation. You do not need to contact us for permission unless you’re reproducing a significant portion of the code. For example, writing a program that uses several chunks of code from this book does not require
permission. Selling or distributing a CD-ROM of examples from O’Reilly books does require permission. Answering a question by citing this book and quoting example code does not require permission. Incorporating a significant amount of example code from this book into your product’s documentation does require permission.
We appreciate, but do not require, attribution. An attribution usually includes the title, author, publisher, and ISBN. For example: “Ruby Best Practices by Gregory Brown. Copyright 2009 Gregory Brown, 978-0-596-52300-8.”
If you feel your use of code examples falls outside fair use or the permission given here, feel free to contact us at [email protected].
Safari® Books Online
When you see a Safari® Books Online icon on the cover of your favorite technology book, that means the book is available online through the O’Reilly Network Safari Bookshelf.
Safari offers a solution that’s better than e-books. It’s a virtual library that lets you easily search thousands of top tech books, cut and paste code samples, download chapters, and find quick answers when you need the most accurate, current information. Try it for free at http://my.safaribooksonline.com.
How to Contact Us
Please address comments and questions concerning this book to the publisher: O’Reilly Media, Inc.
1005 Gravenstein Highway North Sebastopol, CA 95472
800-998-9938 (in the United States or Canada) 707-829-0515 (international or local)
707-829-0104 (fax)
O’Reilly has a web page for this book, where we list errata, examples, and any additional information. You can access this page at:
http://oreilly.com/catalog/9780596523008/
Gregory maintains a community-based page for this book at: http://rubybestpractices.com
To comment or ask technical questions about this book, send email to:
http://www.oreilly.com
Acknowledgments
Over the course of writing Ruby Best Practices, I was thoroughly supported by my friends, family, and fellow hackers. I want to thank each and every one of the folks who’ve helped out with this book, because it would not exist without them.
This book did not have a typical technical review process, but instead was supported by an excellent advisory board whose members participated in group discussion and the occasional review as each chapter was released. These folks not only helped catch technical errors, but helped me sketch out the overall vision for how the book should come together as well. Participants included James Britt, Francis Hwang, Hart Larew, Chris Lee, Jeremy McAnally, and Aaron Patterson.
Rounding out the group was the best pair of guiding mentors I could hope for, Brad Ediger and James Edward Gray II. Both have published Ruby books, and have worked with me extensively on a number of Ruby projects. James and Brad were both instru-mental in producing this book, and to my career as a software developer in general. I have learned a ton from each of them, and thanks to their help with RBP, I can now pass their knowledge on to you.
Much of the source code in this book comes from the open source Ruby community. Although I talk about my own projects (Prawn and Ruport) a lot, most of the code I show is actually from other contributors or at least originated from good ideas that came up in mailing list discussions, feature requests, and so on. In addition to these two projects, I also have benefited from studying a whole slew of other gems, including but not limited to: activesupport, builder, camping, faker, flexmock, gibberish, haml, highline, lazy, nokogiri, pdf-writer, and rspec. Great thanks go out to all of the devel-opers of these projects, whom I’ve tried to acknowledge directly wherever I can throughout the text.
Of course, without Yukihiro Matsumoto (Matz), we wouldn’t have Ruby in the first place. After writing this book, I am more impressed than ever by the language he has designed. If I’m lucky, this book will help show people just how beautiful Ruby can be. Producing the technical content for this work was daunting, but only part of the overall picture. My editor, Mike Loukides, and the entire O’Reilly production team have made publishing this book a very comfortable experience. After overcoming major fears about the hurdles of working with a mainstream publisher, I’ve found the folks at O’Reilly to be helpful, accommodating, and supportive. It is especially nice that this book will become an open community resource less than a year after it prints. This measure is one I hope to see other technical book publishers adopt, and one I’m very thankful that O’Reilly was open to.
Finally, I need to thank the folks who’ve helped me keep my sanity while working on this huge project. My future wife, Jia Wu, has been amazingly supportive of me, and helped make sure that I occasionally ate and slept while working on this book. On the weekends, we’d usually escape for an bit and spend time with my close friends and family. Though they didn’t have anything to do with the project itself, without Pete, Paul, Mom, Dad, and Vinny, I doubt you’d be reading this book right now. Thanks to all of you, even if you’ll never need to read this book.
CHAPTER 1
Driving Code Through Tests
If you’ve done some Ruby—even a little bit—you have probably heard of test-driven development (TDD). Many advocates present this software practice as the “secret key” to programming success. However, it’s still a lot of work to convince people that writing tests that are often longer than their implementation code can actually lower the total time spent on a project and increase overall efficiency.
In my work, I’ve found most of the claims about the benefits of TDD to be true. My code is better because I write tests that document the expected behaviors of my software while verifying that my code is meeting its requirements. By writing automated tests, I can be sure that once I narrow down the source of a bug and fix it, it’ll never resurface without me knowing right away. Because my tests are automated, I can hand my code off to others and mechanically assert my expectations, which does more for me than a handwritten specification ever could do.
However, the important thing to take home from this is that automated testing is really no different than what we did before we discovered it. If you’ve ever tried to narrow down a bug with a print statement based on a conditional, you’ve already written a primitive form of automated testing:
if foo != "blah"
puts "I expected 'blah' but foo contains #{foo}" end
If you’ve ever written an example to verify that a bug exists in an earlier version of code, but not in a later one, you’ve written something not at all far from the sorts of things you’ll write through TDD. The only difference is that one-off examples do not ade-quately account for the problems that can arise during integration with other modules. This problem can become huge, and is one that unit testing frameworks handle quite well.
Even if you already know a bit about testing and have been using it in your work, you might still feel like it doesn’t come naturally. You write tests because you see the long-term benefits, but you usually write your code first. It takes you a while to write your tests, because it seems like the code you wrote is difficult to pin down behavior-wise.
In the end, testing becomes a necessary evil. You appreciate the safety net, but except for when you fall, you’d rather just focus on keeping your balance and moving forward. Masterful Rubyists will tell you otherwise, and for good reason. Testing may be hard, but it truly does make your job of writing software easier. This chapter will show you how to integrate automated testing into your workflow, without forcing you to relearn the troubleshooting skills you’ve already acquired. By making use of the best practices discussed here, you’ll be able to more easily see the merits of TDD in your own work.
A Quick Note on Testing Frameworks
Ruby provides a unit testing framework in its standard library called minitest/unit. This library provides a user-level compatibility layer with the popular test/unit library, which has been fairly standard in the Ruby community for some time now. There are signif-icant differences between the minitest/unit and test/unit implementations, but as we won’t be building low-level extensions in this chapter, you can assume that the code here will work in both minitest/unit and test/unit without modification.
For what it’s worth, I don’t have a very strong preference when it comes to testing frameworks. I am using the Test::Unit API here because it is part of standard Ruby,
and because it is fundamentally easy to hack on and extend. Many of the existing alternative testing frameworks are built on top of Test::Unit, and you will almost cer-tainly need to have a working knowledge of it as a Ruby developer. However, if you’ve been working with a noncompatible framework such as RSpec, there’s nothing wrong with that. The ideas here should be mostly portable to your framework of choice. And now we can move on. Before digging into the nuts and bolts of writing tests, we’ll examine what it means for code to be easily testable, by looking at some real examples.
Designing for Testability
Describing testing with the phrase “Red, Green, Refactor” makes it seem fairly straight-forward. Most people interpret this as the process of writing some failing tests, getting those tests to pass, and then cleaning up the code without causing the tests to fail again. This general assumption is exactly correct, but a common misconception is how much work needs to be done between each phase of this cycle.
def time_data_for_week(week_data,start,employee_id) data = Hash.new { |h,k| h[k] = Hash.new }
%w[M T W TH F S].zip((0..6).to_a).each do |day,offset| date = (start + offset.days).beginning_of_day
data[day][:lunch_hours] = LunchTime.find(:all, conditions: ["employee_id = ? and day between ? and ?",
employee_id, date, date + 1.day - 1.second] ).inject(0) { |s,r| s + r.duration
}
times = [[:sick_hours , "Sick" ], [:personal_hours, "Personal"], [:vacation_hours, "Vacation"], [:other_hours, "Other" ]] times.each do |a,b|
data[day][a] = OtherTime.find(:all, conditions:
["employee_id = ? and category = '#{b}' and date between ? and ?", employee_id, date, date + 1.day - 1.second] ).inject(0) { |s,r| s + r.hours
} end
d = week_data.find { |d,_| d == date } next unless d
d = d[-1] data[day].merge!(
regular_hours: d.inject(0) { |s,e|
s + (e.end_time ? (e.end_time - e.start_time) / 3600 : 0) } - data[day][:lunch_hours],
start_time: d.map { |e| e.start_time }.sort[0], end_time: d.map { |e| e.end_time }.compact.sort[-1] )
end
sums = Hash.new(0) data.each do |k,v|
[:regular_hours, :lunch_hours, :sick_hours,
:personal_hours, :vacation_hours, :other_hours].each { |h| sums[h] += v[h].to_f }
end
Table(:day,:start_time,:end_time,:regular_hours,:lunch_hours,
:sick_hours,:personal_hours,:vacation_hours, :other_hours) do |t| %w[M T W TH F S].each { |d| t << {day: d}.merge(data[d]) }
t << []
t << { day: "<b>Totals</b>" }.merge(sums) end
end
When you looked at the preceding example, did you have an easy time understanding it? If you didn’t, you don’t need to worry, because I can hardly remember what this code does, and I’m the one who wrote it. Though it is certainly possible to produce better code than this without employing TDD, it’s actually quite difficult to produce something this ugly if you are writing your tests first. This is especially true if you manage to keep your iterations nice and tight. The very nature of test-driven develop-ment lends itself to breaking your code up into smaller, simpler chunks that are easy to work with. It’s safe to say that we don’t see any of those attributes here.
Now that we’ve seen an example of what not to do, we can investigate the true benefits of TDD in the setting of a real project. What follows is the process that I went through while developing a simple feature for the Prawn PDF generation library. But first, a small diversion is necessary.
A Test::Unit Trick to Know About
Usually, test cases written with minitest/unit or test/unit look like this:class MyThingieTest < Test::Unit::TestCase def test_must_be_empty
#... end
def test_must_be_awesome #...
end end
But in all the examples you’ll see in this chapter, we’ll be writing our tests like this:
class MyThingieTest < Test::Unit::TestCase must "be empty" do
#... end
must "be awesome" do #...
end end
If you’ve used Test::Unit before, you might be a bit confused by the use of the must() method here. This is actually a custom addition largely based on the test() method in the activesupport gem. All this code does is automatically generate test methods for you, improving the clarity of our examples a bit. You don’t really need to worry about how this works, but for the curious, the implementation can be found at
http://github.com/sandal/rbp/tree/master/testing/test_unit_extensions.rb.
The code we’re about to look at was originally part of Prawn’s early support for inline styling, which allows users to make use of bold and italic typefaces within a single string of text. In practice, these strings look very similar to the most basic HTML markup:
"This is a string with <b>bold, <i>bold italic</i></b> and <i>italic</i> text"
Although the details of how Prawn actually converts these strings into stylized text that can be properly rendered within a PDF document are somewhat gory, the process of breaking up the string and parsing out the style tags is quite straightforward. We’ll focus on this aspect of things, stepping through the design and development process until we end up with a simple function that behaves as follows:
>> StyleParser.process("Some <b>bold</b> and <i>italic</i> text")
=> ["Some ", "<b>", "bold", "</b>", " and ", "<i>", "italic", "</i>", " text"]
This example demonstrates the final product, but the initial pass at things wasn’t so polished. I started by considering the possibility of passing all the strings rendered in Prawn through style processing, so the initial case I thought of was actually to allow the method to return the string itself when it did not detect any style data. My early example looked something like this:
class TestInlineStyleParsing < Test::Unit::TestCase
must "simply return the string if styles are not found" do @pdf = Prawn::Document.new
assert_equal "Hello World", @pdf.parse_inline_styles("Hello World") end
end
My initial functionality looked something like this:
class Prawn::Document
def parse_inline_styles(text) text
end end
This caused my example to run without failure, and is quite possibly the most boring code imaginable. However, working in small steps like this helps keep things simple and also allows you to sanity-check that things are working as expected. Seeing that this was the case, I was able to move forward with another set of examples. The modi-fied test case ended up looking like this:
class TestInlineStyleParsing < Test::Unit::TestCase
must "simply return the string if styles are not found" do @pdf = Prawn::Document.new
assert_equal "Hello World", @pdf.parse_inline_styles("Hello World") end
must "parse italic tags" do @pdf = Prawn::Document.new
assert_equal ["Hello ", "<i>", "Fine", "</i>", " World"], @pdf.parse_inline_styles("Hello <i>Fine</i> World") end
must "parse bold tags" do @pdf = Prawn::Document.new
assert_equal ["Some very ", "<b>", "bold text", "</b>"], @pdf.parse_inline_styles("Some very <b>bold text</b>") end
end
Despite the fact that I’m writing a book titled Ruby Best Practices, I freely admit that I write some dumb code sometimes. For evidence, we can look at the first bit of code that made this example work:
def parse_inline_styles(text) require "strscan"
sc = StringScanner.new(text) output = []
last_pos = 0 loop do
if sc.scan_until(/<\/?[ib]>/) pre = sc.pre_match[last_pos..-1] output << pre unless pre.empty? output << sc.matched
last_pos = sc.pos else
output << sc.rest if sc.rest? break output
end end
output.length == 1 ? output.first : output end
That’s way longer than it needs to be. Luckily, a useful aspect of using automated behavior verification is that it is helpful during refactoring. I had planned to send this code out to the ruby-talk mailing list so that I could learn the elegant solution that I knew must exist but couldn’t quite muster in my first pass. Before I could do that though, I needed to add another example to clarify the intended behavior:
must "parse mixed italic and bold tags" do @pdf = Prawn::Document.new
assert_equal ["Hello ", "<i>", "Fine ", "<b>", "World", "</b>", "</i>"], @pdf.parse_inline_styles("Hello <i>Fine <b>World</b></i>")
end
Some folks might make the claim that a good test suite makes it easier to communicate with customers, but I’ve never been too sure about that. What I do know is that tests are downright awesome for describing a problem to your fellow developers. Within minutes of posting my examples to ruby-talk, I had a much better implementation in hand:*
def parse_inline_styles(text)
segments = text.split( %r{(</?.*?>)} ).reject {|x| x.empty? } segments.size == 1 ? segments.first : segments
end
Running the examples showed that this code accomplished what my earlier code did, as there were no failures. However, your code is only as correct as the examples you choose, and as it turns out, this code gave me more than I bargained for. It parsed out anything within angle braces, meaning it’d pull out the tags in the following string:
"Hello <indigo>Charlie</indigo>"
Though this might be useful in some situations, I really wanted to parse out only the two specific tags I planned to handle, so I added an example to cover this:
must "not split out other tags than <i>, <b>, </i>, </b>" do @pdf = Prawn::Document.new
assert_equal ["Hello <indigo>Ch", "</b>", "arl", "</b>", "ie</indigo>"], @pdf.parse_inline_styles("Hello <indigo>Ch</b>arl</b>ie</indigo>") end
This new example resulted in a failure, as expected. The required change was simple, and caused everything to pass again:
def parse_inline_styles(text)
segments = text.split( %r{(</?[ib]>)} ).delete_if{|x| x.empty? } segments.size == 1 ? segments.first : segments
end
I originally planned to pass through this function every string that Prawn attempted to render, and this influenced the way the initial interface was specified. However, later I realized that it would be better to check to see whether a string had any style tags in it before attempting to parse it. Because the process of rendering the text is handled in two very different ways depending on whether there are inline styles present, I needed to handle only the case when there were tags to be extracted in my parser:
def parse_inline_styles(text)
text.split( %r{(</?[ib]>)} ).delete_if{|x| x.empty? } end
This cleanup caused one of my examples to fail, because it broke the old default behavior:
1) Failure:
test_simply_return_the_string_if_styles_are_not_found(TestInlineStyleParsing) [...]: <"Hello World"> expected but was
<["Hello World"]>.
As this example was no longer relevant, I simply removed it and was back under the green light. But I still needed a related feature, which was the ability to test whether a string needed to be parsed. I considered making this a private method on
Prawn::Document, but it led to some ugly code:
must "be able to check whether a string needs to be parsed" do @pdf = Prawn::Document.new
assert ! @pdf.send(:style_tag?, "Hello World")
assert @pdf.send(:style_tag?, "Hello <i>Fine</i> World") end
Most of the time when I need to use send() to call a private method in one of my tests,
I try to rethink my interface. Sometimes it’s a necessary evil, but most of the time it just means that things are looking to be refactored. When I first added
Document#parse_inline_styles, it didn’t concern me much to add a single utility
method for this purpose. However, once I found out that I needed an additional helper method, I began to rethink the problem. I realized things would look better if I wrapped the code up in a module.
I updated my examples to reflect this change, and cleaned them up a bit by adding a
setup method, which gets run before each individual test:
class TestInlineStyleParsing < Test::Unit::TestCase def setup
@parser = Prawn::Document::Text::StyleParser end
must "parse italic tags" do
assert_equal ["Hello ", "<i>", "Fine", "</i>", " World"], @parser.process("Hello <i>Fine</i> World")
end
must "parse bold tags" do
assert_equal ["Some very ", "<b>", "bold text", "</b>"], @parser.process("Some very <b>bold text</b>")
end
must "parse mixed italic and bold tags" do
assert_equal ["Hello ", "<i>", "Fine ", "<b>", "World", "</b>", "</i>"], @parser.process("Hello <i>Fine <b>World</b></i>")
end
must "not split out other tags than <i>, <b>, </i>, </b>" do
assert_equal ["Hello <indigo>Ch", "</b>", "arl", "</b>", "ie</indigo>"], @parser.process("Hello <indigo>Ch</b>arl</b>ie</indigo>")
end
must "be able to check whether a string needs to be parsed" do assert @parser.style_tag?("Hello <i>Fine</i> World") assert [email protected]_tag?("Hello World")
end end
Because these features didn’t really rely on anything within Prawn::Document, it made
created the module and dropped in the trivial check that made up the style_tag?
feature:
module StyleParser extend self def process(text)
text.split( %r{(</?[ib]>)} ).delete_if{|x| x.empty? } end
def style_tag?(text) !!(text =~ %r{(</?[ib]>)}) end
end
With the tests passing, I snuck in one more bit of cleanup under the green light, just to make things a little more DRY:†
module StyleParser extend self
TAG_PATTERN = %r{(</?[ib]>)} def process(text)
text.split(TAG_PATTERN).delete_if{|x| x.empty? } end
def style_tag?(text) !!(text =~ TAG_PATTERN) end
end
With these two simple features in hand, I was then ready to work on implementing the inline styling support in Prawn, which I can assure you was far less pleasant to hack together.‡ Even though this example was quite simple, it captures the entire process of
evolving a feature by using progressively tweaked examples from start to finish. Al-though the end result is an automated safety net that verifies that my methods behave as I’ve specified them, you can see that the process of problem discovery, refactoring, and iterative design are the true fruits of test-driven development. This is what justifies spending time writing tests that are often longer than your implementation. The re-sulting examples are mostly a helpful side effect; the power of this technique is in what insight you gain through writing them in the first place.
Now that we’ve seen the process in action, we’ll take a step back and go over some testing fundamentals. Although this stuff may be familiar to folks who are already ac-customed to TDD, it doesn’t hurt to brush up on the essentials, as they form a foun-dation for the more advanced stuff that we’ll tackle a little later.
†Don’t Repeat Yourself.
‡In fact, it wasn’t until several months later that an acceptable inline styling tool saw the light of day, thanks
to the efforts of Jamis Buck.
Testing Fundamentals
A few good habits go a long way when it comes to TDD. We’ll now take a look at some key techniques that help make writing solid and maintainable tests much easier.
Well-Focused Examples
A common beginner habit in testing is to create a single example that covers all of the edge cases for a given method. An example of this might be something along these lines:
class VolumeTest < Test::Unit::TestCase
must "compute volume based on length, width, and height" do # defaults to l=w=h=1
assert_equal 1, volume
#when given 1 arg, set l=x, set w,h = 1 x = 6
assert_equal x, volume(x)
# when given 2 args, set l=x, w=y and h=1 y = 2
assert_equal x*y, volume(x,y)
# when given 3 args, set l=x, w=y and h=z z = 7
assert_equal x*y*z, volume(x,y,z)
# when given a hash, use :length, :width, :height
assert_equal x*y*z, volume(length: x, width: y, height: z) end
end
Though it is relatively easy to type things out this way, there are some limitations that are worth noting. One of the most obvious issues with this approach is that it isn’t very organized. Compare the previous example to the next, and you’ll see how much easier it is to read things when they are cleanly separated out:
class VolumeTest < Test::Unit::TestCase
must "return 1 by default if no arguments are given" do # defaults to l=w=h=1
assert_equal 1, volume end
must "set l=x, set w,h = 1 when given 1 numeric argument" do x = 6
assert_equal x, volume(x) end
must "set l=x, w=y, and h=1 when given 2 arguments" do x, y = 6, 2
must "set l=x, w=y, and h=z when given 3 arguments" do x,y,z = 6, 2, 7
assert_equal x*y*z, volume(x,y,z) end
must "use :length, :width, and :height when given a hash argument" do x,y,z = 6, 2, 7
assert_equal x*y*z, volume(length: x, width: y, height: z) end
end
However, the improved clarity is actually one of the lesser reasons why this code is better. In the former example, your failure report will include only the first assertion that was violated; the code that follows it will not even be executed. When you get the report back, you’ll get a message that shows you the numeric expected/actual values, but it will be titled something like, “a volume function should compute volume based on length width and height,” which is not very instructive for determining which case caused the problem.
In the latter approach, every single example will run, testing all of the cases simulta-neously. This means that if a change you make to your code affects three out of the four cases, your tests will report back three out of four cases rather than just the first failed assertion in the example. They’ll have more useful names, too, each uniquely pointing back to the individual must() call that failed.
Although the code shown here is unlikely to have side effects, there is an additional benefit to splitting up examples: each one runs in its own clean-slate environment. This means you can use setup and teardown methods to manage pre- and postprocessing,
but the code will run largely independent of your other examples. The benefit here is that you’ll avoid the problem of accidentally depending on some side effect or state that is left hanging around as a result of another method call. Because of this, your tests will be more isolated and less likely to run into false positives or strange errors.
Testing Exceptions
Code is not merely specified by the way it acts under favorable conditions. Although it’d be great if we could assume conservative input and liberal output constraints, this just doesn’t seem to be practical in most cases. This means that our code will often need to raise appropriate exceptions when it isn’t able to handle the request it has been given, or if it detects misuse that deserves further attention. Luckily, Test::Unit makes
it easy for us to specify both when code should raise a certain error, and when we expect it to run without error. We’ll take a look at a trivial little lockbox object that provides rudimentary access control to get a feel for how this looks. See if you can understand the tests just by reading through them:
class LockBoxTest < Test::Unit::TestCase def setup
@lock_box = LockBox.new( password: "secret",
content: "My Secret Message" ) end
must "raise an error when an invalid password is used" do assert_raises(LockBox::InvalidPassword) do
@lock_box.unlock("kitten") end
end
must "Not raise error when a valid password is used" do assert_nothing_raised do
@lock_box.unlock("secret") end
end
must "prevent access to content by default" do assert_raises(LockBox::UnauthorizedAccess) do @lock_box.content
end end
must "allow access to content when box is properly unlocked" do assert_nothing_raised do
@lock_box.unlock("secret") @lock_box.content
end end end
As you can see, these tests read pretty clearly. Testing your exceptions is as easy as using the assert_raises() and assert_nothing_raised() methods with the relevant error
class names. We can take a quick look at the implementation of LockBox to see what
the code that satisfies these tests looks like:
class LockBox
UnauthorizedAccess = Class.new(StandardError) InvalidPassword = Class.new(StandardError) def initialize(options)
@locked = true
@password = options[:password] @content = options[:content] end
def unlock(pass)
def content
@locked ? raise(UnauthorizedAccess) : @content end
end
Nothing too fancy is going on here—just a few conditional arguments and a pair of custom exceptions.§ But if we failed to test the cases that generated the exceptions, we
wouldn’t have full test coverage. Generally speaking, any time your methods might intentionally raise an error, you’ll want to set up test cases that cover both the condition where this error is raised as well as the case where it is not. This will help make sure that your error can actually be raised, while ensuring that it isn’t raised unconditionally. Testing this way will help you catch trivial mistakes up front, which is always a good thing.
Run the Whole Suite at Once
Though the examples we have worked with so far might fit well in a single file, you’ll eventually want to split up your tests across several files. However, that doesn’t mean that you should run them only in isolation!
A key feature of automated testing is that it gives you a comprehensive sense of how your software is running as a system, not just on a component-by-component basis. To keep aware of any problems that might occur during refactoring or wiring in new features, it is beneficial to run your entire suite of examples on every change. Luckily, using Ruby’s standard project automation tool, this is trivial. Here is a sample
Rakefile that uses some of the most common conventions:
require "rake/testtask" task :default => [:test] Rake::TestTask.new do |test| test.libs << "test"
test.test_files = Dir[ "test/test_*.rb" ] test.verbose = true
end
This code makes it so rake test will run every Ruby file in the test/ folder of your project
that starts with test_ and ends with the .rb extension. A typical directory layout that works with this sort of command looks like this:
test/ test_foo.rb test_bar.rb
§The syntax used for creating errors here is just a shortcut for class MyCustomError < StandardError; end.
You can tweak which files get run by changing the glob pattern passed to Dir. These
work pretty much the same as they do on the command line, so you can just put one together that suits your file layout.
Now, if you’ve got some expensive resources you’re writing tests against, such as file I/O, database interaction, or some network operation, you may be a bit nervous about the idea of running all your tests on every change you make. This may be due to per-formance concerns or due to the fact that you simply can’t afford to do frequent live
tests of your external resources. However, in most cases, this problem can be worked around, and actually leads to better tests.
The solution I’m alluding to is mock objects, and how they can be used to avoid de-pendencies on external resources. We’ll go over several advanced concepts in the fol-lowing section, but mocks are as good a place to start as any, so we’ll work with them first. Before we do that though, let’s review some of the key guidelines that outline testing fundamentals:
• Keep your test cases atomic. If you are testing a function with multiple interfaces, write multiple examples. Also, write an example for each edge case you want to test. • Don’t just check function input and output, also use assert_raises() and
assert_nothing_raised() to test that exceptions are being thrown under the right
conditions, and not unexpectedly.
• Use a rake task to automate running your test suite, and run all of your examples on every change to ensure that integration issues are caught as soon as they are introduced. Running tests individually may save time by catching problems early, but before moving from feature to feature, it is crucial to run the whole suite.
Advanced Testing Techniques
The most basic testing techniques will get you far, but when things get complicated, you need to break out the big guns. What follows are a few tricks to try out when you run into a roadblock.
Using Mocks and Stubs
In a perfect world, all the resources that we needed would be self-contained in our application, and all interactions would take place in constant time. In our real work, life is nothing like this. We’ve got to deal with user input, database interaction, web service calls, file I/O, and countless other moving parts that live outside of our appli-cation. Testing these things can be painful.
it on a staging server. The question here is not whether it is possible to do this, but whether it is necessary.
Sometimes, you really do need to deal with real-world data. This is especially true when you want to tune and optimize performance or test resource-dependent interactions. However, in most cases, our code is mainly interested only in the behavior of the things we interact with, not what they really are. This is where either a mock or a stub could come in handy.
There are additional benefits to removing dependencies on external code and resources as well. By removing these extra layers, you are capable of isolating your examples so that they test only the code in question. This purposefully eliminates a lot of interdependencies within your tests and helps make sure that you find and fix problems in the right places, instead of everywhere their influence is felt.
Let’s start with a trivial example, to help you get your head around the concepts of mocks and stubs, and form a working definition of what they are.
What follows is some basic code that asks a user a yes or no question, waits for input, and then returns true or false based on the answer. A basic implementation might
look like this:
class Questioner def ask(question) puts question response = gets.chomp case(response) when /^y(es)?$/i true
when /^no?$/i false else
puts "I don't understand." ask question
end end end
Go ahead and toy around with this a bit by executing something similar to this little chunk of code, to get a sense for how it works:
q = Questioner.new
puts q.ask("Are you happy?") ? "Good I'm Glad" : "That's Too Bad"
Interacting with this code by just running a simple script in the console is enough to show that it pretty much works as expected. However, how do we test it? Is it enough to break down the code so that it’s a bit more testable, allowing us to write tests for everything but the actual user interaction?
class Questioner def ask(question) puts question
response = yes_or_no(gets.chomp) response.nil? ? ask(question) : response end
def yes_or_no(response) case(response) when /^y(es)?$/i true
when /^no?$/i false end end end
Now most of the work is being done in yes_or_no, which is easily testable:
class QuestionerTest < Test::Unit::TestCase def setup
@questioner = Questioner.new end
%w[y Y YeS YES yes].each do |yes|
must "return true when yes_or_no parses #{yes}" do
assert @questioner.yes_or_no(yes), "#{yes.inspect} expected to parse as true" end
end
%w[n N no nO].each do |no|
must "return false when yes_or_no parses #{no}" do
assert ! @questioner.yes_or_no(no), "#{no.inspect} expected to parse as false" end
end
%w[Note Yesterday xyzaty].each do |mu|
must "return nil because #{mu} is not a variant of 'yes' or 'no'" do
assert_nil @questioner.yes_or_no(mu), "#{mu.inspect} expected to parse as nil" end
end end
These examples will all pass, and most of your code will be tested, except for the trivial
ask() method. However, what if we wanted to build code that relies on the results of the ask() method?
class Questioner
def inquire_about_happiness
def ask(question) puts question
response = yes_or_no(gets.chomp) response.nil? ? ask(question) : response end
def yes_or_no(response) case(response) when /^y(es)?$/i true
when /^no?$/i false end end end
If we want to write tests that depend on the return value of ask(), we’ll need to do something to prevent the need for direct user input. A relatively simple way to test
inquire_about_happiness() is to replace the ask() method with a stub that returns our
expected values for each scenario:
class HappinessTest < Test::Unit::TestCase def setup
@questioner = Questioner.new end
must "respond 'Good I'm Glad' when inquire_about_happiness gets 'yes'" do def @questioner.ask(question); true; end
assert_equal "Good I'm Glad", @questioner.inquire_about_happiness end
must "respond 'That's Too Bad' when inquire_about_happiness gets 'no'" do def @questioner.ask(question); false; end
assert_equal "That's Too Bad", @questioner.inquire_about_happiness end
end
If we wanted to be a bit more formal about things, we could use a third-party tool to make our stubbing more explicit and easier to work with. There are lots of options for this, but one I especially like is the flexmock gem by Jim Weirich. We’ll look at this tool in much greater detail when we discuss formal mocking, but for now, let’s just look at how it can be used to clean up our stubbing example:
require "flexmock/test_unit"
class HappinessTest < Test::Unit::TestCase def setup
@questioner = Questioner.new end
must "respond 'Good I'm Glad' when inquire_about_happiness gets 'yes'" do stubbed = flexmock(@questioner, :ask => true)
assert_equal "Good I'm Glad", stubbed.inquire_about_happiness end
must "respond 'That's Too Bad' when inquire_about_happiness gets 'no'" do stubbed = flexmock(@questioner, :ask => false)
assert_equal "That's Too Bad", stubbed.inquire_about_happiness end
end
The example code accomplishes the same task as our manual stubbing, but does so in an arguably more pleasant and organized way. Though it might be overkill to pull in a third-party package just to stub out a method or two, you can see how this interface would be preferable if you needed to write tests that were a little more complicated, or at least more involved.
No matter how we implement them, stubs do allow us to improve our test coverage a bit more here. Still, let’s pause for a moment and ask ourselves a question: did we really finish our job? Looking at the code, we find that our naive implementation sans tests looks like this:
class Questioner
def inquire_about_happiness
ask("Are you happy?") ? "Good I'm Glad" : "That's Too Bad" end
def ask(question) puts question response = gets.chomp case(response) when /^y(es)?$/i true
when /^no?$/i false else
puts "I don't understand." ask question
end end end
Our test-driven results turn out like this:
class Questioner
def inquire_about_happiness
ask("Are you happy?") ? "Good I'm Glad" : "That's Too Bad" end
def ask(question) puts question
def yes_or_no(response) case(response) when /^y(es)?$/i true
when /^no?$/i false end end end
Though we’ve successfully split out our yes_or_no parser for testing, we still don’t have
any automated checks for how our code will display a question to the user and how it will respond based on that code. Presently, the only safety net we have for our I/O code is our limited testing in our terminals, which can hardly be called robust. Although it is of course better to have some coverage than no coverage at all, we can do better here. Ruby ships with a StringIO class, which essentially is an IO object that is implemented
to work against a string rather than the typical file handles. Although I hesitate to call this a mock object, it comes close in practice. We’ll take a quick look at how you might use it to test I/O code, which is a nice stepping stone that can lead us into real mock territory.
But before we can test with StringIO, we need to make it so that our Questioner class
allows us to swap out the input and output sources for our own custom objects:
class Questioner
def initialize(in=STDIN,out=STDOUT) @input = in
@output = out end
def ask(question) @output.puts question response = @input.gets.chomp case(response)
when /^y(es)?$/i true
when /^no?$/i false else
@output.puts "I don't understand." ask question
end end end
By default, nothing will change and I/O will still go to STDIN and STDOUT. However, this
opens the door for replacing these I/O objects with a pair of StringIO objects, allowing us to totally rethink our tests:
class QuestionerTest < Test::Unit::TestCase def setup
@input = StringIO.new @output = StringIO.new
@questioner = Questioner.new(@input,@output) @question = "Are you happy?"
end
["y", "Y", "YeS", "YES", "yes"].each do |y| must "return false when parsing #{y}" do provide_input(y)
assert @questioner.ask(@question), "Expected '#{y}' to be true" expect_output "#{@question}\n"
end end
["n", "N", "no", "nO"].each do |no|
must "return false when parsing #{no}" do provide_input(no)
assert [email protected](@question) expect_output "#{@question}\n" end
end
[["y", true],["n", false]].each do |input,state|
must "continue to ask for input until given #{input}" do provide_input "Note\nYesterday\nxyzaty\n#{input}" assert_equal state, @questioner.ask(@question)
expect_output "#{@question}\nI don't understand.\n"*3 + "#{@question}\n" end
end
def provide_input(string) @input << string @input.rewind end
def expect_output(string)
assert_equal string, @output.string end
end
Without too much more effort, we were able to specify and test the full behavior of this trivial little program. We are able to test both the logic, and the actual I/O operations, to verify that they work as we expect them to. In this particular case, we were pretty lucky that Ruby ships with a library that acts like an I/O object and makes our testing easier. We won’t always be so lucky. What’s more, we don’t really need most of what
StringIO has to offer here. A lighter (albeit more abstract) approach would be to use a
require "flexmock/test_unit"
class QuestionerTest < Test::Unit::TestCase def setup
@input = flexmock("input") @output = flexmock("output")
@questioner = Questioner.new(@input,@output) @question = "Are you happy?"
end
["y", "Y", "YeS", "YES", "yes"].each do |y| must "return false when parsing #{y}" do expect_output @question
provide_input(y)
assert @questioner.ask(@question), "Expected '#{y}' to be true" end
end
["n", "N", "no", "nO"].each do |no| must "return false when parsing #{no}" do expect_output @question
provide_input(no)
assert [email protected](@question) end
end
[["y", true], ["n", false]].each do |input, state| must "continue to ask for input until given #{input}" do %w[Yesterday North kittens].each do |i|
expect_output @question provide_input(i)
expect_output("I don't understand.") end
expect_output @question provide_input(input)
assert_equal state, @questioner.ask(@question) end
end
def provide_input(string)
@input.should_receive(:gets => string).once end
def expect_output(string)
@output.should_receive(:puts).with(string).once end
end
The interesting thing about this example is that flexmock() returns a completely generic object, yet this accomplishes the same results as using StringIO, which is finely tuned
for emulating a real IO object. The end result is that the latter example tends to focus
on the interactions between your code and the resource, and that the former example is more directly bound to what an I/O object actually is. It can be beneficial to avoid such tight distinctions, especially when working in Ruby, where what an object actually is tends to be less important than what it can do.
To generalize: mock objects essentially break interactions down into the messages that an object should receive, the arguments that accompany the messages, the return values of the methods, whether a block is yielded, and whether any errors should be raised. If this sounds like a lot, don’t worry too much. The beauty of a mock object is that you need to specify only those things that are necessary to handle in your code.
Flexmock (like many of the other Ruby mocking options) is quite robust, and to go over it extensively here would take more than just a single section of a chapter. How-ever, through this simple example, you can see that there are ways to avoid actively hitting your external resources while still being able to test your interactions with them. Of course, using a mock object comes with its own cost, like anything else. In this example, if we changed the internal code to use print() instead of puts(), we would
need to modify our mock object, but we would not need to modify our StringIO-based
solution. Although a mock object completely eliminates the need to worry about the internal state of your dependencies, it creates a tighter coupling to their interfaces. This means that some care should be taken when deciding just how much you want to mock out in any given test suite.
Learning how to build decent mock objects without going overboard takes some prac-tice, but is not too hard once you get the hang of it. It ultimately forms one of the
hard aspects of testing, and once that bridge is crossed, only a few more remain.
Testing Complex Output
Dealing with programs that need to generate complex output can be a pain. Verifying that things actually work as you expect them to is important, but simply comparing raw output values in an automated test leads to examples that are nearly impossible to follow. However, we often resort to just dumping our expected data into our tests and comparing it to what we’re actually generating. This sort of test is useful for detecting when a problem arises, but finding the source of it, even with decent diff utilities, can be a real pain.
Imagine we’ve got a basic blog that needs to output RSS, which is really just a specialized XML format. The following example is a simplified version of what I use to generate the feeds in my blog. James Gray actually wrote the code for it, using XML Builder, another great gem from Jim Weirich:
def entries @entries ||= [] end
def to_rss
xml = Builder::XmlMarkup.new xml.instruct!
xml.rss version: "2.0" do xml.channel do
xml.title title
xml.link "http://#{domain}/" xml.description description xml.language "en-us" @entries.each do |entry| xml.item do
xml.title entry.title xml.description entry.description xml.author author
xml.pubDate entry.published_date xml.link entry.url
xml.guid entry.url end
end end end end end
We need to test that the output of this to_rss method is what we expect it to be. The
lazy approach would look like this:
require "time"
class BlogTest < Test::Unit::TestCase FEED = <<-EOS
<?xml version="1.0" encoding="UTF-8"?><rss version="2.0"
><channel><title>Awesome</title><link>http://majesticseacreature.com/</link> <description>Totally awesome</description><language>en-us</language><item> <title>First Post</title><description>Nothing interesting</description> <author>Gregory Brown</author><pubDate>2008-08-08 00:00:00 -0400</pubDate> <link>http://majesticseacreature.com/awesome.html</link>
<guid>http://majesticseacreature.com/awesome.html</guid></item></channel></rss> EOS
def setup
@blog = Blog.new
@blog.title = "Awesome"
@blog.domain = "majesticseacreature.com" @blog.description = "Totally awesome" @blog.author = "Gregory Brown"
entry = OpenStruct.new
entry.title = "First Post"
entry.description = "Nothing interesting" entry.published_date = Time.parse("08/08/2008")
entry.url = "http://majesticseacreature.com/awesome.html" @blog.entries << entry
end
must "have a totally awesome RSS feed" do assert_equal FEED.delete("\n"), @blog.to_rss end
end
You could make this slightly less ugly by storing your output in a file, but it’s not much better:
class BlogTest < Test::Unit::TestCase def setup
@blog = Blog.new
@blog.title = "Awesome"
@blog.domain = "majesticseacreature.com" @blog.description = "Totally awesome" @blog.author = "Gregory Brown" entry = OpenStruct.new
entry.title = "First Post"
entry.description = "Nothing interesting" entry.published_date = Time.parse("08/08/2008")
entry.url = "http://majesticseacreature.com/awesome.html" @blog.entries << entry
end
must "have a totally awesome RSS feed" do
assert_equal File.read("expected.rss"), @blog.to_rss end
end
In the end, the issue boils down to the fact that you’re definitely not focusing on the important parts of the problem if you have to check the output character by character. An RSS feed with some extra whitespace in it would be no less valid than the file shown here, yet it would cause an annoying failure in your tests.
There are a few solid choices for XML parsing in Ruby, and even support for it in the standard library. However, the library that I find most pleasant to work with is the
nokogiri gem, written by Aaron Patterson. Here’s what part of the tests look like after they’ve been reworked to use Nokogiri:
require "time" require "nokogiri"
class BlogTest < Test::Unit::TestCase def setup
@blog = Blog.new
@blog.title = "Awesome"
@blog.domain = "majesticseacreature.com" @blog.description = "Totally awesome" @blog.author = "Gregory Brown" entry = OpenStruct.new
entry.title = "First Post"
entry.description = "Nothing interesting" entry.published_date = Time.parse("08/08/2008")
entry.url = "http://majesticseacreature.com/awesome.html" @blog.entries << entry
@feed = Nokogiri::XML(@blog.to_rss) end
must "be RSS v 2.0" do
assert_equal "2.0", @feed.at("rss")["version"] end
must "have a title of Awesome" do
assert_equal "Awesome", text_at("rss", "title") end
must "have a description of Totally Awesome" do
assert_equal "Totally awesome", text_at("rss", "description") end
must "have an author of Gregory Brown" do
assert_equal "Gregory Brown", text_at("rss", "author") end
must "have an entry with the title: First Post" do assert_equal "First Post", text_at("item", "title") end
def text_at(*args)
args.inject(@feed) { |s,r| s.send(:at, r) }.inner_text end
end
This is a huge improvement! Now, our tests actually look like they’re verifying the things we’re interested in, rather than simply checking our output against some amor-phous code blob that we can’t easily inspect and verify.
Of course, this approach to testing complex data requires you to trust whatever you are using to parse your output, but as long as you can do that, the ability of whatever library you use to parse your output is from the very start an indication that you are producing meaningful results.
Not every file format you will encounter will have parsers available for it, of course. Some of the formats you need to produce may even be fully custom-made. However, providing that it isn’t impossible to build one, a parser will come in handy for making your tests more flexible and expressive. Consider this possibility before turning to direct file comparison as a last resort only.
We’re about to wrap up with a mixed bag of tips and tricks for keeping your test suite maintainable, but before we do that, let’s go over some of the highlights of the advanced testing techniques discussed in this section:
• Mocks and stubs can be used to remove external dependencies from tests while still verifying proper behavior and interaction.
• Stubs are used when we want to replace some functionality with canned results to make testing other code easier.
• Mocks are used to create objects that can act in place of an external resource for the purpose of testing. Mock objects are set up with expected responses, which are then verified when the tests are run. This means that if you have something like
my_obj.should_receive(:foo).once and foo is never called on my_obj, this will result
in a test failure. This is the primary difference between mocks and stubs.
• When testing complex output, it is best to find a tool that parses the output format you are generating, and write your tests against its results.
• When you can’t find a tool for parsing your output format, you might consider building one that parses only the values you are interested in, in addition to nec-essary basic validation of the document’s structure.
• If it isn’t possible to parse your generated data without great effort, consider storing your expected output in its own file and loading it into your tests as needed, using a diff utility to compare