Learning ROS for Robotics
Programming
A practical, instructive, and comprehensive guide
to introduce yourself to ROS, the top-notch, leading
robotics framework
Aaron Martinez
Enrique Fernández
Learning ROS for Robotics Programming
Copyright © 2013 Packt Publishing
All rights reserved. No part of this book may be reproduced, stored in a retrieval system, or transmitted in any form or by any means, without the prior written permission of the publisher, except in the case of brief quotations embedded in critical articles or reviews.
Every effort has been made in the preparation of this book to ensure the accuracy of the information presented. However, the information contained in this book is sold without warranty, either express or implied. Neither the authors, nor Packt Publishing, and its dealers and distributors will be held liable for any damages caused or alleged to be caused directly or indirectly by this book.
Packt Publishing has endeavored to provide trademark information about all of the companies and products mentioned in this book by the appropriate use of capitals. However, Packt Publishing cannot guarantee the accuracy of this information.
First published: September 2013
Production Reference: 1190913
Published by Packt Publishing Ltd. Livery Place
35 Livery Street
Birmingham B3 2PB, UK.
ISBN 978-1-78216-144-8
www.packtpub.com
About the Authors
Aaron Martinez is a computer engineer, entrepreneur, and expert in digital
fabrication. He did his Master's thesis in 2010 at the IUCTC (Instituto Universitario de Ciencias y Tecnologias Ciberneticas) in the University of Las Palmas de GranCanaria. He prepared his Master's thesis in the field of telepresence using immersive
devices and robotic platforms. After completing his academic career, he attended an internship program at The Institute for Robotics in the Johannes Kepler University in Linz, Austria. During his internship program, he worked as part of a development team of a mobile platform using ROS and the navigation stack. After that, he was involved in some projects related to robotics, one of them is the AVORA project in the University of Las Palmas de Gran Canaria. In this project, he worked on the creation of an AUV (Autonomous Underwater Vehicle) to participate in the Student Autonomous Underwater Challenge-Europe (SAUC-E) in Italy. In 2012, he was responsible for manufacturing this project; in 2013, he helped to adapt the navigation stack and other algorithms from ROS to the robotic platform.
Recently, Aaron created his own company called Biomecan. This company works with projects related to robotics, manufacturing of prototypes, and engineering tissue. The company manufactures devices for other companies and research and development institutes. For the past two years, he has been working on engineering tissue projects, creating a new device to help researchers of cell culture.
Aaron has experience in many fields such as programming, robotics, mechatronics,
and digital fabrication, many devices such as Arduino, BeagleBone, Servers, and
LIDAR, servomotors, and robotic platforms such as Wifibot, Nao Aldebaran, and
I would like to thank my girlfriend who has supported me while writing this book and gave me motivation to continue growing professionally. I also want to thank Donato Monopoli, Head of Biomedical Engineering Department at ITC (Canary-Islands Institute of Technology), and all the staff there. Thanks for teaching me all I know about digital fabrication, machinery, and engineering tissue. I spent the best years of my life in your workshop.
Thanks to my colleagues in the university, especially Alexis Quesada,
who gave me the opportunity to create my first robot in my Master's
thesis. I have learned a lot about robotics working with them.
Finally, thanks to my family and friends for their help and support.
Enrique Fernández is a computer engineer and roboticist. He did his Master's
Thesis in 2009 at the University Institute of Intelligent Systems and Computational Engineering in the University of Las Palmas de Gran Canaria. There he has been working on his Ph.D for the last four years; he is expected to become a Doctor in Computer Science by September 2013. His Ph.D addresses the problem of Path Planning for Autonomous Underwater Gliders, but he has also worked on other robotic projects. He participated in the Student Autonomous UnderwaterChallenge-Europe (SAUC-E) in 2012, and collaborated for the 2013 edition. In 2012, he was awarded a prize for the development of an underwater pan-tilt vision system.
During his Ph.D, Enrique has published several conference papers and publications. Two of these were sent to the International Conference of Robotics and Automation (ICRA) in 2011. He is the co-author of some chapters of this book, and his Master's Thesis was about the FastSLAM algorithm for indoor robots using a SICK laser scanner and the odometry of a Pioneer differential platform. He also has experience with electronics and embedded systems, such as PC104 and Arduino. His background covers SLAM, Computer Vision, Path Planning, Optimization, and Robotics and
Artificial Intelligence in general.
About the Reviewers
Luis Sánchez Crespo has completed his dual Master's degree in Electronics and
Telecommunication Engineering at the University of Las Palmas de Gran Canaria. He has collaborated with different research groups as the Institute for Technological Development and Innovation (IDETIC), the Oceanic Platform of Canary Islands (PLOCAN), and the Institute of Applied Microelectronics (IUMA) where he actually researches on imaging super-resolution algorithms.His professional interests lie in computer vision, signal processing, and electronic design applied on robotics systems. For this reason, he joined the AVORA team, a group of young engineers and students working on the development of Underwater Autonomous Vehicles (AUV) from scratch. Inside this project, Luis has started developing acoustic and computer vision systems, extracting information from different sensors such as hydrophones, SONAR, or camera. He has also been involved in the electronic design of the vehicle. Finally, he has played the Team Leader role during the preparation of the SAUC-E'13 challenge.
With a strong background gained in marine technology, Luis joined Biomecan, a young startup, where he works on developing remotely operated and autonomous vehicles for aquatic environments.
He has focused his career in 2D and 3D signal processing, with the development of a system for tracking and detecting signs of exhaustion and the risk of falling asleep in drivers. After this successful research, he started working on two different
projects at the same time. The first of these projects focused mainly on achieving
video sequences enhancement applying super-resolution. The second project, and one of his most important achievements, was participating in the development of an autonomous underwater vehicle for the Students Autonomous Underwater Challenge-Europe (SAUC-E) in which his team achieved great recognition with the fourth most important prize. In his second year, he took up the mantle of Team Leader, again being recognized by his work during competition.
I would like to thank my family for supporting me since my
first step, Guaxara for lighting my path, and my teammates for
supporting me. I would also like to thank Dario Sosa Cabrera and Anil Motilal Mahtani Mirchandani.
Matthieu Keller is a French student who has completed several internships in
development, system administration, and cyber security. His education is mainlyin Computer Science and Robotics, but he enjoys all kinds of scientific topics.
www.PacktPub.com
Support files, eBooks, discount offers and more
You might want to visit www.PacktPub.com for support files and downloads related to your book.
Did you know that Packt offers eBook versions of every book published, with PDF
and ePub files available? You can upgrade to the eBook version at www.PacktPub. com and as a print book customer, you are entitled to a discount on the eBook copy. Get in touch with us at [email protected] for more details.
At www.PacktPub.com, you can also read a collection of free technical articles, sign up for a range of free newsletters and receive exclusive discounts and offers on Packt books and eBooks.
TM
http://PacktLib.PacktPub.com
Do you need instant solutions to your IT questions? PacktLib is Packt's online
digital book library. Here, you can access, read and search across Packt's entire library of books.
Why Subscribe?
• Fully searchable across every book published by Packt
• Copy and paste, print and bookmark content
• On demand and accessible via web browser
Free Access for Packt account holders
Table of Contents
Preface 1
Chapter 1: Getting Started with ROS
7
Installing ROS Electric – using repositories 10
Adding repositories to your sources.list file 12
Setting up your keys 12
Installation 12
The environment setup 13
Installing ROS Fuerte – using repositories 14
Configuring your Ubuntu repositories 14
Setting up your source.list file 15
Setting up your keys 15
Installation 15
The environment setup 17
Standalone tools 18
How to install VirtualBox and Ubuntu 18
Downloading VirtualBox 19
Creating the virtual machine 19
Summary 23
Chapter 2: The ROS Architecture with Examples
25
Understanding the ROS Filesystem level 26
Packages 27
Stacks 29
Messages 29
Services 31
Understanding the ROS Computation Graph level 32
Messages 37
Bags 37
Master 38
Parameter Server 38
Understanding the ROS Community level 39
Some tutorials to practice with ROS 39
Navigating through the ROS filesystem 39
Creating our own workspace 40
Creating an ROS package 41
Building an ROS package 42
Playing with ROS nodes 42
Learning how to interact with topics 45
Learning how to use services 49
Using the Parameter Server 51
Creating nodes 52
Building the node 55
Creating msg and srv files 57
Using the new srv and msg files 58
Summary 62
Chapter 3: Debugging and Visualization
63
Debugging ROS nodes 66
Using the GDB debugger with ROS nodes 66
Attaching a node to GDB while launching ROS 67
Enabling core dumps for ROS nodes 68
Debugging messages 69
Outputting a debug message 69
Setting the debug message level 70
Configuring the debugging level of a particular node 71
Giving names to messages 72
Conditional and filtered messages 73
More messages – once, throttle, and combinations 74
Using rosconsole and rxconsole to modify the debugging level on the fly 75
Inspecting what is going on 80
Listing nodes, topics, and services 80
Inspecting the node's graph online with rxgraph 80
When something weird happens – roswtf! 83
Plotting scalar data 83
Creating a time series plot with rxplot 84
Visualization of images 87
Visualizing a single image 87
FireWire cameras 88
Working with stereo vision 90
3D visualization 91
Visualizing data on a 3D world using rviz 92
The relationship between topics and frames 94
Visualizing frame transformations 94
Saving and playing back data 96
What is a bag file? 97
Recording data in a bag file with rosbag 98
Playing back a bag file 99
Inspecting all the topics and messages in a bag file using rxbag 100
rqt plugins versus rx applications 102
Summary 102
Chapter 4: Using Sensors and Actuators with ROS
103
Using a joystick or gamepad 104
How does joy_node send joystick movements? 105
Using joystick data to move a turtle in turtlesim 106
Using a laser rangefinder – Hokuyo URG-04lx 110
Understanding how the laser sends data in ROS 111
Accessing the laser data and modifying it 113
Creating a launch file 115
Using the Kinect sensor to view in 3D 116
How does Kinect send data from the sensors and how to see it? 117
Creating an example to use Kinect 119
Using servomotors – Dynamixel 121
How does Dynamixel send and receive commands for the movements? 123
Creating an example to use the servomotor 124
Using Arduino to add more sensors and actuators 125
Creating an example to use Arduino 126
Using the IMU – Xsens MTi 129
How does Xsens send data in ROS? 130
Creating an example to use Xsens 131
Using a low-cost IMU – 10 degrees of freedom 133
Downloading the library for the accelerometer 135
Programming Arduino Nano and the 10DOF sensor 135
Creating a ROS node to use data from the 10DOF sensor 138
Chapter 5: 3D Modeling and Simulation
141
A 3D model of our robot in ROS 141
Creating our first URDF file 142
Explaining the file format 144
Watching the 3D model on rviz 145
Loading meshes to our models 147
Making our robot model movable 148
Physical and collision properties 149
Xacro – a better way to write our robot models 150
Using constants 151
Using math 151
Using macros 151
Moving the robot with code 152
3D modeling with SketchUp 156
Simulation in ROS 158
Using our URDF 3D model in Gazebo 159
Adding sensors to Gazebo 162
Loading and using a map in Gazebo 163
Moving the robot in Gazebo 165
Summary 168
Chapter 6: Computer Vision
171
Connecting and running the camera 173
FireWire IEEE1394 cameras 174
USB cameras 178
Making your own USB camera driver with OpenCV 180
Creating the USB camera driver package 181
Using the ImageTransport API to publish the camera frames 182
Dealing with OpenCV and ROS images using cv_bridge 186
Publishing images with ImageTransport 187
Using OpenCV in ROS 188
Visualizing the camera input images 188
How to calibrate the camera 188
Stereo calibration 193
The ROS image pipeline 198
Image pipeline for stereo cameras 201
ROS packages useful for computer vision tasks 204
Performing visual odometry with viso2 205
Running the viso2 online demo 210
Running viso2 with our low-cost stereo camera 213
Summary 214
Chapter 7: Navigation Stack – Robot Setups
215
The navigation stack in ROS 216
Creating transforms 217
Creating a broadcaster 218
Creating a listener 218
Watching the transformation tree 221
Publishing sensor information 222
Creating the laser node 223
Publishing odometry information 226
How Gazebo creates the odometry 227
Creating our own odometry 230
Creating a base controller 234
Using Gazebo to create the odometry 236
Creating our base controller 238
Creating a map with ROS 241
Saving the map using map_server 243
Loading the map using map_server 244
Summary 245
Chapter 8: Navigation Stack – Beyond Setups
247
Creating a package 248
Creating a robot configuration 248
Configuring the costmaps (global_costmap) and (local_costmap) 251
Configuring the common parameters 251
Configuring the global costmap 253
Configuring the local costmap 253
Base local planner configuration 254
Creating a launch file for the navigation stack 255
Setting up rviz for the navigation stack 256
2D pose estimate 257
Global plan 262
Local plan 263
Planner plan 264
Current goal 264
Adaptive Monte Carlo Localization (AMCL) 266
Avoiding obstacles 268
Sending goals 269
Summary 273
Chapter 9: Combining Everything – Learn by Doing
275
REEM – the humanoid of PAL Robotics 276
Installing REEM from the official repository 278
Running REEM using the Gazebo simulator 282
PR2 – the Willow Garage robot 284
Installing the PR2 simulator 285
Running PR2 in simulation 285
Localization and mapping 289
Running the demos of the PR2 simulator 292
Robonaut 2 – the dexterous humanoid of NASA 293
Installing the Robonaut 2 from the sources 293
Running Robonaut 2 in the ISS fixed pedestal 294
Controlling the Robonaut 2 arms 295
Controlling the robot easily with interactive markers 295
Giving legs to Robonaut 2 297
Loading the ISS environment 298
Husky – the rover of Clearpath Robotics 299
Installing the Husky simulator 300
Running Husky on simulation 300
TurtleBot – the low-cost mobile robot 302
Installing the TurtleBot simulation 302
Running TurtleBot on simulation 303
Summary 303
Preface
Learning ROS for Robotics Programming gives you a comprehensive review of ROS tools. ROS is the Robot Operating System framework, which is used nowadays by hundreds of research groups and companies in the robotics industry. But it is also the painless entry point to robotics for nonprofessional people. You will see how to install ROS, start playing with its basic tools, and you will end up working with state-of-the-art computer vision and navigation tools.
The content of the book can be followed without any special devices, and each chapter comes with a series of source code examples and tutorials that you can run on your own computer. This is the only thing you need to follow in the book. However, we also show you how to work with hardware, so that you can connect your algorithms with the real world. Special care has been taken in choosing devices which are affordable for amateur users, but at the same time the most typical sensors or actuators in robotics research are covered.
What this book covers
Chapter 1, Getting Started with ROS, shows the easiest way you must follow in order to have a working installation of ROS. You will see how to install different distributions of ROS, and you will use ROS Fuerte in the rest of the book. How to make an installation from Debian packages or compiling the sources, as well as making installations in virtual machines, have been described in this chapter.
Chapter 2, The ROS Architecture with Examples, is concerned with the concepts and tools provided by the ROS framework. We will introduce you to nodes, topics, and services, and you will also learn how to use them. Through a series of examples, we will
illustrate how to debug a node or visualize the messages published through a topic.
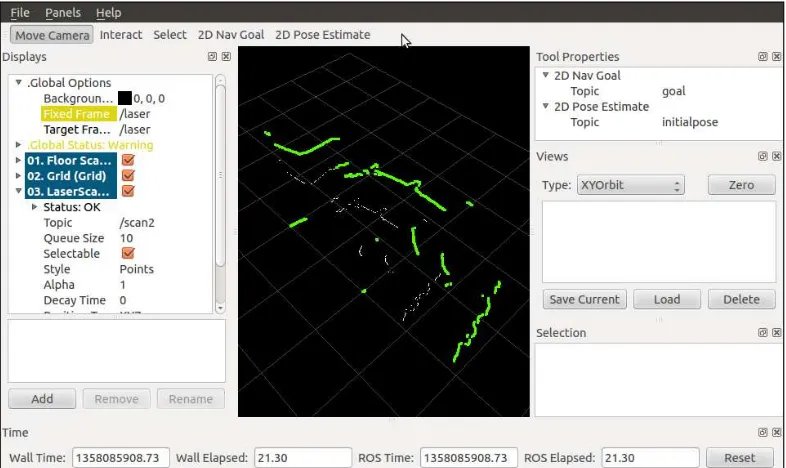
Chapter 3, Debugging and Visualization, goes a step further in order to show you powerful tools for debugging your nodes and visualize the information that goes through the node's graph along with the topics. ROS provides a logging API which allows you to diagnose node problems easily. In fact, we will see some powerful graphical tools such as rxconsole and rxgraph, as well as visualization interfaces such as rxplot and rviz. Finally, this chapter explains how to record and playback messages using rosbag and rxbag.
Chapter 4, Using Sensors and Actuators with ROS, literally connects ROS with the real world. This chapter goes through a number of common sensors and actuators that are supported in ROS, such as range lasers, servo motors, cameras, RGB-D sensors, and much more. Moreover, we explain how to use embedded systems with microcontrollers, similar to the widely known Arduino boards.
Chapter 5, 3D Modeling and Simulation, constitutes one of the first steps in order to
implement our own robot in ROS. It shows you how to model a robot from scratch and run it in simulation using the Gazebo simulator. This will later allow you to use the whole navigation stack provided by ROS and other tools.
Chapter 6, Computer Vision, shows the support for cameras and computer vision tasks in ROS. This chapter starts with drivers available for FireWire and USB cameras, so that you can connect them to your computer and capture images. You will then be able to calibrate your camera using ROS calibration tools. Later, you will be able to use the image pipeline, which is explained in detail. Then, you will see how to use several APIs for vision and integrate OpenCV. Finally, the installation and usage of a visual odometry software is described.
Chapter 7, Navigation Stack – Robot Setups, is the first of two chapters concerned with
the ROS navigation stack. This chapter describes how to configure your robot so
Chapter 8, Navigation Stack – Beyond Setups, continues the discussion of the previous chapter by showing how we can effectively make our robot navigate autonomously. It will use the navigation stack intensively for that. This chapter shows the great potential of ROS using the Gazebo simulator and rviz to create a virtual environment in which we can build a map, localize our robot, and do path planning with obstacle avoidance.
Chapter 9, Combining Everything – Learn by Doing, builds from the previous chapters and shows a number of robots which are supported in ROS using the Gazebo simulator. In this chapter you will see how to run these robots in simulation and perform several of the tasks learned in the rest of the book, especially those related to the navigation stack.
What you need for this book
This book was written with the intention that almost everybody can follow it and run the source code examples provided with it. Basically, you need a computer with a
Linux distribution. Although any Linux distribution should be fine, it is recommended
that you use a recent version of Ubuntu. Then you will use ROS Fuerte, which is installed according to the instructions given in Chapter 1, Getting Started with ROS. For this distribution of ROS, you will need a version of Ubuntu prior to 12.10 because since this version Fuerte is no longer supported.
Regarding the hardware requirements of your computer, in general any computer or laptop is enough. However, it is advisable to use a dedicated graphic card in order to run the Gazebo simulator. Also, it will be good to have a good number of peripherals, so that you can connect several sensors and actuators, including cameras and Arduino boards.
You will also need Git (the git-core Debian package) in order to clone the repository with the source code provided with this book. Similarly, you are expected to have a basic knowledge of the Bash command line, GNU/Linux tools, and some C/C++ programming skills.
Who this book is for
This book is targeted at all robotics developers, from amateurs to professionals. It covers all the aspects involved in a whole robotic system and shows how ROS helps with the task of making a robot really autonomous. Anyone who is learning robotics
and has heard about ROS but has never tried it will benefit from this book. Also, ROS
Conventions
In this book, you will find a number of styles of text that distinguish between
different kinds of information. Here are some examples of these styles, and an explanation of their meanings.
Code words in text are shown as follows: "The *-ros-pkg contributed packages are licensed under a variety of open source licenses."
A block of code is set as follows:
<package>
<description brief="short description"> long description,
</description>
<author>Aaron Martinez, Enrique Fernandez</author> <license>BSD</license>
<url>http://example.com/</url> <depend package="roscpp"/> <depend package="common"/> <depend package="otherPackage"/>
<versioncontrol type="svn" url="https://urlofpackage/trunk"/> <export>
<cpp cflags="-I${prefix}/include" lflags="-L${prefix}/lib -lros"/> </package>
When we wish to draw your attention to a particular part of a code block, the relevant lines or items are set in bold:
<launch>
<node pkg="chapter3_tutorials" type="example1" name="example1" output="screen"
launch-prefix="xterm -e gdb --args"/>
</launch>
Any command-line input or output is written as follows:
$ rosrun book_tutorials tutorialX _param:=9.0
Warnings or important notes appear in a box like this.
Tips and tricks appear like this.
Reader feedback
Feedback from our readers is always welcome. Let us know what you think about this book—what you liked or may have disliked. Reader feedback is important for us to develop titles that you really get the most out of.
To send us general feedback, simply send an e-mail to [email protected], and mention the book title via the subject of your message.
If there is a topic that you have expertise in and you are interested in either writing or contributing to a book, see our author guide on www.packtpub.com/authors.
Customer support
Now that you are the proud owner of a Packt book, we have a number of things to help you to get the most from your purchase.
Downloading the example code
You can download the example code files for all Packt books you have purchased
from your account at http://www.packtpub.com. If you purchased this book elsewhere, you can visit http://www.packtpub.com/support and register to
have the files e-mailed directly to you. You can also download these code files from
https://github.com/AaronMR/Learning_ROS_for_Robotics_Programming.
Downloading the color images of this book
We also provide you a PDF file that has color images of the screenshots/diagrams
used in this book. The color images will help you better understand the changes in
Errata
Although we have taken every care to ensure the accuracy of our content, mistakes
do happen. If you find a mistake in one of our books—maybe a mistake in the text or
the code—we would be grateful if you would report this to us. By doing so, you can save other readers from frustration and help us improve subsequent versions of this
book. If you find any errata, please report them by visiting http://www.packtpub. com/submit-errata, selecting your book, clicking on the erratasubmissionform link,
and entering the details of your errata. Once your errata are verified, your submission
will be accepted and the errata will be uploaded on our website, or added to any list of existing errata, under the Errata section of that title. Any existing errata can be viewed by selecting your title from http://www.packtpub.com/support.
Piracy
Piracy of copyright material on the Internet is an ongoing problem across all media. At Packt, we take the protection of our copyright and licenses very seriously. If you come across any illegal copies of our works, in any form, on the Internet, please provide us with the location address or website name immediately so that we can pursue a remedy.
Please contact us at [email protected] with a link to the suspected pirated material.
We appreciate your help in protecting our authors, and our ability to bring you valuable content.
Questions
Getting Started with ROS
Welcome to the first chapter of this book where you will learn how to install ROS,
the new standard software framework in robotics. With ROS, you will start to program and control your robots the easy way using tons of examples and source code that will show you how to use sensors and devices or add new functionalities to your robot, such as autonomous navigation and visual perception. Thanks to the open source motto and the community that is developing the state-of-the-art algorithms and providing new functionalities, ROS is growing every day.
In this book you will learn the following:
• Installing the ROS framework on a version of Ubuntu
• Learning the basic operation of ROS
• Debugging and visualizing the data
• Programming your robot using this framework
• Creating a 3D model to use it in the simulator
• Using the navigation stack to make your robot autonomous
In this chapter we are going to install a full version of ROS in Ubuntu. We will use Ubuntu because it is fully supported by and recommended for ROS. However, you can use a different operating system instead of Ubuntu, but in these operative systems, ROS is still experimental and could have some errors. So, for this reason, we recommend you to use Ubuntu while you follow the samples in this book.
Robot Operating System (ROS) is a framework that is widely used in robotics. The philosophy is to make a piece of software that could work in other robots by making little changes in the code. What we get with this idea is to create functionalities that can be shared and used in other robots without much effort so that we do not reinvent the wheel.
ROS was originally developed in 2007 by the Stanford Artificial Intelligence
Laboratory (SAIL) with the support of the Stanford AI Robot project. As of 2008, development continues primarily at Willow Garage, a robotics research institute, with more than 20 institutions collaborating within a federated development model.
A lot of research institutions have started to develop projects in ROS by adding hardware and sharing their code samples. Also, the companies have started to adapt their products to be used in ROS. In the following image, you can see some fully supported platforms. Normally, these platforms are published with a lot of code, examples, and simulators to permit the developers to start their work easily.
The sensors and actuators used in robotics have also been adapted to be used with ROS. Every day an increasing number of devices are supported by this framework.
The *-ros-pkg package is a community repository for developing high-level libraries easily. Many of the capabilities frequently associated with ROS, such as the navigation library and the rviz visualizer, are developed in this repository. These libraries give a powerful set of tools to work with ROS easily, knowing what is happening every time. Of these, visualization, simulators, and debugging tools are the most important ones.
ROS is released under the terms of the BSD (Berkeley Software Distribution) license and is an open source software. It is free for commercial and research use. The *-ros-pkg contributed packages are licensed under a variety of open source licenses.
ROS promotes code reutilization so that the robotics developers and scientists do not have to reinvent the wheel all the time. With ROS, you can do this and more. You can take the code from the repositories, improve it, and share it again.
Now we are going to show you how to install ROS Electric and Fuerte. Although in this book we use Fuerte, you may need to install the Electric version to use some code that works only in this version or you may need Electric because your robot doesn't have the latest version of Ubuntu.
As we said before, the operating system used in the book is Ubuntu and we are going to use it in all tutorials. If you are using another operating system and you want to follow the book, the best option is to install a virtual machine with an Ubuntu copy. Later, we will explain how to install a virtual machine in order to use ROS in it.
Anyway, if you want to try installing it in an operating system other than Ubuntu,
you can find the required instructions in the following link: http://wiki.ros.org/ fuerte/Installation.
Installing ROS Electric – using
repositories
There are a few methods available to install ROS. You can do it directly using repositories, the way we will do now, or you can use the code files and compile it. It is more secure to do it using repositories because you have the certainty that it will work.
In this section, you will see the steps to install ROS Electric on your computer.
The installation process has been explained in detail in the official ROS page:
http://wiki.ros.org/electric/Installation.
We assume that you know what an Ubuntu repository is and how to manage it. If you have any queries, check the following link to get more information: https://help.ubuntu.com/community/Repositories/Ubuntu.
Before starting with the installation, we need to configure our repositories.
Navigate to Edit | Software Sources and you will see the following window on your screen. Make sure that everything is selected as shown in the following screenshot:
Adding repositories to your sources.list file
In this step, you have to select your Ubuntu version. It is possible to install ROS Electric in various versions of the operating system. You can use any of them, but we recommend you to always use the most updated version to avoid problems:• A specific way to install the repositories for an Ubuntu-based distro such
as Ubuntu Lucid Lynx (10.04) is as follows:
$ sudo sh -c 'echo "deb http://packages.ros.org/ros/ubuntu lucid main" > /etc/apt/sources.list.d/ros-latest.list'
• A generic way for installing any distro of Ubuntu relies on the lsb_release command that is supported on all Linux Debian-based distro:
$ sudo sh -c 'echo "deb http://packages.ros.org/ros/ubuntu `lsb_ release -cs` main" > /etc/apt/sources.list.d/ros-latest.list'
Once you have added the correct repository, your operating system knows where to download the programs that need to be installed on your system.
Setting up your keys
This step is to confirm that the origin of the code is correct, and nobody has modified
the code or programs without the knowledge of the owner. Normally, when you add a new repository, you have to add the keys of that repository so that it is added to your system's trusted list:
$ wget http://packages.ros.org/ros.key -O - | sudo apt-key add –
We can now be sure that the code came from an authorized site.
Installation
Now we are ready to start the installation. Before we start, it would be better to update the software to avoid problems with libraries or the wrong software version. We do this with the following command:
$ sudo apt-get update
ROS is huge; sometimes you will install libraries and programs that you will
never use. Normally, it has four different installations depending on the final use;
Don't worry if you don't know what you are installing right now, be it rviz, simulators, or navigation. You will learn everything in the upcoming chapters:
• The easiest (and recommended if you have enough hard disk space)
installation is known as desktop-full. It comes with ROS, the Rx tools, the rviz visualizer (for 3D), many generic robot libraries, the simulator in 2D (such as stage) and 3D (usually Gazebo), the navigation stack (to move, localize, do mapping, and control arms), and also perception libraries using vision, lasers or RGB-D cameras:
$ sudo apt-get install ros-electric-desktop-full
• If you do not have enough disk space, or you prefer to install only a few
stacks, first install only the desktop installation file, which comes only with
ROS, the Rx tools, rviz, and generic robot libraries. Later, you can install the rest of the stacks when you need them (using aptitude and looking for the ros-electric-* stacks, for example):
$ sudo apt-get install ros-electric-desktop
• If you only want the bare bones, install ROS-base, which is usually recommended for the robot itself or computers without a screen or just a TTY. It will install the ROS package with the build and communication libraries and no GUI tools at all:
$ sudo apt-get install ros-electric-ros-base
• Finally, along with whatever option you choose from this list, you can install
individual/specific ROS stacks (for a given stack name):
$ sudo apt-get install ros-electric-STACK
The environment setup
Congratulations! You are in this step because you have an installed version of ROS on your system. To start using it, the system must know where the executable or
binary files as well as other commands are. To do this, you need to execute the next
script. If you install another ROS distro in addition to your existing version, you can work with both by calling the script of the one you need every time, since this script simply sets your environment. Here, we will use the one for ROS Electric, but just change electric to fuerte or groovy in the following command if you want to try other distros:
If you type roscore in the shell, you will see that something is starting. This is the
best test to find out whether you have ROS and whether it is installed correctly.
Note that if you open another shell and type roscore or any other ROS command, it does not work. This is because it is necessary to execute the script again to
configure the global variables and path for the location where ROS is installed.
It is very easy to solve this. You only need to add the script at the end of your .bashrc file and when you start a new shell, the script will execute and you will
have the environment configured. Use the following command to do this:
$ echo "source /opt/ros/electric/setup.bash" >> ~/.bashrc $ source ~/.bashrc
If it happens that you have more than a single ROS distribution installed on your system, your ~/.bashrc file must source only setup.bash of the version you are currently using. This is because the last call will override the environment set of the others, as we have mentioned previously, to have several distros living in the same system and switch among them.
Installing ROS Fuerte – using repositories
In this section, we are going to install ROS Fuerte on our computer. You can have different versions installed on the same computer without problems; you only need to select the version that you want to use in the .bashrc file. You will see how to do this in this section.If you want to see the official page where this process is explained, you can visit the
following URL: http://wiki.ros.org/fuerte/Installation.
You can install ROS using two methods: using repositories and using source code. Normal users will only need to make an installation using repositories to get a functional installation of ROS. You can install ROS using the source code but this process is for advanced users and we don't recommend it.
Configuring your Ubuntu repositories
First, you must check that your Ubuntu accepts restricted, universal, and multiversal repositories. Refer to the Installing ROS Electric – using repositories section if you want to see how to do it.
Normally, Ubuntu is configured to allow these repositories and you won't have
Setting up your source.list file
Now we are going to add the URLs from where we can download the code. Note that ROS Fuerte doesn't work for Maverick and Natty, so you must have Ubuntu 10.04, 11.10, or 12.04 on your computer.
For this book we have used Ubuntu 12.04 and it works fine. All the examples have
been checked, compiled, and executed in this version of Ubuntu.
Open a new shell and type the following command, as we did before, which should work for any Ubuntu version you have:
$ sudo sh -c 'echo "deb http://packages.ros.org/ros/ubuntu `lsb_release -cs` main" > /etc/apt/sources.list.d/ros-latest.list'
Setting up your keys
It is important to add the key because with it we can be sure that we are
downloading the code from the right place and nobody has modified it.
If you have followed the steps to install ROS Electric, you don't need to do this again as you have already completed this earlier; if not, add the repository using the following command:
$ wget http://packages.ros.org/ros.key -O - | sudo apt-key add –
Installation
We are ready to install ROS Fuerte at this point. Before doing something, it is necessary to update all the programs used by ROS. We do it to avoid incompatibility problems.
Type the following command in a shell and wait:
$ sudo apt-get update
Depending on whether you had the system updated or not, the command will take
more or less time to finish.
For this book, we are going to install the full version. This version will install all the examples, stacks, and programs. This is a good option for us because in some chapters of this book, we will need to use tools, and if we don't install it now, we will have to do it later:
• The easiest (and recommended if you have enough hard disk space) installation is known as desktop-full. It comes with ROS, the Rx tools, the rviz visualizer (for 3D), many generic robot libraries, the simulator in 2D (such as stage) and 3D (usually Gazebo), the navigation stack (to move, localize, do mapping, and control arms), and also perception libraries using vision, lasers, or RGB-D cameras:
$ sudo apt-get install ros-fuerte-desktop-full
• If you do not have enough disk space, or you prefer to install only a few
stacks, first install only the desktop installation file, which comes only with
ROS, the Rx tools, rviz, and generic robot libraries. Later, you can install the rest of the stacks when you need them (using aptitude and looking for the ros-electric-* stacks, for example):
$ sudo apt-get install ros-fuerte-desktop
• If you only want the bare bones, install ROS-comm, which is usually recommended for the robot itself or computers without a screen or just a TTY. It will install the ROS package with the build and communication libraries and no GUI tools at all:
$ sudo apt-get install ros-fuerte-ros-comm
• Finally, along with whatever option you choose from the list, you can
install individual/specific ROS stacks (for a given stack name):
$ sudo apt-get install ros-fuerte-STACK
Do not worry if you are installing things that you do not know. In the upcoming chapters, you will learn about everything you are installing and how to use it.
When you gain experience with ROS, you can make basic installations in your robots using only the core of ROS, using less resources, and taking only what you need.
Downloading the example code
You can download the example code files for all Packt books you have
purchased from your account at http://www.packtpub.com. If you purchased this book elsewhere, you can visit http://www.packtpub. com/support and register to have the files e-mailed directly to you.
The environment setup
Now that you have installed ROS, to start using it, you must provide Ubuntu with the path where ROS is installed. Open a new shell and type the following command:
$ roscore
roscore: command not found
You will see this message because Ubuntu does not know where to search for the commands. To solve it, type the following command in a shell:
$ source /opt/ros/fuerte/setup.bash
Then, type the roscore command once again, and you will see the following output:
...
started roslaunch server http://localhost:45631/ ros_comm version 1.8.11
SUMMARY ========
PARAMETERS * /rosdistro * /rosversion
NODES
auto-starting new master ....
This means that Ubuntu knows where to find the commands to run ROS. Note that
if you open another shell and type roscore, it will not work. This is because it is necessary to add this script within the .bashrc file. So, every time you start a new shell, the scripts will run because .bashrc always runs when a shell runs.
Use the following commands to add the script:
As mentioned before, only source setup.bash for one ROS distribution. Imagine that you had Electric and Fuerte installed on your computer, and you are using Fuerte as the normal version. If you want to change the version used in a shell, you only have to type the following command:
$ source /opt/ros/electric/setup.bash
If you want to use another version on a permanent basis, you must change the .bashrc
file and put the correct script for your version.
Standalone tools
ROS has some tools that need to be installed after the principal installation. These tools will help us install dependencies between programs to compile, download, and install packages from ROS. These tools are rosinstall and rosdep. We recommend installing them because we will use them in the upcoming chapters. To install these tools, type the following command in a shell:
$ sudo apt-get install python-rosinstall python-rosdep
Now we have a full installation of ROS on our system. As you can see, only a few steps are necessary to do it.
It is possible to have two or more versions of ROS installed on our computer. Furthermore, you can install ROS on a virtual machine if you don't have Ubuntu installed on your computer.
In the next section, we will explain how to install a virtual machine and use a drive image with ROS. Perhaps this is the best way to get ROS for new users.
How to install VirtualBox and Ubuntu
VirtualBox is a general-purpose, full virtualizer for x86 hardware, targeted at server, desktop, and embedded use. VirtualBox is free and supports all the major operating
systems and pretty much every Linux flavor out there.
In the upcoming sections, we are going to show how to install VirtualBox and a new installation of Ubuntu. Further, with this virtual installation, you could have a clean installation to restart your development machine if you have any problem, or to save
the development machine with all the setup files necessary for your robot.
Downloading VirtualBox
The first step is to download the VirtualBox installation file. At the time of writing,
the following links had the latest versions available:
• https://www.virtualbox.org/wiki/Downloads
• http://download.virtualbox.org/virtualbox/4.2.0/VirtualBox-4.2.1-80871-OSX.dmg
Once installed, you need to download the image of Ubuntu. For this tutorial, we will use an Ubuntu copy with ROS Fuerte installed. You can download it from the following URL: http://nootrix.com/wp-content/uploads/2012/08/ROS.ova.
You can find different virtual machines with preinstalled Ubuntu and ROS, but we
are going to use this version because it is referred by the official page of ROS.
Creating the virtual machine
Creating a new virtual machine with the downloaded file is very easy; just follow the steps outlined in this section. Open VirtualBox and navigate to File |
In the next window, you can configure the parameters for the new virtual machine. Keep the default configuration and only change the name of the virtual system. This
name helps you distinguish this virtual machine from others. Our recommendation is to put a descriptive name; in our case, the book's name.
Click on the Import button and accept the software license agreement in the next window. Then, you will see a progress bar. It means that VirtualBox is copying the
file with the virtual image and is creating a new copy with the new name.
Note that this process doesn't modify the original file ROS.ova, and you could create
more virtual machines with different copies from the original file.
The process will take a few minutes depending on the speed of your computer.
To disable USB support, right-click on the virtual machine and select Settings. In the toolbar, navigate to Ports | USB and uncheck Enable USB 2.0 (EHCI) Controller. You can now start the virtual machine again, and it should start without problems.
When you have finished these steps, you will have a full copy of ROS Fuerte that
can be used in this book. You can run all the examples and stacks that we are going to work with. Unfortunately, VirtualBox has problems while working with real hardware, and it's possible that you can't use this copy of ROS Fuerte for the steps outlined in Chapter 4, Using Sensors and Actuators with ROS.
Summary
In this chapter we have learned to install two different versions of ROS (Electric and Fuerte) in Ubuntu. With these steps, you have all the necessary software installed on your system to start working with ROS and the examples of this book. You can install ROS using the source code as well. This option is for advanced users, and we recommend that you use this repository only for installation; it is more common and normally it should not give errors or problems.
It is a good idea to play with ROS and the installation on a virtual machine. This way, if you have problems with the installation or with something, you can reinstall a new copy of your operating system and start again.
Normally, with virtual machines, you will not have access to real hardware, such as sensors and actuators. Anyway, you can use it for testing algorithms, for example.
The ROS Architecture
with Examples
Once you have installed ROS, you surely must be thinking, "OK, I have installed it,
and now what?" In this chapter, you will learn the structure of ROS and what parts
it has. Furthermore, you will start to create nodes, packages, and use ROS with examples using TurtleSim.
The ROS architecture has been designed and divided into three sections or levels of concepts:
• The Filesystem level
• The Computation Graph level
• The Community level
The first level is the Filesystem level. In this level, a group of concepts is used to explain how ROS is internally formed, the folder structure, and the minimal files
that it needs to work.
The second level is the Computation Graph level where communication between processes and systems happen. In this section, we will see all the concepts and systems that ROS has to set up systems, to handle all the processes, to communicate with more than a single computer, and so on.
Understanding the ROS Filesystem level
When you start to use or develop projects with ROS, you will start to see this concept that could sound strange in the beginning, but as you use ROS, it will begin to become familiar to you.
Similar to an operating system, an ROS program is divided into folders, and these
folders have some files that describe their functionalities:
• Packages: Packages form the atomic level of ROS. A package has the minimum structure and content to create a program within ROS. It may
have ROS runtime processes (nodes), configuration files, and so on. • Manifests: Manifests provide information about a package, license information, dependencies, compiler flags, and so on. Manifests are
managed with a file called manifests.xml.
• Stacks: When you gather several packages with some functionality, you will obtain a stack. In ROS, there exists a lot of these stacks with different uses, for example, the navigation stack.
• Stack manifests: Stack manifests (stack.xml) provide data about a stack, including its license information and its dependencies on other stacks.
• Message (msg) types: A message is the information that a process sends to other processes. ROS has a lot of standard types of messages. Message descriptions are stored in my_package/msg/MyMessageType.msg.
In the following screenshot, you can see the contents of the chapter3 folder of this book. What you see is a package where the examples of code for the chapter are stored along with the manifest, and much more. The chapter3 folder does not have messages and services, but if it had, you would have seen the srv and msg folders.
Packages
Usually, when we talk about packages, we refer to a typical structure of files and folders. This structure looks as follows:
• bin/: This is the folder where our compiled and linked programs are stored after building/making them.
• include/package_name/: This directory includes the headers of libraries that you would need. Do not forget to export the manifest, since they are meant to be provided for other packages.
• msg/: If you develop nonstandard messages, put them here.
• scripts/: These are executable scripts that can be Bash, Python, or any other script.
• src/: This is where the source files of your programs are present. You may create a folder for nodes and nodelets, or organize it as you want.
• srv/: This represents the service (srv) types.
• CMakeLists.txt: This is the CMake build file.
To create, modify, or work with packages, ROS gives us some tools for assistance:
• rospack: This command is used to get information or find packages in the system
• roscreate-pkg: When you want to create a new package, use this command
• rosmake: This command is used to compile a package
• rosdep: This command installs system dependencies of a package
• rxdeps: This command is used if you want to see the package dependencies as a graph
To move between the packages and their folders and files, ROS gives us a very useful
package called rosbash, which provides some commands very similar to the Linux commands. The following are a few examples:
• roscd: This command helps to change the directory; this is similar to the cd command in Linux
• rosed: This command is used to edit a file
• roscp: This command is used to copy a file from some package
• rosd: This command lists the directories of a package
• rosls: This command lists the files from a package; this is similar to the ls command in Linux
The file manifest.xml must be in a package, and it is used to specify information
about the package. If you find this file inside a folder, probably this folder is a package.
If you open a manifest.xml file, you will see information about the name of the package, dependencies, and so on. All of this is to make the installation and the distribution of these packages easy.
Two typical tags that are used in the manifest file are <depend> and <export>. The <depend> tag shows which packages must be installed before installing the current package. This is because the new package uses some functionality of the other package. The <export> tag tells the system what flags need to be used to compile the package, what headers are to be included, and so on.
The following code snippet is an example of this file:
<package>
<description brief="short description"> long description,
</description>
<author>Aaron Martinez, Enrique Fernandez</author> <license>BSD</license>
<depend package="roscpp"/> <depend package="common"/> <depend package="otherPackage"/>
<versioncontrol type="svn" url="https://urlofpackage/trunk"/> <export>
<cpp cflags="-I${prefix}/include" lflags="-L${prefix}/lib -lros"/> </package>
Stacks
Packages in ROS are organized into ROS stacks. While the goal of packages is to create minimal collections of code for easy re-use, the goal of stacks is to simplify the process of code sharing.
A stack needs a basic structure of files and folders. You can create it manually, but ROS provides us with the command tool roscreate-stack for this process.
The following three files are necessary for a stack: CMakeList.txt, Makefile, and stack.xml. If you see stack.xml in a folder, you can be sure that this is a stack.
The following code snippet is an example of this file:
<stack>
<description brief="Sample_Stack">Sample_Stack1</description> <author>Maintained by AaronMR</author>
<license>BSD,LGPL,proprietary</license> <review status="unreviewed" notes=""/> <url>http://someurl.blablabla</url>
<depend stack="common_msgs" /> <!-- nav_msgs, sensor_msgs, geometry_ msgs -->
<depend stack="ros_tutorials" /> <!-- turtlesim --> </stack>
Messages
ROS uses a simplified message description language for describing the data values
that ROS nodes publish. With this description, ROS can generate the right source code for these types of messages in several programming languages.
ROS has a lot of messages predefined, but if you develop a new message, it will
be in the msg/ folder of your package. Inside that folder, some files with the .msg
A message must have two principal parts: fields and constants. Fields define the type
of data to be transmitted in the message, for example, int32, float32, and string, or new types that you have created before, such as type1 and type2. Constants
define the name of the fields.
An example of an msg file is as follows:
int32 id float32 vel string name
In ROS, you can find a lot of standard types to use in messages as shown in the
following table:
Primitive type Serialization C++ Python
bool Unsigned 8-bit int uint8_t bool int8 Signed 8-bit int int8_t int
uint8 Unsigned 8-bit int uint8_t int
int16 Signed 16-bit int int16_t int
uint16 Unsigned 16-bit int uint16_t int
int32 Signed 32-bit int int32_t int
uint32 Unsigned 32-bit int uint32_t int
int64 Signed 64-bit int int64_t long
uint64 Unsigned 64-bit int uint64_t long
float32 32-bit IEEE float float float
float64 64-bit IEEE float double float
string ASCII string (4-bit) std::string string
time Secs/nsecs signed
32-You can download the example code files for all Packt books you have
purchased from your account at http://www.packtpub.com. If you purchased this book elsewhere, you can visit http://www.packtpub. com/support and register to have the files e-mailed directly to you.
A special type in ROS is Header. This is used to add the timestamp, frame, and so on. This allows messages to be numbered so that we can know who is sending the message. Other functions can be added, which are transparent to the user but are being handled by ROS.
The Header type contains the following fields:
uint32 seq time stamp string frame_id
Thanks to Header, it is possible to record the timestamp and frame of what is happening with the robot, as we will see in the upcoming chapters.
In ROS, there exist some tools to work with messages. The tool rosmsg prints out the
message definition information and can find the source files that use a message type.
In the upcoming sections, we will see how to create messages with the right tools.
Services
ROS uses a simplified service description language for describing ROS service types. This builds directly upon the ROS msg format to enable request/response communication between nodes. Service descriptions are stored in .srv files in the srv/ subdirectory of a package.
To call a service, you need to use the package name along with the service name;
for example, for the file sample_package1/srv/sample1.srv, you will refer to it as sample_package1/sample1.
There exist some tools that perform some functions with services. The tool rossrv prints out service descriptions, packages that contain the .srv files, and can find
source files that use a service type.
If you want to create a service, ROS can help you with the services generator.
These tools generate code from an initial specification of the service. You only
need to add the line gensrv() to your CMakeLists.txt file.
Understanding the ROS Computation
Graph level
ROS creates a network where all the processes are connected. Any node in the system can access this network, interact with other nodes, see the information that they are sending, and transmit data to the network.
The basic concepts in this level are nodes, the Master, the Parameter Server, messages, services, topics, and bags, all of which provide data to the graph in different ways:
• Nodes: Nodes are processes where computation is done. If you want to have a process that can interact with other nodes, you need to create a node with this process to connect it to the ROS network. Usually, a system will have many nodes to control different functions. You will see that it is better to have many nodes that provide only a single functionality, rather than a large node that makes everything in the system. Nodes are written with an ROS client library, for example, roscpp or rospy.
• Master: The Master provides name registration and lookup for the rest of the nodes. If you don't have it in your system, you can't communicate with nodes, services, messages, and others. But it is possible to have it in a computer where nodes work in other computers.
• Parameter Server: The Parameter Server gives us the possibility to have data stored using keys in a central location. With this parameter, it is possible to
configure nodes while it's running or to change the working of the nodes. • Messages: Nodes communicate with each other through messages.
• Topics: Each message must have a name to be routed by the ROS network. When a node is sending data, we say that the node is publishing a topic. Nodes can receive topics from other nodes simply by subscribing to the topic. A node can subscribe to a topic, and it isn't necessary that the node that is publishing this topic should exist. This permits us to decouple the production of the consumption. It's important that the name of the topic must be unique to avoid problems and confusion between topics with the same name.
• Services: When you publish topics, you are sending data in a many-to-many fashion, but when you need a request or an answer from a node, you can't do it with topics. The services give us the possibility to interact with nodes. Also, services must have a unique name. When a node has a service, all the nodes can communicate with it, thanks to ROS client libraries.
• Bags: Bags are a format to save and play back the ROS message data. Bags are an important mechanism for storing data, such as sensor data, that can
be difficult to collect but is necessary for developing and testing algorithms.
You will use bags a lot while working with complex robots.
In the following figure, you can see the graphical representation of this level.
Nodes
Nodes are executables that can communicate with other processes using topics, services, or the Parameter Server. Using nodes in ROS provides us with fault tolerance and separates the code and functionalities making the system simpler.
A node must have a unique name in the system. This name is used to permit the node to communicate with another node using its name without ambiguity. A node can be written using different libraries such as roscpp and rospy; roscpp is for C++ and rospy is for Python. Throughout this book, we will be using roscpp.
ROS has tools to handle nodes and give us information about it such as rosnode. The tool rosnode is a command-line tool for displaying information about nodes, such as listing the currently running nodes. The commands supported are as follows:
• rosnode info node: This prints information about the node
• rosnode kill node: This kills a running node or sends a given signal
• rosnode list: This lists the active nodes
• rosnode machine hostname: This lists the nodes running on a particular machine or lists the machines
• rosnode ping node: This tests the connectivity to the node
• rosnode cleanup: This purges registration information from unreachable nodes
In the upcoming sections, we will learn how to use these commands with some examples.
A powerful feature of ROS nodes is the possibility to change parameters while you are starting the node. This feature gives us the power to change the node name,
topic names, and parameter names. We use this to reconfigure the node without
recompiling the code so that we can use the node in different scenes.
An example for changing a topic name is as follows:
$ rosrun book_tutorials tutorialX topic1:=/level1/topic1
This command will change the topic name topic1 to /level1/topic1. I am sure
you do not understand this at this moment, but you will find the utility of it in the
To change parameters in the node, you can do something similar to changing the topic name. For this, you only need to add an underscore to the parameter name; for example:
$ rosrun book_tutorials tutorialX _param:=9.0
This will set param to the float number 9.0.
Keep in mind that you cannot use some names that are reserved by the system. They are:
• __name: This is a special reserved keyword for the name of the node
• __log: This is a reserved keyword that designates the location where the
node's log file should be written
• __ip and __hostname: These are substitutes for ROS_IP and ROS_HOSTNAME
• __master: This is a substitute for ROS_MASTER_URI
• __ns: This is a substitute for ROS_NAMESPACE
Topics
Topics are buses used by nodes to transmit data. Topics can be transmitted without a direct connection between nodes, meaning the production and consumption of data are decoupled. A topic can have various subscribers.
Each topic is strongly typed by the ROS message type used to publish it, and nodes can only receive messages from a matching type. A node can subscribe to a topic only if it has the same message type.
The topics in ROS can be transmitted using TCP/IP and UDP. The TCP/IP-based transport is known as TCPROS and uses the persistent TCP/IP connection. This is the default transport used in ROS.
The UDP-based transport is known as UDPROS and is a low-latency, lossy transport. So, it is best suited for tasks such as teleoperation.
ROS has a tool to work with topics called rostopic. It is a command-line tool that gives us information about the topic or publishes data directly on the network.
This tool has the following parameters:
• rostopic bw /topic: This displays the bandwidth used by the topic.
• rostopic find message_type: This finds topics by their type.
• rostopic hz /topic: This displays the publishing rate of the topic.
• rostopic info /topic: This prints information about the active topic, the topics published, the ones it is subscribed to, and services.
• rostopic list: This prints information about active topics.
• rostopic pub /topic type args: This publishes data to the topic. It allows us to create and publish data in whatever topic we want, directly from the command line.
• rostopic type /topic: This prints the topic type, that is, the type of message it publishes.
We will learn to use it in the upcoming sections.
Services
When you need to communicate with nodes and receive a reply, you cannot do it with topics; you need to do it with services.
The services are developed by the user, and standard services don't exist for nodes.
The files with the source code of the messages are stored in the srv folder.
Like topics, services have an associated service type that is the package resource name of the .srv file. As with other ROS filesystem-based types, the service type is the package name and the name of the .srv file. For example, the chapter2_ tutorials/srv/chapter2_srv1.srv file has the service type chapter2_ tutorials/chapter2_srv1.
ROS has two command-line tools to work with services, rossrv and rosservice. With rossrv, we can see information about the services' data structure, and it has the exact same usage as rosmsg.
With rosservice, we can list and query services. The commands supported are as follows:
• rosservice call /service args: This calls the service with the provided arguments
• rosservice find msg-type: This finds services by the service type
• rosservice info /service: This prints information about the service
• rosservice list: This lists the active services
• rosservice type /service: This prints the service type