“If you’re looking to create an iPhone or iPad game, Learning Cocos2D should be the first book on your shopping list. Rod and Ray do a phenomenal job of taking you through the entire process from concept to app, clearly explaining both how to do each step as well as why you’re dong it.” —Jeff LaMarche, Principal, MartianCraft, LLC, and coauthor of Beginning iPhone Development (Apress, 2009)
“This book provides an excellent introduction to iOS 2D game develop-ment. Beyond that, the book also provides one of the best introductions to Box2D available. I am truly impressed with the detail and depth of Box2D coverage.”
—Erin Catto, creator of Box2D
“Warning: reading this book will make you need to write a game! Learning Cocos2D is a great fast-forward into writing the next hit game for iOS— definitely a must for the aspiring indie iOS game developer (regardless of experience level)! Thanks, Rod and Ray, for letting me skip the learning curve; you’ve really saved my bacon!”
—Eric Hayes, Principle Engineer, Brewmium LLC (and Indie iOS Developer)
“Learning Cocos2D is an outstanding read, and I highly recommend it to any iOS developer wanting to get into game development with Cocos2D. This book gave me the knowledge and confidence I needed to write an iOS game without having to be a math and OpenGL whiz.”
—Kirby Turner, White Peak Software, Inc.
“Learning Cocos2D is both an entertaining and informative book; it covers everything you need to know about creating games using Cocos2D.” —Fahim Farook, RookSoft (rooksoft.co.nz)
5IF
$GGLVRQ:HVOH\/HDUQLQJ6HULHV
JTBDPMMFDUJPOPGIBOETPOQSPHSBNNJOH
HVJEFTUIBUIFMQZPVRVJDLMZMFBSOBOFXUFDIOPMPHZPSMBOHVBHFTPZPVDBO
BQQMZXIBUZPVWFMFBSOFESJHIUBXBZ
&BDIUJUMFDPNFTXJUITBNQMFDPEFGPSUIFBQQMJDBUJPOPSBQQMJDBUJPOTCVJMUJO
UIFUFYU5IJTDPEFJTGVMMZBOOPUBUFEBOEDBOCFSFVTFEJOZPVSPXOQSPKFDUT
XJUIOPTUSJOHTBUUBDIFE.BOZDIBQUFSTFOEXJUIBTFSJFTPGFYFSDJTFTUP
FODPVSBHFZPVUPSFFYBNJOFXIBUZPVIBWFKVTUMFBSOFEBOEUPUXFBLPS
BEKVTUUIFDPEFBTBXBZPGMFBSOJOH
5JUMFTJOUIJTTFSJFTUBLFBTJNQMFBQQSPBDIUIFZHFUZPVHPJOHSJHIUBXBZBOE
MFBWFZPVXJUIUIFBCJMJUZUPXBMLPGGBOECVJMEZPVSPXOBQQMJDBUJPOBOEBQQMZ
UIFMBOHVBHFPSUFDIOPMPHZUPXIBUFWFSZPVBSFXPSLJOHPO
Learning Cocos2D
A Hands-On Guide to Building iOS
Games with Cocos2D, Box2D,
and Chipmunk
Rod Strougo
Ray Wenderlich
Upper Saddle River, NJ • Boston • Indianapolis • San Francisco New York • Toronto • Montreal • London • Munich • Paris • Madrid
lisher was aware of a trademark claim, the designations have been printed with initial capital letters or in all capitals.
The authors and publisher have taken care in the preparation of this book, but make no expressed or implied warranty of any kind and assume no responsibility for errors or omissions. No liability is assumed for incidental or consequential damages in connection with or arising out of the use of the information or programs contained herein.
The publisher offers excellent discounts on this book when ordered in quantity for bulk purchases or special sales, which may include electronic versions and/or custom covers and content particular to your business, training goals, marketing focus, and branding interests. For more information, please contact:
U.S. Corporate and Government Sales (800) 382-3419
For sales outside the United States please contact:
International Sales [email protected]
Visit us on the Web: informit.com/aw
Library of Congress Cataloging-in-Publication Data Strougo, Rod,
Learning Cocos2D : a hands-on guide to building iOS games with Cocos2D, Box2D, and Chipmunk / Rod Strougo, Ray Wenderlich. p. cm.
Includes index.
ISBN-13: 978-0-321-73562-1 (pbk. : alk. paper) ISBN-10: 0-321-73562-5 (pbk. : alk. paper)
1. iPhone (Smartphone) —Programming. 2. iPad (Computer) —Programming. 3. Computer games—Programming. I. Wenderlich, Ray, 1980- II. Title. QA76.8.I64S87 2011
794.8’1526—dc23
2011014419
Copyright © 2012 Pearson Education, Inc.
All rights reserved. Printed in the United States of America. This publication is protected by copyright, and permission must be obtained from the publisher prior to any prohibited reproduction, storage in a retrieval system, or transmission in any form or by any means, electronic, mechanical, photocopying, recording, or likewise. For information regarding permissions, write to:
Pearson Education, Inc.
Rights and Contracts Department 501 Boylston Street, Suite 900 Boston, MA 02116
Fax: (617) 671-3447
ISBN-13: 978-0-321-73562-1 ISBN-10: 0-321-73562-5
Dedicated to my wife, Agata. —Rod
Dedicated to my wife, Vicki. —Ray
Preface xxi
Acknowledgments xxxiii About the Authors xxxvii
I Getting Started with Cocos2D 1
1 Hello, Cocos2D 3 2 Hello, Space Viking 23
3 Introduction to Cocos2D Animations and Actions 57 4 Simple Collision Detection and the First Enemy 83
II More Enemies and More Fun 115
5 More Actions, Effects, and Cocos2D Scheduler 117 6 Text, Fonts, and the Written Word 151
III From Level to Game 167
7 Main Menu, Level Completed, and Credits Scenes 169
8 Pump Up the Volume! 197
9 When the World Gets Bigger: Adding Scrolling 231
IV Physics Engines 277
10 Basic Game Physics: Adding Realism with Box2D 279
11 Intermediate Game Physics: Modeling, Racing, and Leaping 333
12 Advanced Game Physics: Even Better than the Real Thing 375
V Particle Systems, Game Center, and Performance 479
14 Particle Systems: Creating Fire, Snow, Ice, and More 481
15 Achievements and Leaderboards with Game Center 495
16 Performance Optimizations 545 17 Conclusion 565
Preface xxi
Acknowledgments xxxiii About the Authors xxxvii
I Getting Started with Cocos2D 1
1 Hello, Cocos2D 3
Downloading and Installing Cocos2D 4 Downloading Cocos2D 4
Installing the Cocos2D Templates 5 Creating Your First Cocos2D HelloWorld 6
Inspecting the Cocos2D Templates 6 Building the Cocos2D HelloWorld Project 7 Taking HelloWorld Further 9
Adding Movement 10
For the More Curious: Understanding the Cocos2D HelloWorld 11
Scenes and Nodes 11 From the Beginning 14
Looking Further into the Cocos2D Source Code 18 Getting CCHelloWorld on Your iPhone or iPad 20
Letting Xcode Do Everything for You 20 Building for Your iPhone or iPad 21 Summary 22
Challenges 22
2 Hello, Space Viking 23
Creating the SpaceViking Project 23 Creating the Space Viking Classes 24 Creating the Background Layer 26
The Gameplay Layer: Adding Ole the Viking to the Game 29
The GameScene Class: Connecting the Layers in a Scene 31
Commanding the Cocos2D Director 34 Adding Movement 35
Importing the Joystick Classes 35 Adding the Joystick and Buttons 36
Applying Joystick Movements to Ole the Viking 40 Texture Atlases 44
Technical Details of Textures and Texture Atlases 45
Creating the Scene 1 Texture Atlas 48 Adding the Scene 1 Texture Atlas to Space Viking 51
For the More Curious: Testing Out CCSpriteBatchNode 52
Fixing Slow Performance on iPhone 3G and Older Devices 53
Summary 54 Challenges 54
3 Introduction to Cocos2D Animations and Actions 57
Animations in Cocos2D 57 Space Viking Design Basics 62
Actions and Animation Basics in Cocos2D 66 Using Property List Files to Store Animation Data 67 Organization, Constants, and Common Protocols 69
Creating the Constants File 71 Common Protocols File 72
The GameObject and GameCharacter Classes 74 Creating the GameObject 74
Creating the GameCharacter Class 80 Summary 82
Challenges 82
4 Simple Collision Detection and the First Enemy 83 Creating the Radar Dish and Viking Classes 83
Creating the RadarDish Class 83 Creating the Viking Class 90 Final Steps 105
Summary 112 Challenges 113
II More Enemies and More Fun 115
5 More Actions, Effects, and Cocos2D Scheduler 117
Power-Ups 118
Mallet Power-Up 118 Health Power-Up 120 Space Cargo Ship 122 Enemy Robot 125
Creating the Enemy Robot 126 Adding the PhaserBullet 137
GameplayLayer and Viking Updates 141 Running Space Viking 144
For the More Curious: Effects in Cocos2D 145 Effects for Fun in Space Viking 146 Running the EffectsTest 148
Returning Sprites and Objects Back to Normal 149 Summary 149
Exercises and Challenges 149
6 Text, Fonts, and the Written Word 151 CCLabelTTF 151
Adding a Start Banner to Space Viking 152 Understanding Anchor Points and Alignment 153 CCLabelBMFont 155
Using Glyph Designer 156
Using the Hiero Font Builder Tool 156 Using CCLabelBMFont Class 159 For the More Curious: Live Debugging 160
Updating EnemyRobot 160 Updating GameplayLayer 163 Other Uses for Text Debugging 164 Summary 165
III From Level to Game 167
7 Main Menu, Level Completed, and Credits Scenes 169
Scenes in Cocos2D 169
Introducing the GameManager 170 Creating the GameManager 172 Menus in Cocos2D 179
Scene Organization and Images 180
Adding Images and Fonts for the Menus 181 Creating the Main Menu 182
Creating the MainMenuScene 182 MainMenuLayer class 183
Additional Menus and GameplayLayer 190 Importing the Intro, LevelComplete, Credits, and Options Scenes and Layers 190
GameplayLayer 190
Changes to SpaceVikingAppDelegate 192
For the More Curious: The IntroLayer and LevelComplete Classes 193
LevelCompleteLayer Class 194 Summary 195
Challenges 195
8 Pump Up the Volume! 197 Introducing CocosDenshion 197
Importing and Setting Up the Audio Filenames 198 Adding the Audio Files to Space Viking 198 Audio Constants 198
Synchronous versus Asynchronous Loading of Audio 201
Loading Audio Synchronously 201 Loading Audio Asynchronously 203 Adding Audio to GameManager 204 Adding the soundEngine to GameObjects 215
Adding Sounds to RadarDish and SpaceCargoShip 216
Adding Sound Effects to Ole the Viking 222 Adding the Sound Method Calls in changeState for Ole 226
Adding Music to the Menu Screen 228 Adding Music to Gameplay 228 Adding Music to the MainMenu 228 For the More Curious: If You Need More Audio Control 229
Summary 230 Challenges 230
9 When the World Gets Bigger: Adding Scrolling 231
Adding the Logic for a Larger World 232 Common Scrolling Problems 234 Creating a Larger World 235
Creating the Second Game Scene 236 Creating the Scrolling Layer 242 Scrolling with Parallax Layers 250 Scrolling to Infinity 252
Creating the Scrolling Layer 254 Creating the Platform Scene 263 Tile Maps 265
Installing the Tiled Tool 266 Creating the Tile Map 267
Cocos2D Compressed TiledMap Class 271 Adding a TileMap to a ParallaxNode 272 Summary 276
Challenges 276
IV Physics Engines 277
10 Basic Game Physics: Adding Realism with Box2D 279
Getting Started 279
Adding Box2D Files to Your Project 284 Box2D Units 288
Hello, Box2D! 289
Creating a Box2D Object 292 Box2D Debug Drawing 295 Putting It All Together 296 Creating Ground 299
Basic Box2D Interaction and Decoration 302 Dragging Objects 304
Mass, Density, Friction, and Restitution 309 Decorating Your Box2D Bodies with Sprites 313 Making a Box2D Puzzle Game 320
Ramping It Up 324 Summary 332 Challenges 332
11 Intermediate Game Physics: Modeling, Racing, and Leaping 333
Getting Started 334
Adding the Resource Files 334 Creating a Basic Box2D Scene 335 Creating a Cart with Box2D 346
Creating Custom Shapes with Box2D 346 Using Vertex Helper 348
Adding Wheels with Box2D Revolute Joints 352 Making the Cart Move and Jump 356
Making the Cart Move with the Accelerometer 356 Making It Scrollable 359
Forces and Impulses 368 Fixing the Tipping 368 Making the Cart Jump 369
More Responsive Direction Switching 373 Summary 374
12 Advanced Game Physics: Even Better than the Real Thing 375
Joints and Ragdolls: Bringing Ole Back into Action 376
Restricting Revolute Joints 376 Using Prismatic Joints 378
How to Create Multiple Bodies and Joints at the Right Spots 378
Adding Ole: The Implementation 380 Adding Obstacles and Bridges 386
Adding a Bridge 386 Adding Spikes 390
An Improved Main Loop 394 The Boss Fight! 396
A Dangerous Digger 405
Finishing Touches: Adding a Cinematic Fight Sequence 411
Summary 417 Challenges 417
13 The Chipmunk Physics Engine (No Alvin Required) 419
What Is Chipmunk? 420 Chipmunk versus Box2D 420 Getting Started with Chipmunk 421
Adding Chipmunk into Your Project 426 Creating a Basic Chipmunk Scene 429 Adding Sprites and Making Them Move 438
Jumping by Directly Setting Velocity 444
Ground Movement by Setting Surface Velocity 445 Detecting Collisions with the Ground 445
Chipmunk Arbiter and Normals 446 Implementation—Collision Detection 446 Implementation—Movement and Jumping 450 Chipmunk and Constraints 455
Revolving Platforms 458
The Great Escape! 467 Following Ole 467
Laying Out the Platforms 468 Animating Ole 469
Music and Sound Effects 473 Adding the Background 474 Adding Win/Lose Conditions 476 Summary 477
Challenges 477
V Particle Systems, Game Center, and Performance 479
14 Particle Systems: Creating Fire, Snow, Ice, and More 481
Built-In Particle Systems 482
Running the Built-In Particle Systems 482 Making It Snow in the Desert 483 Getting Started with Particle Designer 485
A Quick Tour of Particle Designer 486 Creating and Adding a Particle System to Space Viking 489
Adding the Engine Exhaust to Space Viking 490 Summary 494
Challenges 494
15 Achievements and Leaderboards with Game Center 495
What Is Game Center? 495 Why Use Game Center? 497 Enabling Game Center for Your App 497
Obtain an iOS Developer Program Account 497 Create an App ID for Your App 498
Register Your App in iTunes Connect 501 Enable Game Center Support 505 Game Center Authentication 506
Try to Authenticate the Player 507 Keep Informed If Authentication Status Changes 508
The Implementation 508 Setting Up Achievements 515
Adding Achievements into iTunes Connect 515 How Achievements Work 517
Implementing Achievements 518 Creating a Game State Class 519 Creating Helper Functions to Load and Save Data 522
Modifying GCHelper to Send Achievements 524 Using GameState and GCHelper in
SpaceViking 530
Displaying Achievements within the App 534 Setting Up and Implementing Leaderboards 536
Setting up Leaderboards in iTunes Connect 536 How Leaderboards Work 538
Implementing Leaderboards 539 Displaying Leaderboards in-Game 540 Summary 543
Challenges 543
16 Performance Optimizations 545 CCSprite versus CCSpriteBatchNode 545
Testing the Performance Difference 550 Tips for Textures and Texture Atlases 551 Reusing CCSprites 552
Profiling within Cocos2D 554 Using Instruments to Find Performance Bottlenecks 557
Time Profiler 558
OpenGL Driver Instrument 560 Summary 563
17 Conclusion 565
Where to Go from Here 567 Android and Beyond 567 Final Thoughts 568
A Principal Classes of Cocos2D 569
So you want to be a game developer?
Developing games for the iPhone or iPad can be a lot of fun. It is one of the few things we can do to feel like a kid again. Everyone, it seems, has an idea for a game, and what better platform to develop for than the iPhone and iPad?
What stops most people from actually developing a game, though, is that game devel-opment covers a wide swath of computer science skills—graphics, audio, networking— and at times it can seem like you are drinking from a fire hose. When you are first getting started, becoming comfortable with Objective-C can seem like a huge task, especially if you start to look at things like OpenGL ES, OpenAL, and other lower-level APIs for your game.
Writing a game for the iPhone and iPad does not have to be that difficult—and it isn’t. To help simplify the task of building 2D games, look no further than Cocos2D. You no longer have to deal with low-level OpenGL programming APIs to make games for the iPhone, and you don’t need to be a math or physics expert. There’s a much faster and easier way—use a free and popular open source game programming framework called Cocos2D. Cocos2D is extremely fun and easy to use, and with it you can skip the low-level details and focus on what makes your game different and special!
This book teaches you how to use Cocos2D to make your own games, taking you step by step through the process of making an actual game that’s on the App Store right now! The game you build in this book is called Space Viking and is the story of a kick-ass Viking transported to an alien planet. In the process of making the game, you get hands-on experience with all of the most important elements in Cocos2D and see how everything fits together to make a complete game.
Download the Game!
You can download Space Vikings from the App Store: http://itunes.apple.com/us/app/ space-vikings/id400657526mt=8. The game is free, so go ahead and download it, start playing around with it, and see if you’re good enough to get all of the achievements!
through this book, you’ll have made a complete game. Best of all, you’ll have the con-fidence and knowledge it takes to make your own.
Each chapter describes in detail a specific component within the game along with the technology required to support it, be it a tile map editor or some effect we’re cre-ating with Cocos2D, Box2D, or Chipmunk. Once an introduction to the functional-ity and technology is complete, the chapter provides details on how the component has been implemented within Space Viking. This combination of theory and real-world implementation helps to fill the void left by other game-development books.
What Is Cocos2D?
Cocos2D (www.cocos2d-iphone.org) is an open source Objective-C framework for mak-ing 2D games for the iOS and Mac OS X, which includes developmak-ing for the iPhone, iPod touch, the iPad, and the Mac. Cocos2D can either be included as a library to your project in Xcode or automatically added when you create a new game using the included Cocos2D templates.
Cocos2D uses OpenGL ES for graphics rendering, giving you all of the speed and performance of the graphics processor (GPU) on your device. Cocos2D includes a host of other features and capabilities, which you’ll learn more about as you work through the tutorial in this book.
Cocos2D started life as a Python framework for doing 2D games. In late 2008, it was ported to the iPhone and rewritten in Objective-C. There are now additional ports of Cocos2D to Ruby, Java (Android), and even Mono (C#/.NET).
Note
Cocos2D has an active and vibrant community of contributors and supporters. The Cocos2D forums (www.cocos2d-iphone.org/forum) are very active and an excellent resource for learning and troubleshooting as well as keeping up to date on the latest developments of Cocos2D.
Why You Should Use Cocos2D
Cocos2D lets you focus on your core game instead of on low-level APIs. The App Store marketplace is very f luid and evolves rapidly. Prototyping and developing your game quickly is crucial for success in the App Store, and Cocos2D is the best tool for helping you quickly develop your game without getting bogged down trying to learn OpenGL ES or OpenAL.
you. Other useful utilities include font rendering, sprite sheets, a robust sound system, and many more.
Cocos2D is a great prototyping tool. You can quickly make a game in as little as an hour (or however long it takes you to read Chapter 2). You are reading this book because you want to make games for the iPhone and iPad, and using Cocos2D is the quickest way to get there—bar none.
Cocos2D Key Features
Still unsure if Cocos2D is right for you? Well, check out some of these amazing fea-tures of Cocos2D that can make developing your next game a lot easier.
Actions
Actions are one of the most powerful features in Cocos2D. Actions allow you to move, scale, and manipulate sprites and other objects with ease. As an example, to smoothly move a space cargo ship across the screen 400 pixels to the right in 5 sec-onds, all the code you need is:
CCAction *moveAction = [CCMoveBy actionWithDuration:5.0f
position:CGPointMake(400.0f,0.0f)]; [spaceCargoShipSprite runAction:moveAction];
That’s it; just two lines of code! Figure P.1 illustrates the moveAction on the space cargo ship.
Figure P.1 Illustrating the effect of the moveAction on the Space Cargo Ship sprite
There are many kinds of built-in actions in Cocos2D: rotate, scale, jump, blink, fade, tint, animation, and more. You can also chain actions together and call custom callbacks for neat effects with very little code.
Built-In Font Support
An Extensive Effects Library
Cocos2D includes a powerful particle system that makes it easy to add cool effects such as smoke, fire, rain, and snow to your games. Also, Cocos2D includes built-in effects, such as f lip and fading, to transition between screens in your game.
Great for TileMap Games
Cocos2D includes built-in support for tile-mapped games, which is great when you have a large game world made up of small reusable images. Cocos2D also makes it easy to move the camera around to implement scrolling backgrounds or levels. Finally, there is support for parallax scrolling, which gives your game the illusion of 3D depth and perspective.
Audio/Sound Support
The sound engine included with Cocos2D allows for easy use of the power of OpenAL without having to dive into the lower level APIs. With Cocos2D’s sound engine, you can play background music or sound effects with just a single line of code!
Two Powerful Physics Engines
Also bundled with Cocos2D are two powerful physics engines, Box2D and Chipmunk, both of which are fantastic for games. You can add a whole new level of realism to your games and create entire new gameplay types by using game physics—without having to be a math guru.
Important Concepts
Before we get started, it’s important to make sure you’re familiar with some important concepts about Cocos2D and game programming in general.
Sprite
You will see the term sprite used often in game development. A sprite is an image that can be moved independently of other images on the screen. A sprite could be the player character, an enemy, or a larger image used in the background. In practice, sprites are made from your PNG or PVRTC image files. Once loaded in memory, a sprite is converted into a texture used by the iPhone GPU to render onscreen.
Singleton
OpenGL ES
OpenGL ES is a mobile version (ES stands for Embedded Systems) of the Open Graph-ics Language (OpenGL). It is the closest you can get on the iPhone or iPad to sending zeros and ones to the GPU. OpenGL ES is the fastest way to render graphics on the iPhone or iPad, and due to its origin, it is a low-level API. If you are new to game development, OpenGL ES can have a steep learning curve, but luckily you don’t need to know OpenGL ES to use Cocos2D.
The two versions of OpenGL ES supported on the iPhone and iPad are 1.1 and 2.0. There are plans in the Cocos2D roadmap to support OpenGL ES 2.0, although cur-rently only version 1.1 is supported.
Languages and Screen Resolutions
Cocos2D is written in Objective-C, the same language as Cocoa Touch and the majority of the Apple iOS APIs. In Objective-C it is important to understand some basic memory-management techniques, as it is a good foundation for you to become an efficient game developer on the iOS platform. Cocos2D supports all of the native resolutions on the iOS devices, from the original iPhone to the iPad to the retina dis-play on the iPhone 4.
2D versus 3D
You first learn to walk before you can run. The same is true for game development; you have to learn how to make 2D games before diving into the deeper concepts of 3D games. There are some 3D effects and transitions in Cocos2D, such as a 3D wave effect and an orbit camera move; however, most of the functionality is geared toward 2D games and graphics.
Cocos2D is designed for 2D games (hence the 2D in the name), as are the tutorials and examples in this book. If you want to make 3D games, you should look into dif-ferent frameworks, such as Unity, the Unreal Engine, or direct OpenGL.
The Game behind the Book: Space Viking
This book takes you through the process of creating a full-featured Cocos2D-based game for the iPhone and iPad. The game you build in this book is called Space Viking. If you want to try Space Viking now, you can download a free version of the game from the App Store (http://itunes.apple.com/us/app/id400657526) and install it on your iPhone, iPod touch, or iPad.
This book teaches you how to use all of the features and capabilities of Cocos2D, but more important, how to apply them to a real game. By the time you are done, you will have the knowledge and experience needed to get your own game in the App Store. The concepts you learn from building Space Viking apply to a variety of games from action to puzzle.
Space Viking’s Story
Every game starts in the depths of your imagination, with a character and storyline that gets transformed into a game. This is the story of Space Viking.
In the future, the descendants of Earth are forced into colonizing planets outside our own solar system. In order to create hospitable environments, huge interplanetary machines extract giant chunks of ice from Northern Europe and Greenland and send it across the galaxy to these planets. Unbeknown to the scientists, one of these chunks contains Ole the Viking, who eons ago fell into an icy river on his way home from defeating barbarian tribes. Encased in an icy tomb for centuries, Ole awakens thou-sands of years later—and light years from home—after being warmed by an alien sun, as shown in Figure P.2.
Figure P.2 Ole awakens on the alien planet
You get to play as Ole the Viking and battle the aliens on this strange world in hopes of finding a way to return Ole to his native land and time.
You control Ole’s movement to the right and left by using the thumb joystick on the left side of the screen. On the right side are buttons for jumping and attacking. Ole starts out with only his fists. In later levels Ole finds his trusty mallet, and you use the accelerometer to control him in the physics levels.
concept art that Eric Stevens, a graphic artist and fellow game devotee, developed ear-lier when we were discussing game ideas to make next.
Space Viking consists of a number of levels, each of which demonstrates a specific area of Cocos2D or gameplay type. For example, the first level is a side-scrolling beat ’em up, and the fourth level is a mine cart racing level that shows off the game physics found in Box2D and Chipmunk. Our hope is that you can reuse parts of Space Viking to make your own game once you’ve finished this book! That’s right: you can freely reuse the code in this book to build your own game.
Organization of This Book
The goal of this book is to teach you about game development using Cocos2D as you build Space Viking (and learn more about the quest and story of Ole the Viking). You start with a simple level and some basic game mechanics and work your way up to creating levels with physics and particle systems and finally to a complete game by the end of the book.
First you learn the basics of Cocos2D and build a small level with basic running and jumping movements for Ole. Part II shows you how to add animations, actions, effects, and even text to Space Viking. Part III takes the game further, adding more levels and scenes, sounds, and scrolling to the gameplay. In Part IV realism is brought into the game with the Box2D and Chipmunk physics engines. Finally in Part V, you learn how to add a particle system, add high scores, connect to social networks, and debug and optimize Space Viking to round out some best practices for the games you will build in the future.
There are 17 chapters and one appendix in the book, each dealing with a specific area of creating Space Viking.
n Part I: Getting Started with Cocos2D
Learn how to get Cocos2D installed and start using it to create Space Viking. Learn how to add animations and movements to Ole and his enemies.
n Chapter 1: Hello, Cocos2D
This chapter covers how to install Cocos2D framework and templates in Xcode and some companion tools that make developing games easier. These tools are freely available and facilitate the creation of the elements used by Cocos2D.
n Chapter 2: Hello, Space Viking
n Chapter 3: Introduction to Cocos2D Animations and Actions
In this chapter, you learn how to make the game look much more realistic by adding animations to Ole as he moves around the scene.
n Chapter 4: Simple Collision Detection and the First Enemy
In this chapter, you learn how to implement simple collision detection and add the first enemy to your Space Viking game, so Ole can start to fight his way off the planet!
n Part II: More Enemies and More Fun
Learn how to create more complex enemies for Ole to battle and in the process learn about Cocos2D actions and effects. Finish up with a live, onscreen debug-ging system using Cocos2D text capabilities.
n Chapter 5: More Actions, Effects, and Cocos2D Scheduler
Actions are a key concept in Cocos2D—they are an easy way to move objects around, make them grow or disappear, and much more. In this chapter, you put them in practice by adding power-ups and weapons to the level, and you learn some other important Cocos2D capabilities, such as effects and the scheduler.
n Chapter 6: Text, Fonts, and the Written Word
Most games have text in them at some point, and Space Viking is no exception. In this chapter, you learn how to add text to your games using the different methods available in Cocos2D.
n Part III: From Level to Game
Learn how to expand the Space Viking level into a full game by adding menus, sound, and scrolling.
n Chapter 7: Main Menu, Level Completed, and Credits Scenes
Almost all games have more than one screen (or “scene,” as it’s called in Cocos2D); there’s usually a main menu, main game scene, level completed, and credits scene at the very least. In this chapter, you learn how to create multiple scenes by implementing them in Space Viking!
n Chapter 8: Pump Up the Volume!
Adding sound effects and music to a game can make a huge difference. Cocos2D makes it really easy with the CocosDenshion sound engine, so in this chapter you give it a try!
n Chapter 9: When the World Gets Bigger: Adding Scrolling
n Part IV: Physics Engines
With the Box2D and Chipmunk physics engines that come with Cocos2D, you can add some amazing effects to your games, such as gravity, realistic collisions, and even ragdoll effects! In these chapters you get a chance to add some physics-based levels to Space Viking, from simple to advanced!
n Chapter 10: Basic Game Physics: Adding Realism with Box2D
Just as Cocos2D makes it easy to make games for the iPhone without know-ing low-level OpenGL details, Box2D makes it easy to add physics to your game objects without having to be a math expert. In this chapter, you learn how to get started with Box2D by making a fun puzzle game where objects move according to gravity.
n Chapter 11: Intermediate Game Physics: Modeling, Racing, and
Leaping
This chapter shows you some of the really neat stuff you can do with Box2D by making the start of a side-scrolling cart-racing game. In the process, you learn how to model arbitrary shapes, add joints to restrict movement of phys-ics bodies, and much more!
n Chapter 12: Advanced Game Physics: Even Better than the Real
Thing
In this chapter, you make the cart-racing level even more amazing by adding spikes to dodge and an epic boss fight at the end. You learn more about joints, how to detect collisions, and how to add enemy logic as well.
n Chapter 13: The Chipmunk Physics Engine (No Alvin Required)
The second physics engine that comes with Cocos2D, called Chipmunk, is similar to Box2D. This chapter shows you how to use Chipmunk, compares it to Box2D, and gives you hands-on practice by making a Metroid-style escape level.
n Part V: Particle Systems, Game Center, and Performance
Learn how to quickly create and add particle systems to your games, how to integrate with Apple’s Game Center for online leaderboards and achievements, and some performance tips and tricks to keep your game running fast.
n Chapter 14: Particle Systems: Creating Fire, Snow, Ice, and More
Using Cocos2D’s particle system, you can add some amazing special effects to your game—extremely easily! In this chapter, you learn how to use particle systems to add some special effects to Space Viking, such as ship exhaust.
n Chapter 15: Achievements and Leaderboards with Game Center
n Chapter 16: Performance Optimizations
In this chapter, you learn how to tackle some of the most common chal-lenges and issues you will face in optimizing and getting the most out of your Cocos2D game. You get hands-on experience debugging the most common performance issues and applying solutions.
n Chapter 17: Conclusion
This final chapter recaps what you learned and describes where you can go next: into 3D, using Cocos2D on other platforms such as Android, and more advanced game-development topics.
n Appendix: Principal Classes of Cocos2D
The Appendix provides an overview of the main classes you will be using and interacting with in Cocos2D.
By the time you’ve finished reading this book, you’ll have practical experience making an awesome game from scratch! You can then take the concepts you’ve learned (and even some of the code!) and use it to turn your own game into a reality.
Audience for This Book
The audience for this book includes developers who are put off by game-making because they anticipate a long and complex learning curve. Many developers want to write games but don’t know where to start with game development or the Cocos2D framework. This book is a hands-on guide, which takes you from the very beginning of using Cocos2D to applying the advanced physics concepts in Box2D and Chipmunk.
This book is targeted to developers interested in creating games for iOS devices, including the iPhone, iPad, and iPod touch. The book assumes a basic understanding of Objective-C, Cocoa Touch, and the Xcode tools. You are not expected to know any lower-level APIs (Core Audio, OpenGL ES, etc.), as these are used internally by Cocos2D.
Who This Book Is For
If you are already developing applications for the iPhone of other platform but want to make a move from utility applications to games, then this book is for you. It builds on the development knowledge you already have and leads you into game development by describing the terminology, technology, and tools required as well as providing real-world implementation examples.
Who This Book Isn’t For
It is expected that before you read this book you are already familiar with
Objective-C, C, Xcode, and Interface Builder. While the implementations described in this book have been kept as simple as possible, and the use of C is limited, a firm foundation in these languages is required.
The following books can help provide you with the grounding you need to work through this book:
n Cocoa Programming for Mac OS X, Third Edition, by Aaron Hillegass
(Addison-Wesley, 2008)
n Learning Objective-C 2.0 by Robert Clair (Addison-Wesley, 2011)
n Programming in Objective-C 2.0 by Stephen G. Kochan (Addison-Wesley, 2009) n Cocoa Design Patterns by Erik M. Buck and Donald A. Yacktman (Addison-
Wesley, 2009)
n The iPhone Developer’s Cookbook, Second Edition, by Erica Sadun (Addison-Wesley,
2010)
n Core Animation: Simplified Animation Techniques for Mac and iPhone Development by
Marcus Zarra and Matt Long (Addison-Wesley, 2010)
n iPhone Programming: The Big Nerd Ranch Guide by Aaron Hillegass and Joe
Conway (Big Nerd Ranch, Inc., 2010)
n Learning iOS Game Programming: A Hands-On Guide to Building Your First iPhone
Game by Michael Daley (Addison-Wesley, 2011)
These books, along with other resources you’ll find on the web, will help you learn more about how to program for the Mac and iPhone, giving you a deeper knowledge about the Objective-C language and the Cocoa frameworks.
Source Code, Tutorial Videos, and Forums
Access to information is not limited only to the book. The complete, fully commented source code for Space Viking is also included, along with video tutorials (available at http://cocos2Dbook.com) that take you visually through the concepts of each chapter.
There is plenty of code to review throughout the book, along with exercises for you to try out, so it is assumed you have access to the Apple developer tools such as Xcode and the iPhone SDK. Both of these can be downloaded from the Apple iPhone Dev Center: http://developer.apple.com/iphone.
This book would not have been possible without the hard work, support, and kindness of the following people:
n First of all, thanks to our editor, Chuck Toporek, and his assistant, Olivia
Basegio. Chuck patiently helped and encouraged us during the entire process (even though we are both first-time authors!) and has managed all of the work it takes to convert a simple Word document into the actual book you’re holding today. Olivia was extremely helpful through the entire process of keeping every-one coordinated and the tech reviews coming in. Thanks again to both of you in making this book a reality!
n Another person at Addison-Wesley whom we want to thank is Chuti Prasertsith,
who designed the cover for the book.
n A huge thanks to the lead developer and coordinator of Cocos2D, Ricardo
Quesada (also known as Riq), along with the other Cocos2D contributors, such as Steve Oldmeadow and many others. Without Riq and his team’s hard work and dedication to making Cocos2D into the amazing framework and community that it is today, this book just wouldn’t exist. Also, we believe that Cocos2D has made a huge positive difference in many people’s lives by enabling them to accomplish a lifelong dream—to make their own games. Riq maintains Cocos2D as his full-time job, so if you’d like to make a donation to thank him for his hard work, you can do so at www.cocos2d-iphone.org/store. Riq also sells source code for his game Sapus Tongue and a great physics editor called Level-SVG. You can find out more about both at www.sapusmedia.com.
n Also, thank you to Erin Catto (the lead developer of Box2D) and Scott Lembcke
(the lead developer of Chipmunk) for their work on their amazing physics librar-ies. Similarly to Riq’s work on Cocos2D, Erin’s and Scott’s work has enabled countless programmers to create cool physics-based games quickly and easily. Erin and Scott are extremely dedicated to supporting their libraries and commu-nity, and even kindly donated their time in reviewing the physics chapters of this book. If you’d like to donate to Erin or Scott for their hard work on their librar-ies, you can do so by following the links at www.box2d.org and http://code.google. com/p/chipmunk-physics.
n A big thanks to Steve Oldmeadow, the lead developer of CocosDenshion, the
the chapter on audio. Steve’s work has allowed many game developers to quickly and easily add music and sound effects to their games.
n Eric Stevens is an American fine artist who moonlights as a game illustrator.
Years of good times and bad music contributed to the initial concept of Space Viking. Eric worked closely with us to bring Ole and everything you see in Space Viking to life. Eric maintains an illustration site at http://imagedesk.org, and you can see his paintings at several galleries in the Southwest and at http:// ericstevensart.com.
n Mike Weiser is the musician who made the rocking soundtrack and sound effects
forSpace Viking. We think the music made a huge difference in Space Viking and really set the tone we were hoping for. A special thanks to Andrew Peplinski for the Viking grunts and Rulon Brown for conducting the choir that you hear in the beginning of the game. Mike has made music for lots of popular iOS games, and you can check him out at www.mikeweisermusic.com.
n A huge thanks to our technical reviewers: Farim Farook, Marc Hebert, Mark
Hurley, Mike Leonardi, and Nick Waynik. These guys did a great job catching all of our boneheaded mistakes and giving us some great advice on how to make each chapter the best it could be. Thank you so much, guys!
Each of us also has some personal “thank yous” to make.
From Rod Strougo
I thank my wife and family for being ever patient while I was working on this book. There were countless evenings when I was hidden away in my office writing, editing, coding. Without Agata’s support and understanding, there is no way this book could exist. Our older son, Alexander, was two and a half during the writing of this book, and he helped beta test Space Viking, while Anton was born as I was finishing the last chapters. Thank you for all the encouragement, love, and support, Agata.
I would also like to thank Ray for stepping in and writing the Box2D, Chipmunk, and Game Center chapters. Ray did a fantastic job on in-depth coverage of Box2D and Chipmunk, while adding some fun levels to Space Viking.
From Ray Wenderlich
Rod Strougo is the founder and lead developer of the studio Prop Group at www.prop.gr. Rod’s journey in physics and games started way back with an Apple ][, writing games in Basic. From the early passion in games, Rod’s career moved to enter-prise software development, spending 10 years writing software for IBM and recently for a large telecom company. These days Rod enjoys helping others get started on their paths to making games. Originally from Rio de Janeiro, Brazil, Rod lives in Atlanta, Georgia, with his wife and sons.
Part I
Getting Started with
Cocos2D
Learn how to install Cocos2D and start using it to create Space Viking. Learn how to add animations and movements to Ole the Viking and his enemies.
n Chapter 1: “Hello, Cocos2D” n Chapter 2: “Hello, Space Viking”
1
Hello, Cocos2D
Cocos2D is incredibly fun and easy to use. In this chapter you will learn how to install Cocos2D, integrate it with Xcode, and make a simple HelloWorld app. You’ll then add a space cargo ship to the app and have it move around the screen, with just a few lines of code, as shown in Figure 1.1.
Figure 1.1 The space cargo ship that you will add to your HelloWorld app
After you create this simple app, you will get a chance to go behind the scenes and see how the Cocos2D template code generated for you works and try running the app on your own iPhone or iPad.
Note
This chapter walks you through the process of downloading and installing Cocos2D and inte-grating it with Xcode. Once Cocos2D is installed, you’ll build a simple HelloWorld app and test it in the iPhone Simulator. You will learn exactly what each line in the HelloWorld program does as well as how to get HelloWorld on your iOS device.
Ready? Okay then, let’s get started!
Downloading and Installing Cocos2D
This section walks you through the process of downloading and installing Cocos2D. Before you can start creating your first Cocos2D game, you need to download Cocos2D and get the templates installed in Xcode.
Downloading Cocos2D
The official Cocos2D project is hosted on GitHub, but the latest stable and tested releases are available from the Cocos2D homepage under the download tab at www.cocos2d-iphone.org/download. Figure 1.2 shows the Cocos2D download page.
Figure 1.2 Cocos2D homepage showing the download section
To get Cocos2D on your Mac:
1. Create a folder called Cocos2D on your Mac and download the latest stable ver-sion that you see on the www.cocos2d-iphone.org/download site.
In this subfolder is where you will find the install_templates.sh script that you need to run next.
Note
You have two paths to get Cocos2D on your system: you can go with the latest stable branch at the Cocos2D homepage, shown on the previous page, or with the latest develop branch by using Git. The newest features always start life in the develop branch, in the same way as Apple releases the new versions of iOS as beta. Which mechanism you choose is up to you—all of the 1.x versions of Cocos2D are backward compatible with Cocos2D 1.0.
Installing the Cocos2D Templates
Installing the Cocos2D templates is the same whether you downloaded a gzipped archive shown in the previous section or cloned the latest version from the develop branch using Git. To start:
1. Open Terminal and navigate to the Cocos2D folder that you created in the pre-vious section. You can use the cd command to change folders.
2. Once inside the Cocos2D folder, use the cd command once more to change fold-ers so that you are inside the cocos2d-iphone subfolder. You can see a listing of the cocos2d-iphone subfolder in Figure 1.3.
$ cd cocos2d-iphone
Figure 1.3 Looking inside the cocos2d-iphone subdirectory
3. Run the install-templates.sh script by entering the following command:
$ sudo ./install-templates.sh
The install-templates.sh script copies the three Cocos2D templates into the Xcode folder. That is all it takes to install the Cocos2D templates. Restart Xcode if you had it running while installing the templates, and you will be ready to create a Cocos2D HelloWorld in the next section.
Creating Your First Cocos2D HelloWorld
No more delays: time to dive in to the code. In this section you will learn to use the Cocos2D templates that you installed earlier and to build the Cocos2D HelloWorld sample. No programming introduction is complete without a proper “Hello World.”
Inspecting the Cocos2D Templates
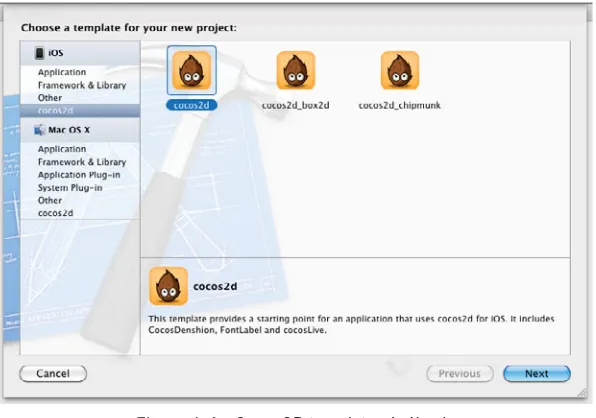
Fire up Xcode, and from Xcode’s menu, select File > New Project and select the
iOS/User Templates section. You should see three Cocos2D templates, as shown in Figure 1.4, under the User Templates section. The first template is for an application with just Cocos2D, the second for a Cocos2D with Box2D application, and the third for a Cocos2D with Chipmunk application.
Figure 1.4 Cocos2D templates in Xcode
Tip
The three Cocos2D templates provide three different versions of a simple HelloWorld application. The Cocos2D Application template has just Cocos2D and is what you will use to create the HelloWorld app. The Box2D template creates a mini Box2D HelloWorld where you can drop boxes into the screen with physics simulation. The Chipmunk template creates a mini Chipmunk project where you can create multiple bodies and try out collisions.
When you are building your own games, these three templates are key to getting your game started quickly. The Box2D and Chipmunk projects contain all of the wiring between Cocos2D and the physics engines. Even the Cocos2D-only template comes already connected with an application delegate and runs without you having to type any code.
Building the Cocos2D HelloWorld Project
Let’s build the basic Cocos2D HelloWorld project. Once you’ve built this one, you should take a stab at building the Cocos2D+Box2D and Cocos2D+Chipmunk exam-ples, too.
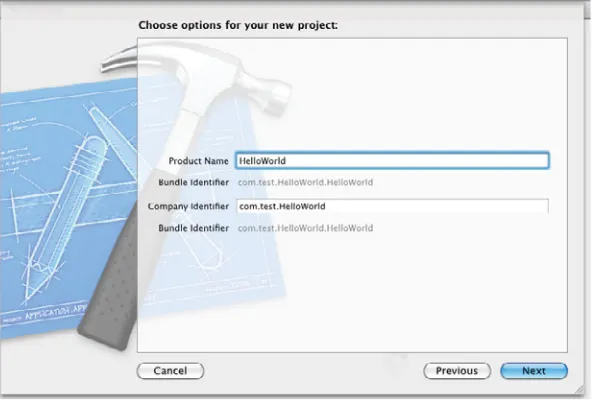
1. Launch Xcode and select File > New Project from the menu. 2. Select the Cocos2D template (without Box2D or Chipmunk). 3. Name this project CCHelloWorld, as shown in Figure 1.5.
Figure 1.6 Showing the CCHelloWorld and iPhone Simulator on the Scheme dropdown
4. In Xcode on the Scheme dropdown, select CCHelloWorld and the iPhone Simulator (4.2 or the latest iOS you have installed on your system), as shown in Figure 1.6.
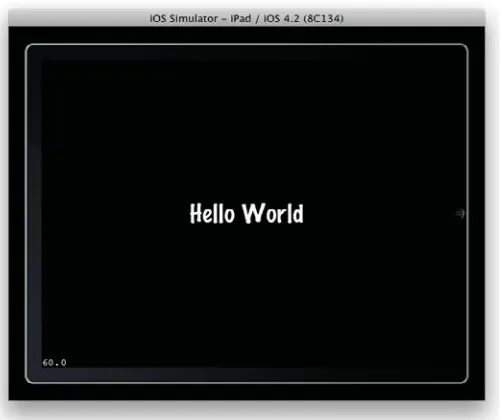
Figure 1.7 The Cocos2D HelloWorld app running in the iPhone Simulator 5. In Xcode, click Run.
You now have a fully functional Cocos2D HelloWorld app running in the iPhone Simulator, as shown in Figure 1.7.
Taking HelloWorld Further
While displaying “Hello World” on the screen is a good first step, you are learning about Cocos2D to create games, so why not add a quick space cargo ship here and make it move?
To start, locate the SpaceCargoShip folder included with the resources for this chap-ter. The SpaceCargoShip folder contains the SpaceCargoShip.png, which is the image of— what else?—the alien’s space cargo ship.
In Xcode with the HelloWorld project opened:
1. Drag the SpaceCargoShip folder into the CCHelloWorld project and select
Copy items into destination group’s folder. You are merely adding the Space CargoShip folder and PNG to your CCHelloWorld project so that it is included with your app.
2. Open the HelloWorldScene.m class and, in the init method, add the lines shown in Listing 1.1.
Listing 1.1 Adding the space cargo ship onscreen
CCSprite *spaceCargoShip = [CCSprite
spriteWithFile:@"SpaceCargoShip.png"]; [spaceCargoShip setPosition:ccp(size.width/2, size.height/2)]; [self addChild:spaceCargoShip];
Click Run, and you should see the space cargo ship in the middle of the screen, as shown in Figure 1.9.
Figure 1.9 Space cargo ship in HelloWorld
Only three lines of code, and you already have a space cargo ship on your iOS device. You will learn in-depth about the details behind the lines in Listing 1.1 in the next chapters.
Adding Movement
A ship is supposed to move around, and moving sprites in Cocos2D is really easy. Add the lines shown in Listing 1.2 right below the lines you added for the space cargo ship.
Listing 1.2 Code to move the spaceCargoShip in HelloWorldScene.m
id moveAction = [CCMoveTo actionWithDuration:5.0f
position:ccp(0, size.height/2)]; [spaceCargoShip runAction:moveAction];
Click Run and watch your space cargo ship move slowly to the left side of the screen. How about that—just five short lines of code and you have a moving ship on your iOS device. It only gets better from here.
Note
Hopefully, this has been one of the simplest HelloWorld programs you have tried out: you only had to type five lines of code. Getting started with Cocos2D is easy, and you can render some amazing effects and graphics with very little code. In the next chapter you will start building Space Viking by putting Ole the Viking and the controls on the screen. You will go from this HelloWorld to a Viking you can move on the screen in one short chapter.
The rest of this chapter explains in detail what each line in HelloWorld does, as well as how to generate builds for your iOS device. If you don’t want to learn what is happening “behind the scenes,” feel free to skip ahead to the next chapter and start creating your Space Viking game.
For the More Curious: Understanding the
Cocos2D HelloWorld
If you are curious about how the Cocos2D application template works, this section covers the most important pieces.
Scenes and Nodes
The first step to understanding the Cocos2D template code is to understand the con-cepts of scenes, layers, and nodes.
Cocos2D games are made up of scenes (CCScenes), and the director (CCDirector) is responsible for running scenes. The Cocos2D Director runs only one scene at a time. For example, Figure 1.10 shows how you might have the CCDirector running a scene with a main menu on it at one point, and switch to another scene with the gameplay later.
CC Director
Gameplay Scene Main Menu
Scene
CC Director
Gameplay Scene Main Menu
Scene
Running Scene: Main Menu Scene Running Scene: Gameplay Scene
Each scene in Cocos2D consists of one or more layers, which are composited on top of each other. For example, in building Space Viking you will create two layers in the first scene: one on the bottom to contain the background, and one on the top to con-tain the moving characters and action.
Each layer (CCLayer) can in turn have sprites (CCSprite), labels (CCLabel), and other objects you want to display onscreen. If you remember, when you added SpaceCargoShip, you created a new sprite and then added it as a child of the layer.
You can see an example of how the hierarchy of Cocos2D nodes fits together in Figure 1.11.
CC Director
Label
Sprite Sprite Sprite Sprite
Background Layer
Main Layer
Controls Layer Gameplay
Scene
Currently running scene
Figure 1.11 Cocos2D Scenes, Layers, and Sprites hierarchy
In Xcode, go to the Classes folder and open the CCHelloWorldAppDelegate.m file. Look inside the applicationDidFinishLaunching method, which is where the Cocos2D Director (CCDirector) is set up and instantiated. On line 113, you will see the following, which is where HelloWorld scene is allocated and run:
[[CCDirector sharedDirector] runWithScene: [HelloWorld scene]];
Open up HelloWorldScene.m and find the scene method that creates a new scene, as shown in Listing 1.3.
Listing 1.3 Inside the HelloWorldScene.m +(id)scene method
+(id) scene {
// 'scene' is an autorelease object. CCScene *scene = [CCScene node];
// 'layer' is an autorelease object. HelloWorld *layer = [HelloWorld node];
// add layer as a child to scene
[scene addChild: layer];
// return the scene return scene; }
The first line of code creates a new instance of CCScene by calling [CCScene node], which is shorthand for [[[CCScene alloc] init] autorelease]. It then creates a new instance of the HelloWorld layer, adds it as a child of the CCScene, and returns the new scene.
When the HelloWorld layer is called, the init method is called, which contains the code shown in Listing 1.4.
Listing 1.4 Inside the HelloWorldScene.m –(id)init method for HelloWorld Layer
// Create and initialize a Label
CCLabelTTL* label = [CCLabelTTL labelWithString:@"Hello World" fontName:@"Marker Felt" fontSize:64];
// Ask CCDirector for the window size
CGSize size = [[CCDirector sharedDirector] winSize]; // Position the label at the center of the screen label.position = ccp( size.width /2 , size.height/2 ); // Add the label as a child to this Layer
[self addChild: label];
So in summary, the CCDirector needs to know which scene to run. Inside of applicationDidFinishLaunching, the template calls the [HelloWorld scene] method to create a new CCScene with a single layer as a child—the HelloWorld layer. The init function of the HelloWorld layer creates a label and adds it as a child of the layer. At that point, you have “Hello World” showing onscreen.
From the Beginning
At this point we’ve covered the most critical parts of the template—how the scene gets run and how the label gets added to the scene. But if you’re still curious, here’s some additional information about the remaining template code automatically created for you.
When the HelloWorld app first starts, the int main(int argc, char *argv[]) function inside of the main.m file is executed by the iOS. The main function allocates the memory pool the HelloWorld application will use and has the UIApplication-Main run the CCHelloWorldAppDelegate class. It is in the application delegate class that HelloWorld comes to life, with the instantiation of the Cocos2D Director. List-ing 1.5 covers the applicationDidFinishLaunchList-ing method that is called by the UIApplicationMain when CCHelloWorld is loaded and ready to start running.
Listing 1.5 applicationDidFinishLaunching in CCHelloWorldAppDelegate.m class
- (void) applicationDidFinishLaunching:(UIApplication*)application {
// Init the window
window = [[UIWindow alloc] initWithFrame:[
[UIScreen mainScreen] bounds]];
// Try to use CADisplayLink director
// if it fails (SDK < 3.1) use the default director
if( ! [CCDirector setDirectorType:kCCDirectorTypeDisplayLink] ) [CCDirector setDirectorType:kCCDirectorTypeDefault]; // 1
CCDirector *director = [CCDirector sharedDirector]; // 2
// Init the View Controller
viewController = [[RootViewController alloc]
initWithNibName:nil bundle:nil];
viewController.wantsFullScreenLayout = YES; // 3 // Create the EAGLView manually
// 1. Create a RGB565 format. Alternative: RGBA8
// 2. depth format of 0 bit. Use 16 or 24 bit for 3d effects, // like CCPageTurnTransition
EAGLView *glView = [EAGLView viewWithFrame:[window bounds]
// attach the openglView to the director
[director setOpenGLView:glView];
// By default, this template only supports Landscape orientations. // Edit the RootViewController.m file to edit the supported // orientations.
#if GAME_AUTOROTATION == kGameAutorotationUIViewController [director setDeviceOrientation:kCCDeviceOrientationPortrait]; #else
[director setDeviceOrientation:kCCDeviceOrientationLandscapeLeft]; #endif // 5
[director setAnimationInterval:1.0/60]; // 6
[director setDisplayFPS:YES]; // 7
// make the OpenGLView a child of the view controller
[viewController setView:glView]; // 8
// make the View Controller a child of the main window
[window addSubview: viewController.view]; [window makeKeyAndVisible]; // 9
// Default texture format for PNG/BMP/TIFF/JPEG/GIF images // It can be RGBA8888, RGBA4444, RGB5_A1, RGB565
[CCTexture2D setDefaultAlphaPixelFormat:
kCCTexture2DPixelFormat_RGBA8888]; // 10 // Removes the startup flicker
[self removeStartupFlicker]; // 11 // Run the intro Scene
[[CCDirector sharedDirector] runWithScene:
[HelloWorld scene]]; // 12
}
The first step is to initialize the UIWindow where the View Controller and EAGLView will be attached. The UIWindow is set to full screen, and the EAGLView is where all of the OpenGL ES calls are going to be sent. Next, the Application Delegate:
1. Tries to set up Cocos2D to use the DisplayLink Director available on iOS 3.1 and higher. The DisplayLink Director allows Cocos2D to be called right before the device needs to display the current image onscreen, so that the updates and render cycles are in sync with the screen refresh interval.
2. Instantiates the Cocos2D Director singleton.
4. Creates the EAGLView, which is used to render your game. Cocos2D will use the EAGLView to send the OpenGL ES commands to the OpenGL ES driver. 5. Sets the orientation to either portrait or landscape. If you are using the View
Controller created by the Cocos2D template, you will need to modify the shouldAutorotateToInterfaceOrientation in the RootViewController.m class to support the orientations you need in your game.
6. Sets the animation interval to 60 times per second, which is the default mode for Cocos2D. Normally, Cocos2D tries to update the screen at the fastest rate (60 times per second).
7. Sets the Frames Per Second (FPS) display to be on and active. Cocos2D has the option of calculating the average frames per second that your game is running at and display it on the bottom left corner of the screen. The FPS display can be really useful in troubleshooting game performance. The FPS display is off by default; this line turns it on.
8. Adds the EAGLView as a child to the RootViewController so that it will be rendered.
9. Adds the RootViewController to the UIWindow and makes it active, allowing for the RootViewController and more importantly the EAGLView to start ren-dering elements on the screen.
10. Sets the Cocos2D texture format. Note that by default Cocos2D uses the high-est bit depth for your images. In later chapters you will learn how to use images with a lower bit depth to save on memory usage.
11. Removes the startup f licker if your game runs only in landscape orientation. If your game runs only in a landscape orientation, Cocos2D needs to brief ly load and display the Default.png image to avoid a f licker from the splash screen (Default.png) to black.
12. Instantiates the HelloWorld scene, which in turn instantiates the HelloWorld layer, and starts running the HelloWorld scene. At this point, the “Hello World” label is visible on the screen.
The Cocos2D Director is responsible for running the game loop and rendering all of the graphics in your game. Since the director is running the game loop, it can control when the game runs, pauses, or stops. Looking at Listing 1.6, you can see the methods in the application delegate that call the director in response to events from the iPhone operating system, including pause and resume.
Listing 1.6 Methods inside of CCHelloWorldAppDelegate.m
- (void)applicationWillResignActive:(UIApplication *)application { [[CCDirector sharedDirector] pause]; // 1
- (void)applicationDidBecomeActive:(UIApplication *)application { [[CCDirector sharedDirector] resume]; // 2
}
- (void)applicationDidReceiveMemoryWarning:(UIApplication *)application { [[CCDirector sharedDirector] purgeCachedData]; // 3
}
- (void)applicationWillTerminate:(UIApplication *)application {
CCDirector *director = [CCDirector sharedDirector]; [[director openGLView] removeFromSuperview];
[viewController release]; [window release];
[director end]; // 4
}
- (void)applicationSignificantTimeChange:(UIApplication *)application { [[CCDirector sharedDirector] setNextDeltaTimeZero:YES]; // 5
}
1. Pauses the game and all timers if the application is paused by the operating sys-tem. This event occurs when the user locks the iPad or iPhone screen while playing a game or when an incoming call or other similar event forces the game to the background.
2. Resumes the game and all timers when the application is brought back into the foreground by the operating system. This event occurs when the user unlocks the iPad or iPhone screen after locking it with the game running or resumes a game after the call is complete.
3. Removes from memory any sprite textures that are not being used at the moment in response to a low-memory warning. This call dumps all of the cached texture and bitmap fonts data that is not currently in use to render graph-ics onscreen.
Note
4. Ends the director and detaches the EAGLView from the application’s UIWindow. This ends the game loop, removes all textures from memory, and clears all of the scheduler timers. This command also forces the director to deallocate the currently running scene, including all of its layers and sprites. The applicationWillTerminate event is called when the user quits the game. 5. Sets the delta time between the last event call and the current event call to zero.
This method is called if a significant amount of time has passed between event calls, usually due to the iPhone readjusting the system time for daylight sav-ings or varying clocks on mobile phone towers. Physics inside of games and other calculations are sensitive to large time changes, and it is useful to reset the amount of time elapsed (delta) to zero if it is too large. If you were to try to run the update methods with a large delta value (several seconds at once, or several minutes), it would throw off the calculations and result in strange behavior and rendering effects. You will learn more about delta times in Part IV of this book.
If you follow the order of execution, the AppDelegate starts when the applica-tion is launched. The AppDelegate starts up the director and in turn calls on the director to run the HelloWorld scene. The HelloWorld scene has one layer, and that layer contains a label with the words “Hello World.” The label is added as a child to the HelloWorld layer, which is a child of the scene. The director starts rendering the scene and its children, displaying the label (i.e., Hello World) onscreen.
Note
The 60.0 number on the bottom-left corner in Figure 1.9 is the frames per second at which Cocos2D is rendering the scene. This information is useful for debugging purposes because it allows you to see the frame rate your game is running. If you wish to disable it (which you will need to do when you ship your final app), you can go into the AppDelegate and remove the following line:
[director setDisplayFPS:YES];
Looking Further into the Cocos2D Source Code
To see the Jump to Def inition in action: 1. Open the HelloWorldScene.m file.
2. On line 18, select the node method and right-click.
3. In the Xcode pop-up menu, select Jump to Def inition. Xcode should open CCNode.m for you and show you the code in Listing 1.7.
Listing 1.7 The node method inside of CCNode.m
#pragma mark CCNode - Init & cleanup
+(id) node {
return [[[self alloc] init] autorelease]; }
Cocos2D has a large collection of utility and helper methods that can save you time and typing. As an example, in the Cocos2D Director there exist the methods convertToGL and convertToUI for converting a point between UIKit and OpenGL ES coordinate systems. In addition to utility and helper methods, Cocos2D has a set of macros to shorten some of the repetitive calls your code would contain.
The ccp macro is one you will use numerous times, and it is just a shortcut to the CGPointMake method. The following is the code behind the ccp macro.
/** Helper macro that creates a CGPoint @return CGPoint
@since v0.7.2 */
#define ccp(__X__,__Y__) CGPointMake(__X__,__Y__)
If you see an unknown method or macro, do not hesitate to jump to the definition of that bit of code. The Cocos2D source is well documented and is easy to understand with some practice. Knowing the helper methods, or at least how to find them, is key to becoming an efficient Cocos2D game developer.
The next section covers how to get HelloWorld and any other games you create onto your iPhone, iPad, or iPod touch.
Getting CCHelloWorld on Your iPhone or iPad
The first step to getting CCHelloWorld on your device is to sign up for an iPhone Developer account with Apple (http://developer.apple.com/iphone). Figure 1.13 shows the iPhone Developer Portal.
Figure 1.13 Apple iOS Developer Portal
Starting with Xcode 3.2.3, there are two ways to manage your builds for the iOS devices. You can let Xcode automatically configure the provisioning profile for your apps, or you can manually create and use an Ad Hoc profile from the iOS Developer Portal.
Letting Xcode Do Everything for You
simulator, only to have to deal with code signing in order to get the game on an actual device. Apple has made this process a lot simpler starting with Xcode 3.2.3. To let Xcode configure the provisioning profiles on your behalf:
1. Make sure your iPhone or iPad is connected via USB. 2. In the Xcode menu, select Window > Organizer. 3. Select the Devices section.
4. Press the button marked Use for Development.
5. When prompted, enter your credentials for the iPhone Developer Program.
That’s it! Xcode automatically sends your device UDID to Apple, creates a special provisioning profile called “Team Provisioning Profile,” and sets everything up for you. After a minute or so, your Organizer window should look similar to Figure 1.14.
Figure 1.14 Xcode Organizer window with iPad configured for development
Building for Your iPhone or iPad
Under the Scheme dropdown menu, select CCHelloWorld and your iPhone or iPad device. You should see your iPad or iPhone listed if it is connected via USB.