HTML5 Games Development by
Example
Beginner's Guide
Create six fun games using the latest HTML5, Canvas, CSS,
and JavaScript techniques
Makzan
HTML5 Games Development by Example
Beginner's GuideCopyright © 2011 Packt Publishing
All rights reserved. No part of this book may be reproduced, stored in a retrieval system, or transmitted in any form or by any means, without the prior written permission of the publisher, except in the case of brief quotations embedded in critical articles or reviews.
Every effort has been made in the preparation of this book to ensure the accuracy of the information presented. However, the information contained in this book is sold without warranty, either express or implied. Neither the author, nor Packt Publishing, and its dealers and distributors will be held liable for any damages caused or alleged to be caused directly or indirectly by this book.
Packt Publishing has endeavored to provide trademark information about all of the companies and products mentioned in this book by the appropriate use of capitals. However, Packt Publishing cannot guarantee the accuracy of this information.
First published: August 2011
Production Reference: 1180811
Published by Packt Publishing Ltd. Livery Place
35 Livery Street
Birmingham B3 2PB, UK.
ISBN 978-1-849691-26-0
www.packtpub.com
Credits
Author
Makzan
Reviewers
Matteo Ferretti
Henk Jurriens
William Malone
Acquisition Editor David Barnes
Development Editor Neha Mallik
Technical Editors Pallavi Kachare
Azharuddin Sheikh
Copy Editor Neha Shetty
Project Coordinator Zainab Bagasrawala
Proofreader Joanna McMahon
Indexer Rekha Nair
Graphics
Geetanjali Sawant
Production Coordinators Melwyn D'sa
Adline Swetha Jesuthas
About the Author
Makzan
is the founder of 42games Limited. He has been designing games since he was a child. He likes to see how the well-designed interactions in his games can trigger the emotions and influence the player. He believes that games should let a player share joyful times with friends. Therefore, his favorite game type is multiplayer casual games.Makzan also wrote a book named FlashMultiplayerVirtualWorld. It is about developing a virtual world to play with friends in real time with Adobe Flash and socket server.
About the Reviewers
Matteo
Ferretti
is a software engineer, an amateur comic-book artist, and an occasional graphic designer, who was drawn into software development since he played his first video game.He fell in love with JavaScript at the end of the 20th century, and he still loves it with the same passion.
Currently he is working for Mozilla, after more than two years in TomTom as a Senior Software Engineer and Tech Leader.
I wish to thank my love, Elisa, for her patience and understanding. I also want to thank my parents, for their continuous support throughout my whole life.
Henk
Jurriens
is a software developer and developer evangelist, experienced with Java, Groovy and Grails, and HTML5. Henk is passionate about new technologies and loves to talk about it, and so gives different presentations about HTML5, Linked Data, and Groovy and Grails.In addition, Henk founded an HTML5 User Group to promote and share knowledge about HTML5. During the year, different meetups are organized. Together with the Google Technology User Group, he organized for example, a HTML5 Hackathon.
Last year, Henk also helped with a HTML5 Game Jam and there he saw the potential of HTML5 Games and this was the reason for him to review this book. With the help of this book, great HTML5 games can be built!
William
Malone
is a software developer specializing in dialects of ECMAScriptwww.PacktPub.com
Support files, eBooks, discount offers and more
You might want to visit www.PacktPub.com for support files and downloads related to your book.
Did you know that Packt offers eBook versions of every book published, with PDF and ePub files available? You can upgrade to the eBook version at www.PacktPub.com and as a print book customer, you are entitled to a discount on the eBook copy. Get in touch with us at service@ packtpub.com for more details.
At www.PacktPub.com, you can also read a collection of free technical articles, sign up for a range of free newsletters and receive exclusive discounts and offers on Packt books and eBooks.
http://PacktLib.PacktPub.com
Do you need instant solutions to your IT questions? PacktLib is Packt's online digital book library. Here, you can access, read and search across Packt's entire library of books.
Why Subscribe?
Fully searchable across every book published by Packt
Copy and paste, print and bookmark content On demand and accessible via web browser
Free Access for Packt account holders
If you have an account with Packt at www.PacktPub.com, you can use this to access PacktLib today and view nine entirely free books. Simply use your login credentials for immediate access.
Table of Contents
Preface
1
Chapter 1: Introducing HTML5 Games
7
Discovering new features in HTML5 8
Canvas 8
Audio 8
GeoLocation 8
WebGL 9
WebSocket 10
Local Storage 10
Offline application 11
Discovering new features in CSS3 11
CSS3 transition 12
CSS3 transform 13
CSS3 animation 14
Learning more detail of new HTML5 and CSS3 features 15
The benefit of creating HTML5 games 15
No third-party plugin required 16
Supporting iOS devices without plugin 16
Breaking the boundary of usual browser games 16
Building HTML5 games 18
What others are playing with HTML5 18
Matching game 18
Sinuous 19
Asteroid-styled bookmarklet 19
Quake 2 20
RumpeTroll 21
Scrabb.ly 21
Browsing more HTML5 games 22 What we are going to create in this book 23
Summary 24
Chapter 2: Getting Started with DOM-based Game Development
25
Preparing the development environment 26Preparing the HTML documents for a DOM-based game 26
Time for action – Installing the jQuery library 27
New HTML5 doctype 28
Header and footer 29
Best practice to place the JavaScript code 29
Running our code after the page is ready 29
Setting up the Ping Pong game elements 30
Time for action – Placing Ping Pong game elements in DOM 30
Introducing jQuery 32
Understanding basic jQuery selectors 33
Understanding the jQuery CSS function 34
Benefits of using jQuery 35
Manipulating game elements in DOM with jQuery 35
Time for action – Changing position of elements with jQuery 35
Understanding the behavior of absolute position 36
Getting a keyboard input from players 37
Time for action – Moving DOM objects by a keyboard input 38
Understanding a key code 39
Making constants more readable 40
Converting strings to numbers with parseInt function 40 Executing JavaScript expressions directly in the Console panel 42
Checking the console window 42
Supporting multiple keyboard input from players 43 Time for action – Listening to keyboard input with another approach 43
Declaring global variables in a better way 45
Creating a JavaScript timer with setInterval function 46
Understanding Game Loop 46
Moving a DOM object with JavaScript Interval 47
Time for action – Moving the ball with JavaScript Interval 47
Beginning collision detection 49
Time for action – Hitting the ball with the paddles 50
Showing text dynamically in HTML 53
Time for action – Showing the score of both players 53
Chapter 3: Building a Memory Matching Game in CSS3
5
7
Moving game objects with CSS3 transition 57Time for action – Moving a playing card around 58
2D transforms functions 61
3D transforms functions 61
Tweening the styles by using CSS3 transition 62
Creating a card-flipping effect 64
Time for action – Flipping a card with CSS3 64
Toggling class with jQuery toggleClass function 66
Controlling the visibility of overlapped elements by z-index 67
Introducing CSS perspective property 68
Introducing backface-visibility 69
Creating a card matching memory game 70
Downloading the sprites sheet of playing cards 70
Setting up the game environment 71
Time for action – Preparing the card matching game 71
Cloning DOM elements with jQuery 77
Selecting the first child of an element in jQuery by using child filters 77
Vertically aligning a DOM element 77
Using CSS sprite with a background position 78
Adding game logic to the matching game 79
Time for action – Adding game logic to the matching game 80
Executing code after CSS transition ended 83
Delaying code execution on flipping cards 83
Randomizing an array in JavaScript 83
Storing internal custom data with an HTML5 custom data attribute 84
Accessing custom data attribute with jQuery 85
Making other playing card games 87
Embedding web fonts into our game 87
Time for action – Embedding a font from Google Font Directory 88
Choosing different font delivery services 90
Summary 91
Chapter 4: Building the Untangle Game with Canvas and Drawing API
93
Introducing the HTML5 Canvas Element 94Drawing a circle in canvas 95
Time for action – Drawing color circles on canvas 95
Putting fallback content when the web browser does not support canvas 97 Drawing circles and shapes with canvas arc function 98
Converting degree to radians 98
Time for action – Drawing different arcs with arc function 99
Beginning a path for each style 102
Closing a path 103
Wrapping the circle drawing in function 104
Time for action – Putting the circle drawing code into a function 104
Generating random numbers in JavaScript 105
Saving the circle position 106
Time for action – Saving the circle position 107 Defining a basic class definition in JavaScript 108
Drawing lines in canvas 108
Time for action – Drawing straight lines between each circle 109
Introducing the line drawing API 111
Interacting with drawn objects in canvas with mouse events 112 Time for action – Dragging the circles in canvas 112
Getting the mouse position in the canvas element 116
Detecting mouse events on circles in canvas 116
Game loop 117
Clearing the canvas 118
Detecting line intersection in canvas 119
Time for action – Distinguishing the intersected lines 119 Determining whether two line segments intersect 123
Making the untangle puzzle game 124
Time for action – Making the untangle puzzle game in canvas 125
Defining the leveling data 129
Determining level-up 130
Displaying current level and completeness progress 131
Summary 131
Chapter 5: Building a Canvas Games Masterclass
133
Filling shapes with gradient color 134
Time for action – Drawing a gradient color background to the Untangle game 134
Adding color stops in the gradient color 135
Filling radial gradient color 136
Time for action – Filling the circles with radial gradient color 136
Drawing text in canvas 139
Time for action – Displaying the progress level text inside the canvas element 139
Using embedded web font inside canvas 142
Time for action – Embedding Google Web Font into the 143
canvas element 143
Drawing images in canvas 144
Time for action – Adding graphics to the game 144
Decorating the canvas-based game 149
Time for action – Adding CSS styles and images decoration to the game 149
Animating a sprite sheet in canvas 152
Time for action – Making a game guide animation 152 Creating a multi-layers canvas game 156
Time for action – Dividing the game into four layers 156
Mixing CSS technique with Canvas drawing 162
Summary 163
Chapter 6: Adding Sound Effects to your Games
165
Adding a sound effect to the play button 166
Time for action – Adding sound effects to the play button 166
Defining an audio element 169
Playing a sound 171
Pausing a sound 171
Adjusting the sound volume 172
Using the jQuery hover event 172
Creating the Ogg format audio to support Mozilla Firefox 172
Time for action – Converting an MP3 sound to Ogg format with Audacity 173
Supporting different web browsers with different audio formats 174
Building a mini piano musical game 174
Time for action – Creating a basic background to the 174
music game 174
Creating scenes in HTML5 games 177
Visualizing the music play back 178
Time for action – Creating the playback visualization in the music game 179
Choosing the right song for the music game 183
Storing and extracting the song level data 183
Getting the elapsed time of the game 184
Creating music dots 185
Moving the music dots 186
Linking the play button to the music game scene 187
Time for action – Animating the scene transition 187
Creating a slide-in effect in CSS3 189
Creating a keyboard-driven mini piano musical game 190
Time for action – Creating a mini piano musical game 190
Hitting the three music lines by key down 192
Determining music dot hits on key down 193
Removing an element in an array with the given index 194
Adding additional features to the mini piano game 195
Adjusting the music volume according to the player 196
Time for action – Removing missed melody notes 196
Removing dots from the game 198
Storing the success count in the last five results 198
Recording music notes as level data 199
Time for action – Adding functionality to record the music level data 199
Handling the audio event on playback completes 202 Time for action – Indicating a game over event in the console 202
Handling audio events 203
Summary 204
Chapter 7: Using Local Storage to Store Game Data
205
Storing data by using HTML5 local storage 206
Creating a game over dialog 206
Time for action – Creating a game over dialog with the elapsed played time 207
Saving scores in the browser 210
Time for action – Saving the game score 210
Storing and loading data with local storage 211
The local storage saves the string value 212
Treating the local storage object as an associated array 213
Saving objects in the local storage 213
Time for action – Saving the time alongside the score 214 Getting the current date and time in JavaScript 217 Using the native JSON to encode an object into a string 218
Loading a stored object from a JSON string 218
Inspecting the local storage in a console window 219
Notifying players of breaking a new record with a nice ribbon effect 220
Time for action – Creating a ribbon in CSS3 221
Saving the entire game progress 224
Saving the game progress 224
Time for action – Saving all essential game data in the local storage 224
Removing a record from the local storage 227
Cloning an array in JavaScript 227
Resuming the game progress 228
Time for action – Resuming a game from the local storage 228
Summary 231
Chapter 8: Building a Multiplayer Draw-and-Guess Game with WebSockets 233
Trying an existing WebSockets web application 234Installing a WebSocket server 236
Installing the Node.JS WebSocket server 236
Time for action – Installing Node.JS 236 Creating a WebSockets server to broadcast the connection count 238
Time for action – Creating a WebSocket server that sends the total
count of connections 238
Initializing the WebSockets server 239
Listening to the connection event on the server side 240 Getting a count of connected clients on the server side 240 Broadcasting a message to all connected browsers 240 Creating a client that connects to a WebSocket server and getting the total
connections count 241
Time for action – Showing the connection count in a WebSocket application 241
Establishing a WebSocket connection 243
WebSockets client events 243
Building a chatting application with WebSockets 243
Sending a message to the server 243
Time for action – Sending a message to the server through WebSockets 244 Sending a message from the client to the server 246
Receiving a message on the server side 246
Broadcasting every received message on the server side to create a chat room 247
Time for action – Broadcasting the messages to all connected browsers 247 Comparing between WebSockets and polling approaches 248
Making a shared drawing whiteboard with Canvas and WebSockets 250
Building a local drawing sketchpad 250
Time for action – Making a local drawing whiteboard with the Canvas 251
Drawing on the canvas 254
Broadcasting the drawing to all connected browsers 254
Time for action – Sending the drawing through WebSockets 254 Defining a data object to communicate between the client and the server 258 Packing the drawing lines data into JSON for broadcasting 259 Recreating the drawing lines after receiving them from other clients 259
Building a multiplayer draw-and-guess game 259
Time for action – Building the draw-and-guess game 260 Controlling the game flow of a multiplayer game 265 Enumerating connected clients on the serverside 266 Sending a message to a specific connection on the server side 267
Improving the game 267
Storing drawn lines on each game 268
Improving the answer checking mechanism 268
Time for action – Decorating the game 268
Summary 271
Chapter 9: Building a Physics Car Game with Box2D and Canvas
273
Installing the Box2D JavaScript library 274Time for action – Installing the Box2D physics library 275
Using b2World to create a new world 277
Using b2AABB to define a bounding area 278
Setting the gravity of the world 278
Setting the Box2D to ignore the slept object 278
Creating a static ground body in the physics world 279
Time for action – Creating a ground in the world 279
Creating a shape 280
Creating a body 280
Drawing the physics world in the canvas 281
Time for action – Drawing the physics world into the canvas 281
Creating a dynamic box in the physics world 284
Time for action – Putting a dynamic box in the world 284 Setting the bouncing effect with the restitution property 285
Advancing the world time 286
Time for action – Setting up the world step loop 286
Adding wheels to the game 287
Time for action – Putting two circles in the world 287
Creating a physical car 288
Time for action – Connecting the box and two circles with revolute joint 289 Using a revolute joint to create an anchor point between two bodies 290
Adding force to the car with a keyboard input 291
Time for action – Adding force to the car 291
Applying force to a body 292
Understanding the difference between ApplyForce and ApplyImpulse 293
Adding ramps to our game environment 293
Time for action – Creating the world with ramps 293 Checking collisions in the Box2D world 295 Time for action – Checking a collision between the car and the destination body 295
Getting the collision contact list 296
Restarting the game 297
Time for action – Restarting the game while pressing the R key 297
Adding a level support to our car game 299
Time for action – Loading game with levels data 299
Using userData in shape and body 306 Drawing graphics every frame according to the state of its physics body 307 Rotating and translating an image in the canvas 308
Adding a final touch to make the game fun to play 308
Time for action – Decorating the game and adding a fuel 309
limitation 309
Adding fuel to add a constraint when applying force 314 Presenting the remaining fuel in a CSS3 progress bar 315
Summary 316
HTML5 game engines 316
Game sprites, and textures 317
Sound effects 317
Appendix: Pop Quiz Answers
31
9
Chapter 2: Getting Started with DOM-based Game Development 319
Running our code after the page is ready 319
Understanding the behavior of absolution position 319
Chapter 3: Building Memory Match Game in CSS3 319 Storing internal custom data with HTML5 custom data attribute 319
Accessing custom data attribute with jQuery 319
Chapter 4: Building Untangle Game with Canvas and Drawing API 320
Using startAngle and endAngle 320
Using closePath with fill command only 320
Accessing shapes in canvas 320
Clearing drawn shapes in canvas 320
Chapter 5: Building Canvas Games Masterclass 320
Drawing text in canvas 320
Styling canvas background 320
Chapter 6: Adding Sound Effects to your Games 321
Using the audio tag 321
Chapter 7: Using Local Storage to Store Game Data 321
Using local storage 321
Chapter 8: Building Multiplayer Draw-and-Guess Game with WebSockets 321
Preface
HTML5 promises to be the hot new platform for online games. HTML5 games work on computers, smartphones, and tablets, including iPhones and iPads. Be one of the first developers to build HTML5 games today and be ready for tomorrow!
This book will show you how to use the latest HTML5 and CSS3 web standards to build card games, drawing games, physics games, and even multiplayer games over the network. With this book, you will build six example games with clear systematic tutorials.
HTML5, CSS3, and the related JavaScript API are the latest hot topics in web. These standards bring us the new game market, HTML5 Games. With the new power from them, we can design games with HTML5 elements, CSS3 properties, and JavaScript to play in browsers.
This book is divided into nine chapters with each one focusing on one topic. We will create six games and specifically learn how we draw game objects, animate them, add audio, connect players, and build a physics game with a Box2D physics engine.
What this book covers
Chapter1, IntroducingHTML5Games, introduces the new features from HTML5, CSS3, and
related JavaScript API. It also demonstrates what games we can make with these features and its benefits.
Chapter2, GettingStartedwithDOM-basedGameDevelopment, kick-starts the game
development journey by creating a traditional Ping Pong game in DOM and jQuery.
Chapter3, BuildingMemoryMatchingGameinCSS3, walks through the new features from
CSS3 and discusses how we can create a memory card matching game in DOM and CSS3.
Chapter4, BuildingUntangleGamewithCanvasandDrawingAPI, introduces a new way
Chapter5, Building a CanvasGameMasterclass, extends the untangle game to show how we
can draw gradients and images using Canvas. It also discusses sprite sheet animations and multi-layer management.
Chapter6, AddingSoundsEffectstoYourGames, adds sound effects and background music to the game by using the Audio element. It discusses the audio format capability among web browsers and creates a keyboard-driven music game by the end of the chapter.
Chapter7, UsingLocalStoragetoStore Game Data, extends the CSS3 memory matching
game to demonstrate how we can use the new Local Storage API to store and resume game progress and best records.
Chapter8, Building a MultiplayerDraw-and-GuessGamewithWebSockets, discusses the
new WebSockets API which allows browsers to establish a persistent connection with the socket server. This allows multiple players to play the game together in real time. A draw-and-guess game is created at the end of chapter.
Chapter9, Building a PhysicsCarGamewithBox2DandCanvas, teaches how to integrate
a famous physics engine, Box2D, into our Canvas games. It discusses how to create physics bodies, apply force, connect them together, associate graphics with the physics, and finally create a platform card game.
What you need for this book
You need the latest modern web browsers, a good text editor, and a basic HTML, CSS, and JavaScript knowledge.
Who this book is for
This book is for game designers who have a basic understanding of HTML, CSS, and JavaScript and want to create Canvas or DOM-based games that run on browsers.
Conventions
In this book, you will find several headings appearing frequently.
Time for action – heading
1.
Action 12.
Action 23.
Action 3Instructions often need some extra explanation so that they make sense, so they are followed with:
What just happened?
This heading explains the working of tasks or instructions that you have just completed.
You will also find some other learning aids in the book, including:
Pop quiz – heading
These are short multiple choice questions intended to help you test your own understanding.
Have a go hero – heading
These set practical challenges and give you ideas for experimenting with what you have learned.
You will also find a number of styles of text that distinguish between different kinds of information. Here are some examples of these styles, and an explanation of their meaning.
Code words in text are shown as follows: "We will start our HTML5 game developmentpment journey from index.html."
A block of code is set as follows:
// starting game var date = new Date();
audiogame.startingTime = date.getTime();
// some time later var date = new Date();
When we wish to draw your attention to a particular part of a code block, the relevant lines or items are set in bold:
function setupLevelData() {
var notes = audiogame.leveldata.split(";");
// store the total number of dots
audiogame.totalDotsCount = notes.length;
for(var i in notes) {
var note = notes[i].split(","); var time = parseFloat(note[0]); var line = parseInt(note[1]);
var musicNote = new MusicNote(time,line); audiogame.musicNotes.push(musicNote); }
}
Any command-line input or output is written as follows:
$ ./configure $ sudo make install
Newterms and importantwords are shown in bold. Words that you see on the screen, in menus or dialog boxes for example, appear in the text like this: "You will get an introduction page of the multiuser sketchpad. Right click on the LaunchExperiment option and choose Openlinkinnewwindow".
Warnings or important notes appear in a box like this.
Reader feedback
Feedback from our readers is always welcome. Let us know what you think about this book—what you liked or may have disliked. Reader feedback is important for us to develop titles that you really get the most out of.
To send us general feedback, simply send an e-mail to [email protected], and mention the book title via the subject of your message.
If there is a book that you need and would like to see us publish, please send us a note in the SUGGEST A TITLE form on www.packtpub.com or e-mail [email protected].
If there is a topic that you have expertise in and you are interested in either writing or contributing to a book, see our author guide on www.packtpub.com/authors.
Customer support
Now that you are the proud owner of a Packt book, we have a number of things to help you to get the most from your purchase.
Downloading the example code for this book
You can download the example code files for all Packt books you have purchased from your account at http://www.PacktPub.com. If you purchased this book elsewhere, you can visit http://www.PacktPub.com/support and register to have the files e-mailed directly to you.
Errata
Piracy
Piracy of copyright material on the Internet is an ongoing problem across all media. At Packt, we take the protection of our copyright and licenses very seriously. If you come across any illegal copies of our works, in any form, on the Internet, please provide us with the location address or website name immediately so that we can pursue a remedy.
Please contact us at [email protected] with a link to the suspected pirated material.
We appreciate your help in protecting our authors, and our ability to bring you valuable content.
Questions
1
Introducing HTML5 Games
Hyper-Text Markup Language, HTML, has been shaping the Internet in the last few decades. It defines how content is structured in web and the linkage between related pages. HTML keeps evolving from version 2 to HTML 4.1, and later XHTML 1.1. Thanks to those web applications and social network applications, HTML is now on the way to HTML5.
Cascading Style Sheet (CSS) defines how web pages are presented visually. It styles all HTML elements and the styles of their states, such as hover and active.
JavaScript is the logic controller of the web page. It makes the web page dynamic and provides client-side interaction between the page and users. It accesses the HTML through DocumentObjectModel (DOM). It re-styles the
HTML elements by applying different CSS styles.
These three receipts bring us the new game market, HTML5 Games. With the new power from them, we can design games with HTML5 elements, CSS3 properties, and JavaScript to play in the browsers.
In this chapter, we shall:
Discover new features in HTML5
Discuss what makes us so excited around HTML5 and CSS3
Take a look at what others are playing with HTML5 on game designing Preview what games we are going to build in later chapters
So let's get started.
Discovering new features in HTML5
There are many new things introduced in HTML5 and CSS3. Before getting our hands dirty in creating the games, let's take an overview of the new features and see how we can use them to create games.
Canvas
Canvas is an HTML5 element that provides drawing shapes and bitmap manipulation functions in low level. We can imagine the Canvas element as a dynamic image tag. The traditional <img> tag shows a static image. Whether the image is dynamically generated or statically loaded from the server, the image is static and will not be changed. We can change the <img> tag to another image source or apply styles to the image, but we cannot modify the image bitmap context itself.
On the other hand, Canvas is like a client-side dynamic <img> tag. We can load images inside it, draw shapes there, and interact with it by JavaScript.
Canvas plays an important role in HTML5 game development. It is one of our main focuses in this book.
Audio
Background music and sound effects are often an essential element in game design. HTML5 comes with native audio support by the audio tag. Thanks to this feature, we do not require the proprietary Flash Player to play sound effects in our HTML5 games. We will discuss the usage of the audio tag in Chapter 6, Building Music Games with HTML5 Audio Elements.
GeoLocation
GeoLocation lets the web page retrieve the latitude and longitude of the user's computer. This feature may not have been so useful years ago when everyone was using the Internet with their desktop PC. There are not many things that we need the road level location accuracy of the user. We can get the rough location by analyzing the IP address.
These days, more and more users are going on the Internet with their powerful smartphones. Webkit and other modern mobile browsers are in everyone's pocket. GeoLocation lets us design mobile applications and games to play with the location.
WebGL
WebGL extends the Canvas element by providing a set of 3D graphics API in the web browser. The API follows the standard of OpenGL ES 2.0. The WebGL provides a real 3D rendering place for 3D HTML5 games. However, not all browsers natively support the WebGL yet at the time of writing this book. Currently only Mozilla Firefox 4, Google Chrome, and a nightly build of WebKit browser support it natively.
The technique of creating games for WebGL is quite different from usual HTML5 game developments. Creating games in WebGL requires handing the 3D models and use of API similar to the OpenGL. Therefore, we will not discuss the WebGL game development in this book.
The following screenshot from Google Body (http://bodybrowser.googlelabs.com) demonstrates how they use WebGL to show a 3D human body that responds to the user's input:
The LearningWebGL (http://learnwebgl.com) provides a collection of
WebSocket
WebSocket is part of the HTML5 spec for connecting the web page to a socket server. It provides us with an event-driven connection between the browser and server. That means the client does not need to poll the server for new data every short period. The server will push updates to the browsers whenever there is any data to update. One benefit of this feature is that the game players can interact with each other almost in real time. When one player does something and sends data to the server, the server will broadcast an event to every other connected browser to acknowledge what the player just did. This creates the possibility of creating multiplayer HTML5 games.
Due to a security issue, WebSocket is now temporary disabled by Mozilla Firefox and Opera. Safari and Chrome may also drop the support on WebSocket until the issue is fixed. You can learn more on this issue by visiting the following link: http://hacks.mozilla.org/2010/12/ websockets-disabled-in-firefox-4/.
Local Storage
HTML5 provides a persistent data storage solution to web browsers.
Local Storage stores key-value paired data persistently. The data is still there after the browser terminates. Moreover, the data is not limited to be accessible only to the browsers that created it. It is available to all browser instances with the same domain. Thanks to Local Storage, we can easily save game status, such as progress and earn achievements, locally in web browsers.
HTML5 also provides Web SQL Database. It is a client-side relational database and is currently supported by Safari, Chrome, and Opera. With the database storage, we can not only store key-value paired data but also complicated relational structures that support SQL queries.
Local Storage and Web SQL Database are useful for us to save game state locally when creating games.
Besides Local Storage, some other storage approaches are now being supported by web browsers. These include Web SQL Database and IndexedDB. These approaches support querying the stored data with condition and thus are more powerful for supporting a complicated data structure.
Offline application
Normally we need an Internet connection to browse web pages. Sometimes we can browse cached offline web pages. These cached offline web pages usually expire quickly. With the next offline application introduced by HTML5, we can declare our cache manifest. It is a list of files that will be stored for later access without an Internet connection.
With the cache manifest, we can store all the game graphics, game control JavaScript files, CSS stylesheets, and the HTML files locally. We can pack our HTML5 games as an offline game on the desktop or the mobile device. Players can play the games even in airplane mode.
The following screenshot from the Pie Guy game (http://mrgan.com/pieguy) shows an HTML5 game in iPhone without an Internet connection. Note the little airplane symbol indicating the offline status:
Discovering new features in CSS3
Instead of directly drawing and interacting on the Canvas drawing board, new CSS3 properties let us animate the DOM in different ways. This makes it possible to make more complicated DOM-based browser games.
CSS3 transition
Traditionally, the style changes immediately when we apply a new style to an element. CSS3 transition applies tweening during the style changes of the target elements.
For example, we have a blue box here and want to change it to red when we do a mouseover. We will use the following code snippets:
HTML:
<a href="#" class="box"></a>
CSS:
a.box {
display:block; width: 100px; height: 100px;
background: #00f; /* blue */ border: 1px solid #000; }
a.box:hover { background: #f00; }
The box changes to red immediately when we do a mouseover. With CSS3 transition applied, we can tween the styles with a specific duration and the easing value:
a.box {
-webkit-transition: all 5s linear; }
Downloading the example code for this book
You can download the example code files for all Packt books you have
purchased from your account at http://www.PacktPub.com. If you
The following screenshot shows the box hover effect with the transition applied:
Since the CSS3 spec is still in draft and not yet fixed, the implementation from different browser vendors may have some minor differences to the W3C spec. Therefore, browser vendors tend to implement their CSS3 properties with a vendor prefix to prevent conflict.
Safari and Chrome use the -webkit-prefix. Opera uses the -o- prefix. Firefox uses the -moz- prefix and IE uses the -ms- prefix. It is a little complex now to declare a CSS3 property, such as box-shadow, with several lines of the same rule for several browsers. We can expect the prefix to be eliminated after that property spec is fixed.
I will just use the -webkit- prefix in most examples to prevent putting so many similar lines in the book. It is more important to get the concept instead of reading the same rules with different vendors prefixed here.
CSS3 transform
CSS3 transform lets us scale the elements, rotate the elements, and translate their position. CSS3 transform is divided into 2D and 3D.
We can reposition an element with translate:
-webkit-transform: translate(x,y);
or scale the element with scale transformation:
-webkit-transform: scale(1.1);
We can also scale and rotate the elements with CSS3 transform and combine other transformations:
a.box {
-webkit-transition: all 0.5s linear; -webkit-transform: translate(100px,50px); }
a.box:hover {
The following screenshots show the CSS3 transform effect when we do a mouseover:
CSS3 transform 3D further extends the spaces into three axes and it currently works only on Safari and Mobile Safari. The following screenshot from WebKit.org shows a 3D card flipping effect when we do a mouseover:
CSS3 animation
CSS3 transition is one type of animation. It declares the tweening animation between two styles of the elements.
The AT-AT Walker (http://anthonycalzadilla.com/css3-ATAT/index-bones.html) shows a nice demo on creating a skeleton bone animation with CSS3 animation key frames, transform, and transition:
Learning more detail of new HTML5 and CSS3 features
HTML5Rocks (http://html5rocks.com) from Google provides a solid quick start guide on new HTML5 elements and CSS3 properties.
Apple also showcases how appealing it can be by using HTML5 in the WebKit-based browser in their homepage (http://apple.com/html5).
CSS3 Info (http://www.css3.info) is a blog with the latest CSS3 news. It is a good place to get the latest CSS3 spec status, compatible list, and basic CSS3 codes.
The benefit of creating HTML5 games
No third-party plugin required
With the native support of all those features in modern browsers, we do not require the users to pre-install any third-party plugin in order to play. These plugins are not standard. They are proprietary and usually require an extra plugin installation that we may not be able to install.
Supporting iOS devices without plugin
Millions of Apple iOS devices around the world do not support third-party plugins such as Flash Player. Despite whatever reason Apple does not allow Flash Player running on their Mobile Safaris, HTML5 and related web standard is what they get in their browsers. We can reach this user base by creating HTML5 games that optimize for mobiles.
Breaking the boundary of usual browser games
In traditional game designing, we build games within a boundary box. We play video games on a television. We play Flash games in web browsers with a rectangle boundary.
With creativity, we are not bound in a rectangle game stage any more. We can have fun with all the page elements and we can even use many browser windows to compose a game. Furthermore, we can even just use the URL bar to create a game (http://
probablyinteractive.com/url-hunter). It may sound confusing, but it is because not many web pages have done this yet.
Building HTML5 games
Thanks to the new features from HTML5 and CSS3, we can now create an entire game in the browser. We can control every element in the DOM. We can animate each document object with CSS3. We have Canvas to dynamically draw things and interact with them. We have an audio element to handle the background music and sound effects. We also have Local Storage to save game data and WebSocket to create a real time multiplayers game. Most modern browsers are already supporting these features. It is now time to build HTML5 games.
What others are playing with HTML5
It is a good chance to study how different HTML5 games perform by watching other HTML5 games made with different techniques.
Matching game
Sinuous
Sinuous (http://10k.aneventapart.com/Uploads/83/), winner of the 10K Apart, shows us how a simple game idea with proper implementation can get people addicted to it. The player controls the big dots in the space with the mouse. The aim is to move the dots to avoid the flying comets. It sounds easy and simple, but it is definitely addictive and a just-one-more-try game. The game is created with a Canvas tag. Players can also play this game with their webkit-enabled mobile devices, such as iPhone, iPad, and Android.
Asteroid-styled bookmarklet
Erik, a web designer from Sweden, created an interesting bookmarklet. It is an asteroid-styled game for any web page. Yes, any web page. It shows an abnormal way to interact with any web page. It creates a plane on the website you are reading from. You can then fly the plane using arrow keys and fire bullets using the space bar. The fun part is that the bullets will destroy the HTML elements on the page. Your goal is to destroy all the things on the web page you choose. This bookmarklet is another example of breaking the boundary of usual browser games. It tells us that we can think outside the box while designing HTML5 games.
The following screenshot shows the plane destroying the content on the web page:
Quake 2
Google demonstrates a WebGL HTML5 port of the first person shooter game, Quake 2. Players move around using the WSAD key and shoot enemies with their mouse. Players can even play with each other in real time by using WebSocket. According to Google, the frame-per-seconds of the HTML5 Quake 2 can be up to 60 fps.
RumpeTroll
RumpeTroll (http://rumpetroll.com/) is an experiment of the HTML5 community where everyone gets connected via WebSocket. We can give our creatures names and move around through mouse clicks. We can also type anything to start a chat. Moreover, we can see what others are doing in real time, thanks to the WebSocketInsert.
Scrabb.ly
Node.js (http://nodejs.orgp://nodejs.org) is an event-driven server-side JavaScript. It can be used as a server connecting concurrent WebSocket clients.
Aves Engine
Aves Engine is an HTML5 game development framework developed by dextrose. It provides tools and API for game developers building their own isometric browser game world with the map editor. The following screenshot captured from the official demonstration video shows how it creates an isometric world:
The engine also takes care of the 2.5 dimension isometric coordinate system, collision detection, and other basic virtual world features. This game engine even works well on mobile devices such as iPad and iPhone. The Aves Engine has gained a lot of attention since its debut and is now acquired by Zynga Game Network Inc, a big social game company.
The video demonstration of the Aves Engine is available on YouTube at the following link:
http://tinyurl.com/dextrose-aves-engine-sneak
Browsing more HTML5 games
These examples are just a selected few. The following sites provide updates on HTML5 games created by others:
Canvas Demo (http://canvasdemo.com) collects a set of applications and games using the HTML5 Canvas tag. It also provides a bunch of Canvas tutorial resources. It is a good place to start learning Canvas.
HTML5 games (http://html5games.com) collect many HTML5 games and organizes them into categories.
Mozilla Labs hosted a HTML5 game design contest in early 2011 and many great games were submitted to the contest. The contest is now over and the list of all the entries is at the following link: https://gaming.mozillalabs.com/games/. The HTML5 Game Jam (http://www.html5gamejam.com/games) is an HTML5 event and the website lists a collection of fun HTML5 games and also some useful resources.
What we are going to create in this book
In the following chapters, we are going to build six games. We are going to first create a DOM-based Ping Pong game that can be played by two players in the same machine. Then we will create a memory matching game with CSS3 animation. Later, we will use Canvas to create an untangle puzzle game. Next, we will build a music game with audio elements. Then we will create a multiplayer draw and guess game with WebSocket. Lastly, we will use the Box2D JavaScript port to create a prototype of a physics car game. The following screenshot is of the memory matching game that we will build in Chapter 3, Building a Memory Matching Game in CSS3
Summary
We learned a lot in this chapter about basic information of HTML5 games.
Specifically, we covered:
New features from HTML5 and CSS3. We had a glimpse of what techniques we will use to create our games in later chapters. Canvas, audio, CSS animation, and more new features were introduced. We will have many new features to play with. The benefit of creating HTML5 games. We discussed why we want to create HTML5 games. We want to meet the web standard, meet the mobile devices, and break the boundary of a game.
HTML5 games that others are playing. We listed several existing HTML5 games that were created with different techniques that we will use. We can test those games before creating our own.
We also previewed the games that we are going to build throughout the book.
Now that we've learned about some background information of HTML5 games, we're ready to create our first DOM-based JavaScript-driven game in the next chapter.
2
Getting Started with DOM-based
Game Development
We have had an idea about what we are going to learn in the whole book in Chapter 1, Introducing HTML5 Games. From this chapter, we will go through a lot of learning-by-doing sections and we will focus on one topic in each section. Before digging deeply into the cutting edge CSS3 animations and HTML5 Canvas game, let's start with traditional DOM-based game development. We will warm up with some basic techniques in this chapter.
In this chapter, we will be:
Preparing the development tools Setting up our first game—Ping Pong
Learning basic positioning with the jQuery JavaScript library Getting keyboard inputs
Creating the Ping Pong game with scoring
The following screenshot shows the game we will get after this chapter. It is a Ping Pong game played by two players with one keyboard simultaneously:
So, let's get on with making our Ping Pong.
Preparing the development environment
The environment for developing HTML5 games is similar to designing websites. We need web browsers with the required plugin and a good text editor. Which text editor is good is a never-ending debate. Each text editor comes with its own strength, so just pick your favorite one. For the browser, we will need a modern browser that supports the latest HTML5, CSS3 spec, and provides us with handy tools for debugging.
There are several modern browser choices on the Internet now. They are Apple Safari (http://apple.com/safari/), Google Chrome (http://www.google.com/chrome/), Mozilla Firefox (http://mozilla.com/firefox/), and Opera (http://opera.com). These browsers support most features we discuss in the examples in the whole book. We will use Google Chrome to demonstrate most examples in the book because it runs fast and smooth with CSS3 transition and Canvas.
Time for action – Installing the jQuery library
We will create our HTML5 Ping Pong game from scratch. It may sound as if we are going to be preparing all the things ourselves. Luckily, at least we can use a JavaScript library to help us. jQuery is the JavaScript library we will be using in the whole book. It will help us in simplifying our JavaScript logic:
1.
Create a new folder named pingpong.2.
Create a new folder named js inside the pingpong directory.3.
Now it's time to download the jQuery library. Go to http://jquery.com/.4.
Select Production and click on Download jQuery.5.
Save jquery-1.4.4.min.js in the js folder we created in step 2.6.
Create a new document named index.html and save it in the first game folder.7.
Open index.html in text editor and insert an empty HTML template:<!DOCTYPE html> <html lang="en"> <head>
<meta charset="utf-8"> <title>Ping Pong</title> </head>
<body> <header>
<h1>Ping Pong</h1> </header>
<footer>
This is an example of creating a Ping Pong Game. </footer>
</body> </html>
8.
Include the jQuery JavaScript file by adding the following line before the closing ofthe body tag:
9.
Finally, we have to ensure that jQuery is loaded successfully. We place the followingcode before the close of the body tag and after the jQuery: <script>
$(function(){
alert("Welcome to the Ping Pong battle."); });
</script>
10.
Save the index.html and open it in the browser. We should see the following alertwindow showing our text. This means our jQuery is correctly set up:
What just happened?
We just created a basic HTML5 page with jQuery and ensured that the jQuery is loaded correctly.
New HTML5 doctype
The DOCTYPE and meta tags are simplified in HTML5.
In HTML4.01, we declare doctype as the following code:
<!DOCTYPE HTML PUBLIC "-//W3C//DTD HTML 4.01//EN" "http://www.w3.org/ TR/html4/strict.dtd">
It is a long line of code, right? While in HTML5, the doctype declaration cannot be simpler:
<!DOCTYPE html>
We even do not have the HTML version in the declaration. This implies that HTML5 will support all existing content of previous HTML versions. Future HTML versions will also support the existing content of HTML5.
The simplification also comes to meta tag. We define the charset of the HTML by using the following short line now:
Header and footer
HTML5 comes with many new features and improvements, one of them is semantics. HTML5 adds new elements to improve the semantics. We just used two, header and footer. Header gives a heading introduction to the section or the entire page. Therefore, we put the h1 title inside header. Footer, same as its name, contains the footer information of the section or the page.
A semantic HTML means that the markup itself provides meaningful information to the content instead of only defining the visual outlook.
Best practice to place the JavaScript code
We put the JavaScript code right before the closing </body> tag and after all the content in the page. There is a reason for putting the code there instead of putting it inside the <head></head> section.
Normally, browsers load content and render them from top to bottom. If the JavaScript code is put in the head section, then the content of document will not be loaded until all JavaScript code is loaded. Actually, all rendering and loading will be blocked if the browsers load a JavaScript code in the middle of the page. This is the reason why we want to put the JavaScript code at the bottom when possible. In this way, we can deliver the content with higher performance.
At the time of writing this book, the latest jQuery version is 1.4.4. That is why the jQuery file in our code examples is named jquery-1.4.4.min.js. This version number will be different, but the usage should be the same unless there is a big change in jQuery without backward compatibility.
Running our code after the page is ready
We need to ensure that the page is ready before our JavaScript code is executed. Otherwise, we may get an error when we try to access an element that is not yet loaded. jQuery provides us with a way to execute the code after the page is ready. It is the following code:
jQuery(document).ready(function(){ // code here.
});
Actually, what we just used is the following codes:
The $ sign is a shortcut for jQuery. When we are calling $(something), we are actually calling jQuery(something).
$(function_callback) is another shortcut for the ready event.
It is identical to the following:
$(document).ready(function_callback);
Also, identical to:
jQuery(document).ready(function_callback);
Pop quiz
1. Which is the best place to put JavaScript code?
a. Before the <head> tag
b. Inside the <head></head> elements c. Right after the <body> tag
d. Right before the </body> tag
Setting up the Ping Pong game elements
We have the preparation ready and it is time to set up the Ping Pong game.
Time for action – Placing Ping Pong game elements in DOM
1.
We will continue from our jQuery installation example. Open the index.html in atext editor.
2.
Then, create the following playground and game objects with DIV nodes in thebody. There are two paddles and one ball inside the playground. Moreover, the playground is inside the game:
<div id="game">
<div id="playground">
<div id="paddleA" class="paddle"></div> <div id="paddleB" class="paddle"></div> <div id="ball"></div>
3.
We now have the game objects' structure ready and it is time to apply styles tothem. Put the following styles inside the head element: <style>
#playground{
background: #e0ffe0; width: 400px;
height: 200px; position: relative; overflow: hidden; }
#ball {
background: #fbb; position: absolute; width: 20px;
height: 20px; left: 150px; top: 100px;
border-radius: 10px; }
.paddle {
background: #bbf; left: 50px; top: 70px;
position: absolute; width: 30px;
height: 70px; }
#paddleB { left: 320px; }
</style>
4.
In the last section, we put our JavaScript logic right after the jQuery inclusion. We5.
We prepared the JavaScript file. Now it is time to link them to our HTML file. Put thefollowing code in index.html before the </body> tag: <script src="js/jquery-1.4.4.js"></script> <script src="js/html5games.pingpong.js"></script>
6.
We will place the game logic inside the html5games.pingpong.js. Our only logicnow is the following paddle's initialization code:
// code inside $(function(){} will run after the DOM is loaded and ready
$(function(){
$("#paddleB").css("top", "20px"); $("#paddleA").css("top", "60px");
});
7.
We will test the setup in a browser. Open the index.html file in a browser and weshould see a screen similar to the one shown in the following screenshot:
What just happened?
We have put two paddles and a ball in the Ping Pong game. We also used jQuery to initialize the position of the two paddles.
Introducing jQuery
jQuery is a JavaScript library that is designed for easily navigating the DOM elements, manipulating them, handling events, and creating an asynchronies remote call.
elements, such as add, remove children, or style. Using jQuery often means chaining selection and modifications actions together.
For example, the following code selects all elements with box class and sets the CSS properties:
$(".box").css({"top":"100px","left":"200px"});
Understanding basic jQuery selectors
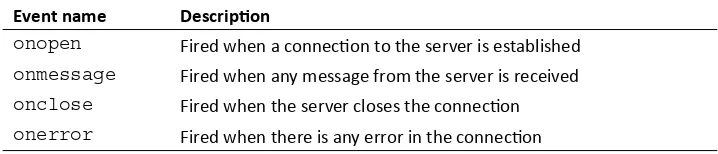
jQuery is about selecting elements and performing actions on them. We need a method to select our required elements in the entire DOM tree. jQuery borrows the selectors from CSS. The selector provides a set of patterns to match elements. The following table lists the most common and useful selectors that we will use in this book:
Selector pattern Meaning Examples
$("Element") Selects all elements with the given tag name
$("p") selects all the p tags.
$("body") selects the body tag. $("#id") Selects the element with
the given ID of the attribute
Provides the following code:
<div id="box1"></div>
<div id="box2"></div>
$("#box1") selects the highlighted element.
$(".className") Selects all elements with the given class attribute
Provides the following code:
<div class="apple"></div> <div class="apple"></div>
<div class="orange"></div> <div class="banana"></div>
$(".apple") selects the highlighted elements with class set to apple. $("selector1,
selector2, selectorN")
Selects all elements that match the given selector
Understanding the jQuery CSS function
The jQuery css is a function to get and set the CSS properties of the selected elements.
Here is a general definition of how to use the css function:
.css(propertyName)
.css(propertyName, value) .css(map)
The css function accepts several types of arguments as listed in the following table:
Function type Arguments definitions Discussion
.css(propertyName) propertyName is a CSS property
The function returns the value of the given CSS property of the selected element.
For example, the following code returns
the value of the background-color
property of the body element:
$("body").css("background-color")
It will only read the value and not modify the property value.
.css(propertyName, value)
propertyName is a CSS property,
value is a value to set for the property
The function modifies the given CSS property to the given value.
For example, the following code sets the background color to red of all elements with box class:
This function is useful for setting multiple CSS properties to the same selected elements at the same time.
For example, the following code sets both left and top CSS properties to the selected element with ID box1:
$("#box1").css({
"left" : "40px",
"top" : "100px"
Benefits of using jQuery
There are several advantages of using jQuery over pure JavaScript, which are as follows:
Using jQuery requires shorter code to select DOM nodes and modify them
Shorter code results in more clear code for reading, it is important in game development that usually contains a lot of code
Writing shorter code increases the development speed
Using the jQuery library enables the code to support all major browsers without extra tweaks; jQuery wraps the pure JavaScript code and deals with cross browser capability by itself
Manipulating game elements in DOM with jQuery
We initialized the paddles game elements with jQuery. We will do an experiment on how we use jQuery to place the game elements.
Time for action – Changing position of elements with jQuery
Let's inspect our Ping Pong game element with a grid background:
1.
We will continue with our Ping Pong example.2.
I have prepared a grid image. Download the pixel_grid.jpg image from thefollowing URL:
http://gamedesign.cc/html5games/pixel_grid.jpg
3.
Create a folder named images in the example directory.4.
Place the pixel_grid.jpg into the images folder. This image helps us inspect thepixel displacement later.
5.
Next, open the index.html file in a text editor.6.
Modify the background property of the playground DIV to include the pixel gridimage like the following: #playground{
7.
Now on opening the index.html in web browser we should have the followingscreenshot. The game elements are overlaid on top of a grid image so we can see where the elements are placed:
What just happened?
We began the example by placing an image called pixel_grid.jpg. This is an image I created for easy debugging purposes. The image is divided into small grids. Every 10 x 10 grid forms a big block with 100 x 100 pixels. By placing this image as background of the DIV, we put a ruler that enables us to measure the position of its children DIVs on the screen.
Understanding the behavior of absolute position
By default, the left and top properties refer to the top left edge of the web page. This reference point is different when any parent of this DOM node has a position style set explicitly. The reference point of the left and top properties becomes the top left edge of that parent.
This is why we need to set the playground with relative position and all game elements inside with absolute position. The following code snippet from our example shows their position values:
#playground{
position: relative; }
#ball {
position: absolute; }
.paddle {
position: absolute; }
Pop quiz
1. Which jQuery selector is to be used if you want to select all header elements? a. $("#header")
b. $(".header") c. $("header") d. $(header)
Getting a keyboard input from players
This book is about game development. We can think about game development as the following loop:
1. A game state is visually displayed.
2. Players input their commands.
3. The game runs according to the players' input under the designed game mechanics. 4. Loop the process again from step 1.
Time for action – Moving DOM objects by a keyboard input
We are going to create a traditional ping pong game. There are two paddles on the left and right side. A ball is placed in the middle of the playground. Players can control the left paddle and move it up and down by using w and s keys, and use arrow-up and down keys for the
right paddle. We will focus on the keyboard input and leave the ball movement for the later section:
1.
Let's continue with our pingpong directory.2.
Open the html5games.pingpong.js file which will contain our game logic.Our only logic now is to listen to the key down event and move the corresponding paddles up or down. Replace the content in the file with the following code: var KEY = {
$("#paddleA").css("top",top-5); break;
case KEY.S: // s
var top = parseInt($("#paddleA").css("top")); // move the paddle A drown 5 pixels
break; }
}); });
3.
Let's test the paddle control of the game. Open the index.html in Google Chrome.Try pressing the w key, the s key, and arrow-up and down. The two paddles should
be able to move up or down according to the input, but they cannot move at the same time now.
What just happened?
Let's take a look at the HTML code we just used. The HTML page contains header, footer information, and a DIV with ID game. The game node contains a child named playground. The playground contains three children, two paddles, and the ball.
We often start the HTML5 game development by preparing a well-structured HTML hierarchy. The HTML hierarchy helps us group similar game objects (which are some DIVs) together. It is a little like grouping assets into a movie clip in Adobe Flash if you have ever made animations with it. We may also consider it as layers of game objects for us to select and style them easily.