HP Vertica Essentials
Learn how to deploy, administer, and manage
HP Vertica, one of the most robust
MPP solutions around
Rishabh Agrawal
HP Vertica Essentials
Copyright © 2014 Packt Publishing
All rights reserved. No part of this book may be reproduced, stored in a retrieval system, or transmitted in any form or by any means, without the prior written permission of the publisher, except in the case of brief quotations embedded in critical articles or reviews.
Every effort has been made in the preparation of this book to ensure the accuracy of the information presented. However, the information contained in this book is sold without warranty, either express or implied. Neither the author, nor Packt Publishing, and its dealers and distributors will be held liable for any damages caused or alleged to be caused directly or indirectly by this book.
Packt Publishing has endeavored to provide trademark information about all of the companies and products mentioned in this book by the appropriate use of capitals. However, Packt Publishing cannot guarantee the accuracy of this information.
First published: May 2014
Production Reference: 1080514
Published by Packt Publishing Ltd. Livery Place
35 Livery Street
Birmingham B3 2PB, UK. ISBN 978-1-78217-156-0 www.packtpub.com
Credits
Author
Rishabh Agrawal
Reviewers
Mr. Yagna Narayana Dande
Nishant Garg
Stephan Holler
Pranabesh Sarkar
Commissioning Editor Kevin Colaco
Acquisition Editor Kevin Colaco
Content Development Editors Amey Varangaonkar
Chalini Victor
Technical Editors Ankita Jha
Dennis John
Neha Mankare
Copy Editors Karuna Narayanan
Adithi Shetty
Laxmi Subramanian
Project Coordinator Melita Lobo
Proofreader Paul Hindle
Graphics Disha Haria
Indexers
Mehreen Deshmukh
Monica Ajmera Mehta
Priya Subramani
Production Coordinator Sushma Redkar
About the Author
Rishabh Agrawal
is currently working as a senior database research engineer and consultant at Impetus India. He has been tinkering with databases since 2010 and has gained expertise in a variety of NoSQL, massively parallel processing (MPP), and relational databases in the Big Data domain in a short span of time. A MongoDB Certified DBA, he has working knowledge of more than 20 databases, namely Cassandra, Oracle NoSQL, FoundationDB, Riak, Gemfire, Gemfire XD, HBase, Hive, Shark, HP Vertica, Greenplum, SQL Server 2008 R2, and so on. His primary focus areas are research and evaluation of new and cutting-edge database technologies and consulting with clients on the strategic use of diverse database technologies. When not at work, he revels in photographing vivid subjects, playingbadminton, writing poems, and dancing. You can connect with him on LinkedIn at in.linkedin.com/pub/rishabh-agrawal/15/ab4/186.
About the Reviewers
Mr. Yagna Narayana Dande
is currently working as a Lead QA Engineer at Collective Media. He has been involved in large-scale testing projects for several years and has exposure to top technologies for both automated and manual testing in functional and non-functional testing. He has worked with both well-established MNCs and startups."Software testing is a passion" is the motto that drives his career.
He is mentioned in an acknowledgement in the book TestNG Beginner's Guide by Packt Publishing for his great contribution towards reviewing the book.
He has contributed to many fields such as server provisioning, ad serving, and Big Data, including Hadoop and distributed filesystems. He writes interesting test domain articles on his blog—http://qabypassion.blogspot.com. You are welcome to contact him for questions regarding testing at [email protected].
Nishant Garg
has more than 13 years of software architecture and development experience in various technologies, such as Java, Java Enterprise Edition, SOA, Spring, Hibernate, Hadoop, and Hive; NoSQL databases such as MongoDB, CouchDB, Flume, Sqoop, Oozie, Spark, and Shark; and MPP databases such as GreenPlum, Vertica, Kafka, Storm, Mahout, and Solr/Lucene.He received his MS in Software Systems from Birla Institute of Technology and Science, Pilani, India, and currently works as a Technical Architect in Big Data R&D Group within Impetus Infotech Pvt. Ltd.
Nishant has also previously worked with some of the most recognizable names in IT services and financial industries, employing full software life cycle methodologies such as Agile and Scrum. He has undertaken many speaking engagements on Big Data technologies and is also the author of the book Apache Kafka, Packt Publishing.
Stephan Holler
currently serves as the Regional Sales Manager for Vertica, HP's answer to enterprise's Big Data. He is responsible for overlooking all sales activities in the DACH region.Prior to that, he worked as an Enterprise Account Manager (Sales) in HP Networking. His responsibility was to drive business in networking hardware. In fiscal years 2011 and 2012, he successfully served more than 150 commercial accounts in Germany. In his former role, he acted as a senior business development consultant overseeing all business activities for the Microsoft Solutions Practice in Germany. His duties were generating revenue for Microsoft's services portfolio, starting from SharePoint to Dynamics CRM solutions.
Back in 2007/2008, he was appointed as the leader for the B2C Backend Integration unit within the e-commerce practice EMEA. His responsibilities ranged from team management to generating new business for a large German retailer.
He began his career with EDS (now HP) in 1998 and progressed through multiple assignments ranging from project manager to various roles in delivery and consulting, and has much client-facing experience in retail, telecommunication, and manufacturing, amongst others. This progressed to leadership roles including portfolio management in EMEA, where he was responsible for enabling sales teams to sell a portfolio-driven approach.
Pranabesh Sarkar
is a technology evangelist on database technologies. He has extensive experience in the IT industry in many facets of data processing and database systems implementation and development, including analysis and design, database administration and development, and performance tuning. He has worked extensively on many database technologies across multiple platforms and possesses expansive knowledge on RDBMS (Oracle, MySQL, and PostgreSQL), MPP databases (Greenplum, Vertica, and Stado), NoSQL database systems (Cassandra, MongoDB, and HBASE), and Big Data technologies including Hadoop/Hive, Shark, Spark, and so on.www.PacktPub.com
Support files, eBooks, discount offers, and more
You might want to visit www.PacktPub.com for support files and downloads related to your book.Did you know that Packt offers eBook versions of every book published, with PDF and ePub
files available? You can upgrade to the eBook version at www.PacktPub.com and as a print book customer, you are entitled to a discount on the eBook copy. Get in touch with us at [email protected] for more details.
At www.PacktPub.com, you can also read a collection of free technical articles, sign up for a range of free newsletters and receive exclusive discounts and offers on Packt books and eBooks.
TM
http://PacktLib.PacktPub.com
Do you need instant solutions to your IT questions? PacktLib is Packt's online digital book
library. Here, you can access, read and search across Packt's entire library of books.
Why subscribe?
• Fully searchable across every book published by Packt
• Copy and paste, print and bookmark content
• On demand and accessible via web browser
Free access for Packt account holders
If you have an account with Packt at www.PacktPub.com, you can use this to access PacktLib today and view nine entirely free books. Simply use your login credentials for immediate access.
Instant updates on new Packt books
Dedicated to maa and papa
Table of Contents
Preface 1
Chapter 1: Installing Vertica
5
Understanding the preinstallation steps 6
Swap space 6
Dynamic CPU frequency scaling 6
Understanding disk space requirements 7
Steps to install Vertica 7 Summary 16
Chapter 2: Cluster Management
17
Comprehending the elastic cluster scaling factor 17
Enabling and disabling an elastic cluster 18
Viewing and setting the scaling factor settings 19
Enabling and disabling local segmentation 19
Understanding the best practices in cluster management 21
Monitoring elastic cluster rebalancing 21
Adding nodes in Vertica 21
Method 22
Using the Management Console to add nodes 22
Adding nodes using administration tools 22
Removing nodes in Vertica 23
Lowering the K-safety level 23
Removing nodes using administration tools 23
Removing nodes using the Management Console 24
Removing hosts from a cluster 24
Replacing nodes 25
Replacing a node using the same name and IP address 25
Replacing a failed node using a different name and IP address 26
Using administration tools to replace nodes with different names
and IP addresses 27
Changing the IP addresses of a Vertica cluster 29
Summary 32
Chapter 3: Monitoring Vertica
33
Monitoring through the system tables 33
Understanding a system table example 35
Looking at events 36
Looking at events through logfiles 37
Looking at events through the ACTIVE_EVENTS system table 38
Monitoring Vertica through the Management Console 40
Retaining monitoring information 40
Enabling and disabling Data Collector 40
Viewing the current data retention policy 40
Configuring data retention policies 41
Monitoring data collection components 41
Summary 43
Chapter 4:
Backup and Restore
45
Requirements for backup hosts 45
Generating the vbr.py configuration file 45
Miscellaneous settings 46
Database access settings 47
Data transmission during the backup process 48
Mapping 48
Creating full and incremental backups 49
Understanding the requirements 49
Running vbr.py 49
Incremental snapshots 50
Creating schema and table snapshots 50
Restoring full database snapshots 50
Restoring from a specific snapshot 51
Restoring from the most recent snapshot 51
Restoring schema and table snapshots 51
Copying a database from one cluster to another 52
Copying the database 53
Using database snapshot functions 53
Creating database snapshots 54
Removing snapshots 57
Chapter 5: Performance Improvement
59
Understanding projections 59
Looking into high availability and recovery 60
Comprehending unsegmented projections 61
Comprehending segmented projections 62
Creating projections using Database Designer 62
The comprehensive design 65
The query-specific design 65
Creating projections manually 67
Column list and encoding 68
The base query 68
The sort order 68
Segmentation 68
Keeping K-safety (K-Safe) in mind 69
Understanding the storage model in Vertica 70
Tuple Mover operations 71
Moveout 71 Mergeout 72
Tuning Tuple Mover 72
Adding storage locations 73
Adding a new location 74
Measuring location performance 74
Setting location performance 75
Understanding storage location tweaking functions 75
Summary 76
Chapter 6:
Bulk Loading
77
Using the COPY command 77
Aborting the COPY command 79
Load methods 79
Data transformation 80
Preface
Column-oriented databases have emerged as one of the leading solutions for
performing analytics on a huge amount of data. Vertica, recently acquired by Hewlett Packard (HP), is one of the flag bearers in the field of distributed-column-oriented databases. Vertica can be easily classified as a Massively Parallel Processing (MPP) database, which allows to you process queries concurrently on a large number of databases. Vertica's distributed architecture not only allows fast query processing, but also a highly fault tolerant architecture. With innovative features such as projections, a replacement for indexes, and views, Vertica has emerged as one of the most sought after relational analytical database solutions.
With more and more clients pressing for Vertica as a solution, we are glad to present a small admin book on Vertica, which will empower DBAs to learn and perform the most essential administration activities on Vertica.
This book has been especially written for Vertica 6.0 (and later). It is assumed that you are a little familiar with the Vertica database. Our references for this book were our experiences with Vertica, the Vertica administration guide, and the Vertica forums. Since this book is just a snapshot of the day-to-day administration activities of Vertica, it is highly advised to look into the official Vertica guides for more information and other administration tasks.
What this book covers
Chapter 1, Installing Vertica, explains how to install Vertica.
Chapter 2, Cluster Management, helps you to learn how to manage a running Vertica cluster.
Chapter 4, Backup and Restore, explains how to create backups of a database and restore them.
Chapter 5, Performance Improvement, helps you learn some tricks of the trade to achieve good performance in Vertica.
Chapter 6, Bulk Loading, illustrates the working of the bulk loading utility of Vertica.
What you need for this book
You just need a running Vertica cluster. If you don't have one, then Chapter 1, Installing Vertica, will explain how to create one of your own.
Who this book is for
This book is intended for Vertica users and DBAs who want to perform basic
administration and fine tuning. Prior knowledge of Vertica will help in understanding the chapters better, but is not mandatory.
Conventions
In this book, you will find a number of styles of text that distinguish between different kinds of information. Here are some examples of these styles, and an explanation of their meaning.
Code words in text are shown as follows: "Now log in as root or use the sudo command."
Any command-line input or output is written as follows:
/opt/vertica/bin/adminTools
Warnings or important notes appear in a box like this.
Tips and tricks appear like this.
Reader feedback
Feedback from our readers is always welcome. Let us know what you think about this book—what you liked or may have disliked. Reader feedback is important for us to develop titles that you really get the most out of.
To send us general feedback, simply send an e-mail to [email protected], and mention the book title via the subject of your message.
If there is a topic that you have expertise in and you are interested in either writing or contributing to a book, see our author guide on www.packtpub.com/authors.
Customer support
Now that you are the proud owner of a Packt book, we have a number of things to help you to get the most from your purchase.
Errata
Piracy
Piracy of copyright material on the Internet is an ongoing problem across all media. At Packt, we take the protection of our copyright and licenses very seriously. If you come across any illegal copies of our works, in any form, on the Internet, please provide us with the location address or website name immediately so that we can pursue a remedy.
Please contact us at [email protected] with a link to the suspected pirated material.
We appreciate your help in protecting our authors, and our ability to bring you valuable content.
Questions
Installing Vertica
Massively Parallel Processing (MPP) databases are those which partition (and optionally replicate) data into multiple nodes. All meta-information regarding data distribution is stored in master nodes. When a query is issued, it is parsed and a suitable query plan is developed as per the meta-information and executed on relevant nodes (nodes that store related user data). HP offers one such MPP database called Vertica to solve pertinent issues of Big Data analytics. Vertica differentiates itself from other MPP databases in many ways. The following are some of the key points:
• Column-oriented architecture: Unlike traditional databases that store data in a row-oriented format, Vertica stores its data in columnar fashion. This allows a great level of compression on data, thus freeing up a lot of disk space. (More on this is covered in Chapter 5, Performance Improvement.)
• Design tools: Vertica offers automated design tools that help in arranging your data more effectively and efficiently. The changes recommended by the tool not only ease pressure on the designer, but also help in achieving seamless performance. (More on this is covered in Chapter 5, Performance Improvement.) • Low hardware costs: Vertica allows you to easily scale up your cluster
using just commodity servers, thus reducing hardware-related costs to a certain extent.
Before installing Vertica, you should bear in mind the following points:
• Only one database instance can be run per cluster of Vertica. So, if you have a three-node cluster, then all three nodes will be dedicated to one single database.
• Only one instance of Vertica is allowed to run per node/host. • Each node requires at least 1 GB of RAM.
• Vertica can be deployed on Linux only and has the following requirements:
° Only the root user or the user with all privileges (sudo) can run the install_vertica script. This script is very crucial for installation and will be used at many places.
° Only ext3/ext4 filesystems are supported by Vertica.
° Verify whether rsync is installed.
° The time should be synchronized in all nodes/servers of a Vertica cluster; hence, it is good to check whether NTP daemon is running.
Understanding the preinstallation steps
Vertica has various preinstallation steps that are needed to be performed for the smooth running of Vertica. Some of the important ones are covered here.Swap space
Swap space is the space on the physical disk that is used when primary memory (RAM) is full. Although swap space is used in sync with RAM, it is not a replacement for RAM. It is suggested to have 2 GB of swap space available for Vertica. Additionally, Vertica performs well when swap-space-related files and Vertica data files are configured to store on different physical disks.
Dynamic CPU frequency scaling
Understanding disk space requirements
It is suggested to keep a buffer of 20-30 percent of disk space per node. Vertica uses buffer space to store temporary data, which is data coming from the merge out operations, hash joins, and sorts, and data arising from managing nodes in the cluster.
Steps to install Vertica
Installing Vertica is fairly simple. With the following steps, we will try to understand a two-node cluster:
1. Download the Vertica installation package from http://my.vertica.com/ according to the Linux OS that you are going to use.
2. Now log in as root or use the sudo command.
3. After downloading the installation package, install the package using the standard command:
° For .rpm (CentOS/RedHat) packages, the command will be:
rpm -Uvh vertica-x.x.x-x.x.rpm
° For .deb (Ubuntu) packages, the command will be:
dpkg -i vertica-x.x.x-x.x.deb
Refer to the following screenshot for more details:
4. In the previous step, we installed the package on only one machine. Note that Vertica is installed under /opt/vertica. Now, we will set up Vertica on other nodes as well. For that, run the following command on the same node:
/opt/vertica/sbin/install_vertica -s host_list -r rpm_package -u dba_username
Here, –s is the hostname/IP of all the nodes of the cluster, including the one on which Vertica is already installed. –r is the path of the Vertica package and –u is the username that we wish to create for working on Vertica. This user has sudo privileges. If prompted, provide a password for the new user. If we do not specify any username, then Vertica creates dbadmin as the user, as shown in the following example:
[impetus@centos64a setups]$ sudo /opt/vertica/sbin/install_vertica -s
192.168.56.101,192.168.56.101,192.168.56.102 -r
"/ilabs/setups/vertica-6.1.3-0.x86_64.RHEL5.rpm" -u dbadmin
Vertica Analytic Database 6.1.3-0 Installation Tool Upgrading admintools meta data format..
scanning /opt/vertica/config/users Starting installation tasks...
Getting system information for cluster (this may take a while)....
Enter password for [email protected] (2 attempts left): backing up admintools.conf on 192.168.56.101
Default shell on nodes: 192.168.56.101 /bin/bash 192.168.56.102 /bin/bash
Installing rpm on 1 hosts.... installing node.... 192.168.56.102
NTP service not synchronized on the hosts: ['192.168.56.101', '192.168.56.102']
Vertica recommends that you keep the system clock synchronized using
NTP or some other time synchronization mechanism to keep all hosts synchronized. Time variances can cause (inconsistent) query
results
when using Date/Time Functions. For instructions, see: * http://kbase.redhat.com/faq/FAQ_43_755.shtm
* http://kbase.redhat.com/faq/FAQ_43_2790.shtm
Info: the package 'pstack' is useful during troubleshooting. Vertica
recommends this package is installed.
Checking/fixing OS parameters... Setting vm.min_free_kbytes to 37872 ...
Info! The maximum number of open file descriptors is less than 65536
Setting open filehandle limit to 65536 ...
Info! The session setting of pam_limits.so is not set in /etc/pam.d/su
Setting session of pam_limits.so in /etc/pam.d/su ... Detected cpufreq module loaded on 192.168.56.101 Detected cpufreq module loaded on 192.168.56.102
CPU frequency scaling is enabled. This may adversely affect the performance of your database.
Vertica recommends that cpu frequency scaling be turned off or set to
'performance'
Creating/Checking Vertica DBA group
Creating/Checking Vertica DBA user
Password for dbadmin:
Installing/Repairing SSH keys for dbadmin
Creating Vertica Data Directory...
All hosts are available ... Verifying system requirements on cluster.
IP configuration ... IP configuration ... Testing hosts (1 of 2)....
Running Consistency Tests
LANG and TZ environment variables ... Running Network Connectivity and Throughput Tests... Waiting for 1 of 2 sites... ...
Test of host 192.168.56.101 (ok) ====================================
Enough RAM per CPUs (ok)
Test of host 192.168.56.102 (ok) ====================================
Enough RAM per CPUs (FAILED)
Vertica requires at least 1 GB per CPU (you have 0.71 GB/CPU) See the Vertica Installation Guide for more information.
Consistency Test (ok) =========================
Info: The $TZ environment variable is not set on 192.168.56.101 Info: The $TZ environment variable is not set on 192.168.56.102
Updating spread configuration...
Creating node node0001 definition for host 192.168.56.101 ... Done
Creating node node0002 definition for host 192.168.56.102 ... Done
Error Monitor 0 errors 4 warnings Installation completed with warnings. Installation complete.
To create a database:
1. Logout and login as dbadmin.**
2. Run /opt/vertica/bin/adminTools as dbadmin
3. Select Create Database from the Configuration Menu
** The installation modified the group privileges for dbadmin. If you used sudo to install vertica as dbadmin, you will need to logout and login again before the privileges are applied.
5. After we have installed Vertica on all the desired nodes, it is time to create a database. Log in as a new user (dbadmin in default scenarios) and connect to the admin panel. For that, we have to run the following command:
/opt/vertica/bin/adminTools
6. If you are connecting to admin tools for the first time, you will be prompted for a license key. If you have the license file, then enter its path; if you want to use the community edition, then just click on OK.
7. After the previous step, you will be asked to review and accept the End-user License Agreement (EULA).
Prompt for EULA
After reviewing and accepting the EULA, you will be presented with the main menu of the admin tools of Vertica.
8. Now, to create a database, navigate to Administration Tools | Configuration Menu | Create Database.
The Create Database option in the configuration menu
9. Now, you will be asked to enter a database name and a comment that you would like to associate with the database.
10. After entering the name and comment, you will be prompted to enter a password for this database.
Password for the new database
11. After entering and re-entering (for confirmation) the password, you need to provide pathnames where the files related to user data and catalog data will be stored.
After providing all the necessary information related to the database, you will be asked to select hosts on which the database needs to be deployed. Once all the desired hosts are selected, Vertica will ask for one final check.
Final confirmation for database creation
12. Now, Vertica will create and deploy the database.
Database creation
Summary
As you can see, Vertica installation is simple. You can perform further checks by creating sample tables and performing basic CRUD operations.
Cluster Management
Vertica provides quite an elastic cluster, which can be scaled both up
(adding new nodes) and down (removing nodes) without affecting the processes of the running database. The most important task after alteration in a cluster is the rebalancing of data across new as well as old nodes. This is done to ensure that the data remains K-Safe. Please refer to Chapter 5, Performance Improvement, for more information on K-Safe.
Projections are divided into segments, which are small portions of data. After adding a new node, some segments are given to it, while the other segments are exchanged to ensure proper K-safety. During the process of node removal from a cluster, all of the storage containers, which are residing at the node that is being removed, are moved to other existing nodes in the cluster. This method of partitioning data into movable segments turns a Vertica cluster into an elastic cluster.
Comprehending the elastic cluster
scaling factor
The MAXIMUM_SKEW_PERCENT parameter plays a crucial role when the number of segments cannot be evenly divided by the number of nodes in a new cluster. For example, if the scaling factor is 4 and there are initially 4 nodes, there will be 16 (4 x 4) segments in the whole cluster. Suppose one additional node is added to the cluster; then, it is not possible to evenly distribute 16 segments among 5 nodes. Hence, Vertica will assign more segments to some nodes as compared to others. So, one possible combination can be 4 nodes get 3 segments each and 1 node gets 4 segments. This skew is around 33.33 percent. Vertica will make sure that it remains below the set MAXIMUM_SKEW_PERCENT parameter. If Vertica is not able to redistribute segments because of the MAXIMUM_SKEW_PERCENT limit, the data-rebalancing process will not fail. However, the segmentation space will be evenly distributed among the 5 nodes, and new segments will be created on each node, making the total 20, that is, 4 segments on each node.
Enabling and disabling an elastic cluster
We can query the ELASTIC_CLUSTER system table to determine if an elastic cluster is enabled on the database or not, that is, to determine if segmentation is on or off. Run the following query to check if an elastic cluster is enabled or not:
=> select is_enabled from ELASTIC_CLUSTER; is_enabled
--- t
(1 row)
To enable an elastic cluster, we can run the following command:
=> SELECT ENABLE_ELASTIC_CLUSTER(); ENABLE_ELASTIC_CLUSTER
--- ENABLED
(1 row)
To disable an elastic cluster, we can run the following command:
=> SELECT DISABLE_ELASTIC_CLUSTER(); DISABLE_ELASTIC_CLUSTER
--- DISABLED
Viewing and setting the scaling factor settings
To view the scaling factor, we can query the ELASTIC_CLUSTER table (4 is the default). Run the following query to find out the scaling factor:
=> SELECT scaling_factor FROM ELASTIC_CLUSTER; scaling_factor
--- 4
(1 row)
We can use the SET_SCALING_FACTOR function to change a database's scaling factor. The scaling factor can be any integer between 1 and 32. It should be taken into account that a very high value of the scaling factor may lead to the nodes creating too many small container files, eventually causing too many ROS container errors. These errors are also known as ROS pushback (refer to Chapter 5, Performance Improvement to learn more about ROS). The following command is an example of using SET_SCALING_FACTOR:
=> SELECT SET_SCALING_FACTOR(5); SET_SCALING_FACTOR
--- SET
(1 row)
=> SELECT scaling_factor FROM ELASTIC_CLUSTER; scaling_factor
--- 5
(1 row)
Enabling and disabling local segmentation
To enable local segmentation, we can use the ENABLE_LOCAL_SEGMENTS function as follows:
=> SELECT ENABLE_LOCAL_SEGMENTS(); ENABLE_LOCAL_SEGMENTS
--- ENABLED
(1 row)
To check the status of local segmentation, we can query the ELASTIC_CLUSTER system table in the following fashion:
=> SELECT is_local_segment_enabled FROM elastic_cluster; is_enabled
--- t
(1 row)
To disable local segmentation, we can use the DISABLE_LOCAL_SEGMENTATION function as follows:
=> SELECT DISABLE_LOCAL_SEGMENTS(); DISABLE_LOCAL_SEGMENTS
--- DISABLED
(1 row)
To check the status of local segmentation, we can query the elastic_cluster system table in the following fashion:
=> SELECT is_local_segment_enabled FROM elastic_cluster; is_enabled
--- f
Understanding the best practices in cluster
management
The following are some of the best practices for local segmentation:
• It only makes sense to keep local segments when we are actually planning to scale the cluster up or down
• It is highly recommended that backups of the database(s) are created before the start of the scaling process
• It is not advisable to create segments if our database tables contain a high number of partitions (more than 75)
Monitoring elastic cluster rebalancing
From Vertica 6.0 onwards, system tables can be used to monitor the rebalance status of an elastic cluster. There are two tables that can be employed. They are as follows:
REBALANCE_TABLE_STATUS REBALANCE_PROJECTION_STATUS
In each table, separated_percent and transferred_percent can be used to determine the overall progress.
Adding nodes in Vertica
Before adding nodes, it is very important that we create a full backup of the database, as adding nodes in Vertica is a sensitive process. To add a new node, we will be using the update_vertica script. However, before adding a node to an existing cluster, the following are certain restrictions and prerequisites that have to be kept in mind:
• Make sure that the database is running.
• Newly added nodes should be reachable by all the existing nodes in the cluster.
• If we have a single node cluster that is deployed, without specifying the IP address, hostname, or hostname specified as the local host, it is not possible to expand the cluster. We must reinstall Vertica and specify an IP address or hostname.
Method
From any node of the cluster, we can run the update_vertica script as follows:
# /opt/vertica/sbin/update_vertica -A <hostname1, hostname2…> -r <rpm_ package>
Here, –A is used for providing IP(s) or hostname(s), and –r is used for providing the location of the rpm/debian package.
The update_vertica script will install Vertica, verify the installation, and add a node to the cluster. Once we have added one or more hosts to the cluster, we need to empower them as data storing nodes through either of the following:
• The Management Console interface (Enterprise Edition only) • The administration tools interface
Using the Management Console to add nodes
We can add or remove nodes from a database by going to the Manage page. Here, just click on the target node and then click on the Add node or Remove node button in the node list. When we add a node, the color of the node icon changes from gray (empty) to green.
Adding nodes using administration tools
The following is the process of adding nodes in a Vertica cluster using administration tools:
1. Navigate to Main Menu | Advanced Menu | Cluster Management | Add Host(s).
2. We should now select the database to which we want to add one or more hosts. A list of unused hosts is displayed.
3. Select the host. You will then be prompted for the password. Provide the password for the database.
4. The user will be prompted about the success or failure of the addition of the node.
6. Before starting the rebalancing of the cluster, Vertica will prompt the user to provide a new higher K-value, or we can continue with the existing K-value. 7. As a final step, we should select whether Vertica should immediately
start rebalancing or whether Vertica should do it at a later time. If we choose to do the rebalancing later, then a script is created and is kept for later execution. It is always advised that we should select the option to automatically start rebalancing. If we choose to automatically rebalance the database, the script will still be created and will be saved for later use and review.
Removing nodes in Vertica
Removing nodes or scaling down the Vertica cluster is a fairly simple process. The procedure of removing nodes comprises the following broad steps:
1. Back up the database.
2. Remember that it is mandatory to lower the K-safety if the cluster is not able to sustain the current level of K-safety after the cluster is scaled down. 3. Remove the host from the database.
Lowering the K-safety level
A database with a K-safety level 1 requires at least three nodes to operate, and a database with a K-safety level 2 requires at least five nodes to operate. Vertica doesn't support K-safety of level 3 and above. To lower the K-safety level, we will use the MARK_DESIGN_KSAFE function in the Vsql console, as shown in the following example:
km=> SELECT MARK_DESIGN_KSAFE(1); MARK_DESIGN_KSAFE
Marked design 1-safe (1 row)
Removing nodes using administration tools
The following are the steps to remove nodes using administration tools:
2. As a precautionary step, create a backup of the database. 3. Make sure that the database is running.
4. Navigate to Main Menu | Advanced Menu | Cluster Management | Remove Host(s).
5. Select the database from which we wish to remove the node and click on OK. 6. Select the node that we wish to remove.
7. We will be asked if we are sure about removing the node. If we are, then click on OK; otherwise, click on Cancel.
8. We will be warned that we must redesign our database and create projections that exclude the hosts we are going to drop; click on Yes. The following screenshot shows the warning prompt:
Warning issued during the removal of a node
9. Vertica begins the process of rebalancing the database and removing the node(s). When you are informed that the hosts were successfully removed, click on OK.
Removing nodes using the Management
Console
We can remove nodes from a database through the Manage page. For removing a node, we have to select the node we want to act upon and then click on the Remove node button in the node list. We can only remove nodes that are part of the database, that is, nodes that show a state of down or nodes that are not working (represented in red) and are not critical for K-safety. When we remove a node, its color changes from red to clear, and the Management Console updates its state to standby.
Removing hosts from a cluster
From one of the hosts in the cluster, we need to run update_vertica with the –R switch, where -R specifies a comma-separated list of hosts to be removed from an existing Vertica cluster. Do not confuse –R with –r, as both have different functionalities. A host can be specified by the hostname or the IP address of the system, as shown in the following example:
# /opt/vertica/sbin/update_vertica -R 192.168.56.103,host04
Replacing nodes
If we have a K-Safe database, we can replace nodes, as a copy of the data will be maintained under the nodes. We do not need to shut down the database to replace the nodes.
Replacing a node using the same name and IP
address
Sometimes, you will be required to upgrade one or more nodes in the cluster. If the new node has the same IP as the original node, then use the following method for replacement:
1. From a working node in the cluster, run the following install_vertica script with the -s (used for providing the hostname or IP(s)) and –r (the path of the rpm/deb package) parameters:
# /opt/vertica/sbin/install_vertica -s host -r rpm_package
2. The installation script will verify the system configuration and the installation of various important components of Vertica, such as Vertica, Spread, and the administration tool's metadata.
3. Now, create catalog and data directories on the new node. Make sure that the path of these directories is the same as that of the original node.
4. Once ready, restart the newly added host, and you will find that it has been added to the cluster.
Replacing a failed node using a different
name and IP address
There may be a time when you will be required to replace a failed node with a node that has a different IP address and hostname. In such cases, proceed with the following steps:
1. As a preventive step, create a backup of the database.
2. After the backup is created, run update_vertica with the –A, -R, -E, and -r parameters, as shown in the following code, to replace the failed host:
/opt/vertica/sbin/update_vertica -A NewHostName -R OldHostName -E -r rpm_package
Where:
° NewHostName is the hostname or IP address of the new node
° OldHostName is the hostname or IP address of the node that is being replaced from the cluster
° The -E parameter makes sure that the failed node is dropped from the cluster
° rpm_package is the name of the rpm package; for example, –r vertica_6.0.x.x86_64.RHEL5. rpm
3. Using administration tools, we can replace the original host with the new host. If we are using more than one database, make sure that the old node is replaced by a new node for all databases.
4. Now, distribute configuration files to the new host. The process is discussed in the next section.
5. Then, we have to run update_vertica again. However, this time, we will run it with the -R parameter, as shown in the following code, to clear all information of the failed node from the administration tool's metadata:
# /opt/vertica/sbin/update_vertica -R OldHostName
OldHostName is the hostname or IP address of the system that we removed from the cluster. Do not confuse –R with –r as both have different functions. 6. Now, start the new node and verify if everything is running properly.
Redistributing configuration files to nodes
The processes of adding and removing nodes automatically redistribute the Vertica configuration files. To distribute configuration files to a host, log on to a host that contains these files using administration tools. This can be done using the following steps:1. Navigate to Main Menu | Configuration Menu | Distribute Config Files. 2. Click on Database Configuration as shown in the following screenshot:
Selecting the redistribution configuration category
3. Then, select the database in which we wish to distribute the files and click on OK.
The vertica.conf file will be distributed to all the other hosts in the database. If it existed earlier on a host, it is overwritten.
4. We need to follow the same process for Secure Sockets Layer (SSL) keys as well as administration tool's metadata. For SSL keys, Vertica may prompt for the location of the server certificate file, server key file, and root certificate file. Provide an appropriate path and click on OK.
Using administration tools to replace nodes
with different names and IP addresses
To replace the original host with a new host using administration tools, proceed with the following steps:
1. As a preventive step, create a backup of the database. 2. You first need to make sure that the database is running.
3. Add the replacement hosts to the cluster using the standard procedure of adding a node.
4. Now, shut down the node that is intended to be replaced. 5. Navigate to Main Menu | Advanced Menu.
6. In the Advanced Menu option, we need to select Stop Vertica on Host. 7. Select the host we wish to replace and then click on OK to stop the node. 8. After stopping the node, navigate to Advanced Menu | Cluster
Management | Replace Host.
9. Select the database that contains the host we wish to replace and then click on OK.
10. A list of all the hosts with their internal names and IP addresses will be displayed. We will select the host we wish to replace and then click on OK, as shown in the following screenshot:
Selecting nodes to replace
11. Select the host we want to use as the replacement and then click on OK. 12. When prompted that the host was successfully replaced, click on OK. 13. Restart all the nodes (new nodes may take some time to start as they will be
Changing the IP addresses of a
Vertica cluster
Sometimes, during networking-related maintenance chores, the IP(s) of one or more servers running Vertica changes to some other IP. In these cases, IP changes are needed to be done in Vertica as well. However, before making changes in Vertica, we must make sure that changes are made in /etc/hosts of all nodes, where the hostname is mapped to the IP address. After making system-level changes, proceed with the following steps to change the IP address of one or more nodes in a cluster:
1. Back up the following three files:
° /opt/vertica/config/admintools.conf
° /opt/vertica/config/vspread.conf
° /etc/sysconfig/spreadd
It is assumed that Vertica is installed on /opt/vertica. If Vertica is installed on some other location, then we should take backups from that location. 2. We should stop Vertica on all nodes.
3. As a root user, we need to stop Spread manually on each node. Spread is the messaging system for distributed systems such as Vertica. We can stop Spread using the following command:
/etc/init.d/spreadd stop
4. On each node, edit /opt/vertica/config/admintools.conf and change the IPs as required. The following is the text from admintools.conf for one of the nodes (replace the old IP with the new one wherever required):
[Configuration]
install_opts = ['-s', '192.168.56.101,192.168.56.102,192.168.56.10 3', '-r', 'vertica-ce-6.0.0-1.x86_64.RHEL5.rpm', '-u', 'dba'] default_base = /home/dbadmin
show_hostnames = False format = 3
[Cluster]
hosts = 192.168.56.101,192.168.56.102,192.168.56.103 spread_hosts =
[Nodes]
node0002 = 192.168.56.102,/home/dba,/home/dba node0003 = 192.168.56.103,/home/dba,/home/dba
v_km_node0001 = 192.168.56.101,/ilabs/data/vertica/catalog,/ilabs/ data/vertica/data
v_km_node0002 = 192.168.56.102,/ilabs/data/vertica/catalog,/ilabs/ data/vertica/data
v_km_node0003 = 192.168.56.103,/ilabs/data/vertica/catalog,/ilabs/ data/vertica/data
[Database:km]
host = 192.168.56.101 restartpolicy = ksafe port = 5433
path = /ilabs/data/vertica/catalog/km/v_km_node0001_catalog nodes = v_km_node0001,v_km_node0002,v_km_node0003
5. On each node, edit /opt/vertica/config/vspread.conf. We need to replace the old IP with the new one wherever required. We also need to change the N number, where N is followed by the IP address without a period (.). Following is the text from vspread.conf for one of the nodes:
Spread_Segment 192.168.56.255:4803 { N192168056101 192.168.56.101 { 192.168.56.101
127.0.0.1 }
N192168056102 192.168.56.102 { 192.168.56.102
127.0.0.1 }
N192168056103 192.168.56.103 { 192.168.56.103
127.0.0.1 }
}
EventLogFile = /dev/null
EventTimeStamp = "[%a %d %b %Y %H:%M:%S]" DaemonUser = spread
6. Just like the changes we made in vspread.conf, we also need to make changes in etc/sysconfig/spreadd.
7. After IP-related changes are made in all three configuration files, we should start Spread on each node as a root user:
/etc/init.d/spreadd start
8. Then, we should start a single Vertica node and connect to our database and run Vsql.
9. In Vsql, issue the following query to verify that the new IP has been updated:
select host_name from host_resources;
10. As a final step, we need to modify the database to use the new IPs. 11. In Vsql, we have to run the following query to display the current node
names that are configured:
km=> \x
Expanded display is on.
km=> select node_name, node_address from nodes; -[ RECORD 1
]+---node_name | v_km_node0001 node_address | 192.168.56.101 -[ RECORD 2 ]+---node_name | v_km_node0002 node_address | 192.168.56.102 -[ RECORD 3 ]+---node_name | v_km_node0003 node_address | 192.168.56.103
12. For each result, we need to update the IP address by issuing the following command:
alter node NODE_NAME is hostname <new IP address>;
In the preceding command, NODE_NAME is the internal name of the node, and <new IP address> is the new IP of this node. Before altering this data, the node of the IP that has been changed needs to be shut down.
Summary
Monitoring Vertica
Monitoring is one of the key database administration tasks. It allows you to find possible bottlenecks in database performance in the most pragmatic fashion. In Vertica, there are several sources of information through which monitoring can be performed. They are as follows:
• System tables • Logfiles
• Management Console (Enterprise Edition only)
Monitoring through the system tables
Vertica stores most of its information about the various states of the database in system tables. The process of storing such information is completely automatic and runs in the background. By querying these system tables and by relating various types of information fetched from these tables, you can efficiently monitor Vertica. The advantage of using system tables is that we can use them, just like any other user table, to perform aggregation, analytics, and so on. There are more than 100 system tables; we can get the whole list by running the following query:The table shown in the following screenshot shows the output of the query:
The system_tables table
On the basis of the type of information a system table stores, system tables can be grouped into the following categories:
• System information • System resources • Background processes • Workload and performance
System tables are clustered into the following schemas (as shown in the preceding screenshot):
• V_CATALOG: This schema contains information about persistent objects in the catalog
Examples of V_CATALOG tables include views, roles, nodes, databases, license_audits, and so on, while examples of V_MONITOR tables include locks, disk_storage, resource_usage, and so on.
We do not need to specify a schema (V_CATALOG or V_MONITOR) for querying system tables as they belong to the default schema. It should be noted that there are certain restrictions imposed on system tables; they are as follows:
1. Vertica provides a SQL-monitoring API that can be used on these system tables, but the database will not connect through this API if the Vertica cluster is in a recovering state.
2. Due to the nature of the data stored in these tables, it is not possible to perform Data Definition Language (DDL) and Data Manipulation Language (DML) operations on system tables.
Understanding a system table example
For example, we just need to run the following command to retrieve all the information from the tables of a database:
select * from tables;
The following screenshot shows the output of the command. Please note that in the table_schema and table_name tables, the columns are case sensitive.
Looking at events
There are various events such as Emergency, Alerts, Critical, Errors, Warnings, Notices, Information, and Debugs that are logged by Vertica. Vertica logs these events in one of the following ways:
• In the Vertica.log file
• In the ACTIVE_EVENTS system table • Using SNMP
• Using Syslog
This book will cover the usage of the Vertial.log files and the ACTIVE_EVENTS system table for logging events.
The following table lists the events that are logged:
Event name Event type Description
Low Disk Space 0 This event is logged either when there is not enough space in the physical disk or when there is a hardware issue.
Read Only File System
1 Vertica uses specific directories for storing Catalog or Data information. When Vertica is unable to create or write to files, this event is logged. Changing access rights may solve the issue.
Loss Of K Safety
2 Vertica defines the minimum number of nodes needed to run a database, particularly in the K-Safe mode. For example, for maintaining K-safety of level 2, we need at least five nodes; if the number of active nodes goes below five, this event will be logged.
It should be ensured that all nodes are able to reach each other in the cluster.
Current Fault Tolerance at Critical Level
3 As discussed earlier, if a database loses K-safety, it shuts down, and this event is logged.
Too Many ROS Containers
Event name Event type Description Node State
Change
6 This event occurs when the node state has changed. For example, a node can change its state from startup to up.
Recovery Failure
7 This event occurs when a database is not able to recover properly from a nonfunctional state.
Recovery Error 8 If the number of recovery errors exceeds the value of Max Tries defined in the vbr.py configuration file, this event is triggered.
Recovery Lock Error
9 This event is logged when a recovering node is not able to secure lock on tables.
Recovery Projection Retrieval Error
10 This event is logged when Vertica is unable to retrieve information about a projection.
Refresh Error 11 This event is logged when a database is not able to refresh itself.
Refresh Lock Error
12 This event is logged when a database is not able to obtain the necessary locks during refresh.
Tuple Mover Error
13 This event is logged when a database fails to move data from RAM (WOS) to physical disk (ROS or Read Optimized Store).
Timer Service Task Error
14 This event is logged when an error occurs in an internal scheduled task.
Stale Checkpoint
15 This event occurs when Write Optimized Store (WOS) data is not completely flushed into the Read Optimized Store (ROS) containers before shutdown. This may result in loss of data.
Looking at events through logfiles
During database startup, Vertica writes logs to the dblog file. This file resides in the catalog-path/<database-name>/ directory path. For any information regarding the starting of data, in case of a failure or success, it is advisable to look into the dblog file. The following is the sample text of a dblog file:
After the database is up and running properly, Vertica starts writing logs to vertica. log. Just like the dblog file, the vertica.log file is also maintained on each node of the cluster. It resides in the catalog-path/<database-name>/<node-name_catalog> directory path. The following is a sample text:
2013-01-05 04:03:07.225 Main:0x1124df70 [Init] <INFO> Starting up Vertica Analytic Database v6.0.0-1
2013-01-05 04:03:07.225 Main:0x1124df70 [Init] <INFO> Project Codename: BunkerHill
2013-01-05 04:03:07.225 Main:0x1124df70 [Init] <INFO>
vertica(v6.0.0-1) built by [email protected] from releases/VER_6_0_RELEASE_BUILD_0_1_20120611@95490 on 'Mon Jun 11 10:40:47 2012' $BuildId$
2013-01-05 04:03:07.225 Main:0x1124df70 [Init] <INFO> 64-bit Optimized Build
2013-01-05 04:03:07.225 Main:0x1124df70 [Init] <INFO> Compiler Version: 4.1.2 20080704 (Red Hat 4.1.2-52)
2013-01-05 04:03:07.225 Main:0x1124df70 <LOG> @v_km_node0001: 00000/5081: Total swap memory used: 94208
Looking at events through the
ACTIVE_EVENTS system table
The ACTIVE_EVENTS system table can be used to look at various events logged by Vertica. The following table describes the various fields of the ACTIVE_EVENTS system table:
Column Description
node_name Internal name of the node
event_code ID of the event type
event_posted_timestamp Timestamp when the event was initiated event_expiration Timestamp when the event expired event_code_description Description of the event type event_problem_description Actual description of the event
The following screenshot shows the sample output when we query the ACTIVE_EVENTS system table:
Monitoring Vertica through the
Management Console
Vertica provides a very intuitive web console that can be installed and integrated with Vertica. Vertica Management Console is shipped only with the Enterprise Edition. It can help you perform almost every administration task that is possible through a command-based console.
Management Console runs only on browsers that support HTML5. By default, it is hosted on port 5450, which can be changed. To access it, we can just enter https://xx.xx.xx.xx:5450/webui, where xx.xx.xx.xx is the IP of the host on which the Management Console is hosted. It will prompt for a username and password; we can supply any credentials of any user who has admin rights. It is not advised to install Management Console on data-hosting nodes.
Retaining monitoring information
As discussed earlier, system tables provide a plethora of information regarding various processes running on a database, including queries. However, sometimes we need to store monitoring information. For this, we can employ Data Collector. Information retained by Data Collector is stored on a disk in the DataCollector directory under the Vertica catalog path.
Enabling and disabling Data Collector
To enable or disable Data Collector, we can use the SET_CONFIG_PARAMETER() function. Data Collector is on by default. To disable Data Collector, use the following command:
=> SELECT SET_CONFIG_PARAMETER('EnableDataCollector', '0');
Use the following command to enable Data Collector:
=> SELECT SET_CONFIG_PARAMETER('EnableDataCollector', '1');
Viewing the current data retention policy
To view the data retention policy, we can use the GET_DATA_COLLECTOR_POLICY() function. We can replace the component variable with the actual component name, as shown in the following line of code:
To get the whole list of components, we can query the V_MONITOR.DATA_COLLECTOR system table. In addition to the list, we will also get their current retention policies and statistics about how much data is retained.
Configuring data retention policies
We can set Data Collector policies using the SET_DATA_COLLECTOR_POLICY() function. Only a superuser can modify policies. This function, shown in the following line of code, allows us to change how much memory (in kb) and disk space (in kb) to retain for each component on all nodes:
SET_DATA_COLLECTOR_POLICY('component', 'memoryKB', 'diskKB')
Failed nodes are not ignored from the policy, as they will create policy anomalies in the cluster. Hence, when failed nodes rejoin, the latest policy is imposed on them.
Monitoring data collection components
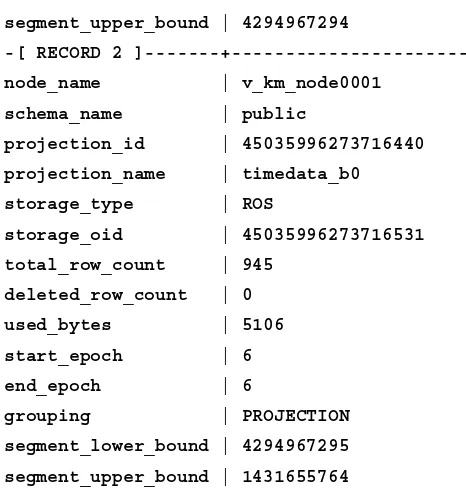
As discussed earlier, when the DATA_COLLECTOR system table is queried, we are presented with a list of Data Collector components, their current retention policies, and statistics about how much data is retained and how much has been discarded. DATA_COLLECTOR also calculates the approximate collection rate to aid in sizing calculations. The following is a simple query that returns all the columns in this system table:km=> \x
Expanded display is on.
km=> SELECT * FROM data_collector;
-[ RECORD 1 ]---+---
---node_name | v_km_node0001
component | AllocationPoolStatistics table_name | dc_allocation_pool_statistics
description | Information about global memory pools, which generally cannot be recovered without restart
record_too_big_errors | 0 lost_buffers | 0 lost_records | 0 retired_files | 64 retired_records | 29674 current_memory_records | 0 current_disk_records | 1786 current_memory_bytes | 0 current_disk_bytes | 251826
first_time | 2013-03-08 16:00:40.002042+05:30 last_time | 2013-03-08 16:15:32.001259+05:30 kb_per_day | 23813.3539369616
-[ RECORD 2 ]---+---
---node_name | v_km_node0001
component | AllocationPoolStatisticsBySecond
table_name | dc_allocation_pool_statistics_by_second description | Information about global memory pools, which generally cannot be recovered without restart (historical, by second) access_restricted | t
in_db_log | f in_vertica_log | f memory_buffer_size_kb | 64 disk_size_kb | 256 record_too_big_errors | 0 lost_buffers | 0 lost_records | 0 retired_files | 292 retired_records | 29777 current_memory_records | 0 current_disk_records | 343 current_memory_bytes | 0 current_disk_bytes | 219173
Summary
Backup and Restore
In this chapter, you will learn how to create database backups and restore backups in Vertica. Vertica provides the vbr.py script to back up, restore, and copy a database. We can create both full and incremental database snapshots, as well as snapshots of specific schemas or tables. For creating the most optimum backup, it is suggested that each node have its own dedicated backup host.
Requirements for backup hosts
The vbr.py utility lets us back up the database to one or more hosts (called backup hosts) that can be outside the database cluster. The backup hosts must have a
password-less SSH access for the database administrator account. Also, backup hosts must have the same versions of Python and rsync as the main nodes. The vbr.py utility initially creates a snapshot of the database cluster of which the backup is being created. When the creation of the new snapshot is complete, it is moved to the designated backup location (host and directory). After Vertica copies the snapshot to the backup location, it deletes the snapshot created initially in the main cluster.
Generating the vbr.py configuration file
To invoke vbr.py to set up a configuration file, we should use the following command:
> vbr.py --setupconfig
Miscellaneous settings
The following table shows the parameters present in the Miscellaneous [Misc] section of the file:
Parameters Default Description
snapshotName* snapshotName This value provides the prefix of the directory that will contain the snapshot. The characters in the value of snapshotName can include the following:
• Aa-Zz
• 0-9
• Period (.), hyphen (-), and underscore (_)
tempDir /tmp The vbr.py utility uses this directory path as the path on all nodes to store temporary data/files during the backup process. Since it is the universal path, it must be present on all nodes in the cluster.
verticaBinDir /opt/
vertica/bin
If Vertica is installed on some other directory than the default location, we need to state where the bin files are present through this parameter. verticaConfig* False Sometimes it is a good idea to backup
configuration files. This parameter, when set to true, permits Vertica to back up config files along with data files.
restorePointLimit* 1 If we wish to store incremental snapshots, we need to increase the value of this parameter from 1. The permissible value range is from 1-99.
objects* None We can create a partial backup by providing a list of object names in the form of a comma-separated list which is included in a snapshot.
Parameters Default Description
retryCount 2 This number indicates the number of
attempts or retries of the backup operation after a fatal error occurs.
retryDelay 1 This is the interval time in seconds in between retries for backup after a failure occurs.
Database access settings
The parameter under the [Database] header needs to be set for database access. The following table lists the parameters present in this section:
Parameters Default Description
dbName N/A As the name implies, it tells the utility which database to back up. If not supplied with a name, any live database is chosen as a backup candidate.
dbUser* The current
username
This parameter tells the utility which user is authorized to run vbr.py to back up or restore. The user must have admin rights.
dbPromptForPassword* True If this parameter is set to False, the utility will not prompt for a password at runtime. If set otherwise, we must also enter the database administrator password in the dbPassword parameter (discussed next). dbPassword* None This identifies the database administrator's
password. The vbr.py utility doesn't encrypt the password, and hence
Data transmission during the backup process
The following table lists the parameters present in the [Transmission] section of the file:
Parameters Default Description
encrypt False When this parameter is set to true, data transmitted during the backup process is encrypted. As a rule of thumb, the utility may engage one whole core on both source and destination nodes to look for encryption. This may create a significant overhead and the performance may suffer.
checksum False In order to ensure that there is no data loss during transmission, we can set this parameter to true. When set to true, rsync performs MD5 checksum over the transmitted data to ensure integrity.
port_rsync 50000 This sets the port number on which rsync will work.
bwlimit 0 This parameter defines the upper limit of the bandwidth of the network to be used in kbps during backup.
hardLinkedLocal False This configuration parameter, when set to true, makes the utility create a backup on a local directory instead of a remote location. A local backup is created by hard links instead of copying data.
Mapping
For each node of the database cluster, a separate mapping heading needs to be written. Each heading is numbered ([Mapping1], [Mapping2], and so on) and controls the backup of the respective node. All of the parameters under this header are mandatory in the configuration file. The following table lists the parameters:
Parameters Default Description
Parameters Default Description
backupDir* None This is the path to the directory that will host the backup files on the designated host or node where the backup will be stored. This directory must exist and the user must have all rights to it.
dbNode None This is Vertica's internal name of the host usually in the form v_databasename_node00xx.
Creating full and incremental backups
In this section, you will learn about the process of creating full and incremental backups. But first, let's understand the requirements.Understanding the requirements
Before we create a snapshot, we must check the following: • The database is up and running.
• All of the backup hosts are up and available to the cluster.
• The user account has all permissions to the target directories on the backup node.
• By default, the vbr.py utility searches for the config file at /opt/vertica/ config/vbr.ini, and if it is not found, the utility exits with an error. We can supply the config file using the --config-file parameter with vbr.py. It should be noted that if some nodes are down but the database is running in K-Safe mode, then the backup will still be created.
Running vbr.py
To run the vbr.py utility, use the following command:
> vbr.py --task backup --config-file myconfig.ini Copying...
xxxxxx out of xxxxxx, 100%
Incremental snapshots
If restorePointLimit is set to a value more than 1, then after creating a full snapshot, the vbr.py utility will create the future backups in an incremental manner. This incremental backup process works in the following manner:
1. The utility obtains the value of the restorePointLimit parameter from the configuration file.
2. If the value is more than 1, then after creating a full backup, incremental backups will be created on subsequent invocation of the utility. It is suggested to create manual backups of snapshots periodically.
3. If after creating the next snapshot the total number of snapshots exceeds the restore point limit, vbr.py automatically deletes the oldest snapshot to maintain the count.
Creating schema and table snapshots
As discussed earlier, it is possible to create object-specific snapshots. These objects can be certain tables or schemas. As mentioned in the table, there are the following two configuration file parameters:
• Objects • Overwrite
Refer to the table under the Miscellaneous settings section for more information.
Restoring full database snapshots
Restoring full database snapshots in Vertica can be a little tricky due to various constraints. The following are the constraints:
• The database must be down. It is good to have another database cluster to serve the application by the time the restore is complete on the primary cluster. • The new cluster should have the same number