Flash
®and PHP
Bible
Flash
®Flash
®and PHP
Bible
Flash®and PHP Bible
Published by
Wiley Publishing, Inc. 10475 Crosspoint Boulevard Indianapolis, IN 46256
www.wiley.com
Copyright © 2008 by Wiley Publishing, Inc., Indianapolis, Indiana
Published by Wiley Publishing, Inc., Indianapolis, Indiana
Published simultaneously in Canada
ISBN: 978-0-470-25824-8
Manufactured in the United States of America
10 9 8 7 6 5 4 3 2 1
No part of this publication may be reproduced, stored in a retrieval system or transmitted in any form or by any means, electronic, mechanical, photocopying, recording, scanning or otherwise, except as permitted under Sections 107 or 108 of the 1976 United States Copyright Act, without either the prior written permission of the Publisher, or authorization through payment of the appropriate per-copy fee to the Copyright Clearance Center, 222 Rosewood Drive, Danvers, MA 01923, (978) 750-8400, fax (978) 646-8600. Requests to the Publisher for permission should be addressed to the Legal Department, Wiley Publishing, Inc., 10475 Crosspoint Blvd., Indianapolis, IN 46256, (317) 572-3447, fax (317) 572-4355, or online at http://www.wiley.com/go/permissions.
LIMIT OF LIABILITY/DISCLAIMER OF WARRANTY: THE PUBLISHER AND THE AUTHOR MAKE NO REPRESENTATIONS OR WARRANTIES WITH RESPECT TO THE ACCURACY OR COMPLETENESS OF THE CONTENTS OF THIS WORK AND SPECIFICALLY DISCLAIM ALL WARRANTIES, INCLUDING WITHOUT LIMITATION WARRANTIES OF FITNESS FOR A PARTICULAR PURPOSE. NO WARRANTY MAY BE CREATED OR EXTENDED BY SALES OR PROMOTIONAL MATERIALS. THE ADVICE AND STRATEGIES CONTAINED HEREIN MAY NOT BE SUITABLE FOR EVERY SITUATION. THIS WORK IS SOLD WITH THE UNDERSTANDING THAT THE PUBLISHER IS NOT ENGAGED IN RENDERING LEGAL, ACCOUNTING, OR OTHER PROFESSIONAL SERVICES. IF PROFESSIONAL ASSISTANCE IS REQUIRED, THE SERVICES OF A COMPETENT PROFESSIONAL PERSON SHOULD BE SOUGHT. NEITHER THE PUBLISHER NOR THE AUTHOR SHALL BE LIABLE FOR DAMAGES ARISING HEREFROM. THE FACT THAT AN ORGANIZATION OR WEBSITE IS REFERRED TO IN THIS WORK AS A CITATION AND/OR A POTENTIAL SOURCE OF FURTHER INFORMATION DOES NOT MEAN THAT THE AUTHOR OR THE PUBLISHER ENDORSES THE INFORMATION THE ORGANIZATION OR WEBSITE MAY PROVIDE OR RECOMMENDATIONS IT MAY MAKE. FURTHER, READERS SHOULD BE AWARE THAT INTERNET WEBSITES LISTED IN THIS WORK MAY HAVE CHANGED OR DISAPPEARED BETWEEN WHEN THIS WORK WAS WRITTEN AND WHEN IT IS READ.
For general information on our other products and services or to obtain technical support, please contact our Customer Care Department within the U.S. at (800) 762-2974, outside the U.S. at (317) 572-3993 or fax (317) 572-4002.
Library of Congress Control Number: 2008925780
About the Author
Matthew Keefeis a new-media designer and developer, with a strong background in application development for the Web and offline. Originally a full-time graphic artist, he found that much of the programming associated with his design work was being outsourced. Matt quickly learned pro-gramming for the web and uncovered a valuable but little-known skill set in this industry, that skill being the ability to build a site and also the ability to powerfully design it. This was preferred by clients because they could do the entire project with one studio.
Matt has worked with companies such as Delphi, PhotoshopCafe, Kineticz Interactive, and Organi Studios to name a few. His work has been published in How To Wow with Flash(Peachpit Press) for which he was a contributing author and technical editor. Matt has also recently finished up work as the technical editor for Essential ActionScript 3(Adobe Dev Library).
Credits
Senior Acquisitions Editor Stephanie McComb
Project Editor Beth Taylor
Technical Editor Navid Mitchell
Copy Editor Kim Heusel
Editorial Manager Robyn Siesky
Business Manager Amy Knies
Sr. Marketing Manager Sandy Smith
Vice President and Executive Group Publisher
Richard Swadley
Vice President and Executive Publisher Bob Ipsen
Vice President and Publisher Barry Pruett
Project Coordinator Erin Smith
Graphics and Production Specialists Claudia Bell
Jennifer Mayberry Ronald Terry
Quality Control Technician Susan Moritz
Media Development Project Manager Laura Moss-Hollister
Media Development Coordinator Jenny Swisher
Associate Producer Shawn Patrick
Proofreading Christine Sabooni
Indexing
Broccoli Information Management
M
acromedia . . . errr Adobe Flash is hands down one of the most impressive and powerful tools for any designer when it comes to bringing an experience to a user. And as Flash continues to evolve not just web, for which it got popular, but also offline users with plat-form developments such as Adobe AIR and the wide range of third-party tools that can be used.But to a hardcore developer Flash has had a bad rap. Mainly due to the fact that AS 1.0 was an awkward, gawky, and immature language. Compared to other languages popular when AS 1.0 was introduced, it wasn’t something to be taken seriously in a developer’s eye and rightfully so. But then if Flash is so hindering, why am I even reading a foreword for a book on the subject?
Things have changed, drastically changed. AS 3.0 is here and it is one of the best languages around when understood. AS 2.0 was a step in the right direction, but AS 3.0 has surpassed every Flash developer’s dreams. Small file sizes, very solid performance, and even some data handling that rivals Java, so really there isn’t a developer who can say it is no longer a concrete language.
And with AS 3.0 a new era of data handling is introduced into Flash. And not only with Flash, but when you start mixing in PHP5, MySQL 5, ASP, AMFPHP, and other methods of handling data, the possibilities open up into a new realm. Data is up for grabs in AS 3.0, and it’s only a matter of read-ing a book like this to apply it. Sockets, xml, web services, and other external data sources allow a Flash developer to get really dirty in a data source and update the content without touching the Flash files again. The benefit is allowing more time to develop an engaging user experience without worrying about repeat edits, a client’s future budget, etc. It actually allows a serious Flash devel-oper to continue to work with data sources as they are developed and concentrate on the benefits of finessing the content itself, rather than what the content is at the time of development that can change on a client’s whim later on.
Gone are the days that you would build a client’s website, have a ton of large swfs, only for them to constantly need updates for photos, copy, catalog items, etc. In this book you will read how to uti-lize the methods mentioned to broaden your understanding of taking out the last restriction to knowing powerful Flash, updating without ever republishing, opening up an FLA, or worrying if the client sent you the right copy, image, or other asset.
Get rid of the idea that a Flash project is now plagued with an ever-so-changing fla file and embrace the idea of run-time content generation.
About the Author ...v
Foreword ...vii
Acknowledgments...ix
Introduction ...xix
Part I: Understanding the Basics . . . 1
Chapter 1: Getting Started with Flash and PHP ...3
Chapter 2: Exploring Flash and PHP ...37
Chapter 3: Getting Connected ...63
Chapter 4: Working with Data ...85
Chapter 5: Interacting with the User ...99
Chapter 6: Working with Cookies ...113
Part II: Developing Interactive Content . . . 125
Chapter 7: Maintaining Security while Working with User Input ...127
Chapter 8: Using Sockets ...153
Part III: Extending Flash and PHP . . . 189
Chapter 9: Working with Third-Party Libraries ...191
Chapter 10: Using Object-Oriented Programming ...219
Part IV: Developing Applications . . . 237
Chapter 11: Developing Basic Applications ...239
Chapter 12: Developing Real-World Applications ...289
Chapter 13: Using Advanced Real-World Applications...335
Chapter 14: Debugging Applications ...381
Part V: Server, Application, and Database Maintenance . . . 393
Chapter 15: Maintaining an Application...395
Chapter 16: Maintaining a Scalable and More Efficient Server ...405
Chapter 17: Building Complete Advanced Applications ...429
About the Author . . . v
Foreword . . . vii
Acknowledgments . . . ix
Introduction . . . xix
Part I: Understanding the Basics
1
Chapter 1: Getting Started with Flash and PHP . . . 3
Adding Apache to a Web Server ...3
Installing Apache for Windows...4
Installing Apache for UNIX...9
Modifying Apache for Windows and UNIX ...13
Installing MySQL ...14
Installing MySQL for Windows...14
Installing MySQL for UNIX ...25
Protecting MySQL ...26
Setting up PHP on the Web Server ...27
Installing PHP for Windows ...27
Installing PHP for UNIX ...33
Summary ...35
Chapter 2: Exploring Flash and PHP . . . 37
Introduction to the Web Server ...37
Working with .htaccess files ...37
Protecting your content ...38
Gathering information about Apache ...40
Using custom error documents...42
Exploring the Basics of PHP ...47
Understanding variables ...47
Working with functions ...49
Understanding control structures ...51
Exploring the Basics of MySQL ...57
Understanding Communications in Flash...63
Determining the status of PHP ...64
Working with various connection types ...65
Connecting Flash to PHP ...69
Connecting PHP to MySQL ...73
Determining the status of MySQL ...73
Connecting to MySQL ...74
Bringing it all together ...77
Summary ...84
Chapter 4: Working with Data . . . 85
Loading Data in Flash...85
Understanding the classes used to load data ...86
Putting it all together ...87
Handling Loaded Data ...88
One-way loading ...88
Two-way loading ...88
Loading XML in Flash ...89
Working with XML in PHP...92
Loading XML ...92
Sending XML ...93
Loading Images Using PHP ...95
Setting up the image loader ...96
Summary ...98
Chapter 5: Interacting with the User . . . 99
Form Development Using Flash ...99
Creating a Contact Form ...101
Calling the PHP ...103
Contact form event handlers...103
Mailing in PHP ...105
Login Module in Flash ...106
Code skeleton...106
Login event handlers ...107
Chapter 6: Working with Cookies . . . 113
Loading Cookies...113
Using cookies with PHP ...114
Using cookies in Flash ...118
Discovering the benefits of using PHP cookies ...122
Summary ...124
Part II: Developing Interactive Content
125
Chapter 7: Maintaining Security while Working with User Input . . . 127
Using Caution with User Input...127
Safely handling file uploads ...128
Checking for valid input...131
Cleaning User Data...132
Sanitizing the data ...133
Properly cleaning HTML data ...136
Storing Data ...136
Securely writing to a file ...137
Creating and storing a safe password using PHP ...141
Returning Data ...143
Securely returning data...143
Using a more secure approach for returning data ...144
Understanding the Flash Security Sandbox ...145
Setting the sandbox type...145
Using the sandboxType property ...145
Determining the active sandbox ...147
Ensuring an application cannot be shared ...151
Summary ...152
Chapter 8: Using Sockets . . . 153
Understanding Sockets...153
Security in sockets ...154
Implementing a socket server ...154
Understanding the socket connection...154
Working with Sockets in PHP...154
Looking for command-line version of PHP ...155
Building a socket server ...156
Testing the socket server...158
Creating a persistent socket server ...160
Working with Sockets in Flash ...161
Initializing a socket connection...161
Event handlers ...162
Building a Chat Client with Sockets Using Flash and PHP ...167
PHP socket server for the chat client...167
Connecting to the socket server ...175
Building the Flash client ...177
Summary ...188
Part III: Extending Flash and PHP
189
Chapter 9: Working with Third-Party Libraries . . . 191
Going over Third-Party Libraries ...191
Other types of third-party libraries ...192
Libraries in PHP ...193
Installing Third-Party Libraries ...193
Installing libraries in Flash CS3 ...193
Installing libraries in PHP ...195
Using Third-Party Libraries ...196
Working with libraries in Flash CS3 ...196
Working with Libraries in PHP ...197
Glancing at AMFPHP ...198
AMFPHP for AS3 and PHP Developers ...198
Testing AMFPHP with a custom service ...201
Using AMFPHP in Flash ...205
Building a Real-World Application Using AMFPHP ...210
AMFPHP services ...210
ActionScript for AMFPHP integration ...216
Summary ...218
Chapter 10: Using Object-Oriented Programming . . . 219
Understanding OOP...219
Overview of OOP practices...220
Using Classes in PHP ...225
Importing classes in PHP ...226
Instantiation ...226
Multiple classes ...228
Using Classes in Flash ...229
Importing ...229
Document class ...229
Library classes ...230
Using Flash and PHP to Build Custom Classes ...231
Summary ...235
Part IV: Developing Applications
237
Chapter 11: Developing Basic Applications. . . 239
Understanding Elements of an Application...239
Understanding application design ...240
Finalizing the planning stage ...242
Developing a Chat Client ...242
The Flash portion ...242
PHP for chat application...252
Using PHP to Develop a Photo Gallery ...260
Developing the ActionScript ...261
Photo gallery navigation ...266
PHP for the photo gallery ...270
Using PHP to Develop an RSS Reader...274
Importing classes ...275
Loading the PHP...275
Using PHP, Flash, and MySQL to Develop a Dynamic Banner Ad ...279
Opening a browser window ...281
Developing the PHP ...283
Random selection ...283
Using PHP to Develop a Hit Counter ...285
Hit counter logic...285
Developing the Flash hit counter ...286
Summary ...287
Chapter 12: Developing Real-World Applications . . . 289
Understanding Real-World Applications...289
Using PayPal in Flash ...290
Using POST data ...293
Using sendToURL ...294
Setting up PayPal communication...294
Using Flash and PHP to Build a Cart ...295
Designing the shopping cart ...296
Building the PHP ...306
Using PHP and Flash to Build an Amazon Search Application ...317
Using the Amazon Web Service ...317
Simplifying the XML response ...319
Developing a Photo Gallery Using flickr ...326
Interfacing with the Web service...331
Building the custom XML document ...332
Summary ...333
Chapter 13: Using Advanced Real-World Applications. . . 335
Building a Drawing Application in Flash ...335
Drawing API in Flash ...336
Using GD Library in PHP ...341
Generating an image in the GD library ...343
Gathering the pixel data in Flash ...345
Using Flash to Develop a Site Monitor ...347
Developing the PHP for the site monitor ...347
Using PHP to e-mail the administrator ...349
Developing the ActionScript for the site monitor ...351
Using Flash to Develop a Video Player ...359
Developing a Poll Application ...364
Building the PHP and MySQL...364
Developing the ActionScript for the poll...368
Building a Simple File Editor ...373
Summary ...380
Chapter 14: Debugging Applications . . . 381
Using Error Reporting in PHP ...381
Displaying errors for debugging ...383
Understanding the error levels ...383
Debugging in Flash ...385
Using an Alternative Trace ...389
Summary ...392
Part V: Server, Application, and Database Maintenance
393
Chapter 15: Maintaining an Application . . . 395
Commenting Code ...395
Understanding styles for commenting code ...396
Removing comments and debug helpers...399
Managing a ChangeLog ...399
Bug tracking ...399
Additional uses...400
Dynamic creation of changes ...400
Managing Multiple Versions ...401
Version control applications ...401
Version control support in CS3...401
Setting up version control...402
Using Custom Libraries ...403
Using custom libraries with version control ...403
Publishing an SWC...404
Summary ...404
Chapter 16: Maintaining a Scalable and More Efficient Server . . . 405
Running an Updated Server ...405
Using automatic updates ...406
Zend Platform...406
Working with Development Installs ...406
Building another version of Apache on the same system ...406
Working with bleeding-edge technology...407
Dependencies ...407
Caching and Optimizing ...408
Optimizing PHP ...408
Optimizing Apache...412
Optimizing MySQL ...413
Caching ...416
Installing memcached on Linux ...416
Installing memcached on Windows ...418
Wrapping up installation for Linux and Windows ...418
Managing servers ...420
Handling Backups ...421
File management ...421
Backup management ...421
Using PHP to back up databases...424
Summary ...427
Chapter 17: Building Complete Advanced Applications . . . 429
Building a Basic Video Player ...429
Building a Video Player in Flash and PHP ...432
Getting started ...432
Remoting integration ...437
Advanced video player development ...446
Building the VideoListItem class ...456
Working with Video Tracking...461
Updating the video class...462
updateVideoTracking method...463
Building a User Login Component in Flash ...465
Developing the LoginWindow class ...466
Testing the login component...473
Building the PHP login manager class...476
Adding remoting to the login component ...478
Finalizing the Video Player ...481
Using an external library ...482
Adding the login component ...482
Summary ...486
T
his book is a multipart exploration into Flash and PHP. Flash has been used for everything from basic banner ads to fully functional applications across the web and desktop.Oftentimes you can find information required to write amazing Flash applications or the server-side counterpart but rarely both. This book builds both aspects and explains the process of work-ing with PHP in your Flash projects.
The first part of the book is a step-by-step walkthrough of the installation and configuration pro-cess for PHP and all the nepro-cessary components. Once the components are installed, the next step is an overview of PHP and a guide to what features and techniques you will find in the book as you continue through the chapters.
Each chapter starts off with a basic overview and then moves quickly into the relevant information, leaving out any fluff to ensure you are getting all of the important information right away.
Part II focuses on the importance and best practices of making your applications more secure while maintaining functionality. The topic of security is repeated throughout the various examples in this book, but this part in particular is where you will find the majority of the security information.
Part III is extending Flash and PHP by working with various third-party applications and libraries. This chapter finishes with an overview of AMFPHP to build more-advanced and easier-to-maintain applications.
Part IV takes all the previous information and walks you through the process of building complete real-world applications in Flash and PHP. These real-world applications will help you build your own custom versions and ultimately allow you to create more-advanced and dynamic applications.
Examples and Source Files
You can find all the source code and starter files for the examples in this book on the following web site.
What You’ll Need
The ActionScript used in this book is not advanced, but a basic understanding of the fundamentals would allow you to better understand the examples. The Flash Bible is a perfect complement to this book and I highly recommend it.
A basic understanding of OOP practices would help you in the second portion of the book but is not required to understand the examples overall. You may want to pick up a book on advanced OOP practices to gain a more thorough understanding of the topic.
The PHP used in this book is assuming a very basic understanding of the subject. This means you will not only learn the advanced topics but how to get there by starting at the beginning. PHP also allows you to develop in a class-based format, so that will be utilized in the full-application chap-ters to ensure you are building a more complete and updatable application.
The last thing you will need is an Internet connection to download the code for the book and work with some of the third-party services. This is not used in the entire book, but to get the full experi-ence the Internet connection will be needed.
That is everything you will need. Now is the time to jump in. Chapter 1 is only a few pages away.
Understanding
the Basics
IN THIS PART
Chapter 1
Getting Started with Flash and PHP
Chapter 2
Exploring Flash and PHP
Chapter 3 Getting Connected
Chapter 4 Working with Data
Chapter 5
Interacting with the User
Chapter 6
T
he process of getting started includes the installation and configura-tion of Apache, MySQL, and PHP. The examples in this book assume the installation will be done locally; however, you can modify the paths and URLs if you want to use a remote server.The order in which you install these programs is important because they use paths and variables from each other, which results in the complete develop-ment environdevelop-ment.
This installation guide covers Windows and UNIX systems. If you have decided to work from the book on an existing server, you can skip to Chapter 2. However, there is some security and configuration information within this chapter you may find useful.
Adding Apache to a Web Server
The first step to working with Flash and PHP is to install the necessary com-ponents. The installation process is defined by installing Apache, then MySQL, and finally PHP. This order is required because PHP needs paths to Apache and MySQL in order to provide that support.
You can recompile (build) any one of these components in the future. However, if you follow this installation order it will mean less work and rework in the future.
The components to be installed change from time to time, but the overall installation process remains fairly constant. This means you can download
IN THIS CHAPTER
Apache installation
PHP installation
MySQL installation
Getting Started with
the latest files from their respective project sites, or to ensure all the components work together, you can obtain these files from the book’s site.
You should have a basic understanding of the system on which you will be installing. It is impor-tant to run a development system in a secured location. The best setup is a computer behind a physical firewall or on an internal network. If this is not possible, simply configure Apache to not allow remote connections and you can change the port number to hide it on your network.
Development systems can require more advanced configuration depending on how they have been set up. You can find common issues explained on the book’s Web site.
Installing Apache for Windows
Once you determine on which system you are installing the development system you can begin to download the necessary components. It is recommended that you use the files provided with the book. I also provide the necessary locations to download the latest files.
Access the latest version from Apache’s Web site. It is easier to install from the binary installer ver-sion rather than compiling the source. However, compiling from source does offer a higher level of customization and allows you to understand what is running under the hood.
Building from source is not for the beginner. It does require a certain level of experience and is only recommended to those who truly feel up to the challenge.
The latest Windows binary installer files for Apache can be found at
www.apache.org/dyn/closer.cgi/httpd/binaries/win32/.
Installing
Start the installation process by opening the Windows installer file that was either downloaded from the book site or directly from Apache’s Web site.
This installation will be mostly visual because the Windows installer is a graphical setup. The key to a successful installation is carefully following and reading the screens throughout the entire installation process. The first screen, as shown in Figure 1.1, requires no modification.
The next two screens are the license agreement, which you can take the time to read or you can simply click Next, because it is pretty standard information.
After that, you will find an introduction to Apache, which gives you a good overview of what Apache has to offer, as shown in Figure 1.2. The screen will also provide links to very valuable resources surrounding the Apache community.
CAUTION
CAUTION
NOTE
NOTE
Understanding the Basics
FIGURE 1.1
The first screen requires no user modification. Simply click Next to continue the installation process.
FIGURE 1.2
The Server Information for a development system does not need to be real, as this figure shows.
The server installation is where you define the specific configuration for your environment. If you were installing Apache on a real system, you would fill in this page with the correct information, otherwise Apache would not route requests correctly. You can accept the default options for a development setup, such as this.
Being that this installation is for a development server you don’t have to fill in the screen with real data, unless you are using this guide to install on a live server.
The Install Apache HTTP Server 2.0 programs and shortcuts for: option is when you want to install Apache so only the current user can access it. If you want all users to be able to access Apache, then you will want to install it as a service.
The installation process of Apache can be done in two ways, as shown in Figure 1.3. The first option is to accept all of the default settings, which results in a quicker installation, but it’s not always the best option.
The second more common option is the Custom alternative where you tell Apache which tools and libraries you want to install. Occasionally when installing an application you can experience a shortage of hard drive space.
Apache, on the other hand, is so small with all of the extra tools installed that you should not have a problem installing it.
FIGURE 1.3
The Custom option is selected to ensure all of the development tools are installed, such as library and module building capability.
Understanding the Basics
For the examples in this book, it is best to accept the Custom installation and make sure all of the libraries and extensions are installed. For example, some of the modules used to modify the user requests are only available when you install the full version.
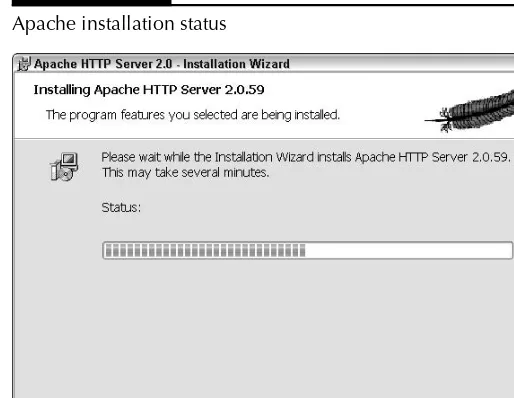
Depending on the system, it may take a while to install Apache. Even if the status bar stops moving don’t get concerned; some of the files take longer than others to install. The application notifies you if something happens during the installation process, which is very rare. Apache will update the progress bar, as shown in Figure 1.4, while the installation is occurring.
FIGURE 1.4
Apache installation status
The last screen you should see is a note that the installation was successful. A DOS prompt may appear notifying you that the Apache service is starting. You may also get a Firewall warning, and you will need to grant Apache the access it requests.
Testing
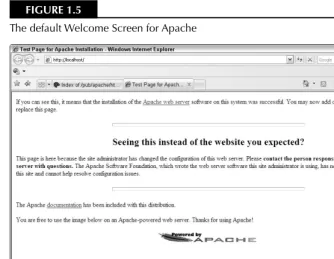
Congratulations. If all went well you should now have Apache installed on your Windows machine. To test the installation, open a Web browser and point it to the local Apache Web server, which is also known as localhost.
http://localhost/
You should be presented with a screen similar to what is seen in Figure 1.5, which basically
Depending on the installation process, you can modify this location, which is sometimes required when installed on a remote server. You would not be able to access the Apache Web server on the
localhostaddress. Instead, you would point to the IP address or the domain name of your Web site.
FIGURE 1.5
The default Welcome Screen for Apache
With Apache installed, you can modify the default page to truly see how Apache functions.
The Web files that Apache serves are located in the document root. This is similar to the
public_htmlor wwwthat you have most likely seen on a remote Web server. Unlike a remote Web server, permissions on these files are often unavailable to other users not viewing from your own personal computer.
The location of this Web directory in Windows using a default installation is:
C:\Program Files\Apache Group\Apache2\htdocs
You will see many different files in this directory, such as the same index files in various languages.
Understanding the Basics
Using your favorite text editor, create a very simple HTML page, such as the following:
<!DOCTYPE html PUBLIC “-//W3C//DTD XHTML 1.0 Strict//EN” “http://www.w3.org/TR/xhtml1/DTD/xhtml1-strict.dtd”> <html xmlns=”http://www.w3.org/1999/xhtml” lang=”en”> <head>
<title>My Custom Page</title>
<body>
<h1>Welcome to my custom page</h1>
<p>This is a test of the customization of Apache!</p> <p>Pretty cool huh?</p>
</body>
</html>
Save this new file in the Apache Web directory and name it myPage.html. After saving the file, open it in your Web browser to witness the flexibility in Apache.
This is not the most advanced example, but it should give you the basic idea of how to modify and work with the Apache Web server. Now is the time to create more useful examples, because you have the basics down.
At this point, with Apache installed and tested, you can move on to the installation and configura-tion of PHP, or you can jump ahead to the configuraconfigura-tion process of Apache.
Alternatively, you can read through the installation of Apache on UNIX, which is covered in the next section.
The installation of Apache in UNIX would be closer to working with a remote server, because you will find that most Web servers are built on Linux. This doesn’t mean you will never find a Windows-based live Web server, but it certainly isn’t as common.
Installing Apache for UNIX
The installation process in UNIX is more advanced than the Windows installation. However, the UNIX installation is often the more common scenario for a live server.
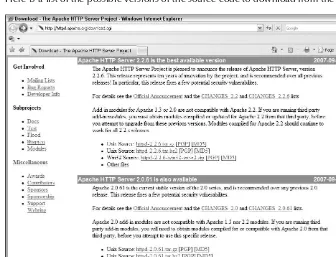
The first step to installing Apache is downloading the source. This source can either be down-loaded from the book’s site or directly from Apache’s Web site. Using the source provided on the book site ensures you’re running a nearly identical system to the one used for writing this book.
You will find the source, as shown in Figure 1.6, directly from Apache at the following URL:
http://httpd.apache.org/download.cgi.
FIGURE 1.6
Here is a list of the possible versions of the source code to download from the Apache server.
After downloading the source for Apache, you can begin the installation process.
Preinstallation
Before installation can begin, the source must be extracted from the downloaded file. This is done by simply uncompressing the tarballfile and untarring the uncompressed file.
$ gzip -d httpd-2.2.6.tar.gz $ tar xvf httpd-2.2.6.tar
Once the previous two processes are complete, you are left with a new directory containing the source code.
Before continuing, change to this directory, which means you will be in the directory the source code is located in.
$ cd httpd-2.2.6/
Understanding the Basics
Installation
When the source code is extracted, you can begin the installation process. Apache will install using its own set of options, but you have the ability to modify these. If you want to configure Apache using the defaults, simply type ./configure.
However, it is a better practice to tailor the installation process to your environment.
One of the most important options you can define is the --prefix, which is where Apache will be installed. This option is used throughout the application and also is used later during the PHP installation and configuration section.
For simplicity a partially modified configuration process is used, but feel free to look through the Apache documentation to gain a better understanding of what settings can be changed.
$ ./configure --prefix=/usr/local/apache --enable-rewrite=shared \
--enable-spelling=shared
Once the configuration process begins, it can take a few minutes to complete. Most of the time you will see the process printing in your terminal window, but even if it is not, it is running.
After the configure command has completed you can run maketo build the Apache package.
$ make
Again, this process may take time depending on your system, so please be patient. Once the make
command is complete, the last command to run installs the package and wraps up the installation portion.
$ make install
Testing
With Apache installed, you can start it and test it in the browser.
Apache installs a very useful tool, apachectl, which can be found in the bin/directory of the installation location. Using the path chosen for this installation, the apachectlapplication would be found here.
$ usr/local/apache/bin/apachectl
Use the following command to start the Apache server:
$ usr/local/apache/bin/apachectl start
Use this command to stop the Apache server:
$ usr/local/apache/bin/apachectl stop
To restart the Apache server, use this command:
$ usr/local/apache/bin/apachectl restart
Testing out the server is done by making a call to localhostfrom your web browser at
http://localhost/.
As you can now see, the installation was a success. To further test and better understand how to modify the files Apache serves, create a new HMTL file and save it in the Apache Web root.
Using your favorite text editor, which in UNIX will most likely be vi, create this new HTML file. The following commands assume you are using vi.
Create a new file:
$ vi /usr/local/apache/htdocs/sampleFile.html
In order to begin entering the HTML code, you need to tell vi to enter Insert mode, which is done by pressing I. Press ESC to exit Insert mode.
Paste or type the following sample HTML code:
<!DOCTYPE html PUBLIC “-//W3C//DTD XHTML 1.0 Strict//EN” “http://www.w3.org/TR/xhtml1/DTD/xhtml1-strict.dtd”> <html xmlns=”http://www.w3.org/1999/xhtml” lang=”en”> <head>
<title>My Custom Page</title> <body>
<h1>Welcome to my custom page</h1>
<p>This is a test of the customization of Apache!</p> <p>Pretty cool huh?</p>
</body> </html>
Once the file is created, press ESC and type the following command to save and close the editor. Note, the :is part of the command.
:wq
Certain files you add or modify require you to restart Apache; however, basic Web files do not fall into that category. You can now display the new page by appending the filename to the local-hostcall at http://localhost/sampleFile.html.
As you can see, the Apache server has been properly installed and you were able to add a custom file that Apache properly served up. At this point, you should have a basic understanding of how Apache functions. The next section (platform independent) goes into more detail about how you can modify Apache.
Understanding the Basics
Modifying Apache for Windows and UNIX
The following tips, tricks, and tweaks can be performed on Windows or UNIX installations. This is because they are specific to Apache and not the environment it runs on.
When working on development systems it isn’t rare to require more than one installation of Apache. This could be to test bleeding-edge code, support more plug-ins, or just to ensure a proj-ect is running on a clone of the live system.
The installation process of Apache stays pretty much the same. You only need to change the prefix option by pointing it to a new/different location. You can run multiple versions of Apache; how-ever, they require separate installation locations. Running multiple versions of Apache at the same time using only the default installation options isn’t possible. This is due to Apache being set up to listen for requests on port 80 by default.
You can modify the port that Apache listens on by editing the configuration file. The configuration files are located in the conf/directory, which is located in the directory that you designate during the Apache install.
For example, you can change the port that Apache runs on. Start by opening the configuration file.
To open the configuration file in UNIX, use vi.
$ vi /usr/local/apache/conf/httpd.conf
To open the configuration file in Windows, navigate to the installation directory and open the
httpd.conffile in your favorite text editor.
C:\Program Files\Apache Group\Apache2\conf\httpd.conf
When the file is open, scroll down or search for the Listendirective, which will look similar to the following:
#
# Listen: Allows you to bind Apache to specific IP addresses and/or
# ports, instead of the default. See also the <VirtualHost> # directive.
#
Listen 80
Apache will only look at this file during startup. When you are finished editing, make sure you restart the Apache server.
Changing that one value allows you to run multiple copies of Apache. However, running multiple Apache instances can be processor intensive, so make sure you only run as many instances as required. In most cases, you will run only one instance on a live server.
NOTE
NOTE
Installing MySQL
Now that Apache is installed, the next component to install is MySQL. This would be the database that your application contents are stored in and managed using PHP.
Installing MySQL for Windows
Much like the Apache installation process, MySQL has a Windows installer that makes the entire process much easier. The installer guides you through the process of installing the core database and any additional components you need. For this setup, the default installation is used, but feel free to customize, which is a very good way to learn.
Downloading
The first step to installing MySQL is downloading the latest install files. You can use the files pro-vided on the book’s Web site to ensure compatibility or you can visit MySQL’s Web site at
http://dev.mysql.com/downloads/mysql/5.0.html#win32to get the latest stable ver-sion at this time.
Choose the Win32 installer with Setup to make the overall installation process easier. This allows you to use the GUI instead of the traditional command-line process of previous versions.
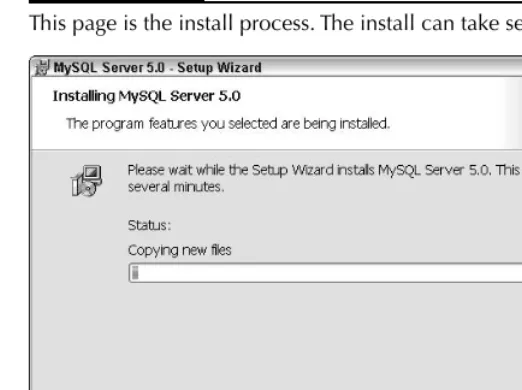
Installation
After you download and open the installer a Welcome page appears, followed by other pages that make up the install process, as shown in Figure 1.7. Similar to the Apache installation, MySQL also has various configuration options that need to be modified. Carefully look over the following steps to ensure your database will function properly.
Choose the Typical install option, which installs the core components necessary to run and main-tain a MySQL database. Click Next to move to the next step.
At this point, MySQL has been installed. The final page gives you the option to launch the configu-ration section when you click Next.
Make sure you select this option. If you accidentally close this page you can rerun it or open the configuration application in the mysql/directory in program files.
The installation of MySQL does not offer all that much in modification. This is because the sup-porting application Configuration Wizard handles all the necessary configuration options.
Select the Detailed Configuration option, as shown in Figure 1.8. This allows you to fine-tune the MySQL configuration as opposed to using all of the defaults. Click Next to continue.
Understanding the Basics
FIGURE 1.7
This page is the install process. The install can take several minutes, depending on the system.
If you select the Standard Configuration option you are presented with a smaller list of configura-tion screens. This speeds up the configuraconfigura-tion process, but doesn’t allow you to customize the functionality of MySQL and could result in a less efficient system.
FIGURE 1.8
Select the configuration type.
The server type determines the memory, hard drive, and CPU usage. This has been installed on your development machine so you want to ensure that MySQL doesn’t become overly processor or resource intensive. Selecting the Developer Machine option ensures this doesn’t happen.
The other two options are for dedicated servers. The Server Machine option would be used when you install MySQL on the same machine your Web server, such as Apache, is running. This is okay for a medium-trafficked site, but you may find a spike in resource usage as your site becomes more active.
When this happens, you will want to introduce a dedicated machine to run your MySQL database, which at this time you would select the Dedicated MySQL Server Machine option. This option tells MySQL it is installed on a dedicated machine and to use all the resources and memory that are present.
Be sure you never accidentally select the Dedicated MySQL Server Machine option when installing on a Web server. Your system will not be able to manage resources prop-erly and could eventually fail.
MySQL will constantly attempt to allocate all free memory whenever it is made available, which means when your Web server closes a stale connection, MySQL could potentially steal that free memory until there is no more room for connection available.
After you select an option (in this example Dedicated Machine), click Next (see Figure 1.9).
FIGURE 1.9
Select the Developer Machine option for your server type.
Select the Multifunctional Database option as the database usage type to allow the ultimate expandability of the system. This allows MySQL to optimize for both InnoDB and MyISAM storage
NOTE
NOTE
Understanding the Basics
The Transactional Database Only option is used when you will be running a lot of transaction-based queries. This means you would be wrapping a bunch of queries (UPDATE, SELECT,
DELETE, INSERT) in one run to ensure all the proper tables and data are modified. But if some-thing goes wrong in one of those modifications it could ruin the remaining data.
This would mean a lot of unnecessary data editing and in some cases could result in bad data. A transaction looks for an error or trigger and if found all the modifications made during the start of the transaction are rolled back and reverted to their nonmodified state.
Here is a simple example of a MySQL-based transaction, which modifies two separate portions of data on the same table.
START TRANSACTION;
UPDATE users SET credits = credits - 100 WHERE id = 3002; UPDATE users SET credits = credits + 100 WHERE id = 3002;
COMMIT;
During the process of a transaction those entries are made unavailable to other sessions to ensure the data cannot be read or modified while a transaction is being performed. You can think of this process as being similar to turning the power off in your house to ensure someone can’t acciden-tally flip a light switch while you are working on something.
The Non-Transactional Database Only option is selected when you know you will never need transaction abilities. This only enables the MyISAM storage engine, which can provide better results, but also limits overall functionality.
Oftentimes you will find the Multifunctional Database option, as shown in Figure 1.10, to the best choice, but it is also good to know what the other options offer.
FIGURE 1.10
The Multifunctional Database option is selected as the database storage type.
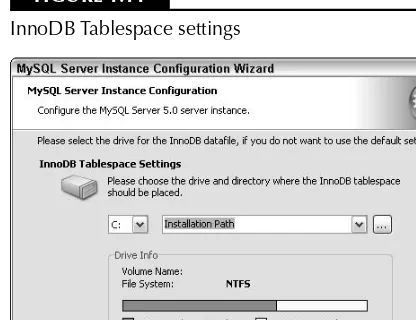
The next page allows you to customize the InnoDB storage system, but it is best to just leave it with the default settings.
In some instances, you may want to choose a separate location, which you can do by clicking the Browse button to the right of the installation box. Choosing a different location is only necessary when the Drive Info notice at the bottom of the window reports a small amount of Free disk space, which means your database could consume the remainder of your resources.
Make sure you never choose a removable drive as the storage location because you could harm the database if that drive is not attached at all times.
As stated earlier, most often it is best to leave this option at its default choice, as shown in Figure 1.11, to ensure your database functions properly.
FIGURE 1.11
InnoDB Tablespace settings
The next option is an approximation of how many concurrent connections your MySQL database will need to handle. Because this installation is being performed on a development server, an esti-mate of no more than 25 is a realistic assumption. Actually, it would be rare to have more than 5, but 25 is a good base number.
Select the Online Transaction Processing (OLTP) option under the “Decision Support” heading when you are developing a Web application to which the public has access. This is because you really have no idea how many people may attempt to access the system at any given time. As your application continues to grow you may even need to chain multiple databases together to handle the load, but for now one database is enough, especially considering this installation is being per-formed on your local system.
CAUTION
CAUTION
Understanding the Basics
Select the Manual Setting option when you want to specify an exact number. This is only necessary when you want full control over your Web application. Oftentimes you see this manual number set to 300 on live Web applications. This appears to be a good average with the ability to handle many connections.
Be careful not to set the concurrent connections option, as shown in Figure 1.12, too high because your system will only have so many resources that can be split and shared by each connection. If you add more memory to your application you can increase this number, but that may not always be the best option.
FIGURE 1.12
Set the approximate number of concurrent connections.
The networking options determine if your MySQL databases will be visible to other machines beyond the local setup. For the ultimate security, disable the Enable TCP/IP option. If you have multiple development machines, you can enable it and choose a nonstandard port.
For this installation, networking is enabled, as shown in Figure 1.13, and the default port is used because I do not intend to allow others to connect, but my Web server is located behind a hard-ware firewall for added security.
Choose a nonstandard port number if you install another version of MySQL on the same system. This is not very common, but sometimes you have to deploy backwards-compatible environments to test your code in various setups. This is a cost-effective alternative to building and maintaining another physical machine to handle the testing process.
Make sure you select the Enable Strict Mode option to ensure your database server functions properly.
FIGURE 1.13
Setting the networking options
On the next page you can select the default character set used in your database. The Standard Character Set option is selected for this example (see Figure 1.14), but oftentimes this is not the best option because it does not allow the most compatibility with existing systems or allow for expansion over time. For this example it will work just fine because you will not have any advanced characters being used.
You can, of course, select any option that best fits your usage, but I prefer the Best Support for Multilingualism option. This option allows for greater expansion and is highly recommended when storing text in many different languages.
Select the Manual Selected Default Character Set/Collection option for the rare times when you want to specify a certain character set to use rather than choosing a selection of them. You will probably never use this option because it is too specific, but it is available if needed.
If you think you will be using multiple languages, I recommend the second option, Best Support for Multilingualism, to ensure your applications will be able to expand, and also allow you to experiment with different options later on.
The Windows Options page (see Figure 1.15) determines how MySQL is initialized. For example, if you choose to run MySQL as a service it will start or stop automatically, controlled by the operat-ing system. If you have installed a previous version of MySQL you will want to choose a different service name. This is to ensure the existing service does not collide with this one.
Select the Launch the MySQL Server automatically option to ensure the database is available when the system starts. This is not required, but it makes it so you don’t have to start the service manu-ally each time you restart your machine. You can, of course, access the service application on your system and modify this option at any time, as well as turn off the service until the next time the
Understanding the Basics
FIGURE 1.14
Selecting a default character set
The Include Bin Directory in Windows PATH option, when selected, includes MySQL support from the command line by simply typing mysql. This means any command prompt will allow you quick access to your MySQL database. You can refer to your operating system instructions for modifying this PATH variable.
You can also add PHP and Apache to this same PATH variable, which would expose them to the command prompt as well. In fact, when you install PHP some instructional material for performing this modification is offered.
FIGURE 1.15
The Windows options determine how MySQL is started and accessed.
The final configuration is used to set a root password, as shown in Figure 1.16. The root user has global permissions over your databases, so you can imagine how important securing this user is. You do not have to choose a password, but by default, MySQL is installed with no root password, which means anyone has access to your databases.
It is best to choose a difficult-to-guess password, retype it once more and be sure that the Enable root access from remote machines option is not selected to disable the ability to administer the databases remotely. It may seem this option would allow for better usability, but there are some exceptions, one of which is overall security of a system.
Even though this setup is being performed on a development server, it is best to keep security in the forefront of the installation process. Doing so will ensure you follow the necessary precautions when you perform a similar installation on a remote setup.
If security is not a concern, you do have the option to create an Anonymous Account. However, creating such an account is nearly identical to a root login with no password and will suffer from the same overall security concerns.
FIGURE 1.16
Security options for MySQL
The last page, as shown in Figure 1.17, is for the processing of the configuration values set in the previous pages. If for some reason an error is encountered, MySQL will notify you.
Most of the time you will see each bullet point with a check mark applied as it is completed.
Understanding the Basics
When processing is complete, you are presented with a notice informing you the configuration has been completed and MySQL is ready to use.
You have now successfully installed and configured MySQL to be used for the remainder of this book. Click Finish to close the configuration page and begin testing the installation.
FIGURE 1.17
Display of configuration processing with proper notices as each task is completed.
Testing
After you install MySQL you can test it. You can view the service status using the MySQL monitor, which determines if the database server is up and running. You can use the command line to log in and investigate the MySQL database just like you would on a remote server.
To open a new command prompt, as shown in Figure 1.18, press Windows key+R. When the prompt open, type the following command to log in:
$ mysql -uroot -p
If you get “command not found” you need to add MySQL to the path variable.
An Enter Password notice appears. Type the password you set in the configuration process.
When typing a password the prompt will not show any text updates.
NOTE
NOTE
NOTE
NOTE
FIGURE 1.18
Command prompt with the command entered to log in to the MySQL database server
If the login is successful, a notice describing the MySQL server appears. The notice contains the version of MySQL that you are currently running. The following is an example of the notice:
Welcome to the MySQL monitor. Commands end with ; or \g. Your MySQL connection id is 5
Server version: 5.0T.45-community-nt MySQL Community Edition (GPL)
Once you log in to MySQL, your command prompt changes to mysql>. From this point on, until you log out, all commands are directed to the database server.
For example, to see what databases are available, type the following command:
mysql> show databases;
To test the database installation, create a new database:
mysql> create database flashphp;
When the database is created, you can select it with the following command:
mysql> use flashphp;
You can even pass in the database name during the login phase, such as:
$ mysql -uroot -p flashphp
At this point, MySQL should be successfully installed on your Windows development server. The next section covers how to install MySQL for UNIX and UNIX-like systems. The PHP installation process is directly following the UNIX instructions. Feel free to jump ahead if you only want to focus on a Windows system.
Understanding the Basics
Installing MySQL for UNIX
You can install MySQL on your UNIX system using the provided source code on the book’s site, or you can download the latest files from MySQL directly at http://dev.mysql.com/ downloads/mysql/5.0.html#linux.
The version to download depends on the environment on which you are installing. Consult the following guide for further information:
http://dev.mysql.com/doc/refman/5.0/en/which-version.html.
After you download the necessary installation files, you can begin the preparation for the installa-tion process. The first step is to add the user and group mysqlfor MySQL to run as. The following command creates the mysqlgroup and adds a mysqluser to that new group:
$ groupadd mysql
$ useradd -g mysql mysql
Choose the directory in which you want to install MySQL. You can choose the same location where you installed Apache to keep all of your development components in the same location.
$ cd /usr/local
You may need to perform the MySQL installation as root if the directory is protected.
Unpack the distribution package and create a symbolic link to that directory.
$ gunzip < /usr/local/mysql5.0.45linuxi686glibc23.tar.gz | tar xvf -$ ln -s /usr/local/ mysql-5.0.45-linux-i686-glibc23 mysql
When the unpacking command is complete, change to the installation directory.
$ cd mysql
Change the ownership of the files to MySQL by running a recursive ownership command. The first command changes the ownership and the second changes the group attribute.
$ chown -R mysql $ chgrp -R mysql
If you have not installed a previous version of MySQL on this machine, you must create the MySQL data directory and grant tables.
scripts/mysql_install_db --user=mysql
If you want MySQL to run automatically when the machine starts, you can copy the
mysql.serverfile located in the support/directory to the location where your system has its other startup files. For more information regarding the location of that directory and other system
NOTE
NOTE
NOTE
NOTE
When everything is properly unpacked and installed, you can begin testing.
To start the MySQL server, run the following command from the mysqlinstallation directory:
$ bin/mysqld_safe -- user=mysql &
Use the following command to verify the server is actually running:
$ bin/mysqladmin version $ bin/mysqladmin variables
The output from mysqladmin versionwill vary depending on the version installed. This is a sample returned from that command:
mysqladmin Ver 14.12 Distrib 5.0.54, for pc-linux-gnu on i686 Copyright (C) 2000 MySQL AB & MySQL Finland AB & TCX DataKonsult
AB
This software comes with ABSOLUTELY NO WARRANTY. This is free software,
and you are welcome to modify and redistribute it under the GPL license
Server version 5.0.54 Protocol version 10
Connection Localhost via UNIX socket UNIX socket /var/lib/mysql/mysql.sock Uptime: 0 days 2 hours 2 min 07 sec
Threads: 1 Questions: 323 Slow queries: 0 Opens: 0 Flush tables: 1 Open tables: 7 Queries per second avg: 0.000
Protecting MySQL
It is important that you protect MySQL users from malicious activity. By default, MySQL installs the root and anonymous users with no passwords, which is the same as using a global default. It is a very good practice to immediately assign passwords and in some cases remove the anonymous users altogether.
Setting a password on Windows
The password for the root account was given a password when you ran the installer. However, if for some reason you want to change it, simply run the following command, substituting
NEW_PASSWORDwith the actual password you want to use:
$ mysql -uroot
mysql> SET PASSWORD FOR ‘root’@’localhost’ = PASSWORD(NEW_PASSWORD);
mysql> SET PASSWORD FOR ‘root’@’%’ = PASSWORD(NEW_PASSWORD);
Understanding the Basics
Setting a password on UNIX
The installation of MySQL on UNIX leaves the root login with no password, unlike the Windows installation. It is very important to assign a password immediately:
$ mysql -uroot
mysql> SET PASSWORD FOR ‘root’@’localhost’ = PASSWORD(NEW_PASSWORD);
mysql> SET PASSWORD FOR ‘root’@’host_name’ = PASSWORD(NEW_PASSWORD);
Replace host_namewith the name of the server host. If you do not know the server host, run this command while logged in to MySQL to determine that information:
SELECT Host, User FROM mysql.user;
To remove the anonymous account, log in to MySQL and issue the following command:
DROP USER ‘’;
Use caution when removing a user and double-check the spelling of the user’s name before you issue that command.
Setting up PHP on the Web Server
PHP is the final component to install in order to complete the process of building the development system. The process of installing PHP is straightforward, but it requires some customization.
When installing the support for the XML and GD libraries, your system may require additional libraries and components.
Installing PHP for Windows
Installing PHP for Windows is actually fairly simple. A lot of the installation process consists of moving files around and editing existing files. You can find the PHP installation files on the book’s Web site or you can download the latest files directly from the php.org site
atwww.php.net/downloads.php.
Installation
To begin the process of installing PHP, run the installer application that you downloaded. The Welcome page for the setup wizard appears, as shown in Figure 1.19.
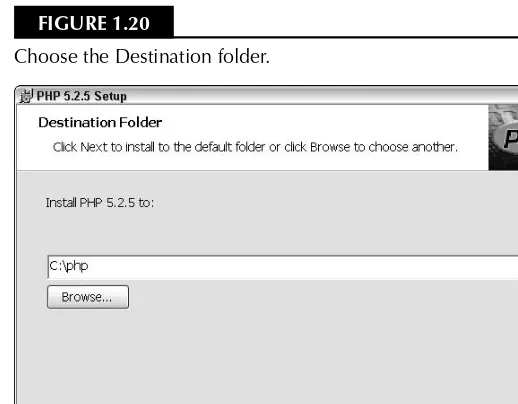
The destination folder, as shown in Figure 1.20, is where you install PHP. By default, it chose a directory path with Program Fileswithin it. This can cause issues on some servers. A common path is C:\phpor C:\php5if you intend to install multiple copies of PHP.
NOTE
NOTE
CAUTION
CAUTION
FIGURE 1.19
The PHP installation Welcome page
FIGURE 1.20
Choose the Destination folder.
Understanding the Basics
The PHP installer is built to configure both PHP and Apache to work together. This includes the editing of the configuration files of Apache.
On the Web Server Setup page, as shown in Figure 1.21, select the version of Apache that you pre-viously installed. If you are unsure which version is installed, you can run the following command in the prompt:
/usr/local/apache2/bin/httpd –v
The following is a sample output from the previous command:
Server version: Apache/2.0.59
Server built: Aug 31 2007 01:58:43
FIGURE 1.21
The PHP Installer Web Server Setup page
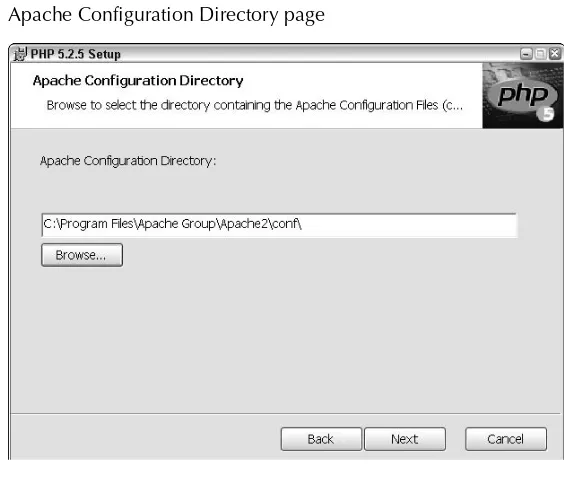
The next page, see Figure 1.22, is where you inform the installer of the location of the Apache con-figuration directory. For example, if you followed the Apache installation guide at the beginning of this chapter, the path would be the following:
C:\Program Files\Apache Group\Apache2\conf\
On the next page you choose the extra extensions needed for this book (see Figure 1.23). Those extensions are GD2, EXIF, MySQL, and PEAR. You can also choose to install any others that you
FIGURE 1.22
Apache Configuration Directory page
FIGURE 1.23
Choose which extensions you want to install in addition to PHP.
Understanding the Basics
The entire configuration is set up at this point, and you can click Install to begin the process of installing PHP. When the installation is finished a Completed page appears.
You can open the directory in which PHP is installed and look at the various files. You can also edit the php.inifile to meet your specific needs.
C:\php5\php.ini
The default configuration of the php.inishould work for a development setup with the excep-tion that you should enable display_errors. Enabling the display of errors tells PHP to print any errors to the screen. In a production setup this could be considered a security concern. A development server is generally only seen by authorized viewers, which means enabling this option is not a problem.
Open the php.inifile and search for the section referring to error_reporting.
display_errors = Off
Change the value to On.
display_errors = On
Changes to the php.inifile are not visible until you restart the server.
Make sure you restart the Apache web server before continuing because you made some modifica-tions to the Apache configuration.
Testing
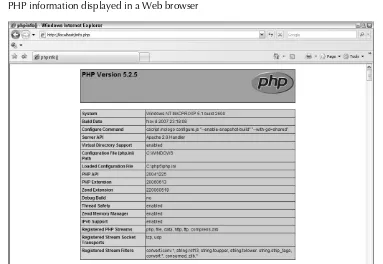
After you install PHP you can create a sample PHP file to test it out. A common sample file is the
phpinfofile, which allows you to see the configuration variables for the PHP installation on the server.
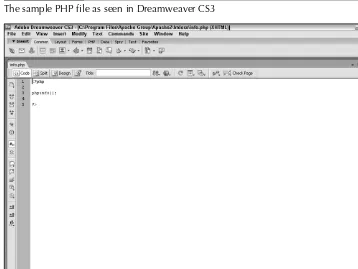
You can use Notepad or any other text editor to create this sample file. If you install the full Web Suite from Adobe, you can use Dreamweaver to write PHP files (see Figure 1.24).
Here is the syntax for the phpinfofile.
<?php
phpinfo();
?>
Save this file as info.phpin the Document Root of the Apache installation. For example, if you install Apache to the default location, the PHP file is saved to:
NOTE
NOTE
FIGURE 1.24
The sample PHP file as seen in Dreamweaver CS3
You can now open this file in your Web browser, as seen in Figure 1.25.
http://localhost/info.php
If you prefer, you can create a custom PHP file to test whether PHP is properly running, such as the following:
<?php
print “Hello, World! This is PHP.”;
?>
When you run this file in the browser, you should see your message displayed.
Understanding the Basics
FIGURE 1.25
PHP information displayed in a Web browser
Installing PHP for UNIX
Installing PHP for UNIX is more detailed and requires more configuration. This is true for most command-line installation setups. You can download the installer files from the book’s Web site or one the official PHP Web sites.
After you obtain the PHP installer files, you can begin the process of installation. Before you begin the installation, it is a good idea to stop Apache to ensure none of the files becomes corrupted.
/usr/local/apache/bin/apachectl stop
To start the installation, create the directory where PHP will be installed.
mkdir /usr/local/php5
You can substitute php5for simply php. However, adding the version number makes it easier to have multiple installations and will be easier to manage in the future.
Unpack the files and type the installation directory:
gunzip php-5.2.5.tar.gz tar -xvf php-5.2.5.tar cd php-5.2.5
Building configuration parameters
The next step is to build the configline. This will contain all the necessary extensions and fea-tures you want to include in the installation. For example, you need to include database and image support to complete some of the chapters in this book, among others. Each option is contained within a set of single quotes (‘) and will include the path if necessary.
./configure’ ‘--prefix=/usr/local/php5’
‘--with-apxs=/usr/local/apache/bin/apxs’ ‘--with-gd’ ‘--enable-exif’ mysql=shared,/usr/local/php5’
mysqli=shared,/usr/local/php5/bin/mysql_config’ libxml-dir=shared,/usr/local/php5’
‘--with-xsl=shared,/usr/local/php5’ ‘--with-jpeg-dir=/usr/local/php5’ with-png-dir=/usr/local/php5’ enable-gd-native-ttf’ freetype-dir=/usr/local/php5’
‘--with-gettext=shared,/usr/local/php5’
When the configuration process is complete (which can take a while depending on the system), create and run the installer:
make
make install
After the make installcommand is completed, PHP should be installed.
Configuration
A few portions of PHP need to be configured to make sure it works seamlessly with Apache and your overall development system. This process is fairly easy to complete, but incorrect modifica-tion can result in a broken system. Also, when modifying configuramodifica-tion files, it is best to make a backup first.
The first step is to move the php.inifile to a central location that PHP will use when it starts up.
cp php.ini.recommended /usr/local/lib/php.ini
In order for Apache to load PHP files, add the necessary module references:
LoadModule php5_module modules/libphp5.so AddType application/x-httpd-php .php .phtml AddType application/x-httpd-php-source .phps
Understanding the Basics
Restart Apache to have these changes take effect. Any time you edit the values in PHP or Apache, you must restart the server.
/usr/local/apache/bin/apachectl start
With everything properly installed, you can test the setup by running a sample PHP file:
<?php
phpinfo();
?>
Summary
In this chapter, you went through the steps necessary to install the complete development system. This process included the installation of Apache, PHP, and MySQL on a Windows or UNIX Web server. The next chapter walks you through the process of making this development setup more secure. This includes securing the files on the server as well as the overall server configuration through the httpd.confconfiguration file.