Upper Saddle River, NJ • Boston • Indianapolis • San Francisco New York • Toronto • Montreal • London • Munich • Paris • Madrid
Cape Town • Sydney • Tokyo • Singapore • Mexico City
iOS Components
and Frameworks
Understanding the Advanced
Features of the iOS SDK
Editor-in-Chief Many of the designations used by manufacturers and sellers to distinguish their products
are claimed as trademarks. Where those designations appear in this book, and the publisher was aware of a trademark claim, the designations have been printed with initial capital letters or in all capitals.
The authors and publisher have taken care in the preparation of this book, but make no expressed or implied warranty of any kind and assume no responsibility for errors or omissions. No liability is assumed for incidental or consequential damages in connection with or arising out of the use of the information or programs contained herein.
The publisher offers excellent discounts on this book when ordered in quantity for bulk purchases or special sales, which may include electronic versions and/or custom covers and content particular to your business, training goals, marketing focus, and branding interests. For more information, please contact:
U.S. Corporate and Government Sales (800) 382-3419
For sales outside the United States, please contact:
International Sales
Visit us on the Web: informit.com/aw
Library of Congress Control Number: 2013944841
Copyright © 2014 Pearson Education, Inc.
All rights reserved. Printed in the United States of America. This publication is protected by copyright, and permission must be obtained from the publisher prior to any prohibited reproduction, storage in a retrieval system, or transmission in any form or by any means, electronic, mechanical, photocopying, recording, or likewise. To obtain permission to use material from this work, please submit a written request to Pearson Education, Inc., Permissions Department, One Lake Street, Upper Saddle River, New Jersey, 07458, or you may fax your request to (201) 236-3290.
AirPlay, AirPort, AirPrint, AirTunes, App Store, Apple, the Apple logo, Apple TV, Aqua, Bonjour, the Bonjour logo, Cocoa, Cocoa Touch, Cover Flow, Finder, FireWire, Game Center, iMac, Instruments, Interface Builder, iCloud, iOS, iPad, iPhone, iPod, iPod touch, iTunes, the iTunes logo, Mac, Mac logo, Macintosh, Mountain Lion, Multi-Touch, Objective-C, Passbook, Quartz, QuickTime, QuickTime logo, Safari, Spotlight, and Xcode are trademarks of Apple, Inc., registered in the United States and other countries. Facebook and the Facebook logo are trademarks of Facebook, Inc., registered in the United States and other countries. Twitter and the Twitter logo are trademarks of Twitter, Inc., registered in the United States and other countries.
ISBN-13: 978-0-321-85671-5 ISBN-10: 0-321-85671-6
Text printed in the United States on recycled paper at Edwards Brothers Malloy in Ann Arbor, Michigan.
❖
I would like to dedicate this book to my co-workers who
continually drive me to never accept the first solution.
—Kyle Richter
I dedicate this book to my wife, Irene, and two daughters,
Audrey and Scarlett. Your boundless energy and love
inspire me daily.
— Joe Keeley
vi Contents
vi Contents
Contents
1 UIKit
Dynamics 1
Sample App 1
Introduction to UIKit Dynamics 2 Implementing UIKit Dynamics 3
Gravity 3 Collisions 4 Attachments 6 Springs 8 Snap 9 Push Forces 9 Item Properties 11
In-Depth UIDynamicAnimator and UIDynamicAnimatorDelegate 13 Summary 13
Exercises 14
2 Core Location, MapKit, and Geofencing 15
The Sample App 15 Obtaining User Location 15
Requirements and Permissions 16 Checking for Services 19
Starting Location Request 20
Parsing and Understanding Location Data 22 Significant Change Notifications 23
Using GPX Files to Test Specific Locations 24 Displaying Maps 26
Understanding the Coordinate Systems 26 MKMapKit Configuration and Customization 26 Responding to User Interactions 28
Map Annotations and Overlays 29 Adding Annotations 29
Displaying Standard and Custom Annotation Views 32 Draggable Annotation Views 35
vii
Checking for Regional Monitoring Capability 44 Defining Boundaries 45
Game Center Manager and Authentication 91 The Achievement Cache 91
Reporting Achievements 93
viii Contents
viii Contents
Adding Achievement Hooks 95 Completion Banners 96 Achievement Challenges 97
Adding Achievements into Whack-a-Cac 100 Earned or Unearned Achievements 101 Partially Earned Achievements 102 Multiple Session Achievements 104
Piggybacked Achievements and Storing Achievement Precision 105
Timer-Based Achievements 106 Resetting Achievements 107
Going Further with Achievements 108 Summary 110
Exercises 110
5 Getting Started with Address Book 111
Why Address Book Support Is Important 111 Limitations of Address Book Programming 112 Introduction to the Sample App 112
Getting Address Book Up and Running 112 Reading Data from the Address Book 115 Reading Multivalues from the Address Book 116 Understanding Address Book Labels 117 Working with Addresses 118
Address Book Graphical User Interface 120 People Picker 120
Programmatically Creating Contacts 125 Summary 128
Exercises 128
6 Working with Music Libraries 129
Introduction to the Sample App 129 Building a Playback Engine 131
Registering for Playback Notifications 131 User Controls 133
ix Getting JSON from the Server 151
Building the Request 151
Sending JSON to the Server 158 Summary 159
Exercise 159
8 Getting Started with iCloud 161
The Sample App 161
x Contents
Differences Between Local and Push Notifications 181 Sample App 182
App Setup 182
Create Development Push SSL Certificate 184 Development Provisioning Profile 188
Add Support for Devices and Shouts 199 Device Controller 202
10 Bluetooth Networking with Game Kit 209
Limitations of Game Kit’s Bluetooth Networking 209 Benefits of Game Kit’s Bluetooth Networking 210 Sample App 210
The Peer Picker 215 Sending Data 218
Data Modes 219
Sending Data in the Sample App 219 Receiving Data 221
xi
Contents xi
Contents
Advanced Features 223 Peer Display Name 223
xii Contents
xii Contents
13 Getting Up and Running with Core Data 251
Sample App 251
Starting a Core Data Project 252 Core Data Environment 254
Building Your Managed Object Model 256 Creating an Entity 257 Other Default Data Setup Techniques 261 Displaying Your Managed Objects 262
Creating Your Fetch Request 262 Fetching by Object ID 264 Displaying Your Object Data 265 Using Predicates 267
Introducing the Fetched Results Controller 268 Preparing the Fetched Results Controller 268 Integrating Table View and Fetched Results Controller 271
Responding to Core Data Changes 273
Adding, Editing, and Removing Managed Objects 275 Inserting a New Managed Object 275
Removing a Managed Object 276 Editing an Existing Managed Object 277 Saving and Rolling Back Your Changes 278 Summary 279
Exercises 279
14 Language Features 281
Literals 282
Boxed Expressions 284 Automatic Reference Counting 285
Using ARC in a New Project 285
Converting an Existing Project to ARC 286 Basic ARC Usage 288
xiii
Using Blocks as Method Parameters 293 Memory, Threads, and Blocks 294
15 Integrating Twitter and Facebook Using Social
Framework 303
Social Integration 303 The Sample App 303 Logging In 304
Using SLComposeViewController 306 Posting with a Custom Interface 308
Posting to Twitter 308
16 Working with Background Tasks 329
The Sample App 330
Checking for Background Availability 330 Finishing a Task in the Background 331
Background Task Identifier 332 Expiration Handler 333
xiv Contents
xiv Contents
xiv
Implementing Background Activities 335 Types of Background Activities 335 Playing Music in the Background 336 Summary 340
Exercises 340
17 Grand Central Dispatch for Performance 341
The Sample App 341 Introduction to Queues 343 Running on the Main Thread 343 Running in the Background 345 Running in an Operation Queue 347
Concurrent Operations 347 Serial Operations 349 Canceling Operations 350 Custom Operations 351 Running in a Dispatch Queue 353
Concurrent Dispatch Queues 353 Serial Dispatch Queues 355 Summary 357
Exercises 358
18 Using Keychain to Secure Data 359
Introduction to the Sample App 360 Setting Up and Using Keychain 360
Setting Up a New KeychainItemWrapper 361 Storing and Retrieving the PIN 362
Keychain Attribute Keys 363 Securing a Dictionary 364 Resetting a Keychain Item 366 Sharing a Keychain Between Apps 367 Keychain Error Codes 368
xv
Contents xv
Contents xv
19 Working with Images and Filters 371
The Sample App 371
Basic Image Data and Display 371 Instantiating an Image 372
Setting Up a Face Detector 388 Processing Face Features 388 Setting Up a Collection View 395
Implementing the Collection View Data Source Methods 396
Implementing the Collection View Delegate Methods 399
xvi Contents
xvi Contents
xvi
21 Introduction to TextKit 417
Sample App 417
Changing Font Settings with Dynamic Type 429 Summary 431
Exercises 431
22 Gesture Recognizers 433
Types of Gesture Recognizers 433 Basic Gesture Recognizer Usage 434 Introduction to the Sample App 434
Tap Recognizer in Action 435 Pinch Recognizer in Action 436 Multiple Recognizers for a View 438
Gesture Recognizers: Under the Hood 440 Multiple Recognizers for a View: Redux 441 Requiring Gesture Recognizer Failures 443 Custom UIGestureRecognizer Subclasses 444 Summary 445
Exercise 445
23 Accessing Photo Libraries 447
Sample App 447 The Assets Library 448
Enumerating Asset Groups and Assets 448 Permissions 449
Groups 451 Assets 455 Displaying Assets 458
Saving to the Camera Roll 462 Dealing with Photo Stream 465 Summary 467
xvii
Signing and Packaging the Pass 482 Creating the Pass Type ID 482
Creating the Pass Signing Certificate 484 Creating the Manifest 489
Signing and Packaging the Pass 489 Testing the Pass 490
Interacting with Passes in an App 490 Updating Passes Automatically 501 Summary 502
Exercises 502
25 Debugging and Instruments 503
xviii Contents
xviii Contents
Instruments 511
The Instruments Interface 512
Exploring Instruments: The Time Profiler 514 Exploring Instruments: Leaks 516
Going Further with Instruments 519 Summary 519
Exercises 520
Foreword
I have been working with the iPhone SDK (now iOS SDK) since the first beta released in 2008. At the time, I was focused on writing desktop apps for the Mac and hadn’t thought much about mobile app development.
If you chose to be an early adopter, you were on your own. In typical Apple fashion, the documentation was sparse, and since access to the SDK required an NDA—and apparently, a secret decoder ring—you were on your own. You couldn’t search Google or turn to StackOverflow for help, and there sure as hell weren’t any books out yet on the SDK.
In the six years (yes, it really has only been six years) since Apple unleashed the original iPhone on the world, we’ve come a long way. The iPhone SDK is now the iOS SDK. There are dozens of books and blogs and podcasts and conferences on iOS development. And ever since 2009, WWDC has been practically impossible to get into, making it even harder for developers—old and new—to learn about the latest features coming to the platform. For iOS developers, there is so much more to learn.
One of the biggest challenges I have as an iOS developer is keeping on top of all the
components and frameworks available in the kit. The iOS HIG should help us with that, but it doesn’t go far enough—deep enough. Sure, now I can find some answers by searching Google or combing through StackOverflow but, more often than not, those answers only explain the how and rarely the why, and they never provide the details you really need.
And this is what Kyle and Joe have done with this book—they’re providing the detail needed so you can fully understand the key frameworks that make up the iOS SDK.
I’ve had the pleasure of knowing Kyle and Joe for a number of years. They are two of the brightest developers I have ever met. They have each written some amazing apps over the years, and they continuously contribute to the iOS development community by sharing their knowledge—speaking at conferences and writing other books on iOS development. If you have a question about how to do something in iOS, chances are good that Kyle and Joe have the answer for you.
But what makes these guys so awesome is not just their encyclopedic knowledge of iOS, it’s their willingness to share what they know with everyone they meet. Kyle and Joe don’t have competitors, they have friends.
Kyle and Joe’s in-depth knowledge of the iOS SDK comes through in this book. It’s one of the things I like about this book. It dives into the details for each component covered at a level that you won’t always find when searching online.
xx Foreword
iOS Components and Frameworks an essential resource for any iOS developer—regardless of your experience level. You might think you’re a master with Core Location and MapKit, but I reckon you’ll find something here that you never knew before.
Kyle and Joe don’t come with egos. They don’t brag. And they sure don’t act like they are better than any other developer in the room. They instill the very spirit that has made the Mac and iOS developer community one of the friendliest, most helpful in our industry, and this book is another example of their eagerness to share their knowledge.
This book, just like the seminal works from Marks and LaMarche or Sadun, will always be within arm’s reach of my desk. This is the book I wish I had when I first started developing iOS apps in 2008. Lucky you, it’s here now.
—Kirby Turner,
Chief Code Monkey at White Peak Software, author of Learning iPad Programming, A Hands on Guide to Building Apps for the iPad, Second Edition (Addison-Wesley Professional), and Cocoa developer community organizer and conference junkie
Preface
Welcome to iOS Components and Frameworks: Understanding the Advanced Features of the iOS SDK !
There are hundreds of “getting started with iOS” books available to choose from, and there are dozens of advanced books in specific topics, such as Core Data or Security. There was, however, a disturbing lack of books that would bridge the gap between beginner and advanced niche topics.
This publication aims to provide development information on the intermediate-to-advanced topics that are otherwise not worthy of standalone books. It’s not that the topics are uninteresting or lackluster, it’s that they are not large enough topics. From topics such as working with JSON to accessing photo libraries, these are frameworks that professional iOS developers use every day but are not typically covered elsewhere.
Additionally, several advanced topics are covered to the level that many developers need in order to just get started. Picking up a 500-page Core Data book is intimidating, whereas Chapter 13 of this book provides a very quick and easy way to get started with Core Data. Additional introductory chapters are provided for debugging and instruments, TextKit, language features, and iCloud.
Topics such as Game Center leaderboards and achievements, AirPrint, music libraries, Address Book, and Passbook are covered in their entirety. Whether you just finished your first iOS project or you are an experienced developer, this book will have something for you.
The chapters have all been updated to work with iOS 7 Beta 4. As such, there were several iOS 7 features that were still in active development that might not work the same as illustrated in the book after the final version of iOS 7 is released. Please let us know if you encounter issues and we will release updates and corrections.
If you have suggestions, bug fixes, corrections, or anything else you’d like to contribute to a future edition, please contact us at [email protected] . We are always interested in hearing what would make this book better and are very excited to continue refining it.
Prerequisites
What You’ll Need
Although you can develop iOS apps in the iOS simulator, it is recommended that you have at least one iOS device available for testing:
■ Apple iOS Developer Account: The latest version of the iOS developer tools including Xcode and the iOS SDKs can be downloaded from Apple’s Developer Portal ( http:// developer.apple.com/ios ). To ship an app to the App Store or to install and test on a personal device, you will also need a paid developer account at $99 per year.
■ Macintosh Computer: To develop for iOS and run Xcode, you will need a modern Mac computer capable of running the latest release of OS X.
How This Book Is Organized
With few exceptions (Game Center and Core Data), each chapter stands on its own. The book can be read cover to cover but any topic can be skipped to when you find a need for that technology; we wrote it with the goal of being a quick reference for many common iOS development tasks.
Here is a brief overview of the chapters you will encounter:
■ Chapter 1 , “UIKit Dynamics”: iOS 7 introduced UI Kit Dynamics to add physics-like animation and behaviors to UIViews. You will learn how to add dynamic animations, physical properties, and behaviors to standard objects. Seven types of behaviors are demonstrated in increasing difficulty from gravity to item properties.
■ Chapter 2 , “Core Location, MapKit, and Geofencing”: iOS 6 introduced new, Apple-provided maps and map data. This chapter covers how to interact with Core Location to determine the device’s location, how to display maps in an app, and how to customize the map display with annotations, overlays, and callouts. It also covers how to set up regional monitoring (or geofencing) to notify the app when the device has entered or exited a region.
■ Chapter 3 , “Leaderboards”: Game Center leaderboards provide an easy way to add social aspects to your iOS game or app. This chapter introduces a fully featured iPad game called Whack-a-Cac, which walks the reader through adding leaderboard support. Users will learn all the required steps necessary for implementing Game Center leaderboards, as well as get a head start on implementing leaderboards with a custom interface.
■ Chapter 4 , “Achievements”: This chapter continues on the Whack-a-Cac game introduced in Chapter 3 . You will learn how to implement Game Center achievements in a fully featured iPad game. From working with iTunes Connect to displaying achievement progress, this chapter provides all the information you need to quickly get up and running with achievements.
■ Chapter 5 , “Getting Started with Address Book”: Integrating a user’s contact information is a critical step for many modern projects. Address Book framework is one of the oldest available on iOS; in this chapter you’ll learn how to interact with that framework. You will learn how to use the people picker, how to access the raw address book data, and how to modify and save that data.
■ Chapter 6 , “Working with Music Libraries”: This chapter covers how to access the user’s music collection from a custom app, including how to see informational data about the music in the collection, and how to select and play music from the collection.
xxv
How This Book Is Organized
■ Chapter 8 , “Getting Started with iCloud”: This chapter explains how to get started using iCloud, for syncing key-value stores and documents between devices. It walks though setting up an app for iCloud, how to implement the key-value store and document approaches, and how to recognize and resolve conflicts.
■ Chapter 9 , “Notifications”: Two types of notifications are supported by iOS: local notifications, which function on the device with no network required, and remote notifications, which require a server to send a push notification through Apple’s Push Notification Service to the device over the network. This chapter explains the differences between the two types of notifications, and demonstrates how to set them up and get notifications working in an app.
■ Chapter 10 , “Bluetooth Networking with Game Kit”: This chapter will walk you through creating a real-time Bluetooth-based chat client, enabling you to connect with a friend within Bluetooth range and send text messages back and forth. You will learn how to interact with the Bluetooth functionality of Game Kit, from finding peers to connecting and transferring data.
■ Chapter 11 , “AirPrint”: An often underappreciated feature of the iOS, AirPrint enables the user to print documents and media to any wireless-enabled AirPrint-compatible printer. Learn how to quickly and effortlessly add AirPrint support to your apps. By the end of this chapter you will be fully equipped to enable users to print views, images, PDFs, and even rendered HTML.
■ Chapter 12 , “Core Data Primer”: Core Data can be a vast and overwhelming topic. This chapter tries to put Core Data in context for the uninitiated, and explains when Core Data might be a good solution for an app and when it might be overkill. It also explains some of the basic concepts of Core Data in simple terminology.
■ Chapter 13 , “Getting Up and Running with Core Data”: This chapter demon-strates how to set up an app to use Core Data, how to set up a Core Data data model, and how to implement many of the most commonly used Core Data tools in an app. If you want to start using Core Data without digging through a 500-page book, this chapter is for you.
■ Chapter 14 , “Language Features”: Objective-C has been evolving since iOS was introduced. This chapter covers some of the language and compiler-level changes that have occurred, and explains how and why a developer would want to use them. It covers the new literal syntaxes for things like numbers, array, and dictionaries; it also covers blocks, ARC, property declarations, and some oldies but goodies including dot notation, fast enumeration, and method swizzling.
xxvi How This Book Is Organized
end of this chapter, you will have a strong background in Social Framework as well as working with Twitter and Facebook to add social aspects to your apps.
■ Chapter 16 , “Working with Background Tasks”: Being able to perform tasks when the app is not the foreground app was a big new feature introduced in iOS 4, and more capabilities have been added since. This chapter explains how to perform tasks in the background after an app has moved from the foreground, and how to perform specific background activities allowed by iOS.
■ Chapter 17 , “Grand Central Dispatch for Performance”: Performing resource-intensive activities on the main thread can make an app’s performance suffer with stutters and lags. This chapter explains several techniques provided by Grand Central Dispatch for doing the heavy lifting concurrently without affecting the performance of the main thread.
■ Chapter 18 , “Using Keychain to Secure Data”: Securing user data is important and an often-overlooked stage of app development. Even large public companies have been called out in the news over the past few years for storing user credit card info and passwords in plain text. This chapter provides an introduction to not only using the Keychain to secure user data but developmental security as a whole. By the end of the chapter, you will be able to use Keychain to secure any type of small data on users’ devices and provide them with peace of mind.
■ Chapter 19 , “Working with Images and Filters”: This chapter covers some basic image-handling techniques, and then dives into some advanced Core Image techniques to apply filters to images. The sample app provides a way to explore all the options that Core Image provides and build filter chains interactively in real time.
■ Chapter 20 , “Collection Views”: Collection views, a powerful new API introduced in iOS6, give the developer flexible tools for laying out scrollable, cell-based content. In addition to new content layout options, collection views provide exciting new animation capabilities, both for animating content in and out of a collection view, and for switching between collection view layouts. The sample app demonstrates setting up a basic collection view, a customized flow layout collection view, and a highly custom, nonlinear collection view layout.
■ Chapter 21 , “Introduction to TextKit”: iOS 7 introduced TextKit as an easier-to-use and greatly expanded update to Core Text. TextKit enables developers to provide rich and interactive text formatting to their apps. Although TextKit is a very large subject, this chapter provides the basic groundwork to accomplish several common tasks, from adding text wrapping around an image to inline custom font attributes. By the end of this chapter, you will have a strong background in TextKit and have the groundwork laid to explore it more in depth.
xxvii
How This Book Is Organized
■ Chapter 23 , “Accessing Photo Libraries”: The iPhone has actually become a very popular camera, as evidenced by the number of photos that people upload to sites such as Flickr. This chapter explains how to access the user’s photo library, and handle photos and videos in a custom app. The sample app demonstrates rebuilding the iOS 6 version of Photos.app.
■ Chapter 24 , “Passbook and PassKit”: With iOS6, Apple introduced Passbook, a standalone app that can store “passes,” or things like plane tickets, coupons, loyalty cards, or concert tickets. This chapter explains how to set up passes, how to create and distribute them, and how to interact with them in an app.
About the Sample Code
Each chapter of this book is designed to stand by itself; therefore, each chapter with the exception of Chapter 25 , “Debugging and Instruments,” Chapter 12 , “Core Data Primer,” and Chapter 14 , “Language Features,” has its own sample project. Chapter 3 , “Leaderboards,” and Chapter 4 , “Achievements,” share a base sample project, but each expands on that base project in unique ways. Each chapter provides a brief introduction to the sample project and walks the reader through any complex sections of the sample project not relating directly to the material in the chapter.
Every effort has been made to create simple-to-understand sample code, which often results in code that is otherwise not well optimized or not specifically the best way of approaching a problem. In these circumstances the chapter denotes where things are being done inappropriately for a real-world app. The sample projects are not designed to be standalone or finished apps; they are designed to demonstrate the functionality being discussed in the chapter. The sample projects are generic with intention; the reader should be able to focus on the material in the chapter and not the unrelated sample code materials. A considerable amount of work has been put into removing unnecessary components from the sample code and condensing subjects into as few lines as possible.
Many readers will be surprised to see that the sample code in the projects is not built using Automatic Reference Counting (ARC); this is by design as well. It is easier to mentally remove the memory management than to add it. The downloadable sample code is made available to suit both tastes; copies of ARC and non-ARC sample code are bundled together. The sample code is prefixed with “ICF” and most, but not all, sample projects are named after the chapter title.
Getting the Sample Code
Installing Git and Working with GitHub
Git is a version control system that has been growing in popularity for several years. To clone and work with the code on GitHub, you will want to first install Git on your Mac. A current installer for Git can be found at http://code.google.com/p/git-osx-installer . Additionally, there are several GUI front ends for Git, even one written by GitHub, which might be more appealing to developers who avoid command-line interfaces. If you do not want to install Git, GitHub also allows for downloading the source files as a Zip.
Contacting the Authors
Acknowledgments
This book could not have existed without a great deal of effort from far too many behind-the-scenes people; although there are only two authors on the cover, dozens of people were responsible for bringing this book to completion. We would like to thank Trina MacDonald first and foremost; without her leadership and her driving us to meet deadlines, we would never have been able to finish. The editors at Pearson have been exceptionally helpful; their continual efforts show on every page, from catching our typos to pointing out technical concerns. The dedicated work of Dave Wood, Olivia Basegio, Collin Ruffenach, Sheri Cain, Tom Cirtin, Elaine Wiley, and Cheri Clark made the following pages possible.
We would also like to thank Jordan Langille of Langille Design ( http://jordanlangille.com ) for providing the designs for the Whack-a-Cac game featured in Chapters 3 and 4 . His efforts have made the Game Center sample projects much more compelling.
The considerable amount of time spent working on this book was shouldered not only by us but also by our families and co-workers. We would like to thank everyone who surrounds us in our daily lives for taking a considerable amount of work off of our plates, as well as understanding the demands that a project like this brings.
About the Authors
Kyle Richter is the founder of Dragon Forged Software, an award-winning iOS and Mac Development Company, and co-founder of Empirical Development, a for-hire iOS shop. Kyle began writing code in the early 1990s and has always been dedicated to the Mac platform. He has written several books on iOS development, as well as articles on many popular developer blogs and websites. He manages a team of more than 20 full-time iOS developers and runs day-to-day operations at three development companies. Kyle travels the world speaking on development and entrepreneurship; currently he calls Key West his home, where he spends his time with his border collie Landis. He can be found on Twitter at @kylerichter.
1
UIKit Dynamics
iOS 7 introduced UIKit Dynamics, which provides realistic physics simulations that can be applied to UIViews. For many years developers have been incorporating realistic-feeling effects to sections of their apps such as swipeable cells and pull-to-refresh animations. Apple has taken a big step in iOS 7 to bring these animations into the core OS, as well as encourage developers to implement them at an aggressive rate.
The UIDynamicItem protocol, along with the dynamic items that support it, is a giant leap forward in user experience. It is now incredibly easy to add effects like gravity, collisions, springs, and snaps to interfaces to provide a polished feel to an app. The APIs introduced for dynamic items are simple and easy to implement, providing very low-hanging fruit to increase the user experience of an app.
Sample App
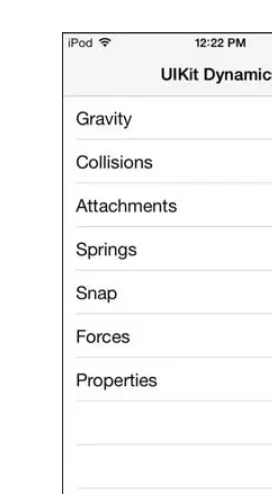
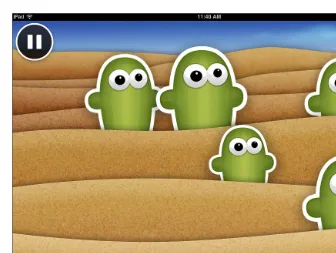
The sample app (shown in Figure 1.1 ) is a basic table demoing the various functions of UIKit Dynamics. Seven demos are presented in the app from gravity to properties. Each demo will be covered in order with a dedicated section. Besides the table view and basic navigation, the sample app does not contain any functionality not specific to UIKit Dynamics.
Although the sample app will run and perform in the iOS Simulator running iOS 7, the best performance is seen on physical devices. It is recommended that UIKit dynamic code be thor-oughly tested on devices before shipping.
Note
2 Chapter 1 UIKit Dynamics
Introduction to UIKit Dynamics
UIKit Dynamics is a new set of classes and methods that was first introduced to iDevices start-ing with iOS 7. In short, it provides an easy-to-implement method to improve user experience of apps by incorporating real-world behaviors and characteristics attached to UIViews. UIKit Dynamics is, in the simplest terms, a basic physics engine for UIKit; however, it is not designed for game development like most traditional physics engines.
Dynamic behavior becomes active when a new UIDynamicAnimator is created and added to a UIView. Each animator item can be customized with various properties and behaviors, such as gravity, collision detection, density, friction, and additional items detailed in the following sections.
There are six additional classes that support the customization of a UIDynamicAnimator item: UIAttachmentBehavior , UICollisionBehavior , UIDynamicItemBehavior ,
UIGravityBehavior , UIPushBehavior , and UISnapBehavior . Each of these items allows for specific customization and will result in realistic behavior and animation of the UIView to which they are attached.
3
Implementing UIKit Dynamics
Implementing UIKit Dynamics
Creating a new animation and attaching it to a view is accomplished using two lines of code. In this example self.view is now set up to use UIKit Dynamic behavior. Each specific dynamic item must be added to the animator using the addBehavior : method.
UIDynamicAnimator *animator = [[UIDynamicAnimator alloc] initWithReferenceView: self.view];
[ animator addBehavior:aDynamicBehavior];
Each UIDynamicAnimator is independent and multiple animators can be run at the same time. For an animator to continue to run, a reference to it must be kept valid. When all items associated with an animator are at rest, the animator is not executing any calculations and will pause; however, best practices recommend removing unused animators.
Lessons from Game Developers
Physics simulations are something that game developers have been working with for many years, and some hard lessons have been learned. Now that physics is spreading into the non-game world, there are some basic truths every developer can benefit from.
When adding physics to a game or an app, do so in small increments. Writing a dozen interact-ing pieces and tryinteract-ing to figure out where the bug lies is next to impossible. The smaller steps that are taken toward the end result, the easier the process will be to polish and debug.
In the physical world there are limits and boundaries often not addressed in computer simula-tions. In the classic computer game Carmageddon, released in 1997, the physics were based on an uncapped frame rate. When computers became faster, the frame rates increased signifi-cantly, creating variables in formulas that produced unexpected results. When applying any type of calculation into a physics engine, ensure that both min and max values are enforced and tested.
Expect the unexpected; when dealing with collisions, shoving 30 objects into an overlapping setup, things can go awry. UIKit Dynamics has some great catches in place to ensure that you cannot push objects through boundaries with tremendous applications of force, and collisions are handled rather gracefully. However, there will most certainly be edge cases and bugs when you’re dealing with many objects with complex interactions. The more that is going on with a physics engine, the more it needs to be tested and debugged; expect to see the laws of the universe toyed with in unexpected and unusual fashions.
Gravity
4 Chapter 1 UIKit Dynamics
place using UIGravityBehavior . This functionality, even prior to iOS 7, was often cloned and implemented by hand using timers and animations.
The following will set up a gravity effect on frogImageView that is a subview of self.view . First a new UIDynamicAnimator is created for the enclosing view that the animated view will appear in, in this example self.view . A new UIGravityBehavior object is created and initial-ized with an array of views that should have the gravity effect applied to them. The gravity behavior is then set; the example will apply a downward y-axis force of 0.1. When the behavior is configured, it is added to the UIDynamicAnimator using the addBehavior : method.
animator = [[ UIDynamicAnimator alloc] initWithReferenceView: self. view];
UIGravityBehavior* gravityBehavior = [[[ UIGravityBehavior alloc]
➥initWithItems:@[ frogImageView]] autorelease];
[gravityBeahvior setXComponent:0.0f yComponent:0.1f]; [ animator addBehavior:gravityBehavior];
Note
The dynamic item must be a subview of the reference view; if the item is not a subview, the animator will simply not provide any movement.
UIKit Dynamics uses their own physics system, jokingly referred to as UIKit Newtons. Although there is no direct correlation to standard formulas, they do provide a close approximation. A force of 1.0 equals roughly 9.80655 m/s 2 , which is the force of gravity on earth. To apply
gravity roughly 1/10th of that found on earth, 0.1 would be used. Gravity in UIKit Dynamics does not need to be specified as only a downward force; if a negative value is provided for the
yComponent , gravity will pull up. Likewise, gravity can be specified for the x-axis in the same fashion. Items also have a density property, which is discussed in more detail in the “Item Properties” section.
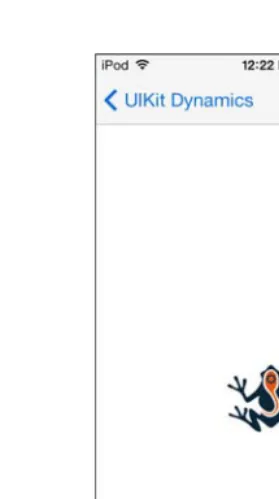
Running the sample code for gravity results in the imageView simply falling at roughly 1/10th the rate of earth gravity (shown in Figure 1.2 ) and completely sliding off the screen. Because there are no boundaries or collisions set, the object isn’t aware that it hit something that should cause it to stop falling, so it falls in essence forever.
Collisions
In the preceding section gravity was covered; however, the object that the gravity was applied to fell through the bottom of the screen and continued on its way into infinity. This is because no collision points were defined and the object had nothing to stop its descent.
5
Implementing UIKit Dynamics
Creating a UICollisionBehavior object is very similar to creating a UIGravityBehavior object. The object is initialized with the UIViews that should be affected, in this case two UIImageViews. In addition to the views, collision behavior also needs to be specified with one of three possible values. UICollisionBehaviorModeItems will cause the items to collide with each other. UICollisionBehaviorModeBoundaries will cause the items not to collide with each other but to collide with boundaries. Finally, UICollisionBehaviorModeEverything will cause the items to collide both with each other and with the boundaries.
For objects to interact with boundaries, those boundaries first need to be defined. The easiest boundary to define is set through a Boolean property on the UICollisionBehavior object called
translatesReferenceBoundsIntoBoundary . In the example this will use the bounds of
self.view . Boundaries can also be set to follow an NSBezierPath using the method addBound aryWithIdentifier:forPath: or based on two points using addBoundaryWithIdentifier: fromPoint:toPoint: .
animator = [[UIDynamicAnimator alloc] initWithReferenceView: self.view];
UIGravityBehavior* gravityBehavior = [[[ UIGravityBehavior alloc]
➥initWithItems:@[ frogImageView, dragonImageView]] autorelease];
[gravityBehavior setXComponent:0.0f yComponent:1.0f];
6 Chapter 1 UIKit Dynamics
UICollisionBehavior* collisionBehavior = [[[ UICollisionBehavior alloc]
➥initWithItems:@[ frogImageView, dragonImageView]] autorelease];
[collisionBehavior setCollisionMode: UICollisionBehaviorModeBoundaries];
collisionBehavior. translatesReferenceBoundsIntoBoundary = YES;
[ animator addBehavior:gravityBehavior]; [ animator addBehavior:collisionBehavior];
UICollisionBehavior also provides a delegate callback that conforms to the
UICollisionBehaviorDelegate protocol.
collisionBehavior. collisionDelegate = self;
The UICollisionBehaviorDelegate has four callback methods, two for beginning collisions and two for ended collisions. Each set of callbacks has one method that will identify the boundary hit and one that will not. All methods provide a reference to the object that has caused the callback method to fire. Collision began methods also provide a CGPoint to reference the exact area of contact. The sample code will update a label after it has detected that an object has been hit.
-( void)collisionBehavior:( UICollisionBehavior *)behavior
➥beganContactForItem:( id< UIDynamicItem>)item
➥withBoundaryIdentifier:( id< NSCopying>)identifier atPoint:( CGPoint)p {
if([item isEqual: frogImageView])
collisionOneLabel. text = @"Frog Collided"; if([item isEqual: dragonImageView])
collisionTwoLabel. text = @"Dragon Collided"; }
-( void)collisionBehavior:( UICollisionBehavior *)behavior
➥endedContactForItem:( id< UIDynamicItem>)item
➥withBoundaryIdentifier:( id< NSCopying>)identifier {
NSLog( @"Collision did end"); }
Attachments
7
Implementing UIKit Dynamics
The sample app builds on the work done in the “Collisions” section. Once again, two image views are used. A boundary collision is created and applied to the UIDynamicAnimator . A new
CGPoint is created and set to the reference point of the center of the frog image view. A new UIAttachmentBehavior object is created and initialized using initWithItem:attachedTo Anchor: . There are also additional initialization methods on UICollisionBehavior that allow specification of points or other objects. The collision and the attachment behavior are both added to the animator object.
animator = [[UIDynamicAnimator alloc] initWithReferenceView: self.view];
UICollisionBehavior* collisionBehavior = [[[ UICollisionBehavior alloc]
➥initWithItems:@[ dragonImageView, frogImageView]] autorelease];
[collisionBehavior setCollisionMode: UICollisionBehaviorModeBoundaries];
collisionBehavior. translatesReferenceBoundsIntoBoundary = YES;
CGPoint frogCenter = CGPointMake( frogImageView. center. x,
➥frogImageView. center. y);
self. attachmentBehavior = [[[ UIAttachmentBehavior alloc]
➥initWithItem: dragonImageView attachedToAnchor:frogCenter] autorelease];
[ animator addBehavior:collisionBehavior]; [animator addBehavior: self.attachmentBehavior];
These objects are now bound by an invisible connector the length equal to their initial distance. If the frog image view moves, the dragon image view will move with it holding onto the center point. However, the frog image view has no capability to move; to solve this, the sample app implements a simple pan gesture. As the frog image view is moved around the view, the center point is updated and the updated anchor point is set.
-( IBAction)handleAttachmentGesture:( UIPanGestureRecognizer*)gesture {
CGPoint gesturePoint = [gesture locationInView: self. view];
frogImageView. center = gesturePoint;
[ self. attachmentBehavior setAnchorPoint:gesturePoint]; }
During the movement, the collision boundaries are still in effect and override the desired behavior of the attachment. This can be demonstrated by pushing the dragon image into the boundaries of the view.
It is also possible to update the length property of the attachment view in order to change the distance the attachment gives to the two objects. The attachment point itself does not need to be the center of the attached object and can be updated to any offset desired using the
8 Chapter 1 UIKit Dynamics
Springs
Springs (shown in Figure 1.3 ) are an extension of the behavior of attachments. UIKitDynamics allows for additional properties to be set on UIAttachmentBehavior , frequency and damping.
Figure 1.3 A spring effect attaching the dragon image to the frog, which demonstrates using the effects of gravity as well as UIAttachmentBehavior damping and frequency.
The following section of the sample app adds three new properties after creating the UIAttachmentBehavior. The first, setFrequency , sets the oscillation or swing for the object. Next, setDamping evens out the animation peaks. The length is also adjusted for this example from its initial position. To better demonstrate these behaviors, gravity is added to this example.
animator = [[UIDynamicAnimator alloc] initWithReferenceView: self.view];
UICollisionBehavior* collisionBehavior = [[[ UICollisionBehavior alloc]
➥initWithItems:@[ dragonImageView, frogImageView]] autorelease];
UIGravityBehavior* gravityBeahvior = [[[ UIGravityBehavior alloc]
➥initWithItems:@[ dragonImageView]] autorelease];
CGPoint frogCenter = CGPointMake( frogImageView. center. x,
9
Implementing UIKit Dynamics
self. attachmentBehavior = [[[ UIAttachmentBehavior alloc]
➥initWithItem: dragonImageView attachedToAnchor:frogCenter] autorelease];
[ self. attachmentBehavior setFrequency:1.0f]; [ self. attachmentBehavior setDamping:0.1f]; [ self. attachmentBehavior setLength: 100.0f];
[collisionBehavior setCollisionMode: UICollisionBehaviorModeBoundaries];
collisionBehavior. translatesReferenceBoundsIntoBoundary = YES;
[ animator addBehavior:gravityBeahvior]; [ animator addBehavior:collisionBehavior]; [animator addBehavior: self.attachmentBehavior];
Moving the frog around the screen now results in the dragon hanging 100 pixels from the bottom and swinging from the effect of the attachment and gravity combined.
Snap
An item can be dynamically moved to another point in a view with a snapping motion. Snapping is a very simple behavior. In the sample app the action is tied to a tap gesture, and tapping anywhere on the screen causes the image to jump to that spot. Each UISnapBehavior is linked to a single item at a time, and during initialization an end point where the item should end up is specified. A damping property can also be specified to affect the amount of bounce in the snap.
CGPoint point = [gesture locationInView: self.view];
animator = [[ UIDynamicAnimator alloc] initWithReferenceView: self. view];
UISnapBehavior* snapBehavior = [[[ UISnapBehavior alloc]
➥initWithItem: frogImageView snapToPoint:point] autorelease];
snapBehavior. damping = 0.75f;
[animator addBehavior:snapBehavior];
Push Forces
UIKit Dynamics also allows for the application of force, called pushing. UIPushBehavior is slightly more complex to use than the previously covered behaviors, but it is fairly easy compared to most other physics engines. The sample uses a UICollisionBehavior object as in many of the previous demos. This ensures that the image view stays on the screen while push effects are applied.
10 Chapter 1 UIKit Dynamics
The sample app also features a reference in the form of a small black square in the center of the screen.
animator = [[UIDynamicAnimator alloc] initWithReferenceView: self.view];
UICollisionBehavior* collisionBehavior = [[[ UICollisionBehavior alloc]
➥initWithItems:@[ dragonImageView]] autorelease];
collisionBehavior. translatesReferenceBoundsIntoBoundary = YES; [ animator addBehavior:collisionBehavior];
UIPushBehavior *pushBehavior = [[[ UIPushBehavior alloc]
➥initWithItems:@[ dragonImageView]
➥mode: UIPushBehaviorModeInstantaneous] autorelease];
pushBehavior. angle = 0.0; pushBehavior. magnitude = 0.0;
self. pushBehavior = pushBehavior;
[animator addBehavior: self.pushBehavior];
If the code were to be run now, the image view would stay fixed on the screen since the push effect has no values associated with it. A new pan gesture is created and in its associated action a new value for magnitude and angle are calculated and applied. In the example an angle is calculated to determine where the push force is coming from. This is based on the angle from the center reference point. A distance is also calculated to apply increasing force. The result is that tapping outside of the black square will apply an amount of force in that direction to the image view. The farther away from the square, the more force is applied.
CGPoint point = [gesture locationInView: self.view];
CGPoint origin = CGPointMake( CGRectGetMidX( self. view. bounds),
➥CGRectGetMidY( self. view. bounds));
CGFloat distance = sqrtf( powf(point. x-origin. x, 2.0)+ powf(point. y-
➥origin. y, 2.0));
CGFloat angle = atan2(point. y-origin. y,point. x-origin. x); distance = MIN(distance, 100.0);
[ self. pushBehavior setMagnitude:distance / 100.0]; [ self. pushBehavior setAngle:angle];
[self. pushBehavior setActive:TRUE];
11
Implementing UIKit Dynamics
setXComponent:yComponent : can be used to specify a CGPoint to which the focus of the force will be applied.
There are two types of push force that can be applied, UIPushBehaviorModeContinuous and
UIPushBehaviorModeInstantaneous . When working with continuous push, the object accel-erates under the force, where as with instantaneous the force is immediately applied.
Item Properties
Dynamic items have a number of default properties set on them when they are created, and these properties can be heavily configured to customize their reactions to the physics engine. The sample app (shown in Figure 1.4 ) demonstrates modifying these properties for one image view while leaving the defaults in place for the other image.
Figure 1.4 Modifying properties on dynamic items to create a unique physics reaction applied under identical forces.
12 Chapter 1 UIKit Dynamics
animator = [[UIDynamicAnimator alloc] initWithReferenceView: self.view];
UIGravityBehavior* gravityBeahvior = [[ UIGravityBehavior alloc]
➥initWithItems:@[ dragonImageView, frogImageView]];
UICollisionBehavior* collisionBehavior = [[[ UICollisionBehavior alloc]
➥initWithItems:@[ dragonImageView, frogImageView]] autorelease];
collisionBehavior. translatesReferenceBoundsIntoBoundary = YES;
UIDynamicItemBehavior* propertiesBehavior = [[[ UIDynamicItemBehavior
➥alloc] initWithItems:@[ frogImageView]] autorelease];
propertiesBehavior. elasticity = 1.0f; propertiesBehavior. allowsRotation = NO; propertiesBehavior. angularResistance = 0.0f; propertiesBehavior. density = 3.0f;
propertiesBehavior. friction = 0.5f; propertiesBehavior. resistance = 0.5f;
[ animator addBehavior:propertiesBehavior]; [ animator addBehavior:gravityBehavior]; [ animator addBehavior:collisionBehavior];
Table 1.1 UIDynamicItem Properties and Their Descriptions
Property Description
allowsRotation A Boolean value that specifies whether the item will rotate as the result of forces applied; defaults to YES .
angularResistance A CGFloat from 0.0 to CGFLOAT_MAX that indicates angular damping; the higher the number, the faster rotation will slow down.
density A representation of density. Density is defaulted to 1.0 for a 100x100 object, or 2.0 for a 100x200 object. Adjustments to density affect the reactions of gravity and collisions.
elasticity Valid for ranges of 0.0 to 1.0 , indicating the amount of bounce an object has when colliding with other objects. 0.0 indicates no bounce, whereas
1.0 indicates that the entire force will be applied back into the bounce.
friction The linear resistance applied when two items slide across each other.
0.0 indicates no friction and 1.0 indicates strong friction; however, val-ues greater than 1.0 can be applied for additional friction.
resistance A linear resistance encountered in open space. Values of 0.0 to
13
Summary
In-Depth UIDynamicAnimator and
UIDynamicAnimatorDelegate
The beginning of this chapter introduced UIDynamicAnimator , and the samples have all used
addBehavior ; however, this class has much more power that can be leveraged. In addition to adding dynamic effects, they can also be removed either one at a time or as a group using
removeBehavior : and removeAllBehaviors . To get a list of all behaviors currently attached to a UIDynamicAnimator, the behaviors property can be used to return an array of behaviors.
It is also possible not only to poll whether the animator is running using the running property but also to determine the length of time using elapsedTime . The UIDynamicAnimator also has an associated delegate UIDynamicAnimatorDelegate . The delegate provides two methods to handle pausing and resuming. UIDynamicAnimator cannot be explicitly paused by the devel-oper. The animation effects are automatically paused when all items have come to a rest and are no longer moving. Any new effect that is applied will cause the items to begin moving and they will be moved back into the active state.
- ( void)dynamicAnimatorDidPause:(UIDynamicAnimator *)animator
UIKit Dynamics is an interesting topic not only from a development standpoint but also as to what it means for the direction of iOS in the future. Apple is making a very strong push to bring software into the real world. Interacting with an app should feel like interacting with the physical world. Users expect to see apps respond in the same way the world around them does. This is not new for Apple; one of the main selling features of the original iPhone was momen-tum scrolling, and they are now giving the tools to add that type of functionality to developers.
14 Chapter 1 UIKit Dynamics
Exercises
1. Modify the values throughout the sample app to see how changes to damping, frequency, gravity, density, friction, and resistance affect the way in which objects interact with each other and the enclosing view.
2
Core Location, MapKit,
and Geofencing
Maps and location information are some of the most useful features of iOS. They give apps the capa-bility to help users find their way with relevant, local information. Apps exist today to help users find locations for very specific needs, find roads and directions, and use specialized transportation services, and even to bring an element of fun to visiting the same locations over and over. With the addition of Apple’s new maps, some powerful new features have been added that developers can take advantage of to take their apps to the next level.
iOS offers two frameworks to assist with locations and maps. The Core Location framework provides classes that help the device determine its location and heading, and work with location-based informa-tion. The MapKit framework provides the user interface aspect of location awareness. It includes Apple Maps, which provides map views, satellite views, and hybrid views in normal 2D and a new 3D view. MapKit offers the capability to manage map annotations like pins, and map overlays for highlighting locations, routes, or other features on a map.
The Sample App
The sample app for this chapter is called FavoritePlaces. It allows users to collect favorite places and view them on a map, along with the device’s current location. Users can use Core Location to geocode, or find the latitude and longitude, for an address. In addition, it can notify users when they go within a radius that they set around a favorite location. The app also provides a special location (signified with a green arrow) that can be dragged around the map to pinpoint a desired next destination; when that arrow is dropped at a location it will automatically reverse-geocode the location to display the name and address of the location.
Obtaining User Location
16 Chapter 2 Core Location, MapKit, and Geofencing
to ensure that location services are enabled for the device before attempting to acquire a loca-tion. Once those requirements have been met, the app can start a location request and parse the result for usage once it is provided by Core Location. This section will describe all these steps in detail.
Requirements and Permissions
To use Core Location in an app, add the CoreLocation framework to the project target, and import the CoreLocation header as needed:
#import <CoreLocation/CoreLocation.h>
To use MapKit in an app, add the MapKit framework to the project target and import the MapKit header in any classes that need it:
#import <MapKit/MapKit.h>
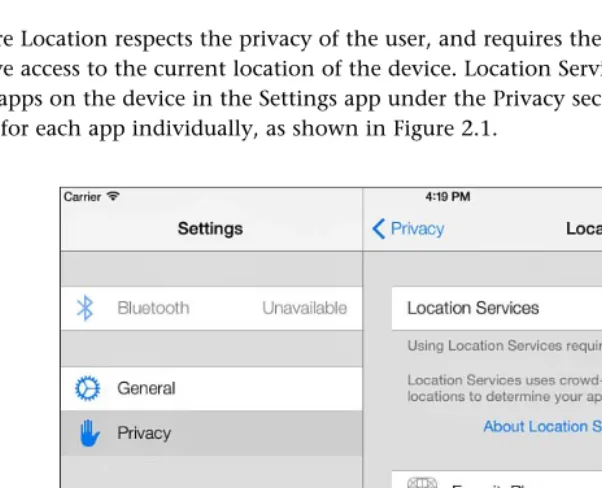
Core Location respects the privacy of the user, and requires the user to provide permission to have access to the current location of the device. Location Services can be turned on or off for all apps on the device in the Settings app under the Privacy section, and can be turned on or off for each app individually, as shown in Figure 2.1 .
17
Obtaining User Location
To request permission to use Location Services, the app needs to ask CLLocationManager to start updating the current location, or the app needs to enable the Shows User Location setting on an instance of MKMapView . If Location Services are turned off for the device, Core Location will prompt the user to turn on Location Services in Settings.app to allow the app to access the current location, as shown in Figure 2.2 .
Figure 2.2 FavoritePlaces sample app location services disabled alert.
If the location manager has not requested permission previously to get the device’s location, it will present an alert view to ask the user’s permission, as shown in Figure 2.3 .
Figure 2.3 FavoritePlaces sample app location permission request alert.
If the user taps OK, permission will be granted and the location manager will acquire the current location. If the user taps Don’t Allow, permission for the current location will be denied, and the CLLocationManager ’s delegate method for authorization status changes will be called in ICFLocationManager .
- ( void)locationManager:( CLLocationManager *)manager didChangeAuthorizationStatus:( CLAuthorizationStatus)status {
if (status == kCLAuthorizationStatusDenied ) {
[ self. locationManager stopUpdatingLocation ];
NSString *errorMessage =
18 Chapter 2 Core Location, MapKit, and Geofencing
NSDictionary *errorInfo =
@{NSLocalizedDescriptionKey : errorMessage }; NSError *deniedError =
[ NSError errorWithDomain : @"ICFLocationErrorDomain"
code : 1
userInfo :errorInfo];
[ self setLocationError:deniedError]; [ self getLocationWithCompletionBlock: nil]; }
if (status == kCLAuthorizationStatusAuthorized ) {
[ self. locationManager startUpdatingLocation ]; [ self setLocationError: nil];
} }
The sample app’s ICFLocationManager class uses completion blocks for location requests from the rest of the app to be able to easily handle multiple requests for the current location. The
getLocationWithCompletionBlock: method will process any completion blocks after a loca-tion is available or an error has occurred so that the calling logic can use the localoca-tion or handle the error as appropriate in the local context. In this case, the caller will present an alert view to display the location permission-denied error, as shown in Figure 2.4 .
Figure 2.4 FavoritePlaces sample app location permission denied alert.
If the user changes the authorization status for location services, either for the app specifically or for the device overall (as shown in Figure 2.1 ), a delegate method can be implemented to respond appropriately.
- ( void)locationManager:( CLLocationManager *)manager didChangeAuthorizationStatus:( CLAuthorizationStatus)status {
if (status == kCLAuthorizationStatusDenied ) {
19
Obtaining User Location
NSString *errorMessage =
@"Location Services Permission Denied for this app.
Visit Settings.app to allow.";
NSDictionary *errorInfo =
@{NSLocalizedDescriptionKey : errorMessage }; NSError *deniedError =
[ NSError errorWithDomain : @"ICFLocationErrorDomain"
code : 1
userInfo :errorInfo];
[ self setLocationError:deniedError]; [ self getLocationWithCompletionBlock: nil]; }
if (status == kCLAuthorizationStatusAuthorized ) {
[ self. locationManager startUpdatingLocation ]; [ self setLocationError: nil];
} }
In ICFLocationManager the method is implemented to display an error alert if the permission is denied, or to restart updating the current location and clear the last error if permission is granted.
Checking for Services
To directly determine whether location services are enabled for the device, there is a class method available on the CLLocationManager called locationServicesEnabled . if ([ CLLocationManager locationServicesEnabled ])
{
ICFLocationManager *appLocationManager = [ ICFLocationManager sharedLocationManager];
[appLocationManager. locationManager startUpdatingLocation ]; }
else
{
20 Chapter 2 Core Location, MapKit, and Geofencing
This can be used to customize how the app deals with having or not having the current loca-tion available. An app that deals with localoca-tions should gracefully handle when the user does not grant access to the current location, and give the user clear instructions for enabling access to the current location if desired.
Starting Location Request
When permission for location services has been granted, an instance of CLLocationManager can be used to find the current location. In the sample app, ICFLocationManager
provides a central class to manage location functionality, so it manages an instance of CLLocationManager for the app. In the init method of ICFLocationManager , a
CLLocationManager is created and customized for the desired location-searching approach.
[ self setLocationManager:[[ CLLocationManager alloc ] init ]];
[ self. locationManager
setDesiredAccuracy : kCLLocationAccuracyBest];
[ self. locationManager setDistanceFilter : 100.0f];
[self. locationManager setDelegate :self];
A CLLocationManager has several parameters that can be set to dictate how it manages the current location. By specifying the desired accuracy parameter, the app can tell the
CLLocationManager whether it is worthwhile to achieve the best accuracy possible at the expense of the battery, or whether a lower-level accuracy is preferred to preserve battery life. Using lower accuracy also reduces the amount of time necessary to acquire a location. Setting the distance filter indicates to the CLLocationManager how much distance must be traveled before new location events are generated; this is useful to fine-tune functionality based on changing locations. Lastly, setting the delegate for the CLLocationManager provides a place for custom functionality in response to location events and permission changes. When the app is ready to get a location, it asks the location manager to start updating the location.
ICFLocationManager *appLocationManager =
[ ICFLocationManager sharedLocationManager];
[appLocationManager. locationManager startUpdatingLocation ];
21
Obtaining User Location
- ( void)locationManager:( CLLocationManager *)manager didUpdateLocations:( NSArray *)locations
{
The location manager can deliver multiple locations in the array of locations provided. The last object in the array is the most recently updated location. The location manager can also return the last location the GPS was aware of very quickly before actually starting to acquire a location; in that case, if the GPS has been off and the device has moved, the location might be very inaccurate. The method will check the accuracy of the location and ignore it if the value is negative. If a reasonably accurate location has been found, the method will store it and execute completion blocks. Note that the location manager might call this method multiple times as the location is refined, and any logic here should work with that in mind.
- ( void)locationManager:( CLLocationManager *)manager didFailWithError:( NSError *)error
If the location manager failed to acquire a location, it will call the locationManager:didFail WithError: method. The error might be due to lack of authorization, or might be due to GPS or Wi-Fi not being available (in Airplane Mode, for example). The sample app implementation will tell the location manager to stop updating the current location if an error is encountered, will capture the location error, and will execute the completion blocks so that the code request-ing the current location can handle the error appropriately.
22 Chapter 2 Core Location, MapKit, and Geofencing
monitoring for it. A filter can optionally be set to prevent getting updates when changes are smaller than the number of degrees provided.
CLLocationDegrees degreesFilter = 2.0;
if ([ CLLocationManager headingAvailable ]) {
[ self. locationManager setHeadingFilter :degreesFilter]; [ self. locationManager startUpdatingHeading ];
}
Heading change events are then delivered to the locationManager:didUpdateHeading: delegate method.
- ( void)locationManager:( CLLocationManager *)manager didUpdateHeading:( CLHeading *)newHeading {
NSLog ( @"New heading, magnetic: %f", newHeading. magneticHeading);
NSLog ( @"New heading, true: %f",newHeading. trueHeading); NSLog ( @"Accuracy: %f",newHeading. headingAccuracy); NSLog ( @"Timestamp: %@",newHeading. timestamp); }
The new heading provides several pieces of useful information. It includes both a magnetic and a true heading, expressed in degrees from north. It provides an accuracy reading, expressed as the number of degrees by which the magnetic heading might be off. A lower, positive value indicates a more accurate heading, and a negative number means that the heading is invalid and there might be magnetic interference preventing a reading. The time stamp reflects when the reading was taken, and should be checked to prevent using an old heading.
Parsing and Understanding Location Data
When the location manager returns a location, it will be an instance of CLLocation . The
CLLocation contains several pieces of useful information about the location. First is the lati-tude and longilati-tude, expressed as a CLLocationCoordinate2D .
CLLocationCoordinate2D coord = lastLocation.coordinate;
NSLog ( @"Location lat/long: %f,%f",coord. latitude, coord. longitude);