Learning XNA 4.0
Aaron Reed
Learning XNA 4.0 by Aaron Reed
Copyright © 2011 Aaron Reed. All rights reserved. Printed in the United States of America.
Published by O’Reilly Media, Inc., 1005 Gravenstein Highway North, Sebastopol, CA 95472.
O’Reilly books may be purchased for educational, business, or sales promotional use. Online editions are also available for most titles (http://my.safaribooksonline.com). For more information, contact our corporate/institutional sales department: (800) 998-9938 or [email protected].
Editor: Courtney Nash Production Editor: Kristen Borg Copyeditor: Genevieve d’Entremont Proofreader: Kristen Borg
Indexer: Fred Brown
Cover Designer: Karen Montgomery Interior Designer: David Futato Illustrator: Robert Romano
Printing History:
December 2010: First Edition.
Nutshell Handbook, the Nutshell Handbook logo, and the O’Reilly logo are registered trademarks of O’Reilly Media, Inc. Learning XNA 4.0, the image of a sea robin fish, and related trade dress are trade-marks of O’Reilly Media, Inc.
Many of the designations used by manufacturers and sellers to distinguish their products are claimed as trademarks. Where those designations appear in this book, and O’Reilly Media, Inc., was aware of a trademark claim, the designations have been printed in caps or initial caps.
While every precaution has been taken in the preparation of this book, the publisher and author assume no responsibility for errors or omissions, or for damages resulting from the use of the information con-tained herein.
ISBN: 978-1-449-39462-2
[M]
To my mother and father, who, after shelling out $2,500 in the 1980’s for a sweet Compaq 286 with a 4-color monitor, 16k internal memory, a 5 1/4" floppy and no internal hard drive, didn’t yell at me when they came home and found that I’d taken
Table of Contents
Preface . . . xiii
1. What’s New in XNA 4.0? . . . 1
Revised Project Folder Structure 1
Develop Games for Windows Phone 7 Series 2
Graphics Profiles 2
Configurable Effects 4
Built-in State Objects 5
Scalars and Orientation 5
Revised Input API 5
Additional Audio API 6
Music and Picture Enumeration and Video Playback 6
Modified and Added Classes and Methods 6
Test Your Knowledge: Quiz 6
2. Getting Started . . . 7
System Requirements 7
Additional Resources 8
Installation 8
Creating Your First XNA Application 10
What You Just Did 13
Summary 13
Test Your Knowledge: Quiz 14
3. Fun with Sprites . . . 15
A Look Behind the Scenes 15
Game Development Versus Polling 18
Modifying Your Game 21
Adding a Sprite to Your Project 22
Loading and Drawing Your Sprite 25
Transparency and Other Options 28
Layer Depth 33
Let’s Move 36
Animation 38
Adjusting the Framerate 43
Adjusting the Animation Speed 44
What You Just Did 45
Summary 46
Test Your Knowledge: Quiz 46
Test Your Knowledge: Exercise 47
4. User Input and Collision Detection . . . 49
More Sprites 49
Keyboard Input 52
Mouse Input 54
Gamepad Input 56
Keeping the Sprite in the Game Window 59
Collision Detection 60
What You Just Did 65
Summary 65
Test Your Knowledge: Quiz 65
Test Your Knowledge: Exercise 66
5. Applying Some Object-Oriented Design . . . 67
Designing Your Classes 67
Creating a Sprite Class 68
Creating a User-Controlled Sprite Class 72
Creating an Automated Sprite Class 74
Game Components 77
Coding the SpriteManager 78
Cleaning Up 80
Making Them Move 83
What You Just Did 83
Summary 84
Test Your Knowledge: Quiz 84
Test Your Knowledge: Exercise 84
6. Sound Effects and Audio . . . 85
Using XACT 86
Implementing XACT Audio Files in Code 92
Using the Simplified API for Sound and Audio 94
Adding More Sound to Your Game 96
What You Just Did 100
Test Your Knowledge: Quiz 101
Test Your Knowledge: Exercise 101
7. Basic Artificial Intelligence . . . 103
The Turing Test 104
Creating Sprites at Random Intervals 104
Randomly Spawning Sprites 106
Irrelevant Objects 110
Creating a Chasing Sprite 112
Creating an Evading Sprite 117
What You Just Did 123
Summary 123
Test Your Knowledge: Quiz 124
Test Your Knowledge: Exercise 124
8. Putting It All Together . . . 125
Drawing 2D Text 126
Randomly Generating Different Sprite Types 132
Adding Some Variety to Your Sprites 133
Adding a Background Image 139
Game Scoring 140
Game States 147
Enabling/Disabling GameComponents 150
Game-Over Logic and the Game-Over Screen 153
Fine-Tuning Gameplay 161
Creating Power-Ups 164
What You Just Did 168
Summary 169
Test Your Knowledge: Quiz 169
Test Your Knowledge: Exercise 169
9. 3D Game Development . . . 171
Coordinate Systems 171
Cameras 173
Creating a 3D Camera 176
Drawing Primitives 178
Matrix Multiplication 183
Movement and Rotation 184
Backface Culling 187
More on Rotations 188
Even More Rotations 190
Primitive Types 191
Applying Textures 195
What You Just Did 198
Summary 199
Test Your Knowledge: Quiz 200
Test Your Knowledge: Exercise 200
10. 3D Models . . . 201
Using 3D Models 201
Setting Up the Project 202
Adding a Model to Your Project 205
Drawing a Model Using a BasicModel Class 206
Adding a Model Manager 210
Rotating Your Model 212
What You Just Did 214
Summary 215
Test Your Knowledge: Quiz 216
Test Your Knowledge: Exercise 216
11. Creating a First-Person Camera . . . 217
Components of a Moving 3D Camera 217
Moving in a First-Person Camera 221
Rotations in a First-Person Camera 224
Rotating a Camera in a Yaw 226
Rotating a Camera in a Roll 227
Rotating a Camera in a Pitch 228
Coding the Camera for the 3D Game 229
What You Just Did 233
Summary 233
Test Your Knowledge: Quiz 234
Test Your Knowledge: Exercise 234
12. 3D Collision Detection and Shooting . . . 235
Creating a Moving Enemy 235
Adding Some Game Logic 237
Firing Shots 246
3D Collision Detection and Bounding Spheres 251
Adding a Crosshair 253
Adding Sound 256
What You Just Did 262
Summary 262
Test Your Knowledge: Quiz 263
13. HLSL Basics . . . 265
HLSL Syntax 267
Dissecting a Sample HLSL Effect File 269
Applying an HLSL Effect in C# 277
Applying HLSL Using Textures 285
HLSL Effects: Creating a Negative 293
HLSL Effects: Blur 293
HLSL Effects: Grayscale 295
What You Just Did 296
Summary 296
Test Your Knowledge: Quiz 297
Test Your Knowledge: Exercise 297
14. Particle Systems . . . 299
Creating a Particle Engine 299
Adding a Particle Effect File 310
Adding Your Particle Engine to Your Game 312
Adding a Starfield 315
What You Just Did 320
Summary 321
Test Your Knowledge: Quiz 321
15. Wrapping Up Your 3D Game . . . 323
Adding a Splash Screen Game Component 323
Keeping Score 334
Adding a Power-Up 338
What You Just Did 343
Test Your Knowledge: Exercise 344
16. Deploying to the Xbox 360 . . . 345
Adding an Xbox 360 Device 345
Converting a Project to Run on the Xbox 360 349
Supporting Gamepad Input 351
Deploying to the Xbox 360 358
Xbox 360 Display Settings 360
The Title Safe Region 361
What You Just Did 363
Summary 363
Test Your Knowledge: Quiz 363
17. Developing for Windows Phone 7 . . . 365
Setting Up Your Windows Phone 7 Device 365
Registering for a Developer Account 366
Registering Your Windows Phone 7 Device 368
Unlocking Your Phone 369
Creating a Windows Phone 7 Project 370
Resources 372
Digging In 373
Screen Rotation and Resolution 378
More Model Classes 380
Adding a ModelManager 386
Finishing Details 391
What You Just Did 395
Summary 395
Test Your Knowledge: Quiz 395
18. Multiplayer Games . . . 397
Split-Screen Functionality 397
Network Game Development 406
Network Configurations 408
Writing an XNA Network Game 410
Modifying the Sprite Class 411
Modifying the UserControlledSprite Class 411
Coding Your Game1 Class 414
Adding Update Code 417
Updating While in the SignIn Game State 418
Updating While in the FindSession Game State 419
Updating While in the CreateSession GameState 422
Updating While in the Start Game State 422
Updating While in the InGame Game State 430
Updating While in the GameOver Game State 431
Adding Draw Code 432
Adding Biohazard Bombs of Insanity! 438
What You Just Did 444
Summary 445
Test Your Knowledge: Quiz 446
Appendix: Answers to Quizzes and Exercises . . . 447
Preface
I’ve taught DirectX and XNA game development courses at Neumont University for the past several years, and I’ve been repeatedly frustrated by my inability to find the right book for these classes. There are numerous books on the subject, but none that I felt fit the goals of my classes (introductory college-level game development courses targeted to an audience familiar with C#) or that presented the material in a style and sequence I felt was appropriate.
Many books required too much previous game or graphics development knowledge. Others assumed too little knowledge of nongame-related development concepts. Still others relied too much on third-party libraries, or presented the material in a sequence that would be counterintuitive to a reader who is new to game development.
I found myself jumping around from Chapter 3 in one book to Chapter 18 in another, then back to the original book for Chapter 7 and Chapter 9, and so forth, while filling in gaps with slides, code samples, and documents I created on my own.
Eventually, I decided to take the content I had developed for my XNA game develop-ment course and write some material on the subject for use in the classroom. Initially, I was going to simply create some papers and essays to give to the students. I then realized that a large audience outside of the university would probably benefit from the material as well. I contacted O’Reilly about the book, and the rest is history.
Through my experience teaching XNA game development, I have been able to deter-mine which points typically snag students and which points typically are easily grasped. I’ve also developed what I feel is a pretty straightforward way of presenting the material in a sequence that makes sense and is easy to follow. This book is designed to follow that sequence and to introduce concepts in a way that will help readers fully understand each individual topic.
Who This Book Is For
This book is meant to be a solid introduction to game development for somebody with basic knowledge of the .NET Framework and C# (or similar technologies). No previous XNA or other game or graphics development experience or knowledge is required.
How This Book Is Organized
This book introduces XNA game development concepts while walking the reader through the development of three different XNA games. Although most of the material generally applies to developing games for any of the available platforms, Chapters
16 and 17 focus on developing games for the Xbox 360 and Windows Phone 7, respectively.
The first portion of the book takes the reader through changes in XNA 4.0 and the development of a 2D game. Here are the chapters that compose this part:
Chapter 1, What’s New in XNA 4.0?
Takes the reader through the major changes in XNA 4.0 from previous versions.
Chapter 2, Getting Started
Walks you through a short introduction to XNA, the tools needed to develop games in XNA, and the installation of XNA Game Studio 4.0.
Chapter 3, Fun with Sprites
Introduces 2D sprites, transparency, sort order, movement, framerates, sprite sheets, and animation.
Chapter 4, User Input and Collision Detection
Covers user input from keyboards, mice, and Xbox 360 gamepads, as well as the implementation of collision detection.
Chapter 5, Applying Some Object-Oriented Design
Discusses and implements game components and applies an object-oriented class hierarchy to the design of your game.
Chapter 6, Sound Effects and Audio
Introduces the Microsoft Cross-Platform Audio Creation Tool (XACT) and the new simplified audio API as methods to add sound to your games on the PC, Xbox 360, and Windows Phone 7.
Chapter 7, Basic Artificial Intelligence
Explains the nature of the science of artificial intelligence and introduces basic artificial intelligence concepts. This chapter also walks through creating custom-ized derived classes within your class hierarchy to implement different behaviors for your sprites.
Chapter 8, Putting It All Together
The next part of the book walks the reader through the development of a 3D game for the PC. At the end of this section, the game is tweaked and deployed to the Xbox 360. Here are the chapters in this part:
Chapter 9, 3D Game Development
Discusses coordinate systems, cameras, and drawing primitive objects, as well as moving, rotating, and scaling objects in 3D space. Culling and texturing surfaces are also discussed.
Chapter 10, 3D Models
Introduces 3D models and discusses drawing, rotating, and moving 3D models in 3D space.
Chapter 11, Creating a First-Person Camera
Walks the reader through the creation of a first-person vector-based camera in 3D, which implements forward and backward movement, strafing, and rotation in yaw, pitch, and roll.
Chapter 12, 3D Collision Detection and Shooting
Delves into the code behind shooting a moving enemy, creating a shot object, moving it in 3D space, and handling collision detection in 3D using bounding spheres. A 3D crosshair HUD (Heads Up Display) and audio effects are also added to the game.
Chapter 13, HLSL Basics
Introduces High Level Shader Language (HLSL) syntax and implementation, as well as the code required to use HLSL effects in XNA. A number of image manip-ulation effects are implemented using HLSL.
Chapter 14, Particle Systems
Walks the reader through the implementation of a custom vertex and a particle used to create an explosion particle effect.
Chapter 15, Wrapping Up Your 3D Game
Fine-tunes the 3D game, with sections covering splash screens, game states, scor-ing, and power-ups.
Chapter 16, Deploying to the Xbox 360
Walks the reader through connecting an Xbox 360 to a PC and deploying to the Xbox 360. User input and screen resolution differences between the PC and the Xbox 360 are discussed.
This next part of the book walks you through creating a new game for Windows Phone 7:
Chapter 17, Developing for Windows Phone 7
Walks the reader through the creation of a new game for Windows Phone 7 while discussing key differences between developing for Windows Phone 7 and other platforms.
The last part of the book walks you through creating a network game in XNA. This part assumes knowledge of all previous chapters and comprises only one chapter, which concentrates on networking functionality in XNA while stepping through the creation of a new XNA game:
Chapter 18, Multiplayer Games
Introduces multiplayer concepts through split-screen functionality as well as net-working. Topics include network architectures, network states, communication via packets, and gamer services.
Finally, in the appendix, you’ll find the answers to the quizzes at the end of each chapter.
Support
My goal in writing this book is to help the reader gain a true understanding of and passion for game development in XNA. To that end, I’ll be supporting the book through my blog, which can be found at:
http://www.aaronreed.com/serenitynow/
On that website you’ll find the source code for the book, as well as other XNA-related content (and a fair bit of non-XNA-related content as well). Feel free to chime in on the forums with questions, comments, or even answers.
Conventions Used in This Book
The following typographic conventions are used in this book:
Italic
Used for emphasis, technical terms where they are defined, URLs, email addresses, filenames, file extensions, and pathnames
Constant width
Used for code samples, methods, functions, variables and their values, objects, and class names
Constant width bold
Used for emphasis in code samples
This icon signifies a tip, suggestion, or general note.
Using Code Examples
This book is here to help you get your job done. In general, you may use the code in this book in your programs and documentation. You do not need to contact us for permission unless you’re reproducing a significant portion of the code. For example, writing a program that uses several chunks of code from this book does not require permission. Selling or distributing a CD-ROM of examples from this book does require permission. Answering a question by citing this book and quoting example code does not require permission. Incorporating a significant amount of example code from this book into your product’s documentation does require permission.
We appreciate, but do not require, attribution. An attribution usually includes the title, author, publisher, and ISBN. For example: “Learning XNA 4.0, by Aaron Reed. Copy-right 2011 Aaron Reed, 978-0-449-39462-2.”
If you feel your use of code examples falls outside fair use or the permission given here, feel free to contact us at [email protected].
We’d Like to Hear from You
We have tested and verified the information in this book to the best of our ability, but you might find that features have changed or that we may have made a mistake or two (shocking and hard to believe as that may be). Please let us know about any errors you find, as well as your suggestions for future editions, by writing to:
O’Reilly Media, Inc.
1005 Gravenstein Highway North Sebastopol, CA 95472
800-998-9938 (in the United States or Canada) 707-829-0515 (international or local)
707-829-0104 (fax)
We have a web page for this book, where we list examples and any plans for future editions. You can access this information at:
http://oreilly.com/catalog/0636920013709/
You can also send messages electronically. To be put on the mailing list or request a catalog, send an email to:
To comment on the book, send an email to:
For more information about our books, conferences, Resource Centers, and the O’Reilly Network, see our website at:
http://www.oreilly.com
Safari® Books Online
When you see a Safari® Books Online icon on the cover of your favorite technology book, that means the book is available online through the O’Reilly Network Safari Bookshelf.
Safari offers a solution that’s better than e-books. It’s a virtual library that lets you easily search thousands of top tech books, cut and paste code samples, download chapters, and find quick answers when you need the most accurate, current information. Try it for free at http://my.safaribooksonline.com.
Acknowledgments
I explained what drove me to this madness in the first place at the beginning of this preface; that is, the book began from a need I had as an instructor to create a more comprehensive and straightforward way of teaching gaming and graphics. What has driven me to put together a second version of that book? In hindsight, I guess it was driven by some form of insanity. More than anybody, thanks go to my beautiful wife and for her never-ending support through all of this. Spending long nights in front of the keyboard and monitor isn’t the best way to keep a marriage going, but my wife puts up with a lot and has always been there for me. I love you so much! Thank you for always being there.
Thank you to my editor (Courtney Nash) and the technical reviewers of the book (Brett Beardall, Ryan Hair, Dan Waters, and others). Without your help, this book would be little more than the misguided ramblings of a boring computer science instructor. Uhh, well…it still might be just that, but either way, your help was invaluable.
what I was doing, I was shocked that they didn’t yell at me and make me fix all the mess I had just created. What thrilled me even more was that when I finished putting it all together and hooked up the stereo, my parents were as excited as I was when I played with the talking parrot program and blasted the audio from a Star Wars game throughout the house. Experiences like that fed my interest in computers, helped me put aside any fear of failure, and instilled in me a passion for building things with technology. Parents of teenagers in America could learn a lot from the example of my parents: embrace your children’s interest (in technology or otherwise), funnel it into productive projects (not just playing games), encourage them to stretch themselves, and celebrate their successes.
Finally, thank you to Kyle Whittingham and Chris Hill for making University of Utah football such a success. It has nothing to do with this book, but it does make me smile. (Utah 31, Alabama 17.)
CHAPTER 1
What’s New in XNA 4.0?
In this chapter, I review major changes that have been made in XNA 4.0. If you’re familiar with XNA 3.x or other versions, this is a great place to get started in this book. If you’re new to XNA, you should probably skip ahead to the next chapter. You won’t be missing out on anything, as all of the information covered in this chapter will be covered throughout the rest of the book.
Revised Project Folder Structure
The first thing you might notice when creating a game project in XNA 4.0 is that the structure of the solution has changed. In previous versions of XNA, the content pipeline picked up game content from a subfolder named Content, which was located within the game project you created, as seen in Solution Explorer (see Figure 1-1).
Figure 1-1. Sample XNA 3.x Solution
In XNA 4.0, the Content folder has been moved to a new project within your solution. The content project will be listed under the name GameProjectNameContent (with the name of your project replacing “GameProjectName”) and will be followed with the word “Content” in parentheses (see Figure 1-2).
Figure 1-2. Sample XNA 4.0 Solution
You’ll add all your game content (audio, textures, models, etc.) to the content project in the same way you added them to the content folder in XNA 3.x. You will also still use the same code to access the content from the content pipeline, just as you did in XNA 3.x. This move makes working with multiple versions of the same project (e.g., if you built a project for both Windows and Xbox 360) much more user friendly and less confusing.
Develop Games for Windows Phone 7 Series
Just as in previous versions of the XNA Framework, XNA 4.0 is designed for cross-platform development. Developers using XNA 4.0 can write games for Windows, Xbox 360, and now Windows Phone 7 Series. Not only that, but aside from some resource management and screen resolution issues, nearly 100% of the code written for any of those platforms will also work on the other platforms. This gives game developers incredible flexibility to easily create games for each platform.
To learn more about developing games for Windows Phone 7 Series, see Chapter 17.
Graphics Profiles
Framework supports development on a wide range of devices with different hardware capabilities. In previous versions of XNA, these hardware differences had to be dealt with at runtime, which often led to platform-dependent code. To help facilitate devel-opment on these different devices, XNA 4.0 introduces the concept of profiles. These profiles allow developers to target certain hardware devices by supporting a specific set of graphics API designated by the profile they choose.
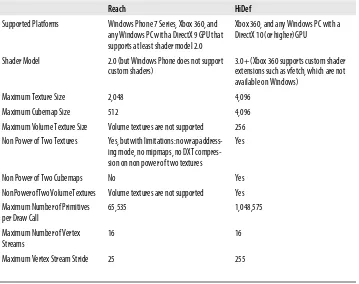
There are two profiles in XNA 4.0: Reach and HiDef. HiDef is designed for high-powered, top-of-the-line hardware, whereas Reach is designed to support a wider range of hardware devices. The Reach profile offers a limited set of graphic features and is a subset of the HiDef profile. When choosing to write a game using the Reach profile, you sacrifice some of the more powerful graphics API, but you’ll be assured that your game will work on a variety of devices (specifically Windows, Xbox 360 and Windows Phone), assuming those devices meet the minimum specifications for XNA 4.0. The HiDef profile is designed to support today’s most powerful graphic devices. You can use the HiDef profile to target Xbox 360 hardware as well as Windows-based com-puters with graphics cards supporting at least DirectX 10.
You can identify which profile is supported by your hardware at runtime by using the GraphicsAdapter.IsProfileSupported method. A chart illustrating more detail on
the differences between the Reach and HiDef profiles is shown in Table 1-1.
Table 1-1. XNA profile comparison
Reach HiDef
Supported Platforms Windows Phone 7 Series, Xbox 360, and any Windows PC with a DirectX 9 GPU that supports at least shader model 2.0
Xbox 360, and any Windows PC with a DirectX 10 (or higher) GPU
Shader Model 2.0 (but Windows Phone does not support custom shaders)
3.0+ (Xbox 360 supports custom shader extensions such as vfetch, which are not available on Windows)
Maximum Texture Size 2,048 4,096
Maximum Cubemap Size 512 4,096
Maximum Volume Texture Size Volume textures are not supported 256
Non Power of Two Textures Yes, but with limitations: no wrap address-ing mode, no mipmaps, no DXT compres-sion on non power of two textures
Yes
Non Power of Two Cubemaps No Yes
Non Power of Two Volume Textures Volume textures are not supported Yes
Maximum Number of Primitives per Draw Call
65,535 1,048,575
Maximum Number of Vertex Streams
16 16
Maximum Vertex Stream Stride 25 255
Reach HiDef
Index Buffer Formats 16-bit 16- and 32-bit
Vertex Element Formats Color, Byte4, Single, Vector2, Vector3, Vec-tor4, Short2, Short4, NormalizedShort2, NormalizedShort4
All of the Reach vertex element formats, plus HalfVector2, HalfVector4
Texture Formats Color, Bgr565, Bgra5551, Bgra4444, NormalizedByte2, NormalizedByte4, Dxt1, Dxt3, Dxt5
All of the Reach texture formats, plus Alpha8, Rg32, Rgba64, Rgba1010102, Single, Vector2, Vector4, HalfSingle, HalfVector2, HalfVector4; floating-point texture formats do not support filtering
Vertex Texture Formats Vertex texturing is not supported Single, Vector2, Vector4, HalfSingle, Half-Vector2, HalfVector4
Render Target Formats Call QueryRenderTargetFormat()
to find out what is supported
Call QueryRenderTargetFormat()
to find out what is supported
Multiple Render Targets No Up to 4; must all have the same bit depth; supports alpha blending and independent write masks per render target
Occlusion Queries No Yes
Separate Alpha Blend No Yes
Configurable Effects
In previous versions of XNA, the BasicEffect class was a very basic effect, implemented mainly to allow new game developers to build games without in-depth knowledge of complex shader code. The idea was that serious game developers would implement their own shaders and not rely on the BasicEffect class.
Much of that thinking had to change with the onset of Windows Phone 7, which does not support custom shaders. As a result, new configurable effects were added, available on both the Reach and HiDef profiles. These are:
Basic Effects
The BasicEffect class has been tweaked to include more pixel and vertex shaders
to support more realistic lighting and fog effects.
Dual Texture Effects
This effect allows you to use two different textures with independent texture co-ordinates. The two textures will be blended together for added complexity and detail.
Alpha Test Effects
Skinned Effects
This effect uses bones and weights to determine the vertex positions. The effect is powerful when used for animation and instancing.
Environment Map Effect
This effect uses textures and a cube map texture to shade objects based on the environment, reflecting the light from objects in the scene.
Built-in State Objects
Some of the state properties that were used in previous versions of XNA to modify the way scenes were drawn on the screen and the way the graphics device processes data sent to it by your game have been moved into state object classes. These classes are:
BlendState
Controls how color and alpha values are blended
DepthStencilState
Controls how the depth buffer and the stencil buffer are used
RasterizerState
Determines how to convert vector data (shapes) into raster data (pixels)
SamplerState
Determines how to sample texture data
Scalars and Orientation
Scalars in XNA 4.0 allow developers to write their games without worrying about the native resolution or screen orientation. The scalars will automatically scale your desired resolution to the resolution supported by the device on which you’re playing your game. This enhancement dramatically improves game performance.
Screen orientation is most important on Windows Phone 7 devices, which switch ro-tation from varieties of landscape to portrait and back when the device rotates. The scalars automatically map your game from one orientation to another, and rotate input such as touch panel input accordingly.
Revised Input API
The Microsoft.Xna.Framework.Input.Touch namespace contains classes that enable
ac-cess to multitouch input on Windows and Windows Phone devices. The namespace adds the TouchPanel class and TouchLocation class, which enable access to touch points
from input devices (such as the touch panel in Windows Phone 7 series devices).
Additional Audio API
Two new classes within the Microsoft.Xna.Framework.Audio namespace have been
added to improve audio support:
Microphone
This class provides methods, fields, and events for capturing audio with microphones
DynamicSoundEffectInstance
This class provides methods and events for playback of the audio buffer, giving developers the ability to play back synthesized or buffered audio
Music and Picture Enumeration and Video Playback
New audio support has been added to allow developers to use Uniform Resource Iden-tifiers (URI) to play songs and to select, edit, and publish photos.
Use the Song.FromUri method to construct a Song object based on the specified URI.
Use the MediaLibrary.SavePicture method to save images to the media library.
Modified and Added Classes and Methods
A fairly large number of classes and methods have been added or modified. You can view a full list on Microsoft’s MSDN website at http://msdn.microsoft.com/en-us/library/ bb417503.aspx.
Test Your Knowledge: Quiz
1. What significant change was made to the XNA folder structure in XNA 4.0? 2. What game platforms are supported with XNA 4.0?
3. What is the difference between the Reach and HiDef profiles in XNA 4.0? 4. Why do the Japanese tourists end up sleeping in a chest of drawers in Kramer’s
CHAPTER 2
Getting Started
Have you ever wanted to write your own video game? I’ll assume that because you’re reading this book, the answer to that question is yes. (Unless, of course, you’re reading this book for its sheer literary goodness, in which case, carry on.) Like many kids, my interest in building games grew the more I played video games. I would spend hours on the computer. It started with Space Invaders, Asteroids, and Combat on the Atari 2600. I then became fascinated by the rich storyline of King Graham of Daventry in Roberta Williams’ King’s Quest series, and my brother and I destroyed several key-boards trying to beat Bruce Jenner in Decathlon. But I reached a point where playing the game wasn’t enough. I wanted to do more; I wanted to actually build the games. I believe part of what separates a software developer from a software user is that curiosity, a desire to look under the covers and figure out what makes something tick.
For those of us with that innate curiosity and desire to write video games, Microsoft’s XNA game development framework is everything we’ve ever hoped for. With the straightforward layout of the framework and the power it presents to the developer, writing games for the PC has never been easier. On top of that, XNA 4.0 enables de-velopers to develop their own games for the Xbox 360 and Windows Phone 7. Never before has access to software development kits targeting next-gen consoles or the latest handheld media devices been so readily available.
I’m sure you’re ready to get started and begin building the next great game, so let’s get right to it. This first chapter will help you get everything installed so you can dive in and start developing in XNA 4.0.
System Requirements
This book uses XNA Game Studio 4.0, which is an integrated development environ-ment (IDE) extension to Microsoft’s Visual Studio for developing games in XNA. XNA Game Studio 4.0 uses the XNA Framework 4.0, which provides developers with a skeleton XNA game to begin with, and the ability to customize and extend that game in order to create their own games in XNA.
XNA Game Studio 4.0 runs on multiple versions of Microsoft Visual Studio 2010. To install it, you must first install either Visual Studio 2010 Standard Edition or higher (with C# language support installed), or Visual C# 2010 Express Edition.
Visual C# 2010 Express Edition is available at no cost from Microsoft at http://www .microsoft.com/express/vcsharp/. It’s a great way to get started in XNA if you don’t have a license for one of the other versions.
Throughout this book, I’ll be using Visual Studio 2010 Professional Edition. The screenshots should look the same (or at least similar) across versions, but you should be aware of the version used to create these examples in case there are discrepancies. With XNA 4.0, developers can target the following platforms for their games: Windows Vista, Windows 7, Xbox 360, and Windows Phone 7. To run XNA games on Windows, you’ll need a graphics card that supports a WDDM 1.1 driver and DirectX 10 or later. A limited API is supported for graphics cards supporting DirectX 9 and at least shader model 2.0.
XNA Game Studio 4.0 is available for download at no charge through the XNA Crea-tor’s Club Online at http://creators.xna.com/en-US/downloads.
Additional Resources
In addition to this book, you may want to check out the Microsoft Creator’s Club Online website. The Creator’s Club website is packed full of tutorials, code samples, and other resources to get you started in XNA.
Also, if you’re a student, you may want to look at DreamSpark. DreamSpark is a Mi-crosoft initiative that allows students access to professional versions of Visual Studio and other design and development tools at no cost.
Installation
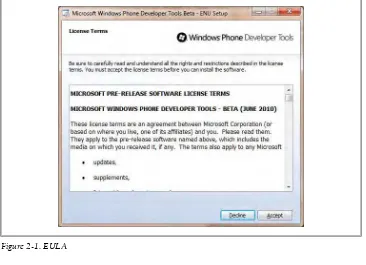
After you’ve installed one of the versions of Visual Studio 2010 mentioned previously, install XNA Game Studio 4.0. The setup for XNA Game Studio is fairly straightforward, but I’ll walk you through it here. At the EULA screen (Figure 2-1), carefully read the end-user license agreement and click Accept.
Next, click the Install Now button, as shown in Figure 2-2.
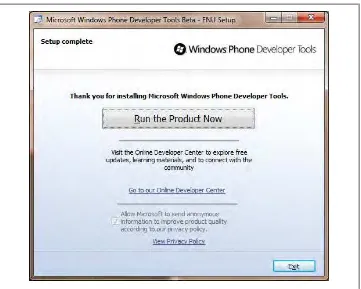
If necessary, the installation will then proceed to download any required resources to complete the installation, and will then automatically install Game Studio 4.0 and the Windows Phone Developer Tools.
Figure 2-1. EULA
Figure 2-2. Welcome
Figure 2-3. Setup complete
Creating Your First XNA Application
Now that you have XNA Game Studio 4.0 installed, it’s time to create your first XNA application. In Visual Studio, select File→New→Project. Under “Installed Templates” on the left side of the window, select Visual C#→XNA Game Studio 4.0.
On the right side of the window, you’ll notice several different options. In this case, you’ll want to create a Windows Game (4.0) project. Name the project Collision, select the directory in which you want the project saved (creating the project in the default location is perfectly fine), and click OK (see Figure 2-4).
Figure 2-4. New project creation screen
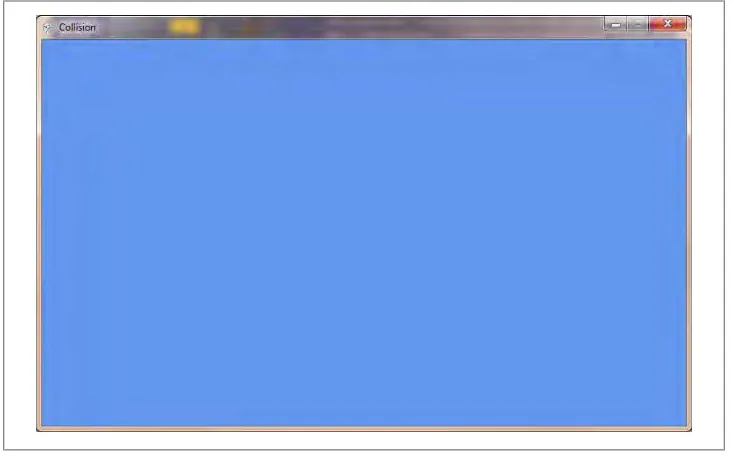
Figure 2-5. Running your Collision project
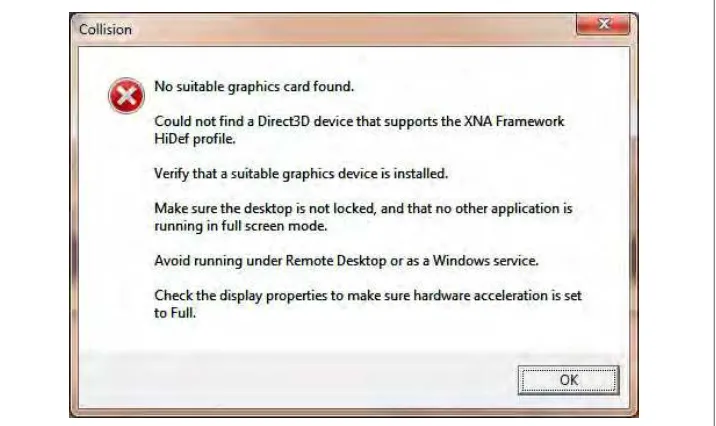
Note that if you receive the error message shown in Figure 2-6 instead of the game window, you either have a graphics card that doesn’t support DirectX 10 or you need to update the drivers for your graphics card. If your graphics card supports DirectX 9 and shader model 2.0, you can adjust your XNA game profile to use a limited API set, which will allow you to develop games using your current graphics card. To adjust the game profile, right-click your Collision project in Solution Explorer and select Proper-ties. Set the Game profile to use “Reach” rather than “HiDef”, as shown in Fig-ure 2-7. After setting the profile to “Reach”, run your game again, and if your graphics card meets the minimum specs, you should see the game window. Also note that when creating a project for Windows Phone 7, the game profile defaults to Reach. When creating a project for Windows or Xbox 360, it defaults to HiDef.
Figure 2-6. “No suitable graphics card found” error
Figure 2-7. Reach profile
What You Just Did
Now you’re ready to really get your hands dirty and dive into building your first game. But first, let’s review what you accomplished in this chapter:
• You installed XNA Game Studio 4.0 and configured your machine for XNA development.
• You created and ran your first XNA project.
Deploying to the Xbox 360 or Windows Phone 7
If you’re chomping at the bit to dive into Xbox 360 or Windows Phone 7 development, you might want to peek ahead at Chapter 17 for information on deployment to Win-dows Phone 7 or Chapter 16 for deployment to the Xbox 360. Because nearly all of the code you write for the PC is directly portable to these platforms, this book in general covers XNA development on the PC. Chapters 16 and 17 cover specific issues you’ll need to consider when targeting each of those platforms.
Summary
• XNA is a powerful framework that facilitates game development on the PC, the Xbox 360, and Windows Phone 7.
• To develop games in XNA, you need to install Visual Studio 2010 Standard Edition or higher, or Visual C# 2010 Express Edition. You must also install XNA Game Studio 4.0.
• XNA development makes us all feel a little bit warmer inside.
Test Your Knowledge: Quiz
CHAPTER 3
Fun with Sprites
In the previous chapter, I mentioned that there was actually a lot happening behind the scenes of the simple blue-screen game you built. Let’s take a more in-depth look at that code and see what’s actually going on. To start, open the game project that you created in Chapter 2.
A Look Behind the Scenes
The program.cs file is pretty straightforward. Your Main method, which creates a new
object of type Game1 and executes its Run method, is located in this file.
The real guts of your game lie in the Game1.cs file. The code for that file will look something like this:
using System;
using System.Collections.Generic; using System.Linq;
using Microsoft.Xna.Framework; using Microsoft.Xna.Framework.Audio; using Microsoft.Xna.Framework.Content; using Microsoft.Xna.Framework.GamerServices; using Microsoft.Xna.Framework.Graphics; using Microsoft.Xna.Framework.Input; using Microsoft.Xna.Framework.Media;
namespace Collision {
/// <summary>
/// This is the main type for your game /// </summary>
public class Game1 : Microsoft.Xna.Framework.Game {
GraphicsDeviceManager graphics; SpriteBatch spriteBatch;
public Game1() {
graphics = new GraphicsDeviceManager(this); Content.RootDirectory = "Content";
}
/// <summary>
/// Allows the game to perform any initialization it needs to before /// starting to run. This is where it can query for any required /// services and load any non-graphic-related content. Calling /// base.Initialize will enumerate through any components /// and initialize them as well.
/// </summary>
protected override void Initialize() {
// TODO: Add your initialization logic here
base.Initialize(); }
/// <summary>
/// LoadContent will be called once per game and is the place to load /// all of your content.
/// </summary>
protected override void LoadContent() {
// Create a new SpriteBatch, which can be used to draw textures. spriteBatch = new SpriteBatch(GraphicsDevice);
// TODO: use this.Content to load your game content here }
/// <summary>
/// UnloadContent will be called once per game and is the place to unload /// all content.
/// </summary>
protected override void UnloadContent() {
// TODO: Unload any non-ContentManager content here }
/// <summary>
/// Allows the game to run logic such as updating the world, /// checking for collisions, gathering input, and playing audio. /// </summary>
/// <param name="gameTime">Provides a snapshot of timing values.</param> protected override void Update(GameTime gameTime)
{
// Allows the game to exit
// TODO: Add your update logic here
base.Update(gameTime); }
/// <summary>
/// This is called when the game should draw itself. /// </summary>
/// <param name="gameTime">Provides a snapshot of timing values.</param> protected override void Draw(GameTime gameTime)
{
GraphicsDevice.Clear(Color.CornflowerBlue);
// TODO: Add your drawing code here
base.Draw(gameTime); }
} }
In this code you’ll notice that a couple of class-level variables are provided automati-cally, as well as a constructor for Game1 and five other methods. The first class-level
variable is of the type GraphicsDeviceManager. This is a very important object because it provides you, as a developer, with a way to access the graphics device on your PC, Xbox 360, or Windows Phone 7 device. The GraphicsDeviceManager object has a
prop-erty called GraphicsDevice that represents the actual graphics device on your machine. Because that graphics device object acts as a conduit between your XNA game and the graphics card on your machine (or more accurately, the Graphics Processing Unit, or GPU, on the graphics card), everything you do on the screen in your XNA games will run through this object.
The second variable is an instance of the SpriteBatch class. This is the core object you’ll
be using to draw sprites. In computer graphics terms, a sprite is defined as a 2D or 3D image that is integrated into a larger scene. 2D games are made by drawing multiple sprites in a scene (player sprites, enemy sprites, background sprites, etc.). You’ll be using this concept and drawing sprites of your own throughout this chapter.
The Initialize method is used to initialize variables and other objects associated with
your Game1 object. Your graphics device object will be instantiated at this point and can be used in the Initialize method to help you initialize other objects that depend on
its settings. You’ll use this method to initialize score values and other such items in later chapters in this book.
The LoadContent method is called after the Initialize method, as well as any time the graphics content of the game needs to be reloaded (e.g., if the graphics device is reset due to the player changing the display settings, or something like that). The
LoadContent method is where you will load all graphics and other content required by your game, including images, models, sounds, and so on. Again, as your current project doesn’t really do anything exciting, there isn’t much happening in this method.
After the LoadContent method finishes, the Game1 object will enter into something
known as a game loop. Almost all games use some form of game loop, regardless of whether they are written in XNA. This is one area where game development differs from typical application development, and for some developers it can take a bit of getting used to.
Essentially, a game loop consists of a series of methods that are called over and over until the game ends. In XNA, the game loop consists of only two methods: Update and Draw. For now, you can think of the game loop in these terms: all logic that affects the
actual game play will be done in the Update or the Draw method. The Draw method is
typically used, unsurprisingly, to draw things. You should try to do as little as possible in the Draw method other than draw your scene. Everything else needed to run your game (which eventually will involve moving objects, checking for collisions, updating scores, checking for end-game logic, etc.) should take place in the Update method.
Game Development Versus Polling
Another key difference between game development and typical application develop-ment is the concept of polling versus registering for events. Many nongame applications are written solely for events driven by users. For example, if you were writing a widget-naming module for some system, you might build a screen that asks the user for the name of a widget and that has OK and Cancel buttons. Regardless of the language in which the application is written, typically it won’t do anything until the user presses the OK or the Cancel button. When the user hits either button, the system will fire an event that the application will catch. That is, the application will wake up and do something only when the user tells it to do so by sending it an event indicating that one of those buttons has been pressed.
In contrast, game development is driven by polling for events, rather than waiting to hear that an event has taken place. Instead of the system telling the game that the user has moved the mouse, for example, your game will have to ask the system whether the mouse has moved. In the meantime, the application is always performing actions, re-gardless of user input.
Let’s say you develop a game where a wizard named Jimmy (yes, there’s a big market for Jimmy the Wizard games…) tries to escape from the clutches of an evil pelican warlord (that’s right, pelican warlords—scary stuff!). You’ll have to account for user events such as the player moving Jimmy to the left or making Jimmy cast an antipelican wing-breaking spell. But rather than XNA telling you that the player has performed these actions via some event, you need to instead poll the input devices (mouse, key-board, gamepad, etc.) to check for changes in input.
regardless of any event caused by the player, and the game will be responsible for con-stantly changing the position of that enemy object without subscribing to any event. That’s the main reason for having a game loop: it provides a way for a game to always be doing something, regardless of what the player is doing.
Of course, much more could be going on than just moving the enemy around the screen. What if the pelican warlord can throw some form of antiwizard bombs in the air? There might be 1, 2, 5, 50, or more bombs flying through the air that need to be moved constantly. You’d also have to constantly check to see whether those bombs hit any-thing and react accordingly. And what if the player never moves Jimmy, and the pelican warlord catches him? Something should happen in that situation. On top of that, maybe you’ve set a timer and Jimmy has to escape from the pelican warlord within three minutes. Now you also have some type of timer to keep track of, and some logic to perform if the timer expires or if Jimmy escapes before that happens. In game devel-opment, there is always something happening (usually a lot of things), and you’re con-stantly updating animations, moving objects, checking for collisions, updating scores, checking for end-of-game logic, and so on.
In the hypothetical widget-naming application, it would be somewhat difficult to con-stantly check for some nonuser-generated event, but in XNA development, the method for doing so is built into the application architecture in the form of the game loop. All of these tasks are handled within the Update method of the game loop, and the scene
is drawn in the Draw method of the game loop.
In reality, all applications are built with loops that function in similar ways to a game loop. Windows itself uses a messaging and events system that constantly loops and lets applications know when they need to repaint themselves and perform other functions. Access to these loops is hidden by default, however, because most applications don’t require access to such nonuser-driven events.
OK, let’s get back to the code we were looking at previously. You’ll notice that in the
Update method there are a couple of lines of code that tell the game to exit when the
player presses the Back button on his gamepad: if (GamePad.GetState(PlayerIndex.One).Buttons.Back == ButtonState.Pressed)
this.Exit( );
This is how the game shuts down on the Xbox 360 or in Windows when an Xbox 360 controller is being used (otherwise, you can click the red X on the window to close it or use Alt-F4 to shut down the application).
As mentioned earlier, the Update method is where you update everything to do with the
game. You can update the positions of items on the screen, scores, animation sequences and so on. You’d also check for user input, detect collisions, and adjust any artificial intelligence (AI) algorithms in your Update method.
These changes to the game that are checked for and acted upon in the Update method
often correlate to what is known as a game state. Game state is a very important concept; it’s a way for a game to know what is currently happening in that game. Games typically have several drastically different states, such as showing a splash screen versus actual gameplay versus displaying end-game screens. There may also be more subtle changes in state, such as the user receiving some form of power-up that makes her invincible for a time or some other change in the game behavior. Typically, you’ll modify game states in the Update method and then use those states in the Draw method to draw
different images, scenes, or other information connected to that particular state. The Draw method is where you take all of the objects in your game and draw them on
the screen itself, using the graphics device object mentioned earlier. In your current application, the only thing in the Draw method is a line of code that uses the graphics
device object to clear the display and set the color to CornFlowerBlue (we’ll talk about
that in more depth momentarily).
Figure 3-1 shows the lifecycle of an XNA game, complete with the Update and Draw
methods forming a game loop.
Figure 3-1. Lifecycle of an XNA game
Notice that there are two possible outcomes from the Update method: either it will
continue in the game loop and the Draw method will be called or, if the game is over, it will exit the game loop and the UnloadContent method will be called. The game loop
ends when you call the Game class’s Exit method, just as your game does by default
when the user presses the Back button on the Xbox 360 controller. The game will also exit the game loop if the player presses Alt-F4 or hits the red X button to close down the game window.
time or when the player presses some key that you determine, the game will actually exit. That may seem like a lot of work right now and may be somewhat confusing, but don’t stress about it just yet. You’ll be doing that sort of thing throughout this book, and soon you’ll understand exactly how to make it happen.
Once the game exits the game loop, UnloadContent is called. This method is used to
unload any content loaded in the LoadContent method that requires special unload handling. Typically, XNA (like .NET) will handle all your garbage collection for you, but if you’ve modified memory in some object that requires special handling, the
UnloadContent method will allow you to take care of that here.
Modifying Your Game
All right, enough talk. You’re itching to get into game development and ready to put something cool into your game. Let’s make it happen.
Take a look at your Draw method. Currently, the method contains the following code:
protected override void Draw(GameTime gameTime) {
GraphicsDevice.Clear(Color.CornflowerBlue);
// TODO: Add your drawing code here
base.Draw(gameTime); }
The first thing to notice here is the parameter that your Draw method receives. The
parameter is of the type GameTime and represents the time that has passed during the
execution of your game. Why do you need a variable keeping track of time? Because computers do not all run at the same speed. This variable helps you determine when animations and other events should happen based on actual game time rather than processor speed. The gameTime variable will be used throughout this book to gauge things such as framerate, animations, sounds, and other effects. The same parameter is also passed into the Update method, because many of the functions that control those
effects need to be performed in the Update method rather than the Draw method.
At the end of the method, you call the Game1 object’s base Draw method, which is es-sential in order to get cascading calls to Draw methods in GameComponents and other
objects. That might not make sense to you now, but be assured that you want the
base.Draw call in the code, and you should not remove it.
Finally, let’s look at the call to Clear using the GraphicsDevice property of the graph ics object. Again, this property represents the actual graphics device on your PC, Xbox
360, or Windows Phone 7 device and allows you to draw different objects on the screen. The Clear method here actually erases everything on the screen and covers the screen
with the color specified (in this case, CornFlowerBlue). Change the color to something
like Color.Red and run your game by selecting Debug→Start Debugging. You’ll see the
same window as before, but now the background color in the window will be red. Remember when I mentioned that the boring blue screen was actually doing quite a bit behind the scenes? This is what I was talking about. While you see a boring blue (or now, red) screen, XNA is working its tail off to give that screen to you. It’s running through its game loop 60 times per second, erasing everything on the screen and paint-ing it red.
In addition, it’s also calling the Update method 60 times per second and checking to see
whether the Back button on a connected Xbox 360 controller has been pressed. That may not seem like a lot, but XNA is really cruising—and the best part about it is that the game is all set up and ready for you to customize.
So, if the game loop is running at 60 times per second and calling both Update and Draw, why do you want to clear the screen every single time? Although it may sound
inefficient to clear the screen and redraw the entire scene and all objects for each new frame, it is far more efficient to do that than the alternative, which would be to try to keep track of everything that moves in a scene from one frame to the next, draw the moved items in their new locations, and draw whatever was behind the object previ-ously in the location from which the object has moved. If you were to remove the
Clear call, XNA would not erase the screen before drawing each frame, and will create
some unexpected results.
Frames and Framerates
What’s a frame? As mentioned previously, by default, XNA will clear the screen and redraw the scene every time Draw is called. A scene that results from one of these Draw
calls is referred to as a frame. You can think of a 2D game in XNA as a cartoon flipbook, where you draw a character on one page and then the same character, moved slightly, on the next page, and so forth, so that when you flip through the book the character gives the illusion of moving. XNA does exactly the same thing. Every 16 milliseconds (or 60 times per second), the screen is cleared and a new scene is drawn. When that new scene is drawn with a character in a slightly different position, it gives the illusion that the character is animated.
Multiple frames make up an animation in a game, and the number of frames drawn per second represents something called the framerate for the game (e.g., 60 fps = 60 frames drawn every second).
Adding a Sprite to Your Project
files, .bmp files, .png files, and other formats, and converts them during compilation to an internal format that’s friendly to XNA. It also does similar things with other types of resources, such as sound files, 3D models, fonts, etc., which will be explored later in this book. A great benefit of the XNA Framework is that it takes a lot of the guesswork out of importing different file types. If you put an image file into your game and the content pipeline is able to recognize it during compilation, you don’t have to worry about the format of the image. (We’ll talk more about the content pipeline in later chapters.)
Download the source code for this chapter and place it somewhere on your PC’s hard drive. You’ll need to do this so that you can access the images that you’ll be adding to your project throughout the rest of this chapter.
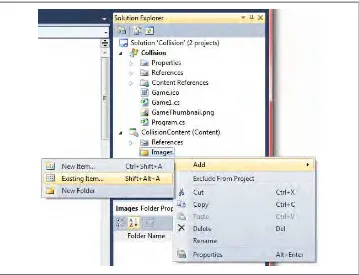
Open Visual Studio’s Solution Explorer and take a look at your solution. You’ll see two projects within your solution: a solution named Collision and one named Collision-Content. All resources you use in your game (images, sounds, models, etc.) should be added to your solution in the project named CollisionContent. Because I’m an organi-zation junkie, I recommend creating a subfolder within the CollisionContent project for each content type (images, sounds, etc.) and adding each resource to the appropriate folder. To begin, create a new folder within the CollisionContent project by right-clicking that project and selecting Add→New Folder. Name the new folder Images. Next, right-click the CollisionContent\Images folder in Solution Explorer and select Add→Existing Item (see Figure 3-2).
In the file search dialog that opens, navigate to the logo.png file within the source code you downloaded for this chapter. The file will be located in the BasicSprite \Collision\CollisionContent\Images folder. Once you’ve selected an image file, you’ll see that item within the Content\Images folder in your Solution Explorer. It will also have been copied to your own <Solution>\CollisionContent\Images directory on your hard drive.
Building your solution at this point (click Debug→Build Solution) will cause the content pipeline to attempt to compile the image file you just added. If you have no build errors, this means the content pipeline recognized the format of the image and was able to convert it to an XNA internal format, and XNA is ready to load and use your image. The content pipeline uses an asset name to access content resources. Another way of verifying that your image file is recognized by the content pipeline is to view the prop-erties on the newly added item by right-clicking the item in Solution Explorer and selecting Properties, as shown in Figure 3-3.
As you can see in Figure 3-3, the default asset name of the logo.png file that you added is logo, or the name of the file without the extension. By default, all asset names will
be the name of the file the asset represents without the file extension.
Figure 3-2. Adding an image to your solution
If you see the Asset Name property in the Properties window, you’ll know that the
content pipeline recognized your image. While you can change the asset names for your resources, the asset names in your project need to be unique. However, asset names need to be unique only within each content folder. This is another benefit of using subfolders within the CollisionContent project to organize resources—you can have multiple resources with the same asset name, as long as they are in different folders under the CollisionContent project. This may sound like a bad idea that will only com-plicate things, but it’s actually pretty common and very helpful. For example, you may have a font, an effect file, and an image that are all used for an explosion, and it would actually makes things less complicated if you could name them all “Explosion” while keeping them in separate directories dedicated to resources of their respective types. In Figure 3-3, you may also have noticed two properties below Asset Name: Content Importer and Content Processor. The fact that these properties exist and that they are
set to Texture - XNA Framework is another sign that the content pipeline has recognized the image that you’ve added to the project; they are marked as ready to be processed by the content pipeline as texture objects. A texture in computer graphics refers to a 2D image that will typically be applied to a surface of some object. We’ll be doing exactly that with some image files when we get to the 3D section of this book, but for now we’ll be drawing these textures directly onto the screen in a 2D game.
Loading and Drawing Your Sprite
Now that you have an image loaded into your solution that is recognized by the content pipeline, you’re ready to draw it on the screen. But before you can access them in code, resources need to be loaded from the content pipeline into variables that you can use to manipulate them.
The default object used to store an image is Texture2D. Go ahead and add a Texture 2D variable to your game in the Game1.cs file near the variable declarations for your
GraphicsDeviceManager and SpriteBatch:
Texture2D texture;
Now you’ll need to load the actual image file into your Texture2D variable. To access
data from the content pipeline, you use the Content property of the Game class. This property is of the type ContentManager and provides access to all objects loaded in the
content pipeline. The ContentManager class has a Load method that will let you load
content into different XNA object formats.
As mentioned previously, all loading of graphics, sounds, and other content resources should be done within the LoadContent method. Add the following line to the LoadContent method:
texture = Content.Load<Texture2D>(@"Images/logo");
The parameter passed into the Content.Load method is the path to the image file,
start-ing with the Content node in Solution Explorer. When used in relation to strings, the
@ symbol causes the string that follows to be interpreted literally, with escape sequences
ignored. So, the following two lines of code will create the exact same string: string str1 = @"images\logo";
string str2 = "images\\logo";
Notice also in the Content.Load call that the parameter used represents the asset name
of the resource, rather than the filename.
The Load method of the ContentManager class is a generic method that requires a type
parameter indicating which type of variable you want to access. In this case, you are dealing with an image and are expecting a Texture2D object to be returned.
Your image file is now loaded into the variable texture and is ready for you to use. All
drawing in XNA should be done within the Draw method, so add these three lines to
your Draw method, after the Clear call: spriteBatch.Begin( );
spriteBatch.Draw(texture, Vector2.Zero, Color.White); spriteBatch.End( );
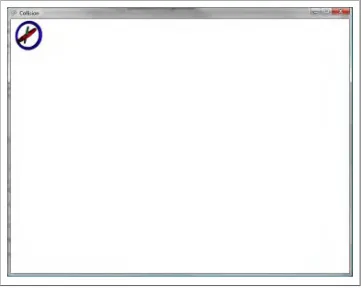
These three lines of code will draw the image you added to your project in the upper-left corner of the screen. Run your game by selecting Debug→Start Debugging, and you should see something similar to Figure 3-4.
Let’s take a look at these three lines of code. The first thing to note is that all three lines use an object called spriteBatch, which is of the type SpriteBatch. This variable is
defined in your project when you first create it and is instantiated in the LoadContent
method.
Basically, what’s happening here is that with the Begin and End calls from the Sprite Batch object, XNA is telling the graphics device that it’s going to send it a sprite (or a 2D image). The graphics device will be receiving large amounts of data throughout an XNA game, and the data will be in different formats and types. Whenever you send data to the graphics device, you need to let it know what type of data it is so that it can process it correctly. Therefore, you can’t just call SpriteBatch.Draw anytime you want;
you first need to let the graphics card know that sprite data is being sent by calling
SpriteBatch.Begin.
Your Draw call has three parameters, described in Table 3-1.
Table 3-1. Draw call parameters
Parameter Type Description
texture Texture2D The Texture2D object that holds the image file you want to draw.
position Vector2 The position (in 2D coordinates) at which you want to begin drawing the image. The image is always drawn starting from the upper-left corner.
color Color The tinting color. Specifying White will not tint the image, whereas specifying any other color will cause the image drawn to be tinted with that color.
Try playing around with the parameters in the Draw call—specifically, with the position and tint color parameters. In 2D, XNA uses the Vector2 struct to define coordinates. Vector2.Zero is a simplified way of specifying a Vector2 with coordinates of 0 for X and
Y (i.e., it’s the same as saying new Vector2(0,0)).
In 2D XNA games, the X, Y screen coordinate (0, 0) is the upper-left corner of the screen; coordinates move in positive X to the right and positive Y downward.
If you wanted to center your image in the game’s window, you’d need to find the center of the window and then offset the upper-left-corner coordinate appropriately. You can find the size of the window by accessing the Window.ClientBounds property of the
Game class. When a game is run in Windows, Window.ClientBounds.X and Window. ClientBounds.Y correspond to the upper-left coordinate of the game window, whereas
the Width and Height properties of Window.ClientBounds are always equal to the width and height of the window. This is true if the game is running in full-screen or windowed mode. On the Xbox 360 and Windows Phone 7, Window.ClientBounds.X and Y are
always 0, while the Width and Height properties of Window.ClientBounds are always equal to the width and height of the display (because Windows Phone 7 and Xbox 360 games are always run in full-screen mode).
Dividing these properties’ values by 2 will give you the coordinates for the center of the window. To center your image exactly in the middle of the screen, you’d then need to
offset that center coordinate by half the width and height of the image. This is because the position parameter passed to the Draw method does not represent the center of the
image to be drawn, but rather the upper-left corner of the image. You can access the size of your image via the Texture2D variable that holds the image in memory (in this case, texture). The Texture2D variable has Width and Height properties that hold the
size of the image. Replace your Draw call with the one here to see the image centered in
the window:
spriteBatch.Draw(texture, new Vector2(
(Window.ClientBounds.Width / 2) - (texture.Width / 2), (Window.ClientBounds.Height / 2) - (texture.Height / 2)), Color.White);
Transparency and Other Options
When drawing multiple sprites on the screen, you can (and should, for speed reasons) draw as many of them as possible within one SpriteBatch Begin and End block. In fact,
typically you’ll want to have one SpriteBatch object for your game and draw all your 2D images within that block.
As you saw in Figure 3-4, the XNA logo that I used has a big, ugly white background that would probably look better if it were transparent.
There are two ways to render portions of images transparently: either the image file itself must have a transparent background, or the portion of the image that you want to be transparent must be solid magenta (255, 0, 255) because XNA will automatically render solid magenta as transparent. Transparency can be saved to certain file formats (such as .png) that make use of an alpha channel. These formats do not contain only RGB values; instead, each pixel has an additional alpha channel (the A in RGBA) that determines the transparency of the pixel.
If you have an image-editing tool at your disposal, you can use it to create a transparent background on an image of your choice. Paint.net is a great free image-editing tool that is actually written in .NET and is available at http://www.getpaint.net. For the rest of this example I’ll be using another XNA logo image file with a transparent background, which is provided with the source code for this section of the book. The file is named
logo_trans.png.
Add the transparent XNA logo image to your project in the same way that you added the other image: by right-clicking the CollisionContent\Images node in Solution Ex-plorer, selecting Add→Existing Item, and navigat