INTRODUCTION . . . xxi
CHAPTER 1 Getting Started with iOS 5 Programming . . . 1
CHAPTER 2 Writing Your First Hello World! Application . . . .17
CHAPTER 3 Understanding Views, Outlets, and Actions . . . 35
CHAPTER 4 Exploring the Diff erent View Controllers . . . 67
CHAPTER 5 Enabling Multi-Platform Support for the iPhone and iPad . . . 109
CHAPTER 6 Handling Keyboard Inputs . . . 123
CHAPTER 7 Supporting Screen Rotations . . . 149
CHAPTER 8 Displaying and Persisting Data Using the Table View . . . 163
CHAPTER 9 Using Application Preferences . . . 201
CHAPTER 10 File Handling . . . 221
CHAPTER 11 Database Storage Using SQLite . . . 253
CHAPTER 12 Programming iCloud . . . 269
CHAPTER 13 Performing Simple Animations and Video Playback . . . 295
CHAPTER 14 Accessing Built-In Applications . . . .317
CHAPTER 15 Accessing the Sensors . . . 339
CHAPTER 16 Using Web Services . . . 359
CHAPTER 17 Bluetooth Programming . . . 393
CHAPTER 18 Bonjour Programming . . . 415
CHAPTER 19 Programming Remote Notifi cations Using Apple Push Notifi cation Services . . . 427
CHAPTER 20 Displaying Maps . . . 449
CHAPTER 21 Programming Background Applications . . . 487
APPENDIX A Testing on an Actual Device . . . 511
APPENDIX B Getting Around in Xcode . . . 533
APPENDIX C Crash Course in Objective-C . . . 559
Wei-Meng Lee
Indianapolis, IN 46256 www.wiley.com
Copyright © 2012 by John Wiley & Sons, Inc., Indianapolis, Indiana Published simultaneously in Canada
ISBN: 978-1-118-14425-1 ISBN: 978-1-118-22571-4 (ebk) ISBN: 978-1-118-23584-3 (ebk) ISBN: 978-1-118-26369-3 (ebk)
Manufactured in the United States of America 10 9 8 7 6 5 4 3 2 1
No part of this publication may be reproduced, stored in a retrieval system or transmitted in any form or by any means, electronic, mechanical, photocopying, recording, scanning or otherwise, except as permitted under Sections 107 or 108 of the 1976 United States Copyright Act, without either the prior written permission of the Publisher, or authorization through payment of the appropriate per-copy fee to the Copyright Clearance Center, 222 Rosewood Drive, Danvers, MA 01923, (978) 750-8400, fax (978) 646-8600. Requests to the Publisher for permission should be addressed to the Permissions Department, John Wiley & Sons, Inc., 111 River Street, Hoboken, NJ 07030, (201) 748-6011,
fax (201) 748-6008, or online at http://www.wiley.com/go/permissions.
Limit of Liability/Disclaimer of Warranty: The publisher and the author make no representations or warranties with respect to the accuracy or completeness of the contents of this work and specifically disclaim all warranties, including without limitation warranties of fitness for a particular purpose. No warranty may be created or extended by sales or promotional materials. The advice and strategies contained herein may not be suitable for every situation. This work is sold with the understanding that the publisher is not engaged in rendering legal, accounting, or other professional services. If professional assistance is required, the services of a competent professional person should be sought. Neither the publisher nor the author shall be liable for damages arising herefrom. The fact that an organization or Web site is referred to in this work as a citation and/or a potential source of further information does not mean that the author or the publisher endorses the information the organization or Web site may provide or recommendations it may make. Further, readers should be aware that Internet Web sites listed in this work may have changed or disappeared between when this work was written and when it is read.
For general information on our other products and services please contact our Customer Care Department within the United States at (877) 762-2974, outside the United States at (317) 572-3993 or fax (317) 572-4002.
Wiley also publishes its books in a variety of electronic formats and by print-on-demand. Not all content that is available in standard print versions of this book may appear or be packaged in all book formats. If you have purchased a version of this book that did not include media that is referenced by or accompanies a standard print version, you may request this media by visiting http://booksupport.wiley.com. For more information about Wiley products, visit us at www.wiley.com.
Library of Congress Control Number: 2011944672
WEI-MENG LEE is a technologist and founder of Developer Learning Solutions (www .learn2develop.net), a technology company specializing in hands-on training on the latest mobile technologies. Wei-Meng has many years of training experience and his training courses place special emphasis on the learning-by-doing approach. His hands-on approach to learning programming makes understanding the subject much easier than reading books, tutorials, and documentation. His name regularly appears in online and print publications such as DevX.com, MobiForge.com, and CoDe Magazine. Wei-Meng Lee is frequently invited to speak at technological conferences, and recently participated in Mobile Connections in the United States and DevTeach/DevMobile in Montreal, Canada. Contact Wei-Meng at [email protected].
ABOUT THE TECHNICAL EDITOR
EXECUTIVEEDITOR
OVER THE PAST YEAR OR SO, the development landscape of Apple’s iOS has changed greatly. The successful iOS is now in its fifth iteration, and the Xcode IDE has transitioned to a much easier-to-use version 4, with a tight integration of Interface Builder. I have received a lot of
feedback from readers of the previous edition of this book, many of whom appreciate the hands-on approach that it takes. I also have received feedback from readers who are stumped by the changes that have occurred between Xcode versions 3 and 4; but such confusion epitomizes the rapid pace of change that all developers experience.
This new edition of the book was revised to cover both new technologies and the various feedback I have received. I had a thorough relook at the exercises readers were having issues with, to ensure that they can be easily followed and achieve the effect I intended. I also took this opportunity to revise all the examples using Xcode 4, which is the IDE included with iOS 5. Of course, this book covers new iOS 5 features — notably, the new iCloud feature that ships with iOS 5. I have also added some topics that would interest most iOS developers, such as how to import and export documents from within your application, programming the various sensors in iOS, and using JSON web services.
Writing a book is always exciting, but along with the excitement are long hours of hard work, straining to get things done accurately and on time. I would like to take this opportunity to thank a number of people who helped to make this book possible.
First, I want to thank my Executive Editor Robert Elliott, who started off as a stranger, but is now my good friend. Robert is not the usual AE, disappearing after the contract is signed. He has been involved throughout the entire writing process and is always ready to help. I can’t say enough good things about Robert, so I will just say thank you, Robert!
Next, a huge thanks to Ami Sullivan, my project editor, who is always a pleasure to work with. Ami is the force behind the scenes, who makes the book appear on time on shelves in the bookstores! Thanks, Ami!
I also thank copy editor Luann Rouff and technical editor Trenton Shumay. They have been eagle-eye editing the book, ensuring that every sentence makes sense — both grammatically as well as technically. Thanks, Luann and Trent!
INTRODUCTION xxi
CHAPTER 1: GETTING STARTED WITH IOS 5 PROGRAMMING 1
Obtaining the Tools and SDK
2
Components of Xcode
3
Xcode 3
iOS Simulator 4
Interface Builder 9
Instruments 10
Architecture of the iOS
11
Some Useful Information before You Get Started
13
Versions of iOS 13
Testing on Real Devices 14
Screen Resolutions 14
Summary 15
CHAPTER 2: WRITING YOUR FIRST HELLO WORLD! APPLICATION 17Getting Started with Xcode
17
Using Interface Builder 20
Writing Some Code 24
Customizing Your Application Icon
26
Displaying Launch Images
28
Summary 33
CHAPTER 3: UNDERSTANDING VIEWS, OUTLETS, AND ACTIONS 35Outlets and Actions
36
Using Views
40
Using the Alert View 41
Using the Action Sheet 45
Page Control and Image View 46
Using the Web View 55
Adding Views Dynamically Using Code
57
Understanding View Hierarchy
61
xvi
The Single View Application Template
68
Application Delegate 71
Controlling Your UI Using View Controllers 74
The Empty Application Template
77
Adding a View Controller and Views Programmatically 81
Animating the Switching of Views 87
The Master-Detail Application Template
89
Displaying Some Items in the Master-Detail Application 98
The Tabbed Application Template
103
Summary 107
CHAPTER 5: ENABLING MULTI-PLATFORM SUPPORTFOR THE IPHONE AND IPAD 109
Technique 1 — Modifying the Device Target Setting
109
Detecting the Platform Programmatically 114
Technique 2 — Creating Universal Applications
116
Choosing a Porting Technique
120
Summary 120
CHAPTER 6: HANDLING KEYBOARD INPUTS 123
Using the Keyboard
124
Customizing the Type of Inputs
125
Dismissing the Keyboard 127
Automatically Displaying the Keyboard When
the View Window Is Loaded 133
Detecting the Presence of the Keyboard
133
Using the Scroll View 134
Scrolling Views When the Keyboard Appears 138
Summary 145
CHAPTER 7: SUPPORTING SCREEN ROTATIONS 149
Responding to Device Rotations
149
Rotating to a Diff erent Screen Orientation 152
Handling Rotations 153
Programmatically Rotating the Screen
159
Rotating during Runtime 159
Fixing the View Window to a Specifi c Orientation 159
Creating a Simple Table View
164
Adding a Header and Footer 169
Adding an Image 169
Displaying the Item Selected 171
Indenting 173
Modifying the Height of Each Row 173
Using the Table View in a Master-Detail Application
173
Displaying Sections
174
Adding Indexing 183
Adding Search Capability 183
Disclosures and Checkmarks 194
Navigating to Another View 195
Summary 199
CHAPTER 9: USING APPLICATION PREFERENCES 201
Creating Application Preferences
202
Programmatically Accessing the Settings Values
209
Loading the Settings Values 214
Resetting the Preferences Settings Values 216
Saving the Settings Values 217
Summary 218
CHAPTER 10: FILE HANDLING 221
Understanding the Application Folders
222
Using the Documents and Library Folders 223
Storing Files in the Temporary Folder 227
Which Folder Should You Use: Documents or tmp? 228
Using Property Lists
228
Copying Bundled Resources
235
Importing and Exporting Files
237
Exporting Documents 239
File Sharing 242
Importing Documents 245
Importing Self-Defi ned Documents 248
xviii
Linking to the SQLite3 Library
254
Creating and Opening a Database
256
Examining the Database Created 258
Creating a Table 258
Inserting Records 259
Bind Variables 260
Retrieving Records 263
Bundling SQLite Databases with Your Application
265
Summary 266
CHAPTER 12: PROGRAMMING ICLOUD 269
Storing and Using Documents in iCloud
270
Enabling iCloud Storage for Your Application 270
Setting Project Entitlements 273
Managing iCloud Documents Using the UIDocument Class 276
Storing Documents on iCloud 278
Storing Key-Value Data in iCloud
289
Summary 292
CHAPTER 13: PERFORMING SIMPLE ANIMATIONS ANDVIDEO PLAYBACK 295
Using the NSTimer Class
295
Animating the Visual Change 302
Transforming Views
302
Translation 303 Rotation 305 Scaling 307
Animating a Series of Images
307
Playing Video on the iPhone
310
Summary 314
CHAPTER 14: ACCESSING BUILT-IN APPLICATIONS 317
Sending E-Mail
317
Invoking Safari 324
Invoking the Phone 324
Accessing the Photo Library 327
Accessing the Camera 332
Summary 335
CHAPTER 15: ACCESSING THE SENSORS 339
Using the Gyroscope and Accelerometer
339
Visualizing the Sensor Data
345
Using the Shake API to Detect Shakes
350
Summary 356
CHAPTER 16: USING WEB SERVICES 359
Basics of Consuming XML Web Services
360
Using SOAP 1.1 361
Using SOAP 1.2 363
Using HTTP POST 364
Consuming a Web Service in Your iOS Application Using SOAP
365
Parsing the XML Response
373
Consuming JSON Web Services
377
Integrating Twitter into Your Application
383
Summary 389
CHAPTER 17: BLUETOOTH PROGRAMMING 393
Using the Game Kit Framework
393
Searching for Peer Devices 394
Sending and Receiving Data 401
Implementing Voice Chatting
404
Summary 412
CHAPTER 18: BONJOUR PROGRAMMING 415
Creating the Application
415
Publishing a Service
417
Browsing for Services
420
Summary 425
CHAPTER 19: PROGRAMMING REMOTE NOTIFICATIONS USINGAPPLE PUSH NOTIFICATION SERVICES 427
Using Apple Push Notifi cation Service
428
xx
Confi guring an App ID for Push Notifi cations 433
Creating a Provisioning Profi le 435
Provisioning a Device 437
Creating the iOS Application
438
Creating the Push Notifi cation Provider
443
Summary 447
CHAPTER 20: DISPLAYING MAPS 449
Displaying Maps and Monitoring Changes Using the Map Kit
449
Getting Location Data
455
Specifying the Hardware Requirement for Location Tracking 460
Displaying Location Using a Map 460
Getting Directional Information 464
Rotating the Map 468
Displaying Annotations 474
Reverse Geocoding 478
Displaying a Disclosure Button 482
Summary 484
CHAPTER 21: PROGRAMMING BACKGROUND APPLICATIONS 487
Understanding Background Execution on the iOS
488
Examining the Diff erent Application States 488
Opting Out of Background Mode 491
Detecting Multitasking Support 492
Tracking Locations in the Background 492
Making Your Location Apps More Energy Effi cient 496
Local Notifi cation
498
Notifying Other Objects Using the NSNotifi cation Class
505
Summary 509
APPENDIX A: TESTING ON AN ACTUAL DEVICE 511
APPENDIX B: GETTING AROUND IN XCODE 533
APPENDIX C: CRASH COURSE IN OBJECTIVE-C 559
APPENDIX D: ANSWERS TO EXERCISES 587
APPLE FIRST OFFICIALLY ANNOUNCED the iOS 5 at the Worldwide Developers Conference (WWDC) in June 2011. After 7 betas and with much anticipation, Apple finally rolled out iOS 5 with the vastly improved iPhone 4S. With 200 new features added to the iOS, Apple is set to reign as the king of the mobile platform for the foreseeable future. This means developers also have vast potential for their applications — if you know how to program for the iOS platform. This book will show you how.
When I first started learning about iPhone and iPad development, I went through the same journey that most developers go through: Write a Hello World application, play around with Xcode and Interface Builder, try to understand what the code is doing, and repeat that process. I was also overwhelmed by the concept of a View Controller, and wondered why it was needed if I simply wanted to display a view. My background in developing for Windows Mobile and Android did not help much, and I had to start working with this concept from scratch.
This book was written to help jump-start beginning iPhone and iPad developers. It covers the various topics in a linear manner that enables you to progressively learn without being overwhelmed by the details. I adopt the philosophy that the best way to learn is by doing — hence, the numerous hands-on “Try It Out” sections in each chapter, which first demonstrate how to build something and then explain “How It Works.”
Although iPhone and iPad programming is a huge topic, my aim in this book is to get you started with the fundamentals, help you understand the underlying architecture of the SDK, and appreciate why things are done in a certain way. It is beyond the scope of any one book to cover everything under the sun related to iPhone and iPad programming, but I am confident that after reading this book (and doing the exercises), you will be well equipped to tackle your next iPhone or iPad programming challenge.
WHO THIS BOOK IS FOR
This book is for the beginning iPhone and iPad developer who wants to start developing applications using the Apple iOS SDK. To truly benefit from this book, you should have some background in programming and at least be familiar with object-oriented programming concepts. If you are totally new to the Objective-C language, you might want to jump straight to Appendix C, which provides an overview of the language. Alternatively, you can use Appendix C as a quick reference while you tackle the various chapters, checking out the syntax as you try the exercises. Depending on your learning style, one of these approaches should work best for you.
xxii
WHAT THIS BOOK COVERS
This book covers the fundamentals of iPhone and iPad programming using the iOS SDK. It is divided into 21 chapters and four appendices.
Chapter 1: Getting Started with iOS 5 Programming covers the various tools found in the iOS SDK and explains their uses in iPhone and iPad development.
Chapter 2: Write Your First Hello World! Application gets you started with Xcode and Interface Builder to build a Hello World application. The focus is on giving you some hands-on practice getting a project up and running quickly. More details on the various project components are covered in subsequent chapters.
Chapter 3: Understanding Views, Outlets, and Actions covers the fundamental concepts of iPhone and iPad programming: outlets and actions. You learn how outlets and actions allow your code to interact with the visual elements in Interface Builder and why they are an integral part of every iPhone and iPad application. You will also learn about the various UI widgets known as views that make up the user interface of your application.
Chapter 4: Exploring the Different View Controllers discusses the various View Controllers available in the iOS SDK. You will learn how to develop different types of applications — Single View, Master-Detail, as well as Tabbed applications.
Chapter 5: Enabling Multi-Platform Support for the iPhone and iPad shows how you can port your iPhone applications to the iPad platform. You will also learn how to create universal applications that will run on both the iPhone and the iPad.
Chapter 6: Handling Keyboard Inputs shows you how to deal with the virtual keyboard in your iPhone or iPad. You learn how to hide the keyboard on demand and how to ensure that your views are not blocked by the keyboard when it is displayed.
Chapter 7: Supporting Screen Rotations demonstrates how you can reorient your application’s UI when the device is rotated. You learn about the various events that are fired when the device is rotated, and how to force your application to be displayed in a certain orientation.
Chapter 8: Displaying and Persisting Data Using the Table View explores one of the most powerful views in the iOS SDK — the Table View. The Table View is commonly used to display rows of data. In this chapter, you also learn how to implement search capabilities in your Table View.
Chapter 9: Using Application Preferences discusses the use of application settings to persist application preferences. Using application settings, you can access preferences related to your application through the Settings application available on the iPhone and iPad.
Chapter 10: File Handling shows how you can persist your application data by saving the data to files in your application’s sandbox directory. You also learn how to access the various folders available in your application sandbox.
Chapter 11: Database Storage Using SQLite covers the use of the embedded SQLite3 database library to store your data.
Chapter 12: Programming iCloud discusses and demonstrates how to store your documents and application-specific data on Apple’s new iCloud feature.
Chapter 13: Performing Simple Animations and Video Playback provides an overview of the various techniques you can use to implement basic animations on the iPhone and iPad. You also learn about the various affine transformations supported by the iOS SDK. In addition, you learn how to play back video on the iPhone and iPad.
Chapter 14: Accessing Built-In Applications describes the various ways you can access the iPhone and iPad’s built-in applications, such as the Photo Library, Contacts, and others. You also learn how you can invoke built-in applications such as Mail and Safari from within your applications.
Chapter 15: Accessing the Sensors shows how you can access the accelerometer and gyroscope sensors that are included with every iPhone and iPad. You will also learn how to detect shakes to your device.
Chapter 16: Using Web Services teaches you how to consume web services from within your iPhone and iPad application. You will learn the various ways to communicate with four web services — JSON, SOAP, HTTP GET, and HTTP POST. You will also learn how to parse the XML result returned by the web service.
Chapter 17: Bluetooth Programming explores the use of the Game Kit framework for Bluetooth programming. You will learn how to enable two devices to communicate using a Bluetooth connection, and how to implement voice chatting over a Bluetooth connection.
Chapter 18: Bonjour Programming shows how you can publish and find services on the network using the Bonjour protocol.
Chapter 19: Programming Remote Notifications Using Apple Push Notification Services explains how you can implement applications that use push notifications. The APNs enables your applications to continuously receive status updates from a service provider even though the application may not be running.
Chapter 20: Displaying Maps demonstrates how to build a location-based services application using the Map Kit framework. You will also learn how to obtain geographical location data and use it to display a map.
xxiv
learn how to use the local notifications feature to schedule notifications that will fire at specific time intervals.
Appendix A: Testing on an Actual Device outlines the steps you need to take to test your application on a real device.
Appendix B: Getting Around in Xcode provides a quick run-through of the many features in Xcode and Interface Builder.
Appendix C: Crash Course in Objective-C offers a brief tutorial in Objective-C. Readers who are new to this language should read this material before getting started.
Appendix D: Answers to Exercises contains the solutions to the end-of-chapter exercises found in every chapter except Chapter 1.
HOW THIS BOOK IS STRUCTURED
This book breaks down the task of learning iPhone and iPad programming into several smaller chunks, enabling you to digest each foundational topic before delving into a more advanced topic. In addition, some chapters cover topics already discussed in a previous chapter. That’s because there is usually more than one way of doing things in Xcode and Interface Builder, so this approach enables you to learn the different techniques available for developing iPhone and iPad applications.
If you are a total beginner to iOS programming, start with Chapters 1 and 2. After you are comfortable with the basics, head to the appendices to read more about the tools and language you are using. Once you are ready, you can continue with Chapter 3 and gradually move into more advanced topics.
A useful feature of this book is that all the code samples in each chapter are independent of those discussed in previous chapters. That gives you the flexibility to dive right into the topics that interest you and start working on the Try It Out projects.
WHAT YOU NEED TO USE THIS BOOK
Most of the examples in this book run on the iPhone Simulator (which is included with the iOS SDK). For exercises that access the hardware (such as the accelerometer and gyroscope), you need a real iPhone or iPad. In general, to get the most out of this book, having a real iPhone or iPad device is not necessary (although it is definitely required for testing if you plan to deploy your application on the App Store).
CONVENTIONS
TRY IT OUT
These Are Exercises or Examples for You to Follow
The Try It Out sections, which appear once or more per chapter, provide hands-on exercises that demonstrate the concept under discussion as you follow the text.
1.
They consist of numbered steps.2.
Follow the steps with your copy of the project files.How It Works
After each Try It Out section, these sections explain the code you’ve typed in detail.
As for other conventions in the text:
➤ New terms and important words are highlighted in italics when first introduced.
➤ Keyboard combinations are treated like this: Control-R.
➤ Filenames, URLs, and code within the text are treated like so: persistence.properties.
➤ Code is presented in two different ways:
We use a monofont type with no highlighting for most code examples.
We use bold to emphasize code that is of particular importance in the present context.
WARNING Boxes like this one hold important, not-to-be forgotten information that is directly relevant to the surrounding text.
NOTE Notes, tips, hints, tricks, and asides to the current discussion look like this.
SOURCE CODE AND ANSWERS APPENDIX
xxvi
page to obtain all the source code for the book. Code that is included on the website is highlighted by the following icon and/or CodeNote, as shown following the icon:
Listings include the filename in the title. If it is just a code snippet, you’ll find the filename in a CodeNote such as this:
Code zip filename available for download at wrox.com
After you download the code, just decompress it with your favorite compression tool. Alternatively, go to the main Wrox code download page at www.wrox.com/dynamic/books/download.aspx to see the code available for this book and all other Wrox books.
Please note that Appendix D, “Answers to the Exercises,” is available as a PDF for download.
NOTE Because many books have similar titles, you may fi nd it easiest to search by ISBN; this book’s ISBN is 978-1-118-14425-1.
ERRATA
We make every effort to ensure that there are no errors in the text or the code. However, no one is perfect and mistakes do occur. If you find an error in one of our books, such as a spelling mistake or a faulty piece of code, we would be very grateful for your feedback. By sending in errata, you may save another reader hours of frustration and at the same time help us provide even higher-quality information.
To find the errata page for this book, go to www.wrox.com and locate the title using the Search box or one of the title lists. Then, on the book details page, click the Book Errata link. On this page, you can view all errata that has been submitted for this book and posted by Wrox editors. A complete book list, including links to each book’s errata, is also available at www.wrox.com/ misc-pages/booklist.shtml.
P2P.WROX.COM
For author and peer discussion, join the P2P forums at p2p.wrox.com. The forums are a web-based system for you to post messages relating to Wrox books and related technologies and interact with other readers and technology users. The forums offer a subscription feature to email you topics of interest of your choosing when new posts are made to the forums. Wrox authors, editors, other industry experts, and your fellow readers are present on these forums.
At p2p.wrox.com, you will find a number of different forums that will help you not only as you read this book, but also as you develop your own applications. To join the forums, just follow these steps:
1. Go
to p2p.wrox.com and click the Register link.2.
Read the terms of use and click Agree.3.
Complete the required information to join as well as any optional information you want to provide and click Submit.4.
You will receive an email with information describing how to verify your account and complete the joining process.After you join, you can post new messages and respond to messages that other users post. You can read messages at any time on the web. If you want to have new messages from a particular forum emailed to you, click the Subscribe to This Forum icon by the forum name in the forum listing.
Getting Started with iOS 5
Programming
WHAT YOU WILL LEARN IN THIS CHAPTER
➤ How to obtain the iOS SDK - Software Development Kit
➤ Components included in the iOS SDK
➤ Features of the development tools — Xcode, Interface Builder, and iOS Simulator
➤ Capabilities of the iOS Simulator
➤ Architecture of iOS
➤ Characteristics of the iPhone and iPad
Welcome to the world of iOS programming! That you are now holding this book shows that you are fascinated with the idea of developing your own iPhone and iPad applications and want to join the ranks of the tens of thousands of developers whose applications are already deployed in the App Store.
As the Chinese adage says, “To accomplish your mission, fi rst sharpen your tools.” Successful programming requires that you fi rst know your tools well. Indeed, this couldn’t be truer for iOS programming — you need to be familiar with quite a few tools before you can even get started. Hence, this chapter describes the various relevant tools and information you need to jump on the iOS development bandwagon.
Before you download and install Xcode, make sure you satisfy the following system requirements:
➤ Only Intel Macs are supported, so if you have another processor type (such as the older G4 or G5 Macs), you’re out of luck.
➤ Your system is updated with the latest Mac OS X Lion release.
An actual iPhone/iPod touch/iPad is highly recommended, although not strictly necessary. To test your application, you can use the included iOS Simulator (which enables you to simulate an iPhone or an iPad). However, to test certain hardware features like the accelerometer and gyroscope, you need to use a real device.
When Xcode is downloaded, proceed with installing it. Accept a few licensing agreements and then select the destination folder in which to install the SDK.
If you select the default settings during the installation phase, the various tools will be installed in the /Developer/Applications folder (see Figure 1-2).
OBTAINING THE TOOLS AND SDK
To develop for iOS, you need to download the iOS SDK. The iOS SDK comes with free Xcode from the Mac App Store (see Figure 1-1).
FIGURE 1-1
COMPONENTS OF XCODE
The Xcode package includes a suite of development tools to help you create applications for your iPhone, iPod touch, and iPad. It includes the following:
➤ Xcode IDE — Integrated development environment (IDE) that enables you to manage, edit, and debug your projects
➤ Dashcode — Integrated development environment (IDE) that enables you to develop web-based iPhone and iPad applications and Dashboard widgets. Dashcode is beyond the scope of this book.
➤ iOS Simulator — Provides a software simulator to simulate an iPhone or an iPad on your Mac
➤ Interface Builder — Visual editor for designing user interfaces for your iPhone and iPad applications
➤ Instruments — Analysis tool to help you both optimize your application and monitor for memory leaks in real time
The following sections discuss each tool (except Dashcode) in more detail.
Xcode
To launch Xcode, double-click the Xcode icon located in the /Developer/Applications folder (refer to Figure 1-2). Alternatively, go the quicker route and use Spotlight: Simply type Xcode into the search box and Xcode should be in the Top Hit position.
Using Xcode, you can develop different types of iPhone, iPad, and Mac OS X applications using the various project templates shown in Figure 1-4.
FIGURE 1-4
For iOS applications, each template gives you the option to select the platform you are targeting — iPhone, iPad, or Universal (runs on both iPhone and iPad).
The IDE in Xcode provides many tools and features that make your development life much easier. One such feature is Code Sense, which displays a popup list showing the available classes and members, such as methods, properties, and so on.
NOTE For a more comprehensive description of some of the most commonly used features in Xcode, refer to Appendix B.
iOS Simulator
The iOS Simulator, shown in Figure 1-5, is a very useful tool that you can use to test your
The iOS Simulator can simulate different versions of the iOS (see Figure 1-6. To support older versions of the SDK, you need to install the previous versions of the SDKs). This capability is useful if you need to support older versions of the platform, as well as test and debug errors reported in the
THE IOS SIMULATOR IS NOT AN EMULATOR
To understand the difference between a simulator and an emulator, keep in mind that a simulator tries to mimic the behavior of a real device. In the case of the iOS Simulator, it simulates the real behavior of an actual iPhone/iPad device. However, the Simulator itself uses the various libraries installed on the Mac (such as
QuickTime) to perform its rendering so that the effect looks the same as an actual iPhone. In addition, applications tested on the Simulator are compiled into x86 code, which is the byte-code understood by the Simulator. A real iPhone device, conversely, uses ARM-based code.
In contrast, an emulator emulates the working of a real device. Applications tested on an emulator are compiled into the actual byte-code used by the real device. The emulator executes the application by translating the byte-code into a form that can be executed by the host computer running the emulator.
To understand the subtle difference between simulation and emulation, imagine you are trying to convince a child that playing with knives is dangerous. To simulate this, you pretend to cut yourself with a knife and groan in pain. To emulate this, you actually cut yourself.
In addition, the iOS Simulator can simulate different devices — iPad (see Figure 1-7), iPhone (3G and 3GS), and iPhone 4 with Retina display (see Figure 1-8).
FIGURE 1-6
FIGURE 1-7 FIGURE 1-8
Features of the iOS Simulator
The iOS Simulator simulates various features of a real iPhone, iPod touch, or iPad device. Features you can test on the iOS Simulator include the following:
➤ Support for gestures:
➤ Tap
➤ Touch and Hold
➤ Double-tap
➤ Swipe
➤ Rotate
➤ Drag
➤ Pinch
➤ Low-memory warning simulations
However, the iOS Simulator, being a software simulator for the real device, does have its limitations. The following features are not available on the iOS Simulator:
➤ Making phone calls
➤ Accessing the accelerometer
➤ Sending and receiving SMS messages
➤ Installing applications from the App Store
➤ Camera
➤ Microphone
➤ Several features of OpenGL ES
NOTE In the latest release of the SDK (5.0), the iOS Simulator enables you to simulate diff erent locations as well as movements. Chapter 20 discusses this in more detail.
Note also that the speed of the iOS Simulator is more tightly coupled to the performance of your Mac than the actual device. Therefore, it is important that you test your application on a real device, rather than rely exclusively on the iOS Simulator for testing.
Despite the iOS Simulator’s limitations, it is defi nitely a useful tool for testing your applications. That said, testing your application on a real device is imperative before you deploy it on the App Store.
Uninstalling Applications from the iOS Simulator
All third-party applications are stored in the <iPhoneUserDomain>/<version_no>/Applications/ folder. When an application is deployed onto the iOS Simulator, an icon is created on the Home screen and a fi le and a few folders are created within the Applications folder (see Figure 1-9).
FIGURE 1-9
To uninstall (delete) an application, execute the following steps:
1.
Click and hold the icon of the application on the Home screen until all the icons start wriggling. Note that all the icons now have an X button displayed on their top-left corner.2.
Click the X button next to the icon of the application you want to uninstall (see Figure 1-10).3.
An alert window appears asking if you are sure you want to delete the icon. Click Delete to confi rm the deletion.The easiest way to reset the iOS Simulator to its original state is to select iOS Simulator ➪ Reset Content and Settings . . . .
Interface Builder
Interface Builder is a visual tool that enables you to design the user interfaces for your iPhone/iPad applications. Using Interface Builder, you drag and drop views onto windows and then connect the various views with outlets and actions so that they can programmatically interact with your code.
WARNING When an application is uninstalled, the corresponding fi le and folder in the Applications folder are deleted automatically.
NOTE Outlets and actions are discussed in more detail in Chapter 3, and Appendix B discusses Interface Builder in more detail.
Instruments
The Instruments application (see Figure 1-12) enables you to dynamically trace and profi le the performance of your Mac OS X, iPhone, and iPad applications.
FIGURE 1-12
Using Instruments, you can do all of the following:
➤ Stress test your applications.
➤ Monitor your applications for memory leaks.
➤ Gain a deep understanding of the executing behavior of your applications.
➤ Track diffi cult-to-reproduce problems in your applications.
ARCHITECTURE OF THE IOS
Although this book doesn’t explore the innards of iOS, understanding some of its important characteristics is useful. Figure 1-13 shows the different abstraction layers that make up the Mac OS X and iOS (which is used by the iPhone, iPod touch, and iPad).
NOTE The iOS is architecturally very similar to the Mac OS X except that the topmost layer is Cocoa Touch for the iPhone, rather than the Cocoa Framework.
The bottom layer is the Core OS, which is the foundation of the operating system. It is in charge of memory management, the fi le system, networking, and other OS tasks, and it interacts directly with the hardware. The Core OS layer consists of components such as the following:
➤ OS X Kernel
➤ Mach 3.0
➤ BSD
➤ Sockets
➤ Security
➤ Power Management
➤ Keychain
➤ Certifi cates
The Core Services layer provides an abstraction over the services provided in the Core OS layer. It provides fundamental access to iOS services and consists of the following components:
➤ Collections
➤ Address Book
➤ Networking
➤ File Access
➤ SQLite
➤ Core Location
➤ Net Services
➤ Threading
➤ Preferences
➤ URL Utilities
The Media layer provides multimedia services that you can use in your iPhone and iPad applications. It consists of the following components:
➤ Core Audio
➤ OpenGL
➤ Audio Mixing
➤ Audio Recording
➤ Video Playback
➤ JPG, PNG, TIFF
➤ Quartz
➤ Core Animation
➤ OpenGL ES
The Cocoa Touch layer provides an abstraction layer to expose the various libraries for programming the iPhone and iPad, such as the following:
➤ Multi-Touch events
➤ Multi-Touch controls
➤ Accelerometer
➤ View Hierarchy
➤ Localization
➤ Alerts
➤ People Picker
➤ Image Picker
➤ Controllers
In iOS programming, all the functionalities in each layer are exposed through various frameworks that you will use in your project. Subsequent chapters in this book demonstrate how to use these frameworks in your projects.
NOTE A framework is a software library that provides specifi c functionalities. Refer to Apple’s documentation at http://developer.apple.com/
iphone/library/documentation/Miscellaneous/Conceptual/
iPhoneOSTechOverview/iPhoneOSFrameworks/iPhoneOSFrameworks.html for a list of frameworks included in the SDK.
SOME USEFUL INFORMATION BEFORE YOU GET STARTED
You now have a good idea of the tools involved in iPhone and iPad application development. Before you go ahead and take the plunge, the following sections discuss some useful information that can make your journey more pleasant.
Versions of iOS
At the time of writing, iOS is in its fi fth revision — that is, version 5.0. Its major versions are as follows:
➤ 1.0 — Initial release of the iPhone
➤ 1.1 — Additional features and bug fi xes for 1.0
➤ 2.0 — Released with iPhone 3G; comes with App Store
➤ 2.1 — Additional features and bug fi xes for 2.0
➤ 2.2 — Additional features and bug fi xes for 2.1
➤ 3.0 — Third major release of the iPhone OS
➤ 3.1 — Additional features and bug fi xes for 3.0
➤ 3.2 — This version release is for the iPad only.
➤ 4.0 — Fourth major release of the iPhone OS. Renamed as iOS. This version is designed for the new iPhone 4 and it also supports older devices, such as the iPod touch and iPhones.
The older iPhones (iPhone 3G/3GS) and the iPod touch have lower resolutions compared to the iPhone 4/4S. They have a resolution of 480 × 320 pixels, one quarter of the resolution of the iPhone 4.
When programming for the iPhones, it is important to note the difference between points and pixels. For example, the following statement specifi es a frame that starts from the point (20,10) with a width of 280 points and a height of 50 points:
CGRect frame = CGRectMake(20, 10, 280, 50);
On the older iPhones, a point corresponds to a
pixel. Thus, the preceding statement translates directly to the pixel (20,10), with a width of 280 pixels and a height of 50 pixels. However, if the statement is executed within the iPhone 4/4S, a point translates to two pixels. Thus, the preceding statement translates into the pixel (40,20), with a width of 560 pixels and a height of 100 pixels. The translation is performed automatically
Testing on Real Devices
One of the most common complaints about developing applications for the iPhone and iPad is how diffi cult Apple makes it to test a new application on an actual device. Nonetheless, for security reasons, Apple requires all applications to be signed with a valid certifi cate; and for testing purposes, a developer certifi cate is required.
To test your applications on a device, you must sign up for the iOS Developer Program and request that a developer certifi cate be installed onto your device. Appendix A outlines these steps in detail.
Screen Resolutions
The iPhone 4S is a beautiful device with a high-resolution screen. At 3.5 inches (diagonally), the iPhone screen supports multi-touch operation and allows a pixel resolution of 960 × 640 at 326 ppi (see Figure 1-14). When designing your application, note that because of the status bar, the actual resolution is generally limited to 920 × 640 pixels. Of course, you can turn off the status bar programmatically to gain access to the full 960 × 640 resolution.
Also, be mindful that users may rotate the device to display your application in landscape mode. You need to make provisions to your user interface so that applications can still work properly in landscape mode.
NOTE Chapter 7 discusses how to handle screen rotations.
by the OS, which is very useful because it enables older applications to run and scale correctly without modifi cations on the iPhone 4/4S.
The iPad has a pixel resolution of 1,024 × 768 at 132 ppi.
Table 1-1 summarizes the screen resolutions for the various platforms.
TABLE 1-1: Platform Resolutions
PLATFORM
RESOLUTION (PIXELS)
VISIBLE REAL ESTATE WITHOUT THE STATUS BAR (PIXELS) — LANDSCAPE MODE
VISIBLE REAL ESTATE WITHOUT THE STATUS BAR (PIXELS) — PORTRAIT MODE
iPhone 4/4S 960 × 640 960 × 600 920 × 640
iPhone 3G/3GS, iPod touch
480 × 320 480 × 300 460 × 320
iPad 1024 × 768 1024 × 748 1004 × 768
SUMMARY
This chapter offered a quick tour of the available tools used for iPhone and iPad application development. You had a look at the iOS Simulator, which you will use to test your applications without using a real device. The Simulator is a very powerful tool that you will use very often in your iPhone development journey.
⊲ WHAT YOU LEARNED IN THIS CHAPTER
TOPIC KEY CONCEPTS
Obtaining the iOS SDK Download Xcode 4 from the Mac App Store.
iOS Simulator Most of the testing can be done on the iOS Simulator. However, it is strongly recommended that you have a real device for actual testing. Limitations of the iOS
Simulator
Access to hardware is generally not supported by the Simulator. For example, the camera, accelerometer, voice recording, and so on are not supported.
Frameworks in the iOS SDK
Writing Your First Hello World!
Application
WHAT YOU WILL LEARN IN THIS CHAPTER
➤ How to create a new iPhone project
➤ Building your fi rst iPhone application using Xcode
➤ Designing the user interface (UI) of your iPhone application with Interface Builder
➤ How to add an icon to your iPhone application
➤ How to display launch images for your iPhone application
Now that you have installed the iOS SDK, you are ready to start developing for the iPhone! Programming books customarily start by demonstrating how to develop a “Hello World!” application. This approach enables you to use the various tools quickly without getting bogged down with the details. It also provides you with instant gratification: You see for yourself that things really work, which can be a morale booster that inspires you to learn more.
GETTING STARTED WITH XCODE
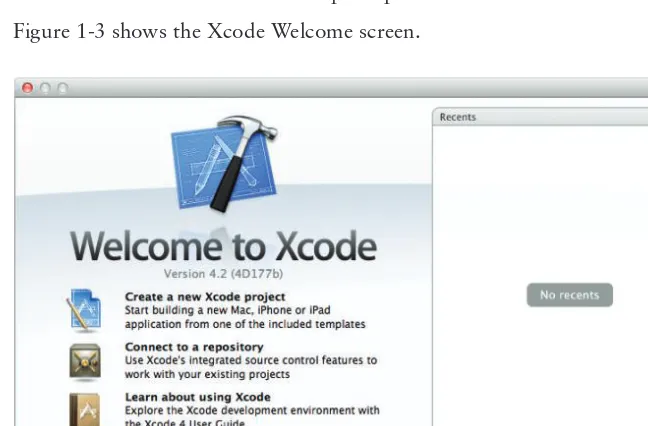
Power up Xcode and you should see the Welcome screen, shown in Figure 2-1.
2
To create a new iPhone project, click the Create a new Xcode project button (or choose File ➪ New ➪ New Project). Figure 2-2 shows the different types of projects you can create using Xcode. The left panel shows the two primary categories — iPhone OS and Mac OS X. The iPhone uses the iOS, so click the Application item listed under iOS to view the different templates available for developing your iPhone application.
FIGURE 2-1
Name the project HelloWorld and provide a company identifier for your application
(you typically use your company’s domain name in reverse order, such as net.learn2develop for my www.learn2develop.net domain). Name the Class Prefix to be the same as the project name and select iPhone as the Device Family. Finally, ensure that all the options are unchecked and then click Next (see Figure 2-3). You will be asked to select a folder in which to save your project. Xcode then proceeds to create the project for the template you have selected. Figure 2-4 shows the various files and folders automatically created for your project.
The left panel of Xcode shows the groups in the project. You can expand each group or folder to reveal the files contained in it. To edit a particular file, select it from the list, and the editor on the right panel opens the file for editing. If you want a separate window for editing, simply double-click the file to edit it in a new window.
Although you can create quite a few types of iPhone applications, for this chapter select the Single View Application template and then click Next.
NOTE Subsequent chapters show you how to develop some of the other types of iOS applications, such as Tabbed applications and Master-Detail applications.
Using Interface Builder
At this point, the project has no UI. To prove this, simply press Command-R (or select Product ➪ Run), and your application is deployed to the included iPhone Simulator. Figure 2-5 shows the blank screen displayed on the iPhone Simulator. Note how it looks now, because as you go through the chapter you will see changes occur based on your actions.
FIGURE 2-4
Obviously, a blank screen is not very useful. Therefore, it’s time to try adding some views to your application’s UI. In the list of files in your project, you’ll notice a file with the .xib extension — HelloWorldViewController.xib. Files with .xib extensions are basically XML files containing the UI definitions of an application. You can edit .xib files by either modifying their XML content or, more easily (and more sanely), using Interface Builder.
Interface Builder, integrated into Xcode (prior to Xcode 4, Interface Builder is a separate application that ships with the iOS SDK), enables you to build the UI of iPhone (and Mac) applications by using drag and drop.
Select the HelloWorldViewController.xib file to edit it using Interface Builder. Figure 2-6 shows Interface Builder displaying the content of HelloWorldViewController.xib.
NOTE By default, the iPhone Simulator that is launched shows the image of the iPhone 4. However, the screen resolution for this simulator is still 320x480 pixels, simulating the older iPhone 3GS’s screen resolution. If you want to simulate the Retina display of an iPhone 4 or iPhone 4S, you need to select Hardware ➪
Device ➪ iPhone (Retina).
NOTE Refer to Appendix B for a crash course on Interface Builder if you are not familiar with it.
FIGURE 2-7
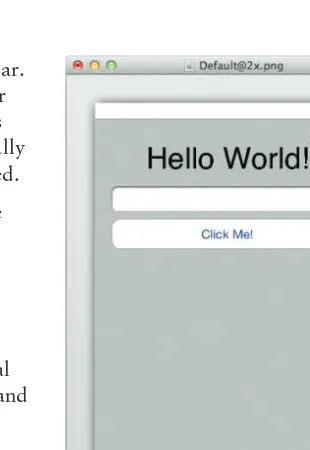
After the Label is added, select it and go to the Attributes Inspector window (you can view this by choosing View ➪ Utilities ➪ Show Attributes Inspector). Enter Hello World! in the Text field (see Figure 2-8). Then, in the Alignment field, click the center alignment button.
With the Label still selected, click on the “T” icon displayed next to the Font field and select the Helvetica Custom font (see Figure 2-9). Set the font size to 36.
Resize the Label so that it now looks like Figure 2-10.
Next, from the Library window, drag and drop a Text Field to the View window, followed by a Round Rect Button. Modify the attribute of the Round Rect Button by entering Click Me! in the Title field of its Attributes Inspector window. Figure 2-11 shows how the View window looks now.
FIGURE 2-9 FIGURE 2-10
FIGURE 2-11
Run the application again by pressing Command-R. The iPhone Simulator now displays the modified UI (see Figure 2-12).
Click the Text Field and watch the keyboard automatically appear (see Figure 2-13).
Click the Home button on the iPhone Simulator, and you will see that your application has been installed on the Simulator. To go back to the application, simply click the HelloWorld icon (see Figure 2-14).
FIGURE 2-12 FIGURE 2-13 FIGURE 2-14
NOTE By default, starting with iOS 4, all applications built using the iOS SDK support multitasking. Hence, when you press the Home button on your iPhone, your application is not terminated; it is sent to the background and suspended. Tapping an application icon resumes the application. Chapter 21 contains more details about background execution of your iOS applications.
Writing Some Code
By now you should be comfortable enough with Xcode and Interface Builder to write some code. This section will give you a taste of programming the iPhone.
In the HelloWorldViewController.h file, add a declaration for the btnClicked: action:
#import <UIKit/UIKit.h>
@interface HelloWorldViewController : UIViewController
-(IBAction) btnClicked:(id) sender;
The bold statement creates an action (commonly known as an event handler) named btnClicked:. With the action declared, save the file and return to Interface Builder by clicking the HelloWorldViewController.xib file.
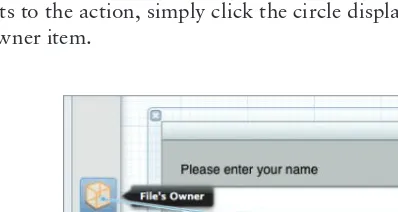
Earlier in this chapter, when you edited the HelloWorldViewController.xib file, you saw three icons displayed in Interface Builder (see Figure 2-15) These three icons, from top to bottom, are File’s Owner, First Responder, and View.
Control-click the Round Rect Button in the View window and drag it to the File’s Owner item (see Figure 2-16). A small popup containing the btnClicked: action
appears. Select the btnClicked: action. Basically, what you are doing here is linking the Round Rect Button with the action (btnClicked:) so that when the user clicks the button, the action is invoked.
FIGURE 2-15
FIGURE 2-16
In the HelloWorldViewController.m file, add the code that provides the implementation for the btnClicked: action:
#import “HelloWorldViewController.h”
@implementation HelloWorldViewController
-(IBAction) btnClicked:(id) sender {
//---display an alert
cancelButtonTitle:@”OK”
otherButtonTitles:nil]; [alert show];
[alert release];
}
The preceding code displays an alert containing the sentence “iPhone, here I come!”
That’s it! Run the application again. This time, when you click the Round Rect Button, an Alert view displays (see Figure 2-17).
CUSTOMIZING YOUR APPLICATION ICON
As shown earlier, the application installed on your iPhone Simulator uses a default white image as an icon. You can, however, customize this icon. When designing icons for your iPhone and iPad applications, bear the following in mind:
➤ Design your icon to be 57⫻ 57 pixels (for iPhone), 114⫻114 pixels
(for iPhone high resolution), or 72⫻72 pixels (for iPad). For distribution through the App Store, you also need to prepare a 512⫻512 pixel image.
➤ Use square corners for your icon image because iPhone automatically rounds them. It also adds a glossy surface (you can turn off this feature, though).
FIGURE 2-17
NOTE Apple has published a description of the various images that you can use in your iPhone application. For details, see http://developer.apple.com/ library/ios/#documentation/userexperience/conceptual/mobilehig/ IconsImages/IconsImages.html.
The following Try It Out demonstrates how to add an icon to your application so that the iPhone will use it instead of the default white image.
TRY IT OUT
Adding an Icon to the Application
1.
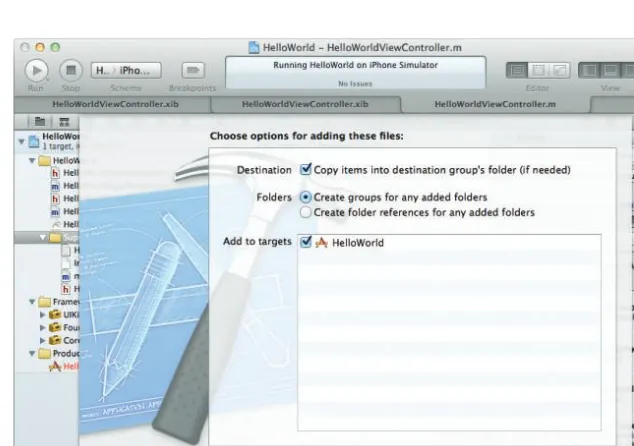
To add an icon to your application, drag and drop an image (named as icon.png in this example) onto the Supporting Files folder of your project. You will be asked if you want to make a copy of the image you are dropping. Check this option so that a copy of the image will be stored in your project folder (see Figure 2-18).FIGURE 2-18
value to the name of the icon, icon.png (see Figure 2-19). This specifies the name of the image to be used as the application icon.
HOW TO TURN OFF THE GLOSSY SURFACE ON YOUR ICON
To turn off the glossy effect applied to your icon, you need to add the
UIPrerenderedIcon key (the friendly name for this key is “Icon already includes gloss effects”) to the HelloWorld-Info.plist file in your Xcode project and then set it to YES (see Figure 2-21). For more details on the various keys that you can set in your HelloWorld-Info.plist file, refer to Apple’s documentation at http:// developer.apple.com/iphone/library/documentation/General/Reference/ InfoPlistKeyReference/Articles/iPhoneOSKeys.html.
FIGURE 2-21
How It Works
Setting an icon for your application is very straightforward — simply specify the icon filename in the Icon files array item’s first array element and it will appear in your iPhone when you run the application again.
DISPLAYING LAUNCH IMAGES
In order to enhance the user experience of your application, Apple requires your application to include a launch image. Basically, a launch image is an image of what your application looks like when it is loaded for the first time. Using a launch image ensures that while your application is being loaded, the user is not staring at a blank screen. Instead, the launch image is displayed. This engages the user with your application immediately. When it is fully loaded, the launch image then disappears, and your application displays its first screen, ready to use.
application is loaded, the system will automatically display this image and then hide it when the first View window of your application is ready to be shown. If you want to display different launch images depending on the resolution of the device, you can do the following:
➤ Create an image named Default.png with a resolution of 320⫻480. This launch image will be loaded when your application is loaded on an iOS device with a screen resolution of 320⫻480 (e.g., the iPhone 3GS).
➤ Create an image named [email protected] with a resolution of 640⫻960. This launch image will be loaded when your application is loaded on an iOS device with a screen resolution of 640⫻960 (e.g., the iPhone 4 or iPhone 4S).
You can create the launch image from scratch using a photo-editing application, or easily capture one using the Organizer tool that is part of Xcode — all you need to do is view and capture the image you want to use as the launch image on your iPhone. The following Try It Out describes how to add a launch image using the Organizer.
TRY IT OUT
Adding a Launch Image to the Application
1.
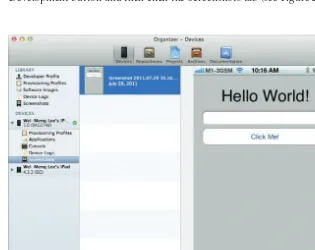
With the iPhone connected to your Mac, launch Xcode and select Window ➪ Organizer.2.
You should now be able to see the name of the device attached to your Mac. Click the Use for3.
View the desired image on your iPhone. In this example, I have deployed the application onto my iPhone (Appendix A shows you how to deploy an application onto a real iOS device) and then launched it. I will capture the first View window that appears so that I can use it as a launch image. Click the New Screenshot button located on the bottom, right corner of the window to capture the screenshot.4.
All the captured images are shown in the middle of the Organizer window. Select the image that you want to use and click the Save As Launch Image . . . button.5.
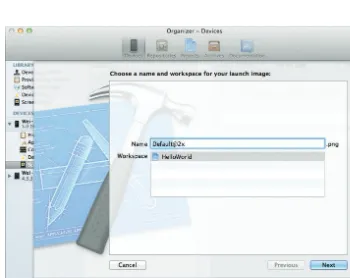
You will be prompted to select the project that you want to use for the launch image (see Figure 2-23). You will also be asked to name the image. If you are capturing an image from a Retina display device (such as the iPhone 4 or iPhone 4S), name it Default@2x. If not, name it Default.6.
The file will be copied to the HelloWorld Xcode project (see Figure 2-24).7.
Observe that the captured image contains the status bar. You should erase the status bar using a graphics editor tool, as the status bar should not be displayed to users (see Figure 2-25). Interestingly, this area is automatically hidden by the status bar on the device when it is loaded.8.
Press Command-R to test the application on the iPhoneSimulator. Notice that the application loads as usual, but if you try to click the Text Field or Round Rect Button in the initial couple of seconds, they will not be responsive, as the actual HelloWorldViewController View window has not been loaded yet (you are still seeing the launch image). After a few seconds, the actual HelloWorldViewController View window is loaded and you can click the Text Field or Round Rect buttons.
How It Works
When you include an image named [email protected] (or Default.png) in your project, it will be displayed when your application is first being loaded. This improves the user experience by creating the impression that your application loads immediately.
Pay attention to the dimension of the image; it will not be displayed during loading if it is the wrong size. If your application has only a single launch image (either Default.png or [email protected]),
FIGURE 2-24
images, then a different launch image will be loaded for different devices. To prove this, add another image with a resolution of 320x480 (see Figure 2-26) and name it Default.png.
FIGURE 2-26
If you now run the application on the iPhone Simulator, you will notice that the Default.png will be displayed (see Figure 2-27). If you run it on the iPhone (Retina) Simulator, you will see the [email protected] loaded.
While Apple has explicitly stated that the launch image is meant to improve the user experience of your application, not to display a “splash screen” for it (like the example just shown), a lot of developers are making use of this feature to display splash screens for their applications.
SUMMARY
This chapter provided a brief introduction to developing your first iPhone application. You have created a simple iPhone application, designed its user interface using some of the built-in views, and then test it on the iPhone Simulator. You have also learned how to write a simple action for your Button so that it can display a message when the user clicks on it. Finally, you saw how to assign an image to be used as the icon for your application and how to set a launch image for your application.
Although you likely still have many questions, the aim of this chapter was to get you started. The next few chapters dive deeper into the details of iPhone programming, gradually revealing the secrets of how all those components that seem so mysterious at first work together to create your application.
EXERCISES
1.
You want to add an icon to an iPhone project in Xcode. What is the size of the image that you should provide?2.
What is the easiest way to add a launch image to an iPhone application?3.
When adding an image to the Supporting Files folder in your Xcode project, why do you need to check the “Copy items into destination group’s folder (If needed)” option?⊲ WHAT YOU LEARNED IN THIS CHAPTER
TOPIC KEY CONCEPTS
Xcode Create your iPhone Application project and write code that manipulates your application.
Interface Builder Build your iPhone UI using the various views located in the Library. Adding an application icon Add an image to the project and then specify the image name in
the Icon fi les item of the info.plist fi le.
Adding a launch image Add an image named Default.png or ([email protected]) to the Supporting Files folder of your project.
Creating icons for your iPhone applications
Understanding Views, Outlets,
and Actions
WHAT YOU WILL LEARN IN THIS CHAPTER
➤ How to declare and defi ne outlets
➤ How to declare and defi ne actions
➤ Connecting outlets and actions to the views in your View window
➤ How to use the UIAlertView to display an alert view to the user
➤ How to use the UIActionSheet to display some options to the user
➤ Using the UIPageControl to control paging
➤ How to use the UIImageView to display images
➤ How to use the UIWebView to display web content in your
application
➤ Dynamically adding views to your application during runtime
In the previous chapter, you built a simple Hello World! iPhone application without
understanding much about the underlying details of how things work together. In fact, one of the greatest hurdles in gaining proficiency with iOS programming is the large number of details you need to learn before you can get an application up and running. Hence, this chapter starts with the basics of creating the user interface (UI) of an iPhone application, and describes how your code connects with the various graphical widgets.