Changing switch hostname
Configuring passwords s List
Switch(config)#hostname SW1
SW1(config)#enable secret cisco MD5 hash.
SW1(config)#enable password notcisco Clear text.
Securing console port SW1(config)#line con 0
SW1(config-line)#password cisco SW1(config-line)#login
Securing terminal lines SW1(config)#line vty 0 4
SW1(config-line)#password cisco SW1(config-line)#login
Encrypting passwords SW1(config)#service password-encryption
Configuring banners SW1(config)#banner motd $
-=-=-=-=-=-=-=-=-=-=-=-=-=-=-=-=- UNAUTHORIZED ACCESS IS PROHIBITED -=-=-=-=-=-=-=-=-=-=-=-=-=-=-=-=- $
Giving the switch an IP address SW1(config)#interface vlan 1
SW1(config-if)#ip address 172.16.1.11 255.255.255.0 (or dhcp) SW1(config-if)#shutdown
Setting the default gateway SW1(config)#ip default-gateway 172.16.1.1
Saving configuration SW1#copy running-config startup-config
Destination filename [startup-config]? Building configuration…
[OK]
Press enter to confirm file name.
SW1#wr
Building configuration… [OK]
Short for write memory.
Working environment
(name lookup, history, exec-timeout and logging behavior) SW1(config)#no ip domain-lookup
SW1(config)#line vty 0 4
SW1(config-line)#history size 15 SW1(config-line)# exec-timeout 10 30 SW1(config-line)#logging synchronous
Also valid for line con 0.
Configuring switch to use SSH • Configure DNS domain name:
SW1(config)#ip domain-name example.com • Configure a username and password: SW1(config)#username admin password cisco
• Generate encryption keys:
SW1(config)#crypto key generate rsa How many bits in the modulus [512]: 1024
• Define SSH version to use: SW1(config)#ip ssh version 2
• Enable vty lines to use SSH: SW1(config)#line vty 0 4
SW1(config-line)#login local
SW1(config-line)#transport input telnet ssh
The size of the key modulus in the range of 360 to 2048.
You can set vty lines to use only telnet or only ssh or both as in the example.
Cisco Commands List
Aliases SW1(config)#alias exec c configure terminal SW1(config)#alias exec s show ip interface brief SW1(config)#alias exec sr show running-config
Used to create shortcuts for long commands.
Description, speed and duplex SW1(config)#interface fastEthernet 0/1
SW1(config-if)#description LINK TO INTERNET ROUTER SW1(config-if)#speed 100 (options: 10, 100, auto) SW1(config)#interface range fastEthernet 0/5 – 10
SW1(config-if-range)#duplex full (options: half, full, auto)
The range
keyword used to set a group of interfaces at once.
Verify Basic Configuration
SW1#show version Shows information about the switch and its interfaces, RAM, NVRAM, flash, IOS, etc.
SW1#show running-config Shows the current configuration file stored in DRAM.
SW1#show startup-config Shows the configuration file stored in NVRAM which is used at first boot process.
SW1#show history Lists the commands currently held in the history buffer.
SW1#show ip interface brief Shows an overview of all interfaces, their physical status, protocol status and ip address if assigned. SW1#show interface vlan 1 Shows detailed information about the specified
interface, its status, protocol, duplex, speed, encapsulation, last 5 min traffic.
SW1#show interfaces description Shows the description of all interfaces
SW1#show interfaces status Shows the status of all interfaces like connected or not, speed, duplex, trunk or access vlan. SW1#show crypto key mypubkey rsa Shows the public encryption key used for SSH.
SW1#show dhcp lease Shows information about the leased IP address (when an interface is configured to get IP address via a dhcp server)
Configuring port security • Make the switch interface as access port:
SW1(config-if)#switchport mode access
• Enable port security on the interface: SW1(config-if)#switchport port-security
• Specify the maximum number of allowed MAC addresses: SW1(config-if)#switchport port-security maximum 1
• Define the action to take when violation occurs: SW1(config-if)#switchport port-security violation shutdown (options: shutdown, protect, restrict)
• Specify the allowed MAC addresses:
SW1(config-if)#switchport port-security mac-address 68b5.9965.1195 (options: H.H.H, sticky)
The sticky
keyword is used to let the interface dynamically learns and configures the MAC addresses of the
currently connected hosts.
Verify and troubleshoot port security
SW1#show mac-address-table Shows the entries of the mac address table SW1#show port-security overview of port security of all interfaces SW1#show port-security interface fa0/5 Shows detailed information about port
security on the specified interface Configuring VLANs
• Create a new VLAN and give it a name: SW1(config)#vlan 10
SW1(config-vlan)#name SALES
• Assign an access interface to access a specific VLAN: SW1(config)#interface fastEthernet 0/5
SW1(config-if)#switchport mode access SW1(config-if)#switchport access vlan 10
Cisco Commands List
Configuring an auxiliary VLAN for cisco IP phones SW1(config)#interface fastEthernet 0/5
SW1(config-if)#switchport access vlan 10 SW1(config-if)#switchport voice vlan 12
accessing vlan 10 (data) and 12 (VoIP)
Configuring Trunks SW1(config)#interface fastEthernet 0/1
SW1(config-if)#switchport mode trunk
(options: access, trunk, dynamic auto, dynamic desirable) SW1(config-if)#switchport trunk allowed vlan add 10
(options: add, remove, all, except)
Securing VLANS and Trunking • Administratively disable unused interfaces:
SW1(config-if)#shutdown
• Prevent trunking by disabling auto negotiation on the interface: SW1(config-if)#nonegotiate (or hardcode the port as an access port) SW1(config-if)#switchport mode access
• Assign the port to an unused VLAN: SW1(config-if)#switchport access vlan 222
Configuring VTP • Configure VTP mode:
SW1(config)#vtp mode server (options: server, client, transparent) • Configure VTP domain name:
SW1(config)#vtp domain EXAMPLE (case-sensitive) • Configure VTP password: (optional)
SW1(config)#vtp password cisco (case-sensitive) • Configure VTP pruning: (optional)
SW1(config)#vtp pruning (only works on VTP servers) • Enable VTP version 2: (optional)
SW1(config)#vtp version 2
• Bring up trunks between the switches
The transparent
VTP mode is used when an engineer wants to deactivate VTP on a particular switch
Verify and troubleshoot VLANS and VTP
SW1#show interfaces if switchport Lists information about administrative setting and operation status of interface SW1#show interfaces trunk Lists all the trunk ports on a switch
including the trunk allowed VLANS SW1#show vlan {brief| id| name| summary} Lists information about the VLANs SW1#show vtp status Lists VTP configuration (mode, domain
name, version, etc) and revision number SW1#show vtp password Shows the VTP password
STP optimization
• Hard coding the root bridge (changing bridge priority): SW1(config)#spanning-tree vlan 1 root primary
SW1(config)#spanning-tree vlan 1 root secondary SW1(config)#spanning-tree [vlan 1] priority 8192
• Changing the STP mode:
SW1(config)#spanning-tree mode rapid-pvst (options: mst, pvst, rapid-pvst)
• Enabling portfast and BPDU guard on an interface: SW1(config-if)#spanning-tree portfast
SW1(config-if)#spanning-tree bpduguard enable • Changing port cost:
SW1(config-if)#spanning-tree [vlan 1] cost 25 • Bundling interfaces into an etherchannel: SW1(config-if)#channel-group 1 mode on
(options: auto, desirable, on)
Priority must be a multiply of 4096
Portfast and BPDU guard are enabled only on interfaces connected to end user hosts
Cisco Commands List
STP verification and troubleshooting
SW1#show spanning-tree Shows detailed info about STP state SW1#show spanning-tree interface fa0/2 Shows STP info only on a specific port SW1#show spanning-tree vlan 1 Shows STP info only for a specific VLAN SW1#show spanning-tree [vlan1] root Shows info about the root switch
SW1#show spanning-tree [vlan1] bridge Shows info about the local switch SW1#show etherchannel 1 Show the state of the etherchannels
SW1#debug spanning-tree events Provides informational messages about the changes in the STP topology
Enabling or disabling CDP • Enabling CDP globally on a switch:
SW1(config)#cdp run
• Disabling CDP on a given interface: SW1(config-if)#no cdp enable
Using CDP for network verification and troubleshooting
SW1#show cdp Shows global information about CDP itself SW1#show cdp interface fa0/2 Shows information about CDP on a specific
interface
SW1#show cdp neighbors Shows information about the directly connected cisco devices including interfaces names capabilities
SW1#show cdp neighbors detail Shows detailed information about the
neighboring cisco devices including device address and version of IOS they run
SW1#show cdp entry * Same as show cdp neighbor detail SW1#show cdp entry SW2 Shows detailed information about the
specified entry only
Cisco Commands List
Router basic configuration Router(config)#hostname R1
R1(config)#enable secret cisco R1(config)#line con 0
R1(config-line)#password cisco R1(config-line)#login
R1(config-line)#logging synchronous R1(config-line)#exec-timeout 30 0 R1(config-line)#exit
R1(config)#line vty 0 4
R1(config-line)#password cisco R1(config-line)#login
R1(config-line)#logging synchronous R1(config-line)#exec-timeout 30 0 R1(config-line)#exit
R1(config)#line aux 0
R1(config-line)#password cisco R1(config-line)#login
R1(config-line)#logging synchronous R1(config-line)#exec-timeout 30 0 R1(config-line)#exit
R1(config)#banner motd $
-=-=-=-=-=-=-=-=-=-=-=-=-=-=-=-=- UNAUTHORIZED ACCESS IS PROHIBITED -=-=-=-=-=-=-=-=-=-=-=-=-=-=-=-=- $
R1(config)#alias exec c configure terminal R1(config)#alias exec s show ip interface brief R1(config)#alias exec sr show running-config R1(config)#no ip domain-lookup
R1(config)#service password-encryption R1(config)#ip domain-name example.com R1(config)#username admin password cisco R1(config)#crypto key generate rsa How many bits in the modulus [512]: 1024 R1(config)#ip ssh version 2
R1(config)#line vty 0 4 R1(config-line)#login local
R1(config-line)#transport input telnet ssh
This section includes IOS commands that are absolutely identical on both routers and switches, except the part of line aux 0 which is
configured only on router because
switches do not have an
auxiliary port.
Configuring router interfaces R1(config)#interface fastEthernet 0/0
R1(config-if)#description LINK_TO_LOCAL_LAN_THROUGH_SW1 R1(config-if)#ip address 172.16.1.1 255.255.255.0
R1(config-if)#no shutdown R1(config-if)#exit
R1(config)#interface serial 0/1/0
R1(config-if)#description WAN_CONNECTION_TO_R2 R1(config-if)#ip address 10.1.1.1 255.255.255.252 R1(config-if)#clock rate 128000
R1(config-if)#no shutdown
Clock rate is set only on the DCE side, typically the ISP side. On your router which is DTE you don't need to set
clocking.
Configuring Router-On-Stick for vlan routing R1(config)#interface fastEthernet 0/0
R1(config-if)#no shutdown
R1(config)# interface fastEthernet 0/0.10 R1(config-subif)# encapsulation dot1q 10
R1(config-subif)#ip address 192.168.10.1 255.255.255.0 R1(config-subif)# interface fastEthernet 0/0.20
R1(config-subif)# encapsulation dot1q 20
R1(config-subif)#ip address 192.168.20.1 255.255.255.0
Static routes
R1(config)#ip route 10.1.2.0 255.255.255.0 10.1.128.1 Using next hop
R1(config)#ip route 10.1.2.0 255.255.255.0 Serial 0/0
*Note: Exit interface can be used in point-to-point serial links.
Using exit interface Default Route
R1(config)#ip route 0.0.0.0 0.0.0.0 199.1.1.1
RIPv2 Configuration R1(config)#router rip
R1(config-router)#version 2
R1(config-router)#network 10.0.0.0 (written as an original class A) R1(config-router)#no autosummary
R1(config-router)#passive-interface serial 0/0
RIPv2 Verification
R1#show ip protocols Shows information about the running routing protocol process
R1#show ip route Shows the entire routing table R1#show ip route rip Shows routes learned via RIP only
R1#show ip route 10.1.1.1 Shows detailed information about the route to the specified destination network
OSPF Configuration • Enter OSPF router configuration mode:
R1(config)#router ospf 10 (process ID)
• Configure one or more network commands to identify which interfaces will run OSPF:
R1(config-router)#network 10.0.0.0 0.255.255.255 area 0 R1(config-router)#network 172.16.8.0 0.0.7.255 area 0 R1(config-router)#network 192.168.1.254 0.0.0.0 area 1
• Configure router ID either by: (Optional) o Using router-id ospf subcommand: R1(config-router)#router-id 1.1.1.1
o Configuring an IP address on a loopback interface: R1(config)#interface loopback 0
R1(config-if)#ip address 1.1.1.1 255.255.255.255
• Change Hello and Dead intervals per interface: (Optional) R1(config-if)#ip ospf hello-interval 2
R1(config-if)#ip ospf dead-interval 6
• Impact routing choices by tuning interface cost using one of the following ways: (Optional)
o Changing interface cost: R1(config-if)#ip ospf cost 55
o Changing interface bandwidth: R1(config-if)#bandwidth 128 (Kbps)
o Changing the reference bandwidth that used by OSPF to calculate the cost:
R1(config-router)#auto-cost reference-bandwidth 1000 (Mbps) • Disabling OSPF on a certain interface: (Optional) R1(config-router)#passive-interface serial 0/0
• Configuring OSPF authentication: (Optional) o Type 0 authentication (none):
R1(config-if)#ip ospf authentication null o Type 1 authentication (clear text): R1(config-if)#ip ospf authentication
R1(config-if)#ip ospf authentication-key cisco o Type 2 authentication (md5):
R1(config-if)#ip ospf authentication message-digest R1(config-if)#ip ospf message-digest-key 1 md5 cisco
OSPF verification
R1#show ip protocols Shows information about the running routing protocol process
R1#show ip route Shows the entire routing table R1#show ip route ospf Shows routes learned via OSPF only
R1#show ip ospf neighbors Shows all neighboring routers along with their respective adjacency state
R1#show ip ospf database Shows all the information contained in the LSDB
R1#show ip ospf interfaces serial 0/0 Shows detailed information about OSPF running on a specific interface
EIGRP Configuration • Enter EIGRP configuration mode and define AS number: R1(config)#router eigrp 121 (AS number)
• Configure one or more network commands to enable EIGRP on the specified interfaces:
R1(config-router)#network 10.0.0.0
R1(config-router)#network 172.16.0.0 0.0.3.255 R1(config-router)#network 192.168.1.1 0.0.0.0 R1(config-router)#network 0.0.0.0 255.255.255.255
• Disable auto summarization: (Optional) R1(config-router)#no autosummary
• Disable EIGRP on a specific interface: (Optional) R1(config-router)#passive-interface serial 0/0
• Configure load balancing parameters: (Optional) R1(config-router)#maximum-paths 6
R1(config-router)#variance 4
• Change interface Hello and Hold timers: (Optional) R1(config-if)#ip hello-interval eigrp 121 3
R1(config-if)#ip hold-time eigrp 121 10
• Impacting metric calculations by tuning BW and delay of the interface: (Optional)
R1(config-if)#bandwidth 265 (kbps)
R1(config-if)#delay 120 (tens of microseconds)
EIGRP Authentication • Create an authentication key chain as follows:
o Create a key chain and give it a name: R1(config)#key chain MY_KEYS
o Create one or more keys giving them numbers: R1(config-keychain)#key 1
o Define the key value:
R1(config-keychain-key)#key-string 1stKEY
o Define the life time of the keys (optional): R1(config-keychain-key)#send-lifetime [start time] [end time] R1(config-keychain-key)#accept-lifetime [start time] [end time]
• Enable md5 authentication mode for EIGRP on the interface: R1(config-if)#ip authentication mode eigrp 121 md5
• Refer to the correct key chain to be used on the interface: R1(config-if)#ip authentication key-chain eigrp 121 MY_KEYS
The key-string value and the mode must be the same on both routers. Lifetime options of the keys requires the clock of the routers to be set
correctly, better use NTP, or it can cause problems
EIGRP Verification
R1#show ip route eigrp Shows routes learned via EIGRP only R1#show ip eigrp neighbors Shows EIGRP neighbors and status R1#show ip eigrp topology Shows EIGRP topology table, including
successor and feasible successor R1#show ip eigrp interfaces Shows interfaces that run EIGRP R1#show ip eigrp traffic Lists statistics on numbers of EIGRP
Access Control Lists (ACLs) Standard ACL
• Plane the location (router and interface) and direction (in or out) on that interface:
o Standard ACL should be placed as close as possible to the destination of the packet.
o Identify the source IP addresses of packets as they go in the direction that the ACL is examining.
• Use a remark to describe the ACL: (Optional):
R1(config)#access-list 1 remark ACL TO DENY ACCESS FROM SALES VLAN • Create the ACL, keeping the following in mind:
o ACL uses first-match logic.
o There is an implicit deny any at the end of the ACL. R1(config)#access-list 2 deny 192.168.1.77
R1(config)#access-list 2 deny 192.168.1.64 0.0.0.31 R1(config)#access-list 2 permit 10.1.0.0 0.0.255.255 R1(config)#access-list 2 deny 10.0.0.0 0.255.255.255 R1(config)#access-list 2 permit any
• Enable the ACL on the chosen router interface in the correct direction (in or out):
R1(config-if)#ip access-group 2 out
Standard ACL number ranges: 1 – 99 and 1300 – 1999.
• Using standard ACL to limit telnet and SSH access to a router: o Create the ACL that defines the permitted telnet clients: R1(config)#access-list 99 remark ALLOWED TELNET CLIENTS
R1(config)#access-list 99 permit 192.168.1.128 0.0.0.15 o apply the ACL inbound the vty lines
R1(config)#line vty 0 4
R1(config-line)#access-class 99 in
Extended ACL • Note:
o Extended ACL should be placed as close as possible to the source of the packet.
o Extended ACL matches packets based on source & des. IP addresses, protocol, source & des. Port numbers and other criteria as well.
R1(config)#access-list 101 remark MY_ACCESS_LIST
R1(config)#access-list 101 deny ip host 10.1.1.1 host 10.2.2.2 R1(config)#access-list 101 deny tcp 10.1.1.0 0.0.0.255 any eq 23 R1(config)#access-list 101 deny icmp 10.1.1.1 0.0.0.0 any
R1(config)#access-list 101 deny tcp host 10.1.1.0 host 10.0.0.1 eq 80 R1(config)#access-list 101 deny udp host 10.1.1.7 eq 53 any
R1(config)#access-list 101 permit ip any any R1(config)#interface fastEthernet 0/0
R1(config-if)#ip access-group 101 in
Extended ACL number ranges: 100 – 199 and 2000 – 2699.
Named ACL • Note:
o Named ACLs use names to identify ACLs rather than numbers, and commands that permit or deny traffic are written in a sub mode called named ACL mode (nacl).
o Named ACL enables the editing of the ACL (deleting or inserting statements) by sequencing statements of the ACL. • Named standard ACL:
R1(config)#ip access-list standard MY_STANDARD_ACL R1(config-std-nacl)#permit 10.1.1.0 0.0.0.255 R1(config-std-nacl)#deny 10.2.2.2
R1(config-std-nacl)#permit any
R1(config)#interface fastEthernet 0/1
• Named extended ACL:
R1(config)#ip access-list extended MY_EXTENDED_ACL R1(config-ext-nacl)#deny icmp 10.1.1.1 0.0.0.0 any
R1(config-ext-nacl)#deny tcp host 10.1.1.0 host 10.0.0.1 eq 80 R1(config-ext-nacl)# permit ip any any
R1(config)#interface fastEthernet 0/1
R1(config-if)#ip access-group MY_EXTENDED_ACL in • Editing ACL using sequence numbers:
R1(config)#ip access-list extended MY_EXTENDED_ACL
R1(config-ext-nacl)#no 20 (deletes the statement of sequence number 20)
R1(config)#ip access-list standard 99
R1(config-std-nacl)#5 deny 1.1.1.1 (inserts a statement with sequence 5)
You can edit numbered ACLs using the configuration style of the named ACLs in as shown in the last example.
Verifying ACLs
R1#show access-lists Shows all ACLs configured on a router with counters at the end of each statement R1#show ip access-list Same as the previous command
R1#show ip access-list 101 Shows only the specified ACL
R1#show ip interface f0/0 Includes a reference to the ACLs enabled on that interface either in or out. DHCP Server
• Define a DHCP pool and give it a name: R1(config)#ip dhcp pool MY_POOL
• Define network and mask to use in this pool and the default gateway:
R1(dhcp-config)#network 192.168.1.0 255.255.255.0 R1(dhcp-config)#default-router 192.168.1.1
• Define one or more DNS server (OPTIONAL): R1(dhcp-config)#dns-server 213.131.65.20 8.8.8.8
• Confine the lease time (OPTIONAL): R1(dhcp-config)lease 2 (days)
• Define one or more scopes of excluded (reserved) addresses (OPTIONAL):
R1(config)#ip dhcp excluded-address 192.168.1.1 192.168.1.100 R1(config)#ip dhcp excluded-address 192.168.1.200 192.168.1.254
DHCP Verification and Troubleshooting
R1#show ip dhcp pool POOL_1 shows the status of the specified pool and the leased addresses from that pool
R1#show ip dhcp binding Shows all the leased ip addresses from all configured DHCP pools
PPP Configuration R1(config)#interface serial 0/0
R1(config-if)#encapsulation ppp
PPP Authentication CHAP
• Configure the hostname: R1(config)#hostname ALPHA
• Configure the name of the other end router and the shared password:
ALPHA(config)#username BETA password XYZ
• Enable CHAP authentication on the interface: ALPHA(config)#interface serial 0/0
ALPHA(config-if)#ppp authentication chap
The password used is shared password, that means it must be the same on both routers
PAP • Configure the hostname:
R1(config)#hostname ALPHA
• Configure the name of the other end router and the shared password:
ALPHA(config)#username BETA password XYZ
• Enable PAP authentication on the interface and define the username and password to be sent by PAP:
ALPHA(config)#interface serial 0/0 ALPHA(config-if)#ppp authentication pap
ALPHA(config-if)#ppp pap sent-username ALPHA password XYZ PPP Verification and troubleshoot
R1#show interface s0/0 Shows the encapsulation type and the control protocols of PPP
R1#show run Useful for viewing the configuration of
usernames and passwords used to authenticate ppp
R1#debug ppp authentication Displays the authentication process of ppp in real time
Frame Relay
Multipoint (one subnet)
• Give the interface an ip address and enable Frame Relay encapsulation:
R1(config)#interface serial 0/0
R1(config-if)#ip address 1.1.1.1 255.255.255.0 R1(config-if)#encapsulation frame-relay (ietf)
• Configure LMI signaling type: (Optional as discussed with ISP) R1(config-if)#frame-relay lmi-type ansi
(options: ansi, cisco, q933a)
• Configure Frame Relay mapping:
R1(config-if)#frame-relay map ip 1.1.1.2 102 broadcast (ietf) R1(config-if)#frame-relay map ip 1.1.1.3 103 broadcast
DLCI = 103
DLCI = 201 DLCI = 102
R2(config)#interface serial 0/0
R2(config-if)#ip address 1.1.1.2 255.255.255.0 R2(config-if)#encapsulation frame-relay
R2(config-if)#frame-relay map ip 1.1.1.1 201 broadcast R2(config-if)#frame-relay map ip 1.1.1.3 201 broadcast R3(config)#interface serial 0/0
R3(config-if)#ip address 1.1.1.3 255.255.255.0 R3(config-if)#encapsulation frame-relay
R3(config-if)#frame-relay map ip 1.1.1.1 301 broadcast R3(config-if)#frame-relay map ip 1.1.1.2 301 broadcast
Point-to-point (different subnets; one subnet per subinterface) • Enable Frame Relay encapsulation:
R1(config)#interface serial 0/0
R1(config-if)#encapsulation frame-relay
• Give an ip address to a subinterface and configure its DLCI: R1(config)#interface serial 0/0.102 point-to-point
R1(config-subif)#ip address 1.1.1.1 255.255.255.0 R1(config-subif)#frame-relay interface-dlci 102 R1(config)#interface serial 0/0.103 point-to-point R1(config-subif)#ip address 2.2.2.1 255.255.255.0 R1(config-subif)#frame-relay interface-dlci 103 R2(config)#interface serial 0/0
R2(config-if)#encapsulation frame-relay
R2(config)#interface serial 0/0.201 point-to-point R2(config-subif)#ip address 1.1.1.2 255.255.255.0 R2(config-subif)#frame-relay interface-dlci 201 R3(config)#interface serial 0/0
R3(config-if)#encapsulation frame-relay
R3(config)#interface serial 0/0.301 point-to-point R3(config-subif)#ip address 2.2.2.2 255.255.255.0 R3(config-subif)#frame-relay interface-dlci 301
Frame Relay Verification and troubleshoot
R1#show interfaces serial 0/0 Shows the encapsulation type R1#show frame-relay PVC Lists PVC status information R1#show frame-relay map Lists DLCI to IP mapping R1#show frame-relay lmi Lists LMI status information
R1#debug frame-relay lmi Displays the content of LMI messages R1#debug frame-relay events Lists messages about certain Frame Relay
events, including Inverse ARP messaeges Network Address Translation (NAT)
Static NAT • Define the outside and inside interfaces: R1(config)#interface serial 0/0
R1(config-if)#ip nat outside
R1(config)#interface FastEthernet 1/1 R1(config-if)#ip nat inside
• Configure static NAT statement:
R1(config)#ip nat inside source static 192.168.1.10 200.1.1.1 Dynamic NAT
• Define the outside and inside interfaces:
• Create an ACL that determines the IP addresses that are allowed to be translated:
R1(config)#access-list 3 permit 192.168.1.0 0.0.0.255 • Create a pool of public IP addresses:
R1(config)#ip nat pool PUB 200.1.1.1 200.1.1.6 netmask 255.255.255.248 • Configure NAT statement:
NAT Overload (PAT)
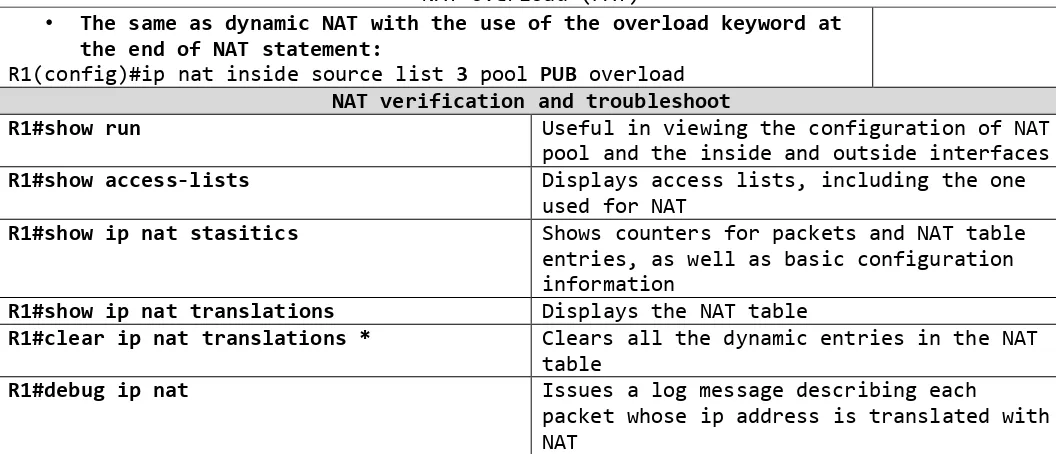
• The same as dynamic NAT with the use of the overload keyword at the end of NAT statement:
R1(config)#ip nat inside source list 3 pool PUB overload NAT verification and troubleshoot
R1#show run Useful in viewing the configuration of NAT
pool and the inside and outside interfaces R1#show access-lists Displays access lists, including the one
used for NAT
R1#show ip nat stasitics Shows counters for packets and NAT table entries, as well as basic configuration information
R1#show ip nat translations Displays the NAT table
R1#clear ip nat translations * Clears all the dynamic entries in the NAT table
R1#debug ip nat Issues a log message describing each