•Coversgesturedevices,3Ddisplay,embeddedsystems,andotheradvancedtopics
•InstallJavaFX8andconfigureyourenvironment •Workwithtouch-basedinterfacessuchasinWindows8
•Interpretgesture-basedeventstheLeapMotionControllerandsimilarhardware •IntegrateJavaFXwithembeddedsystemssuchasArduinoandRaspberryPi •DevelopmodernGUIbusinessformstypeapplications
•Workwithshapes,color,text,andanimation •Addaudioandvideotoyourprojects
•CreatecustomcontrolsusingSVG,CSS,andtheanimationtimer •Learntostyleauser-interfaceviaCSS
For your convenience Apress has placed some of the front
matter material after the index. Please use the Bookmarks
Contents at a Glance
About the Authors ...
xvii
About the Technical Reviewer ...
xix
Acknowledgments ...
xxi
Introduction ...
xxiii
Chapter 1: Getting Started
■
...
1
Chapter 2: JavaFX Fundamentals
■
...
31
Chapter 3: Lambdas and Properties
■
...
61
Chapter 4: Layouts and UI Controls
■
...
91
Chapter 5: Graphics with JavaFX
■
...
123
Chapter 6: Custom UIs
■
...
151
Chapter 7: Media with JavaFX
■
...
183
Chapter 8: JavaFX on the Web
■
...
215
Chapter 9: JavaFX 3D
■
...
241
Chapter 11: JavaFX on the Raspberry Pi
■
...
305
Chapter 12: JavaFX and Gestures
■
...
339
Chapter 13: References
■
...
365
Introduction
Welcome to JavaFX 8: Introduction by Example. What is JavaFX?
JavaFX is Java’s next-generation graphical user interface (GUI) toolkit that allows developers to rapidly build rich cross-platform applications. Built from the ground up, JavaFX takes advantage of modern GPUs through hardware-accelerated graphics while providing well-designed programming interfaces enabling developers to combine graphics, animation, and UI controls. The new JavaFX 8 is a pure Java language application programming interface (API). The goal of JavaFX is to be used across many types of devices, such as embedded devices, smartphones, TVs, tablet computers, and desktops.
Nandini Ramani of Oracle plainly states the intended direction of JavaFX as a platform in the following excerpt from the screencast Introducing JavaFX:
The industry is moving toward multi-core/multi-threading platforms with GPUs. JavaFX leverages these attributes to improve execution efficiency and UI design flexibility. Our initial goal is to give architects and developers of enterprise applications a set of tools and APIs to help them build better data-driven business applications.
—Nandini Ramani Oracle Corp. VP of Development, Java Client Platform
Depending on who you talk to, you are likely to encounter different definitions of “user experience” (or in the UI world, UX). But one fact remains; the users will always demand better content and increased usability from GUI applications. In light of this fact, developers and designers often work together to craft applications to fulfill this demand. JavaFX provides a toolkit that helps both the developer and designer (in some cases, the same person) to create functional yet aesthetically pleasing applications. Another thing to acknowledge is that if you are developing a game, media player, or the usual enterprise application, JavaFX will not only assist in developing richer UIs, but you’ll also find that the APIs are extremely well designed to greatly improve developer productivity (we’re all about the user of the API’s perspective).
Although this book doesn’t go through an exhaustive study of all of JavaFX 8’s capabilities, you will find common use cases that can help you build richer applications. Hopefully, this book will lead you in the right direction by providing practical, real-world examples.
Some History
In 2005 Sun Microsystems acquired the company SeeBeyond, where a software engineer named Chris Oliver created a graphics-rich scripting language known as F3 (Form Follows Function). F3 was later unveiled by Sun Microsystems at the 2007 JavaOne conference as JavaFX. On April 20, 2009, Oracle Corporation announced the acquisition of Sun Microsystems, making Oracle the new steward of JavaFX.
At JavaOne 2010, Oracle announced the JavaFX roadmap, which included its plans to phase out the JavaFX scripting language and re-create the JavaFX platform for the Java platform as Java-based APIs. As promised based on the 2010 roadmap, JavaFX 2.0 SDK was released at JavaOne, in October 2011. In addition to the release of JavaFX 2.0, Oracle announced its commitment to take steps to open-source JavaFX, thus allowing the community to help move the platform forward. Open sourcing JavaFX will increase its adoption, enable a quicker turnaround time on bug fixes, and generate new enhancements.
Between JavaFX 2.1 and 2.2 the number of new features grew rapidly. Please refer to Table FM-1 for the numerous features included between versions 2.1 and 2.2. JavaFX 2.1 was the official release of the Java SDK on a MacOS. JavaFX 2.2 was the official release of the Java SDK on a Linux operating system.
The new Java 8 release was announced March 18, 2014. Java 8 has many new APIs and language enhancements, which includes lambdas, Stream API, Nashorn JavaScript engine, and JavaFX APIs. Relating to JavaFX 8, the following are such as: 3D graphics, Rich text support, and Printing APIs. To see all of the new features in Java 8 visit http://www.oracle.com/technetwork/java/javase/8-whats-new-2157071.html.
What You Will Learn in This Book
The title of the book says it all: JavaFX 8:Introduction by Example. In this book you will be learning the new JavaFX 8 capabilities by following practical examples. These examples will, in turn, provide you with the knowledge needed to create your own rich client applications. Following Java’s mantra “Write once, run anywhere,” JavaFX also preserves this same sentiment. Because JavaFX 8 is written entirely in Java the language, you will feel right at home.
Most of the examples can be compiled and run under Java 7. However, most of them are designed to take advantage of Java 8’s language enhancements, and therefore Java 8 will be required. An Table FM-1. Historical Timeline of Major JavaFX Releases
Release Date Version Platform Description
December 4th 2008 1.0 Windows and MacOS JavaFX Script Language, Production
Suite, Media Playback
February 12th 2009 1.1 Windows and MacOS New mobile development
June 2nd 2009 1.2 Windows, MacOS, Linux, Solaris Skinnable UI controls, Charting API, and Performance improvements
April 22nd 2010 1.3 Windows, MacOS, Linux, Solaris JavaFX Composer, TV Emulator, Mobile Emulator
October 3rd 2011 2.0 Windows Rewritten for the Java Language
April 27, 2012 2.1 Windows, MacOS The official version for the MacOS
platform was released. Media supports H.264/MPEG-4 AVC. Supports a JavaScript bridge for web engine.
August 14, 2012 2.2 Windows, MacOS and Linux The official version for the Linux
platform was released. The following are the new APIs and tools:
Canvas, HTTP Live Streaming, Touch events, Gestures, Image manipulation APIs and native application packaging.
discussed in Chapter 3. While working through this book with JavaFX 8 and Java 8, you will see that the new APIs and language enhancements will help you to become a more productive developer. Having said this, we encourage you to explore all of the new Java 8 capabilities.
This book covers JavaFX 8’s fundamentals, lambdas, properties, layouts, UI controls, Graphics, Animation, Custom UIs, Charts, Media, Web, 3D, Arduino, RaspberryPi, Touch events, and gestures.
Who This Book Is For
If you are a Java developer looking to take your client-side applications to the next level, you will find this book your guide to help you begin creating usable and aesthetically pleasing user interfaces. Also, if you are an experienced Java Swing, Flash/Flex, SWT or web developer who wants to learn how to create high-performant rich client-side applications, this is the book for you.
How This Book Is Structured
Chapter
1
Getting Started
To get started using this book to learn JavaFX 8, you will want to set up your development
environment to compile and run many of its examples. In this chapter you will learn how to install the required software, such as the Java development kit (JDK) and the NetBeans integrated development environment (IDE). After installing the required software, you will begin by creating a traditional JavaFX “Hello World” example. Once you are comfortable with the development environment, we will walk through the JavaFX Hello World source code. Finally, you will get a glimpse of how to package your application as a standalone application to be launched and distributed.
I realize many developers are partial to their IDEs and editors, so I’ve provided two methods to compile and run the Hello World example. In the first method you will be using the Netbeans IDE and in the second method you will learn how to use the command line (terminal window) to compile and launch JavaFX applications. The second method is an approach for those who are not fond of fancy IDEs.
If you are already familiar with the installation of the Java Development Kit (JDK) and the NetBeans IDE, you can skip to Chapter 2, which covers the fundamentals (JavaFX 2D). Let’s get started!
Installing Required Software
When using this book you’ll need to download and install Java 8 Java Development Kit (JDK) or a later version. Get it from the following URL:
http://www.oracle.com/technetwork/java/javase/downloads/index.html
Also install NetBeans 8 or greater:
https://netbeans.org/downloads
Currently JavaFX 8 runs on the following operating systems:
Windows OS (XP, Vista, 7, 8) 32- and 64-bit
Linux (32- and- 64-bit)
Linux ARMv6/7 VFP, HardFP ABI (32-bit)
Solaris (32- and 64-bit)
After downloading the appropriate software versions for your operating system, you will install the Java 8 JDK and the NetBeans 8 IDE.
Installing the Java 8 Development Kit
The first thing to do is install the correct version of Java. You want the development kit, not the runtime. Follow the steps outlined in this section to download and install Java 8. Download the Java 8 JDK from the following location:
http://www.oracle.com/technetwork/java/javase/downloads/index.html
In the following steps I will be using the Java 8 JDK 32-bit version for the Windows 7 operating system as an example. The steps are similar on other operating systems and JDK versions; however, if your environment is different, please refer to http://www.oracle.com/technetwork/java/javase/ overview/index.html for additional details. The following are steps to install the Java 8 JDK:
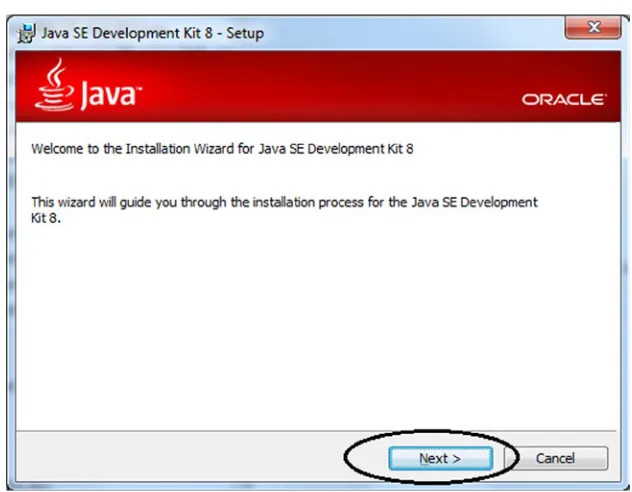
1. Install the Java 8 JDK. Launch the binary executable. The screen in Figure 1-1 will appear once you’ve launched the JavaFX SDK setup executable. That’s a security warning you’ll commonly receive on the Windows platform to inform you about installing software. Typically other operating systems will pop up a similar warning dialog box to alert you of risks of installing or running binary files. Click the Run button to proceed. Typically you will need administrator rights on the machine to install software. On Windows you can right-click the executable and run as Administrator.
2. Begin the setup of the Java 8 JDK. The screen in Figure 1-2 will appear, to begin the installation process. Click the Next button to begin installation.
Figure 1-2. Java SE Development Kit 8 setup
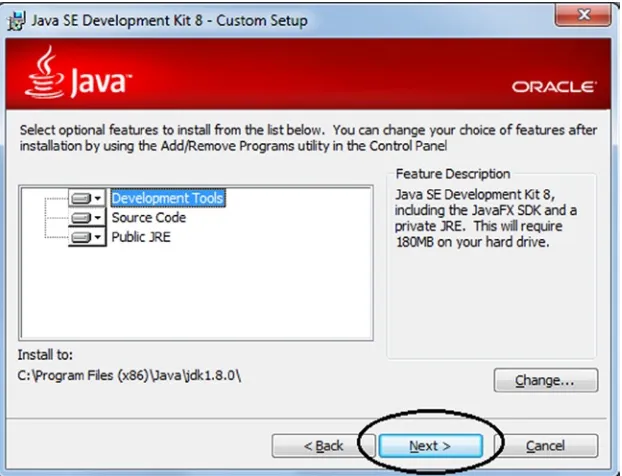
4. The installation process will display a progress bar, as shown in Figure 1-4. Figure 1-3. Java SE Development Kit 8 optional features
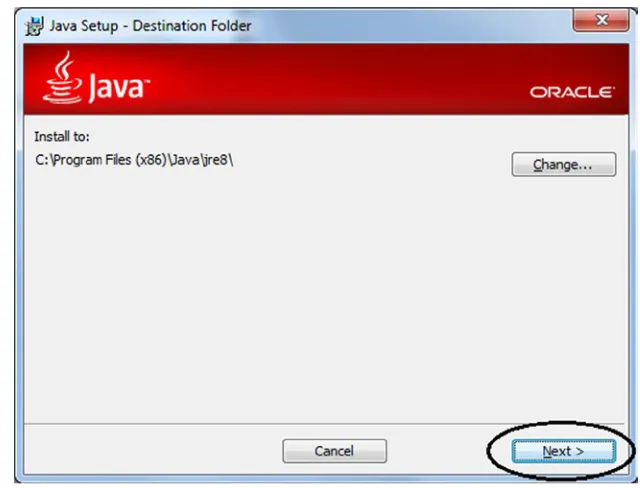
5. Change the installation directory of the Java runtime. Accept the defaults and click Next to proceed. Figure 1-5 shows the Destination Folder dialog, where you can change the Java runtime installation directory.
Figure 1-5. The Java 8 runtime destination directory
Setting Environment Variables
Now you need to set a couple of key environment variables. How you set them and the values they should be set to vary depending on your choice of operating system. The two variables to set are:
JAVA_HOME: Tells your operating system where the Java installation directory lives.
PATH: Specifies where the Java executable directory resides. This environment variable lets the system search paths or directories containing executable files. Java executables reside in the bin directory under the JAVA_HOME home directory.
Following are the variables to set in 32-bit Windows:
set JAVA_HOME="C:\Program Files (x86)\Java\jdk1.8.0" set PATH=%JAVA_HOME%\bin;%PATH%
Set the same variables in 64-bit Windows, but the values are different:
set JAVA_HOME="C:\Program Files\Java\jdk1.8.0" set PATH=%JAVA_HOME%\bin;%PATH%
On Unix-based platforms such as Mac OS X and Linux, your settings and how you make them depend somewhat upon which shell you are using. The following examples show how to set the needed variables for the Bash and Bourne, and the CSH shells:
#csh environments
setenv JAVA_HOME /usr/java/jdk1.8.0 setenv PATH ${JAVA_HOME}/bin:${PATH}
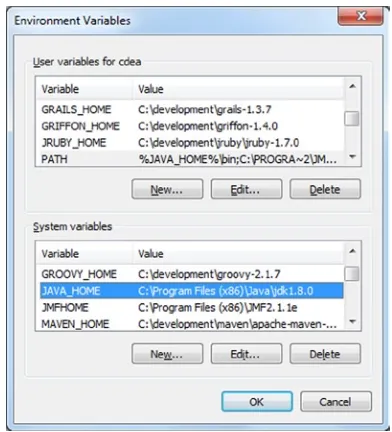
These statements will set environment variables temporarily for the current terminal window session. To make JAVA_HOME and PATH more permanent you will want to add them to your system upon logon such that they are always made available whenever you boot or login. Depending on your operating system you will need to be able to edit environment variable names and values. In the Windows environment you can use the keyboard shortcut Windows logo key + Pause/Break key, and then click the Advanced system settings to display the Systems Property dialog.
Next, click Environment Variables. This is where you can add, edit, and delete environment variables. You will add or edit the JAVA_HOME environment variable by using the installed home directory as the value. Shown in Figure 1-7 is the Environment Variables dialog on the Windows operating system.
Figure 1-7. Windows Environment Variables
To set your
JAVA_HOME for the Mac OS X platform, you will need to launch a terminal window to edit your home directory’s .bash_profile file (for example, named ~/.bash_profile) by adding the export commands shown earlier.
On Linux and other Unix operating systems that use Bash shell environments
launch a terminal window and edit either the ~/.bashrc or ~/.profile file to contain the export commands.
On Linux and other Unix operating systems that use C shell (csh) environments,
Once you’ve set up your path and JAVA_HOME environment variables, you will want to verify by launching a terminal window and executing the following two commands from the command prompt:
java -version javac –version
The output in each case should display a message indicating the Java 8 version of the language and runtime.
Installing the NetBeans IDE
When developing JavaFX applications you will be using the NetBeans IDE. Be sure to download the correct NetBeans version containing JavaFX. To install the NetBeans IDE, follow these steps:
1. Download the NetBeans IDE from the following location:
https://netbeans.org/downloads/index.html
2. Install NetBeans 8 or later. Launch the binary executable. The screen in Figure 1-8 will appear once you’ve launched the NetBeans installation executable. On the Windows platform you will receive a security warning to inform the user about installing software.
Figure 1-8. Windows security warning
3. Click on the Run button to proceed. Figure 1-8 shows a Windows security warning prompt that appears before launching binary files.
5. Read and accept the NetBeans license agreement. After reading and
agreeing to the terms, click the “I accept the terms in the license agreement” check box and then click Next to proceed. Figure 1-10 shows the NetBeans License Agreement.
6. Read and accept the JUnit license agreement. After reading and agreeing to the terms, click “I accept the terms in the license agreement. Install JUnit” and then click the Next button to proceed.
7. Shown in Figure 1-11 is the JUnit License Agreement. JUnit is a Java unit testing library.
8. Choose the destination directory to install NetBeans and select the Java 8 SE Development Kit previously installed. As usual, keep the defaults for the destination to install the NetBeans IDE. However, you will need to select the correct JDK.
9. Figure 1-12 shows a drop-down where you can specify the JDK for the NetBeans IDE. You will select the Java 8 JDK.
Figure 1-12. NetBeans IDE installation
13. Launch the NetBeans IDE. You should see the opening page shown in Figure 1-17.
Now you are ready to go forward and create JavaFX applications.
Creating a JavaFX Hello World Application
You’ll be learning two methods in this section to develop, compile, and run a JavaFX-based HelloWorld application. In the first method you will be using the NetBeans IDE we just installed and in the second method you will develop a JavaFX application without using an IDE.
Using the Netbeans IDE
To quickly get started with creating, coding, compiling, and running a simple JavaFX HelloWorld application using the NetBeans IDE, follow the steps outline in this section. You’ll want to go deeper in the next section, to get an understanding of what the IDE is doing behind the scenes on your behalf. For now, though, let’s just get some code written and running.
1. Launch NetBeans IDE.
2. On the File menu, select New Project.
3. Under Choose Project and Categories, select the JavaFX folder.
5. Specify HelloWorld for your project name.
6. Change or accept the defaults for the Project Location and Project Folder fields. Figure 1-18 shows the New JavaFX Application dialog wizard to create a simple HelloWorld application.
Figure 1-18. New JavaFX Application wizard
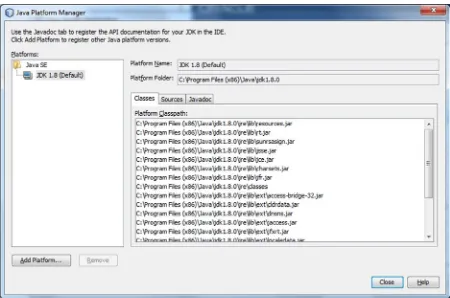
Figure 1-19. The Java Platform Manager window containing JDK 1.8 as a managed platform
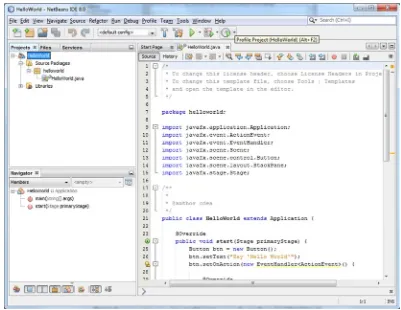
Figure 1-20. A newly created HelloWorld project
Note In the NetBeans IDE, which may have other projects, you may encounter a particular project set as the main project. It is advised to set the main project as None by choosing Run ➤Set Main Project ➤ select
None (as shown in Figure 1-22). By doing this it allows a project to run just by clicking on the green arrowed button. Assuming the project is selected on the left in the Projects tab. NetBeans will automatically search a project’s JavaFX main application class to launch the application. See step 10, following.
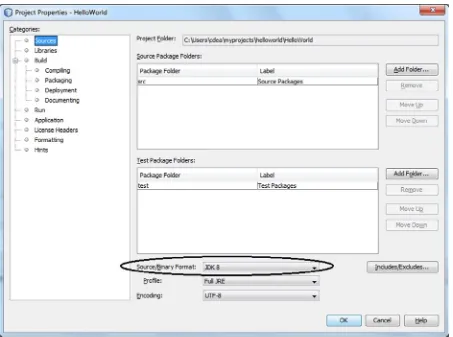
Figure 1-21. Project Properties
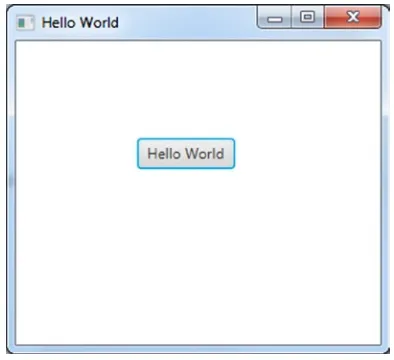
11. Select the Run menu and Run Main Project or hit the F6 key. You can also click the green arrow icon on the tool bar. After you hit the Run option, the output should look like Figure 1-23.
Figure 1-23. JavaFX Hello World launched from the NetBeans IDE
You shouldn’t encounter any difficulty when following steps 1 through 8. However, steps 9 ensures that your project’s source/binary format is using JDK 8. Because of the new additions to the Java language in Java 8, such as lambdas, most of the source code in this book will rely on the new syntax and therefore will not be backward-compatible with prior versions of Java 8. Typically, developers have prior versions of the Java development kit such as JDK 7. NetBeans allows you to switch between different JDKs when projects require older versions. An important thing to note is that in early releases of JavaFX 2.0, the software was packaged separately from the Java SDK, which caused some software versioning confusion. Thank goodness it is now just one download (JDK 8)! If you are still using Java 7 SDK, the latest download will also contain JavaFX in one bundle since JavaFX 2.1.
Using the Command-Line Prompt
The second method of developing JavaFX 8 applications is to use a common text editor and the command line prompt (terminal). By learning how to compile and execute applications on the command-line prompt you will learn about the classpath and where the executable files reside. This exposure should sharpen your skills when you are in environments where fancy IDEs and/or editors aren’t easily available.
Working from the command line you will basically use popular text editors such as vi, Emacs, or Notepad to code your JavaFX Hello World application. An example is shown in Listing 1-1.
Listing 1-1. A JavaFX Hello World application from HelloWorldMain.java
package helloworldmain;
public class HelloWorldMain extends Application {
/**
* @param args the command line arguments */
public static void main(String[] args) { Application.launch(args);
}
@Override
Group root = new Group();
btn.setOnAction(new EventHandler<ActionEvent>() {
public void handle(ActionEvent event) {
Once the Java file is created you will use the command-line prompt or terminal window to compile and run your JavaFX application. Following are the steps to create a JavaFX Hello World application to be compiled and run on the command-line prompt.
1. Copy and paste the code from Listing 1-1 into a text editor, and save the file as HelloWorldMain.java.
2. After saving the file named HelloWorldMain.java, on the command-line prompt you will navigate to the directory location of the file. The examples to follow assume you have saved the file to a directory named myprojects/ helloworld. Change directory as follows on Mac OS X, Linux, and Unix-based operating systems:
cd ~/myprojects/helloworld
3. Change directory on Windows operating systems using the following command:
C:\Users\myusername>cd myprojects\helloworld C:\Users\myusername\myprojects\helloworld>
4. Compile the source code file HelloWorldMain.java using the Java compiler javac with the -d switch with the current path. Type the following command:
C:\Users\myusername\myprojects\helloworld>javac -d . HelloWorldMain.java
When finished compiling, your directory structure should resemble the following:
|myprojects
|helloworld
|HelloWorldMain.java |helloworldmain
|HelloWorldMain.class
5. Run and test your JavaFX Hello World application. Assuming you are located in the same directory as the HelloWorldMain.java file, type the following command to run your JavaFX Hello World application from the command-line prompt:
C:\Users\myusername\myprojects\helloworld>java helloworldmain.HelloWorldMain
Shown in Figure 1-24 is the output of a simple JavaFX Hello World application launched from the command-line prompt.
Figure 1-24. JavaFX Hello World launched from the command-line prompt
Walking Through the Code
Listing 1-2. A skeleton version of the file HelloWorldMain.java
public class HelloWorldMain extends Application {
/**
* @param args the command line arguments */
public static void main(String[] args) { // Main thread
Application.launch(args); }
@Override
public void start(Stage primaryStage) { // JavaFX application thread
// JavaFX code here... }
}
Here, in our main() method’s entry point we launch the JavaFX application by simply passing in the command-line arguments to the Application.launch() method. To access any arguments passed into the launch() method you can invoke the getParameters() method of the Application class. Please see the Javadoc documentation for details on various ways to access named and raw arguments. After the Application.launch() method has executed, the application will enter a ready state, and the framework internals will invoke the start() method to begin. At this point, the program execution occurs on the JavaFX application thread and not on the main thread. When the start() method is invoked, a JavaFX javafx.stage.Stage object is available for the developer to use and manipulate. Following is the overridden Application start() method:
@Override
public void start(Stage primaryStage) {...}
When the program begins in the start() method, a separate thread of execution occurs, called the JavaFX application thread. Keep in mind that running on the JavaFX application thread is synonymous with running on Java Swing’s event dispatch thread. Later in this book, you will learn how to create background processes to avoid blocking the JavaFX application thread. When you know how to build applications to avoid blocking the GUI, the user will notice that your application is much more responsive (snappy) under heavy usage. Mastering responsiveness in GUI applications is an important concept in enhancing usability and the overall user experience.
JavaFX Scene Graph
Proceeding with our example, in the start() method we see that for a JavaFX desktop window (stage) you can set the title bar using the setTitle() method. Next, you create a root node (Group), which is added to the Scene object as the top-level surface for the application window. The following code snippet shows how to set the title and create the scene:
primaryStage.setTitle("Hello World"); Group root = new Group();
Scene scene = new Scene(root, 300, 250);
JavaFX Node
A JavaFX Node is a fundamental base class for all scene graph nodes to be rendered. The following graphics capabilities can be applied to Nodes: scaling, transforms, translations, and effects.
Some of the most commonly used nodes are UI controls and Shape objects. Similar to a tree data structure, a scene graph will contain children nodes by using a container class such as the Group or Pane class. We’ll learn more about the Group class later when we look at the ObservableList class, but for now you can think of them as Java List or Collection classes that are capable of holding child Node objects. In the following code a button (Button) node is created to be positioned on the scene and set with an event handler (EventHandler<ActionEvent>) that responds when the user presses the button. The handler code will output the word “Hello World” on the console.
Button btn = new Button(); btn.setLayoutX(100); btn.setLayoutY(80);
btn.setText("Hello World");
btn.setOnAction(new EventHandler<ActionEvent>() { public void handle(ActionEvent event) { System.out.println("Hello World"); }
});
root.getChildren().add(btn);
Once the child nodes have been added to our root Group via the getChildren().add() method, we set the primaryStage’s scene and call the show() method on the Stage object to display a JavaFX application window. By default the window will allow a user to minimize, maximize, and close (exit) the application. Following is the code to set the scene and display (show) the JavaFX application window (Stage):
primaryStage.setScene(scene); primaryStage.show();
Packaging a JavaFX Application
To give you a taste of the JavaFX Packager tool’s capabilities, I will show you how to package the HelloWorldMain classes into a single executable jar file that a user can double-click or launch from a command prompt (terminal).
cd myprojects/helloworld
javac -d . HelloWorldMain.java
javafxpackager -createjar -appclass helloworldmain.HelloWorldMain -srcdir . -outdir out -outfile helloworld.jar -v
Table 1-1 describes the common options and switches that are used in building a JavaFX jar executable application.
Table 1-1. Common javafxpackager Options to Build an Executable jar
Option/Switch Example Description
-createjar -- Creates a JavaFX JAR executable application.
-appclass helloworldmain.HelloWorldMain Specifies the fully qualified name of the class containing the main() method.
-srcdir . The top-level location of the parent directory holding the compiled classes (current directory).
-outdir out The destination where the packaged jar file will be created.
-outfile helloworld.jar Specifies the name of the executable jar file.
-v -- Allows verbose displays logging information when
executing javafxpackager.
To run the jar executable on the command line, you simply type the following and press Enter:
javaw -jar out/helloworld.jar
There are many ways to package and deploy JavaFX applications. To learn more, please see Oracle’s “Deploying JavaFX Applications” at the following URL:
http://docs.oracle.com/javafx/2/deployment/jfxpub-deployment.htm
Also see the following, related articles:
“Packaging JavaFX Applications as Native Installers” at
http://fxexperience
.com/2012/03/packaging-javafx-applications-as-native “JavaFX And Maven” at
http://www.zenjava.com/2012/02/17/javafx-and-maven “JavaFX Gradle Plugin 0.3.0 Released” at
https://bitbucket.org/shemnon/
Summary
31
Chapter
2
JavaFX Fundamentals
There is nothing more frustrating than receiving complicated advice as a solution to a problem. Because of this, I have always made it a point to focus on the fundamentals. In order to render graphics on the JavaFX scene, you will need basic shapes and colors. Expanding upon your
knowledge of the JavaFX scene graph, which you visited toward the end of Chapter 1, you will learn in this chapter how to draw and manipulate 2D shapes on the JavaFX scene graph.
Even more fundamental than a shape object is JavaFX’s javafx.scene.Node class. The Node class is a fundamental base class for all JavaFX scene graph nodes. The Node class provides the ability to transform, translate, and apply effects to any node. Many examples in this chapter involve the javafx.scene.shape.Shape class, which is a descendant of the Node class. Therefore, the Shape class will inherit all of the Node class’ capabilities. In this chapter you will explore many derived classes that inherit from Shape. You will begin this chapter by examining JavaFX’s most basic shape, the Line node.
JavaFX Lines
Rendering lines in JavaFX is conceptually similar to Euclidean geometry in that two (x, y) coordinate points connect to draw a segment into space. When drawn on the JavaFX scene graph, lines are rendered using the screen coordinate space (system). In geometry, a line is defined as a segment connected by two points in space, although it lacks a width (thickness) and color value. Does this mean that the line is invisible? In the computer world, physical devices plot pixels and shapes that occupy real surfaces. Monitors and printers are examples of such surfaces. Because of this method of production, modern graphics programming has adopted the standard screen coordinate system. In this system, lines that are drawn are visible and have attributes of width and color.
As you learn more about JavaFX, you will discover many scene graph objects, such as lines, circles, and rectangles. These objects are derived classes of the Shape class. All shape objects can perform geometric operations between two shaped areas, such as subtract, intersect and union. By mastering the Shape API, you will begin to see endless possibilities. Now let’s discuss how to create lines.
To draw lines in JavaFX, you will use the javafx.scene.shape.Line class. When creating a Line instance you need to specify a start (x, y) coordinate and an end coordinate to draw a line. There are two ways to specify the start and end points when creating Line nodes. The first method is to use a constructor with the parameters startX, startY, endX, and endY. The data types of all the parameters are double values, which provide floating-point decimal precision. The following line has a start point (100, 10) and end point (10, 110) created using a constructor.
Line line = new Line(100, 10, 10, 110);
The second method to create a line node is to instantiate a Line class by using the empty default constructor and subsequently setting each attribute using associated setter methods. The following code snippet shows how to specify a line’s start and end points using setter methods.
Line line = new Line(); line.setStartX(100); line.setStartY(10); line.setEndX(10); line.setEndY(110);
Line nodes drawn on the scene graph default to a stroke width of 1.0 (double) and a stroke color of black (Color.BLACK). According to the Javadoc, all shapes have a stroke color of null (no color) except Line, Polyline, and Path nodes.
(0, 0) x
y
Now that you know how to draw lines on the scene graph, you are probably wondering how to be more creative with lines. Creating different kinds of lines is simple; you basically set properties inherited from the parent class (javafx.scene.shape.Shape). Table 2-1 shows the properties you can set on a line (Shape). To retrieve or modify each property, you will use its appropriate getter and setter methods. The table lists each property name and its data type, with a description. Please refer to the Javadoc documentation for more details.
Table 2-1. The javafx.scene.shape.Shape Class Properties
Property Data Type Description
fill javafx.scene.paint.Paint A color to fill inside a shape.
smooth Boolean True turns on anti-aliasing, otherwise false.
strokeDashOffset Double The offset (distance) into the dashed pattern.
strokeLineCap javafx.scene.shape.StrokeLineCap The cap style on the end of a line or path. There are three styles: StrokeLineCap.BUTT, StrokeLineCap.ROUND, and StrokeLineCap.SQUARE.
strokeLineJoin javafx.scene.shape.StrokeLineJoin Decoration when lines meet. There are three types: StrokeLineJoin.MITER, StrokeLineJoin.BEVEL, and StrokeLineJoin.ROUND.
strokeMiterLimit Double The limit of a miter joint. Used along with the miter join decoration (StrokeLineJoin.MITER).
stroke javafx.scene.paint.Paint A color for the shape’s line stroke.
strokeType javafx.scene.shape.StrokeType Where to draw the stroke around the boundary of a Shape node. There are three types: StrokeType.CENTERED, StrokeType.INSIDE, and StrokeType.OUTSIDE.
strokeWidth Double A stroke line’s width.
Drawing Lines
In Figure 2-2 you can see that the first line (top) is a thick red line with a dashed stroke pattern. The second line is a thick white line having rounded end caps (line cap). Last is an ordinary blue line having the same thickness as the others. You will also notice in Figure 2-2 underneath the blue line are a label and slider control; these allow the user to change the red (top) line’s stroke dash offset property dynamically. The label control displays the dash offset value as the slider control moves.
Figure 2-2. Drawing lines
Listing 2-1shows the source code for DrawingLines.java.
Listing 2-1. DrawingLines.java
package jfx8ibe;
import javafx.application.Application; import javafx.beans.value.ObservableValue; import javafx.scene.Group;
import javafx.scene.Scene;
import javafx.scene.control.Slider; import javafx.scene.paint.Color; import javafx.scene.shape.Line;
import javafx.scene.shape.StrokeLineCap; import javafx.scene.text.Text;
import javafx.stage.Stage;
/**
* Drawing Lines
* Listing 2-1 DrawingLines.java * @author carldea
*/
public class DrawingLines extends Application {
@Override
public void start(Stage primaryStage) {
primaryStage.setTitle("Chapter 2 Drawing Lines");
// Red line
redLine.setStrokeLineCap(StrokeLineCap.BUTT);
// creating a dashed pattern
redLine.getStrokeDashArray().addAll(10d, 5d, 15d, 5d, 20d); redLine.setStrokeDashOffset(0);
root.getChildren().add(redLine);
// White line
Line whiteLine = new Line(10, 30, 200, 30); whiteLine.setStroke(Color.WHITE);
whiteLine.setStrokeWidth(10);
whiteLine.setStrokeLineCap(StrokeLineCap.ROUND);
root.getChildren().add(whiteLine); redLine.strokeDashOffsetProperty() .bind(slider.valueProperty());
offsetText.setStroke(Color.WHITE);
// display stroke dash offset value slider.valueProperty()
.addListener((ov, curVal, newVal) ->
offsetText.setText("Stroke Dash Offset: " + slider.getValue())); root.getChildren().add(offsetText);
primaryStage.setScene(scene);
public static void main(String[] args) { launch(args);
} }
DrawingLines.java begins by setting the title of the Stage window using the setTitle() method. Then it creates a root node (javafx.scene.Group) for the Scene object. All root nodes (those extending javafx.scene.Parent) have a method getChildren().add() to allow any JavaFX node to be added to the scene graph. By default the Scene object will be filled with a white background; however, because one of our lines is white, the code will set the scene to have a color of gray (Color.GRAY). This will allow some contrast in order to see the white line. Next is the code that creates the three lines (red, white and blue).
In the first line, the code sets the common properties of a Line node. The common properties are stroke color, stroke width, and stroke line cap. As noted earlier, lines do not have a shape internally, so a line’s fill color property is set to null (no color) and stroke color defaults to black. To set the stroke color you can use built-in JavaFX colors by using the javafx.scene.paint.Color class. For instance, for the color red you will use Color.RED. There are many ways to specify color, such as using RGB, HSB, or Web hex values. All three methods also have the ability to specify alpha value (transparency). Later, you will see additional methods for coloring shapes. Please refer to the Javadoc to learn more about color (javafx.scene.paint.Color). After setting the stroke’s outline color you can set the line’s stroke width (thickness) by using the setStrokeWidth() method. Shapes also have a stroke line cap property. This property specifies the style of the ends of the line. For instance, specifying the stroke line cap as butt (StrokeLineCap.BUTT) will make a flat square end, while a round (StrokeLineCap.ROUND) style will appear with a rounded end. The following code snippet sets a line node’s common shape properties:
// setting common properties redLine.setStroke(Color.RED); redLine.setStrokeWidth(10);
redLine.setStrokeLineCap(StrokeLineCap.BUTT);
After setting the common properties on the red Line node, the example code creates a dashed pattern. To form a dashed pattern you would simply add double values to the getStrokeDashArray().add() method. Each value represents the number of pixels for a dash segment. To set the dash segment array, the first value (10d) is a visible dash segment 10 pixels wide. Next is a five-pixel empty segment (not visible). Following that is a visible dash segment 15 pixels wide, and so on. Because the array has an odd number of values, you can see that as the pattern repeats itself, the first value (10d) becomes a 10-pixel empty segment (not visible). Following is the code to create a dashed pattern for a Line node:
// creating a dashed pattern
By default the dash offset property value is zero. To see what happens when the offset property changes, the user can drag the slider thumb to the right to increase the offset. The stroke dash offset is the distance into the current pattern to begin the line drawing.
Because the other two lines are pretty much the same in the way they modify common properties, I will not explain them any further. I trust you now understand the fundamentals of creating lines. One last thing to mention about this example is the Slider control and the way it is wired up using binding. We will discuss binding further in Chapter 3.
Notice in Listing 2-1 also that after the three lines just discussed, the slider control has handler code that updates a Text node dynamically to display the dash offset value. Also notice the invocation to the addListener() method, containing concise code added as a change listener. This may look odd to you; however, it reflects a new Java 8 feature called lambda expressions, which you will learn more about in Chapter 3. The following code snippet creates a change listener using lambdas instead of an anonymous inner class (ChangeListener).
// display stroke dash offset value slider.valueProperty()
.addListener( (ov, oldVal, newVal) ->
offsetText.setText("Stroke Dash Offset: " + slider.getValue()));
Learning about how to draw lines will help you apply the same knowledge to any Shape node in JavaFX. These important concepts will allow you to create any kind of shape styled the way you see fit. Speaking of shapes, that’s what we’ll discuss next.
Drawing Shapes
If you are familiar with drawing programs that allows a user to draw shapes on the canvas, you’ll notice a lot of similarities when using the JavaFX’s Shape API. The JavaFX Shape API allows you to create many common shapes such as lines, rectangles, and circles. Some of the more complex shapes are Arc, CubicCurve, Ellipse, and QuadCurve. JavaFX also lets you create custom shapes for situations where the predefined stock shapes don’t fit the bill. In this section you will be exploring basic shapes, complex shapes, and custom shapes. I will not demonstrate all of the shapes available to JavaFX, because of space limitations. To see all the available shapes, refer to the Javadoc documentation for details.
As stated earlier, JavaFX has common shapes such as lines, rectangles and circles. In the section “Drawing Lines,” you learned the basic method of changing any shape’s stroke color, stroke width, and many other attributes. Knowing these skills will be useful throughout this chapter. Let’s begin by getting familiar with the rectangle shape.
Following is a code snippet that draws a rectangle positioned at (50, 50) with a width of 100, a height of 130, an arc width of 10, and an arc height of 40.
Rectangle roundRect = new Rectangle(); roundRect.setX(50);
roundRect.setY(50); roundRect.setWidth(100); roundRect.setHeight(130); roundRect.setArcWidth(10); roundRect.setArcHeight(40);
Having the basic knowledge of simple shapes such as lines and rectangles you will inevitably come across other simple shapes having equivalent properties that we can manipulate in the same way. Armed with this knowledge of simple shapes let’s look at creating more complex shapes.
Drawing Complex Shapes
Learning about simple shapes is great, but to create more complex shapes you need to see what other built-in shapes that the JavaFX API has to offer. Exploring the Java documentation (javafx.scene.shape.*), you will discover many derived shape classes to choose from. The following are all the currently supported shapes:
Arc
Circle
CubicCurve
Ellipse
Line
Arc width
Arc height
Polygon
Polyline
QuadCurve
Rectangle
SVGPath
Text (which is considered to be a type of shape)
A Complex Shape Example
To demonstrate the drawing of complex shapes, the next code example draws four fun cartoon-like shapes. Normally cartoon drawings have a thick stroke width, similar to a penciled-in outline. The first shape in the example is a sine wave; the second an ice cream cone, the third a smile, and the last a donut. Before studying the code you may want to see the shapes drawn onto the scene, so you can visualize each shape as you look at the code listing. Figure 2-4 is the output of Listing 2-2, depicting four complex shapes.
The DrawingShape.java code shown in Listing 2-2 demonstrates the drawing of the shapes you see in Figure 2-4. The first complex shape involves a cubic curve (CubicCurve) that is drawn in the shape of a sine wave. The next shape is an ice cream cone; it uses the Path class, which contains path elements (javafx.scene.shape.PathElement). The third shape is a Quadratic Bézier curve (QuadCurve) forming a smile. Our final shape is a delectable donut; to create this donut shape you will create two (Ellipse) shapes (one smaller and one larger) and subtract one. For brevity, Listing 2-2 shows just the start() method, containing the main JavaFX elements. To get the full code listing, download the example code from the book’s web site.
Listing 2-2. DrawingShape.java
@Override
public void start(Stage primaryStage) {
primaryStage.setTitle("Chapter 2 Drawing Shapes"); Group root = new Group();
Scene scene = new Scene(root, 306, 550, Color.WHITE);
// Sine wave
CubicCurve cubicCurve = new CubicCurve( 50, // start x point
QuadCurveTo quadCurveTo = new QuadCurveTo(); quadCurveTo.setX(150);
// cone rim
// donut hole
Ellipse smallCircle = new Ellipse( 100, // center x
Shape donut = Path.subtract(bigCircle, smallCircle); donut.setStrokeWidth(1.8);
donut.setStroke(Color.BLACK);
// orange glaze
donut.setFill(Color.rgb(255, 200, 0));
// add drop shadow
DropShadow dropShadow = new DropShadow( 5, // radius
donut.setTranslateY(quad.getBoundsInParent().getMinY() + 30);
root.getChildren().add(donut);
primaryStage.setScene(scene); primaryStage.show();
}
Four shapes are drawn in Figure 2-4. Each shape will be detailed further in the following sections, which describe the code and the reasoning behind the creation of each of the four shapes.
The Cubic Curve
Figure 2-5. Cubic curve
The startX, startY, endX, and endY parameters are the starting and ending points of a curved line, and controlX1, controlY1, controlX2, and controlY2 are control points. The control point (controlX1, controlY1) is a point in screen space that will influence the line segment between the start point (startX, startY) and the midpoint of the line. The point (controlX2, controlY2) is another control point that will influence the line segment between the midpoint of the line and its end point (endX, endY). A control point is a point that pulls the curve toward the direction of itself. A definition of a control point is a line perpendicular to a tangent line on the curve. In our example, we simply have a control point 1 above the line to pull the curve upward to form a hill and control point 2 below the line to pull the curve downward to form a valley.
Note All older JavaFX 2.x Builder classes are deprecated in JavaFX 8. Be advised that the previous edition of this book used Builder classes. Shape classes using deprecated builder classes should be converted in favor of constructors and setter methods when specifying properties.
The Ice Cream Cone
The ice cream cone shape is created using the javafx.scene.shape.Path class. Each path element is created and added to the Path object. Also, each element is not considered a graph node (javafx.scene.Node). This means that path elements do not extend from the javafx.scene. shape.Shape class and they cannot be child nodes in a scene graph to be displayed. Figure 2-6 shows an ice cream cone shape.
Figure 2-6. The ice cream cone is drawn using JavaFX’s Path node
Path elements actually extend from the javafx.scene.shape.PathElement class, which is used only in the context of a Path object. So you won’t be able to instantiate a LineTo class to be put in the scene graph. Just remember that the classes with To as a suffix are path elements, not Shape nodes.
For example, the MoveTo and LineTo object instances are Path elements added to a Path object, not shapes that can be added to the scene. Following are Path elements added to a Path object to draw an ice cream cone:
// Ice cream
Path path = new Path();
MoveTo moveTo = new MoveTo(); moveTo.setX(50);
moveTo.setY(150);
...// Additional Path Elements created. LineTo lineTo1 = new LineTo();
lineTo1.setX(50); lineTo1.setY(150);
...// Additional Path Elements created.
The Smile
To render the smile shape, the code uses the javafx.scene.shape.QuadCurve class. This is similar to the cubic curve example described earlier in the first shape. Instead of two control points you only have one control point. Again, a control point influences a line by pulling the midpoint toward it. Shown in Figure 2-7 is a QuadCurve shape with a control point below its starting and ending points to form a smile.
Figure 2-7. Quadratic curve
The following code draws a quadratic curve with a stroke thickness of three pixels filled with the color white:
// A smile
QuadCurve quad = new QuadCurve( 50, // start x point 50, // start y point 125,// control x point 150,// control y point 150,// end x point 50);// end y point
quad.setStrokeWidth(3); quad.setStroke(Color.BLACK); quad.setFill(Color.WHITE);
The Donut
To create the donut shape, you begin by creating two circular ellipse (javafx.scene.shape.Ellipse) instances. Subtracting the smaller ellipse (donut hole) from the larger ellipse area creates a newly derived Shape object, which is returned using the static Path.subtract() method. The following code snippet creates the donut shape using the Path.subtract() method:
// outer donut
Ellipse bigCircle = ...//Outer shape area
// donut hole
Ellipse smallCircle = ...// Inner shape area
// make a donut
Shape donut = Path.subtract(bigCircle, smallCircle);
Next is applying a drop shadow effect to the donut shape. A common technique is to draw the shape filled black while the original shape is laid on top slightly offset to appear as a shadow. However, in JavaFX the code will be drawing the donut shape once and use the setEffect()
method to apply a DropShadow object instance. To cast the shadow offset, call the setOffsetX() and setOffsetY() methods. Typically if the light source is from the upper left, the shadow is shown from the lower right of the shape.
One last thing to point out is that all shapes in the example are initially drawn to be positioned underneath one another. Looking back at Listing 2-2, you’ll notice that as each shape was created, its translateY property was set to reposition or shift each shape from its original position. For example, if a shape’s upper-left bounding box point is created at (100, 100) and you want it to be moved to (101, 101), the translateX and translateY properties would be set to 1.
As each shape is rendered beneath another in this example, you may invoke the
getBoundsInParent() method to return the information about the bounding region of a node, such as its width and height. The getBoundsInParent() calculation for the height and width includes the node’s actual dimensions (width and height) plus any effects, translations, and transformations. For example, a shape that has a drop shadow effect increases its width by including the shadow.
Figure 2-9 is a dashed red rectangle surrounding a Rectangle node inside a parent node better known as the bounding rectangle in parent (Bounds in Parent). You will notice that the width and height calculations include transforms, translates, and effects applied to the shape. In the figure, the transform operation is a rotation and the effect is a drop shadow.
Painting Colors
I’ve mentioned that various drawing programs have their own tools to draw shapes. Drawing programs also provide the ability to paint shapes, using a color palette. Typically, paint programs have a paint bucket tool to fill areas on the canvas. Often, photo editing software packages have the ability to fill using a gradient color or change the lighting of colors. In JavaFX you can also apply colors (Paint) to objects using similar techniques. In this section you will see an example of a JavaFX application that will showcase three shapes filled with colors (Paint).
An Example of Color
To demonstrate common color fills, Figure 2-10 illustrates an application that displays three shapes, with different color fills. It depicts the following three shapes: ellipse, rectangle, and rounded
rectangle. Each shape has a gradient fill. The first shape, the ellipse, is filled with a red radial gradient. The second is a rectangle filled with a yellow linear gradient. Finally, the rounded rectangle has a green cycle reflect gradient fill. You’ll also notice a thick black line behind the yellow rectangle to illustrate the alpha level (transparency) of colors.
width
translation
transform (rotate)
height
effects
Bounding Rectangle in Parent
Parent Node
Note The example to follow touches on basic techniques for creating solid colors, gradient colors, and translucent colors. There are also advanced strategies, such as the ImagePattern API and Blend API. You can read about those, if you are interested, in the API documentation viewable through Javadoc.
Figure 2-10. Colored shapes
In JavaFX, all shapes can be filled with simple colors and gradient colors. As a reminder, according to the Javadoc all shape nodes are filled with the color black by default except for Line, Polyline, and Path class (descendents of java.scene.shape.Shape). Listing 2-3 uses the following main classes that will be used to fill the shape nodes shown in Figure 2-10:
javafx.scene.paint.Color javafx.scene.paint.Stop
javafx.scene.paint.RadialGradient javafx.scene.paint.LinearGradient
Listing 2-3. PaintingColors.java
@Override
public void start(Stage primaryStage) {
primaryStage.setTitle("Chapter 2 Painting Colors"); Group root = new Group();
Scene scene = new Scene(root, 350, 300, Color.WHITE);
// Red ellipse with radial gradient color Ellipse ellipse = new Ellipse(100, // center X 50 + 70/2, // center Y
50, // radius X 70/2); // radius Y
RadialGradient gradient1 = new RadialGradient( 0, // focusAngle
double ellipseHeight = ellipse.getBoundsInParent() .getHeight();
blackLine.setTranslateY(ellipseHeight + 10);
root.getChildren().add(blackLine);
// A rectangle filled with a linear gradient with a translucent color. Rectangle rectangle = new Rectangle();
rectangle.setX(50); rectangle.setY(50); rectangle.setWidth(100); rectangle.setHeight(70);
rectangle.setTranslateY(ellipseHeight + 10);
LinearGradient linearGrad = new LinearGradient( 0, // start X
1, // end Y
// A rectangle filled with a linear gradient with a reflective cycle. Rectangle roundRect = new Rectangle();
roundRect.setX(50);
roundRect.setTranslateY(ellipseHeight + 10 + rectangle.getHeight() + 10);
LinearGradient cycleGrad = new LinearGradient( 50, // start X
When specifying color values, the PaintingColors.java code uses the colors in the default RGB color space. To create a color, the code uses the Color.rgb() method. This method takes three integer values, representing red, green, and blue components. Another overloaded method takes three integer values and a fourth parameter with a data type of double. This fourth parameter is the alpha channel, which sets the opacity of the color. This value is between zero (0) and one (1).
After drawing the ellipse shape, the code invokes the setFill() method using a radial gradient to give the appearance of a 3D spherical object. Next, it creates a rectangle filled with a yellow semitransparent linear gradient. Added behind the yellow rectangle is a thick black line to
demonstrate the semitransparent color. Finally, the code implements a rounded rectangle filled with a green-and-black reflective linear gradient resembling 3D tubes in a diagonal direction. Each shape and its associated color fill will be discussed in more detail in the following sections.
Gradient Color
Creating a gradient color in JavaFX involves five things:
1. A starting point to begin the first stop color.
2. The end point, representing the end stop color.
3. The proportional property to specify whether to use standard screen coordinates or unit square coordinates.
4. The Cycle method to specify one of the three enums: NO_CYCLE, REFLECT, or REPEAT.
5. An array of stop (Stop) colors. Each stop containing a color will begin by painting the first stop color, then interpolating to the second stop color, and so on.
When dealing with either linear or radial gradient color, pay special attention to the proportional attribute. By setting this attribute to false, you can draw a line (the gradient axis) having a beginning point (start X, start Y) and an end point (end X, end Y) based on standard screen (x, y) coordinates.
However, if the proportional attribute is set to a value of true, the gradient axis line beginning and ending points will be represented as unit square coordinates. This means that x, y coordinates for begin and end points must be between 0.0 and 1.0 (double). This strategy is more compact and easier to define than screen coordinates on the scene graph.
Radial Gradient
The amazing thing about colors with gradients is that they can often make shapes appear three-dimensional. Gradient paint allows you to interpolate between two or more colors, which gives depth to the shape. JavaFX provides two types of gradients: a radial (RadialGradient) and a linear (LinearGradient) gradient. For our ellipse shape you will be using a radial gradient (RadialGradient).
Table 2-2 presents the JavaFX 8 Javadoc definitions found for the RadialGradient class. You can find this documentation at the following URL:
In our example the focus angle is set to zero, the distance is set to .1, center X and Y are set to (80, 45), the radius is set to 120 pixels, proportional is set to false, the cycle method is set to the no cycle (CycleMethod.NO_CYCLE), and two color stop values set to red (Color.RED) and black (Color.BLACK). These settings give a radial gradient to our ellipse by starting with the color red with a center position of (80, 45) (upper left of the ellipse) that interpolates to the color black with a distance of 120 pixels (radius).
Semitransparent Gradients
Next, you will see how to create the rectangle, which has a yellow semitransparent linear gradient. For our yellow rectangle you will use a linear gradient (LinearGradient) paint.
Table 2-3 presents the JavaFX 8 Javadoc definitions found for the LinearGradient class. You can find the definitions also at the following URL:
http://docs.oracle.com/javase/8/javafx/api/javafx/scene/paint/LinearGradient.html
Table 2-3. LinearGradient Properties
Property Data Type Description
startX Double X coordinate of the gradient axis start point.
startY Double Y coordinate of the gradient axis start point.
endX Double X coordinate of the gradient axis end point.
endY Double Y coordinate of the gradient axis end point.
proportional Boolean Whether the coordinates are proportional to the shape which this gradient fills. When set to true use unit square coordinates, otherwise use scene/screen coordinate system.
cycleMethod CycleMethod Cycle method applied to the gradient. Table 2-2. RadialGradient Properties
Property Data Type Description
focusAngle Double Angle in degrees from the center of the gradient to the focus point to which the first color is mapped.
focusDistance Double Distance from the center of the gradient to the focus point to which the first color is mapped.
centerX Double X coordinate of the center point of the gradient’s circle.
centerY Double Y coordinate of the center point of the gradient’s circle.
radius Double Radius of the circle defining the extents of the color gradient.
proportional boolean Coordinates and sizes are proportional to the shape this gradient fills.
cycleMethod CycleMethod Cycle method applied to the gradient.
To create a linear gradient paint, you specify startX, startY, endX, and endY for the start and end points. The start and end point coordinates denote where the gradient pattern begins and stops.
To create the second shape in Figure 2-10, the yellow rectangle, you set the start X and Y to (0.0, 0.0), end X and Y to (0.0, 1.0), proportional to true, the cycle method to no cycle
(CycleMethod.NO_CYCLE), and two color stop values to yellow (Color.YELLOW) and black (Color.BLACK) with an alpha transparency of .784.These settings give a linear gradient to our rectangle from top to bottom with a starting point of (0.0, 0.0) (the top left of a unit square) that interpolates to the color black to an end point of (0.0, 1.0) (the bottom left of a unit square).
Reflective Cycle Gradients
Finally, at the bottom of Figure 2-10 you’ll notice a rounded rectangle with a repeating pattern of a gradient using green and black in a diagonal direction. This is a simple linear gradient paint that is the same as the linear gradient paint (LinearGradient) except that the start X, Y and end X, Y values are set in a diagonal position, and the cycle method is set to reflect (CycleMethod.REFLECT). When specifying the cycle method to reflect (CycleMethod.REFLECT), the gradient pattern will repeat or cycle between the stop colors. The following code snippet implements the rounded rectangle having a cycle method of reflect (CycleMethod.REFLECT):
LinearGradient cycleGrad = new LinearGradient(
Another basic JavaFX node is the Text node. Text nodes allow you to display a string of characters onto the scene graph. To create Text nodes on the JavaFX scene graph you will use the javafx. scene.text.Text class. Because all JavaFX scene nodes extend from javafx.scene.Node they will inherit many capabilities such as the ability to be scaled, translated, or rotated.
Based on the Java inheritance hierarchy, the Text node’s direct parent is a javafx.scene.shape.Shape class which provides even more capabilities than the Node class. Because a Text node is both a Node and a Shape object it is able to perform geometric operation between two shape areas such as subtract, intersect, or union. You can also clip viewport areas with a shape similar to stenciled letters.
To demonstrate drawing text, in this section you will look at a basic example of how to draw text nodes on the scene graph. This example will touch on the following three capabilities:
Positioning
Text nodes using (x, y) coordinates
Setting a
Text node’s stroke color
Rotating a
To make things a little interesting, we will create 100 Text nodes and produce random values for the three capabilities just mentioned. Figure 2-11shows our drawing text example in action.
Figure 2-11. Drawing text
The DrawingText.java code shown in Listing 2-4 creates 100 Text nodes with randomly generated values for the following attributes:
x, y coordinates
RGB fill color
Angle of rotation (degrees).
The code first creates a loop to generate random (x, y) coordinates to position Text nodes. In the loop, it creates random RGB color components between 0 and 255 to be applied to the Text nodes. Setting all components to zero produces black. Setting all three RGB values to 255 produces the color white.
Listing 2-4. DrawingText.java
@Override
public void start(Stage primaryStage) {
primaryStage.setTitle("Chapter 2 Drawing Text"); Group root = new Group();
Scene scene = new Scene(root, 300, 250, Color.WHITE); Random rand = new Random(System.currentTimeMillis()); for (int i = 0; i < 100; i++) {
int x = rand.nextInt((int) scene.getWidth()); int y = rand.nextInt((int) scene.getHeight()); int red = rand.nextInt(255);
Text text = new Text(x, y, "JavaFX 8");
int rot = rand.nextInt(360);
text.setFill(Color.rgb(red, green, blue, .99)); text.setRotate(rot);
root.getChildren().add(text); }
primaryStage.setScene(scene); primaryStage.show();
}
The rotation angle (in degrees) is a randomly generated value from 0–360 degrees, which causes the baseline of the text to be tilted. According to the API documentation the setRotate() method will rotate about the pivot point, which is the center of the untransformed layout bounds (layoutBounds) property. Basically, the pivot point is the center of a node that has no transforms (scaling, translating, shearing, rotating, and so on) applied.
Figure 2-12. Text node’s baseline (x, y) coordinate position
Note If you need to use a combination of transforms, such as rotate, scale, and translate, take a look at the getTransforms().add(...) method. For more details on the difference between bounds in local, bounds in parent, and layout bounds, please see the Javadoc documentation.
The following code is used in DrawingText.java to create random values for a Text node’s x and y position (baseline), color, and rotation:
int x = rand.nextInt((int) scene.getWidth()); int y = rand.nextInt((int) scene.getHeight()); int red = rand.nextInt(255);
int green = rand.nextInt(255); int blue = rand.nextInt(255); int rot = rand.nextInt(360);
The following code snippet applies (x, y) coordinates, color (RGB) with an opacity .99 and a rotation (angle in degrees) to the Text node:
Text text = new Text(x, y, "JavaFX 8");
text.setFill(Color.rgb(red, green, blue, .99)); text.setRotate(rot);
root.getChildren().add(text);
You should be starting to see the power of the scene graph API in its ease of use, especially when working with Text nodes. Here you were able to position, colorize, and rotate text. To spruce things up a bit more, you will next see how to change a text’s font and apply effects.
Changing Text Fonts
JavaFX’s Font API enables you to change font styles and font sizes in the same way as word
processing applications. To demonstrate it, I created a JavaFX application that displays four text nodes with the string value of “JavaFX 8 Intro by Example,” each having a different font style. In addition to the font styles I also added effects such as a drop shadow (DropShadow) and reflection (Reflection).
Figure 2-13 shows the example’s output, and Listing 2-5 shows the ChangingTextFonts.java source code.
Figure 2-13. Changing text fonts
Listing 2-5. ChangingTextFonts.java
@Override
public void start(Stage primaryStage) {
primaryStage.setTitle("Chapter 2 Changing Text Fonts");
System.out.println("Font families: "); Font.getFamilies()
.stream()
.forEach( i -> System.out.println(i)); System.out.println("Font names: "); Font.getFontNames()
Group root = new Group();
Scene scene = new Scene(root, 580, 250, Color.WHITE);
// Serif with drop shadow
Text text2 = new Text(50, 50, "JavaFX 8: Intro. by Example"); Font serif = Font.font("Serif", 30);
text2.setFont(serif); text2.setFill(Color.RED);
DropShadow dropShadow = new DropShadow(); dropShadow.setOffsetX(2.0f);
dropShadow.setOffsetY(2.0f);
dropShadow.setColor(Color.rgb(50, 50, 50, .588)); text2.setEffect(dropShadow);
root.getChildren().add(text2);
// SanSerif
Text text3 = new Text(50, 100, "JavaFX 8: Intro. by Example"); Font sanSerif = Font.font("SanSerif", 30);
text3.setFont(sanSerif); text3.setFill(Color.BLUE); root.getChildren().add(text3);
// Dialog
Text text4 = new Text(50, 150, "JavaFX 8: Intro. by Example"); Font dialogFont = Font.font("Dialog", 30);
text4.setFont(dialogFont);
text4.setFill(Color.rgb(0, 255, 0)); root.getChildren().add(text4);
// Monospaced
Text text5 = new Text(50, 200, "JavaFX 8: Intro. by Example"); Font monoFont = Font.font("Monospaced", 30);
text5.setFont(monoFont); text5.setFill(Color.BLACK); root.getChildren().add(text5);
// Reflection
Reflection refl = new Reflection(); refl.setFraction(0.8f);