• Table of Contents • Index
Sams Teach Yourself PHP, MySQL® and Apache All in One
By
Julie C. Meloni
Publisher : Sams Publishing Pub Date : December 18, 2003
ISBN : 0-672-32620-5 Pages : 624
In just a short time you can learn how to use
PHP, MySQL, and Apache together to create
dynamic, interactive Web sites and
applications using the three leading
open-source Web development technologies.
Using a straightforward, step-by-step
• Table of Contents • Index
Sams Teach Yourself PHP, MySQL® and Apache All in One
By
Julie C. Meloni
Publisher : Sams Publishing Pub Date : December 18, 2003
ISBN : 0-672-32620-5 Pages : 624
Copyright
About the Authors
Lead author
Contributing authors
Acknowledgments
We Want to Hear from You!
Reader Services
Introduction
Who Should Read This Book?
How This Book Is Organized
Conventions Used in This Book
Part I. Laying the Groundwork
Chapter 1. Installing and Configuring MySQL
Current and Future Versions of MySQL
How to Get MySQL
Installing MySQL on Linux/Unix
Installing MySQL on Windows
Basic Security Guidelines
Introducing the MySQL Privilege System
Working with User Privileges
Summary
Q&A
Workshop
Chapter 2. Installing and Configuring Apache
Current and Future Versions of Apache
Choosing an Installation Method
Installing Apache on Linux/Unix
Installing Apache on Windows
Apache Configuration File Structure
Apache Log Files
Apache-Related Commands
Starting Apache for the First Time
Troubleshooting
Summary
Q&A
Workshop
Chapter 3. Installing and Configuring PHP
Current and Future Versions of PHP
Building PHP on Linux/Unix with Apache
Installing PHP Files on Windows
php.ini Basics
Testing Your Installation
Getting Installation Help
The Basics of PHP Scripts
Summary
Q&A
Workshop
Part II. PHP Language Structure
Chapter 4. The Building Blocks of PHP
Variables
Data Types
Operators and Expressions
Constants
Summary
Workshop
Chapter 5. Flow Control Functions in PHP
Switching Flow
Loops
Code Blocks and Browser Output
Summary
Q&A
Workshop
Chapter 6. Working with Functions
What Is a Function?
Calling Functions
Defining a Function
Returning Values from User-Defined Functions
Variable Scope
Saving State Between Function Calls with the static Statement
More About Arguments
Testing for the Existence of a Function
Summary
Q&A
Workshop
Chapter 7. Working with Arrays and Objects
What Is an Array?
Creating Arrays
Some Array-Related Functions
Creating an Object
Object Inheritance
Summary
Q&A
Workshop
Part III. Getting Involved with the Code
Chapter 8. Working with Strings, Dates, and Times
Formatting Strings with PHP
Investigating Strings in PHP
Manipulating Strings with PHP
Using Date and Time Functions in PHP
Summary
Chapter 9. Working with Forms
Creating a Simple Input Form
Accessing Form Input with User-Defined Arrays
Combining HTML and PHP Code on a Single Page
Using Hidden Fields to Save State
Redirecting the User
Sending Mail on Form Submission
Working with File Uploads
Summary
Workshop
Chapter 10. Working with User Sessions
Session Function Overview
Starting a Session
Working with Session Variables
Passing Session IDs in the Query String
Destroying Sessions and Unsetting Variables
Summary
Q&A
Workshop
Chapter 11. Working with Files and Directories
Including Files with include() Testing Files
Creating and Deleting Files
Opening a File for Writing, Reading, or Appending
Reading from Files
Writing or Appending to a File
Working with Directories
Summary
Q&A
Workshop
Chapter 12. Working with the Server Environment
Opening Pipes to and from Processes Using popen() Running Commands with exec()
Running Commands with system() or passthru() Summary
Q&A
Workshop
Understanding the Image-Creation Process
Necessary Modifications to PHP Drawing a New Image
Getting Fancy with Pie Charts
Modifying Existing Images
Summary
Q&A
Workshop
Part IV. PHP and MySQL Integration
Chapter 14. Learning the Database Design Process
The Importance of Good Database Design
Types of Table Relationships
Understanding Normalization
Following the Design Process
Summary
Q&A
Workshop
Chapter 15. Learning Basic SQL Commands
Learning the MySQL Data Types
Learning the Table Creation Syntax
Using the INSERT Command
Using the SELECT Command
Using WHERE in Your Queries
Selecting from Multiple Tables
Using the UPDATE Command to Modify Records
Using the REPLACE Command
Using the DELETE Command
Frequently Used String Functions in MySQL
Using Date and Time Functions in MySQL
Summary
Q&A
Workshop
Chapter 16. Interacting with MySQL Using PHP
Connecting to MySQL with PHP
Working with MySQL Data
Workshop
Part V. Basic Projects
Chapter 17. Managing a Simple Mailing List
Developing the Subscription Mechanism Developing the Mailing Mechanism
Summary
Q&A
Workshop
Chapter 18. Creating an Online Address Book
Planning and Creating the Database Tables
Creating a Menu
Creating the Record Addition Mechanism
Viewing Records
Creating the Record Deletion Mechanism
Adding Subentries to a Record
Summary
Workshop
Chapter 19. Creating a Simple Discussion Forum
Designing the Database Tables
Creating the Input Forms and Scripts
Displaying the Topic List
Displaying the Posts in a Topic
Adding Posts to a Topic
Summary
Chapter 20. Creating an Online Storefront
Planning and Creating the Database Tables
Displaying Categories of Items
Displaying Items
Summary
Workshop
Chapter 21. Creating a Shopping Cart Mechanism
Planning and Creating the Database Tables
Integrating the Cart with Your Storefront
Payment Methods and the Checkout Sequence
Workshop
Chapter 22. Creating a Simple Calendar Building a Simple Display Calendar
Creating a Calendar Library
Summary
Q&A
Workshop
Chapter 23. Restricting Access to Your Applications
Authentication Overview
Apache Authentication Module Functionality
Using Apache for Access Control
Combining Apache Access Methods
Limiting Access Based on HTTP Methods
Introducing Cookies
Setting a Cookie with PHP
Restricting Access Based on Cookie Values
Summary
Q&A
Workshop
Chapter 24. Logging and Monitoring Web Server Activity
Standard Apache Access Logging
Standard Apache Error Logging
Managing Apache Logs
Logging Custom Information to a Database
Summary
Q&A
Workshop
Chapter 25. Application Localization
About Internationalization and Localization
About Character Sets
Environment Modifications
Creating a Localized Page Structure
Summary
Q&A
Part VI. Administration and Fine Tuning
Chapter 26. Apache Performance Tuning and Virtual Hosting
Scalability Issues
Load Testing with ApacheBench
Proactive Performance Tuning
Preventing Abuse
Implementing Virtual Hosting
Summary
Q&A
Chapter 27. Setting Up a Secure Web Server
The Need for Security
The SSL Protocol
Obtaining and Installing SSL Tools
Managing Certificates
SSL Configuration
Summary
Q&A
Chapter 28. Optimizing and Tuning MySQL
Building an Optimized Platform
MySQL Startup Options
Optimizing Your Table Structure
Optimizing Your Queries
Using the FLUSH Command
Using the SHOW Command
Summary
Q&A
Workshop
Chapter 29. Software Upgrades
Staying in the Loop
Upgrading MySQL
Upgrading Apache
Upgrading PHP
Summary
Workshop
Part VII. Looking Toward the Future
What's Wrong With PHP 4?
The New Object Model Additional New Features
So, When Should I Upgrade to PHP 5?
Summary
Q&A
Chapter 31. Features and Backward Compatibility of MySQL 4.1
Using Subqueries
Internationalization Enhancements
Additional New Functionality
Looking Further Ahead to MySQL 5.0
Summary Q&A
Workshop
Part VIII. Appendix
Appendix A. Installing MySQL, Apache, and PHP from the CD-ROM
Linux/Unix Installation
Windows Installation
Troubleshooting
Copyright
Copyright © 2004 by Sams Publishing
All rights reserved. No part of this book shall be reproduced, stored in a retrieval system, or transmitted by any means, electronic, mechanical, photocopying, recording, or otherwise, without written permission from the publisher. No patent
liability is assumed with respect to the use of the information contained herein. Although every precaution has been taken in the preparation of this book, the publisher and author assume no responsibility for errors or omissions. Nor is any liability assumed for damages resulting from the use of the information contained herein.
Library of Congress Catalog Card Number: 2003109401
Printed in the United States of America
First Printing: December 2003
06 05 04 03 4 3 2 1
Trademarks
All terms mentioned in this book that are known to be trademarks or service marks have been appropriately
capitalized. Sams Publishing cannot attest to the accuracy of this information. Use of a term in this book should not be regarded as affecting the validity of any trademark or service mark.
Every effort has been made to make this book as complete and as accurate as possible, but no warranty or fitness is implied. The information provided is on an "as is" basis. The author and the publisher shall have neither liability nor responsibility to any person or entity with respect to any loss or damages arising from the information contained in this book or from the use of the CD or programs accompanying it.
Bulk Sales
Sams Publishing offers excellent discounts on this book when ordered in quantity for bulk purchases or special sales. For more information, please contact
U.S. Corporate and Government Sales 1-800-382-3419
[email protected]
For sales outside of the U.S., please contact
International Sales +1-317-428-3341
Credits
Acquisitions Editor
Shelley Johnston
Development Editor
Chris Newman
Charlotte Clapp
Project Editor
Dan Knott
Copy Editor
Krista Hansing
Indexer
Sharon Shock
Proofreader
Mike Henry
Technical Editor
Chris Newman
Publishing Coordinator
Vanessa Evans
Multimedia Developer
Dan Scherf
Designer
Gary Adair
Page Layout
About the Authors
Lead author
Lead author
Julie C. Meloni is the technical director for i2i Interactive (http://www.i2ii.com), a multimedia company located in Los Altos, California. She's been developing Web-based applications since the Web first saw the light of day and remembers the excitement surrounding the first GUI Web browser. She has authored several books and articles on Web-based
Contributing authors
Matt Zandstra is a writer and consultant specializing in server programming. With his business partner, Max Guglielmino, he runs Corrosive (http://www.corrosive.co.uk), a technical agency that plans, designs and builds Internet applications. Matt is
interested in all aspects of object-oriented programming, and is currently exploring enterprise design patterns for PHP 5. When he is not reading, writing, or thinking about coding in PHP and Java, Matt shoots alien invaders in the park with his four-year-old daughter, Holly. He lives by the sea in Brighton, Great
Britain, with his partner Louise McDougall, and their children Holly and Jake.
Daniel López Ridruejo is the founder of BitRock, a technology company providing multiplatform installation and management tools for a variety of commercial and open source software products. Previously, he was part of the original engineering team at Covalent Technologies, Inc., which provides Apache software, support, and services for the enterprise. He is the author of several popular Apache and Linux guides, the mod_mono module for integrating Apache and .NET, and of Comanche, a GUI configuration tool for Apache. Daniel is a regular speaker at open source conferences such as Linux World, ApacheCon, and the O'Reilly Open Source Convention. He holds a Master of Science degree in Telecommunications from the Escuela Superior de Ingenieros de Sevilla and
Acknowledgments
The Apache Foundation, the PHP Group, and MySQL AB deserve much more recognition than they ever get for creating these super products that drive a great portion of the Web.
Daniel Lòpez (author of Sams Teach Yourself Apache 2 in 24 Hours) and Matt Zandstra (author of Sams Teach Yourself PHP in 24 Hours) wrote super books, which form a portion of this book. Obviously, this book would not exist without their work!
We Want to Hear from You!
As the reader of this book, you are our most important critic and commentator. We value your opinion and want to know what we're doing right, what we could do better, what areas you'd like to see us publish in, and any other words of wisdom you're willing to pass our way.
You can email or write me directly to let me know what you did or didn't like about this bookas well as what we can do to make our books stronger.
Please note that I cannot help you with technical problems related to the topic of this book, and that due to the high
volume of mail I receive, I might not be able to reply to every message.
When you write, please be sure to include this book's title and author as well as your name and phone or email address. I will carefully review your comments and share them with the author and editors who worked on the book.
Email: [email protected]
Mail: Mark Taber
Associate Publisher Sams Publishing 800 East 96th Street
Reader Services
For more information about this book or others from Sams
Introduction
Welcome to Sams Teach Yourself PHP, MySQL, and Apache All in One! This book combines the lessons found in Sams Teach Yourself Apache 2 in 24 Hours, Sams Teach Yourself PHP in 24 Hours, and Sams Teach Yourself MySQL in 24 Hours, along with several additional chapters, to provide you with a solid and
painless introduction to the world of developing Web-based applications using these three technologies.
Over the course of this book, you'll learn the concepts
necessary for configuring and managing Apache, the basics of programming in PHP, and the methods for using and
Who Should Read This Book?
This book is geared toward individuals who possess a general understanding of the concepts of working in a Web-based development environment, be it Linux/Unix or Windows. Installation and configuration lessons assume that you have familiarity with your operating system and the basic methods of building (on Linux/Unix systems) or installing (on Windows
systems) software.
The lessons that delve into programming with PHP assume no previous knowledge of the language, but if you have experience with other programming languages, such as C or Perl, you will find the going much easier. Similarly, if you have worked with other databases, such as Oracle or Microsoft SQL Server, you will have a good foundation for working through the MySQL-related lessons.
How This Book Is Organized
This book is divided into seven parts, corresponding to
particular topic groups. The lessons within each part should be read one right after another, with each lesson building on the information found in those before it:
Part I, "Laying the Groundwork," walks you through the installation and configuration of MySQL, Apache, and PHP. You'll need to complete the lessons in Part I before moving on, unless you already have access to a working installation of these technologies. Even if you don't need to install and configure MySQL, Apache, and PHP in your environment, you should still skim these lessons so that you understand the basics.
Part II, "PHP Language Structure," is devoted to teaching you the basics of the PHP language, including structural elements such as arrays and objects. The examples will get you in the habit of writing code, uploading it to your server, and testing the results.
Part III, "Getting Involved with the Code," consists of lessons that cover intermediate-level
application-development topics, including working with forms and files, restricting access, and completing other small projects
designed to introduce a specific concept.
Part IV, "PHP and MySQL Integration," contains lessons devoted to working with databases in general, such as database normalization, as well as using PHP to connect to and work with MySQL. Included is a basic SQL primer, which also includes MySQL-specific functions and other
Part V, "Basic Projects," consists of lessons devoted to performing a particular task using PHP and MySQL,
integrating all the knowledge gained so far. Projects include an address book, a discussion forum, and a basic online storefront, among others.
Part VI, "Administration and Fine Tuning," is devoted to administering and tuning Apache and MySQL. It also includes information on virtual hosting and setting up a secure Web server.
Part VII, "Looking Toward the Future," contains information regarding the upcoming major releases of PHP 5.0 and MySQL 4.1.
If you find that you are already familiar with a topic, you can skip ahead to the next lesson. However, in some instances, lessons refer to specific concepts learned in previous chapters, so be aware that you might have to skim a skipped lesson so that your development environment remains consistent with the book.
At the end of each chapter, a few quiz questions test how well you've learned the material. Additional activities provide
Conventions Used in This Book
This book uses different typefaces to differentiate between code and plain English, and also to help you identify important
concepts. Throughout the lessons, code, commands, and text you type or see onscreen appear in a computer typeface. New terms appear in italics at the point in the text where they are defined. Additionally, icons accompany special blocks of
information:
A "By the Way" presents an interesting piece of information related to the current topic.
A "Did You Know" offers advice or teaches an easier method for performing a task.
Part I: Laying the Groundwork
CHAPTER 1Installing and Configuring MySQL
CHAPTER 2Installing and Configuring Apache
Chapter 1. Installing and Configuring
MySQL
Welcome to the first chapter of Sams Teach Yourself PHP,
MySQL, and Apache. This is the first of three installation-related chapters, in which you will learn how to set up a development environment. We'll tackle the MySQL installation first, primarily because the PHP installation is much simpler when MySQL is already installed.
In this chapter, you will learn
How to install MySQL
Basic security guidelines for running MySQL
Current and Future Versions of MySQL
The installation instructions in this chapter refer to MySQL
4.0.15, which is the current production version of the software. This version number can be read as minor release number 15 of the major version 4.0 software. MySQL AB, the company
responsible for creating and distributing MySQL, uses minor release numbers for updates containing security enhancements or bug fixes. Minor releases do not follow a set release
schedule; when enhancements or fixes are added to the code and thoroughly tested, MySQL AB releases a new version, with a new minor version number.
It is possible that by the time you purchase this book, the minor version number will have changed, to 4.0.16 or beyond. If that is the case, you should read the list of changes at
http://www.mysql.com/doc/en/News-4.0.x.html for any changes regarding the installation or configuration process, which makes up the bulk of this chapter.
How to Get MySQL
MySQL AB, the company that develops and maintains the MySQL database server, distributes MySQL on its Web site: http://www.mysql.com/. Binary distributions for all platforms, as well as RPMs and source code files for Linux/Unix platforms, can be found at the Web site. Additionally, you can purchase boxed versions of the softwarethat is, software in a box and with a printed version of the comprehensive MySQL manualfrom the MySQL AB online store, for a very reasonable price.
The installation instructions in this chapter are based on the official MySQL 4.0.x distribution from MySQL AB. All files can be downloaded from http://www.mysql.com/downloads/mysql-4.0.html, and the current versions as of the time of writing are also found on the CD included with this book.
For instructions on installing MySQL from the CD, please refer to
Installing MySQL on Linux/Unix
The process of installing MySQL on Linux/Unix is
straightforward, whether you use RPMs or install the binaries. For a minimal installation from RPMs, you will need two files:
MySQL-server-VERSION.i386.rpm The MySQL server
MySQL-client-VERSION.i386.rpm The standard MySQL
client libraries
To perform a minimal installation from RPMs, type the following at your prompt:
#> rpm -i MySQL-server-VERSION.i386.rpm MySQL-client-VERSION.i386.rpm
Replace VERSION in the filename with the actual version you downloaded. For example, the current MySQL 4.0 server RPM is called MySQL-server-4.0.15-0.i386.rpm, and the client libraries RPM is called MySQL-client-4.0.15-0.i386.rpm.
series of commands in the binary distribution installation
process has you adding a group and a user and unpacking the distribution, as follows:
Replace VERSION-OS in the filename with the actual version you downloaded. For example, the current MySQL 4.0 Linux/i386 binary is called mysql-max-4.0.15-pc-linux-i686.tar.gz.
#> groupadd mysql
#> useradd -g mysql mysql
#> cd /usr/local
#> gunzip < /path/to/mysql-VERSION-OS.tar.gz | tar xvf
Next, the instructions tell you to create a link with a shorter name:
#> ln -s mysql-VERSION-OS mysql
Once unpacked, the README and INSTALL files will walk you
through the remainder of the installation process for the version of MySQL you've chosen. In general, the following series of
commands will be used:
#> scripts/mysql_install_db
#> chown -R root /usr/local/mysql
#> chown -R mysql /usr/local/mysql/data
#> chgrp -R mysql /usr/local/mysql
#> chown -R root /usr/local/mysql/bin
You're now ready to start the MySQL server, so skip down to the section called "Basic Security Guidelines." If you had any issues with your installation, check the "Troubleshooting Your
Installing MySQL on Windows
The MySQL installation process on Windows is also quite simplethe developers from MySQL AB have packaged up everything you need in one zip file with a setup program! Download the zip file, extract its contents into a temporary directory, and run the setup.exe application. After the
setup.exe application installs the MySQL server and client
programs, you're ready to start the MySQL server.
The following steps detail the installation of MySQL 4.0.x on Windows, when the installer is downloaded from MySQL AB. The install sequence looks similar, regardless if you have a Windows 98, Windows NT, Windows 2000, or Windows XP environment for testing and development. Many users install MySQL on personal Windows machines just to get a feel for working with the database before deploying MySQL in a production
environment.
If you have the tools and skills to compile your own Windows binary files, the Cygwin source code is also available from MySQL AB. Follow the instructions contained in the source distribution, to build your own executable files.
Jumping right into the installation sequence, assuming you have download the Windows installer from the MySQL AB Web site, follow these steps:
1. Extract the contents of the zip file into a temporary
directory and find the setup.exe file, and then
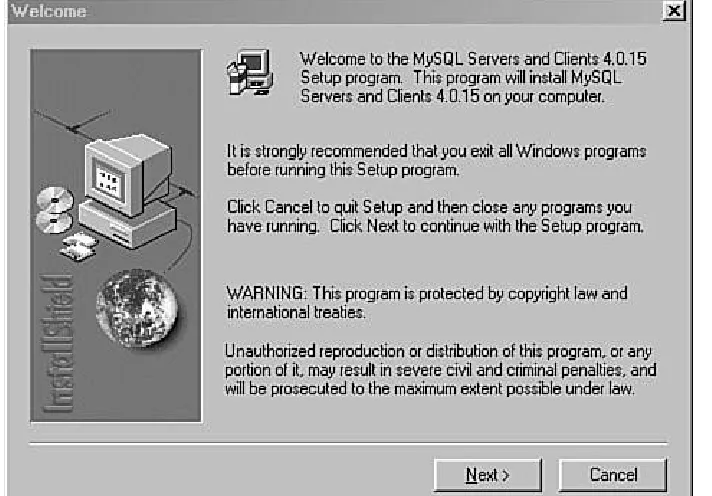
screen of the installation wizard, as shown in Figure 1.1. Click Next to continue.
Figure 1.1. The first step of the MySQL
installation wizard.
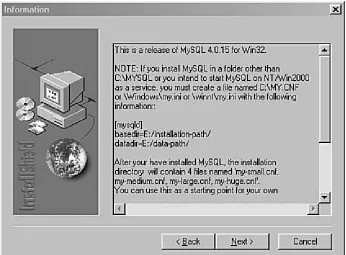
The second screen in the installation process contains valuable information regarding the installation location (see Figure 1.2). The default installation location is C:\mysql. If you plan to install MySQL in a different location, this screen shows you a few changes that you will have to make on your own. The information on this screen is also important for Windows NT users who want to start MySQL as a service. Read the
information and note anything relevant to your situation, and then click Next to continue.
Figure 1.2. Step 2 of the MySQL installation
wizard. Note any relevant information before
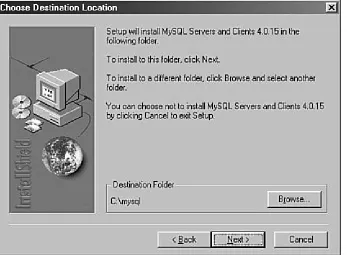
The third screen in the installation process has you select the installation location (see Figure 1.3). If you want to install
[image:35.612.72.418.71.326.2]MySQL in the default location, click Next to continue. Otherwise, click Browse and navigate to the location of your choice, and then click Next to continue.
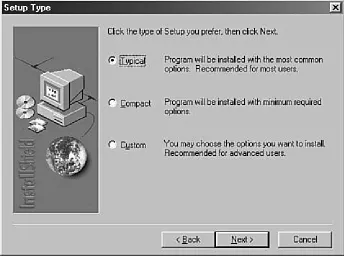
The fourth screen asks you to select the installation methodTypical, Compact, or Custom (see Figure 1.4). The Custom option allows you to select elements of MySQL to
[image:36.612.76.423.73.328.2]install, such as documentation and help files. Select Typical as the installation method, and click Next to continue.
The installation process will now take over and install files in their proper locations. When the process is finished, you will see a confirmation of completion, as in Figure 1.5. Click Finish to complete the setup process.
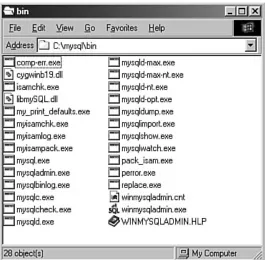
There are no fancy shortcuts installed in your Windows Start menu after an installation of MySQL from MySQL AB, so now you must start the process yourself. If you navigate to the MySQL applications directory (usually C:\mysql\bin\ unless you changed your installation path), you will find numerous applications ready for action (see Figure 1.6).
The winmysqladmin.exe application is a great friend to
Windows users who are just getting started with MySQL. If you double-click this file, it will start the MySQL server and place a stoplight icon in your taskbar.
[image:39.612.73.339.70.330.2]When you start WinMySQLadmin for the first time, you will be prompted for a username and password (see Figure 1.7). The application will create the initial MySQL user account on a Windows system.
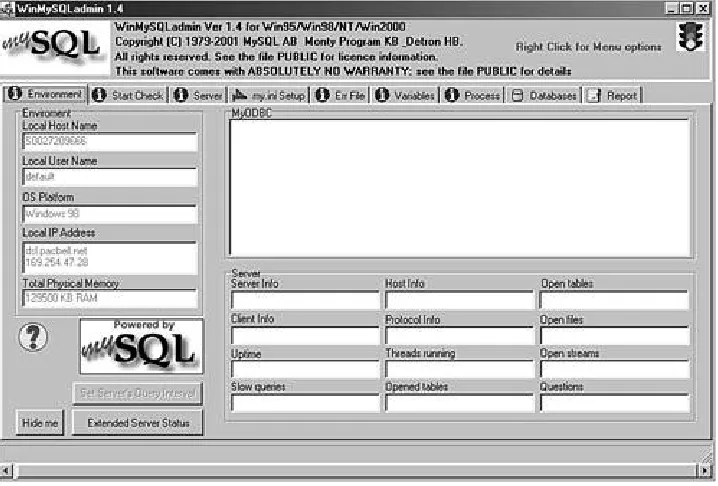
When you are finished creating the account, or whenever you right-click the stoplight icon in your taskbar, the graphical user interface will launch. This interface, shown in Figure 1.8,
[image:40.612.74.433.456.699.2]provides an easy way to maintain and monitor your new server.
WinMySQLadmin will automatically interpret environment information, such as IP address and machine name. The tabs across the top allow you to view system information and edit MySQL configuration options.
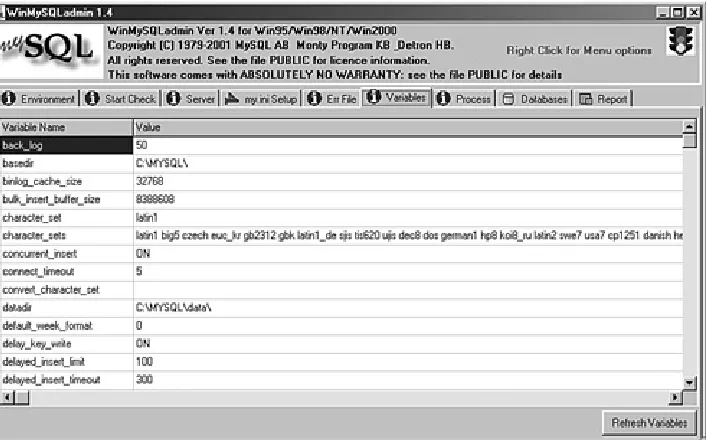
For example, if you select the Variables tab, as shown in Figure 1.9, you can also view server configuration information. This information is similar to the output of the MySQL SHOW
[image:41.612.79.434.299.519.2]VARIABLES command.
Figure 1.9. Server configuration information.
Troubleshooting Your Installation
If you have any problems during the installation of MySQL, the first place you should look is the "Problems and Common
Errors" chapter of the MySQL manual, which is located at http://www.mysql.com/doc/P/r/Problems.html.
The following are some common problems:
On Linux/Unix, incorrect permissions do not allow you to start the MySQL daemon. If this is the case, be sure you have changed owners and groups to match those indicated in the installation instructions.
If you see the message Access denied when connecting to MySQL, be sure you are using the correct username and password.
If you see the message Can't connect to server, make sure the MySQL daemon is running.
When defining tables, if you specify a length for a field whose type does not require a length, the table will not be created. For example, you should not specify a length when defining a field as TEXT (as opposed to CHAR or VARCHAR).
Basic Security Guidelines
Regardless of whether you are running MySQL on Windows or Linux/Unix, and no matter whether you administer your own server or use a system provided to you by your Internet service provider, you must understand basic security guidelines. If you are accessing MySQL through your Internet service provider, there are several aspects of server security that you, as a non-root user, should not be able to modify or circumvent.
Unfortunately, many Internet service providers pay no mind to security guidelines, leaving their clients exposedand for the most part, unaware of the risk.
Starting MySQL
Securing MySQL begins with the server startup procedure. If you are not the administrator of the server, you won't be able to change this, but you can certainly check it out and report
vulnerabilities to your Internet service provider.
If your MySQL installation is on Linux/Unix, your primary
concern should be the owner of the MySQL daemonit should not be root. Running the daemon as a non-root user such as
mysql or database will limit the ability of malicious individuals
to gain access to the server and overwrite files.
#> ps auxw | grep mysqld
mysql 153 0.0 0.6 12068 2624 ? S Nov16 0:00 /usr/local/bin/mysql/bin/mysqld
--defaults-extra-file=/usr/local/bin/mysql/data/my.cnf
--basedir=/usr/local/bin/mysql --datadir=/usr/local/bin/mysql/data
--user=mysql --pid-file=/usr/local/bin/mysql/data/mike.pid --skip-locking
The following output shows MySQL running as the root user (see the first entry on the second line):
#> ps auxw | grep mysqld
root 21107 0.0 1.1 11176 1444 ? S Nov 27 0:00 /usr/local/mysql/bin/mysqld
--basedir=/usr/local/mysql --datadir=/usr/local/mysql/data --skip-locking
If you see that MySQL is running as root on your system, immediately contact your Internet service provider and
mysqld --user=non_root_user_name
For example, if you want to run MySQL as user mysql, use
mysqld --user=mysql
However, the recommended method for starting MySQL is through the safe_mysqld startup script in the bin directory of your MySQL installation:
#> /usr/local/bin/mysql/bin/safe_mysqld &
Securing Your MySQL Connection
You can connect to the MySQL monitor or other MySQL
applications in several different ways, each of which has its own security risks. If your MySQL installation is on your own
workstation, you have less to worry about than users who have to use a network connection to reach their server.
If MySQL is installed on your workstation, your biggest security concern is leaving your workstation unattended with your
delete data, insert bogus data, or shut down the server. Utilize a screen saver or lock screen mechanism with a password if you must leave your workstation unattended in a public area.
If MySQL is installed on a server outside your network, the security of the connection should be of some concern. As with any transmission of data over the Internet, it can be
intercepted. If the transmission is unencrypted, the person who intercepted it can piece it together and use the information. Suppose the unencrypted transmission is your MySQL login informationa rogue individual now has access to your database, masquerading as you.
One way to prevent this from happening is to connect to MySQL through a secure connection. Instead of using Telnet to reach the remote machine, use SSH. SSH looks and acts like Telnet, but all transmissions to and from the remote machine are encrypted. Similarly, if you use a Web-based administration interface, such as phpMyAdmin (see
http://phpmyadmin.sourceforge.net for more information) or another tool used by your Internet service provider, access that tool over a secure HTTP connection.
Introducing the MySQL Privilege System
The MySQL privilege system is always on. The first time you try to connect, and for each subsequent action, MySQL checks the following three things:
Where you are accessing from (your host)
Who you say you are (your username and password)
What you're allowed to do (your command privileges)
All this information is stored in the database called mysql, which is automatically created when MySQL is installed. There are several tables in the mysql database:
columns_priv Defines user privileges for specific fields
within a table
db Defines the permissions for all databases on the server
func Defines user-created functions
host Defines the acceptable hosts that can connect to a specific database
tables_priv Defines user privileges for specific tables
within a database
user Defines the command privileges for a specific user
chapter as you add a few sample users to MySQL. For now, just remember that these tables exist and must have relevant data in them in order for users to complete actions.
The Two-Step Authentication Process
As you've learned, MySQL checks three things during the
authentication process. The actions associated with these three things are performed in two steps:
1. MySQL looks at the host you are connecting from and the username and password pair that you are using. If your host is allowed to connect, your password is correct for your username, and the username
matches one assigned to the host, MySQL moves to the second step.
For whichever SQL command you are attempting to use, MySQL verifies that you have the ability to perform that action for that database, table, and field.
If step 1 fails, you'll see an error about it and you won't be able to continue on to step 2. For example, suppose you are
connecting to MySQL with a username of joe and a password of
abc123 and you want to access a database called myDB. You will
receive an error message if any of those connection variables is incorrect for any of the following reasons:
Your password is incorrect.
Username joe doesn't exist.
User joe can connect from localhost but cannot use the myDB database.
You may see an error like the following:
#> /usr/local/mysql/bin/mysql -h localhost -u joe -pabc123 test
Error 1045: Access denied for user: 'joe@localhost' (Using password: YES)
If user joe with a password of abc123 is allowed to connect from localhost to the myDB database, MySQL will check the actions that joe can perform in step 2 of the process. For our purposes, suppose that joe is allowed to select data but is not allowed to insert data. The sequence of events and errors would look like the following:
#> /usr/local/mysql/bin/mysql -h localhost -u joe -pabc123 test
Reading table information for completion of table and column names
You can turn off this feature to get a quicker startup with -A
Your MySQL connection id is 61198 to server version: 4.0.15-log
Type 'help;' or '\h' for help. Type '\c' to clear the buffer.
mysql> select * from test_table;
+----+---+
| id | test_field |
+----+---+
+----+---+
| 1 | blah |
| 2 | blah blah |
+----+---+
2 rows in set (0.0 sec)
mysql> insert into test_table values ('', 'my text');
Error 1044: Access denied for user: 'joe@localhost' (Using password: YES)
Action-based permissions are common in applications with several levels of administration. For example, if you have created an application containing personal financial data, you might grant only SELECT privileges to entry-level staff
Working with User Privileges
In most cases when you are accessing MySQL through an Internet service provider, you will have only one user and one database available to you. By default, that one user will have access to all tables in that database and will be allowed to perform all commands. In this case, the responsibility is yours as the developer to create a secure application through your programming.
If you are the administrator of your own server or have the
ability to add as many databases and users as you want, as well as modify the access privileges of your users, these next few sections will take you through the processes of doing so.
Adding Users
Administering your server through a third-party application might afford you a simple method for adding users, using a wizard-like process or a graphical interface. However, adding users through the MySQL monitor is not difficult, especially if you understand the security checkpoints used by MySQL, which you just learned.
The simplest method for adding new users is the GRANT
command. By connecting to MySQL as the root user, you can issue one command to set up a new user. The other method is to issue INSERT statements into all the relevant tables in the
mysql database, which requires you to know all the fields in the
tables used to store permissions. This method works just as well but is more complicated than the simple GRANT command.
GRANT privileges
ON databasename.tablename
TO username@host
IDENTIFIED BY "password";
The privileges you can grant are
ALL Gives the user all the following privileges
ALTER User can alter (modify) tables, columns, and indexes
CREATE User can create databases and tables
DELETE User can delete records from tables
DROP User can drop (delete) tables and databases
FILE User can read and write files; this is used to import or dump data
INDEX User can add or delete indexes
INSERT User can add records to tables
PROCESS User can view and stop system processes; only
REFERENCES Not currently used by MySQL, but a column for
REFERENCES privileges exists in the user table
RELOAD User can issue FLUSH statements; only trusted users
should be able to do this
SELECT User can select records from tables
SHUTDOWN User can shut down the MySQL server; only
trusted users should be able to do this
UPDATE User can update (modify) records in tables
USAGE User can connect to MySQL but has no privileges
If, for instance, you want to create a user called john with a password of 99hjc, with SELECT and INSERT privileges on all tables in the database called myDB, and you want this user to be able to connect from any host, use
GRANT SELECT, INSERT
ON myDB.*
TO john@"%"
IDENTIFIED BY "99hjc";
list of tables, and % replaces a list of all hosts in the known worlda very long list indeed.
Here's another example of adding a user using the GRANT
command, this time to add a user called jane with a password
of 45sdg11, with ALL privileges on a table called employees in
the database called myCompany. This new user can connect only from a specific host:
GRANT ALL
ON myCompany.employees
IDENTIFIED BY "45sdg11";
If you know that janescomputer.company.com has an IP
address of 63.124.45.2, you can substitute that address in the hostname portion of the command, as follows:
GRANT ALL
ON myCompany.employees
IDENTIFIED BY "45sdg11";
One note about adding users: Always use a password and make sure that the password is a good one! MySQL allows you to
create users without a password, but that leaves the door wide open should someone with bad intentions guess the name of one of your users with full privileges granted to them!
If you use the GRANT command to add users, the changes will immediately take effect. To make absolutely sure of this, you can issue the FLUSH PRIVILEGES command in the MySQL monitor to reload the privilege tables.
Removing Privileges
Removing privileges is as simple as adding them; instead of a
GRANT command, you use REVOKE. The REVOKE command syntax
is
REVOKE privileges
ON databasename.tablename
FROM username@hostname;
In the same way that you can grant permissions using INSERT commands, you can also revoke permissions by issuing DELETE commands to remove records from tables in the mysql
fields and tables, and it's just much easier and safer to use
REVOKE.
To revoke the ability for user john to INSERT items in the
myCompany database, you would issue this REVOKE statement:
REVOKE INSERT
ON myDB.*
FROM john@"%";
Summary
Installing MySQL on Windows is a very simple process, thanks to a wizard-based installation method. MySQL AB provides a GUI-based administration tool for Windows users, called
WinMySQLadmin. Linux/Unix users do not have a wizard-based installation process, but it's not difficult to follow a simple set of commands to unpack the MySQL client and server binaries. Linux/Unix users can also use RPMs for installation.
Security is always a priority, and there are several steps you can take to ensure a safe and secure installation of MySQL. Even if you are not the administrator of the server, you should be able to recognize breaches and raise a ruckus with the
server administrator!
The MySQL server should not run as the root user. Additionally, named users within MySQL should always have a password, and their access privileges should be well defined.
MySQL uses the privilege tables in a two-step process for each request that is made. MySQL needs to know who you are and where you are connecting from, and each of these pieces of information must match an entry in its privilege tables. Also, the user whose identity you are using must have specific permission to perform the type of request you are making.
You can add user privileges using the GRANT command, which uses a simple syntax to add entries to the user table in the
mysql database. The REVOKE command, which is equally simple,
Q&A
Q1:How do I completely remove a user? The REVOKE command just eliminates the privileges.
A1:To completely remove a user from the privilege table, you have to issue a specific
DELETE command from the user table in the mysql database.
Q2:What if I tell my Internet service provider to stop running MySQL asand it won't? root,
A2:
Workshop
The workshop is designed to help you anticipate possible
questions, review what you've learned, and begin learning how to put your knowledge into practice.
Quiz
1:True or False: Telnet is a perfectly acceptable method to securely connect to MySQLfrom a remote host.
2:Which three pieces of information does MySQL check each time a request is made?
3:
What command would you use to grant SELECT, INSERT, and UPDATE privileges to a user named bill on localhost to all tables on the BillDB database? Also, what piece of information is missing from this statement that is recommended for security
purposes?
Answers
A1:False. The key word is secure, and Telnet does not encrypt data between hosts.
Instead, use SSH to connect to your server.
A2:Who you are, where you are accessing from, and what actions you're allowed toperform.
A3:GRANT SELECT, INSERT, UPDATE
ON BillDB.*
TO bill@localhost;
The important missing piece is a password for the user!
Activities
1:
Think of situations in which you might want to restrict command access at the table level. For example, you wouldn't want the intern-level administrator to have shutdown privileges for the corporate database.
2:If you have administrative privileges in MySQL, issue several GRANT commands to createdummy users. It doesn't matter whether the tables and databases you name are actually present.
Chapter 2. Installing and Configuring
Apache
In this second of three installation-related chapters, you will install the Apache Web server and familiarize yourself with its main components, including log and configuration files.
In this chapter, you will learn
How to install the Apache server on Linux/Unix
How to install the Apache server on Windows
How to make configuration changes to Apache
Current and Future Versions of Apache
The installation instructions in this chapter refer to Apache HTTPD server version 2.0.47, which is the current production version of the software. The Apache Software Foundation uses minor release numbers for updates containing security
enhancements or bug fixes. Minor releases do not follow a set release schedule; when enhancements or fixes are added to the code and thoroughly tested, the Apache Software Foundation will releases a new version, with a new minor version number.
It is possible that by the time you purchase this book, the minor version number will have changed, to 2.0.48 or beyond. If that is the case, you should read the list of changes, which is linked from the download area at
http://httpd.apache.org/download.cgi, for any changes
regarding the installation or configuration process, which makes up the bulk of this chapter.
Choosing an Installation Method
You have several options when it comes to getting a basic Apache installation in place. Apache is open source, meaning that you can have access to the full source code of the
software, which in turn enables you to build your own custom server. Additionally, pre-built Apache binary distributions are available for most modern Unix platforms. The examples in this chapter will teach you how to build Apache from source if you are using Linux/Unix, and how to use the installer if you plan to run Apache on a Windows system.
For instructions on installing Apache from the CD, please refer to
Appendix A, "Installing MySQL, Apache, and PHP from the CD-ROM."
Building from Source
Building from source gives you the greatest flexibility because it enables you to build a custom server, remove modules you do not need, and extend the server with third-party modules.
Building Apache from source code enables you to easily upgrade to the latest versions and quickly apply security patches,
whereas updated versions from vendors can take days or weeks to appear.
The process of building Apache from the source code is not especially difficult for simple installations, but can grow in
Installing a Binary
Linux/Unix binary installations are available from vendors and can also be downloaded from the Apache Software Foundation Web site. They provide a convenient way to install Apache for users with limited system administration knowledge, or with no special configuration needs. Third-party commercial vendors provide prepackaged Apache installations together with an application server, additional modules, support, and so on.
Installing Apache on Linux/Unix
This section explains how to install a fresh build of Apache 2.0.x on Linux/Unix. The steps necessary to successfully install
Apache from source are
1. Downloading the software
Running the configuration script
Compiling the code and installing it
The following sections describe these steps in detail.
Downloading the Apache Source Code
The official Apache download site is located at
http://httpd.apache.org/. You can find several Apache versions, packaged with different compression methods. The distribution files are first packed with the tar utility and then compressed either with the gzip tool or the compress utility. Download the
.tar.gz version if you have the gunzip utility installed in your
system. This utility comes installed by default in open source operating systems such as FreeBSD and Linux. Download the
tar.Z file if gunzip is not present in your system. (It isn't
included in the default installation of many commercial Unix operating systems.)
The file you want to download will be named something similar
to httpd-2.0.version.tar.Z or httpd-2.0.version.tar.gz,
/usr/local/src/.
Uncompressing the Source Code
If you downloaded the tarball compressed with gzip (it will have a tar.gz suffix), you can uncompress it using the gunzip utility (part of the gzip distribution).
Tarball is a commonly used nickname for software packed using the tar utility.
You can uncompress and unpack the software by typing the following command:
# gunzip < httpd-2.0*.tar.gz | tar xvf
If you downloaded the tarball compressed with compress
(tar.Z suffix), you can issue the following command:
Uncompressing the tarball creates a structure of directories, with the top-level directory named httpd-2.0_version. Change your current directory to this top-level directory to prepare for configuring the software.
Preparing to Build Apache
You can specify which features the resulting binary will have by using the configure script in the top-level distribution
directory. By default, Apache will be compiled with a set of
standard modules compiled statically and will be installed in the
/usr/local/apache2 directory. If you are happy with these
settings, you can issue the following command to configure Apache:
#./configure
However, in preparation for the PHP installation in Chapter 3, you will need to make sure that mod_so is compiled into
Apache. This module, named for the Unix shared object (*.so) format, enables the use of dynamic modules such as PHP with Apache. To configure Apache to install itself in a specific location (in this case, /usr/local/apache2/) and to enable the use of
#./configure --prefix=/usr/local/apache2 --enable-module=so
The purpose of the configure script is to figure out everything related to finding libraries, compile-time options, platform-specific differences, and so on, and to create a set of special files called makefiles. Makefiles contain instructions to perform different tasks, called targets, such as building Apache. These files will be read by the make utility, which will carry out those tasks. If everything goes well, after executing configure, you will see a set of messages related to the different checks just performed, and will be returned to the prompt:
...
creating test/Makefile
config.status: creating docs/conf/httpd-std.conf
config.status: creating include/ap_config_layout.h
config.status: creating support/apxs
config.status: creating support/apachectl
config.status: creating support/dbmmanage
config.status: creating support/envvars-std
config.status: creating support/logresolve.pl
config.status: creating support/phf_abuse_log.cgi
config.status: creating support/split-logfile
config.status: creating build/rules.mk
config.status: creating include/ap_config_auto.h
config.status: executing default commands
#
If the configure script fails, warnings will appear, alerting you to track down additional software that must be installed, such as compilers or libraries. After you install any missing software, you can try the configure command again, after deleting the
config.log and config.status files from the top-level
directory.
Building and Installing Apache
...
Installing header files
Installing man pages and online manual
mkdir /usr/local/apache2/man
mkdir /usr/local/apache2/man/man1
mkdir /usr/local/apache2/man/man8
mkdir /usr/local/apache2/manual
Installing build system files
make[1]: Leaving directory `/usr/local/src/httpd-2.0.40'
#
The Apache distribution files should now be in the
/usr/local/apache2 directory, as specified by the --prefix
switch in the configure command. To test that the httpd binary has been correctly built, type the following at the prompt:
# /usr/local/apache2/bin/httpd v
Server version: Apache/2.0.47
Server built: Sep 28 2003 11:47:22
Installing Apache on Windows
Apache 2.0 runs on most Windows platforms and offers
increased performance and stability over the 1.3 versions for Windows. You can build Apache from source, but because not many Windows users have compilers, this section deals with the binary installer.
Before installing Apache, you'll probably want to make sure that you are not currently running a Web server (for instance, a
previous version of Apache, Microsoft Internet Information
Server, or Microsoft Personal Web Server) in your machine. You might want to uninstall or otherwise disable existing servers. You can run several Web servers, but they will need to run in different address and port combinations.
Before downloading the installer, take a momenta very
important momentand look for a statement on the downloads page (found at http://httpd.apache.org/download.cgi) that says If you are downloading the Win32 distribution, please
read these important notes. The direct URL to these notes is
http://www.apache.org/dist/httpd/binaries/win32/README.html.
The Apache Software Foundation maintains this page for the benefit of all Windows users who want to run a version of the Apache server. On this page, there are notes for nearly every flavor of Windows still in use, and as such it will be in your best interest to read the information that is presented. I guarantee that if you are running Apache either as a production or
says that you can do whatever you want with the
[image:73.612.76.438.236.501.2]softwareincluding making proprietary modificationsexcept claim that you wrote it, but be sure to read the license so that you fully understand the terms.
Figure 2.1. The Windows installer welcome
screen.
After you accept the license, the installer presents you with a brief introduction to Apache. Following that, it asks you to provide basic information about your computer, as shown in Figure 2.2. This includes the full network address for the server (for instance, mycomputer.mydomain.com) and the
Figure 2.2. The basic information screen.
If your machine does not have a full network address, use localhost or 127.0.0.1 as the server name.
running on port 80.
[image:75.612.78.435.263.534.2]The next screen enables you to choose the type of installation, as shown in Figure 2.3. Typical installation means that Apache binaries and documentation will be installed, but headers and libraries will not. This is the best option to choose unless you plan to compile your own modules.
Figure 2.3. The installation type selection screen.
A custom installation enables you to choose whether to install header files or documentation. After selecting the target
installation directory, which defaults to c:\Program
Files\Apache Group, the program will proceed with the
installation process. If everything goes well, it will present you with the final screen shown in Figure 2.4.
Apache Configuration File Structure
Apache keeps all of its configuration information in text files. The main file is called httpd.conf. This file contains directives and containers, which enable you to customize your Apache installation. Directives configure specific settings of Apache, such as authorization, performance, and network parameters.
Containers specify the context to which those settings refer. For example, authorization configuration can refer to the server as a whole, a directory, or a single file.
Directives
The following rules apply for Apache directive syntax:
The directive arguments follow the directive name.
Directive arguments are separated by spaces.
The number and type of arguments vary from directive to directive; some have no arguments.
A directive occupies a single line, but you can continue it on a different line by ending the previous line with a backslash character (\).
The pound sign (#) should precede the directive, and must appear on its own line.
In the Apache server documentation, found online at http://httpd.apache.org/docs-2.0/, you can browse the
belong. You'll soon learn about some of the basic directives, but you should supplement your knowledge using the online
documentation.
Figure 2.5 shows an entry from the documentation for the
ServerName directive description. You can read this description
[image:78.612.74.435.283.541.2]in the online documentation at http://httpd.apache.org/docs-2.0/mod/core.html#servername.
Figure 2.5. Directive description example.
The schema, as detailed in the documentation at
http://httpd.apache.org/docs-2.0/mod/directive-dict.html, is the same for all directives:
Default If the directive has a default value, it will appear here.
Context This entry details the containers or sections in which the directive can appear. Containers are explained in the next section. The possible values are server config,
virtual host, directory, and .htaccess.
Status This entry indicates whether the directive is built in Apache (core), belongs to one of the bundled modules
(base or extension, depending on whether they are
compiled by default), is part of a Multi-Processing Module (MPM), or is bundled with Apache but not ready for use in a production server (experimental).
Module This entry indicates the module to which the directive belongs.
Compatibility This entry contains information about which versions of Apache support the directive.
Override Apache directives belong to different categories. The override field is used to specify which directive
categories can appear in .htaccess per-directory configuration files.
A brief explanation of the directive follows these entries in the documentation, and a reference to related directives or
documentation might appear at the end.
Containers
they belong to the default server scope (server config) and apply to the server as a whole.
These are the default Apache directive containers:
<VirtualHost> A VirtualHost directive specifies a virtual
server. Apache enables you to host different Web sites with a single Apache installation. Directives inside this container apply to a particular Web site. This directive accepts a
domain name or IP address and an optional port as arguments. You will learn more about virtual hosts in Chapter 26, "Apache Performance Tuning and Virtual Hosting."
<Directory>, <DirectoryMatch> These containers allow directives to apply to a certain directory or group of
directories in the file system. Directory containers take a directory or directory pattern argument. Enclosed directives apply to the specified directories and their subdirectories.
The DirectoryMatch container allows regular expression
patterns to be specified as an argument. For example, the following allows a match of all second-level subdirectories of the www directory that are made up of four numbers, such as a directory named after a year and month (0902 for September 2002):
<DirectoryMatch "^/www/.*/[0-9]{4}">
patterns. They are similar to their Directory counterparts.
LocationMatch takes a regular expression as an argument.
For example, the following matches directories containing either "/my/data" or "/your/data":
<LocationMatch "/(my|your)/data">
<Files>, <FilesMatch> Similar to Directory and Location containers, Files sections allow directives to apply to
certain files or file patterns.
Containers surround directives, as shown in Listing 2.1.
Listing 2.1 Sample Container Directives
1: <Directory "/some/directory">
2: SomeDirective1
3: SomeDirective2
4: </Directory>
5: <Location "/downloads/*.html">
6: SomeDirective3
8: <Files "\.(gif|jpg)">
9: SomeDirective4
10: </Files>
Sample directives SomeDirective1 and SomeDirective2 will apply to the directory /www/docs and its subdirectories.
SomeDirective3 will apply to URLs referring to pages with the
.html extension under the /download/ URL. SomeDirective4
will apply to all files with .gif or .jpg extensions.
Conditional Evaluation
Apache provides support for conditional containers. Directives enclosed in these containers will be processed only if certain conditions are met.
<IfDefine> Directives in this container will be processed if
a specific command-line switch is passed to the Apache executable. The directive in Listing 2.2 will be processed only if the -DMyModule switch was passed to the Apache binary being executed. You can pass this directly or by modifying the apachectl script, as described in the
"Apache-Related Commands" section later in this chapter.
IfDefine containers allow the argument to be negated.
That is, directives inside a <IfDefine !MyModule> section will be processed only if no -DMyModule parameter was
passed as a command-line argument. For example, if -DSSL is not passed, listening on the SSL port (usually 443) will not occur.
processed only if the module passed as an argument is
present in the Web server. For example, Apache ships with a default httpd.conf configuration file that provides support for different MPMs. Only the configuration belonging to the MPM compiled in will be processed, as you can see in Listing 2.3. The purpose of the example is to illustrate that only one of the directive groups will be evaluated.
Listing 2.2
IfDefineExample
1: <IfDefine MyModule>
2: LoadModule my_module modules/libmymodule.so
3: </IfDefine>
Listing 2.3
IfModuleExample
1: <IfModule prefork.c>
2: StartServers 5
3: MinSpareServers 5
4: MaxSpareServers 10
5: MaxClients 20
6: MaxRequestsPerChild 0
8:
9: <IfModule worker.c>
10: StartServers 3
11: MaxClients 8
12: MinSpareThreads 5
13: MaxSpareThreads 10
14: ThreadsPerChild 25
15: MaxRequestsPerChild 0
16: </IfModule>
ServerRoot
The ServerRoot directive takes a single argument: a directory
path pointing to the directory where the server lives. All relative path references in other directives are relative to the value of
ServerRoot. If you compiled Apache from source on
Linux/Unix, as described earlier in this chapter, the default value of ServerRoot is /usr/local/apache2. If you used the Windows installer, the ServerRoot is c:\Program
Files\Apache Group.
Per-Directory Configuration Files
to exist outside the main configuration file, httpd.conf. These special files can be placed in the file system. Apache will
process the content of these files if a document is requested in a directory containing one of these files or any subdirectories under it. The contents of all the applicable per-directory
configuration files are merged and processed. For example, if Apache receives a request for the
/usr/local/apache2/htdocs/index.html file, it will look for
per-directory configuration files in the /, /usr, /usr/local,
/usr/local/apache2, and /usr/local/apache2/htdocs
directories, in that order.
Enabling per-directory configuration files has a performance penalty. Apache must perform expensive disk operations looking for these files in every request, even if the files do not exist.
Per-directory configuration files are called .htaccess by default. This is for historical reasons; they were originally used to
protect access to directories containing HTML files.
The directive AccessFileName enables you to change the name of the per-directory configuration files from .htaccess to
something else. It accepts a list of filenames that Apache will use when looking for per-directory configuration files.
To determine whether a directive can be overridden in the per-directory configuration file, check whether the Context: field of the directive syntax definition contains .htaccess.
Apache directives belong to different groups, specified in the
Override: field in the directive syntax description. Possible
values are
AuthConfig Authorization directives
Indexes Directives controlling directory indexing
Limit Directives controlling host access
Options Directives controlling specific directory features
You can control which of these directive groups can appear in per-directory configuration files by using the AllowOverride directive. AllowOverride can also take an All or a None argument. All means that directives belonging to all groups can appear in the configuration file. None disables per-directory files in a directory and any of its subdirectories. Listing 2.4
shows ho