Joomla! 1.5 Cookbook
Over 60 quick and direct recipes to help you overcome
common Joomla! queries
Tom Canavan
Joomla! 1.5 Cookbook
Copyright © 2010 Packt Publishing
All rights reserved. No part of this book may be reproduced, stored in a retrieval system, or transmitted in any form or by any means, without the prior written permission of the publisher, except in the case of brief quotations embedded in critical articles or reviews. Every effort has been made in the preparation of this book to ensure the accuracy of the information presented. However, the information contained in this book is sold without warranty, either express or implied. Neither the author, nor Packt Publishing, and its dealers and distributors will be held liable for any damages caused or alleged to be caused directly or indirectly by this book.
Packt Publishing has endeavored to provide trademark information about all of the companies and products mentioned in this book by the appropriate use of capitals. However, Packt Publishing cannot guarantee the accuracy of this information.
First published: October 2010
Production Reference: 1191010
Published by Packt Publishing Ltd. 32 Lincoln Road
Olton
Birmingham, B27 6PA, UK. ISBN 978-1-849512-36-7 www.packtpub.com
About the Author
Tom Canavan
has been in the Computer and IT industry for 20+ years where he spent several years as a Systems Consultant to many Fortune 100 clients and other global companies.Canavan is considered a top security and disaster recovery expert in the Joomla! world. He is the author of the Packt Publishing book Joomla! Web Security.
He is a former CIO and is currently the co-founder of SalvusAlerting.com. Canavan contributes articles on security and disaster recovery to several websites.
It's often difficult for me, as an author to write the acknowledgements of
a book. Not because I feel there's no one to thank, but because there are so many.
Firstly, I thank Jesus Christ, my Lord and Savior. Without his help, I would not have had the courage to strike out on yet another book. My deepest gratitude and thanks goes to my wife, who put up with me writing another book. Special thanks to Mike Carson of JoomlaShowroom.com for his assistance with understanding K2. Thanks go to Alexis at Freakedout.co, for helping me through some rough spots in the technology. Learning the Joomla! 1.6 ACL was no small feat and special thanks go to Jen Kramer for educating me on it. Thank you to the hardworking editors and staff at Packt who put up with multiple delays, and rewrites from me. I know there are many others who helped me and please forgive me if you didn't get a direct mention. I am very grateful for your assistance and help.
About the Reviewer
Eric Brown,
who was born and raised in California, joined the U.S. Navy at the age of 17 and became a Preventive Medicine Technician. Upon exiting military service, he left themedical field behind and moved to Nebraska and entered into college studying art and
design which resulted in a Bachelor of Science degree in Graphic Design from Wayne State College in Nebraska. Eric has since then branched out by teaching himself (or learning from others) various aspects of HTML, CSS, and PHP as well as a variety of other code languages and web marketing strategies and tools. He currently owns his own design and development business located in Curtis, NE. where he lives with his wife and pets.
Over the years, Eric has worked for a local design and development firm in Nebraska on such projects as the Golden Spike Tower website aimed at tourist traffic centered on the Union Pacific's Bailey Yard and with a premier pet industry design and development firm
as a project manager. He has also written for such prestigious publications as Trafficology (a purchased print publication on web marketing read by over 80,000 world-wide),
CMSWire.com (a leader in content management news), Revenues.com (a highly rated site on various aspects of marketing), and Gadgetell.com (a well-known gadget news site). Eric was a reviewer for Joomla! 1.5 Javascript jQuery book from Packt Publishing. He has also been involved in other books as well as providing editing, image touch-up, and custom hand-drawn maps for Tagging Along (a Neville Family retrospective) and editing, layout, cover art, and image touch-up on My Life and Community (Biography of Ken Huebner).
Saidur Rahman Bijon
is an open-source enthusiast from Bangladesh. He is a computer science graduate from BRAC University. He has been developing web applications since 2005. During this time, he developed e-commerce, web 2.0, social networking, and micro-blogging applications and he worked on Joomla!, Zend Framework, Drupal, andWordPress. He is also a Zend-certified engineer. He shares his knowledge and ideas
at http://saidur.wordpress.com.
He started his career by developing a large-scale application for the Bangladesh Navy with a Japanese and US-based offshore company. Currently, he is working in Blueliner Marketing, LLC (http://www.bluelinerny.com/), an US-based company as a senior software engineer.
Saidur was a reviewer for Codeigniter 1.7 book from Packt Publishing.
I appreciate Packt Publishing for giving me the opportunity to review this book. I really am thankful to my family, friends, and colleagues for their help.
Tahsin Hasan
is a software engineer. He has passed the Zend Certification Examinationon 09, August, 2009 and has become the seventeenth Zend Certified Engineer (ZCE)
from Bangladesh. This is the top-most certification on PHP from Zend, the developer of
this outstanding scripting language. He is a tech enthusiast and always keeps himself well-equipped with latest technologies. He has completed his M.Sc. and B.Sc. in Computer Science and Engineering from Jahangirnagar University.
Tahsin Hasan has profound knowledge on LAMP environment. His advanced understanding
of database environments and Apache web server is an asset. He has proficiency in
Table of Contents
Preface
1
Chapter 1: Installing Joomla!
7
Introduction 7
Preparing to install 8
Setting up your database on a cPanel® host 15
Setting up your database on a GoDaddy.Com® server 20
Installation of Joomla! 1.5 25
Ensuring permissions are correct 35
Chapter 2: Working with phpMyAdmin
39
Introduction 39
Exporting a MySQL database using phpMyAdmin 41
Importing a MySQL database using phpMyAdmin 48
Working with your database using phpMyAdmin 53
Removing a table from your database 58
Removing content from a table 61
Chapter 3: Templates
65
Introduction 65
Installing the template using the administrator tool 66 Replacing the default administrator template 68
Manual installation of a template 74
Using more than one template on your site 78
Determining your templates' module positions 85
Replacing a logo in a template 90
Chapter 4: Editing Content and Menus
97
Introduction 97
Installing a new editor 98
ii
Table of Contents
Setting up categories 108
Article creation 114
Adding new menus 124
Setting up a blog on your Joomla! site 133
Adding an extension menu 141
Chapter 5: Managing Links, Users, and Media
151
Introduction 151
Managing users 152
Setting up a site contact 158
Working with media 163
Managing the login and user experience 169
Web Link manager 177
Changing lost super admin password 182
Chapter 6: Managing Modules and Components
187
Introduction 187
Installing and managing components 188
Creating menu items for components 193
Installing, creating, and managing modules 196
Chapter 7: Managing Articles Using the K2 Content Construction Kit 201
Introduction 201
Installation and introduction of K2 202
Working with items AKA articles 217
Working with comments 225
Summary 229
Chapter 8: Installing Third-party Extensions
231
Introduction 231
Installing and using eXtplorer 232
Using and configuring content uploader extension 237
jomCalendar 241
Using and configuring CompojoomComment 248
Summary 253
Chapter 9: Troubleshooting
255
Introduction 255
Developing a 'troubleshooting mentality' 256
Summary 266
Chapter 10: Securing your Joomla! Site
267
Introduction 267
Setting permissions for your site 268
Using .htaccess and php.ini 272
Denying specific IP addresses 279
Summary 280
Chapter 11: Joomla! 1.6
281
Introduction 281
Joomla! 1.6 ACL 282
Working with new category manager 292
Extensions 300
Appendix
305
Usernames, passwords and database reference sheet 305
Turning the legacy mode on or off 306
Changing the favorite icon 307
Setting up a site in a subfolder 308
Questions to ask a prospective host 309
Checking and updating your server software 311
Preface
If you are a Joomla! site owner, you must already be aware of how this robust, easy to use, open source content management system can help you build a great looking site instantly.
You must also be aware of the many problems that it can throw up from time to time. Find
the solutions to all your basic and advanced Joomla! queries, so you don't have to wait for someone on the forums to help you out every time.
The Joomla! 1.5 Cookbook will provide you with quick and direct solutions to the most common and uncommon problems faced by you, the Joomla! site owner, sidestepping all the
theoretical fuss.
Joomla! is the insanely popular, award winning content management system which helps you build professional looking websites, even if you don't have any HTML programming experience or design skills.
Normally, sometimes you might trip over some common pitfalls which would slow the progress
of your website down. This book will help you find a direct and quick way through common
problems which can be easily avoided with a few tips and tricks. It starts off with solutions to the most common queries that you might face during the installation and set up for Joomla! 1.5, then moving on swiftly to guide you through Joomla! templates, modules, security, managing your users, and much more. So the next time things go wrong with your Joomla! site and you are wondering, for example, how to work with your site's database; just pick up
this book and quickly find your way through.
2
What this book covers
Chapter1, Installing Joomla!: This chapter covers the important process of installation. In this chapter, you will learn how to install and use the FTP program FileZilla. Using this you will then learn how to transfer Joomla! up to your server and ensure permissions are correct. There are several different hosting platforms you can choose, but many of them run an application known as cPanel®. Another hosting platform is from the company GoDaddy.com®. You will learn how to use both of these popular systems to install your database and configure it. The
last item is a cheat sheet for you to record all the particulars for your host.
Chapter 2, Working with phpMyAdmin: As you learn in Chapter 1, Joomla! is a database-driven system that renders the content on the screen from database queries. In this chapter, you will learn how to export (backup) and import (restore) a database. The database is comprised
of "rows" and "tables", working with those you can get fine-grained control over your systems.
Lastly, you'll learn how to remove a database table or simply empty out the data.
Chapter3, Templates: Joomla! has a special extension known as a Template. The Template is what gives the the look to the external part of your book. Using a template requires that be installated. In this chapter you will learn how to install and assign a template as your default one. Of course, templates, like the rest of Joomla!, have a bit of management that goes on and ensuring you know that will give you a sharp-looking site.
The back-end of Joomla! has a template too, known as the administrator template. This template can be replaced with any number of third-party templates available for this purpose.
You will learn how to install and assign that one as well.
There are times when you want to use more than one template; this will be covered along with learning how to change a logo (graphics) in a template. Finally, templates use a 'module'
position to determine where to show content. You'll wrap up this chapter with knowing how to
determine a template's MODULE positions.
Chapter4, Editing Content and Menus: Joomla! is a Content Management System, and thus has a host of things such as an editor, sections for content, and putting content
into categories. You will learn in this chapter how to install an editor, set up, and define
the sections and categories that match your needs. Creating an article is the heart of Joomla! - that is - providing something for your visitors to read or interact with. We cover this as well as setting up menus to display the content.
You may want to use Joomla! for a blog site. Joomla! is perfect for this and we wrap this
chapter up with instructions on setting up a blog site on Joomla! and learning how to add an extension menu.
Chapter5, Managing Links, Users and Media: With your Joomla! site you will likely be managing users. This chapter covers all the administrative detail such as adding, deleting,
and suspending users. It covers how to take your users and assign them into Groups. You
You're likely to have a need for your clients to reach out to you. Publishing your e-mail is
unsafe due to spammers gathering it. Joomla! has provided a means to create a contact
using specific users. You'll go through the steps to set up and configure this user.
Adding in links to your site from external sources gives you a great source of extra content. This process is known as using Web Link manager.
Finally, should you ever find yourself having lost your admin password or been locked out of
your administrator console, you'll need to manually reset the password for your database. We wrap up this chapter with a simple and quick means to do so.
Chapter6, Managing ModulesandComponents: Joomla! can be extended via the use of "Extensions". These extensions fall into three categories: Components, Modules, and Plugins. This chapter covers the installation and management of components and modules. Additionally, you will learn how to create the necessary menu items to drive these applications. Occasionally, you will need to enable, disable, or uninstall an extension. This step is simple and is covered in a brief recipe.
Lastly you will learn how to change the menu order of components.
Chapter7, ManagingArticlesUsingtheK2Content ConstructionKit: K2 is a wonderful content creation kit from Joomlaworks.gr. K2 gives you the ability to manage content in
an extremely powerful way. In this recipe, you'll learn how to install and configure K2. Using
a short cut known as a 'master category', you can templatize your settings in K2 and greatly ease your administration time.
K2 offers some great extras such as connections for YouTube and PhotoGalleries as well.
If you add K2 to an existing Joomla! site, you don't have to recreate all the articles. K2 offers an import feature and you'll become very familiar with it here.
Like Joomla!, K2 also offers categories, except that it removes the concept of Sections. What that opens up is Categories, within Categories, within Categories. This is known as Nested
Categories. This recipe will show you how to set up and configure your categories for
maximum use.
Tag Clouds are a popular means to display descriptions about your content and help with your
Search Engine Efforts. You'll learn how to use this powerful tag cloud system.
The final two recipes cover configuration and moderation of comments in K2 as well as some
tips and tricks to enhance your K2 experience.
4
Chapter9, Troubleshooting: You will run into trouble from time to time with your Joomla! site or server. This chapter helps you with establishing a good and well-known troubleshooting process
and offers some assistance on specific problems such as connecting to your database.
Chapter10, Securing your Joomla! Site: Security is one task you should spend an appropriate amount of time and not skip. This set of recipes will assist you through the proper setting of
permissions - a common trouble spot. You will learn how to patch, or in other words update your code. Apache web server provides a special setting file called .htaccess that allows you
change and configure many important parts of your site. You'll learn how to use .htaccess to protect your site.
From time to time you may have a directory that you wish to keep private, free from prying eyes. In the recipe, Preventing Unauthorized Directory Viewing, you'll learn how to stop access to unauthorized persons.
Hackers love sites that give lots of error information, this helps them learn what your site is
running and potentially gives them a clue on breaking in. You'll build a universal error page
that gives the information on errors to your visitors that prevents hackers from learning too much.
Rounding out the security chapter, you'll discover how to disable your servers "banner", (a means to divulge important) information, block IP's and evil bots as well as adding protection for PHP, the language Joomla! is written in.
Chapter11, Joomla! 1.6: Joomla 1.6 is the newest (and at this time, still beta) version of Joomla!. This is essentially a new version from the ground up. There are many new and powerful
features in 1.6, such as the Access Control Level system or ACL. You'll spend time learning how to set up and configure this as well as establishing certain ways to restrict content.
Users and groups have changed a bit in 1.6 from the previous version and getting familiar with them will help you adopt v1.6.
The next two recipes are on learning to control access on a per article basis and using the new category manager. Lastly, there have been a great number of improvements in the extension
manager and you'll discover those in the final recipe of this chapter.
What you need for this book
You will need your desktop or notebook computer with an Internet Browser. You'll need to have or obtain a FTP client program, such as FileZilla. It will be beneficial to download the
application known as NotePad+. This is a Windows application that replaces the normal notepad application.
The other technologies used in this book include the Linux operating system, MySQL
database, PHP, and the Apache Web Server. You will only need a web hosting account
The final piece is the most recent version of the Joomla! 1.5.xx family and optionally the latest
version of Joomla 1.6!.
Who this book is for
If you are a Joomla! site owner and have some problems that you want to get rid of quickly; or you just want to get particular things working or improved, this is the book for you. HTML, CSS, or programming knowledge is not required.
Conventions
In this book, you will find a number of styles of text that distinguish between different kinds of
information. Here are some examples of these styles, and an explanation of their meaning. Code words in text are shown as follows: "If you see this on your particular setup be sure and
upload the fles into the folder called public_html." A block of code is set as follows:
SetEnvIfNoCase User-Agent "^libwww-perl*" block_bad_bots Deny from env=block_bad_bots
RewriteEngine On
RewriteCond %{HTTP_USER_AGENT} ^BlackWidow [OR] RewriteCond %{HTTP_USER_AGENT} ^Bot\
New terms and important words are shown in bold. Words that you see on the screen, in menus or dialog boxes for example, appear in the text like this: "Click the New Site button".
Warnings or important notes appear in a box like this.
Tips and tricks appear like this.
Reader feedback
Feedback from our readers is always welcome. Let us know what you think about this book—what you liked or may have disliked. Reader feedback is important for us to develop titles that you really get the most out of.
6
If there is a book that you need and would like to see us publish, please send us a note in the SUGGEST A TITLE form on www.packtpub.com or e-mail [email protected].
If there is a topic that you have expertise in and you are interested in either writing or contributing to a book, see our author guide on www.packtpub.com/authors.
Customer support
Now that you are the proud owner of a Packt book, we have a number of things to help you to get the most from your purchase.
Downloading the example code for this book
You can download the example code files for all Packt books you have
purchased from your account at http://www.PacktPub.com. If you purchased this book elsewhere, you can visit http://www.PacktPub. com/support and register to have the files e-mailed directly to you.
Errata
Although we have taken every care to ensure the accuracy of our content, mistakes do happen.
If you find a mistake in one of our books—maybe a mistake in the text or the code—we would be
grateful if you would report this to us. By doing so, you can save other readers from frustration
and help us improve subsequent versions of this book. If you find any errata, please report them
by visiting http://www.packtpub.com/support, selecting your book, clicking on the errata
submission form link, and entering the details of your errata. Once your errata are verified, your
submission will be accepted and the errata will be uploaded on our website, or added to any list of existing errata, under the Errata section of that title. Any existing errata can be viewed by selecting your title from http://www.packtpub.com/support.
Piracy
Piracy of copyright material on the Internet is an ongoing problem across all media. At Packt, we take the protection of our copyright and licenses very seriously. If you come across any illegal copies of our works, in any form, on the Internet, please provide us with the location address or website name immediately so that we can pursue a remedy.
Please contact us at [email protected] with a link to the suspected pirated material.
We appreciate your help in protecting our authors, and our ability to bring you valuable content.
Questions
1
Installing Joomla!
In this chapter, we will cover:
f Installation of an FTP program
f Transferring Joomla! files to your server
f Setting up and test of your database on a cPanel® server
f Setting up and testing of your database on a GoDaddy.Com® webserver
f Installation of Joomla! 1.5 on your webserver
f Ensuring permissions are correct
f Cheat sheet for access information
Introduction
Installation of Joomla! 1.5 is typically very simple. While there are very few choices in hosting you need to make to install Joomla!, many users are tripped up by some common pitfalls. This chapter will help you avoid those. This chapter will show you how to install Joomla! on two different but common types of hosting platform.
We will look at setting up the database on two common hosting platforms, cPanel® and GoDaddy.com®. Both of the hosting systems offer various and important features, yet each accomplishes setup of your database in a different manner.
In this chapter we will be covering:
f Setting up of the database
f Getting the necessary details from your database server
Installing Joomla!
8
The first host type we'll cover is a cPanel® based host, which is found in many, many hosting platforms. The examples we use are from the popular host http://www.rochenhost.com/ which hosts Joomla.org
The other hosting platform we discuss is GoDaddy.com®.
Each approaches the task of the database setup very differently, yet they accomplish the same goal - setting up your database for Joomla!.
Once you get past the hurdle of setting up the database on the host, then the steps to install Joomla! are the same. This chapter will show you how to install an FTP client, set up each host, and then how to setup Joomla! 1.5.
Our first recipe is setting up the FTP (File Transfer Protocol) using an Open source application called FileZilla. You will use the FTP program to transfer the Joomla! 1.5 source files from your local machine to your server.
There are a few decisions you will need to make and space has been provided in this chapter to record your settings for future reference.
If you write down your settings be sure and keep this manual in a safe place. Loss or exposure of these settings could result in your site being damaged or attacked by a third party. Think of your ATM PIN - this is just as important.
Joomla! has a few requirements such as username, passwords, language, and whether or not you wish to implement the FTP layer.
Getting it wrong the first time is not the end of the world and is easily fixed by reinstalling or by
correcting the install. See the chapter on Troubleshooting for more information.
Downloading the source for Joomla! should only take a few minutes and opening it is easy on most any Modern Windows® or Macintosh® Machine.
Grab a pencil and paper and let's get started.
Please note GoDaddy.com® is a registered trademark of GoDaddy.com, Inc. & cPanel® is a registered trademark of cPanel, Inc. Rochenhost.com is trademark Rochen Ltd.
Preparing to install
In this task we will gather the required materials for installation. You will need an FTP
Getting ready
f Get FileZilla by visiting their site at this link: http://filezilla-project.org/ download.php
f Save it to a place on your computer that you can recall. If you are a Windows user,
please select the first RECOMMENDED choice labeled: FileZilla_3.3.2_win32-setup.exe
If you are on a Macintosh please locate the appropriate FTP transfer program.
f Download the latest FULL PACKAGE version of Joomla! 1.5.xx from the following URL: http://www.joomla.org/download.html
Versions may vary
However, by the time this book went to print the current version is 1.5.21.
You will see the .15 version in some graphics. Do not be concerned as they
operate the same. Be sure and download the latest version for the 1.5.xx family available.
f Contact your host for your particular FTP settings. You will need:
ftp server address (typically ftp.yourserver.com)
Username for your ftp server Password for your ftp server
Security Tip
If you cannot keep this book in a safe place do not write your production settings in here. If someone gains access to your settings you wrote down, it could result in someone gaining unauthorized access. A full sheet has been
provided in the appendix for you to fill in and tear out should you need to.
For convenience you may record those settings here: FTP SERVER OR IP ADDRESS: ____________________ FTP USER: __________________________________ FTP PASSWORD: ______________________________ FTP PORT (OPTIONAL): ________ (typically PORT: 21)
Installing Joomla!
10
For convenience you may record those settings here:
Admin: The default user name is ADMIN - for installation that is what you will use. Password: ________________
eMail account: _____________________________
Did you know..
FTP is not considered the most secure means to communicate with your server. In the chapter on security you will be introduced to a more secure means of communication called SSH.
Depending on your host once you set up and login with FTP you may have to navigate to the website directory (known often as public_html). Ask your host to set up your FTP account to point to the path to the web sites root directory as default.
How to do it...
1. InstallFileZilla by double-clicking on the executable. This will take about two minutes. FileZilla is very self explanatory and accepting the defaults is the best method to get it installed and working.
2. We will need to set up your FileZilla client to talk to your server. Click File | Site Manager
You will now see the following screen:
3. Setting up Site Manager
This will open up the configuration for a new HOST entry.
4. Click the New Site button
You will need the FTP settings you wrote down previously.
HOST: Enter the your FTP information that your host gave you PORT: Enter port number your host gave you (typically 21). Note this
is in most cases automatically handled for you by FileZilla and you should not need to change it.
Servertype: Leave as FTP - File Transfer Protocol unless instructed
by the webhosting provider to use a different setting
Logontype: Select Normal (it will default to Anonymous) User: Username that your Host gave you
Installing Joomla!
12
5. Click Connect to save and test the connection. It should show you something like the following screenshot:
Once you see this screen you are ready to begin set up. Please note that the contents
on your screen's right and left windows will be different. You should see a folder
listing on the right screen of your contents.
If you do not see this screen it means your connection was refused by the server. Repeat the above steps. If it still fails, contact your host and verify the settings.
6. Uncompress Joomla!
Locate the compressed (zipped) file you downloaded in Item 2. It will be named
like this: Joomla_1.5.XX-Stable-Full_package.zip(code in text) where "xx" represents the latest version of Joomla! you downloaded.
Using Windows® right-click the file and choose Extract All… - this will uncompress
the file into a folder by the same name. It is worth noting that other applications such
as WinZip, WinRAR or others will handle this procedure differently. Record Joomla! path name here: ____________________________
Zip
7. Start FileZilla
Start your FileZilla application (if it is not already) and open Site Manager, select your host, and click Connect.
8. Navigate in the FileZilla window titled: Local site to your uncompressed Joomla folder.
You should see something like this: (Note that is the left window of FileZilla)
9. This is a screen showing you what is on your machine.
10. Transfer files over from your local machine to Server
Installing Joomla!
14
13. Right-click on the highlighted folders and you will see the following screen:
14. Click the Upload button, as circled in the preceding screenshot.
You will see the files copying to the RIGHT window. Once done, you will see this in the
right-hand pane, which represents your server.
The following is a screenshot of your web server after Joomla! has been uploaded.
What is public_html?
On some web servers you may see a folder called public_html and a folder called www. If you see this on your particular setup be sure and
upload the files into the folder called public_html.
How it works...
FileZilla, in this example, is being used with the FTP protocol. FTP has to have two computers to setup and conduct a transfer. The "server" itself, in our case, the web server, has FTP server software running on it. It will accept a session from a client, (FileZilla) and allow the user to
add/change/delete/copy files and execute other commands.
Given the sensitive nature of FTP, it can be a security risk; therefore, strong passwords are the only choice you should make. In addition to that, turning off Anonymous FTP is vital.
Anonymous means, "ANY" FTP client can connect and execute commands such as deleting all files, or uploading viruses. Always make sure you disable Anonymous FTP.
Setting up your database on a cPanel® host
This recipe will guide you through the steps necessary to set up a database on your cPanel® enabled host. cPanel® is by far one of the most popular control panels for web hosting, and as you get to know it you will see why. It is a very powerful and well-built application. We'll refer to it several times through various recipes.
We are using a http://www.rochenhost.com/ server for our screenshots. Setting up your database is simple and easy.
Getting ready
To get started you were provided login details by your host for your cPanel® or 'hosting control' - most likely they will have their own name for it. However if you login and see something like the following generic cPanel screenshot - you are in the right place:
cPanel® is trademark by cPanel, Inc.
If you are in doubt, ask your hosting technical support. Gather your host login information:
Installing Joomla!
16
If you cannot keep this book in a safe place, do not write usernames and passwords in it. These should be kept in a safe place.
Each database needs to have a unique name. You will need to provide a name for the
database, the user name (for Joomla! itself), and a password. These should be different to your other username and passwords. It is recommended that you allow cPanel® to generate the password for you. This will ensure you have a very strong password.
How to do it...
1. Login to your cPanel®
2. Scroll down your screen till you see DATABASES
3. Click the icon MySQL® Database Wizard - it should look this:
4. After you click this you will see the following screenshot - this is where you will start
the database creation. In this example we have a "prefix" of watcher_ you will have
a different prefix.
5. Fill in your database name which can be anything you want. It has a limitation of 16 characters. Try to choose something descriptive but not common. Write the database name here:
Database name _________________________ 6. Click the Next Step button
You should see something like:
7. Create a user for Joomla! in our database
This step is necessary for Joomla! to talk to the database.
8. Create a username no longer than seven characters. Record the username here _______________________
Now - for maximum security use the password generator. It will create a strong password for you. Here is an example of it in action.
9. Once it generates a password for you, click the I have copied this password in a safe place checkbox to use it.
Record the password here for later use: ________________________
Installing Joomla!
18
10. This completes the creation of the user. In our case we chose jadmin1 and our password of U&{u$.S1F2t_.
11. Give the newly created user rights to use the database. The next screen you will see is the Privileges screen.
The Privileges screen defines the rights this user will have to the database.
12. Check the ALL PRIVILEGES box.
13. Click the Next Step button. You will be presented with a screen similar
to the following:
This completes the setup of your database. Now click Home in the upper left of the screen.
There's more...
We need to be sure the database is working. We do that by returning to the main cPanel® page and scrolling back down to the Database Section. Look for this icon and click it:
Once you click that icon it will launch the administration tool for MySQL. You will see a screen
like the one following this paragraph. Please note your information will be different, and the count in your database will be ZERO (0). This partial screenshot shows we have two databases
in our example setup. You will only have one.
Installing Joomla!
20
Your server name may differ but will likely be localhost
Record the information you see located in your version of cPANEL®. Database Server Name: ______________________
Database Server Name Tip
Most of the time, you can simply use localhost as your Database Server Name unless you see something else indicated in the green circled area.
This completes the set up of your database on cPanel®. You may skip over the GoDaddy. Com® instructions and continue with installing Joomla!
How it works...
This GUI that is embedded into the cPanel interface issues the necessary MySql commands to instruct the database server on setting up a database, adding a user, and giving that user proper permission to use the database.
Setting up your database on a
GoDaddy.Com® server
This recipe is for websites that are hosted on GoDaddy.com® or GoDaddy.com® resellers such as PotentiaHosting.com™.
These steps detail how to set up your database on a GoDaddy.com® server.
GoDaddy.com® offers a wide range of tools equal to the tools discussed in previous section. However GoDaddy.com® handles setting up your new hosting in a very different manner. By following these steps you will have your site's database up and running in no time.
Getting ready
What you will need:
f GoDaddy.com® username / number and password
f Your four digit security code or credit card information - this information is required
How to do it...
1. Login to GoDaddy.com® using your username and password.
2. To reach the database setup, we have to navigate through the menu. Follow these steps:
3. Click Hosting.
4. Under My Products choose Hosting - this will take you to the control panel:
The preceding screenshot shows (in our example) two accounts - yours will show the number of accounts you have purchased.
5. Now click on Manage Account next to the Hosting Account you wish to set up.
6. You will be taken to the Hosting Control Center control panel - choose
Databases - you will see the following icon.
Installing Joomla!
22
8. This screen is where you will enter all your information.
9. How to complete this screen:
Provide a Description (example: Joomla! 1.5 website)
Provide a MySQL Database/User Name. Note that on GoDaddy.
com® this means both the database name and the Username are identical. This will be important for your Joomla! installation
Create a strong password and repeat it. See the tips GoDaddy.
com® provides for creating a strong password - labeled How to
Generate a Strong Password.
For our purposes you can leave the Read-Only User Name, New
Password/Confirm Password sections blank
Choose MySQL Version 5.0 Click OK
It is important that you select 5.0 as your database. 4.1 is provided for older applications that cannot support the new database.
11. In your database list (see the preceding screenshot) once it is complete click the pencil icon on the right:
Clicking this will provide the critical details you will need to set up Joomla! You should
see a screen similar to the one shown in the following screenshot:
12. Record your details here:
Status: Should read Setup
Host Name: ______________________________ Database Name: __________________________
User Name: ______________________________
Password: _________________________________ (optional as you should have recorded it earlier)
13. Check database to ensure it is working
Installing Joomla!
24
This will open the database manager for you. You will see the following screen and
you will need your Username and Password:
14. Populate the Username and Password and click Go. This will take you to a screen similar to this:
You will see on the left your database under information_schema. It should say (0) next to it. In our case it reads: joomlacookbook(0).
This indicates your database is set up. In the next recipe you will install Joomla!
How it works...
GoDaddy.com® process works behind the scenes the same way the cPanel system works.
It issues the commands to set up and configure a database server. The steps are different
Installation of Joomla! 1.5
You are now ready to install Joomla! 1.5 on your web hosting platform. In this recipe, we will go through the set up of your database and uploading of the files.
This process should only take about five to ten minutes to complete. Once done you will have
a working Joomla! site ready to add your own content, templates, extensions, and more. Most of this process is handled through your browser.
Getting ready
You will need:
f User name for database
f Password for database
f Database server name
f Site name
f Email address for Admin of the site
f Site admin password
f FTP client (FileZilla or other) and FTP user name and password
How to do it...
1. Open a browser and point it at your domain or IP address. Example: http://www.MyDomain.com
http://192.168.1.100
Installing Joomla!
26
This is the initial start-up screen for Joomla! 1.5 installation. It defaults to English (US), However Joomla! is available in many languages.
2. Please choose your language or click Next to accept the default. 3. Pre-Installation Check
This is the Pre-installation Check screen. You should see all green in the top box and mostly or all green in the lower box. Here is a screenshot of the server's setup options close up:
4. In this case we have Display Errors turned On, it is recommended to be Off. A closer look will show you each screen.
You should see all green Yes here, if you do not contact your host and tell them to adjust your settings. In our example we have purposely turned OnDisplay Errors. You
likely will not see it in your installation. However you should follow the recommended settings for maximum performance.
5. Once you get all green Yes and your actual settings match the Recommended
settings, repeat step one or press this button on top of the screen:
6. Should these be set differently, you can change them in a file called php.ini. I recommend you speak to your host about changing them should they be different. This will rerun the checks. If however everything is ok, then move to the next step. 7. License review.
This is an information screen showing the GNU/GPL license that applies to your use of Joomla!.
8. Read the license and click Next. 9. Database Configuration
Installing Joomla!
28
10. This is a partial screenshot of the database configuration screen. You will need to
enter your details in the following screenshot:
In this screen you will need the database settings you set up in the previous recipes.
You will see two versions of the same setting. One demonstrating GoDaddy.Com® and the other representing cPanel®.
11. The following screenshots are part of the database configuration screen. The
different examples are shown to demonstrate GoDaddy.com® versus cPanel®
13. If you are on cPanel® your settings example will look more like this. Note that in most cases localhost will be your Host Name and the username and database name should be different from each other. Again your answers will vary.
14. Now fill in the Basic Settings screen with the correct responses. 15. Do not click Next yet.
16. Database configuration continued.
Under basic settings you will see Advanced Settings as follows:
Assuming this is a new installation, then no action is required on your part.
17. FTP Layer (THIS STEP IS OPTIONAL AND SHOULD BE SKIPPED IF YOU DO NOT
NEED IT)
On some hosting setups there are various technical reasons why you cannot change permissions or upload extensions that are important to the operation of the site. This layer, while optional most of time is crucial for those hosting setups.
Contact your host and ask them specifically if they are running 'SuExec'. If so, you can
skip this step.
Installing Joomla!
30
18. You will need the following information to complete this setup:
FTP User
FTP Password
FTP Root Path (the directory where your website will reside)
19. You can save the FTP password but for security it is recommended you DO NOT. To save your password, click Yes under the Advanced Settings.
Do not change the Host or Port information. 20. Click Next Step
21. Main configuration
This step will personalize your Joomla! installation.
There are only a few steps here. 22. Fill in your website's Site Name:
This will display in the browser and search engines. Don't worry - you can change it anytime.
23. Next fill in your (admin) email and password. You must type your password in twice.
Installing Joomla!
32
25. Click the Install Sample Data button:
This step only takes a few moments. You will see this upon success:
As this is a new installation, and not a migration from Joomla! 1.0 you do not need to install the LOAD MIGRATION SCRIPT.
26. Click the Next button. 27. Completion.
Once you complete the previous step you will be greeted with the following screen:
DO NOT CLOSE THIS SCREEN OR NAVIGATE AWAY.
28. Now - Open FileZilla and connect to your web server. In the right-hand pane of FileZilla, you should see a screen similar to the following:
29. Highlight and right-click the installation folder. You will see the following screen.
30. Click Delete for the Installation folder. This will take a few moments. Once done, close FileZilla and return to your Joomla! installation.
Installing Joomla!
34
You should see this screen:
32. Enter your Username and Password. 33. This will log you in.
34. Press Logout.
35. Close and reopen your browser and open your new website (www.yourdomain.com) 36. This is how your website should look.
How it works...
This installation program sets up all the necessary parts of the system. It will place all the proper information in the various database tables. It writes out the ever important CONFIGURATION.PHP file which provides the instructions to Joomla! on how to access
your database, and a few other important settings.
See also
If you have an older Joomla! 1.0 site, you may wish to migrate it to a 1.5 site. You can learn
more about migration from the following URL. Personally I recommend building your new site from scratch to prevent any compatibility problems.
http://docs.joomla.org/Migrating_from_1.0.x_to_1.5_Stable
Ensuring permissions are correct
In any computer, files and programs have a 'permission' level, meaning it states who can
read, write, change, or run them. In Joomla! (Linux-based machines) we have three sets of permissions: one for the 'owner', one for the 'group', and one for the 'world'. A common security mistake is setting these incorrectly.
In this short recipe, you will check your permissions for your 'files' and 'folders'.
Getting ready
You will need:
Your FileZilla FTP client and FTP username and password.
How to do it...
1. Open your FileZilla FTP client and in your Site Manager select your web host
2. In the right-hand pane of FileZilla, you will see your files and folders. To the far right
Installing Joomla!
36
There are many files and they should be set (as this is a fresh install) ok. However, it
won't hurt to check.
3. Click one of the folders then (for Windows ® users) press Ctrl+A. This will highlight all
the files and folders in your site. You should see a screen similar to the following:
This partial screenshot shows you have selected everything. 4. Right-click in the blue colored portion. Select File permissions…:
5. FOLDER PERMISSIONS should be set for 755.
The following items should be checked or filled in:
6. Numeric value should be set for 755. 7. Check the box Recurse into subdirectories.
8. Check the box Apply to directories only.
9. File Permissions should be set to 644
In some hosting setups you may not be able to perform this step. This
would be why you would have needed to turn on the FTP LAYER earlier
10. Following the same process as in step 4, highlight all your files and folders, right click, and click your file permissions selection.
This time however you will change the settings as follows: 11. Numeric value should be set for 644.
Installing Joomla!
38
This step will take longer than the DIRECTORIES step. Once complete you may exit FileZilla.
How it works...
This will establish the 'permission's properly. Linux sets up three different classes for
permissions on each file and folder: User (u): This is the owner of the file
Group (g): Other users who are in a group and able to access files
Other (o): PUBLIC or the WORLD (meaning - everyone who does not belong to the other two roles)
You noted the numbers 755 and 644. These numbers are represented by the OCTAL numbering system (BASE 8). What they tell the Operating System about the files is
as follows: READ is 4 WRITE is 2 EXECUTE is 1
In OCTAL we add them the same as normal numbers. For example, 4+2+1 = 7. Meaning we give the OWNER of the folder READ, WRITE, and EXECUTE permissions.
Whereas we give the GROUP and OTHER 4+1 = 5, READ and WRITE permission. On our FILES we give the OWNER 4+2 = 6 and for the GROUP and OTHER we give 4
2
Working with
phpMyAdmin
In this chapter, we will cover:
f Exporting a database
f Importing a database
f Working with database rows and tables
f Removing a table
f Emptying a table
Introduction
In the first chapter and recipes, you were shown how to setup a database and establish users.
The tool for driving this is called, phpMyAdmin.
phpMyAdmin is a popular, open-source tool that is a standard on most web hosts. Written in PHP, it enables you to handle all the administration of your MySQL database, keeping you from working in the command-line mode.
Here is an example of a command for setting up a new user:
CREATE USER 'jcookbookadmin'@'localhost' IDENTIFIED BY 'MyPassword';
or creating a database
Working with phpMyAdmin
40
or assigning privileges to it
GRANT ALL PRIVILEGES ON 'jbookdb' . * TO 'jcookbookadmin'@'localhost';
As you can see, attempting to remember all those commands is probably more than you want or need.
As Joomla! is primarily a database-powered system, from time to time you will need to know your way around phpMyAdmin for some of the tasks you may face.
One important item that phpMyAdmin can help you with is exporting your database. What this means is backing up your database and putting it in a safe place.
In later chapters, you will learn how to install and use tools to assist with backup and recovery; however in an emergency having knowledge of this tool is important.
This tool can also be dangerous and I STRONGLY RECOMMEND, you backup your database
(using export) before you try anything. That way you can quickly restore it. Before diving in, let's learn some terms that are used in describing databases.
Term Description
Table A table is a 'container' that holds records or rows. Your data resides in those rows.
Row A container within a table that defines how your data is stored
Browse This command enables you to browse through your data in your database, viewing it by table, by row, or row by row. In other words, you can see all the Joomla! data.
Data This is your actual data. Think of names, address, phone numbers, and so on. This in a phone book would be considered the 'data' of the phone book. In your Joomla! database, your 'content' would be the data.
Drop A powerful and dangerous command. Allows you to drop a 'table' or 'tables' in a database. Be careful - there is NO undelete.
Empty This empties a table of its contents, but preserves the table.
Export This will export the data in a single table or the entire database. There are several formats you can choose from. For most cases, you will choose SQL format. This is also known as a DUMP.
Import This is the reverse of export. It brings data and data structures into the database. This will create a new table and associated structures. It can overwrite existing tables.
Manage MySQL users and privileges
Exporting a MySQL database using
phpMyAdmin
Backing up your database is critical to long term safety and reliability of your Joomla! site. Should the database become corrupted or get damaged, having a copy to restore is vital. In this recipe we will "export" or "backup" our database.
Exporting is the process of making a copy and saving it locally on your desktop or other means of storage.
Getting ready
You will need your username and password for accessing your database in your control panel.
Depending on your hosting you may need your username and password for the database.
How to do it...
1. Log in to your hosting and navigate to your cPanel®. 2. Locate your phpMyAdmin.
Working with phpMyAdmin
42
4. Choose your database
In our example, we're clicking the database _15. You will need to choose your
database. The next screenshot will show a screen that should be similar to yours.
This is a view of all the rows and tables in our database. Your screen will scroll
down to show them all. 5. Click the Export button.
This step will open the EXPORT screen and allow you to choose some or all of the tables. Now you will see a demonstration of both.
You should see a screen like the following. It is called: View dump (schema)
For our purposes keep the defaults.
6. In the upper left-hand side, under Export click Select All. This will highlight all the tables as you can see as follows:
7. At the bottom of the screen you will see this image:
Working with phpMyAdmin
44
8. File name template is the name of our database dump.
In this example we used the phrase Joomla_DB_DUMP. Go ahead and put in a name for your database dump.
9. The second choice you need to make is the compression type.
This is important based on what your server may or may not support.
10. The types of compression listed are:
None: This will download a TEXT file for you which contains all the
data and commands
zipped: This is the Zip format
gzipped: This is the linux/unix version of Zip compression
If you are unsure which your host supports contact your technical support. Or consider saving one of each formats.
11. In this example, choose zipped format and click Go.
Depending on the browser you use, your screen will look something like this. In this case, I'm using Firefox.
13. This particular process of exporting a database is very helpful in case of the event
where you want to move your site to a new server or a new database server. You
are strongly encouraged to exercise EXTREME CAUTION when working inside the phpMyAdmin tool. It's a simple matter to accidentally delete your database. <line break><line break>Next let's learn what each checkbox does on this screen.
14. Export allows you to choose ALL or SOME of the tables in the database. In this example, we see the following "tables".
jos_banner jos_bannerclient jos_bannertrack jos_categories jos_components jos_comprofiler Jos_banner
Working with phpMyAdmin
46
Below that are several 'radio buttons' to choose the output type that the database will provide you. The default isSQL. However, as you can see there are many types, such
as creation of a PDF File, an Excel® file, and many others. Each of those is useful for different purposes and most have options specific to their format.
For our purposes we will use the default of SQL.
The next part of the screen is called OPTIONS. This is where you will control various items in your Export also known as "DUMP". We will use the term Export and DUMP interchangeably.
15. This is the left-hand side of the screen.
The first portion is for the addition of 'comments' into your DUMP. As a normal
matter of course you should not need to change that part from the defaults. 16. Structure will probably share the same chosen options. Let's look at each.
Add DROP TABLE/VIEW/PROCEDURE/FUNCTION/EVENT: As you
But what if..?
If you use the DROP command, and your "backup" is bad or corrupt, you will only restore something bad or corrupt. It is important to note, that the procedures to download a database are the same procedures to use to make a backup. Downloading a copy is a backup.
Add IF NOT EXISTS: This is a default item (and should remain
checked) that will add the necessary commands to "add" the content (data) back to the database IF it does not exist. This is helpful if you have a blank database.
The next two defaults that are checked are:
Add AUTO_INCREMENT
Enclose table and field names with backquotes
These are necessary for proper insertion. They should remain checked.
Add CREATE PROCEDURE / FUNCTION / EVENT: This box by
default IS NOT checked. You most likely will not need to check
it. This will add back in a "stored procedure" or other advanced database concepts that are beyond the scope of this book. 17. The next portion of the screen directly below is: Data.
As you can see the DATA box is checked already, as well as Complete inserts and
Extended inserts. An "INSERT" is the command that will be included with your data dump that tells the database to "INSERT" or write it in when it's imported (that is, uploaded or restored).
Working with phpMyAdmin
48
Timeout
In the case of a LARGE database, your database server may time out giving you an error message. Checking this will put in the proper commands in your dump to instruct the database server to give it more time (in essence it delays the writes to the database server). For a deeper technical explanation of delayed inserts see: http://dev.mysql.com/doc/refman/5.1/en/ insert-delayed.html
18. The next two boxes are to be left in the state you see in the preceding screenshot.
One point to note is the drop-down box on the lower right in the above image shows three different commands we can embedded in our database dump. We want INSERT for our purposes. However, there is also UPDATE and
REPLACE.
UPDATE: If used would 'update' the data in a table and row
REPLACE: It works exactly like INSERT except that it will overwrite anything in its path
For our purposes accept the default setting that are presented.
How it works...
The MySQL database accepts all these instructions from you to add, change, and delete information to the database.
The database server provides the content to Joomla! in order to present it on the screen. This is the power of the Content Management System. You are managing the content, rather than being worried about the code development.
Importing a MySQL database using
phpMyAdmin
In the event of a problem, such as corruption of data, or loss of the database, it may be necessary to restore your database. This is known as importing.
Getting ready
You will need your username and password for accessing your database in your control panel.
Depending on your hosting you may need your username and password for the database.
How to do it...
IMPORTING:
1. Login to your hosting and navigate to your cPanel®. 2. Locate your phpMyAdmin.
3. Click the phpMyAdmin button to open. You will see a screen as follows:
4. Select your database
Working with phpMyAdmin
50
The database in this case is being indicated by the arrow.
5. Once you click on your database if it contains tables and rows, you will see a number next to it and all the tables on the left side of your screen.
In our case, we have a new (empty) database and we see:
6. You will see a message (not shown in image) that states No tables found in database, and the count next to the database name is zero (0).
This database is now ready for IMPORT of the data from the EXPORT step. 7. Click the Import button found on the top toolbar.
It is important unless otherwise directed, to accept the defaults for this screen. 8. Click the Browse…button in the previous screenshot.
You will be presented with a dialog box such as this one. Find the location of your EXPORTED dump file from the previous recipe and choose it, then move
to the next step.
9. Click the Go button in the lower right-hand corner.
The database IMPORT will commence and should only take a few seconds.
Once done you should see a screen similar to the following one. The key thought you need to know is the number of records. In our EXPORT, we had forty-six records. As you can see in the following screenshot we have the same amount. Making sure the numbers are the same is important.
Working with phpMyAdmin
52
How it works...
The IMPORT function works by giving the database several commands, such as the following:
INSERT INTO `jos_components` (
This tells the database to "insert" or write into the TABLE jos_components columns, the data that follows the VALUES key word.
Insert is a database command that instructs the database to 'Insert' or put into, new ROWS, or content, into your database tables.
In the IMPORT process (depending on our EXPORT settings) it will execute any other
commands it finds in your .sql file.
Another example:
`track_type` int(10) unsigned NOT NULL, `banner_id` int(10) unsigned NOT NULL ) ENGINE=MyISAM DEFAULT CHARSET=utf8;
The command CREATE TABLE IF NOT EXISTS jos_bannertrack instructs the database server to create a new table called jos_bannertrack. Insert would be used to put content into the table.
The great thing for restore is the .sql file will contain the proper commands to rebuild the heart of your Joomla! site, which is the database.
Working with your database using
phpMyAdmin
This recipe will show you some basic commands and operations you may need from time to time.
I strongly suggest you setup a test Joomla! site and test database to learn these commands. That way if you break something, you won't damage your production site.
In this section we'll look at a few basic commands and scripts you may need from time to time.
Getting ready
You will need the passwords for:
f FTP
f cPanel
f Possibly your database (this can be obtained from configuration.php) Depending on your hosting you may need your username and password for the database. Some hosts require it once you get into their control panel system and others do not. GoDaddy.com®, for instance, requires you to enter a username and password to interact with your database. Other webhosts do not require it, once you are logged into cPanel.
You will need a copy of your database (see the preceding warning). You can use the previous
Working with phpMyAdmin
54
How to do it...
1. Getting a list of names, username, and their email address from your database. 2. Open your phpMyAdmin and navigate to your database as in previous steps.
Here is a screenshot of our database ready to work on.
3. Click Query on the toolbar on the top in phpMyAdmin and click the SQL button.
You will see this screen:
4. In the Run SQL query/queries on database _testDB: enter this script by typing it in and clicking Go in the lower right-corner.
SELECT name, username, email
FROM jos_users;
This will yield the following from my test database. You will have different information
This 'queried' the database for this information and provided it quite simply.
5. Let's look at another query - one that will tell us WHO is the SUPER ADMINISTRATOR in our website. This has multiple implications, such as security and recovery of a lost Super Admin password.
Return back to this screen by clicking the SQL button again.
6. Enter the following script: SELECT name, username
FROM jos_users
where GID=25;
Working with phpMyAdmin
56
What about other GID's?
Other user GID numbers can be found by replacing the GID=25 with GID=#. For instance you can review whose who using the above SQL statement with these GID's:
8. Optimize table(s): On a very busy website, you may see performance dropping. This is a quick means to clean up the database. This script will be presented in two forms, command line, and GUI.
Please make sure you EXPORT your database before attempting this command. 9. Open your SQL window as you did in previous steps, and type in this command:
OPTIMIZE TABLE tablename: Where tablename is the name of the table in question.
This will then show you a screen similar to the following:
The second method allows you to optimize a single table, any number of tables, or all the tables at once.
11. Click on the DATABASE <name> link at the very top. See the arrow in the following screenshot. This will return you to the starting point for your database. In this example testDB.
You should see a list of all the tables as follows:
Working with phpMyAdmin
58
13. For convenience, the drop down has been opened for discussion. 14. Now click CheckAll, this will highlight all the tables.
15. Pull down the drop-down box. 16. Click Optimizetable.
You can also optimize just a single table, for instance, jos_content. This is a quick and easy to way to do so without having to remember SQL commands.
How it works...
Running OPTIMIZE TABLE tablename solves this problem. You should run the OPTIMIZE command occasionally on a busy website. 'Optimize' reclaims the space that was consumed by the deleted data.
During the operation of a website, if you have lots of content or other items changing frequently, this can leave gaps in the tables. This means your server will have to work harder, taking longer to deliver information, thus you could experience website slow down.
Removing a table from your database
Occasionally you might experience a Joomla! extension that does not uninstall properly. This can happen for many reasons and if it needs to be removed, it must be removed manually. Other instances might be where you uninstalled an extension, but it left behind its tables intentionally yet they need to be removed for any number of reasons.
This is an ADVANCED and DANGEROUS task. Using this command will result in the data in question being permanently removed from your database. BEFORE USING THESE COMMANDS BE SURE AND BACKUP
(export) YOUR DATABASE
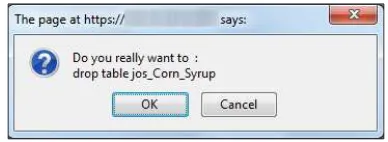
In this recipe we will look at the command line method to delete or remove a table. The term is 'drop' which means delete or remove. We will remove an imaginary extension table from our database called jos_Corn_Syrup. The situation is we have removed our extension called Corn
Chart, used to track the corn fields for farmers. However, the programmer wrote our extension
so that it purposely leaves behind the tables for upgrades, and so on. This is a common (and good) practice.
Getting ready
You will need your username and password for accessing your database in your cPanel® and