by Doug Sahlin and Claudia Snell
Building Web Sites
A L L - I N - O N E D E S K R E F E R E N C E
FOR
by Doug Sahlin and Claudia Snell
Building Web Sites
A L L - I N - O N E D E S K R E F E R E N C E
FOR
Building Web Sites All-in-One Desk Reference For Dummies®
Copyright © 2007 by Wiley Publishing, Inc., Indianapolis, Indiana Published by Wiley Publishing, Inc., Indianapolis, Indiana Published simultaneously in Canada
No part of this publication may be reproduced, stored in a retrieval system or transmitted in any form or by any means, electronic, mechanical, photocopying, recording, scanning or otherwise, except as permit-ted under Sections 107 or 108 of the 1976 Unipermit-ted States Copyright Act, without either the prior written permission of the Publisher, or authorization through payment of the appropriate per-copy fee to the Copyright Clearance Center, 222 Rosewood Drive, Danvers, MA 01923, (978) 750-8400, fax (978) 646-8600. Requests to the Publisher for permission should be addressed to the Legal Department, Wiley Publishing,
Inc., 10475 Crosspoint Blvd., Indianapolis, IN 46256, (317) 572-3447, fax (317) 572-4355, or online at http://
www.wiley.com/go/permissions.
Trademarks:Wiley, the Wiley Publishing logo, For Dummies, the Dummies Man logo, A Reference for the Rest of Us!, The Dummies Way, Dummies Daily, The Fun and Easy Way, Dummies.com, and related trade dress are trademarks or registered trademarks of John Wiley & Sons, Inc. and/or its affiliates in the United States and other countries, and may not be used without written permission. All other trademarks are the property of their respective owners. Wiley Publishing, Inc., is not associated with any product or vendor mentioned in this book.
LIMIT OF LIABILITY/DISCLAIMER OF WARRANTY: THE PUBLISHER AND THE AUTHOR MAKE NO REPRESENTATIONS OR WARRANTIES WITH RESPECT TO THE ACCURACY OR COMPLETENESS OF THE CONTENTS OF THIS WORK AND SPECIFICALLY DISCLAIM ALL WARRANTIES, INCLUDING WITHOUT LIMITATION WARRANTIES OF FITNESS FOR A PARTICULAR PURPOSE. NO WARRANTY MAY BE CREATED OR EXTENDED BY SALES OR PROMOTIONAL MATERIALS. THE ADVICE AND STRATEGIES CONTAINED HEREIN MAY NOT BE SUITABLE FOR EVERY SITUATION. THIS WORK IS SOLD WITH THE UNDERSTANDING THAT THE PUBLISHER IS NOT ENGAGED IN RENDERING LEGAL, ACCOUNTING, OR OTHER PROFESSIONAL SERVICES. IF PROFESSIONAL ASSISTANCE IS REQUIRED, THE SERVICES OF A COMPE-TENT PROFESSIONAL PERSON SHOULD BE SOUGHT. NEITHER THE PUBLISHER NOR THE AUTHOR SHALL BE LIABLE FOR DAMAGES ARISING HEREFROM. THE FACT THAT AN ORGANIZATION OR WEBSITE IS REFERRED TO IN THIS WORK AS A CITATION AND/OR A POTENTIAL SOURCE OF FURTHER INFORMATION DOES NOT MEAN THAT THE AUTHOR OR THE PUBLISHER ENDORSES THE INFORMATION THE ORGANIZATION OR WEBSITE MAY PROVIDE OR RECOMMENDATIONS IT MAY MAKE. FURTHER, READERS SHOULD BE AWARE THAT INTERNET WEBSITES LISTED IN THIS WORK MAY HAVE CHANGED OR DISAPPEARED BETWEEN WHEN THIS WORK WAS WRITTEN AND WHEN IT IS READ.
For general information on our other products and services, please contact our Customer Care Department within the U.S. at 800-762-2974, outside the U.S. at 317-572-3993, or fax 317-572-4002.
For technical support, please visit www.wiley.com/techsupport.
Wiley also publishes its books in a variety of electronic formats. Some content that appears in print may not be available in electronic books.
Library of Congress Control Number: 2006936836 ISBN-13: 978-0-470-00994-9
ISBN-10: 0-470-00994-2
Manufactured in the United States of America 10 9 8 7 6 5 4 3 2 1
About the Authors
Doug Sahlin is an author, photographer, and Web designer living in central Florida. His clients include attorneys, authors, artists, doctors, and musi-cians. He has written and coauthored over 16 books on office applications, Web design applications, and digital photography. His books have been trans-lated into five foreign languages. When he’s not busy writing, photographing clients, or designing Web sites, he enjoys playing the guitar and dabbling in watercolor painting.
Dedication
From Doug:Dedicated to the memory of Barry Murphy: songwriter, musi-cian, friend, and world-class human being.
From Claudia:This book is dedicated to my family: my husband, Jason Snell, and my kids, Sarah and Damon Bousquet.
Authors’ Acknowledgments
From Doug: Thanks to Steve Hayes for making this project possible. Kudos to project editor Nicole Sholly for her sense of humor and dedication to the task at hand. Thanks to the fastidious Heidi Unger — who must be related to Felix — for rendering squeaky clean text and providing insightful questions. Special thanks to fellow authors Bonnie Blake, Joyce Evans, and Ken Milburn for their friendship and inspiration. Thanks to literary agent extraordinaire, Margot Maley Hutchison, who shall go forward in time with the nickname Ollie. As always, thanks to my friends, mentors, and relatives, especially you Karen and Ted.
From Claudia: I would like to acknowledge the great support I have gotten from the faculty at Assumption College and most especially: Dr. Robert Fry, Scott Glushien, Brian Bercier, and Dr. Rockie Blunt. Their support and guid-ance has made it possible for me to pursue my career.
I would also like to acknowledge the Macromedia User Group program, the team at Macromedia, Ed Sullivan, and Amy Brooks, and all the managers. Participating in the User Group program gave me tremendous opportunities to learn. The user group managers are a fantastic resource. I always appreci-ated their thoughts and advice on Web design and development.
Publisher’s Acknowledgments
We’re proud of this book; please send us your comments through our online registration form
located at www.dummies.com/register/.
Some of the people who helped bring this book to market include the following: Acquisitions, Editorial, and Media
Development
Project Editor:Nicole Sholly
Senior Acquisitions Editor:Steve Hayes Copy Editor:Heidi Unger
Technical Editor:Danilo Celic Editorial Manager:Kevin Kirschner Media Development Manager:
Laura VanWinkle
Editorial Assistant:Amanda Foxworth Sr. Editorial Assistant:Cherie Case Cartoons:Rich Tennant
(www.the5thwave.com)
Composition Services
Project Coordinator: Jennifer Theriot Layout and Graphics: Claudia Bell,
Lavonne Cook, Denny Hager, Stephanie D. Jumper, Heather Ryan, Ronald Terry
Proofreaders: Laura Albert, Christine Pingleton, Techbooks Indexer:Techbooks
Anniversary Logo Design:Richard Pacifico
Publishing and Editorial for Technology Dummies
Richard Swadley,Vice President and Executive Group Publisher Andy Cummings,Vice President and Publisher
Mary Bednarek,Executive Acquisitions Director Mary C. Corder,Editorial Director
Publishing for Consumer Dummies
Diane Graves Steele,Vice President and Publisher Joyce Pepple,Acquisitions Director
Composition Services
Contents at a Glance
Introduction ...1
Book I: Preparations ...7
Chapter 1: Planning a Web Project...9
Chapter 2: Build a Web Team or Go It Alone...23
Chapter 3: Developing the Content...37
Chapter 4: Creating Relevant Site Content...43
Book II: Site Design ...55
Chapter 1: Conceptualizing Your Site ...57
Chapter 2: Creating Effective Layouts ...71
Chapter 3: Organizing Your Content ...91
Chapter 4: Ensuring Visual Appeal...101
Book III: Site Construction ...121
Chapter 1: Pulling Together Tools and Materials...123
Chapter 2: Making a Web Page with HTML ...143
Chapter 3: Creating a Web Page Layout with HTML and CSS ...159
Chapter 4: Introducing Web and Graphics Software...179
Chapter 5: Getting Started with Dreamweaver...203
Chapter 6: Using Dreamweaver: Advanced Techniques...231
Chapter 7: Creating a Web Page from a Photoshop File ...255
Chapter 8: Meeting HTML’s Powerful Friends ...275
Chapter 9: Web Site Usability and Accessibility...291
Chapter 10: Publishing the Web Site ...303
Book IV: Web Graphics ...317
Chapter 1: Finding Inspiration ...319
Chapter 2: Bringing Your Vision to Life ...333
Chapter 3: Workhorse Graphics ...351
Book V: Multimedia ...399
Chapter 1: Incorporating Flash Creations ...401
Chapter 2: Using Sound ...431
Chapter 3: Using Web Video...445
Chapter 4: Slideshow Pro ...465
Book VI: Audience Interaction ...479
Chapter 1: Adding Basic Interactivity with HTML Forms and JavaScript...481
Chapter 2: An Introduction to ASP ...505
Chapter 3: Introduction to PHP ...527
Chapter 4: MySQL and PHP...539
Chapter 5: Additional Site Interactivity ...551
Book VII: E-Commerce...569
Chapter 1: An E-Commerce Primer ...571
Chapter 2: Building an E-Commerce Site...591
Chapter 3: Maintaining an E-Commerce Site...615
Book VIII: Site Management...633
Chapter 1: Helping a Site Succeed...635
Chapter 2: Maintaining a Web Site ...653
Chapter 3: Expanding a Site ...681
Book IX: Case Studies ...693
Chapter 1: Personal Web Sites ...695
Chapter 2: Blog Site...703
Chapter 3: Online Newsletter...719
Chapter 4: Photographer/Portfolio Site...727
Table of Contents
Introduction...1
About This Book...1
Foolish Assumptions ...2
Conventions Used in This Book ...2
What You Don’t Have to Read ...3
How This Book Is Organized...3
Book I: Preparations...3
Book II: Site Design...3
Book III: Site Construction...3
Book IV: Web Graphics ...4
Book V: Multimedia ...4
Book VI: Audience Interaction ...4
Book VII: E-Commerce...4
Book VIII: Site Management...4
Book IX: Case Studies...5
Icons Used in This Book...5
Where to Go from Here...5
Book I: Preparations...7
Chapter 1: Planning a Web Project . . . .9
Defining the Audience ...9
Internal stakeholders ...10
External audience...10
Setting Goals ...12
Creating a Scope Document...13
Preparing to Get Started ...13
Defining why you’re doing the project ...14
Brainstorming and evaluating your ideas ...14
Looking at budget and timelines ...14
Considering collaborations...15
Selling the Idea ...15
Holding a Kick-Off Meeting ...16
Revising Your Original Plans — Using Feedback to Improve ...16
Receiving feedback ...17
Giving feedback ...18
Building Web Sites All-in-One Desk Reference For Dummies
x
Chapter 2: Build a Web Team or Go It Alone . . . .23
Flying Solo: Skills You Need to Go It Alone ...23
Managing the project ...23
Serving your customer ...24
Dealing with HTML, CSS, and other scripting...25
Using Photoshop, Fireworks, and other graphics applications ...26
Developing content ...28
Considering basic computer and Internet skills ...28
Incorporating multimedia in your project ...28
Handling a solo project...29
Hiring Members of the Team ...29
Project manager...30
Web designer/new media designer ...30
Web developer/programmer...31
Content developer/writer...31
Webmaster/host ...32
Other professional help...32
Managing the team ...32
Handing Off a Project to a Client...34
Chapter 3: Developing the Content . . . .37
Knowing What to Put on Your Site...37
Finding out what your client’s visitors need ...38
Finding out what your client needs from site visitors...40
Reconciling the content with the goals ...41
Keeping It Fresh: An Ongoing Process ...42
Assigning content development tasks...42
Keeping the graphics fresh ...42
Chapter 4: Creating Relevant Site Content . . . .43
Portraying Your Client’s Company...43
Defining your client’s voice...43
Developing your client’s look ...45
Selling Goods or Services...46
Emphasizing key points...46
Highlighting the product ...47
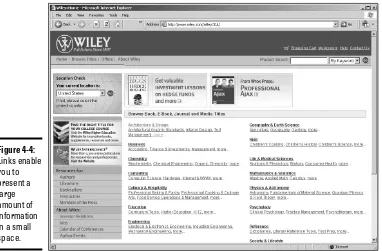
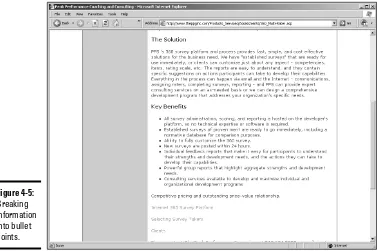
Providing Information...48
Handling large amounts of content ...48
Presenting information ...50
Including e-learning materials ...52
Using Personas to Develop Content ...53
Defining your client’s customers...54
Table of Contents
xi
Book II: Site Design...55
Chapter 1: Conceptualizing Your Site . . . .57
Deciding What Types of Pages You Need...57
Considering static Web pages...58
Freshening the content with dynamic Web pages ...60
Evaluating multimedia element choices...61
Choosing the Right Delivery Method ...64
Knowing when static pages suit your purpose ...64
Using dynamic pages to manage complex information...65
Considering multimedia ...67
Handling Printable Materials ...67
Chapter 2: Creating Effective Layouts . . . .71
Content Is Key: Making Sure It’s All Included ...72
Creating Order from Chaos: Consistency Is Your Friend ...73
Including Things That Every Page Needs ...75
Banner...75
Page headline...76
Global navigation...76
Page title ...77
Page description and keywords ...77
Page footer ...80
Planning How to Emphasize Important Information ...81
Understanding the Basics of Usable and Accessible Design...83
Creating a Layout Wire Frame ...85
Chapter 3: Organizing Your Content . . . .91
Considering File Management ...92
Keeping It Tidy ...94
Implementing Information Architecture ...96
Developing section-level information architecture...97
Arranging page-level information...98
Avoiding Content Problems ...99
Chapter 4: Ensuring Visual Appeal . . . .101
Colors on the Web...101
CMYK color ...102
RGB color ...102
Hexadecimal colors...102
Making nice with established color schemes ...103
Web-safe colors...104
Building Web Sites All-in-One Desk Reference For Dummies
xii
Using Fonts Effectively on Web Sites...109
Implementing Stock Images and Other Elements ...111
Facelifting an Existing Site ...114
Choosing a new color scheme ...114
Figuring out which graphics to replace...114
Creating a new prototype ...115
Applying the new colors to your CSS file ...119
Book III: Site Construction ...121
Chapter 1: Pulling Together Tools and Materials . . . .123
Matching the Tools to Your Needs...123
Hauling Out the Hardware ...124
A computer...125
Setting Up Your Web Design Studio ...130
Desperately Seeking Software ...131
Researching software before you buy ...132
Graphics software ...132
Multimedia software ...136
Web design software ...139
Browser software...141
Chapter 2: Making a Web Page with HTML . . . .143
Getting Acquainted with the Basic Parts of an HTML Document...143
Starting Your HTML Document Right ...144
The document type definition ...145
The head tag and what goes in it ...146
Now for some body! ...149
The anatomy of a whole page ...150
Controlling layouts with CSS...156
Helpful Development Practices ...157
Chapter 3: Creating a Web Page Layout with HTML and CSS . . . .159
Introducing CSS ...159
Understanding why CSS can help your site — and you ...159
Checking the source...161
Using CSS with other tools ...162
Ways of Working with CSS...163
Inline styles ...164
Table of Contents
xiii
External style sheets...165
Commenting your code ...166
Creating a CSS Document...167
Setting default selectors ...168
Setting class and ID selectors ...169
Special Effects with CSS...174
Styling your links ...174
Cool headlines ...175
Custom padding and margins ...175
Custom borders ...176
Chapter 4: Introducing Web and Graphics Software . . . .179
Choosing Graphics Software...179
Adobe Photoshop...179
Adobe Illustrator ...181
Other professional-grade graphics software ...182
Considering Web-Design Software ...183
Deciding on Multimedia Software ...184
Touring Photoshop CS2...185
The Welcome Screen...185
The default workspace ...186
The work area ...187
Layers and the Layer palette ...188
Tools and the toolbox ...190
Chapter 5: Getting Started with Dreamweaver . . . .203
Exploring the Dreamweaver Interface ...203
The Start Page...205
The New Document dialog box...206
The Files panel...210
The Document window...214
The Preferences dialog box...219
The Properties inspector (panel)...220
The CSS Styles panel ...221
The Insert bar ...223
Creating a Web Site with Dreamweaver ...223
Testing Your Pages and Validating the Code ...225
Publishing Your Web Site with Dreamweaver ...227
Chapter 6: Using Dreamweaver: Advanced Techniques . . . .231
Creating a Site with Prebuilt Page Designs ...232
Creating Templates to Ease Site Maintenance ...235
Making a template ...235
Building Web Sites All-in-One Desk Reference For Dummies
xiv
Creating a page using a template ...237
Updating a template...238
Exploring the Assets Panel and Library Items ...240
Touring the Assets panel...240
Discovering library items ...242
Adding Functionality with Dreamweaver Behaviors ...246
Including the Open Browser Window behavior ...248
Editing a behavior via the Behaviors panel ...252
Creating a pop-up message ...253
Chapter 7: Creating a Web Page from a Photoshop File . . . .255
Taking a Wire Frame to a Finished Design ...255
Finishing the Artwork ...261
Placing a photo in your banner ...262
Creating a clipping mask ...262
Implementing filters, adjustment layers, and blend modes ...263
Slicing a Photoshop Document ...266
Optimizing Graphics for the Web...268
Making a Graphic Transparent...272
Chapter 8: Meeting HTML’s Powerful Friends . . . .275
Web Technologies Defined...275
Vary your content with variables ...276
Conditional statements ...277
Here we go loop-de-loop...278
Creating functional functions ...280
Looking on the Server Side ...281
ASP/ASP.NET ...281
.NET Framework ...282
JavaScript ...282
PHP ...284
CGI/PERL ...284
Checking Out the Client Side ...287
Java...287
VBScript...288
Chapter 9: Web Site Usability and Accessibility . . . .291
Ensuring Your Site Is Easy to Use...291
Helping Users Access Your Site...293
Images need alternate content ...294
Use more than one method to convey your information...295
Pictures are important...296
Orientation tools are helpful...296
Creating Accessible Web Pages...297
Using Dreamweaver to insert accessible elements ...297
Table of Contents
xv
Chapter 10: Publishing the Web Site . . . .303
Look Before You Leap: What to Do before Launch ...303
Develop a checklist ...303
Get opinions ...306
Going Live ...308
Using Dreamweaver to upload content ...309
Uploading pages with an FTP client...312
What Next? The Launch Is Not the End of the Project ...314
Submitting the site to search engines ...315
Implementing marketing...315
Requesting link exchanges...316
Book IV: Web Graphics ...317
Chapter 1: Finding Inspiration . . . .319
Finding Fresh Ideas ...319
Respecting the Copyrights of Others ...320
Protecting Your Own Copyrights ...322
Working with Colors (Web Safe versus Not Web Safe) ...322
Creativity Tools — Color Charts and More...325
Font/Type Issues on Web Sites...326
Print to Web — Making Your Web Site Work with Existing Materials ...327
Understanding Image Formats for Web Design ...328
Using the GIF image file format...328
Using the JPEG image file format...330
Using the PNG image file format...331
Chapter 2: Bringing Your Vision to Life . . . .333
Introducing Fireworks 8 ...333
Vector and raster images...333
The PNG file format...335
Fireworks interface mini-tour ...336
Creating Art with Other Tools ...343
Adding Photoshop CS2 to your graphics toolbox...343
Getting graphics ready for the Web with ImageReady ...344
Creating painterly images in Corel Painter ...348
Chapter 3: Workhorse Graphics . . . .351
Creating Buttons in Fireworks ...351
Introducing the Button Editor ...352
Creating a simple two-state button ...352
Building Web Sites All-in-One Desk Reference For Dummies
xvi
Creating a Vertical Navigation Menu ...357
Creating a Pop-Up Menu...360
Recycling — Reuse Everything ...365
Making a reusable graphic template...365
Organizing a site ...366
A Doodle to a Working Page — Concept to Completion ...367
Mind mapping ...367
Creating a client mockup...368
Optimizing Artwork in Fireworks...368
Optimizing GIF artwork ...369
Optimizing JPEG artwork ...370
Exporting Artwork from Fireworks ...372
Chapter 4: Creating Compelling Graphics . . . .373
Creating Banner Graphics ...373
Using Photoshop to create a banner ...374
Including all the important information ...376
Working with an existing logo...376
Create Promotional Graphics ...378
Emphasize your point...379
Complement your style ...380
Creating Fast-Loading, Beautiful Photos ...382
Resizing your photos for the Web ...382
Using professional optimization techniques ...385
Creating a Photo Gallery ...390
Choosing your photos ...390
Putting the photos in order...392
Using Photoshop to create a photo gallery ...393
Using Dreamweaver to create a photo gallery ...396
Book V: Multimedia...399
Chapter 1: Incorporating Flash Creations . . . .401
Introducing Flash 8 ...401
Touring the interface ...402
Getting comfortable with Flash ...407
Setting up your workspace ...413
Building Flashy Navigation ...415
Creating the navigation menu document ...415
Creating buttons in Flash ...416
Assembling your menu ...421
Adding functionality to the buttons...423
Table of Contents
xvii
Flash as an Animation Tool...426
Create a Flash Presentation ...427
Exploring the Many Tricks of Flash ...428
Chapter 2: Using Sound . . . .431
Exploring Audio Formats for the Web ...431
Adding Flash Audio to a Page ...432
Creating Flash audio ...432
Adding sound to a Web page ...435
Embedding a QuickTime Player in a Page ...437
Adding the RealMedia Player to a Page...438
Adding the Windows Media Player to a Web Page ...440
Delivering Your Message ...443
Chapter 3: Using Web Video . . . .445
Exploring Web Video Formats ...445
Working with Digital Video...446
Capturing video ...446
Encoding video ...447
Creating and Encoding Flash Video ...449
Adding Flash Video to a Web Page...455
Adding QuickTime Player to a Page ...458
Adding Windows Media Player to a Page...461
Avoiding DV Pitfalls ...462
Chapter 4: Slideshow Pro . . . .465
About Slideshow Pro ...465
Installing the Extension ...466
Creating a Slide Show ...467
Launching Slideshow Pro ...467
Adding slides to your show ...471
Adding text and sound to a slide...474
Editing a slide show ...478
Book VI: Audience Interaction...479
Chapter 1: Adding Basic Interactivity with HTML
Forms and JavaScript . . . .481
Understanding Interactivity...481
Getting Ready to Code...482
Building an HTML Form ...484
Form tags: <form> </form>...484
Building Web Sites All-in-One Desk Reference For Dummies
xviii
Submit buttons: <input type=“submit”>...485
Creating a simple form in Dreamweaver ...485
Testing the form ...490
Adding Elements to Your Form ...491
Password fields...491
Hidden fields ...491
Textarea form objects ...493
Multiple choice types (check box and radio)...494
Drop-down lists...498
Event handlers and JavaScript ...500
Making dynamic pages with server side technology...502
Chapter 2: An Introduction to ASP . . . .505
Understanding ASP ...505
Creating ASP Pages and Testing Them on Your Local System ...507
Working with IIS ...507
Setting up the Web site ...508
Defining the site in Dreamweaver ...508
Creating ASP Pages in Dreamweaver...511
Using variables ...513
Introducing VBScript functions ...518
Discovering Cool ASP Tricks ...519
Displaying a random image...520
Create a rotating ad banner ...521
Chapter 3: Introduction to PHP . . . .527
What Is PHP?...527
Fulfilling PHP Server Side Requirements ...528
Creating PHP Pages...528
Declaring and Using Variables ...529
Working with Conditional Statements ...531
Putting conditional statements into action ...532
Using comparison operators ...534
Using logical operators...535
Repeating Lines of Code Using Loops ...535
Using the while loop ...535
Using the for loop...536
Generating a Random Image...536
Chapter 4: MySQL and PHP . . . .539
Creating a Mailing List Form...540
Creating the Database ...542
Creating the PHP Code ...545
Table of Contents
xix
Chapter 5: Additional Site Interactivity . . . .551
Engaging Visitors with an Online Journal (Blog) ...551 Initiating Online Conversations: Forums and Message Boards ...553 Establishing an Online Community: Wiki ...555 Feeding Them Your Content: RSS...557 Using an online feed reader ...559 Creating an RSS feed ...559 Validating your feed ...562 Getting your feed going ...565 Branding through E-Mail ...566 Keeping Them Up to Date: Newsletters ...568
Book VII: E-Commerce ...569
Chapter 1: An E-Commerce Primer . . . .571
Nailing Down E-Commerce Concepts ...571 Establishing an online identity ...572 Researching domain names ...572 Purchasing domain names ...574 Choosing an e-commerce-friendly server ...575 Planning a user-friendly site ...578 Brainstorming the site ...579 Adding Basic E-Commerce with PayPal...581 Integrating with Credit Card Authorization Packages...584 Solving the online payment maze ...585 Internet fraud: An e-commerce merchant’s
worst nightmare...586 SSL — What Is It?...586 Using a secure server...587 Sharing an SSL certificate...587 E-commerce Do’s and Don’ts ...588
Chapter 2: Building an E-Commerce Site . . . .591
Building Web Sites All-in-One Desk Reference For Dummies
xx
Selling Online ...611 If you build it they won’t care ...611 Security concerns...612 Following through on every sale ...613
Chapter 3: Maintaining an E-Commerce Site . . . .615
When Technology Breaks Down...615 When client-side technology runs amuck ...615 Server-side technology, or code sleight of hand ...616 Handling Customers ...617 Getting it in writing ...617 Documenting everything ...619 Handling e-commerce customers...619 Search Engine Optimization (SEO) and Marketing ...620 Optimizing the site for search engines ...620 Finding sites to link to the e-commerce site ...622 Danger, Will Robinson! These do not compute ...623 Using search engine software ...625 Marketing the site to the world ...625 Figuring Out When to Upgrade...629 Upgrading to a more robust Web hosting package...630 Upgrading to another server ...631
Book VIII: Site Management ...633
Chapter 1: Helping a Site Succeed . . . .635
Planning and Incorporating Search Engine Optimization (SEO)...635 Seeing why SEO is essential ...636 Understanding the mechanisms: Meta tags,
Table of Contents
xxi
Chapter 2: Maintaining a Web Site . . . .653
Updating Pages without Destroying Them ...653 Sharing the Work with Contribute ...655 Creating a connection ...656 Administering the Web site ...659 Sending a connection key...662 Editing Web pages ...665 Managing a Site with Dreamweaver...667 Editing new pages...667 Archiving pages ...670 Tips for Managing Tasks...671 Simplifying repetitive tasks with Snippets ...671 Taking advantage of your assets ...674 Using the Dreamweaver Library...676
Chapter 3: Expanding a Site . . . .681
Use It or Lose It: Should You Add On or Redesign? ...681 Adding on to an existing site ...681 Redesigning the site from scratch...682 Headache-Free Expansion ...684 Things to consider when redesigning...684 Trauma-free site expansion...688 After Launching the Expanded Site ...690
Book IX: Case Studies...693
Chapter 1: Personal Web Sites . . . .695
Tailoring the Site to Your Client ...695 Creating the Home Page ...696 Creating Other Pages ...697 The photo gallery ...697 The discography page ...698 The events page...698 The multimedia gallery...700 Editing a Personal Web Site ...701
Chapter 2: Blog Site . . . .703
Chapter 3: Online Newsletter . . . .719
Building a Mailing List ...719 Making It Easy to Add People ...721 Managing the Mailing List ...723 Give Subscribers Something Useful...723 Case Study: Newsletter for an Acupuncture Clinic...725
Chapter 4: Photographer/Portfolio Site . . . .727
Defining Goals for the Site...727 Designing the Site...728 Creating the navigation menu in Fireworks ...728 Optimizing images in Fireworks ...730 Creating thumbnails in Fireworks ...731 Creating the other assets ...731 Putting it together in Dreamweaver...733 Creating the portfolio pages ...735 Showing off without snootiness ...737
Index...739
Introduction
W
eb sites can be very complex or very simple. When you’re building a site, you have many decisions to make, all dependent on the needs of a particular project. This can be overwhelming, but don’t fret — you have Building Web Sites All-in-One Desk Reference For Dummiesto help you. It’s so comprehensive and so flexible that it will help you in all aspects of Web design, from the initial planning phases to testing and publishing your masterpiece.This book can help you take on the role of project manager, graphic designer, developer, or multimedia designer, and it has information about interacting with different specialists on larger or more complex projects. So whether you’re undertaking your first Web design project or are a veteran taking on a Web design team, this book is for you.
About This Book
Here are some of the things you can do with this book:
✦ Plan your Web site project.
✦ Assemble and manage a Web team.
✦ Create layouts, graphics, navigation menus, and Web pages from scratch.
✦ Optimize graphic elements for your Web pages.
✦ Work with HTML and CSS to create and maintain your pages.
✦ Create HTML forms.
✦ Add multimedia content such as Flash movies and video clips.
✦ Integrate e-commerce into your Web site project.
✦ Maintain and promote a Web site.
Foolish Assumptions
2
Foolish Assumptions
We have, perhaps foolishly, made a few assumptions about our readers. We expect that you have basic computer skills (either Windows or Mac) and a basic understanding of how to use a browser and the Internet. The authors and publisher of this book assume you’re a bright, intelligent person who wants to learn but doesn’t have the time to read a book from cover to cover. We assume you’ll find the information you need by perusing the index and then cut to the chase and read that section.
If you don’t have any prior knowledge of HTML, CSS, or graphics software, that’s okay; we give you the basics here. We do assume that you have more than a passing interest in Web design. In fact, this book is geared for Web designers, or anyone with aspirations of becoming a Web designer. If you don’t have any prior experience with Web design or managing Web site projects, that’s okay, too. This book starts at the beginning before moving into more advanced topics.
Conventions Used in This Book
By conventions,we simply mean a set of rules we’ve employed in this book to present information to you consistently. When you see a term italicized, look for its definition, which we’ve included so that you know what things mean in the context of Web site construction. Sometimes, we give you infor-mation to enter on-screen; in this case, we’ve boldedwhat you need to type. We’ve placed Web site addresses and e-mail addresses in monofontso that they stand out from regular text. Code appears in its own font, set off from the rest of the text, like this:
Never mind the furthermore, the plea is self-defense.
When we present complex information with copious amounts of code, we present examples and then dissect the code. Blocks of code are neatly bun-dled into a listing, which looks like this:
Listing Intro-1: Everything you wanted to know about code, but were afraid to ask.
How This Book Is Organized
3
What You Don’t Have to Read
We’ve structured this book modularly— that is, it’s designed so that you can easily find just the information you need — so you don’t have to read what-ever doesn’t pertain to your task at hand. We include sidebars here and there throughout the book that contain interesting information that isn’t nec-essarily integral to the discussion at hand; feel free to skip over these. You also don’t have to read the paragraphs next to the Technical Stuff icons, which parse out uber-techie tidbits (which might or might not be your cup of tea).
How This Book Is Organized
Building Web Sites All-in-One Desk Reference For Dummies is split into nine minibooks. You don’t have to read it sequentially, you don’t have to look at every minibook, you don’t have to review each chapter, and you don’t even have to read all the sections in any particular chapter. (Of course, you can if you want to; it’s a good read.) The Table of Contents and the Index can help you quickly find whatever information you need. In this section, we briefly describe what each minibook contains.
Book I: Preparations
This minibook covers all the things you need to do before you start actually creating a Web site. The topics of planning, managing your project, flying solo on a project, and assembling and managing a Web design team are all covered here. We’ve also included information about creating a site that por-trays the client and her organization in a flattering light while providing visi-tors with content that keeps them coming back for more.
Book II: Site Design
Site design is about the nuts and bolts of how a site works and about making the visual aspects work within the technical needs — this minibook helps you make these two worlds come together. In short, if you’re looking for information about creating layouts and planning site structure, implement-ing appropriate design, and collectimplement-ing and usimplement-ing feedback, you’ll want to read this minibook.
Book III: Site Construction
How This Book Is Organized
4
before delving into the details of preparing a site to go live. Book II is about being an architect and designer; Book III is about being the crew that gets the job done.
Book IV: Web Graphics
A Web site without graphics is text, which won’t keep a visitor interested for very long. Book IV begins with a section on finding inspiration. After you’re inspired, it’s off to the races with information on how to create graphics in Photoshop and Fireworks.
Book V: Multimedia
Book V shows you how to add multimedia content to your designs. We start out by showing you how to incorporate Flash elements into your designs. If your client wants music or other joyful noise on her Web site, read Chapter 2 of this minibook. If it’s full-motion video your client is after, we show you how to add it in Chapter 3 of this minibook. If your client has copious amounts of images to display in a short amount of space, check out Chapter 4, where we show you how to add a tres-coolslide show to a Web site.
Book VI: Audience Interaction
Web sites come in many flavors. If your client has the need to give and receive information via the World Wide Web, this minibook is your Rx for Web interactivity. If your client’s site needs forms, see Chapter 1. In the latter chapters of this book we also show you how to incorporate additional inter-activity, such as databases and pages that change depending on the needs of the visitors. We end this book with an introduction to other forms of inter-activity, such as blogs, forums, and other such delights.
Book VII: E-Commerce
If your client wants to take his local, bricks-and-mortar business worldwide, we show you how to accomplish this feat in Book VII. E-commerce is indeed complex, but we do our best to simplify it for you. First, we explore basic concepts such as credit card packages, secure Web sites, and PayPal. Then, we move on to the technological and legal considerations of an e-commerce Web site. Last but not least, we show you what you need to consider when building and maintaining an e-commerce site.
Book VIII: Site Management
Where to Go from Here
5
course, after the site has a steady stream of visitors, you or your client will need to maintain the site. And if the site really catches on, your client will probably need you to revise or redesign the site. We show you how to main-tain and expand a Web site in Chapters 2 and 3 of this minibook.
Book IX: Case Studies
The final minibook of this lofty tome is four chapters of case studies. We learn a lot by surfing the Net and dissecting what’s good, bad, and downright ugly about what’s out there. You can too. To give you an idea of what goes into planning and then creating a site, we explore the needs of four different clients and the resulting Web sites.
Icons Used in This Book
For Dummiesbooks are known for those helpful icons that point you in the direction of really great information. In this section, we briefly describe each icon used in this book.
The Tip icon points out helpful information that is likely to make your job easier.
This icon marks an interesting and useful fact — something that you might want to remember for later use.
The Warning icon highlights lurking danger. With this icon, we’re telling you to pay attention and proceed with caution.
When you see this icon, you know that there’s techie stuff nearby. If you’re not feeling very techie, you can skip this info.
Where to Go from Here
Where to Go from Here
6
Book I
Contents at a Glance
Chapter 1: Planning a Web Project ...9
Chapter 2: Build a Web Team or Go It Alone ...23
Chapter 3: Developing the Content ...37
Chapter 1: Planning a Web Project
In This Chapter
⻬Clarifying your needs⻬Defining the scope
⻬Getting the project started
⻬Getting comfortable with iterative process
A
s with any project, planning and gaining support are crucial to your success. Web site projects are sometimes deceptive. They look as if you can just toss one together without too much fuss, but don’t be fooled by that; you can’t skimp on the planning process. You need assistance regardless of the size of the project, so make sure you’ve got everyone you need on board — including, for example, department managers or IT personnel. Although the players might be different when looking at fully inhouse productions as opposed to a collaboration between inhouse and hired teams (the topic of Chapter 2 of this minibook), the need to research and plan still exists. It’s easy to get excited when you start a Web project, but don’t let that get you into trouble later.Something to keep in mind as you work is that Web projects are iterative.By that, we mean that a Web project requires many cycles of review and revi-sion as you move along. You must develop a flow to move through the proj-ect, and you need a clear vision of the projproj-ect, too — but don’t get hung up on working out every single detail beforehand. Being flexible to adjustments while not deviating from the plan is a difficult but important balancing act. In this chapter, we lay out the information that will help you stay balanced.
Defining the Audience
Defining the Audience
10
Internal stakeholders
Internal stakeholdersare the people who work for the company that has hired you to create its Web site — managers, public relations people, IT and marketing professionals, customer service reps, sales people, and so on. All of these people have needs that you must consider when planning and creat-ing the site.
The best way to gain support is to do a little upfront legwork. As much as possible, talk to key players; ask them what they want to get out of the Web site. Doing this helps you make sure that you address their actual needs and concerns as you prepare to make your formal presentation. It also ensures that when you make the formal presentation of your project, you can speak to their needs and anticipate their questions. Web builders commonly make the mistakes of not letting other people have input and wasting the stake-holders’ time by presenting information that doesn’t help them decide how to support your project.
Some helpful questions to ask before you start your project are
What are your expectations for this Web site?
What do you want the results to be and what sort of functionality do you want?
Do you have an established site or printed materials?
Do you have a corporate brand, logos, and other look-and-feel materials that need to be incorporated?
Are there people within your organization that will help support the site? If so, what are their roles?
Do you have a project point person?
If your client does not know what she’s looking for, ask her to go look at some Web sites. Tell her to look at competitors’ sites and also at sites that have similar purposes (informational, e-commerce, or whatever). Ask the client to make a list of things she likes and doesn’t like. Set a time for a follow-up meeting to discuss what she finds. As you review the sites, ask her to explain what she likes or dislikes and why. The process of analyzing these other sites will help you and your client develop a better vision of what the client needs.
External audience
Book I
away from considering the real needsof your external audience. Often, the visitors are referred to as a target audienceand are described in very broad terms. Unfortunately, the discussion of a target audience is generally a short one and not very detailed.
As a Web site project manager/designer, though, you must be careful to dig a little deeper into what kinds of people are in the target audience and what they want; otherwise, the site will try to be everything to everybody instead of being just what it needs to be for that audience. Luckily, certain tech-niques can help you avoid the common pitfalls of designing for your users — profiles. Profiles(also known as personas) are detailed descriptions of your users as individual people. While you’re developing your content and design, you might forget that your users are individual people. Generalizing your audience makes it much harder to deliver truly helpful and engaging con-tent. Profiles help you think about your users’ needs.
Here are some easy steps to help you create a profile:
1.
Start with a general target audience description and then imagine one of those people standing out in the crowd.What does that person look like?
2.
Create a detailed description of that individual, even giving the person a name or using photos that fit the description to help you envision this person.3.
Choose several more individuals from that target audience crowd. If your site is servicing multiple crowds, create several profiles for each crowd. For instance, if you’re making a site that helps kids with home-work, you need to think of a group of teachers, a group of parents, and a group of kids.4.
Select just a couple individuals to be representatives for the whole group.Starting with several individuals and then narrowing it down to only a few gives you more information at first, which you can focus on later. If you’ve really thought about your individuals, you should start to notice patterns that can help you focus on what their needs really are.
Setting Goals
12
learn about e-commerce. Doing so can help customers feel more confident about doing business with the company.
Paying careful attention to your users helps you create a site that delivers what they need and expect. You should be able to develop a good idea of what works well for them. Doing this upfront work helps you decide every-thing from look and feel to voice and functionality. Making sure your site is what your visitors need and want helps your site be a success.
Setting Goals
Each Web site needs a purpose. Even if you’re designing a small site about your hobby, you need to have a reason for building the site. You also need to decide what you will use to measure the success of the site. People often talk about a “successful” Web site, but what does that really mean? Is the goal to raise awareness or to increase sales? Is the purpose to cut down on cus-tomer service calls or to obtain a large volume of traffic? If a site doesn’t have a goal or a definition of success, it becomes impossible to develop or maintain it. You determine these goals in part by talking with the internal stakeholders of the site (what are their expectations?) and also by determin-ing what it is that the external audience needs. (We discuss these two groups in the preceding section.)
Usually, a site has more than one goal, so make a list and prioritize them. You have to decide what goals and features are must-haves and what are simply nice to have. Concentrate your efforts on the must-haves first and create a game plan for future development to add the nice-to-have stuff. The great thing about Web sites is that if you plan them well, adding things can be fairly simple.
Book I Chapter 1
Planning a W
eb
Project
Preparing to Get Started
13
Creating a Scope Document
Define your Web projects in terms of what features and content you intend to include. Having a general idea of what the site will include is not enough because everyone has their own vision of that. A well-run project needs good communication right from the start. The success of a project depends on everyone agreeing on what the project includes. This project definition — or scope— should be written out in a scope documentand distributed to all members of the team. Any changes to the scope of the project need to be recorded as changes to the scope document and then redistributed to team members.
Creating the scope document involves defining what the project is, but don’t forget to also define what a project isnot.If the site will include Flash but not video, the scope document needs to say so. Define each element clearly. Simply including “Flash element,” for example, in a list in the scope document is not enough. With each element, spell out what the project func-tionality isand is notin very definite terms. So, to properly reflect the “Flash element” in your document, you must be specific, like this: “Flash document to include animated bulleted list as provided by client and supporting graph from client’s PowerPoint presentation. This Flash element will not include audio or video.” By being specific, you protect yourself and your client from being unpleasantly surprised when you produce the Flash piece.
All projects suffer to some degree from something called scope creep,which happens when people start throwing in little extras that weren’t part of the original scope. Keep these things to a minimum. If you need to revise a por-tion of a project in any substantial way, make sure you amend the original scope document, adjust the timelines as necessary, and then get all the key players to sign off. Failing to rein in scope creep can kill your project.
Preparing to Get Started
Preparing to Get Started
14
Defining why you’re doing the project
This might sound obvious, but you should define why you’re going to build or redesign a site in the first place. Companies commonly start a Web proj-ect because their colleagues or competitors have Web sites. While “keeping up with the other guy” is a reason, it can’t be the only reason. Without a strong message or clear direction, your site can end up being a bland imita-tion of other sites, and that is usually counter-productive. A Web site can be a great tool for an organization if you focus on why you’re building it and what can make your site better than everyone else’s.
Brainstorming and evaluating your ideas
As with any type of a project, the first thing you can do after you have some basic information about the needs of your internal stakeholders and external audience is have a brainstorming session. Do this alone or with the core team so that you can get the ideas flowing with minimal complications. You can (and in many cases, should) have additional brainstorming sessions with the team later. The important thing at this point is to write down every-thing that pops to mind.
After you have had your brainstorming session, it’s time to consider the ideas from that session in a more practical way. Compare what you have with your defined goals and reasons and start discarding things that just don’t fit. Again, this part of the Web project is similar to many other types of projects. Web project managers can easily fall into the trap of thinking that because it’s a Web project, all the work will be done on a computer, and old-school techniques don’t apply — resist the urge to fall into that trap. Getting away from the computer and technology can help you focus on the purpose of your project and the content you plan to deliver without the distraction of the computer and technology.
Looking at budget and timelines
Even an inhouse project has a budget and a timeline. These things can change during the course of a project: Sometimes, deadlines cannot be met or need to be pushed forward. But remember that time and money, as in any project, are tied together.
Book I
✦ Clearly establish deadlines up front, specifying what elements team members will deliver on those deadlines and what resources team members will need from stakeholders for the project to continue on track.Include information about what will happen if stakeholders or clients delay the project. When a client is responsible for delivering materials, such as photos or text, and he doesn’t get it to you on time, you cannot proceed. It’s standard practice to add the number of days the materials were late to the timeline. If clients are two days late with text, the deadline pushes out two days.
✦ Whether you are working as a freelance Web designer or as part of an internal team, put everything in writing.This way, you avoid the he said/ she said scenario that only causes frustration and is counterproductive.
✦ Use a rush fee.This is extra money that you charge if the client wants you to deliver the project faster than originally agreed. You can also use a rush fee when a client asks for a project on extremely short notice — for example, a client calls and asks you to create a minisite in only two days.
Considering collaborations
As you complete your own planning, consider the possible reactions to what you’re planning to do. There might be some opposition from individuals who don’t think a Web site is a good thing. On the other hand, some overly enthu-siastic people might want to pitch in and help. Try to think about the people who will be impacted by the project and be prepared to address concerns, using all the information you’ve gathered to this point. Thinking of how (or if) you’ll collaborate with those who want to help is a good idea, which can help you with the next steps — selling the idea and having a meeting to offi-cially get things rolling.
Selling the Idea
Whether you work in a large, corporate environment or you’re a freelancer/ design firm, you need to sell your plan to the stakeholders. Remember, sell-ingis not a dirty word. You’re not trying to get people to agree to buy some-thing they don’t need. In fact, if you’ve done your preplanning, your project will actually help them solve problems.
Holding a Kick-Off Meeting
16
In short, present your idea, answer their questions — be prepared for their concerns.
Holding a Kick-Off Meeting
Another form of selling the idea, the kick-off, is a meeting to get all the hands-on people involved. The main purpose for this meeting is to explain the project and set expectations among the members of the team and give them copies of the scope document so they can review and understand fully what is expected. In addition to that, open up a discussion among team members, giving them an opportunity for sharing ideas and honing the plan.
When presenting your idea and defining the project, ask questions of your team regarding feasibility and capabilities. Also, be prepared for their questions — production people and IT folks need details in order to do their jobs correctly. Don’t confuse their questioning for “being difficult.” Also, try to understand any issues that are raised. Sometimes, features or functional-ity are possible but just not practical to create or support, so you might need to suggest a compromise. Work with your team to come up with the best solutions.
Make brainstorming ideas a part of the process. Allow everyone to give input about big-picture concepts on features and functionality. However, when the actual work begins, respect people’s expertise. Writers should be the ones responsible for the written content; designers create the designs; and devel-opers work with the code. It’s great to share ideas, but when members of the team start doing each other’s jobs, it becomes counterproductive. As a proj-ect manager, you should establish that collaboration is good, but second-guessing expertise creates friction and generally hurts the finished project. Make sure you hire the right people and then define the roles and build a good environment for teamwork.
The final task for a kick-off meeting is setting the next steps — make sure all team members understand what they need to do after the meeting. Be clear about what you expect from each team member and give deadlines. A good way to start the project off right is to follow up with an e-mail that includes a summary of the meeting, a list of tasks, and an outline of expectations.
Revising Your Original Plans —
Using Feedback to Improve
Book I Chapter 1
Planning a W
eb
Project
Revising Your Original Plans — Using Feedback to Improve
17
product be better. Establishing project milestones (which we discuss in the earlier section, “Setting Goals”) is an important part of the initial planning phases. The milestones provide points along the way when all stakeholders can have a look at the site and give feedback about the progress.
Whether formal or informal, usability testing(a process where you let people play with the site to see what works and what doesn’t) at key milestone points can provide useful feedback. To conduct a quick, informal usability test, select some people who are representative of your target audience — preferably people who are not involved in the project at all — and ask them to try to use your site; then have them provide feedback about their experi-ences. Book III, Chapters 9 and 10 contain more information about usability testing and getting feedback.
When you’re asking others to preview the site — whether they’re usability testers or internal stakeholders — make sure you label place holder text and graphics clearly and let people know that they are not going to be part of the finished project. Place holderitems do just that in a layout — they hold the place while finished text and artwork are being created. A large, red, “For Placement Only” statement across a graphic often helps people stay on track while they review a project in progress.
Make sure you show your work to stakeholders whenever you’ve made sig-nificant progress or hit a project milestone. They need to know that you’re staying on track. Also, keep in mind that some of your stakeholders might not be able to envision the finished product. When you notice that someone is getting bogged down on a temporary item — such as a place holder graphic — thank them for their feedback and then try to redirect their attention to items you do need feedback on.
Receiving feedback
If you’re looking for a particular type of feedback, make sure you ask specific questions that prompt users to comment on the elements or issues you want to focus on. In general, it’s not very productive to just send out a link with a note that says, “What do you think?” You’ll get responses like, “Looks good” — which is great for a final okay before launching a project but is not so good when you’re midproject and looking for something more solid. In some cases, you might even want to direct their attention to a particular piece of function-ality, such as the subnavigation or a new Flash presentation, and ask them to comment specifically about just that piece. Here are some tips that can help you get the information you need:
Revising Your Original Plans — Using Feedback to Improve
18
✦ Make sure you ask for specific feedback from individuals based on
their expertise.Any Web project involves many details and many differ-ent disciplines working together. Make sure you have experts to help keep you on track. In other words, it’s best to ask writers to help you proofread your content; designers can make sure your colors are work-ing for you. Rely on experts you trust for detailed feedback on details specific to what they know.
✦ Never assume that a person has nothing useful to contribute.While the finer details should be picked over by an expert, a fresh set of eyes is very helpful when looking at the project as a whole. Remember, your actual visitors don’t have inside knowledge or expertise and will also be looking at your site from a fresh perspective. For example, I’ve even gotten great feedback from an 8-year-old child about some icons that weren’t working — you never know who will have a useful tip.
✦ Include a list of what is new since the last time you sent out a link for review.It’s not polite or productive to expect people to play compare and contrast to figure out what you’ve been up to. Keep in mind that most of your usability testers and sources of feedback are trying to look at your project and comment on it between working on their own proj-ects. They won’t take the time to help you if you don’t take the time to direct their attention to the important issues.
✦ Make sure you don’t ask for feedback if you’re unable to use it.If you know that you’re locked into a particular piece of functionality or pres-entation, don’t ask people to comment on whether it should be there. It wastes their time, and they might not want to help you the next time. Let people know up front about situations that are beyond your control. For instance, if you must display a particular logo in a specific place, include that information in your note requesting feedback.
✦ Ask open-ended questions.Try to come up with questions that will make people interact with your site and really think about what they are experiencing. You need to get honest input from people even if it’s not a bunch of compliments. If you collect useful information and act on it, you will get plenty of compliments when you launch a great Web site.
✦ Thank them for their input.Make sure you thank them for their time — you’ll need to call on them again as your project progresses. Keep them interested in helping you. It’s easy to forget this little detail when you’re wrapped up in your project, but people want to know that their time was well spent. Make sure you send out a follow-up after you’ve collected feedback, including a summary of the feedback and what you intend to do as a result of the comments given.
Giving feedback
Book I Chapter 1
Planning a W
eb
Project
Revising Your Original Plans — Using Feedback to Improve
19
✦ Take your time. When you’re evaluating a project to give feedback, take your time and look at the site. Your feedback isn’t helpful if you immedi-ately start reacting without taking a few moments to look at it and con-sider what you’re going to say.
✦ Stay polite, and don’t get personal in a negative way. It might sound strange, but being polite goes a long way when giving feedback. People often forget that someone has put a lot of time and effort into her work, and no one likes to be criticized. Make sure that when you give feedback, you take that into consideration. Blurting out comments shuts down communications pretty quickly. Ultimately, it’s the project that suffers for it.
✦ Balance positive and negative comments.Launching into a laundry list of everything that is wrong with the site is a bad idea. Remember, a human being did the work — not a machine. The best way to have your suggestions ignored is to sound like you’re launching a nitpicky attack. Try to balance your negative comments with positive ones. For instance, instead of saying, “I don’t like where the logo is, it’s crunched up in the corner,” try, “I see that you’ve put a lot of work into this. It’s looking good, but I think I’d like to see the logo with a little more space around it. It seems a bit crowded.” The second approach takes a few seconds longer but helps build and maintain a good working relationship. Web projects take a long time and can be difficult and frustrating. To avoid creating problems, take a few moments to consider delivery of comments.
✦ If something doesn’t look right, ask questions.Web sites go through a lot of changes throughout the process. If you think something looks wrong, ask what is going on. Sometimes, there is a good explanation for why something looks strange. For example, if the logo is missing, don’t just say, “The logo is missing.” Instead, try something like, “I noticed the logo is missing, why is that?” It could be an oversight; it could be that a new logo is being developed. Again, delivery of critical comments makes the difference between a healthy collaboration and a confrontation.
✦ Keep your feedback mostly objective.Remember that the project is not your personal, artistic statement. If you don’t like the color but the colors have already been decided, accept the decision and move on to other issues. It’s okay to have some personal reactions to the site and comment on them, but don’t be offended if you’re overruled. Everyone has something to contribute, but not every idea can be included — or the site will look like a crazy quilt!
Preparing to Redesign an Existing Site
20
me to the shopping cart page”), and what actually happened (“I got a page that said, ‘404 error — Page Not Found’”). This tells the developer or designer exactly what to look at. “It’s broken” doesn’t tell them any-thing. If you encounter an error message or error code, tell the designer/ developer what it is, specifically,and what action you took right before it occurred. The more information you give, the better. If you don’t give specific information up front, you can count on playing a game of 50 questions later as designers and developers try to wrestle the details from you.
Preparing to Redesign an Existing Site
Most of the preparations that you need to do for a new site also apply to an existing site. Some differences that you should take into consideration as you prepare to redesign a site include these:
✦ Evaluate your current Web site.The first task is to look at the current site and evaluate how well it aligns with your needs. Look at the content, functionality, and look and feel as separate elements. Take each aspect of your site into consideration — technologies used, coding techniques, site structure, colors, style of writing, and so on. List them all and rate them based on whether they can be used on the new site.
✦ Have experts look at what you have.Large or complex sites need to be evaluated by selected experts or consultants. In particular, coding and technologies need to be evaluated to make sure that you don’t reuse old, outdated technologies instead of using a redesign as an opportunity to make important upgrades.
Don’t get caught up in the “newer is always better” line of thinking because it isn’t. You know the old saying — “If it isn’t broken, don’t fix it.” Sometimes that’s the best course to take. Make sure you weigh the pros and cons of keeping or replacing code carefully before you dive into a big project.
✦ Include all stakeholders in the initial evaluation process.This can help you verify that the information on your site is current and accurate. A site redesign is a good opportunity to involve all interested parties in looking at and updating materials that have been posted for a while. It’s common for certain types of information to be posted to a site and then forgotten. Be sure to look at contact information and directions pages — they often harbor out-of-date information.
Book I Chapter 1
Planning a W
eb
Project
Preparing to Redesign an Existing Site
21
the past few years, and many sites could benefit from recoding the pages. Book III, Chapters 2 and 3 have information about current HTML and CSS coding.
Book I: Preparations
Chapter 2: Build a Web
Team or Go It Alone
In This Chapter
⻬Evaluating what you need to do it yourself
⻬Knowing who can help
⻬Giving the reins to the client
W
eb design projects require a blend of skills. The unique blend of cre-ative and technological requirements means that an aspect of Web design and development draws on skills you’ve used in other positions — or on skills you don’t necessarily consider your strengths. The most effective Web professionals are those who know how to leverage their own personal skills and talents and find others who can fill in any skill gaps. Specializing in what you’re good at and aligning yourself with others who share your work philosophies enables you to build long-term relationships with those who can work with you to get the job done — whether you go it alone or are part of a team. This chapter covers both scenarios to help you decide which route is the best for you.Flying Solo: Skills You Need to Go It Alone
You need many skills to single-handedly undertake a Web design project. Some of these skills are tangible — you must know some HTML and CSS and how to effectively use Photoshop and other graphics programs — while others are intangible — you must be able to provide good service while managing the project and your time and keeping the budget under control. This section lists and describes some of the necessary skills you need to fly solo on a Web-design project.