iv
About the Author... xv
About the Technical Reviewer ... xvi
Acknowledgments ... xvii
Preface... xviii
Chapter 1: Introduction...1
Chapter 2: Software ...15
Chapter 3: Hardware...31
Chapter 4: Smart Materials and Tools ...53
Chapter 5: LED Bracelets ...73
Chapter 6: Solar-Powered Glow-in-the-Dark Bag...95
Chapter 7: Piano Tie...115
Chapter 8: Bag Alarm ...141
Chapter 9: Beatbox Hoodie ...165
Chapter 10: Sunshine Umbrella ...187
Chapter 11: Beat Dress ...211
Chapter 12: Shape Memory Flower ...233
Chapter 13: EL Wire Dress ...251
Chapter 14: Making Things Tiny ...279
World,SayHellotoArduino
In2005,DavidCuartiellesmetMassimoBanziintheItaliancityofIvrea.Banziwasteachingelectronics touniversitystudents,andCuartielles,auniversityelectronicsteacherinSweden,wasinItalytoworkon aproject.Bothmenfeltthatelectronicsshouldnotbelimitedtoengineersbutshouldalsobeusedasa materialfordesignstudents.Atthetime,however,theyhadamajorproblem:thetoolsavailablefor workingwithelectronicswerenotaimedatstudentswithnopriorknowledgeofelectronics—andthey wereveryexpensive.Mostuniversitiescouldnotbuytoolsforeachstudent;theyneededtobeshared amongthestudents.Andmostuniversitieswouldnotconsiderinvestinginsuchtoolsoutsidethe engineeringdepartments.
CuartiellesandBanzibothbelievedthatstudentsneedfullaccesstothetoolstheyaresupposedto useandit’stheuniversity'sresponsibilitytoprovidethestudentswiththetools.Thetwomencouldn’t solvethemoneyproblem,sotheybegandevelopingatoolthatstudentscouldbuybyontheirownand waseasyenoughtobeusedwithoutpriorknowledgeofelectronics.TomIgoe,aNewYorkCity–based teacher,andDavidMellis,hisformerstudent,joinedtheproject.Later,GianlucaMartinojoinedthe projectasamainproducer.Todaythesefiveareknownas“theArduinoteam”andwhattheycreated wastheArduinoboardandsoftware.AnearlyArduinoboardisshowninFigure1-1.
TalkingtheTalk
Theprogressionofthefieldofwearablecomputinghasforcedtheneedforspecialterminology.Ifyou arenewtothefield,thissectionoffersquickdefinitionsofsomeoftheterminologyyoumightcome acrosswhileworkingwithwearables.
Wearables
Wearablesisacollectivenamethathastodowithanythingcombiningfashionandtechnology.Itusually referstotechnology-enhancedgarmentsorapieceoftechnologythatcanbewornonthebody.
Wearablecomputingreferstoasmallcomputerthatcanbeeitherwornonthebody—insideorplaced ontoclothing.ThorpandShannonarestillconsideredtobethepredecessorstothefieldofwearable
Moveables
Hapticsrefersmoretothecommunicationbetweenthewearerofagarmentandtheactualgarment. Smallvibratorsaretypicallyusedforindicatingtypesofinformationindifferentlocationsofthebody.
Incontrasttopersonalcomputersthatdomanythings,embeddedtechnologyisacomplete,specific devicethatcombinessoftware,hardware,andmechanicalparts.Normallyyouusethetermtodescribe technologyobjectslikeMP3playersoreventrafficlights.Mostwearablesbecomeembedded
technologiesbydefaultsinceeverythingisincludedinthewearableobjectitself.Somewearableshave wirelesscommunicationwithanotherobject,andthedefinitionbecomesblurred.
E-textile
Hacking
conceptbutnottheterm.Prototypingreferstothepracticeofphysicallyvisualizinganidea.It’snot aboutdesigningafinishedproduct,butmakinganideaforaphysicalobject.Inasense,fashionrunwayTechnofashionisatermusedtodescribeasubcategorywithinfashionthatdoesn’tnecessarilyinclude anytechnologyatall.Alotoftechnofashiondoesincludetechnology,butinessence,it’smoreabout
DIY
Normallyhightechreferstocomplextechnologiesandlowtechreferstosimplertechnologiesor nondigitaltechnology.Insomecasesthetermsareusedtodescribeprototypes;mostprojectsinthis
Figure1-2.LEDpanelbagfromtheThinkingofDallipurexhibition
PhysicalComputing
Thetermphysicalcomputingisusedtodescribedesigningwithhardwareandsoftwarethatrespondsto thephysicalworld.Itisnottrue,however,thatallphysicalcomputingobjectsrespondtotheanalog world.Thetermisalsousedtodescribeasubcategoryofinteractiondesignthatfocusesonthe relationshipsbetweenusersanddigitalobjects;traditionalnondigitalobjectsareusedandmodified withelectronicstoexplorethisrelationship.Wearablesarealsoconsideredtobeapartofphysical computingaswellasinteractiveartanddesign.
WorkProcess
Everyone’sworkprocessesdiffer,andtheprocessofmakingwearablesusuallydependsontheproject itself.Notalltheprojectsinthebookfollowthesamepath.Whenworkingonaproject,itissometimesa goodideatopauseandthinkitthroughfirst.Untilyouhavefoundyourownworkprocess,itisgoodto followtheprocessofothers.
ThissectionincludessomeofthekeystonesthatIthinkshouldbeincludedinyourprocess.
TheIdea
Whenitcomestowearablecomputingoranyphysicalcomputing,theideaisalwaysabitofa“the chickenortheegg”problem.Toinspireideasaboutwhattodowithwearablesyouneedtoknowabit aboutelectronicsandprogramming.Atthesametime,thebestwaytolearnaboutelectronicsisto programandmakethings.
Thereisamisconceptionthatyouneedtoknowalotaboutelectronicsbeforeyougetstarted. Simplecomponents,liketheoneshowninFigure1-3,areenoughtogetstarted.Therearetonsof projectsthatcanbemadeifyouknowhowaLEDworksandknowhowtosew(IcoverLEDsearlyinthe book).Creatingtheprojectsinthisbookisagoodstartingpoint,andyouwillsoonfindthatthemore youlearnthroughcreating,themoreideasyouhaveonotherthingstomake.Youshouldallowyourself thefreedomofcreativitytoexploreanyideasyouhave—andbecertaintostorethem.Ideasareabit strangethatway;youcanstudyandlearntonsofthingsthathelpyougenerategoodideas,butinsome cases,theyjusthappen.Evenifyoudon’thaveanyideasonwhattodo,Irecommendyoustilldo something.
Ithinkitistrueinanyfieldofdesign:allgoodideasstartwithpenandpaper.
Researching
AdafruitIndustries
AdafruitIndustries(www.adafruit.com)carriesagreatselectionofcomponentsandmaterials,andhas excellenttutorialsondifferentsubjects.ThecompanyalsoproducesanalternativetotheLilyPadcalled Flora,anotherArduinocloneaimedatwearables.
RSComponents
RSComponents(www.rs-components.com)hasaniceselectionofstandardArduinocomponentsand shipsworldwide.
Farnell
Farnell(www.farnell.com)hasaniceselectionofstandardArduinocomponents,aswellastraditional electronicstools.Shipsworldwide.
RobotItaly
RobotItaly(www.robot-italy.com)hasagoodselectionofArduinoboardsandelectroniccomponents forhobbyists.Thecompanyalsocarriesspecializedcomponentsliketheflexiblesolarpanelusedinthis book.ItisaSparkFunElectronicsreseller.Shipsworldwide.
PlugHouse
PlugHouse(www.plughouse.co.kr)isaKorea-basedshopwithaselectionofthemostcommonArduino modelsandoneofthemostbeautifulArduinostarterkitpackages.
SeeedStudio
SeeedStudio(www.seeedstudio.com)isbasedinChinaandhasagreatselectionofusefultoolsand materials.ThecompanyalsoproducesaverysmallandtheonlyflexibleArduinoboardcloneinthe world;itiscalledSeeeduinoFilm.Shipsworldwide.
Squarebit
Squarebit(www.squarebit.com.au)isanonlinestorebasedinAustraliathatcaterstostudents,hobbyists, andhackers.Thecompanyhasagoodselectionofcomponents.
electro:kit
ArduinoStore
ArduinoStore(www.store.arduino.cc)istheofficialArduinostore,carryingallofficialArduinoboards. Shipsworldwide.
LessEMF
LessEMF(www.lessemf.com)featuresalargeselectionofconductivefabricsandthread.Shipsworldwide.
FurtherReading
Thefieldofwearablesisanintersectionbetweenelectronics,programming,fashion,andtraditional handcraft.Thismakesitimpossibletocovereverysingleaspectinonebook.Soincombinationwiththis practicalapproachtowearables,youmightfindsomeofthefollowingbooksgoodadd-onstoyour studies.Thelistincludesboththeoreticalandpracticaltitles.
AntonioGuerrero,Jose.NewFashionandDesignTechnologies.London,UK:A&CBlackPublishers,2010. Igoe,Tom.MakingThingsTalk.Sebastopol,CA:O’ReillyMedia,2011.
Lee,Suzanne.FashioningtheFuture.London,UK:ThamesandHudson,2005. Lewis,Alison.SwitchCraft.NewYork:PotterCraft,2008.
Olsson,Tony,etal.OpenSoftwear.BlushingBoyPublishing.2011.
Pakhchyan,Syuzi.FashioningTechnology.Sebastopol,CA:O’ReillyMedia,2008. Quinn,Bradley.TechnoFashion.London,UK:BergPublishers,2002.
SanMartin,Macarena.FutureFashion.Barcelona,Spain:Promopress,2010.
Software
writeyourprograms(calledsketches)andtransferthemfromyourcomputertotheArduinoboard.In otherwords,itisaprogramthathelpsustowritecodeandsendittotheArduinofromthecomputer.
NoteIDEstandsforIntegratedDevelopmentEnvironment.
AnIDEissimilartoawordprocessingprogram,butspecializedforcomputers.TheArduinoIDE borroweditslooksfromanotheropen-sourceprogrammingenvironmentcalledProcessing.Processing wasalsodesignedfornewcomersunfamiliartosoftwaredevelopment.
TheArduinoIDEsupportsalltheofficialArduinoboards;soifyouareworkingwithanArduino boardclone,youmightneedtorefertotheofficialdocumentationofthatboard.Allsupportedboards canbefoundontheArduinowebsiteathttp://arduino.cc/en/Main/Hardware.
Togetstarted,youneedtodownloadtheArduinoIDE;thebestplacetofinditisontheArduino websiteathttp://arduino.cc/en/Main/Software.Makesurethatyoudownloadthesoftwarethat correspondstoyouroperatingsystem;alsoselectthecorrectinstallationguide.
chapter.IfyouareusingaLilyPadwiththeArduinoseriallightadapter,theinstallationinstructionsare thesameastheArduinoUno’s.
NoteFortheprojectsinthisbook,wewillusetheArduinoUno,theArduinoLilyPad,theArduinoLilyPad
Simple,andtheArduinoMini,dependingontheproject.
InstallingtheIDEonWindows
OnceyouhavedownloadedtheArduinoIDE,youneedtounpackthefile.Ifyouarenewtousingthe IDE,Isuggestyouunpackandplacethefolderonyourdesktop.WhentheArduinoIDEisinstalledonto yourcomputerandyouopenit,youwillfindtheArduinolaunchapplication(seeFigure2-1).
Figure2-1.ArduinofolderonWindows
driversanditwillfail.Sometimesthistakessometime,sobepatient.Whenitfailstoinstallthedrivers, dothefollowing:
1. Openyoursearchbox(intheStartmenu),type“devicemanager”,andhit Enter.Thedevicemanagerwillpopup.
2. UnderPortsyoushouldseethatitsaysArduinoUno(itmightalsoappearas UnknownDeviceinOtherDevices).
3. Right-clickonArduinoUnoandchooseUpdateDriverSoftware.
4. ThiswillopenanewwindowandyoushouldchoosethestepthatsaysBrowse MyComputerforDrivers.
5. NavigatetoyourArduinoIDEfolder.InsidetheArduinofolder,youwillfind thedriversfolder,whichyoushouldmark.DonotmarktheFTDI USB Driver foldersincethedriversforArduinoUnoarenotinsidethisone.Thedriver updatescreenshouldnowlooklikeFigure2-2.
NoteForthemostup-to-dateinstallationinstructions,havealookat
http://arduino.cc/en/Guide/Windows.
Figure2-2.Windowsdriverinstallation
InstallingtheFTDIDriveronWindows
ToinstalltheFTDIdriveronWindows,followthepreviousguidefortheUno;butinstep5,choosethe
FTDI USB Driver.Youhavetorepeatthisprocesstwicesincetherearetwodriversthatneedtobe installed.
InstallingtheIDEonMacOSX
OnceyoudownloadtheArduinoIDEandmountthediskimagebydouble-clickingonit,thedesktop shouldlooklikeFigure2-3.
Figure2-3.Arduino.dmg
InstallingtheFTDIDriveronOSX
ToinstalltheFTDIdriveronOSX,clicktheiconthatsaysFTDIUSBSerialDriverinFigure2-3.Thiswill starttheinstallationprogram;youjusthavetofollowtheon-screeninstructions.Notethatthis installationwillforceyoutorestartthecomputer,somakesuretosaveallfilesyoumayhaveopened beforeyoustartedtheinstallation.
RunningtheIDE
IfyoustartyourIDE,itshouldlooksomethinglikeFigure2-4.
Figure2-4.TheArduinoIDElaunched
ExaminingtheFileMenu
FirstwehavetheFilemenu,asshowninFigure2-5.
Figure2-5.TheFilemenu
IntheFilemenu,youcanopenanewsketch,savesketches,andopenoldonesyoualreadyhave saved.SavedsketchescanalsobefoundintheSketchbookdropdown.Youwillalsofindacollectionof pre-madeexamplesketchesinthedrop-downExamplesmenu.Thefirstparthasstandardexamplesand theotherparthasexamplesketchesthatareincludedinlibraries.Librariesareacollectionofcodethat canbeincludedinthestandardArduinoIDE.Usuallywhensomeonefiguresouthowtodosomething complicatedthatrequiresalotofcode,theymakeitintoalibrarytomakeiteasiertousethecode. Anotherreasontomakealibraryistosharecodewithotherswhomaywanttouseit.
ExaminingtheEditMenu
ExaminingtheToolsMenu
TheToolsmenuisprobablythemostimportantonetokeeptrackof.Becauseofthelargevarietyof Arduinoboards,youalwayshavetosettheIDEtocompileforyourtypeofboard.InsidetheToolsmenu underBoard,youwillfindallboardsthataresupportedbytheofficialArduinoIDE,asshownin Figure2-6.
Figure2-6.TheToolsmenu
NexttotheBoarddrop-downmenu,youwillfindtheSerialPortmenu.BesidessettingtheIDEto compileforyourtypeofArduino,youalsoneedtosettheIDEtouploadovertherightboardUSBport onyourcomputer.OnaWindowscomputer,everyUSBdeviceyouconnectwillbeassignedaCOM number;andifyouopentheSerialPortmenu,youwillfindalistofCOMportswithdifferentnumbers, suchasCOM4,COM7,orCOM23.IfmorethanoneCOMportshowsup,theeasiestwaytodetermine whichofthemisyourArduinoboardistounplugtheArduinoboardandre-openthemenu.TheCOM portthatismissingwillbeyourArduinoboard.InWindowsthatparticularboardwillalwayskeepthat COMnumber.IfyouconnectanewArduinoboard,thatboardwillbeassignedadifferentCOMnumber.
ExaminingtheIDEButtons
Figure2-8.TheArduinoIDEwiththeSerialmonitoropen
AnyinformationsentfromtheArduinoboardwillappearinthebigwindow.Abovethiswindowyou willfindaninputwindowandaSendbutton.Thisisusedifyouwanttosendinformationfromthe computertotheArduinoboard.Atthebottomyouwillfindtwodrop-downmenus.Thefirstonehas optionsforlineediting,whichmeansthewaytheserialmonitorrearrangestheinformationreceived. Theotherdropdowniswhereyousetthespeedofthecommunication,whichhastobethesameon boththecomputerandonyourArduinoboard.
WhatIsSoftware?
Softwareisusuallywhatwecallacollectionofprogramsanddatathattellsacomputerwhattodo. Everythingweinstallonourcomputerisnormallysomesortofsoftware;andwithoutanysoftware, therewouldn’tbemuchtodoonourcomputers.
TheArduinoisbasicallyasmallcomputer(whichisalsocalledamicroprocessor)withoutany softwareonitfromthestart.Itislikeacleansheetofpaper,soweneedsoftwaretobeabletomakethe Arduinodostuff.ButbeforewestartwritingsoftwarefortheArduino,weneedtoknowhowtogivethe Arduinoinstructionsthatitwillunderstand.ComputersandmicroprocessorsliketheArduinoare similartohumanswhenitcomestocommunicating.Ifyouwantmetogetyouacupofcoffee,you wouldhavetoaskmesomethinglike,
“Couldyoupleasegetmeacupofcoffee?”
Then,ifIhavethetimeandfeellikeit,Imightgoandgetyouacup.Butifyouweretoaskme, “Pouvez-vouss’ilvousplaîtmefaireunetassedecafé?”
IwouldhavenocluewhatyouaretalkingaboutsinceIdonotspeakFrench.
“Isthefortodayagoingparktoniceday.”
Itwouldnotmakeanysensewhatsoever.ButifIrearrangethewordstofollowthestandardrulesof creatinganEnglishsentence,Iwouldsay:
Inthiscase,youprobablywouldunderstandmebetter.
Computersworkthesameway,butinastrictermanner.Whenwritingprogramsforcomputers,you havetofollowcertainrulesonhowyoucombinethecommands—andtheycannotbemisspelled.The rulesforwritingprogramsarecalledsyntax.Thesyntaxrefersto“how”wewritetheprograms.“What” wewriteinprogramsarethecommands.Itisthesyntaxtogetherwiththecommandsthatmakea programminglanguage.Again,likehumanlanguages,eachprogramminglanguagehasdifferent syntaxesandcommands.Sometimeswealsorefertothisascodeandcodeiswhatsoftwareismadeof. Soagain,theArduinoIDEisthesoftwareweusetowriteprogramsfortheArduinoboard.
HowWeWriteCode
BeforewegetstartedwithwritingprogramsfortheArduino,let’shavealookwhatcodeactuallyconsists of.Thefirstthingyouneedtoknowaboutisvariables.
Variables
Variablesarelikecontainersforsomethingelse.Variablesallowustostoreinformationwithinour programs;andtheinformationcanbeknownorunknown.It’slikeacookiejarthatweputstuffin.We variablesandcharactervariables.Anintegerisanumberwithoutanydecimals.Anumberwithdecimals iscalledalong.
canbestoredinacharactervariable.Sobeforeyoucreateavariable,youneedtoknowwhatkindof informationyouwantstoreinit.
Creatingavariableisalsoknownasdeclaringavariable,andtomakeonewehavetofollowthe syntaxoftheprogramminglanguage.Todeclareavariableinaprogram,youwoulddothefollowing (youcantypethisintotheIDEwindowifyoulike):
int myVariablename;
Inthiscase,intisshortforinteger,whichdeclareswhatkindofinformationwewillbestoringinthe variable(whichisnumberswithoutdecimals).myVariablenameistheactualnameofthevariableand thiscouldbeanything.Eventhoughyoucanassignavariableanynameyouwant,it’sagoodideatogive itapropername.Forexample,ifyouwanttostoreinformationfromasensor,youcouldnameit
sensorValue;orbetteryet,ifit’salightsensor,nameitlightSensorValue.ThereasonIuseacapitalletter onthesecondwordinthevariablenameisbecausethenamehastobeaconsistentstringofcharacters.
sensorvalueisnotanacceptablename,butsensorvalueis;sojusttomakeitsimplertoread,Iusually writethesecondwordwithacapitalletter.Itisalsogoodtonameyourvariablessothattheymake sense.Ifyoustartnamingyourvariablesbanana,apple,orlovePrada,itwillbehardtorememberwhat kindinformationisactuallystoredinthem.
Thesemicolonattheendtellsthecomputer,orinourcasetheArduino,wherethelineofcodeends. Withoutthesemicolon,theArduinowouldjustkeeponreadingthatlineofcodethinkingsomethingwill comeaftermyVariablenameanditwillbestuckdoingthisforever.However,ifyouforgetasemicolonin yourcode,theArduinoIDEtellsyouthatsomethingiswrongbeforeyoucansendyourprogramtothe Arduinoboard.
SonowyouhavedeclaredanintegervariablenamedmyVariablename.Inthiscase,thevariableis empty;butifweknowthatwewanttostoresomethinginit,wewouldhavetowriteitlikethis
int myVariablename = 13;
ThiswouldnotonlycreateanintegervariablecalledmyVariablename,butalsostorethenumber13 insideit.Then,anytimeweusemyVariablenameinourprogram,theArduinoreadsitasthenumber13. SothenameismoreforyoursakesincetheArduinoneverreadsthenameofthevariable,itjustopensit andpicksoutwhateverisinsideit.However,theArduinodoescheckwhatkindofvariableitis,soyou can’tfoolitbyputtingacharacterinsideanintvariable.
Ifyouwanttodeclareacharactervariable,youwillhavetowrite
char myCharacter;
Andifyouwanttoassignthevariableacharacterfromthestart,youneedtowriteitas
char myCharacter = 'H';
thecodetocheckforerrorswiththehelpoftheIDE.Everytimewedothis,theArduinowillalsotryto 1. Ideclaremyvariables.
2. Iaddwhatiscalledthesetup. 3. Iaddtheloop.
Thenextstepistoaddthesetup.Thesetupisthenameofafunctionthatalwaysneedstobeincluded insideasketch.Afunctionisaportionwithinaprogramthatperformsaspecifictask.InanArduino sketch,thisisthefirstpartoftheprogramtheArduinoboardwilllookforanddoeswhatever
instructionsitfindsinside.Itwillonlyenterthesetuponce,andthenitwillcontinuetolookfortheloop. ThefollowingshowshowyoudeclareasetupinsideanArduinosketch(tryitinyourownIDEwindow):
void setup(){
//enter commands here }
Thisiswhyweusesemicolonsattheendofcommands,sothattheArduinoknowswhereevery commandendsandwhenitistimetomovetoanewline.
Thecurlybrackets{}inthesetupfunctionareusedtoshowwherethefunctionstartsandwhereit ends.Youalwaysusealeft(oranopen)curlybracket{toshowwheresomethingstarts,andaright(or closed)curlybracket}toshowwheresomethingends.Towritesketches,youwillusealotofcurly brackets,andifyoumissoneofthem,thesketchwillnotcompile.Agoodtipistoalwaysentertheleft curlybracketandtherightcurlybracketatthesametimesothatyoudon’tforgetitlater.Thenormal brackets()inthesetupfunctionareusedforadditionalparameters.Inthesetupfunction,itdoesnot takeanyadditionalparameters,sowejustleaveitemptyeverytime.
Parametersallowyoutosendinformationtothefunction,sothatthefunctioncanprocessthat information.Insomeoftheprojectswe’llworkon,wewillseehowaddingparameterstofunctions mightcomeinhandy.
Inthesetupfunctionyoumayalsofindtwoslashes(//)withtextthatfollows.Thetwoslashes indicatethateverythingwrittenafterwardisnotapartoftheactualprogram.Ithastheeffectofhiding
Nextupwehavetheloopfunction.Thisiswheretheactionhappens.Thisisthepartofthesketchwhere theArduinospendsmostofitstimewhileit’spoweredup.
Todeclaretheloop,youwrite:
void loop(){
//enter commands here }
SettingpinMode
ThepinModefunctionisusedtosetthemodeofadigitalpinontheArduinoboard.Thedigitalpinscan beusedbothasanINPUToranOUTPUT.Thismeansthatwecanusethesetobothreceiveinformation comingintotheArduinoboardandwecanusethemtocontrolsomethingoutsidetheArduinoboard. Butfromthestart,theArduinoboarddoesnotknowhowyouwillusethedigitalpins;soyouneedtotell itbyusingpinMode.Sinceweonlyneedtotelltheboardoncehowwewillusethedigitalpins,this commandisalwaysplacedinsidethevoidsetupfunction,asfollows:
int myPin = 13;
void setup(){
pinMode(myPin,OUTPUT); }
ThepinModecommandtakestwoparameters.
Thefirstisthepinonwhichyouwishtosetthemode.Ihaveenteredavariable calledmyPin.
Thesecondparameteristheactualmodeyouwantthepinusedas.Ihave declareditasanOUTPUTbecauseIwanttouseittocontrolsomethingoutsidethe board.IfIwantedtousethepintoreaddigitalinformationcomingintotheboard, IwoulduseINPUThereinstead.
WritingaPin’sState
OnceyouhavedeclaredapinasanOUTPUT,youcansetittoastateofeitherONorOFF.Todothisyou wouldusethefunctiondigitalWrite,whichtakestwoparameters:
void loop(){
digitalWrite(myPin, HIGH); }
Asyoucansee,thiscommandisplacedintheloopbecausethisiswheremostofouractiontakes place.
ThefirstparameterisstillthemyPinvariablebecausewealsohavetonamethepin thatwewanttosetthestate.
HIGH,inthisexample,istheactualstateanditmeansthesameasON.IfIwantto turnitOFF,IwouldjustwriteLOW.
ThedigitalWritecommandcanbeplacedinthesetup,butthenitwouldonlyrunonce.
AddingaDelay
Wecouldmakeasimpleprogramwithjustthetwocommandsfromthepreviousexample,addinga variablelikeso:
void setup(){
pinMode(myPin, OUTPUT); }
void loop(){
digitalWrite(myPin, HIGH); digitalWrite(myPin, LOW); }
Inthisexample,IhavedeclaredavariablecalledmyPinandassigneditthevalue13.Ihavedeclared itasanOUTPUT,andintheloopIamturningitonandoff.However,ifIweretoconnectsomethingto
myPinlikeasmalllamporasmallmotor,itwouldappearthatnothingishappeningapartfromthelamp switchingon.ThethingisthateveniftheArduinoisasmallcomputer,itisstillaprettyfastone.The ArduinoisabletoturnonwhateverisconnectedtomyPinacoupleofhundredthousandtimesper seconds.Ifwehaveasmalllampconnected,itisveryhardtoseethatthelampisbeingturnedONand
OFF.Infact,itisimpossibleforthehumaneyetodetectthisflickering,anditwouldjustlooklikethe lampisonallthetime.
Sointhiscaseweneedtoaddthedelaycommand,andasthenamesuggests,thiscommandmakes apauseinyoursketch.Thedelaycommandcountsinmilliseconds,sotomakeaone-seconddelay,we wouldsetthedelayto1000,likethis:
int myPin = 13;
void setup(){
pinMode(myPin, OUTPUT); }
void loop(){
digitalWrite(myPin, HIGH); delay(1000);
digitalWrite(myPin, LOW); delay(1000);
}
Iusetwodelaycommandsbecause,ifIjustuseonedelaybetweenthedigitalWritecommands,at theendoftheloopitwouldjustjumpfromOFFbacktoONagain,andwewouldnotbeabletotellthatit actuallywentOFF.Butinthiscase,weturnmyPintoHIGHforasecondandthenweturnitLOWfora second.Ifwehaveasmalllampconnectedtopin13,thiswouldgiveusplentyoftimetotellthatthe lampgoesONandOFF.
We'llcomebacktothiscodeinChapter3whenwecheckthatourArduinoisworkingproperly.For
Hardware
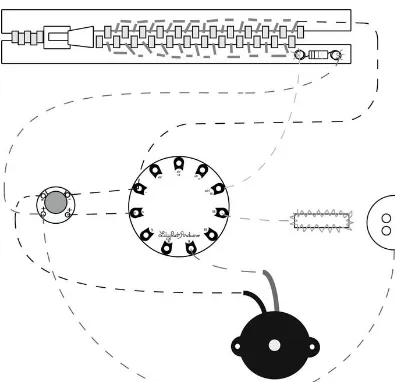
Figure3-1.Close-upofconnectiontraces
Thesearethetracepatterns,whichusuallyarethinlinesofcopper.Theselinesconnectallthesmall componentstogether.WearenotgoingtogothrougheverysinglecomponentontheArduinoboard becauseitwouldtakewaytoolonguntilwegottothefunstuff.Still,therearepartsoftheArduinoboard weneedtohavealookatbeforeyoucanstartmakingyourownwearableproject.Thefirstoneisthe ATmegachip,andFigure3-2showswhereyoucanfinditonthestandardArduinoboard.
TheATmegachipisbasicallythebrainoftheArduinoboard.Youcanfindthesamethinginyour owncomputer,butinanotherformfactor.TheATmegachipisalsoavailableindifferentformfactors, andthat’swhyyouhavetochangetheArduinoboardtypeinyourArduinoIDE—becausedifferent ArduinoboardsusedifferentATmegachips.Forexample,theLilyPadusesasmaller,surface-mounted ATmegachip.Surface-mountedmeansthatitissolderedtothetopoftheboard’ssurface.
Incontrast,theArduinoUnohasabiggerDIP-mountedATmegachip.DIPmountmeansthatthe chipisattachedtotheboardeitherthroughholesthatgothroughtheboardor,liketheArduinoUno,in asocket.ThereasonforputtingtheATmegachipinasocketontheUnoboardisthatifyouaccidentally connectyourArduinoboardtosomethingelseinthewrongway,thechipmightgetburned.Ifthis happens,youcanpopoutthechipandputinanewone.WiththeLilyPad,theproblemisthatit’svery hardtoreplaceasurface-mountedchip.ThisiswhyIprefertodoallmytestingwithastandardArduino boardliketheUno;ifsomethinghappens,IcanjustbuyanewATmegachipratherthanreplacean entireboard.Buttobehonest,Ihavenevermanagedtodestroyasingleboard—andIhaveusedalotof them.
ThemainreasonIprefertotestthingsonastandardArduinoboardisbecausedoingsoisfast.Ilove thedesignoftheLilyPad,butit’smadeforwearabledevicesandthereforeverysmall.Thismeansittakes abitlongertoconnectandtestthingswithaLilyPad;soifyourbudgetallowsit,considerbuyingboth theLilyPadandastandardArduinoboard.SincebothuseanATmegachip,thecodeyouwriteisthe same.
MicroprocessorsliketheATmegachipareamazingthingsthatletusconvertdataintoinformation. ThewaytheArduinoisdesigned,itletsusreadanyinformationandcontrolalmostanythingwecan imagine.
OntheInside
Insideamicroprocessoryoufindthousandsofsuper-smalltransistors.Lateron,wewillbeusingbigger transistors,liketheoneshowninFigure3-3.
Butthesmallonesfoundinmicroprocessorsfollowthesameprincipleasthebigones.IfIapply electricitytooneofthelegsofthetransistorinFigure3-3,theothertwowouldconnecttooneanother insidethetransistor.Atransistorworkssimilartoaswitch,whereitiseitheronoroff.Thismightsound likeasimpleelectroniccomponent,butinfactitisconsideredtobeoneofthemostimportant
technologicalinventionsever.Todayitisthekeyactivecomponentofallmoderntechnology. Thethingthatmakesthetransistorsospecialisthatit’salsothecomponentthatmademodern computerspossible.Withtransistorsitispossibletomakewhatiscalledlogicalgates.Alogicalgateisa physicalimplementationofaBooleanfunction.Thismeansthattheycandetectifsomethingistrueor false.WhilewritingsketchesfortheArduino,youcanuseBooleanvariables,whicharevariablesthatcan beonlyoneoftwothings:trueoffalse.ABooleanvariableisdeclaredthesameasanyothervariable:
boolean myBoolean = true;
Inourcode,wewouldusethebooleantocheckifthingsaretrue;andiftheyare,wecanchooseto dosomethingelse.Thetransistorenablesustodothesamethinginreallife.Usually,bigtransistorslike theoneinFigure3-3areusedtocontrolhighpowerwithalower-poweredsignal,asshownin
Figure3-4.
InFigure3-4,Ihaveaddedafanandabattery,andconnectedittothetransistor.Theconnectionto ifthefanisonornot.Ifwesupplypowertothesignalpin,itwouldbetruethatthefanison;andifthere isnopoweronthesignalpin,thestatementwouldbefalse.
Figure3-5.OverviewoftheArduinoUnoboard
Figure3-5showsthefollowing:
USBconnector
Digitalpins
Analogpins
Figure3-6.OverviewoftheLilyPadSimpleboard
Figure3-6showsthefollowing:
AnalogpinsA2,A3,A4,andA5 Digitalpins5,6,9,10,and11
Powerpinsandpowerconnector
SerialtoUSBconnector
USBConnector
AUSBconnectorisshowninFigure3-7.ThisiswhereyouconnectyourArduinoboardtoyour computerusingaUSBcable.
Figure3-7.Close-upoftheUSBconnectoronastandardArduinoboard
Figure3-8.AgreenlightindicatesthattheArduinoboardispowered
IfyouareusingaLilyPad,youwillneedeitheraUSB-to-serialcableortheArduinosimpleUSB converter.ThestandardArduinoboards,liketheUno,donotneedanadapterforthissinceithasan onboardchiptohandlethecommunication.Also,USBisadifferentcommunicationprotocolthanwhat theArduinousesanditisnotsupportedbydefault,soitneedsanextrachiptoconvertthesignalto serialcommunication,whichitdoessupport.Thisisoneofthethingsthathavebeenremovedfromthe LilyPadtomakeitsmaller.TheLilyPadalsohasaphysicalpowerswitchthatcanbeturnedonandoff.
DigitalPins
OntheUnoboardwehave13digitalpinsintotal.OnthesamesideyouwillalsofindoneGNDpin, whichisshortfor“ground”.AllareshowninFigure3-9.Thedigitalpinsarecalleddigitalpinsbecause theyonlyoperatewithzerosandones,which,asyounowknow,isthesameasonandoff.
Figure3-9.Digitalpinsfrom0to13
Figure3-10.OntheLilyPadSimple,thedigitalpinsarenumbered5,6,9,10,and11
OntheLilyPadSimple,itismuchsimplertoseparateconnectionsbecausetherearefewerpins, whichareplacedfartherapart.Havingconductivethreadconnectionstoocloseisnotgoodbecausethey couldaccidentallycomeincontactwithoneanother,whichcouldcauseerrorsorshortcircuits(more onconductivethreadinChapter4).
AnalogPins
Oppositethedigitalpinsaretheanalogpins,wherewecanconnectsensorsthatmeasurethingswe senseintherealworld.Theproblemwiththerealworldisthatmostoftheinformationisnotdigital.In otherwords,wearenotlikecomputersandourunderstandingoftheworldisnotcalculatedinzerosand ones.Ashumans,weperceivethingslikelightinarangeofvalues.Theproblemwithcomputersisthat theycanonlyunderstandtwodifferentstates,onandoff.Sothat'swhytheArduinohasanalogpins, whichareabitdifferentfromdigitalpins.
Analogpinsarethesameasthedigitalonesinthesensethattheyareusedasinputpins,butwhat makesthemdifferentisthatdigitalpinscanonlymeasureifsomethingisonoroff,oractuallyifthere are0voltsor5voltsinthepin.Theanalogpinscanmeasureavoltagerangebetween0and5voltsin 1024steps.Soifweconnectananalogsensortoananalogpin,thissensorwouldgiveusavaluebetween 0and1023,whichmeansthatifthevalueis0,itisequalto0volts,and1023wouldbe5volts.Ifthe sensorgivesyou511,itmeansthatthereareapproximately2.5voltsintheanalogpin.
Withanalogpins,wecanmeasurealotofthingsintherealworld,liketemperature,distance,speed, andmuchmore.Ifyoucanthinkofanythingthatyouwanttomeasure,thereisagoodchancethereisa sensorforit.Infact,IhaveneverfoundasituationwhereIcouldn’tfindasuitablesensortouse.Inmost cases,thereistheoptiontobuildthesensoryourselfifneedbe.Wewilldoexactlythatinsomeofthe projectsinthisbook.
Figure3-11.Thepowerandanalogpins
PowerPins
Thefirstpin,whichsaysRESET,canbeusedtoresettheArduinoboard.Iftheboardispowered,this makestheArduinostartthesketchfromstart.Thereisalsoaphysicalbuttonthatdoesthesamething;it islocatednexttotheATmegachip.
NexttotheRESETisapinthatsays3.3V,whichmeansthereisalways3.3voltsinthispin.Thispinis typicallyusedwhenyoumakecircuitconnectionsoutsidetheArduinoboardandyouneedtopowerit. Wealsohavethe5Vpin,whichissimilartothe3.3V,buttherearealways5voltsinthispinwhenthe Arduinoboardispowered.ThereasontheArduinohasa3.3Vanda5Visthatthesearecommon voltagesusedbysmallelectroniccomponents.
ThenyouhavetwoGNDpinswhereyoualsoconnectanythingyouwanttocontrolorpowerfrom theArduinoboard—becausetocompleteaelectroniccircuit,poweralwayshastogobacktowhereit camefrom.
ExternalPower
Toconnectanexternalpowersource,youusetheDCjack,whichisshowninFigure3-12.
Figure3-12.TheDCjackneedsaminimumof6voltsandamaximumof17volts.
IntheDCjack,youcanconnectanytransformerthatgivesanythingbetween6voltsand20volts. JustmakesureitisaDCtransformer.Youcanfindthisinformationwrittenonmosttransformers.The Arduinoboardneedsatleast6voltstorun,anditcan’thandlemorethan20volts;butit’srecommended tostayinbetween9voltsand12volts.SixvoltswouldpowertheArduinoboard,butifyouhave
anythingelseconnectedtotheArduino,thismightnotbeenough.
Figure3-13.Transformersupportinga230Vinputanda3Voutput
Thisparticulartransformertakesaninputvoltageupto220voltsandtransformsthisinto3volts. ThistransformerwouldnotbeenoughforpoweringtheArduinoUnoboard,butitwouldpowera LilyPadthattakesaninputof2.7voltsto5.5volts.TheUnostandardboardhasmorecomponentson theboardthantheLilyPad,sothestandardboardneedsabitmorepower.Thestandardboardalsohas anonboardpowerregulatorthatcantakeahighervoltageinputandlowerittotheoperationalvoltage oftheATmegachip.ThisislackingontheLilyPad,soyouhavetomakesuretostaywithinthe
operationalvoltagerange,oryoumightendupburningtheATmegachipontheLilyPad.
Figure3-14.ThetwopowerconnectorsontheLilyPad
Electricity
Alltheprojectsinthisbookarepoweredbyelectricity.Eventhoughweuseitonadailybasis,mostofus haveahardtimeexplainingwhatelectricityactuallyis.Infact,thetermelectricityisveryvague.The wordwascoinedaroundtheyear1600ADandcomesfromtheLatinwordElectricus ,meaningamber-like.ItwastheGreekswhofiguredoutthatwhenyourubtwopiecesofambertogether,theygeneratean electricaleffect.Luckily,thescienceofelectricitydidn’tstopthere,oryouwouldhavealotofproblems poweringtheprojectsinthisbook.
Untilthelatenineteenthcentury,therewerefewpracticalapplicationsforelectricity,andit’snot untilthelast100yearsthatwehavecometorelyonelectricityasasourceofpower.Wewon’tgothrough theentirehistoryofelectricity,butthereareafewthingsyoushouldknowbeforeyoustartplaying aroundwithelectricity.
First,youshouldknowthatalltheprojectsinthisbookarelowvoltage,andaslongasyoufollowthe instructions,theyarecompletelysafe.Theworstthingthatcanhappenisthatyouaccidentallyburna smallcomponent.Infact,asewingmachineisprobablythemostdangeroustoolyouwilluseinanyof theprojects.
Oneofthemisconceptionsregardingelectricityisthatitissomethingconstant.Wecountonthe electricityinourwallsocketstoalwaysbeatthesamelevel,butthisisnotthecase.Electricitymovesa bitlikewater.Youmighthaveaconstantflowofwater,butsometimesthewatermovesabitfasteror slower—andit’sthesamewithelectricity.
Voltage,Current,andResistance
thisisknownasthecurrent,whichismeasuredinamperes.
NoteElectricityalwayshastogobacktowhereitcamefromsothattheelectronscankeeppushingeachother
around.
Theforceofthepushbetweenthebilliardballsinthepipeisthesameasthepushbetween electrons,whichisknownasthevoltage.
Whenwewanttomoveelectricityfromoneplacetoanother,weusuallyusewires;andwiththe ballsinthepipe,thepipeactsasthewire.Thepipeaddswhatwecallresistance;whentheballstouch thepipe,itmakesthemslowdownabit.
ThissymbolisusedtoindicatethattheinputpowerisAC.ThesymbolforDClooksliketheone
NoteAlwaysmakesuretothrowyourbatteriesinbatteryrecyclebinssincetheycontainharmfulchemicals.
Zinc-carbon:Usedinmostofthecommon,inexpensiveAA,AAA,anddry-cell batteries.
Alkaline:CommonlyusedinAAanddrybatteries.
Lithiumion:Oftenusedinrechargeablebatteriesforhigh-performancedevices likecellphones,digitalcameras,andlaptopcomputers.Theseareusuallyabit moreexpensive.
Leadacid:Usedforproductsthatneedalongershelf-life,likecarbatteries.
OnthestandardArduinoboard,youcanconnectbatteriestotheDCjackwiththeappropriate connectorforyourtypeofbattery.Personally,Ilike9voltbatteriessincetheyhaveaniceformfactor andenoughenergytopowertheArduinoforsometime.
BatteryConnectors
YouhaveaniceselectionofdifferentbatteryconnectorsfortheLilyPadsinceitishardtoconnect batteriesinawearableproject.Aconnectorreallyhelps.ThefirstoneistheLilyPadpowersupply (showninFigure3-17),whichtakesastandardAAAbattery.RemembertoneverpowertheLilyPad boardswithmorethan5volts.
Figure3-17.TheLilyPadpowersupplyusesnormalAAAbatteries
Figure3-18.LilyPadcoincellbatteryholder
Figure3-19.TheLilyPadLiPoweruses3.7Vlithiumbatteries
TestingtheHardware
NowthatyouknowthebasicsoftheArduinohardware,let’stesttomakecertainthateverythingworks asitshould.Forthis,youwillbeusingtheArduinoIDE.OntheArduinoboard,thereisasmallLED mountedontheboardnexttopin13.LEDstandsforlightemittingdiodeandit’sasmalllamponthe Arduinoboardthatcanbeusedfortestinganddebugging.Wearegoingtouseittomakesurethe ArduinoIDEisinstalledcorrectlyandthatthereisnothingwrongwiththeArduinoboard.Let’sstart withthecode,asfollows:
int ledPin = 13;
void setup(){
pinMode(ledPin, OUTPUT); }
void loop(){
digitalWrite(ledPin,HIGH); delay(500);
digitalWrite(ledPin,LOW); delay(500);
ThisisthesamecodewestartedinChapter2,butnowwearegoingtotestitonourArduinoboard bytakingthefollowingsteps:
1. PlugyourArduinointothecomputerusingtheUSBcable.StarttheArduino IDE.
2. ChecktheToolsmenutoensurethatthecorrectArduinoboardisselected underBoardandthatyouhaveselectedthecorrectportunderSerialPort.
3. PresstheVerify/Compilebuttonandwaitforthe“Donecompiling”message. Checkthatyoureceivedamessageinwhitetextintheblackwindow. 4. PresstheUploadbuttonandwaitforthe“Doneuploading”message.
5. CheckthattheLEDnexttopin13isblinking(theLEDisshowninFigure3-20).
Figure3-20.Pin13hasanonboardLEDconnectedtoit.
Summary
Todotheentirefieldofelectronicsandmicroprocessorsjustice,IwouldneedmanymorepagesthanI haveforthisbook.Butthegoodthingisthatyoudon’tneedtoknoweverythingtogetstarteddoingstuff withelectronics.Itisstilltruethatthemoreyouknow,thebetteryourdesignswillbecome;butIalways stressthatitismoreimportantgetstartedmakingthingsbecausethisiswhentheactuallearning happens.Mostofthethingscoveredinthischapterwillberevisitedthroughprojectslateron,wherewe gothroughhowthedifferentpartsworkatapracticallevel.
Therearealotofoptionsifyouwanttolearnmoreaboutthebasicsofelectronicsandelectronic components,buttheonesworthmentioningareGettingStartedinElectronics(MasterPublishing,2003) andEngineer’sMiniNotebook(RadioShack,1985),bothbyForrestMims.Thesebooksareexcellent introductionstoelectronicsandarewrittenandhand-drawnbyMimshimself.
CharlesPlattalsowroteaverygoodintroductiontoelectronicstitledMake:Electronics(Learningby Discovery)(Make,2009).
Smart Materials and Tools
Smartmaterialshaveoneormorepropertiesthatcanchangeitsstateusingexternalstimulilikestress, electricity,moisture,magneticfields,andmore.However,theterm“smartmaterials”isalsousedto refertomaterialscombinedwithelectronics.Wewillnotbotherwithdefinitionoftheword,butinstead focusonthemostimportantaspectofsmartmaterials,andthatishowawesometheyare.Inthis chapter,Iwilllistafewofthesmartmaterialsthatwe’lluseinthebook,aswellassomeotheronesthatI havecomeacrossduringmyprototypingyears.Iwillalsointroducesometoolsthataregoodtohavein yourprototypingkitalongwithyourstandardsewingequipment.
Materials
ThermochromicInk
Thenamecomesfromthetermthermochromism,whichreferstotheabilityasubstancehastochange itsowncolordependingontemperature.Thermochromicinkwasmadepopularintheearly1990sby theHypercolorclothinglinefromGenerraSportswear.Hypercolorclothingwasashort-livedfad,but todaythermochromicinkshavemadeasmallcomeback.Thishasmadeitfairlyeasytogetyourhands onthermochromicinkandopensalotofpotentialforcreativedesigns.Therearetwotypesof
thermochromicinks:onethatappearswhenheatedandonethatdisappearswhenheated.
Figures4-1and4-2showfabricwiththermochromicinkpatternsbeforeandafterheatisapplied.
Figure4-1.Thermochromicscreenprintonfabric
Figure4-2.Thermochromicscreenprintafterheatisapplied
KanthalWire
Kanthalisatrademarkednameforiron-chromium-aluminumalloysthatareusedforhigh-temperature applications.Itisavailableinarangeofresistances.WhenelectricityisappliedtoKanthalwire,itstarts togenerateheat.StandardKanthalwirehasameltingpointof1200°C(2200°F),whichispretty
ConductiveFoam
Youprobablyhaveconductivefoamsomewhereinyourhouseandyoudon’tknowit.Conductivefoam isusedtogroundelectronicappliances.Forexample,somestoveshaveconductivefoaminplaceswhere metalisexposedtomakesurethattheelectricitygoesbacktowhereitcamefrom,andnotthrough anybodythatmightcomeincontactwiththemetalarea.
Youcanbuyconductivefoaminallshapesandsizesandwithdifferentresistances.Anexampleis showninFigure4-3.
Whenyoubuyelectroniccomponents,someofthemcomepackagedinconductivefoamtoprotect thecomponentfromstaticelectricity.Makesuretosavethatfoambecauseyouneverknowwhenit mightcomeinhandy.Conductivefoamsareusedtomakesoft-pressuresensorsandbuttons.Oryoucan makeyourownstyluspenforyoursmartphoneortablet.Totestwhetherapieceoffoamisconductive ornot,youcanuseamultimeter.(Tolearnmoreaboutusingamultimeter,headovertoChapter5.)
Touchscreensareusuallyresistive,whichmeansthattheycandetectwhereyourfingerisbecause skinisconductive.Thisiswhytouchscreendevicesdon’tworkwhenyouarewearinggloves.Butasmall pieceoffoamonthetipofaglovefingerorapenwouldwork.Orifyouwanttomakeapairof
touchscreengloves,youcoulduseconductivethread(describedinthenextsection).
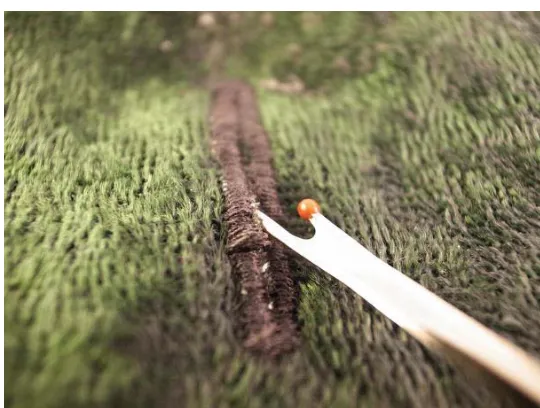
ConductiveThread
Wewilluseconductivethreadasasubstituteforwiresinmanyprojectsinthebook.Whenitcomesto finalizingyourproject,youwillfindthatinsomecasesit’snotverypracticaltousewiresforwearable projects.Conductivethreadlookslikenormalgraythread(seeFigure4-4),butcanconductelectricity. Mostconductivethreadsaresilver-platedandavailableinarangeofresistances.Inmostcasesyou shouldnotfollowtheresistanceindicatedbythesuppliersinceitishardtotellhowmuchthreadyou willusebeforeyoustartsewing.It’susuallybettertosewyouconnectionsandthenmeasurethe resistancetogetamoreexactresistancevalue.Themorethreadyouadd,thegreatertheresistancewill be.Youuseamultimetertomeasureresistance.
Onethingtokeepinmindwhenusingconductivethreadinwearablesisthathumanskinalso conductselectricity,andifthethreadtouchesskin,itmightinterferewiththesignal.Butthisalsomeans thatyoucanuseconductivethreadtomakeasensorthatdetectswhenit’stouched.
ConductiveTextile
Conductivefabricsaretextilesthathavetheabilitytoconductelectricity.Sometextilesaremadewith metalstrandswovenintothefabric(seeFigure4-5)andothersaremadebyimpregnatingnormalfabrics withmetalorcarbonpowders.Theconductiveareascanbecoatedontofabricorembeddedintofabric.
Whenitcomestomakingwearableprojects,conductivetextilesaregreatformakingsensorsorasa substituteforusingcables.Conductivetextilesoffermoreflexibledesignsolutions.Examplesoftheway conductivetextilesarenormallyusedincludethefollowing:
Staticelectricityshielding Signalandpowertransfer
Heatingelements
Figure4-5.Thin,conductivemeshfabric
Conductivetextilesareavailablewithdifferentmaterialcompoundsthatdefinetheresistanceinthe material;thisincludesthefollowing:
Electronylon:Thetextilefibershavebeencoatedwithcopper,whichgivesthe materialaverylowresistance,ifany.
Electrolycra:LooksandfeelslikenormalLycra,butitisconductiveandcan changeitsresistancewhenstretched.
Steelfabric:Wovenfromverythinstainlesssteelfiber,butitfeelslikenormal textile.Steelfabricshaveahighresistance.
Zelt:Alow-budgetalternativethatusesacooper-zinccoating.Thedownsideto coatedthreadisthattheconductivematerialmightbeaccidentallystrippedfrom thethread.
Mostconductivefabricscomewithresistancespecifications,butyoushouldnevertrustthemsince everypieceoffabrichasslightvariation.Inmostcasesyoudon’tusethefabricasyouboughtit,instead youcutitintopieces;oncethisisdone,it’sbettertomeasuretheresistanceyourselfusingamultimeter.
SomecompanieshavedevelopedmorespecializedconductivefabricsliketheoneinFigure4-6 wherethefabricispartlyconductive.Theconductiveareasareseparatedbynormalthread.
Figure4-6.Conductivemeshfabricmixedwithnon-conductivethread
ConductiveVelcro
beusedasaswitchorevenasensorthatmeasurestheamountofVelcrothatisopenbymeasuringthe resistanceintheVelcro.
ConductivePaint
Thereareavarietyofconductivepaints.Thecompoundsofthepaintsdifferaccordingtothe application.
Copperpaintsarehighlyconductive.
SilverpaintistypicallyusedforrepairingbrokenconnectionsonPCBboardslike thebaseboardoftheArduinoorLilyPad,ontowhichallthecomponentsare placed.
Carbon-basedpaintsaren’tasconductiveasmetal-basedpaints,buttheyare goodenoughtomakeelectronicconnections.InFigure4-8you’llfindacarbon- andwater-basedpaintcalledBarepaint.
It’sevenpossibletomakeyourownconductivepaintbymixinggraphitecarbonpowerwithan insulatorlikeliquidtapeorpaint.Ifyoutrytomakeyourownconductivepaint,youshouldexpectsome trialanderrorbeforeyoufindagoodformulathatfitsyourproject’sneeds.
Sincecarbonisconductive,youcanevenmakesimplesensorswithacharcoalpenandpaper.Keep inmindyouneedalotofcharcoalonthepapertomakethiswork,andevenifitdoes,asensormadeof paperhaslimitedapplicationssinceitcaneasilybreak.