Opa: Up and Running
by Henri Binsztok, Adam Koprowski, and Ida Swarczewskaja Copyright © 2013 MLstate. All rights reserved.
Printed in the United States of America.
Published by O’Reilly Media, Inc., 1005 Gravenstein Highway North, Sebastopol, CA 95472.
O’Reilly books may be purchased for educational, business, or sales promotional use. Online editions are also available for most titles (http://my.safaribooksonline.com). For more information, contact our corporate/ institutional sales department: 800-998-9938 or [email protected].
Editors: Simon St. Laurent and Meghan Blanchette Production Editor: Rachel Steely
Copyeditor: Audrey Doyle Proofreader: Rachel Steely
Cover Designer: Karen Montgomery Interior Designer: David Futato Illustrator: Rebecca Demarest
February 2013: First Edition
Revision History for the First Edition: 2013-02-20: First release
See http://oreilly.com/catalog/errata.csp?isbn=9781449328856 for release details.
Nutshell Handbook, the Nutshell Handbook logo, and the O’Reilly logo are registered trademarks of O’Reilly Media, Inc. Opa: Up and Running, the image of an opah fish, and related trade dress are trademarks of O’Reilly Media, Inc.
Many of the designations used by manufacturers and sellers to distinguish their products are claimed as trademarks. Where those designations appear in this book, and O’Reilly Media, Inc., was aware of a trade‐ mark claim, the designations have been printed in caps or initial caps.
While every precaution has been taken in the preparation of this book, the publisher and authors assume no responsibility for errors or omissions, or for damages resulting from the use of the information contained herein.
Table of Contents
Preface. . . vii
Part I. Coding a Mini Wikipedia
1. First Steps: Getting to Know Opa. . . 3
Installing Opa 3
Installing Node.js 3
Auto-Installing MongoDB 4
Our First Program 4
Writing and Running the Code 4
What localhost:8080 Means 5
What the Code Means 6
What Happens When We Run Your Application 7
Details About the Opa Runtime 8
Toward Real Programs 9
Battle Plan 10
Summary 11
2. Opa Fundamentals. . . 13
Primitive Values 13
Dynamic Content 15
Records 17
Introduction to Types, and More About Records 18
A Brief Introduction to Variants 20
Functions: Building Blocks 21
Functional Programming 22
Functional + Typed 25
Activating a User Account Without an Activation Email 101
Account Activation: URL Data Handling 102
Keeping Track of Logged-In User: Handling User Associated Data 104
The User’s Top-Bar Menu 108
Exercise 110
Summary 111
9. Building Reactive UIs: New Messages with a Real-Time Preview. . . 113
Parsing 113
Parsing Expressions 115
Modeling Messages 117
Rendering Messages 118
Reactive UI: Live Preview 120
Summary 127
10. Data Storage and Querying: Storing and Fetching Relevant Messages. . . 129
Collections in Opa: Lists, Sets, and Maps 129
Declaring Data 130
Inserting/Updating Data 132
Reading (and Querying) Data 133
Projections 136
Data Manipulations in Birdy 136
Database Declaration 137
Storing New Messages 138
Fetching Relevant Messages 138
User and Topic Pages 142
Following Users and Topics 146
Following Users 146
Following Topics 147
Follow Button 148
Exercise 151
Preface
Modern web applications represent the new way to write software. Facebook, Twitter, and Wikipedia are some well-known examples of such applications. They run on servers, and users can access them with a browser via either desktop or mobile devices. We refer to these as “modern” applications because they combine a rich user interface with real-time interaction and the capability to connect with online services, among other capabilities.
Opa is a programming framework for JavaScript that enables you to easily write modern web applications that have all the aforementioned cool features. This book is a gentle introduction to Opa.
What Is Opa?
Traditionally, many different technologies and languages are involved when writing web applications. Not so with Opa! Opa is the only technology you need to know to write the code that runs on the client (in the browser) and the code that runs on the server, including database queries.
Opa natively supports the web platform, which is a set of technologies that includes HTML5 and CSS, and it automates many aspects of modern web application program‐ ming: Ajax/Comet client/server communication, event-driven and nonblocking code transformations, etc.
One of the main distinctive features of Opa is strong static typing, with type inference. This means that every application you write is checked by a program called a typechecker that automatically tracks inconsistencies in the application. Typing enables Opa pro‐ grammers to debug applications quickly, and increases application safety and security.
As a final step, Opa generates standard code: JavaScript for the client side, Node.js, and MongoDB for the server side.
The philosophy of Opa is to support multiple platforms. It is possible to extend Opa to support different backends.
How Do I Work with Opa?
Working with Opa is as easy as 1, 2, 3:
1. Write your application code in a text editor.
2. Generate your application by invoking Opa.
3. Run and/or deploy your application online.
In “Installing Opa” (page 3), you will learn how to install Opa and create your first application. Then you will develop two real applications with Opa: a mini-Wikipedia and a mini-Twitter.
The applications you develop with Opa are standard JavaScript projects that run both in the browser (where JavaScript is by far the most prevalent) and on the server. On the server side (also called the backend), the applications rely on two popular technologies for the runtime:
• Node.js, which allows you to execute JavaScript code on the server
• MongoDB, which is a NoSQL database server
Both technologies were chosen for their ability to scale, that is, easily add servers to handle more clients when your application becomes hugely popular.
Conventions Used in This Book
The following typographical conventions are used in this book:
Italic
Indicates new terms, URLs, email addresses, filenames, and file extensions
Constant width
Used for program listings, as well as within paragraphs to refer to program elements such as variable or function names, databases, data types, environment variables, statements, and keywords
Constant width bold
Shows commands or other text that should be typed literally by the user
Constant width italic
This icon signifies a tip, suggestion, or general note.
This icon indicates a warning or caution.
Using Code Examples
This book is here to help you get your job done. In general, if this book includes code examples, you may use the code in this book in your programs and documentation. You do not need to contact us for permission unless you’re reproducing a significant portion of the code. For example, writing a program that uses several chunks of code from this book does not require permission. Selling or distributing a CD-ROM of examples from O’Reilly books does require permission. Answering a question by citing this book and quoting example code does not require permission. Incorporating a significant amount of example code from this book into your product’s documentation does require permission.
We appreciate, but do not require, attribution. An attribution usually includes the title, author, publisher, and ISBN. For example: “Opa: Up and Running by Henri Binsztok, Adam Koprowski, and Ida Swarczewskaja (O’Reilly). Copyright 2013 MLstate, 978-1-449-32885-6.”
If you feel your use of code examples falls outside fair use or the permission given here, feel free to contact us at [email protected].
Safari® Books Online
Safari Books Online is an on-demand digital library that delivers ex‐ pert content in both book and video form from the world’s leading authors in technology and business.
Technology professionals, software developers, web designers, and business and crea‐ tive professionals use Safari Books Online as their primary resource for research, prob‐ lem solving, learning, and certification training.
Safari Books Online offers a range of product mixes and pricing programs for organi‐ zations, government agencies, and individuals. Subscribers have access to thousands of books, training videos, and prepublication manuscripts in one fully searchable database from publishers like O’Reilly Media, Prentice Hall Professional, Addison-Wesley Pro‐ fessional, Microsoft Press, Sams, Que, Peachpit Press, Focal Press, Cisco Press, John Wiley & Sons, Syngress, Morgan Kaufmann, IBM Redbooks, Packt, Adobe Press, FT
Press, Apress, Manning, New Riders, McGraw-Hill, Jones & Bartlett, Course Technol‐ ogy, and dozens more. For more information about Safari Books Online, please visit us online.
How to Contact Us
Please address comments and questions concerning this book to the publisher:
O’Reilly Media, Inc.
1005 Gravenstein Highway North Sebastopol, CA 95472
800-998-9938 (in the United States or Canada) 707-829-0515 (international or local)
707-829-0104 (fax)
We have a web page for this book, where we list errata, examples, and any additional information. You can access this page at http://oreil.ly/Opa_1E.
To comment or ask technical questions about this book, send email to bookques [email protected].
For more information about our books, courses, conferences, and news, see our website at http://www.oreilly.com.
Find us on Facebook: http://facebook.com/oreilly
Follow us on Twitter: http://twitter.com/oreillymedia
Watch us on YouTube: http://www.youtube.com/oreillymedia
Acknowledgments
PART I
Coding a Mini Wikipedia
This book is organized into two parts. In this first part, we start from the beginning and progress to coding a wiki application that could later grow to match the features and scalability of Wikipedia.
CHAPTER 1
First Steps: Getting to Know Opa
In this chapter, you will get your first glimpse of Opa. You will learn how to install it, write an Opa program, and become familiar with the crucial steps in the development cycle.
Installing Opa
To install Opa, get the package for your architecture from Opa’s website. At the time of this writing, installers are available for all major platforms: Mac OS X, Windows, Linux (generic, Ubuntu, and Fedora), and FreeBSD. These installers work with 64-bit architectures and, on some platforms, with 32-bit architectures.
On Mac OS X, you need to have Apple’s Xcode command-line tools installed as well.
As an option, you can compile Opa from source, but we strongly recommend using packages to begin with.
Once you have downloaded Opa, you can that check it’s correctly installed by opening a terminal and running the following:
Tokyo:~ henri$ opa --version
Opa compiler (c) MLstate -- version 1.0.7 -- build 4040
This gives you the Opa version and build number. Opa then checks that its runtime dependencies are also installed in your system and should guide you to install them if necessary. You are all set!
Installing Node.js
Opa uses Node.js to execute JavaScript code on the server. To install Node.js, get the package for your platform from the Node.js website. Then type the following command in your terminal:
Tokyo:~ henri$ npm install -g ursa formidable
The -g stands for global and means that the node modules will be installed wherever the Node.js program could easily find them.
Auto-Installing MongoDB
MongoDB is automatically installed and launched while you are running the Opa application on the server.
You can find up-to-date installation instructions online at https:// github.com/MLstate/opalang/wiki/Getting-started.
Our First Program
In this section, you will write and then run your first program. You’ll then learn what the code actually means, how to build the application, and what happens behind the scenes.
Writing and Running the Code
You will write your Opa application code in a text editor. Any basic editor works, but we recommend using one of the editors for which Opa-specific plug-ins exist, including:
• Sublime Text2
• Emacs
• Vim
• Eclipse
Please check the online Opa documentation for up-to-date information on how to set up your preferred text editor.
Now open your editor and create a file that is named hello.opa and that contains the following content:
Server.start(Server.http, { title: "Hello, world",
page: function() { <h1>Hello, world</h1> } }
)
Tokyo:~ henri$ opa hello.opa --Http serving on http://localhost:8080
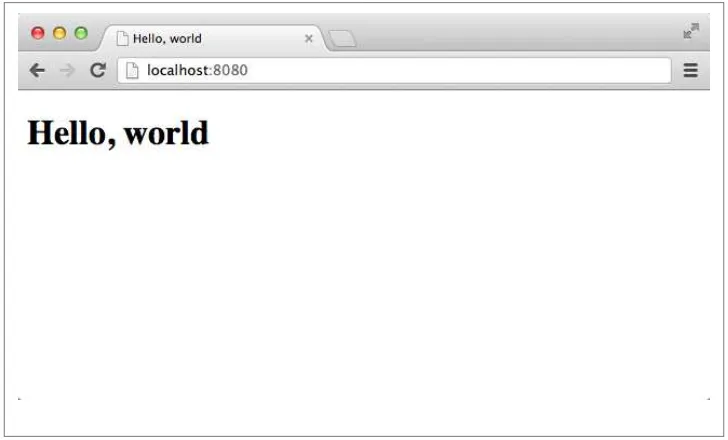
We will come back to this code later to discuss what actually happens here. For now, just point your browser to http://localhost:8080 and you should see something similar to Figure 1-1.
Figure 1-1. Our first Opa program in action
What localhost:8080 Means
Usually, you open addresses in your browser that look like this: facebook.com. This so-called URL (Uniform Resource Locator) allows to locate Internet resources, similar to how you use street addresses you to locate buildings.
Referring to the URL used in the preceding code, localhost is the standard way to address the local machine, that is, this computer. The corresponding IP address, usually 127.0.0.1 or the name of your computer, will work as well.
The 8080 after the colon in the address is the port number. Domain names are used to locate sites; ports are used to distinguish different services within sites. If we were to compare URLs to street addresses, domain names would correspond to the country, city, and street, whereas the port would correspond to the house/apartment number.
The default port for web services is 80. However, running applications on port numbers smaller than 1024 often requires administrator rights; therefore, Opa chooses 8080 as
the default port for its applications. You can change this with the --port X switch of the executable; for example:
Tokyo:~ henri$ ./hello.js --port 2012
Lastly, a URL may also contain a path, as in http://example.com/this/andthat.html, in which the path is /this/andthat.html. The domain name and the path are handled sep‐ arately. The domain name is used to locate the box running the service. To do this, browsers make requests on DNS servers that translate the name into the IP address of the service. When scaling, the DNS is the first technology to distribute the requests of many clients to different boxes. The path is used to locate a resource on the service. Originally, the path was used to locate a file on the service—perhaps a static resource such as an image or a script. But with modern frameworks such as Opa, most resources are virtual.
What the Code Means
Let’s decipher the meaning of the four lines of code we wrote:
Server.start(Server.http, { title: "Hello, world",
page: function() { <h1>Hello, world</h1> } }
)
Server.start is an entry point for Opa programs, much like main in Java or C, which launches the application web service. It takes two arguments: the server configuration and the definition of how the server should handle incoming requests. This second parameter can exist in many different forms, and you will learn more about them in Chapter 3.
Here we are using a variant that creates a simple application with a single page (which will be shown regardless of the URL). This variant is defined by a record with two fields:
title and page, denoting the page title and content, respectively. If you are familiar with JavaScript, you will notice that Opa borrows the same { field1: val1, ... fieldN: valN } syntax to denote records. You will learn more about records in “Re‐ cords” (page 17).
The title field is a string, whereas page is a function that takes no arguments and returns the (X)HTML content of the page.
HTML is a first-class citizen in Opa: it is a predefined data type with special support that allows it to be entered using its usual syntax. Opa supports the shiny and new HTML5 version of HTML. You will learn more about HTML5 features in Chapter 5.
What Happens When We Run Your Application
When you run your application by invoking opa hello.opa --, you actually perform two different operations:
1. You transform (or compile) the source code you have written into a runnable application.
2. You launch the runtime environment and execute your application.
Let’s take a closer look at step 1. Opa is a JavaScript framework consisting of two pieces: a library and a compiler. The library is an approximate version of the prebuilt code you use in your applications, while the compiler is a strange and complex beast that performs several operations:
1. The compiler reads the Opa code you have written (that step is called parsing) and checks that the code is syntactically correct. For instance, if you forget a closing parenthesis in your code, you will get a parsing error.
2. If parsing succeeds, the compiler verifies more deeply that your application does not do silly things, by checking the consistency of the whole application. This major step is called typechecking and you will learn about it in detail in Chapter 2. 3. If typing succeeds, the compiler identifies which parts of the application run on the
server, on the database, and on the client. This step is called slicing and it is one of the unique features that Opa provides.
4. The compiler computes the data schema and generates all database queries.
5. It then translates all client-side code from Opa to JavaScript.
6. Finally, it generates the Opa server-side code to JavaScript code (with the Node.js backend) and embeds the client resources (including the generated client code) so that the server can send them to any client that connects.
Of course, you don’t need to know exactly how the Opa compiler works to develop applications. Several development environments (or IDEs) have integrated project build capability, so the compilation process is just a keystroke away.
Throughout this book, we will show you how to work with Opa using the command line, since it works repeatably on all platforms. IDEs are just graphical interfaces for running the same commands for you.
If there are any problems, the compiler will inform you of them with appropriate error or warning messages. Otherwise, an executable JavaScript file will be generated. In this case, it will be called hello.js.
Details About the Opa Runtime
The Opa compiler outputs a standard JavaScript application that uses two main technologies:
1. The Node.js framework for the runtime
2. The MongoDB database
Opa-generated apps check that their own runtime environment is correct—that is, that your system is properly installed—so both should be set up by now. If not, check “In‐ stalling Opa” (page 3).
You can compile a program without running it by invoking:
Tokyo:~ henri$ opa file.opa
without the double minus sign.
If you look at what happened in your directory, you will see that Opa creates one file and one directory:
Tokyo:~ henri$ ls
_build program.js program.opa
The program.js file is the one you can run by invoking:
Tokyo:~ henri$ ./program.js
Http serving on http://localhost:8080
The _build directory contains the resources of the generated application. The applica‐ tion that results is a standard Node.js/MongoDB application that you can deploy in the cloud.
If some Node.js packages are missing, Opa will guide you through installing them when running your application:
Tokyo:~ henri$ opa file.opa
The cloud platform that most startups use, Amazon EC2, plays nicely with Opa. Go to https://github.com/MLstate/opalang/wiki/Amazon-Image-for-Opa for more information. Another interesting option is to use an online platform (a concept also called Platform-as-a-Service, or PaaS) on which you can deploy your application code directly. Plat‐ forms such as dotCloud and Heroku support Opa. Please consult https://github.com/MLstate/opalang/wiki/Opa-in-the-Cloud for up-to-date instructions for each platform.
Toward Real Programs
In our short “Hello, World” application, all the code went into a single hello.opa file. For real programs, you’ll want to split the code among different files.
For instance, the popular MVC (Model-View-Controller) approach is to separate three things in an application: the model, which represents the data and its treatment; the view, which is the user interface of the data; and the controller, which synchronizes the model and the view.
It’s very easy to start a new application with Opa thanks to a scaffolding mechanism that automatically creates an empty MVC application for you. Just type:
Tokyo:~ henri$ opa create myapp
to create a myapp application.
You can compile it and run it using the following command:
Tokyo:~ henri$ cd myapp; make run
To see the source of the application, take a look at the generated files and open main.opa, data.opa, and page.opa with your favorite editor:
Tokyo:~ henri$ ls -R src
controller model view
src/controller: main.opa
src/model: data.opa
src/view: page.opa
We will discuss the code in Chapter 2, but for now it’s important to know the following:
• The controller main.opa is the main file of the application, much like hello.opa was. • The model data.opa is almost empty and contains a sample database declaration.
• The view page.opa is mostly static HTML content.
Battle Plan
Now that you have written your first Opa application, you are ready to proceed with the main goal of this first part of the book: creating a simple wiki app. Our high-level specification for the app is as follows:
• The app should support the popular Markdown markup format.
• Different topics should correspond to different URLs.
• Editing should be inline, with an easy way to switch between viewing and editing modes.
• It will be rather simple: no preview (in editing mode), no index, and no user and history management (i.e., everyone can edit pages, and the app will not store pre‐ vious versions of pages, nor information about who made the modifications).
The application is not overly complicated, but it still has a number of interesting features that will give you a great opportunity to learn how to tackle different issues in Opa. In the following chapters, you will learn how to:
• Declare web servers, handle requests to different URLs, and work with resources (Chapter 3)
• Store and manipulate data in a database (Chapter 4)
• Create user interfaces (UIs) based on the HTML and CSS web standards (Chapter 5)
Summary
In this chapter, you got a feel for what Opa is. You learned how to:
• Install Opa
• Write and run a simple app
• Set up your next goal
CHAPTER 2
Opa Fundamentals
In Chapter 1, you wrote your first Opa program. That will always return the same value,
Hello, world, as a main title. The value itself is: <h1>Hello, world</h1>
This value is an HTML fragment, one of the primitive values of Opa. The second myapp
application you saw in Chapter 1 also contains HTML values in src/view/page.opa:
content =
<div class="hero-unit"> Page content goes here... </div>
Here, the HTML value is named content, so it can be reused later.
Opa also offers a universal closing tag, </>, that you can use to close any tag. In the previous case, you could have written:
content =
<div class="hero-unit"> Page content goes here... </>
Let’s discover the Opa values right now.
Primitive Values
As with most programming languages, Opa supports strings, integers, and floats, but Opa also supports native web values such as HTML and CSS elements. As you can see, comments in Opa consist of text preceded by double slashes, //:
"hi"// a string 12 // an integer 3.14159 // a float
<p>Paragraph</p> // an HTML fragment #id // a DOM identifier
css {color: black} // a CSS property
HTML values are fragments of HTML5. Each fragment has an opening tag such as <p>
and a closing tag such as </p>. The <p> tag is the tag that defines a paragraph. We will provide a more complete list of tags shortly, but for now here are the main ones (see Table 2-1):
Table 2-1. Most common tags in HTML5
Tag Definition p Paragraph
h1 Level 1 title (header)
h2..6 Level 2 to 6 title (header)
div Generic container
span Inline generic container
ul List of unnumbered items
li List item
a Link
video Video item
You can embed HTML fragments, as shown here:
<div>
Content <span>button</span> <ul>
<li>First item</li> <li>Second item</li> </ul>
</div>
Be careful to properly close tags when embedding them: the first one opened should be the last one closed. This is true for all except a handful of tags that don’t necessarily need to be closed, such as <meta>, <img>, <input>, and some others.
Tags can have attributes. For instance, the a tag has the href attribute, which specifies the HTML reference it points to. So to insert a link to http://google.com, you can write:
HTML fragments, when grouped together, create a document. We will discuss all the relevant properties of a document in Chapter 5. For now, it’s sufficient to know that tags can have a unique ID using the id attribute.
For instance, <div id="iamunique">...</div> creates an iamunique ID that can be accessed by the DOM identifier #iamunique.
All Opa values can be named, to be reused later in your program. Here is an example:
customer = "John Doe" price = 12.99
tax = price * 0.16 total = price + tax
Note that you can play with these basic values by inserting them into the former Hello, World application. For instance, try:
Here are a few things to note regarding the preceding code:
• Traditionally, each line of computation ends with a semicolon. There is ongoing debate over whether this is a good thing or not. In Opa, you can omit the semicolons if you want to.
• The end of the computation generates an HTML fragment and uses a mechanism known as string expansion to insert values (known as customer and total) inside the text. As you can see, you use braces for string expansion in Opa.
Dynamic Content
Thus far, you have learned how to build static content. Each time you run your appli‐ cation by pointing your browser to http://localhost:8080, you get the same content.
The Web was born this way, although originally the mechanism was different, as de‐ velopers used to write static HTML content within files and used a static server program, such as Apache, to serve the files to users’ browsers. The pages would use the HTML
<a> tag to create links between pages or between different sites.
But we are here to build applications. An application consists primarily of web values that can do the following:
• React to the users’ actions.
• Store data (e.g., user accounts) permanently in a database.
The most basic user action is the mouse click. Modern applications do not use the link tag to react to users’ mouse clicks. So we will use an HTML attribute, onclick, which is present in many tags.
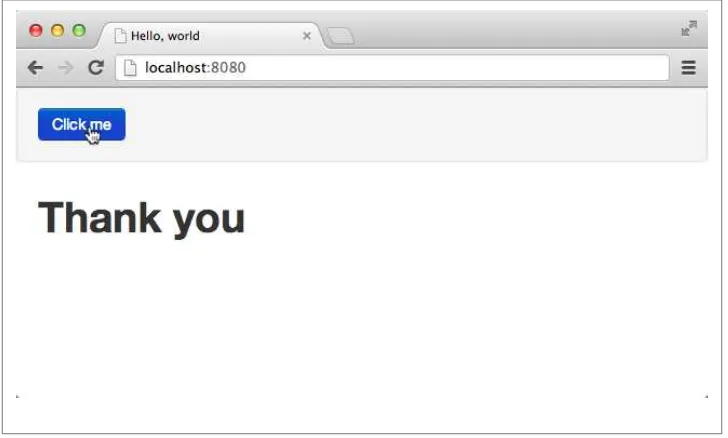
Let’s create a small application that displays “Thank you” once the user clicks on “Click me”:
Server.start(Server.http, { title: "Hello, world", page: function() {
<div onclick={function(_) { #thankyou = "Thank you" }}>Click me</div> <div id="thankyou"/>
} } )
Run the application now! You should see something similar to Figure 2-1. You can restart your application by refreshing the page in your browser.
The most important new line in this program is:
<div onclick={function(_) { #thankyou = "Thank you" }}>Click me</div>
which combines two things:
• The HTML value <div onclick={...}>Click me</div>
• The resultant action, function(_) { #thankyou = "Thank you"}
We won’t explain every bit of code in that line right now (you will know everything by the end of this chapter), but it is important to note the following:
• You bind Opa code to the onclick event with the opening braces.
• You recognize that #thankyou is a DOM identifier value, and you can assign content to the DOM identifier like you do for other values.
To continue our quest, you need to understand two powerful programming mechanisms:
• Records, which allow you to structure data
• Functions, which help you to organize your application code
It turns out that you are already using both! The record lies behind the following:
{ title: ..., page: ... }
The function was already used twice:
• For the page that displays by default
• Again, when you click on “Click me”
Records
One of the main features in terms of Opa structuring values is records. As you will see throughout this book, Opa records are extremely powerful and you will use them a lot. Their nickname is “Power Rows.”
Records are a set of values, each defined by its field name. Values for each field can be of any type, including records or even more complex types:
// this is a record with 3 fields
{ first_name: "John", last_name: "Doe", age: 18 }
// this is a record with 2 fields, one of them being a record itself { product: "book", price: { base: 29.99, tax: 4.80 } }
Naturally, it’s useful to name values so that you can construct more complex ones step by step:
level1_pricing = { base: 29.99, tax: 4.80 } book = { product: "book", price: level1_pricing }
As we said earlier, all programs, including the very first one you wrote, use records:
{ title: "Hello, world",
page: function() { <h1>Hello, world</h1> } }
The code includes a record that has two fields: title, which is a string, and page, which is another value that we will discuss next.
Records in Opa can be extended, that is, you can add new fields later in your program:
level1_pricing = { level1_pricing with total: 29.99 + 4.80}
Introduction to Types, and More About Records
Now that you know about basic values and records, it’s time to learn more about types. You should be familiar with types. You have seen strings and integers, and as a developer, you know they represent different types of values. So does Opa!
"Hey" // this has type string 10 // this has type int
You can enforce types by writing them if you want, but in most cases, Opa infers them for you and you can safely omit them:
string text = "Hey"
Opa uses the type information to help you. For instance, Opa won’t let you mix different types as doing so is either a bug or a bad coding practice. Try writing:
1 + "Hello"
and see how Opa reacts.
Often, the mistake is not straightforward and involves two different parts of the code. Opa handles this particularly well. If you write:
a = 1; b = "Hello"; a + b
Opa will tell you what the error is and why it occurred. Try it!
You will get the following error message:
Error: File "typeerror.opa", line 3, characters 1-5, (3:1-3:5 | 21-25) Type Conflict
(2:5-2:11) string
The types of the first argument and the second argument of function + of stdlib.core should be the same
The preceding error message says that:
• 1 is of type int (this was inferred).
• “Hello” is of type string (this was inferred as well). • The type error exists in expression a + b.
• Both arguments of function + should have the same type.
To make it easier to read type error messages, you can name types:
type mytype = string mytype text = "Hey"
This becomes useful with records. Each record (as with all other values in Opa) has its corresponding type, even though you will not have to spell it out. For instance:
{ title: "The Firm",
author: { first_name: "John", last_name: "Grisham" } }
has type:
type book = { string title,
{string first_name, string last_name} author }
which you should read as: “Type book is a record with two fields: title and author. Field title has type string, whereas author is a field whose type is a record with two
string fields: first_name and last_name.”
After such type declaration, you could as well write:
book some_book = { title: "The Firm",
author: {first_name: "John", last_name: "Grisham"} }
In the preceding code, you gave a name (some_book) and an explicit type (book) to the value shown previously.
Sometimes the expressions describing record fields can get long and complex:
author = { first_name: long_expression_to_compute_first_name, last_name: long_expression_to_compute_last_name}
In this case, to improve readability we will often compute and bind them first:
author =
first_name = long_expression_to_compute_first_name last_name = long_expression_to_compute_last_name {first_name: first_name, last_name: last_name}
For this frequent case where fields are initialized from variables with the same name, Opa provides an abbreviation and allows you to replace the last line in the preceding code with:
{~first_name, ~last_name}
Here {~field, ...} stands for {field: field, ...}. If all fields are constructed in this way, you can even put the tilde in front of the record and write:
~{first_name, last_name}
You will often construct one record from another, as in:
grisham = {first_name: "John", last_name: "Grisham"}
steinbeck = {first_name: grisham.first_name, last_name: "Steinbeck"}
Opa facilitates this frequent-use case with the following construction:
{record with field1: value1, ... fieldN: valueN}
The value of this expression is the same as that of record except for fields field1 to
fieldN, which are given values value1 to valueN. For instance, the steinbeck value in the previous code can be replaced with:
steinbeck = {grisham with last_name: "Steinbeck"}
Records are ever-present in Opa. Their power comes from the fact that all record manipulations are typechecked:
• You cannot try to access a field that does not exist.
• You cannot misspell a field’s name (or rather, you can, but the compiler will point out your mistake).
• You cannot try to access a field in a type-incompatible way (i.e., as a string when it is an int).
This power does not cost you anything, as you can just use records as you would in a dynamic language without ever explicitly declaring their types.
A Brief Introduction to Variants
One last aspect of the mighty record is variants.
Variants are the way to properly represent multiple-choice lists. Imagine that you want to define a currency type for an online store that handles payments in US dollars (USD), Canadian dollars (CAN), and British pounds (GBP). You could use the string type to define that value. But what if you write the following at some point?:
The typo will remain unnoticed, the compiler won’t complain, and the related bugs will have to be hunted down during the app testing. As a result, depending on the code structure, the item might not be billed.
Instead, you can write:
type currency = { USD } or { CAN } or { GBP } // here price is a previously defined book value price = { amount: 29.99, currency: { USD }}
The or keyword states that the type currency will be one of the three options: USD, CAN, or GBP. Opa provides very useful typechecking for variants. For instance, it checks that values are only allowed variants or that you always take all variants into account. You should use them instead of strings as much as possible.
We will discuss variants in more detail in Chapter 7.
Functions: Building Blocks
Before we move on to the main example of this part of the book, let’s take a look at some building blocks of the language that you will need to understand.
Structuring programs is very important. You never want to write your program as a single piece of code; rather, you want to break it down into blocks. The two main block levels are:
• The modules (for bigger applications, which we will take a look at later)
• The functions (inside modules and for any application)
Using functions, you make your program more readable and your code reusable.
Functions are written and called very easily:
// the following function computes the tax of a given price function compute_tax(price) {
price * 0.16; }
// we now can call (or invoke) the compute_tax function as much as we want tax1 = compute_tax(4.99);
tax2 = compute_tax(29.99);
Here we have the function keyword, then the name of the function, compute_tax, and a list of its arguments in between parentheses. In this case, there’s only one argument:
price, followed by the function body inside curly braces. Opa does not have an explicit
return keyword and instead adopts the convention that the last expression in the func‐ tion is its return value. Here, it means the function returns the value of price times 0.16.
The open parenthesis in function invocation must immediately follow the function’s name, with no spaces in between.
The use of functions in this example means that when the tax level changes, you only have to modify one line of your program, instead of chasing down all the places where the tax is computed in your application. For this reason, you should always use functions whenever you can, and never copy and paste code. Each time you are tempted to copy and paste your code, you should use a function instead.
You may have noticed that we introduced a semicolon at the end of line. This is because we are getting into real programs, which involve several computations. Therefore, we use a semicolon to indicate that a given computation is finished, and that we can proceed to the next one. In many cases, semicolons can be omitted and there is still no consensus on whether it’s a good or a bad design decision. You have to find your own coding style!
Functional Programming
The coding style that Opa promotes is called the functional programming style. Among other things, this means that functions play a central role and are very powerful. The functional programming style is often described as elegant, and we will show you why. But for now, it helps to know that the main difference between functional programming and classic programming is that in the former, values are not mutable by default.
For instance, in Opa, the main definition of values such as the following is the binding of a value:
name = expression
However, this does not create a variable in the classic programming style. The previous expression just means we give name to the expression and can subsequently use name
to refer to the value denoted by expression.
The main reason for this is that immutable code is easier to reason about. In the absence of variables, the result of a function depends only on its arguments. Contrast this with a function whose behavior depends on a bunch of global variables. This is one of the main reasons why in the excellent book Effective Java (Addison-Wesley), where muta‐ bility is the norm, the author advises that you use immutability whenever possible, explaining:
Our argument for immutability also concerns scaling web applications and services. The architecture prevalent today for scaling up is to use stateless servers that can be multiplied without limits. Should a server fail, a new one pops in, and traffic is directed to random servers. But this implies that no application has unsaved data or state. The problem here is that mutable variables often contain such information, and this infor‐ mation will not be synchronized with these other servers unless the synchronization has been done manually (which is a painful process). Therefore, not using state (and variables) is a good programming practice, today more than ever.
Bindings Versus Variables
It is important to understand that value binding is different from variable creation. Variables, as you know them from other programming languages, are mutable. This means you can reassign different values to them, such as in this JavaScript snippet:
x = 10
f = function() { return x + 1 } x = 20
f()
Here, the value returned is 21, since in JavaScript the function f points to the modified value of the variable x. However, the following Opa snippet returns 11!
x = 10
f = function() { x + 1 } x = 20
f()
This is because Opa values are immutable and they cannot change subsequently. There‐ fore, in the preceding Opa snippet, x is being redefined as a new value, but the function
f still points to the previous value. But there’s more to it.
Bindings and functions are deeply linked. Let’s play with them a bit by writing a function that computes the Euclidean distance between two points:
function distance(x1, y1, x2, y2) { dx = x1 - x2
dy = y1 - y2
Math.sqrt_f(dx*dx + dy*dy) }
In the preceding code, the function distance first binds the value x1-x2 to dx, and similarly binds y1-y2 for dy, and then uses dx and dy in the final expression.
Math.sqrt_f is a function from the Math module (more about modules later) of the standard library for computing the square root of a given floating-point number.
In fact, the bindings inside functions can include local functions, so the previous could be rewritten as follows, introducing the intermediate sqr function:
function distance(x1, y1, x2, y2) { dx = x1 - x2
dy = y1 - y2
function sqr(x) { x*x } Math.sqrt_f(sqr(dx) + sqr(dy)) }
Finally, functions can be anonymous, in which case they do not have a name but they can be used inside any expression. The anonymous variant of the incr function in the preceding code would be:
function(x) { x + 1 }
This variant can be stored in a named value:
incr = function(x) { x + 1 }
Anonymous functions are particularly useful for passing arguments to other functions; for instance, to specify how the app should react to a user’s actions.
As you can see, functional programming allows much better control of programming scope. In pure JavaScript, you would write:
var foo;
if (x==10) { foo = 20; } else { foo = 30; }
This would introduce a variable, and then set its value, even if foo is unmodified in the rest of the program. In Opa, you simply write:
foo = if (x==10) { 20; } else { 30; }
The preceding code will have the guarantee that foo is not further modified.
Purity, or Not
Languages that prohibit destructive modifications (updates) of their data structures are called purely functional. One example of such a language is Haskell.
Opa takes a somewhat more liberal approach, where immutability is the default. Defaults are very important, though, as the article Why the Defaults Matter convincingly explains for the major part of the language.
Functional + Typed
At the beginning of this chapter, we played with types. Opa is indeed a statically typed language. This means that every value has a type assigned to it, and this assignment takes place at compilation time. Being typed is orthogonal to being a functional lan‐ guage. This is important, as the compiler uses this information to detect and report all kinds of flaws in the program.
So why were there no types in the code snippets shown in the preceding section? In Opa, explicitly writing types is often not required as the types are inferred in the absence of explicit type annotations. This means you could write the distance function with explicit types as follows (the additions are in bold):
function float distance(float x1, float y1, float x2, float y2) { float dx = x1 - x2
float dy = y1 - y2
Math.sqrt_f(dx*dx + dy*dy) }
Arithmetic operators work both for int and for float types, so the only reason all values are given the float type is because of the Math.sqrt_f function (its int counter-part is called Math.sqrt_i).
The type inference that the compiler performs may not seem too impressive on this trivial example, but in later chapters, when we deal with more complex types, its benefits will become more pronounced. The type checker algorithm that performs type inference and verification is a very complex and sophisticated algorithm—especially the one in Opa, which required tremendous effort on the part of Opa developers to specify and implement.
Why Static Typing Matters
Many web application development frameworks today rely on dynamically typed programming languages.
One of the key benefits of Opa is that it provides static typing before generating standard JavaScript code. Since the Opa compiler is able to detect a huge class of programming errors, it reports them to the developer even before it runs and tests the application. Due to the very lax nature of JavaScript, such verifications are impossible to perform on pure JavaScript.
Time spent debugging is greatly diminished, and you can be very productive with Opa.
Opa programs are immune to many problems such as null pointer exceptions, buffer overflows, and code injections. This means the language, out of the box, offers high security guarantees thanks to its static typing discipline.
Summary
In this chapter, we learned the fundamental concepts of Opa, in particular:
• How to use records to structure data
• How to write Opa functions
• Why Opa is functional and why this is important
• What types str and why they are important
CHAPTER 3
Servers, Resources, and URLs
Applications contain resources (images, scripts, styles, etc.), and they need to navigate between different pages with different URLs. In this chapter, we will explore how to create a more generic application.
Web Resources
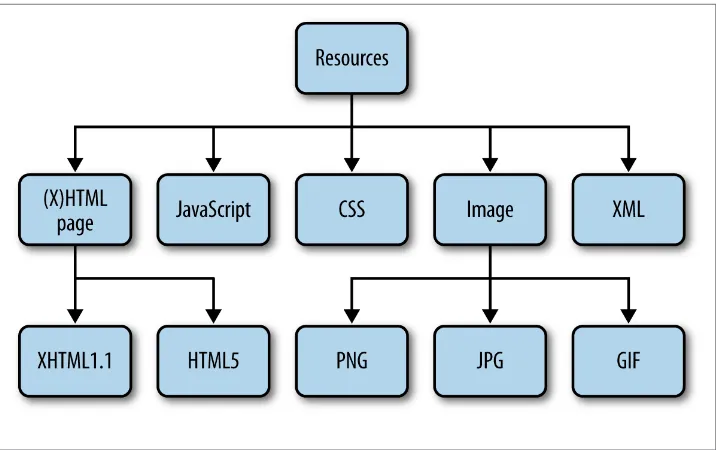
A resource is anything that can be sent from the server to the client. Figure 3-1 presents different types of web resources, including:
• HTML content
• JavaScript code
• Cascading Style Sheets (CSS)
• Images (in PNG, JPG, or GIF formats)
• XML files
Embedding (Static) Resources
Opa contains directives to embed resources. The simplest one is @static_resource: resource logo = @static_resource("img/logo.png")
The string given as the argument to this directive is a path to the resource, which can be relative to the directory from which the project will be compiled.
This directive acts as a function; that is, you can bind its result to a variable (here,
logo) and use it in your program. The type of this variable is resource, which is an object that can be sent from the server in response to the client’s request.
Figure 3-1. Different types of web resources
Sometimes you may have several resources you want to use: for example, a directory full of images. Instead of including each image one by one, you can use @static_ resource_directory:
resources = @static_resource_directory("resources")
This line of code will include all resources based on all files from a given directory (here,
resources) and its subdirectories.
What is the type of this variable? Such an embedded directory is represented as a map‐ ping from filenames (string) to resources (resource), and hence has the type
map(string, resource). We will talk more about maps in “Maps (Dictionaries)” (page 38).
Serving Resources
Embedding resources is the first step. The next step is to instruct the web server to serve them for certain requests. Remember the Server.start function and how you used it in your first Opa app in “Writing and Running the Code” (page 4)? The second argument defines how different requests should be handled. To serve resources from the resour‐ ces directory you first need to embed them:
resources = @static_resource_directory("resources")
Now you need to create a server for them:
Server.start(Server.http, {resources: resources})
Note that before you used a {title: ..., page: ...} variant for this second argument to create a single-page app, that is, to direct all client requests to page. This new variant,
{resources: ...}, creates a server that just responds to requests for resources. Imagine that the local resources directory has the following structure:
+- resources +- imgs
| +- opa-logo.png +- css
| +- style.css
In this case, running the preceding application and directing the browser to http:// localhost:8080/resources/css/style.css would give you the stylesheet. What if you tried some other URL? This would result in the infamous "Error 404: Not Found" error. OK, so what if you wanted to extend your “Hello web” application slightly and use some resources in it? You could use two servers:
// serve resources
Server.start(Server.http, {resources: @static_resource_directory("resources")})
// serve the main page
function page() {
<img src="resources/img/logo.png" alt="Opa"/> <hr/>
<h1>This is a demo of a very simple Opa app.</h1> }
Server.start(Server.http, { title: "Hello web", page: page })
Note how this code combined the directive to embed the resources and the server dec‐ laration in one; this is entirely permissible.
What happens if you declare more than one server? For every request, the servers will be tried one by one. If a request can be handled by the resources server, it handles it. Otherwise, the request will be handed over to the second server, which in this case can handle each and every request.
Be aware that the order of the servers does matter. If you swapped the declarations, all URLs would be handled by your “one page server” and hence no resources would ever be served.
Another way to achieve the same effect is to simply use a list of servers in the second argument of Server.start. In this case, the preceding program could be written more concisely as:
function page() {
<img src="resources/img/logo.png" alt="Opa"/> <hr/>
<h1>This is a demo of a very simple Opa app.</h1> }
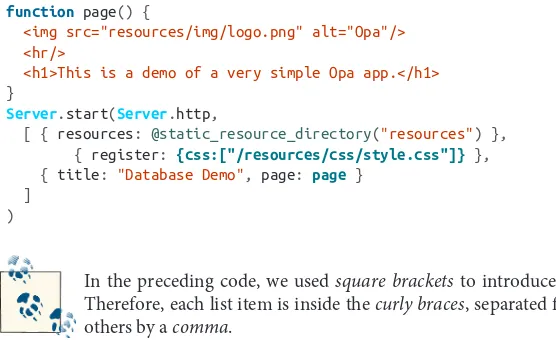
Server.start(Server.http,
[ { resources: @static_resource_directory("resources") }, { register: {css:["/resources/css/style.css"]} }, { title: "Database Demo", page: page }
] )
In the preceding code, we used square brackets to introduce the list. Therefore, each list item is inside the curly braces, separated from the others by a comma.
Now compile your application:
Demo:~ ida$ opa simple_demo.opa
And run it:
Demo:~ ida$ ./simple_demo.js
Http serving on http://Demo.local:8080
When you open it in the browser, you will see input similar to that shown in Figure 3-2, which has a little CSS file included.
Figure 3-2. Our first program with resources
Constructing (Dynamic) Resources
In addition to embedding static, ready-to-use resources, it is also possible to create them on the fly. You will rarely do this for such things as images and stylesheets, but you will often do this to create HTML pages dynamically; for example, pages based on the state of the database or on user input.
Opa offers many functions for this; the ones we will typically use are:
xhtml Resource.page(string title, xhtml body)
xhtml Resource.styled_page(string title, list(string) stylesheets, xhtml body)
Resource.page takes two parameters, title and content, and constructs a page resource with this data. Resource.styled_page is similar, but it takes one extra argu‐ ment: a list of URLs of CSS stylesheets to be used to style the application. You will see an example of how to use it in the following section.
URL Dispatching
All the applications you have developed so far have consisted of just a single page, but in practice most bigger sites will have multiple pages. The standard way to handle this is with Uniform Resource Locators, more commonly known as URLs.
URLs and Their Syntax
URLs are used as addresses to locate Internet resources. The general syntax of a URL is as follows:
scheme://domain:port/path?query_string#fragment_id
For web pages, which in this book is the type of resource we are mainly interested in, the scheme will read http (for unsecured access) or https (for secure, encrypted access).
The port will usually be omitted, in which case the default will be used (80 for http and 443 for https).
Typically, domain is used to identify the site, path to locate the page within that site,
query_string to communicate additional parameters (e.g., user identification or pref‐ erences chosen during interaction with the site), and fragment_id for precise location within the page.
An example of an address utilizing all those elements is:
http://example.com/over/there/index.html?type=animal;name=ferret#nose
In this example, the scheme is http, the domain is example.com, the path is /over/there/ index.html, the query contains two key-value associations, type=animal and name=fer ret, and the fragment points to nose.
Please note that there also exists a notion of Uniform Resource Identifiers (URIs), which is more general than that of URLs, but for the purposes of this book both can be treated as synonymous.
With what you’ve learned so far, it is very easy to build sites consisting of multiple pages. You can do this via yet another variant of the argument accepted in the Server.start
function: {dispatch: dispatch_fun}, where dispatch_fun is a function that takes a structured URL as an argument and produces a resource to deliver to the user. This process is often referred to as URL dispatching.
You learned about resources in “Web Resources” (page 27) and about how to create them dynamically in “Constructing (Dynamic) Resources” (page 31). But what is a structured URL? It is a structural representation of a URL with all its components sep‐ arated. Since your application will work within a single domain, you are working with relative URLs here, or URLs relative to the domain of the application, without the scheme and domain parts.
Here is the definition of the type representing such URLs in Opa:
list((string, string)) query, option(string) fragment, bool is_directory, bool is_from_root }
The preceding code consists of the following:
• A path split into a list of directories separated by a slash (/) • A query consisting of a list of pairs of key-value associations • An optional fragment (we will discuss options in more detail later)
• is_from_root and is_directory, which denote, respectively, whether the string representation of the path starts or ends with a slash (/)
For example, consider the following address within a website:
/over/there/index.html?type=animal;name=ferret#nose
The structured representation of this address in Opa will be:
{ path: ["over", "there", "index.html"],
query: [("type", "animal"), ("name", "ferret")], fragment: some("nose"),
is_from_root: true, is_directory: false }
Due to HTTP, the fragment identifier is not transmitted from the client to the server via a normal web request.
To practice URL dispatching in Opa, let’s write a simple program that will construct a page consisting of the relative address requested by the user. If that address refers to a path starting with bold, the remaining part of the address will be printed in bold. If it starts with italic, it will be shown in italic.
Hopefully, the following short program should not be too difficult to understand now:
Summary
In this chapter you learned how to deal with URLs and resources in Opa. Specifically, you learned:
• What web resources are
• How to embed them in an Opa server
• How to serve resources to application users
• How to create dynamic HTML resources
• How to dispatch URLs, that is, serve different content for different URLs
CHAPTER 4
Data Storage
Opa manages all aspects of applications and services within a single language semantic. Storing and querying data is, not surprisingly, one of the core features of Opa.
In most frameworks, we use APIs and connectors to communicate between the language and a database. Both of these “speak different languages,” with some form of mapping in between them.
The Opa approach is slightly different, with the database operations being very tightly integrated into the language and the mapping being performed fully transparently by the compiler. The layer that performs transparent mapping of data is known as DbGen.
In this chapter you will learn about Opa’s approach to storing basic types. Then we will discuss how to handle a slightly more complex data type: maps.
CRUD (Create, Read, Update, and Delete)
To get started, let’s look at a very simple database declaration, containing only a single
int, a counter of sorts: database db { int /counter = 0; }
As you can see, Opa features a database block with a given name and a list of declara‐ tions of database values enclosed in curly braces.
Opa programs can handle multiple database connections, even through different database engines. At the time of this writing, support of MongoDB is much more advanced, but CouchDB is also supported and PostgreSQL support is in progress.
Every declaration consists of a type (here, int), a path (here, /counter), and optionally, a default value (here, 0).
The default value is used when you attempt to read a path’s value that does not exist. In cases where the path was never written or was removed, the default value is returned.
Omitting initialization values will cause Opa to use a default value, which is 0 for int, 0.0 for float, and "" for string values.
Locations in Opa’s database are called paths, as they bear a strong similarity to filesystem paths. Every value is available at a path consisting of the database name, followed by the path of the value, in our case /db/counter. You can read a given value by simply writing its path, as in:
counter_value = /db/counter
There is an alternative read operation, prefixed with a question mark: ?/db/counter. The difference occurs in read operations on paths that were never written into. The regular variant in this case will just supply the default, whereas an operator prefixed with a question mark returns optional value, with the value present only if it was explicitly written into the path. You will learn more about optional values in Opa in “Polymorphic Types” (page 75).
Similarly, you can write the value using path <- value notation:
/db/counter <- 42;
A few extra operators are also available for manipulating int paths:
/db/counter++; /db/counter += 10; /db/counter -= 3;
The last element in CRUD is Delete, which is also very easy with Opa. To delete the counter, you write:
Db.remove(@/db/counter)
Of course, this is just the beginning of the “database story” in Opa. You will learn more as we go along.
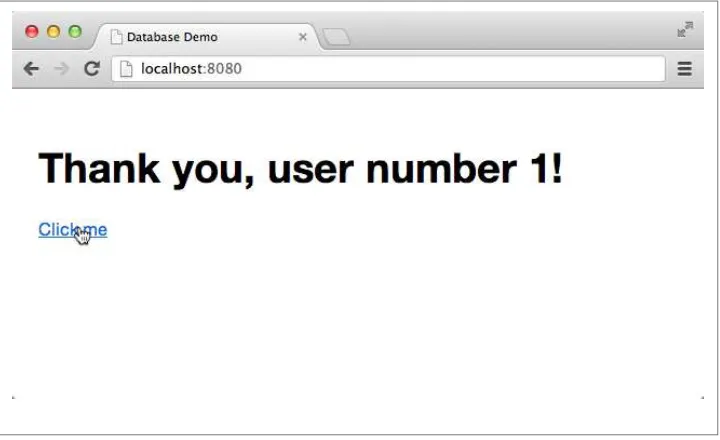
database int /counter = 0; function action(_) { /counter++;
#msg = <div>Thank you, user number {/counter}!</div> }
function page() {
<h1 id="msg">Hello</h1>
<a onclick={action}>Click me</a> }
Server.start(Server.http,
[ { resources: @static_resource_directory("resources") }, { register: {css:["/resources/css/style.css"]} }, { title: "Database Demo", page: page }
] )
Compile and run this application in your terminal:
Demo:~ ida$ opa opa_database_demo.opa
--You will get a result similar to the screenshot shown in Figure 4-1.
Figure 4-1. Opa database demo app
You will learn more about databases in the following chapters. But first, let’s take a look at maps.
Maps (Dictionaries)
The data model for the wiki app you will build is quite simple: you want a collection of topics. A topic is represented by a string and it should be associated with content. You will use the Markdown markup format for the content. We will explain how to handle this format in “Markdown” (page 50), but for now, all you need to know is that Markdown is internally represented as a string.
For your data model you need a mapping from strings (topics) to strings (Markdown content). This is what maps are for.
Map is an abstract data type that associates keys with values. It is often called a dictio‐ nary or an associative array, and is, in many programming languages, implemented using hash tables.
All you need to know for now is that in Opa, the type of the dictionary is map(key, val), where key is the type of keys and val is the type of values. For instance, map(int, string) is a type of dictionary mapping int keys to string values.
In memory, it is simple to play with maps. The only thing to remember is that they are used in a functional way [for a refresher, refer to “Functional Programming” (page 22)].
You can, for example, store values in successive versions of maps and retrieve them like so:
value = Option.default("Not found", result)
Note that although m0, m1, and m2 are separate values, they point to one another and the final data structure is stored efficiently in memory.
Storing maps in databases is even easier than manipulating them in memory, thanks to the DbGen automation layer that Opa provides. For the wiki, you will want a database mapping from strings to strings, which you can obtain with the following declaration:
database wiki {
map(string, string) /page }
The read/write notation that we discussed earlier has a variation that allows you to easily index a given map element by providing its key in square brackets. So read and write operations on maps become:
At this point, you know enough to write two useful functions for data manipulation in the wiki; save_data(topic, source) saves source as new content for topic:
function save_data(topic, source) { /wiki/page[topic] <- source; }
And load_data(topic) retrieves content for topic: function load_data(topic) {
/wiki/page[topic]; }
What will happen when you try to load data for a nonexisting page? Remember our discussion about default values in “CRUD (Create, Read, Update, and Delete)” (page 35)? This notion extends to maps as well: if you ask for nonexisting data, you will get the default value, which is an empty string.
It is possible to change this default value, although the syntax will be slightly different, as you would be providing a default for an individual element in a map, not the map itself. You will need to add a new line in your database definition:
/page[_] = "This page is empty. Double-click to edit."
The underscore (_) here means “any value.” We will demonstrate more uses of the underscore later in the book.
The final database declaration for the wiki app looks like this:
database wiki {
map(string, string) /page
/page[_] = "This page is empty. Double-click to edit." }
Summary
In this chapter you learned the basics of handling data storage in Opa. You should now know how to:
• Store and manipulate basic values in the database • Store maps, or associations from keys to values
In the following chapter we will look in more detail at the topic of utilizing HTML and CSS to build user interfaces (UIs) in Opa.
CHAPTER 5
Building the UI in HTML and CSS
In this chapter we will focus on building the user interface. The first step is to create the presentation layer in Opa.
HTML Markup
For presentation, Opa uses the modern web standards HTML5 and CSS3 [we will dis‐ cuss these in more detail in “Adding Style (CSS)” (page 51)]. You already saw a glimpse of how Opa deals with HTML in “Writing and Running the Code” (page 4) and we will expand on that here.
Tags and Attributes
Recall from our earlier discussion that HTML can be included verbatim in Opa pro‐ grams, and that it can be returned from functions as shown here:
function sample_page() {
<header>
<h3>HTML in Opa</h3> </header>
<article>
<div class="container"> <p>Learning by examples.</p> </div>
</article> }
Now, there are few things to keep in mind when writing HTML snippets in Opa code:
• The name of the closing tag is optional, so <tag>...</tag> can be shortened to
<tag>...</>.
• If the attribute consists of a single string with no special characters (i.e., it consists of only letters, digits, and an underscore) the quotes around it can be omitted.
• Double quotes (as in attr="...") are required; single quotes (as in attr='...') are not.
When you apply the first two rules in this list, you can rewrite the preceding snippet as follows: <p>Learning by examples.</> </>
</> }
Opa also features web templates, known as markdown templates, in its standard library.
Inserts
We’ve discussed the basics of static HTML, but things get much more interesting when you have to generate the HTML programmatically. In Opa, this is mainly achieved using inserts, which we will explain now.
If you happen to know JavaScript (do not worry if you don’t) you are used to writing code like this:
x + " + " + y + " = " + (x+y);
Opa’s equivalent is the following:
"{x} + {y} = {x+y}";
This is both shorter and more readable. The parts of the string between the curly braces
{...} are the expressions that are evaluated, converted to strings (more on the rules for converting to strings later), and inserted at those points in the string literal. This mech‐ anism is easy, readable, and quite importantly, safe, as before “injecting” the computed value it automatically gets properly escaped depending on the object you are inserting to.