67
BAB 4
IMPLEMENTASI DAN EVALUASI
Pada bab ini dijelaskan mengenai implementasi dan hasil evaluasi dari aplikasi yang telah dibuat. Dalam subbab implementasi akan diuraikan mulai dari sarana yang diperlukan, instalasi aplikasi dan persiapan jaringan, Sedangkan pada subbab evaluasi akan dibahas mengenai kemampuan sistem dan keterbatasan system.
4.1 S arana yang diperlukan
Untuk menjalankan Network Management system dibutuhkan sarana pendukung, yaitu perangkat keras dan perangkat lunak. Berikut akan dijelaskan spesifikasi yang dibutuhkan.
4.1.1 S pesifikasi kebutuhan perangkat keras Terbagi atas 2 bagian, yaitu:
1. Perangkat keras untuk NM S
Kebutuhan minimum yang direkomendasikan penulis : • Processor : Intel Pentium III 733 M hz
• Memori : 256 M B
• VGA Card : 8 M B
• NIC :10/100 M bps ( 1 buah ) 2. Perangkat keras untuk computer client
68 Kebutuhan minimum yang direkomendasikan penulis :
• Processor :Intel Pentium II 400 M hz
• Memori : 64 M B
• VGA Card : 8 M B
4.1.2.1.1 S pesifikasi kebutuhan perangkat lunak
Piranti lunak yang digunakan untuk membangun NM S terbagi atas 2 bagian yaitu:
1. Perangkat lunak untuk NM S:
• Sistem operasi : Ubuntu 7.10 Gutsy Gibon • Program web server : Apache 2
2. Perangkat lunak untuk client:
• Sistem operasi : Semua jenis system operasi • Web browser : Semua jenis web browser 4.2 Persiapan awal
Sebelum NM S dapat diimplementasikan, ada beberapa persiapan yang harus dilakukan terlebih dahulu mulai dari installasi Operating sistem sampai persiapan jaringan.
4.2.1 Installasi operating system
Persiapan awal yang akan dilakukan terlebih dahulu adalah instalasi operating system(OS). Instalasi yang akan dibahas adalah
69 instalasi OS pada komputer NM S. Pada computer client cukup disediakan web browser (Internet explorer,M ozilla,dll) dan jaringan internet.
Berikut ini adalah langkah- langkah dalam melakukan instalasi OS pada computer NM S yaitu merliputi Instalasi Ubuntu &.10 Gutsy Gibon, instalasi apache 2, instalasi nagios.
Pada tahap implementasi ini, digunakan computer dengan spesifikasi sebagai berikut:
• Processor : Intel Core duo 2.0 Ghz
• Memory : 1 GB
• VGA : 256 M B
• NIC : 10/100 M bps
4.2.1.1 Instalasi Ubuntu 7.10 Gutsy Gibon
Langkah – langkah yang dilakukan dalam instalasi Ubuntu 7>10 Gutsy Gibon dapat dijabarkan sebagai berikut:
70
Gambar 4.1 Instalasi Ubuntu 7.10 – Install Hard Disk
71
Gambar 4.2 Instalasi Ubuntu 7.10 – Select language
72
73
Gambar 4.4 Instalasi Ubuntu 7.10 – Select Country setelah pilih other
74
75
76
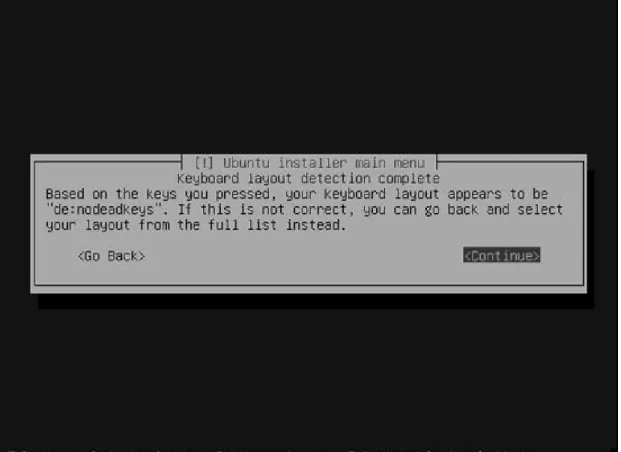
Gambar 4.7 Instalasi Ubuntu 7.10 – Select Keyboard Layout
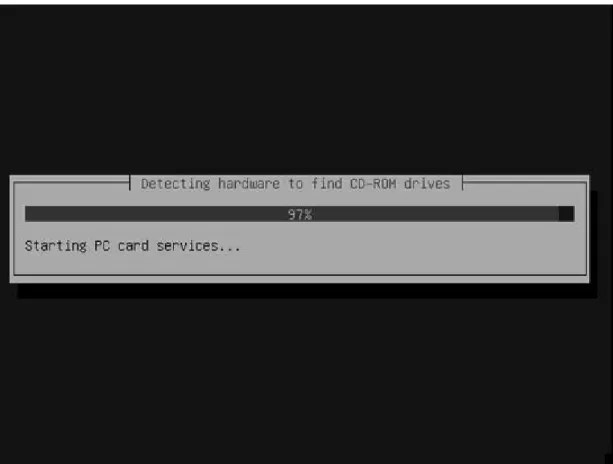
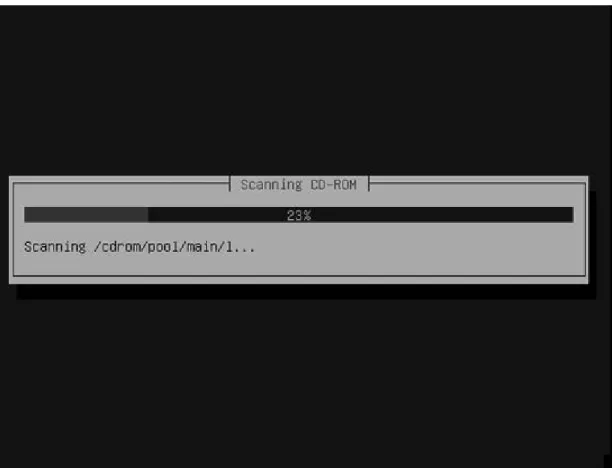
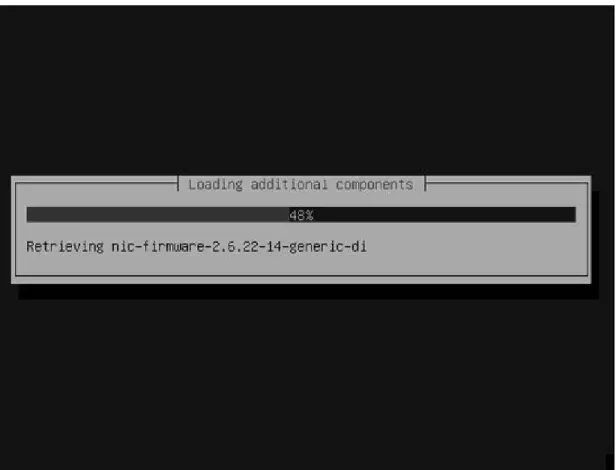
• Installer mengecek CD, Hardware dan konfigurasi network dengan DHCP jika ada DHCP server di dalam network. Pada gambar 4.8, 4.9, 4.10, 4.11.
77
78
79
80
Gambar 4.11 Instalasi Ubuntu 7.11 – konfigurasi network dengan DHCP
81
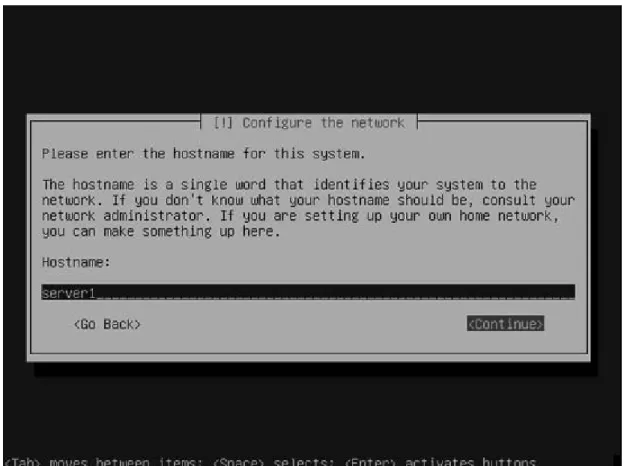
Gambar 4.12 Instalasi Ubuntu 7.10 – Select Hostname
82
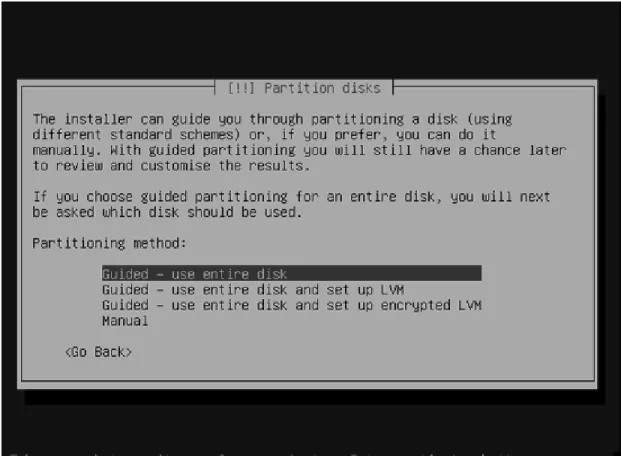
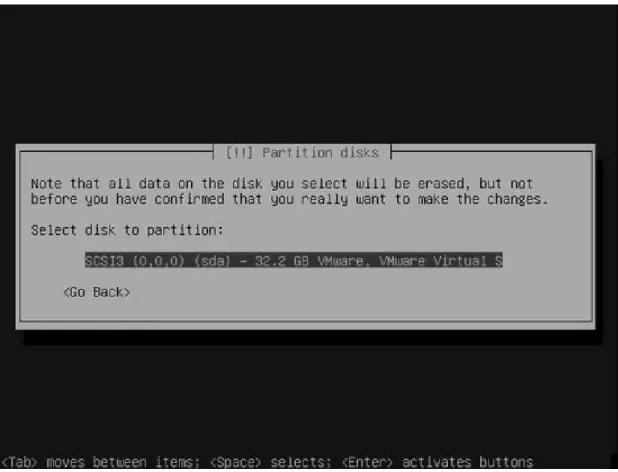
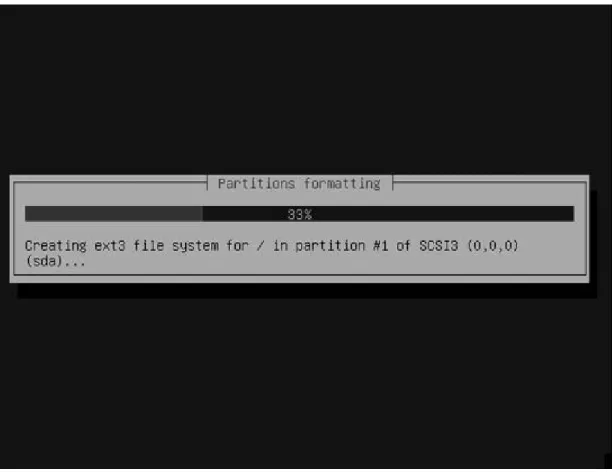
Gambar 4.13 Instalasi Ubuntu 7.10 – Select partition
83
Gambar 4.14 Instalasi Ubuntu 7.10 – Select partition
84
85
Gambar 4.16 Instalasi Ubuntu 7.10 – Select partition
86
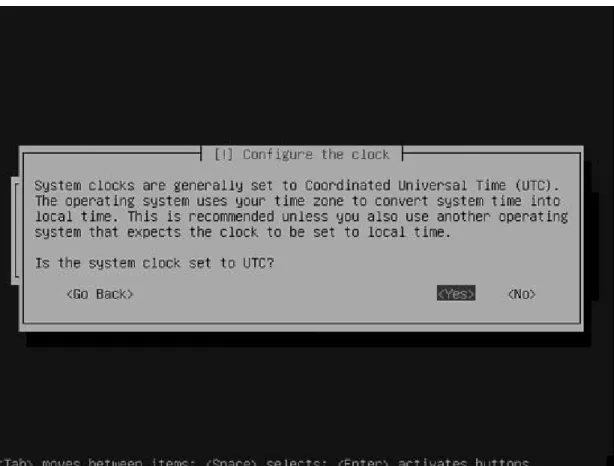
Gambar 4.17 Instalasi Ubuntu 7.10 – Select system clock
87
Gambar 4.18 Instalasi Ubuntu 7.10 – Select new user
88
Gambar 4.19 Instalasi Ubuntu 7.10 – Select account
89
90
Gambar 4.21 Instalasi Ubuntu 7.10 – Re-enter Password
91
92
93
Gambar 4.24 Instalasi Ubuntu 7.10 – Install Base System
• Pilih OpenSSH Server agar dapat dihubungkan dengan SSH client seperti PuTTY
94
95
96
Gambar 4.27 Instalasi Ubuntu 7.10 – Install openSS H-server
97
Gambar 4.28 Instalasi Ubuntu 7.10 – Install GRUB boot loader
• Keluarkan CD installer dari CD-ROM lalu pilih continue untuk reboot sistem
98
Gambar 4.29 Instalasi Ubuntu 7.10 – Installation complete
• Setelah selesai reboot system, buat root account sudo passwd root
password *****
• Selanjutnya root dapat dijalankan dengan mengetik su
• Setelah itu konfigurasi network lalu set ip address, subnet mask, dan gateway. Lalu beri # pada network dan broadcast. nano /etc/network/interfaces
99
# This file describes the network interfaces available on your system # and how to activate them. For more information, see interfaces(5).
# The loopback network interface auto lo
iface lo inet loopback
# The primary network interface allow hotplug eth0
auto eth0
iface eth0 inet static address 202.93.143.3 netmask 255.255.255.248 #network 192.168.0.0 #broadcast 192.168.0.255 gateway 202.93.143.1 • Restart network /etc/init.d/networking restart • Set host nano /etc/hosts
100 127.0.0.1 localhost.localdomain localhost
202.93.143.3 nms.indonusa.net.id nms
# The following lines are desirable for IPv6 capable hosts ::1 ip6-localhost ip6-loopback nms.indonusa.net.id fe00::0 ip6-localnet
ff00::0 ip6-mcastprefix ff02::1 ip6-allnodes ff02::2 ip6-allrouters ff02::3 ip6-allhosts
setelah itu ketik : hostname
hostname –f
• Edit source.list lalu update dan upgrade Linux installation nano /etc/apt/sources.list
#
# deb cdrom:[Ubuntu-Server 7.10 _Gutsy Gibbon_ - Release i386 (20071016)]/ gutsy main restricted
deb cdrom:[Ubuntu-Server 7.10 _Gutsy Gibbon_ - Release i386 (20071016)]/ gutsy main restricted
101 # newer versions of the distribution.
deb http://de.archive.ubuntu.com/ubuntu/ gutsy main restricted deb-src http://de.archive.ubuntu.com/ubuntu/ gutsy main restricted
## M ajor bug fix updates produced after the final release of the ## distribution.
deb http://de.archive.ubuntu.com/ubuntu/ gutsy-updates main restricted deb-src http://de.archive.ubuntu.com/ubuntu/ gutsy-updates main restricted
## N.B. software from this repository is ENTIRELY UNSUPPORTED by the Ubuntu ## team, and may not be under a free licence. Please satisfy yourself as to
## your rights to use the software. Also, please note that software in
## universe WILL NOT receive any review or updates from the Ubuntu security ## team.
deb http://de.archive.ubuntu.com/ubuntu/ gutsy universe deb-src http://de.archive.ubuntu.com/ubuntu/ gutsy universe deb http://de.archive.ubuntu.com/ubuntu/ gutsy-updates universe deb-src http://de.archive.ubuntu.com/ubuntu/ gutsy-updates universe
## N.B. software from this repository is ENTIRELY UNSUPPORTED by the Ubuntu ## team, and may not be under a free licence. Please satisfy yourself as to
102 ## multiverse WILL NOT receive any review or updates from the Ubuntu
## security team.
deb http://de.archive.ubuntu.com/ubuntu/ gutsy multiverse deb-src http://de.archive.ubuntu.com/ubuntu/ gutsy multiverse deb http://de.archive.ubuntu.com/ubuntu/ gutsy-updates multiverse deb-src http://de.archive.ubuntu.com/ubuntu/ gutsy-updates multiverse
## Uncomment the following two lines to add software from the 'backports' ## repository.
## N.B. software from this repository may not have been tested as ## extensively as that contained in the main release, although it includes ## newer versions of some applications which may provide useful features. ## Also, please note that software in backports WILL NOT receive any review ## or updates from the Ubuntu security team.
# deb http://de.archive.ubuntu.com/ubuntu/ gutsy-backports main restricted universe multiverse
# deb-src http://de.archive.ubuntu.com/ubuntu/ gutsy-backports main restricted universe multiverse
## Uncomment the following two lines to add software from Canonical's ## 'partner' repository. This software is not part of Ubuntu, but is
## offered by Canonical and the respective vendors as a service to Ubuntu ## users.
103 # deb http://archive.canonical.com/ubuntu gutsy partner
# deb-src http://archive.canonical.com/ubuntu gutsy partner
deb http://security.ubuntu.com/ubuntu gutsy-security main restricted deb-src http://security.ubuntu.com/ubuntu gutsy-security main restricted deb http://security.ubuntu.com/ubuntu gutsy-security universe
deb-src http://security.ubuntu.com/ubuntu gutsy-security universe deb http://security.ubuntu.com/ubuntu gutsy-security multiverse deb-src http://security.ubuntu.com/ubuntu gutsy-security multiverse
lalu update dan upgrade apt-get update
apt-get upgrade
• Install beberapa package
apt-get install binutils cpp fetchmail flex gcc libarchive-zip-perl libc6-dev libcompress-zlib-perl libdb4.3-dev libpcre3 libpopt-dev lynx m4 make ncftp nmap openssl perl perl-modules unzip zip zlib1g-dev autoconf automake1.9 libtool bison autotools-dev g++ build-essential
• Install Quota apt-get install quota nano /etc/fstab
104 # /etc/fstab: static file system information.
#
# <file system> <mount point> <type> <options> <dump> <pass> proc /proc proc defaults 0 0
# /dev/sda1
UUID=9fc157ff-975c-4f20-9fef-6a70085abdbd / ext3 defaults,errors=remount-ro,usrquota,grpquota 0 1
# /dev/sda5
UUID=48fb7dd8-f099-4d63-ac1b-30e886ac7436 none swap sw 0 0 /dev/scd0 /media/cdrom0 udf,iso9660 user,noauto,exec 0 0
/dev/fd0 /media/floppy0 auto rw,user,noauto,exec 0 0
• Postfix With SMTP-AUTH And TLS
apt-get install postfix libsasl2-2 sasl2-bin libsasl2-modules libdb3-util procmail lalu masukkan seperti di bawah ini:
General type of mail configuration: <-- Internet Site System mail name: <-- nms.indonusa.net.id
dpkg-reconfigure postfix
lalu masukkan seperti di bawah ini:
General type of mail configuration: <-- Internet Site System mail name: <-- nms.indonusa.net.id
105 Root and postmaster mail recipient: <-- [blank]
Other destinations to accept mail for (blank for none): <-- nms.indonusa.net.id, localhost.indonusa.net.id, localhost.localdomain, localhost
Force synchronous updates on mail queue? <-- No Local networks: <-- 127.0.0.0/8
Use procmail for local delivery? <-- Yes M ailbox size limit: <-- 0
Local address extension character: <-- + Internet protocols to use: <-- all
postconf -e 'smtpd_sasl_local_domain =' postconf -e 'smtpd_sasl_auth_enable = yes'
postconf -e 'smtpd_sasl_security_options = noanonymous' postconf -e 'broken_sasl_auth_clients = yes'
postconf -e 'smtpd_recipient_restrictions =
permit_sasl_authenticated,permit_mynetworks,reject_unauth_destination' postconf -e 'inet_interfaces = all'
echo 'pwcheck_method: saslauthd' >> /etc/postfix/sasl/smtpd.conf echo 'mech_list: plain login' >> /etc/postfix/sasl/smtpd.conf
lalu ketik :
106 # See /usr/share/postfix/main.cf.dist for a commented, more complete version
# Debian specific: Specifying a file name will cause the first # line of that file to be used as the name. The Debian default # is /etc/mailname.
#myorigin = /etc/mailname
smtpd_banner = $myhostname ESM TP $mail_name (Ubuntu) biff = no
# appending .domain is the M UA's job. append_dot_mydomain = no
# Uncomment the next line to generate "delayed mail" warnings #delay_warning_time = 4h # TLS parameters smtpd_tls_cert_file = /etc/postfix/ssl/smtpd.crt smtpd_tls_key_file = /etc/postfix/ssl/smtpd.key smtpd_use_tls = yes smtpd_tls_session_cache_database = btree:${queue_directory}/smtpd_scache smtp_tls_session_cache_database = btree:${queue_directory}/smtp_scache
107 # See /usr/share/doc/postfix/TLS_READM E.gz in the postfix-doc package for # information on enabling SSL in the smtp client.
myhostname = nms.indonusa.net.id alias_maps = hash:/etc/aliases alias_database = hash:/etc/aliases myorigin = /etc/mailname
mydestination = nms.indonusa.net.id, localhost.indonusa.net.id, localhost.localdomain, localhost
relayhost =
mynetworks = 127.0.0.0/8
mailbox_command = procmail -a "$EXTENSION" mailbox_size_limit = 0 recipient_delimiter = + inet_interfaces = all inet_protocols = all smtpd_sasl_local_domain = smtpd_sasl_auth_enable = yes smtpd_sasl_security_options = noanonymous broken_sasl_auth_clients = yes smtpd_recipient_restrictions = permit_sasl_authenticated,permit_mynetworks,reject_unauth_destination smtpd_tls_auth_only = no
108 smtp_use_tls = yes smtp_tls_note_starttls_offer = yes smtpd_tls_CAfile = /etc/postfix/ssl/cacert.pem smtpd_tls_loglevel = 1 smtpd_tls_received_header = yes smtpd_tls_session_cache_timeout = 3600s tls_random_source = dev:/dev/urandom
lalu restart postfix /etc/init.d/postfix restart
mkdir -p /var/spool/postfix/var/run/saslauthd nano /etc/default/saslauthd
#
# Settings for saslauthd daemon #
# Should saslauthd run automatically on startup? (default: no) START=yes
# Which authentication mechanisms should saslauthd use? (default: pam) #
# Available options in this Debian package: # getpwent -- use the getpwent() library function
109 # kerberos5 -- use Kerberos 5
# pam -- use PAM
# rimap -- use a remote IM AP server
# shadow -- use the local shadow password file # sasldb -- use the local sasldb database file
# ldap -- use LDAP (configuration is in /etc/saslauthd.conf) #
# Only one option may be used at a time. See the saslauthd man page # for more information.
#
# Example: M ECHANISM S="pam" M ECHANISM S="pam"
# Additional options for this mechanism. (default: none)
# See the saslauthd man page for information about mech-specific options. M ECH_OPTIONS=""
# How many saslauthd processes should we run? (default: 5) # A value of 0 will fork a new process for each connection. THREADS=5
# Other options (default: -c)
110 #
# Example for postfix users: "-c -m /var/spool/postfix/var/run/saslauthd" # Note: See /usr/share/doc/sasl2-bin/READM E.Debian
OPTIONS="-c -m /var/spool/postfix/var/run/saslauthd -r"
• Courier-IMAP/Courier-POP3
Install IM AP/IM AP-SSL (for IMAPs on port 993) and Courier-POP3/Courier-POP3-SSL (for POP3s on port 995):
apt-get install courier-authdaemon courier-base courier-imap courier-imap-ssl courier-pop courier-pop-ssl courier-ssl gamin libgamin0 libglib2.0-0
lalu masukkan seperti di bawah ini:
Create directories for web-based administration ? <-- No SSL certificate required <-- Ok
lalu ketik :
postconf -e 'home_mailbox = Maildir/' postconf -e 'mailbox_command =' /etc/init.d/postfix restart
• Install Apache/PHP5 Install apache :
111 apt-get install apache2 apache2-doc apache2-mpm-prefork apache2-utils libexpat1 ssl-cert
Install PHP5:
apt-get install libapache2-mod-php5 php5 php5-common php5-curl php5-dev php5-gd php5-idn php-pear php5-imagick php5-imap php5-json php5-mcrypt memcache mhash ming mysql ps pspell php5-recode php5-snmp php5-sqlite php5-tidy php5-xmlrpc php5-xsl
lalu masukkan seperti di bawah ini:
Continue installing libc-client without M aildir support? <-- Yes nano /etc/apache2/mods-available/dir.conf
<IfM odule mod_dir.c>
#DirectoryIndex index.html index.cgi index.pl index.php index.xhtml DirectoryIndex index.html index.htm index.shtml index.cgi index.php index.php3 index.pl index.xhtml
</IfM odule> a2enmod ssl a2enmod rewrite a2enmod suexec a2enmod include lalu reload apache :
112 • Disable PHP Globally nano /etc/mime.types [...] #application/x-httpd-php phtml pht php #application/x-httpd-php-source phps #application/x-httpd-php3 php3 #application/x-httpd-php3-preprocessed php3p #application/x-httpd-php4 php4 [...] nano /etc/apache2/mods-enabled/php5.conf <IfM odule mod_php5.c>
#AddType application/x-httpd-php .php .phtml .php3 #AddType application/x-httpd-php-source .phps </IfM odule>
lalu restart apache /etc/init.d/apache2 restart
• Install Proftpd
apt-get install proftpd ucf
113 Run proftpd from inetd or standalone? <-- standalone
M atikan ipv6 nano /etc/proftpd/proftpd.conf [...] UseIPv6 off [...] nano /etc/proftpd/proftpd.conf [...] DefaultRoot ~ IdentLookups off
ServerIdent on "FTP Server ready." [...]
ln -s /etc/proftpd/proftpd.conf /etc/proftpd.conf
restart Proftpd:
/etc/init.d/proftpd restart
• Install Webalizer
114
• Syncronize the system clock
apt-get install ntp ntpdate
• Install Some Perl Modules Needed By SpamAssassin (Comes With ISPConfig)
apt-get install libhtml-parser-perl libdb-file-lock-perl libnet-dns-perl
• A note on SuExec
Untuk menjalankan CGI script dalam suExec /usr/lib/apache2/suexec –V -D AP_DOC_ROOT="/var/www" -D AP_GID_M IN=100 -D AP_HTTPD_USER="www-data" -D AP_LOG_EXEC="/var/log/apache2/suexec.log" -D AP_SAFE_PATH="/usr/local/bin:/usr/bin:/bin" -D AP_UID_M IN=100 -D AP_USERDIR_SUFFIX="public_html"
115 4.2.1.2 Installasi PuTTY
Setelah installasi Ubuntu 7.10 Gutsy Gibon selesai, peginstallan selanjutnya dilakukan dengan remote server. Seluruh penginstallan dan konfigurasi selanjutnya menggunakan remote server. Jadi Penginstallan dan Pensettingan konfigurasi dapat dilakukan di mana saja. Remote server yang digunakan adalah PuTTY. Langkah – langkah installasi PuTTY dijabarkan sebagai berikut:
• Pilih next
Gambar 4.30 PuTTY setup • Pilih folder untuk tempat penginstallan lalu klik next.
116
Gambar 4.31 S elect destination location • Pilih nama folder untuk shortcut pada start menu.
117
Gambar 4.32 S elect start menu folder • Pilih additional task lalu klik next
118
Gambar 4.33 S elect additional task • Cek program yang akan diinstall lalu klik install
119
Gambar 4.34 Check Installation • Klik Finish
120
Gambar 4.35 Finish Installation
4.2.1.3 Install Nagios
Langkah – langkah penginstallan Nagios dijabarkan sebagai berikut : • Install apache2
sudo apt-get install apache2 sudo apt-get install build-essential • Install library
sudo apt-get install libgd2-xpm-dev • Login sebagai root lalu ketik : sudo –s
121 /usr/sbin/useradd nagios
passwd nagios
• Buat nagios grup /usr/sbin/groupadd nagios
/usr/sbin/usermod -G nagios nagios • Buat nagcmd grup
/usr/sbin/groupadd nagcmd
/usr/sbin/usermod -G nagcmd nagios /usr/sbin/usermod -G nagcmd www-data • Buat folder untuk download
mkdir ~/downloads cd ~/downloads
• Download nagios dan nagios plugin yang stable version
wget http://osdn.dl.sourceforge.net/sourceforge/nagios/nagios-3.0.2.tar.gz wget http://osdn.dl.sourceforge.net/sourceforge/nagiosplug/nagios-plugins-1.4.12.tar.gz • Extract nagios-3.0.2 cd ~/downloads tar xvfz nagios-3.0.2.tar.gz cd nagios-3.0.2 • Konfigurasi nagios ./configure --with-command-group=nagcmd
122 • Compile nagios sourcecode
make all
• Install binaries, init, config, set commandmode make install
make install-init make install-config
make install-commandmode
• Sebelum menjalankan nagios set email jika ada alerts nano /usr/local/nagios/etc/objects/contacts.cfg
• Install nagios web config make install-webconf
• Set nagiosadmin account dan password untuk login ke nagios htpasswd -c /usr/local/nagios/etc/htpasswd.users nagiosadmin • Restart apache2
/etc/init.d/apache2 reload • Install nagios plugin cd ~/downloads
tar xzf nagios-plugins-1.4.11.tar.gz cd nagios-plugins-1.4.11
• Compile dan install plugin
./configure --with-nagios-user=nagios --with-nagios-group=nagios make
123 make install
• Konfigurasi nagios secara automatic pada saat system boot ln -s /etc/init.d/nagios /etc/rcS.d/S99nagios
• Verify sample nagios configuration
/usr/local/nagios/bin/nagios -v /usr/local/nagios/etc/nagios.cfg • Jika tidak ada error, start nagios
/etc/init.d/nagios start
4.2.1.4 Menambah host
Berikut langkah – langkah untuk menambah host: • Konfigurasi monitoring host localhost
root@nms:/home/adminisp# cp /usr/local/nagios/etc/objects/localhost.cfg /usr/local/nagios/etc/objects/ServerA
• Konfigurasi untuk host yang baru
root@nms:/home/adminisp# nano /usr/local/nagios/etc/objects/ServerA.cfg cek konfigurasi:
define host{
use linux-server ; Name of host template to use
; This host
definition will inherit all variables that are defined ; in (or inherited
124 host_name ServerA alias serverA address 192.168.1.1 } define service{
use local-service ; Name of service template to use host_name ServerA service_description PING
check_command check_ping!100.0,20%!500.0,60% }
define service{
use local-service ; Name of service template to use host_name ServerA service_description SSH check_command check_ssh notifications_enabled 0 } define service{
use local-service ; Name of service template to use
125 host_name ServerA
service description HTTP check command check http notifications enabled 0 }
• Edit hostgroup yang ada pada localhost.cfg untuk menambahkan ServerA agar menjadi member dr hostgroup
root@nms:/home/adminisp# nano /usr/local/nagios/etc/objects/localhost.cfg define hostgroup{
hostgroup_name linux-servers ; The name of the hostgroup alias Linux Servers ; Long name of the group
members localhost, serverA ; Comma separated list of hosts that belong to this group
}
• Tambah entri konfigurasi host yang baru di bawah baris cfg_file=/opt/nagios/etc/objects/localhost.cfg
126 cfg_file=/usr/local/nagios/etc/objects/localhost.cfg
cfg_file=/opt/nagios/etc/objects/serverA.cfg
• Setelah itu verifikasi konfigurasi anda
root@nms:/home/adminisp# /usr/local/nagios/bin/nagios.cfg –v /usr/local/nagios.cfg
Nagios 3.0.2
Copyright (c) 1999-2008 Ethan Galstad (http://www.nagios.org) Last M odified: 04-01-2008
License: GPL
Reading configuration data...
Running pre-flight check on configuration data... Checking services...
Checked 11 services. Checking hosts... Checked 2 hosts. Checking host groups... Checked 1 host groups. Checking service groups... Checked 0 service groups. Checking contacts... Checked 1 contacts.
127 Checking contact groups...
Checked 1 contact groups. Checking service escalations... Checked 0 service escalations. Checking service dependencies... Checked 0 service dependencies. Checking host escalations... Checked 0 host escalations. Checking host dependencies... Checked 0 host dependencies. Checking commands...
Checked 25 commands. Checking time periods... Checked 5 time periods.
Checking for circular paths between hosts...
Checking for circular host and service dependencies... Checking global event handlers...
Checking obsessive compulsive processor commands... Checking misc settings...
Total Warnings: 0 Total Errors: 0
Things look okay - No serious problems were detected during the pre-flight check
128
• Lalu restart nagios
root@nms:/home/adminisp# /etc/init.d/nagios restart Running configuration check...done.
Stopping nagios: done. Starting nagios: done.
4.2.2 Implementasi nagios
Untuk menjalankan nagios dibutuhkan jaringan internet. Lalu browse ke http://nms.indonusa.net.id/nagios untuk memulai mengakses nagios.
Gambar 4.36 Window Popup untuk login ke nagios
Halaman ini yang pertama kali muncul apabila mengakses nagios. nagios memerlukan username dan login password untuk dapat mengakses halaman utama (Gambar 4.37).
129
Gambar 4.37 Nagios Home
Pada halaman utama nagios web anda akan melihat daftar menu yang berada pada bagian kiri, setiap menu menampilkan informasi tentang status hosthost yang dimonitor. M isalkan kita mencoba mengakses menu Host Detail untuk melihat informasi detail host yang dimonitor, seperti tampak pada gambar 4.39.
130
Gambar 4.38 S ervice Detail
Halaman ini menunjukkan semua host dan service yang dimonitor oleh nagios. Halaman ini juga mengecek apakah semua sistem berjalan lancar, dan dapat mengetahuinya jika ada yang terputus ataupun adanya gangguan.
131
Gambar 4.39 Host Detail
Pada halaman ini untuk mengetahui host apa saja yg dimonitoring, status up atau down, terakhir kali pengecekan, lamanya waktu sejak pertama kali penambahan host dan status informasi untuk melihat apakah ada paket yang loss.
132
Gambar 4.40 Hostgroup overview
Halaman ini untuk melihat secara keseluruhan status host, service, baerbagai macam action seperti melihat host dalam map, melihat service detail, melihat extended information untuk hot tersebut.
133
Gambar 4.41 S tatus map
Halaman ini memperlihatkan status map semua host yang dimonitoring Networks, serta memberikan informasi tentang host yang diinginkan.
134
Gambar 4.42 S ervice Problem
Halaman ini memberitahukan apabila ada masalah yang muncul dalam jaringan, serta memberikan informasi host mana yang bermasalah dan permasalahannya di mana serta informasi lainnya.
135
136 Halaman ini menunjukkan performance secara keseluruhan dari seluruh host yang ada.
Gambar 4.44 Hostgroup availability daily
Halaman ini memberitahukan berapa persen host – host up / down pada hari ini.
137
Gambar 4.45 Hostgroup availability weekly
Halaman ini memberitahukan berapa persen host – host up / down pada minggu ini.
138
Gambar 4.46 Hostgroup availability monthly
Halaman ini memberitahukan berapa persen host – host up / down pada bulan ini.
140
141 Halaman ini memberikan detail dari seluruh kejadian yang terjadi pada seluruh host yang ada setiap 30 detik.Hal ini yang menyebabkan laporan yang dihasilkan nagios sangat akurat. Halaman event log ini di refresh setiap setengah hari.
Tabel 4.1 Tabel Keterangan Event Log
Bulatan warna merah M enunjukkan status critical, yang berarti host tersebut terputus.
Bulatan warna kuning M enunjukkan status warning, yang berarti host tersebut mengalami masalah.
Bulatan warna hijau M enunjukkan status OK, yang berarti host berjalan dengan baik
Gambar speaker M enunjukkan host notification
142
Gambar 4.48 Downtime
Halaman ini untuk menjadwalkan downtime pada host ataupun service yang diinginkan.Pada halaman ini admin dapat menjadwalkan downtime pada host atau service yang diinginkan.