Talend for Big Data
Access, transform, and integrate data using Talend's
open source, extensible tools
Bahaaldine Azarmi
Talend for Big Data
Copyright © 2014 Packt Publishing
All rights reserved. No part of this book may be reproduced, stored in a retrieval system, or transmitted in any form or by any means, without the prior written permission of the publisher, except in the case of brief quotations embedded in critical articles or reviews.
Every effort has been made in the preparation of this book to ensure the accuracy of the information presented. However, the information contained in this book is sold without warranty, either express or implied. Neither the author, nor Packt Publishing, and its dealers and distributors will be held liable for any damages caused or alleged to be caused directly or indirectly by this book.
Packt Publishing has endeavored to provide trademark information about all of the companies and products mentioned in this book by the appropriate use of capitals. However, Packt Publishing cannot guarantee the accuracy of this information.
First published: February 2014
Production Reference: 2170214
Published by Packt Publishing Ltd. Livery Place
35 Livery Street
Birmingham B3 2PB, UK. ISBN 978-1-78216-949-9 www.packtpub.com
About the Author
Bahaaldine Azarmi
is the cofounder of reach5.co. With his past experience of working at Oracle and Talend, he has specialized in real-time architecture using service-oriented architecture products, Big Data projects, and web technologies.About the Reviewers
Simone Bianchi
has a degree in Electronic Engineering from Italy, where he is living today, working as a programmer to develop web applications using technologies such as Java, JSP, jQuery, and Oracle. After having a brief experience with the Oracle Warehouse Builder tool, and as soon as the Talend solution came out, he started to extensively use this new tool in all his data migration/integration tasks as well as develop ETL layers in data warehouse projects. He also developed several Talend custom components such as tLogGrid, tDBFInput/Output, which you can download from the TalendForge site, and the ones to access/store data on the Web via SOAP/REST API.I'd like to thank Packt Publishing to have chosen me to review this book, as well as the very kind people who work there, to have helped me to accomplish my first review at my best.
Vikram Takkar
is a freelance Business Intelligence and Data Integration professional with nine years of rich hands-on experience in multiple BI and ETL tools. He has a strong expertise in technologies such as Talend, Jaspersoft, Pentaho, Big Data-MongoDB, Oracle, and MySQL. He has managed and successfully executed multiple projects in data warehousing and data migration developed for both Unix and Windows environments. He has also worked as a Talend Data Integration trainer and facilitated training for various corporate clients in India, Europe, and the United States. He is an impressive communicator with strong leadership, analytical, and problem-solving skills. He is comfortable interacting with people across hierarchical levels for ensuring smooth project execution as per the client's specifications. Apart from this, he is a blogger and publishes articles and videos on open source BI and ETL tools along with supporting technologies on his YouTube channel at www.youtube.com/vtakkar. You can follow him on Twitter @VikTakkar and you can visit his blog at www.vikramtakkar.com.www.PacktPub.com
Support files, eBooks, discount offers and more
You might want to visit www.PacktPub.com for support files and downloads related to your book.Did you know that Packt offers eBook versions of every book published, with PDF and ePub files available? You can upgrade to the eBook version at www.PacktPub. com and as a print book customer, you are entitled to a discount on the eBook copy. Get in touch with us at [email protected] for more details.
At www.PacktPub.com, you can also read a collection of free technical articles, sign up for a range of free newsletters and receive exclusive discounts and offers on Packt books and eBooks.
TM
http://PacktLib.PacktPub.com
Do you need instant solutions to your IT questions? PacktLib is Packt's online digital book library. Here, you can access, read and search across Packt's entire library of books.
Why Subscribe?
• Fully searchable across every book published by Packt • Copy and paste, print and bookmark content
• On demand and accessible via web browser
Free Access for Packt account holders
Table of Contents
Preface 1
Chapter 1: Getting Started with Talend Big Data
5
Talend Unified Platform presentation 5
Knowing about the Hadoop ecosystem 7
Prerequisites for running examples 8
Downloading Talend Open Studio for Big Data 9
Installing TOSBD 9
Running TOSBD for the first time 10
Summary 12
Chapter 2: Building Our First Big Data Job
13
TOSBD – the development environment 13
A simple HDFS writer job 16
Checking the result in HDFS 25
Summary 25
Chapter 3: Formatting Data
27
Twitter Sentiment Analysis 27
Writing the tweets in HDFS 28
Setting our Apache Hive tables 31
Formatting tweets with Apache Hive 35
Summary 38
Chapter 4: Processing Tweets with Apache Hive
39
Extracting hashtags 39
Extracting emoticons 44
Joining the dots 46
Chapter 5: Aggregate Data with Apache Pig
49
Knowing about Pig 49
Extracting the top Twitter users 51
Extracting the top hashtags, emoticons, and sentiments 56
Summary 58
Chapter 6: Back to the SQL Database
59
Linking HDFS and RDBMS with Sqoop 59
Exporting and importing data to a MySQL database 60
Summary 64
Chapter 7: Big Data Architecture and Integration Patterns
65
The streaming pattern 65
The partitioning pattern 68
Summary 71
Appendix: Installing Your Hadoop Cluster with Cloudera CDH VM 73
Downloading Cloudera CDH VM 73
Launching the VM for the first time 75
Basic required configuration 76
Preface
Data volume is growing fast. However, data integration tools are not scalable enough to process such an amount of data, and thus, more and more companies are thinking about starting Big Data projects—diving into the Hadoop ecosystem projects, understanding each technology, learning MapReduce, Hive SQL, and Pig-Latin—thereby becoming more of a burden more than a solution. Software vendors such as Talend are trying to ease the deployment of Big Data by democratizing the use of Apache Hadoop projects through a set of graphical development components, which doesn't require the developer to be a Hadoop expert to kick off their project.
This book will guide you through a couple of hands-on techniques to get a better understanding of Talend Open Studio for Big Data.
What this book covers
Chapter 1, Getting Started with Talend Big Data, explains the structure of Talend products and then sets up your Talend environment and discovers Talend Studio for the first time.
Chapter 2, Building Our First Big Data Job, explains how we can start creating our first HDFS job and be sure our Talend Studio is integrated with our Hadoop cluster. Chapter 3, Formatting Data, describes the basics of Twitter Sentiment Analysis and gives an introduction to format data with Apache Hive.
Chapter 5, Aggregate Data with Apache Pig, finalizes the data processing done so far and reveals the top records using Talend Big Data Pig components.
Chapter 6, Back to the SQL Database, will guide you on how to work with the Talend Sqoop component in order to export data from HDFS to a SQL Database.
Chapter 7, Big Data Architecture and Integration Patterns, describes the most used patterns deployed in the context of Big Data projects in an enterprise.
Appendix, Installing Your Hadoop Cluster with Cloudera CDH VM describes the main steps to set up a Hadoop cluster based on Cloudera CDH4.3. You would learn how to go about installations and configuration.
What you need for this book
You will need a copy of the latest version of Talend Open Studio for Big Data, a copy of Cloudera CDH distribution, and a MySQL database.
Who this book is for
This book is for developers with an existing data integration background, who want to start their first Big Data project. Having a minimum of Java knowledge is a plus, while having an expertise in Hadoop is not required.
Conventions
In this book, you will find a number of styles of text that distinguish between different kinds of information. Here are some examples of these styles, and an explanation of their meaning.
Code words in text, database table names, folder names, filenames,
file extensions, pathnames, dummy URLs, user input, and Twitter handles are shown as follows: The custom UDF is present in the org.talend.demo package and called ExtractPattern
A block of code is set as follows:
CREATE EXTERNAL TABLE hash_tags ( hash_tags_id string,
Preface
[ 3 ] day_of_month string,
time string, month string,
New terms and important words are shown in bold. Words that you see on the screen, in menus or dialog boxes for example, appear in the text like this: So my advice would be to create an account or click on Ignore if you already have one.
Warnings or important notes appear in a box like this.
Tips and tricks appear like this.
Reader feedback
Feedback from our readers is always welcome. Let us know what you think about this book—what you liked or may have disliked. Reader feedback is important for us to develop titles that you really get the most out of.
To send us general feedback, simply send an e-mail to [email protected], and mention the book title via the subject of your message.
If there is a topic that you have expertise in and you are interested in either writing or contributing to a book, see our author guide on www.packtpub.com/authors.
Customer support
Now that you are the proud owner of a Packt book, we have a number of things to help you to get the most from your purchase.
Downloading the color images of this book
Errata
Although we have taken every care to ensure the accuracy of our content, mistakes do happen. If you find a mistake in one of our books—maybe a mistake in the text or the code—we would be grateful if you would report this to us. By doing so, you can save other readers from frustration and help us improve subsequent versions of this book. If you find any errata, please report them by visiting http://www.packtpub. com/submit-errata, selecting your book, clicking on the erratasubmissionform link, and entering the details of your errata. Once your errata are verified, your submission will be accepted and the errata will be uploaded on our website, or added to any list of existing errata, under the Errata section of that title. Any existing errata can be viewed by selecting your title from http://www.packtpub.com/support.
Piracy
Piracy of copyright material on the Internet is an ongoing problem across all media. At Packt, we take the protection of our copyright and licenses very seriously. If you come across any illegal copies of our works, in any form, on the Internet, please provide us with the location address or website name immediately so that we can pursue a remedy.
Please contact us at [email protected] with a link to the suspected pirated material.
We appreciate your help in protecting our authors, and our ability to bring you valuable content.
Questions
Getting Started with
Talend Big Data
In this chapter, we will learn how the Talend products are regrouped as an integration platform, and we'll set up our development environment to start building Big Data jobs.
The following topics are covered:
• Talend Unified Platform structure
• Setting up our Talend development environment
Talend addresses all aspects of integration from the technical layer to the business layer, and all products are regrouped into one unique unified platform as shown in the following diagram:
Talend Unified Platform
Talend Unified Platform offers a unique Eclipse-based environment, which means that users can jump from one product to another just by clicking on the related perspective button without the need for changing tools. All jobs, services, and technical assets are designed in the same environment with the same methodology, deployed and executed in the same runtime, monitored and operated in the same management console.
• Talend Data Integration is the historical Talend product, which rapidly promoted Talend as a leader in its field. It allows developers to create the simplest integration jobs such as extracting data from a file and loading it to a database, and create complex data integration job orchestration, high volume integration with parallelization feature, and finally Big Data Integration mainly based on Hadoop projects. This book is essentially dedicated to this module and will give the reader a better understanding of the Talend Big Data usage module.
• Talend Data quality comes with additional analytics features mainly focused on data profiling in order to get a better understanding not only of the quality and reliability of your data, but also integration features such as data standardization, enrichment, matching, and survivorship based on largely adopted industry algorithms.
Chapter 1
[ 7 ]
• Talend Master Data Management manages the best of all products and offers business customers all the features required to manage master data such as a business user interface, workflow and business processes, data quality controls, and role-based access management.
• Talend Business Process Management will help business users to graphically design their business processes composed of human tasks, events, and business activity monitoring. It also takes advantage of all existing integration services such ESB SOAP and REST Services or even Data Quality jobs, thanks to a comprehensive integration layer between all products.
Talend Unified Platform is part of the commercial subscription offer; however, all products are available under a community version called Talend Open Studio. As mentioned earlier, Talend Unified Platform is unified at every level, whereas Talend community version products are separate studios. It doesn't include teamwork module, and also advanced features such as administration console, clustering, and so on globally.
This book is focused on Talend Open Studio for Big Data (TOSBD), which adds to Talend Open Studio for Data Integration a set of components that enables developers to graphically design Hadoop jobs.
Knowing about the Hadoop ecosystem
As you can see, there is a project for each task that you need to accomplish in a Hadoop cluster which is explained in the following points:
• HDFS is the main layer where the data is stored. We will see in the following chapter how to use TOSBD to read and write data in it. More information can be found at http://hadoop.apache.org/ docs/stable1/hdfs_design.html.
• MapReduce is a framework used to process a large amount of data stored in HDFS, and it relies on a map function that processes key values pairs and a reduce function to merge all the values as the following publication explains http://research.google.com/archive/mapreduce.html. • In this book, we will use a bunch of high-level projects over HDFS, such as
Pig and HIVE, in order to generate the MapReduce code and manipulate the data in an easier way instead of coding the MapReduce itself.
• Other projects such as Flume or Sqoop are used for integration purpose with an industry framework and tools such as RDBMS in the case of Sqoop. The more you get into Big Data projects, the more skills you need, the more time you need to ramp up on the different projects and framework. TOSBD will help to reduce this ramp up time by providing a comprehensive graphical set of tools that ease the pain of starting and developing such projects.
Prerequisites for running examples
As described earlier in this chapter, this book will describe how to implement Big Data Hadoop jobs using TOSBD. For this the following technical assets will be needed:
• A Windows/Linux/Mac OS machine
• Oracle (Sun) Java JDK 7 is required to install and run TOSBD, and is available at http://www.oracle.com/technetwork/java/javase/downloads/ jdk7-downloads-1880260.html
• Cloudera CDH Quick Start VM, a Hadoop distribution, which by default contains a ready-to-use single node Apache Hadoop is available at http://www.cloudera.com/content/support/en/downloads/
download-components/download-products.html?productID=F6mO278Rvo • A VMWare Player or VirtualBox free for personal use (for windows and
Chapter 1
[ 9 ]
• MySQL Database, an open source RDBMS, is available at http://dev.mysql.com/downloads/mysql/
• And obviously, TOSBD, which is described in the next part
Downloading Talend Open Studio for
Big Data
Downloading a community version of Talend is pretty straightforward; just connect on http://www.talend.com/download/big-data, and scroll at the bottom of the page to see the download section as shown in the following screenshot:
Talend Open Studio for Big Data download section
The product is a generic bundle, which can be run either on Mac, Linux, or Windows. This book uses the last version of the product; just click on the Download now button to get the TOS_BD-r110020-V5.4.0.zip archive of TOSBD.
Installing TOSBD
All products of the Talend community version are of Eclipse-based tooling
environment and packaged as archive. To install TOSBD, you only need to extract the archive preferably under a path, which doesn't contain any space, for example:
Operating system Path
Mac, Linux /home/username/talend/ Windows C:\talend\
Running TOSBD for the first time
As said earlier in the download section of this chapter, the product is generic and is packaged in one archive for several environments; thus, running TOSBD is just a matter of choosing the right executable file in the installation directory.
All executable filenames have the same syntax:
TOS_BD-[Operating system]-[Architecture]-[Extension]
Then, to run TOS_BD on a 64-bit Windows machine, TOS_BD-win-x86_64.exe should be run, TOS_BD-macosx-cocoa for Mac, and so on. Just choose the one that fits your configuration.
The first time you run the studio, a window will pop up asking to accept the terms of use and license agreement; once accepted, the project configuration wizard will appear. It presents the existing project, in our case, only the default demo project exists. The wizard also proposes to import or create a project.
When you work with Talend products, all your developments are regrouped in a project, which is then stored in a workspace with other projects.
We are now going to create the project, which will contain all development done in this book. In the project wizard, perform the following steps:
Chapter 1
[ 11 ]
• Name your project; I've set the name to Packt_Big_Data; you don't really need the underscores, but you might guess that's just a habit of mine. • Click on Finish; you are now ready to run the studio:
TOSBD project configuration done
• A window will appear to let you create a Talend Forge account, which is really useful if you want to get the latest information on the products, interact with the products community, get access to the forum and also to the bug tracker (Jira), and more. So my advice would be to create an account or click on Ignore if you already have one.
• The studio will load all Big Data edition components and then open the welcome window, scroll down in the window, and check the Do not display again checkbox for the next studio boot as shown in the following screenshot:
Studio welcome page
Summary
So far, we have learned the difference between Talend Unified Platform and Talend Community Edition, and also how fast it is to set up a Talend Open Studio for Big Data development environment.
Building Our First Big
Data Job
This chapter will help you to understand how the development studio is organized and then how to use TOSBD components to build Big Data jobs.
In this chapter, we will cover the following: • TOSBD – the development environment • Configuring the Hadoop HDFS connection
• Writing a simple job that writes data in Hadoop HDFS • Running the job
• Checking the result in HDFS
TOSBD – the development environment
The studio is divided into the following parts:
• The Repository view on the left contains all the technical artifacts designed in the studio, such as jobs, context variables, code, and connection resources, as shown in the following screenshot:
The TOSBD Studio's Repository view
Chapter 2
[ 15 ]
The design view
• The properties and controls view is where you will get all information on your job, used context, components, and modules, and also have the ability to run a job in the studio without having to deploy it, as shown in the following screenshot:
• The last view is the Palette view, which by default is placed on the left-hand side of the studio; I manually move it next to the Repository view for the convenience of design. You can see the Palette view in the following screenshot:
TOSBD's Palette view
• The Palette view contains all the 500+ Talend components required to create a job.
• The last detail is about the perspective buttons located in the top-right corner, where you can switch from a studio resolution to the others. The main benefit if you ever switch to the commercial edition is that you will be able to switch between two products just by clicking on the button.
A simple HDFS writer job
Chapter 2
[ 17 ]
To do so, we'll need a Hadoop distribution, and fortunately, most of the software vendors are providing some quick-start virtual machines to be able to kick off a Big Data project.
From my side, I'm going to use a Cloudera CDH VM, which you also must have downloaded as mentioned in the previous chapter.
If you have installed and set up your VM as described in the Appendix, Installing Your Hadoop Cluster with Cloudera CDH VM you are ready to create your first job.
We will organize our studio's workspace and create a folder for each chapter by performing the following steps:
1. In the Repository view, right-click on Jobs and click on Create Folder. 2. Type Chapter1 and click on Finish. You will be able to see the Chapter1
folder, as shown in the following screenshot:
The workspace's structure
3. We will now create a new job in this new folder by right-clicking on it and choosing Create Job. A window will appear to give all the details of the job; just add the following properties and leave the rest blank, as they are not really useful, as shown in the next screenshot:
° Description: This job is part of the previous chapter of the Talend Big Data book and aims to write a new file in the Hadoop
distributed file system
Create a new job
4. When your job is opened, you will see a complete list of components in the Palette view, from application components such as SAP connectors, to database, file, and so on. The complete list of components is available on this link: http://talendforge.org/components/.
Take a deep breath; more than 500 components are waiting for you there!
Chapter 2
[ 19 ]
HDFS components
6. In Talend, reading and writing components end with the words Input and Output respectively. As we want to write in HDFS, we will use the tHDFSOutput component. Other components are described in detail in the documentation; their names give you a good idea of what they are used for.
7. Drag-and-drop the tHDFSOutput component in the design view and double-click on the component; the properties view should show all the information of the component, as shown in the following screenshot:
tHDFSOutput properties
8. As you can see, the preceding view lets you configure the component properly, depending on the distribution you want to use, your Hadoop distribution, the security, and so on.
9. We will be notified that a JAR file is missing in the studio, in order to use the component. This is because some JAR files and drivers are provided under a license that cannot be embedded in the Talend package. We can embed them by performing the following steps:
1. Click on the Install button.
2. Then in the pop up, follow the instructions to download and install the JAR.
10. If everything went well during the installation, the notification should have disappeared.
Chapter 2
[ 21 ]
1. Right-click on the Contexts node and choose Create context group. 2. Name the group as PacktContext and click on the Next button. 3. Add three variables and switch to the Values as Table tab to set the
following default values:
Name Value
hdfsHost CLOUDERA_VM_HOST_IP for example, 172.16.253.202
hdfsPort 8020
username YOUR_USERNAME (as seen in the VM setup Appendix) for example, bahaaldine
4. Click on the Finish button.
12. You will see throughout the book that contexts are really convenient and are anyway part of the Talend design's best practices. To use the context group in our job, just switch to the Contexts tab in the property view and click on Select Context Group, then select PacktContext and all the defined variables to add them to the job, as shown in the following screenshot:
13. We are ready to configure the tHDFSOutput component by just setting the following properties and keeping the rest as default:
Name Value
Distribution Cloudera
Hadoop version Cloudera CDH4.3+(YARN mode)
NameNode URI "hdfs://"+context.hdfsHost+":"+conte context.hdfsPort+"/"
User name context.username
File Name "/user/"+context.username+"/packt/ chp01/.init"
The following screenshot shows the tHDFSOutput_1 component's properties, as discussed in the preceding table:
The tHDFSOutput_1 component's settings
Chapter 2
[ 23 ]
14. The job, as it is, cannot run; we need an entry point that triggers the tHDFSOutput_1 component. To do that, we'll use the tFixedFlowInput_1 component for which I recommend that you read the documentation. Basically, this component is used to start the job's data flow with a custom data schema, custom constant, or variable data row, and by setting the number of rows the component should iterate.
15. Search the component in the Palette view and drag-and-drop it in the design view, as shown in the following screenshot:
Two components to reign on HDFS
16. We need to configure the tFixedFlowInput component to send a row, which will trigger the writing of our second component. However, we don't need data in the row; we'll just create an empty row by performing the following steps:
1. Click on the component, and in the Component tab of the property view, click on the Edit schema button.
2. Add a new column called empty.
3. Right-click on the component and choose Row / Main, and then connect it to tHDFSOutput to finish the job design.
The following screenshot shows the tFixedFlowInput_1 component's properties:
17. We are now ready to run the job and see what happens on HDFS:
1. In the property view, choose the Run tab and click on the Run button. 2. You should get the following output:
HDFS write output
Chapter 2
[ 25 ]
Checking the result in HDFS
To check if everything went well, we need to browse to HDFS and see if the empty. init file has been created. To do so, connect via SSH or directly through a terminal in your Cloudera VM, and issue the following command:
$ hadoopfs –ls /user/bahaaldine/packt/chap01
The following output will appear:
-rw-r--r-- 3 bahaaldinesupergroup 1 2013-11-20 02:15 /user/ bahaaldine/packt/chp01/.init
hadoopfsis the command-line utility to interact with HDFS; it supports all the basic shell commands such as ls, tail, mkdir, cat, and many others. For more information, I recommend that you read the documentation at http://hadoop.apache.org/ docs/r0.19.1/hdfs_shell.html.
Summary
At this point, we have learned how to use the different views in TOSBD and how to build a job and configure its components. We have also discussed how to use the basic HDFS commands to interact with the filesystem.
Formatting Data
In this chapter, we will be introduced to Twitter Sentiment Analysis, and see how we can format raw tweets into usable tweets. We will:
• Start by writing data into our Hadoop distributed file system
• Set up our Apache Hive environment to keep a reliable data structure
Twitter Sentiment Analysis
Sentiment analysis is one of the topics that you may have met with some of the most popular social network analytics tools. The goal of such analysis is to determine what people are feeling regarding a specific topic.
Twitter is a good candidate for sentiment analysis because of the tweet structure. The following is the one from the provided data set:
Sun Mar 17 08:33:59 CET 2013 (Nats25) OH MY GOOOOOOOD! Why am I awake L
We can see that the author is obviously not happy with the fact that he's awake so early on a Sunday morning. What if we could relate certain words or topics with certain emoticons? We could then get the mood of authors regarding their tweets. What if the word is a company name? Now you may understand the stakes behind the scene.
So, the purpose of all the later chapters is to create and set up all the required technical assets to implement the Twitter Sentimental Analysis. What we want here is to:
• Write tweet files on HDFS
• Extract hashtags, emoticons, and build sentiments still with Hive • Reveal tops hashtags, emoticons, and sentiments with Apache Pig • Export dry data to RDBMS wwith Apache Sqoop
Writing the tweets in HDFS
For convenience, we'll only work on one 60 MB tweet file, but real-life use cases are worked on several GB files. This file was generated with a Talend ESB Job that uses the Twitter streaming component, as shown in the following diagram:
If you have reached this part, this step should be easy because it's very close to what we did in the previous chapter.
The purpose here is to create a Job, which consumes our tweets like a file, but more than just consuming, we want to add some structure to our file before writing it to HDFS.
As you may have noticed in the previous part of this chapter, a tweet structure extracted with Talend ESB looks like the following one:
Chapter 3
[ 29 ]
So, we will use a tFileInputPositional component to read our file and extract the columns of our tweets as follows:
1. Create a new Job called CH02_01_HDFS_WRITING_TWEETS under a new Chapter2 folder.
2. Drag-and-drop a tFileInputPositional component from the palette. 3. Drag-and-drop an HDFSOutput component.
The first component reads data depending on the column position and length, so we need to create a schema and configure the column pattern. Double-click on the component and click on the Edit schema button in the component property view, as shown in the following screenshot:
The Edit schema button
Click on the Edit schema button to add the following columns:
Name Type
day_of_week String
month String
day_of_month String
time String
zone String
year String
The following screenshot shows the resulting schema configuration:
The tFileInputPositional schema
The following table contains a context variable whose value is set to the tweet files path. Create a new context variable and add the context with all variables to your Job:
Name Type
tweetFilePath PATH_TO_YOUR_TWEET_FILE
Finalize the component configuration with the following properties:
Name Type
File name / Stream context.tweetFilePath
Row separator \n
Pattern "3,4,3,9,5,5,*"
We now need to configure the tHDFSOutput component in the same way as we have done in Chapter2, Building Our First Big Data Job, but with one difference in the file path property, as given in the following table:
Name Type
File name / Stream "/user/bahaaldine/packt/chp02/tweet.log "
Chapter 3
[ 31 ]
The following diagram shows the Job execution; we can see that 580936 tweets had been written in HDFS.
Write tweets in HDFS
Do not hesitate to check in HDFS if the file has been properly written.
Setting our Apache Hive tables
Before trying to format our data, we need to create a data structure over HDFS to be able to manipulate the data in a convenient way. Apache Hive is a project of the Hadoop ecosystem, which adds an abstraction layer over HDFS and lets the user interact with the data using a SQL-like language called HiveQL. Because we don't want to directly request the big raw files stored in our Hadoop file system, we'll use Hive to:
• Create the tables representing the tweet structure contained in the files • Format the data using Hive User Defined Function (UDF)
More information on Hive can be found at http://hive.apache.org/. Let's dive into the first step and create a new Job to build our tweets table.
Since we have a better vision of the table, we should create a table to store our tweets. Thanks to the previous part in which we have seen all the required columns. We will create one table by performing the following steps:
1. Create a new Job CH02_02_HIVE_CREATE_TWEET_TABLE in the repository under the Chapter2 folder.
3. Drag-and-drop one tHiveConnection component and three tHiveRow components in the design view, as shown in the following screenshot:
Creating our new Hive Job
Basically, we need to connect to Hive with the tHiveConnection component and then select the proper Hive database, drop the tweet table if it already exists, and recreate it. I usually create such a Job to not only create tables for the first instance but also recreate them to initialize my environment when needed. To get a better understanding of our Job, we'll rename the different components by performing the following steps:
1. Double-click on a component.
2. In the property view, choose the Component view panel and change the label format for each component as follows:
° The tHiveConnection label should be renamed to connection to hive
Chapter 3
[ 33 ]
We'll use the context group that we have created in Chapter 2, Building Our First Big Data Job, and add the following variables related to Hive:
Name Value
As we are working in a pseudo-distributed mode with only one node, each service is hosted on the same VM so that the hosts are the same. But in the production mode, services can be distributed in several nodes, and the host and port can differ. We'll use these variables to establish the connection to our Hive environment by performing the following steps:
1. In the property view Contexts tab, add the context and all available variables to the Job.
2. Double-click on the tHiveConnection component. 3. Set the following component properties:
Name Value
Distribution Cloudera
Hadoop Version Cloudera CDH4.3+(YARN mode)
Connection mode Embedded
Hive Server Hive 1
Host context.hiveHost
Port context.hivePort
Set JobTracker URI Checked with URI:
context.JTHost+":"+context.JTPort
Set Namenode URI Checked with URI:
You may have noticed that we need to install a JAR file to be able to use the tHiveConnection component; just click on the Install Jar button and follow the instructions.
Now that our Hive connection is properly configured, we can use this connection for each tHiveRow component by performing the following steps:
1. Double-click on the component.
2. In the property view, check the Use an existing connection checkbox. 3. Be sure tHiveConnection 1 is selected in the drop-down list.
Each tHiveRow component basically consists of HiveQL queries that interact with our Hive server. Let's configure this component by performing the following steps:
1. The first Hive component selects the right database by using the following command:
use default
2. The second component drops the existing tweets table by using the following command:
DROP TABLE IF EXISTS tweets
3. The third one create a new tweets table as follows:
CREATE EXTERNAL TABLE tweets
(day_of_week string, mont string, day_of_month string, time
string, zone string, year string, username string, content string) ROW FORMAT DELIMITED FIELDS TERMINATED BY ';'
LOCATION '/user/"+context.username+"/packt/chp02
4. We set the delimiter to the semicolon, and the data location to the directory where we have written the tweets file.
5. Connect the component by right-clicking on it and choosing onComponent Ok for each of them. At the end, your Job should look as follows:
Chapter 3
[ 35 ]
Checking in Hive if the table has been created is pretty easy; just open a terminal in your Cloudera VM and issue the following commands:
• $ hive: This command connects to the Hive server and opens the Hive command-line tool
• $ use default: This command selects the database
• $ desc tweets: This command shows tweets table description and prints the following information:
The Hive tweet table's description
Formatting tweets with Apache Hive
In this last part of the Hive integration process, we now need to create a formatted tweet table and separate the content into the following two parts:
• The effective content of the tweet • The username of the tweet author
We are doing this because so far we only have the merged content and we couldn't determine who is the most active user on a specific topic. This is very useful, for example, for a political party to get a list of the tough leaders during the electoral period. As you understood the added value can be really significant, we need to proceed with the following steps to reach to this goal:
1. Right-click on CH02_02_HIVE_CREATE_TWEET_TABLE and duplicate it into a new CH02_03_HIVE_FORMAT_DATA Job under the Chapter2 folder. 2. Modify the third tHiveRow component and change the dropped table name
using the following command:
3. Modify the request in the last tHiveRow component to change the table name, add a new username column, and change the data location folder using the following command:
CREATE EXTERNAL TABLE formatted_tweets (day_of_week string, mont string, day_of_month string, time string, zone string, year string, username string, content string) ROW FORMAT DELIMITED FIELDS TERMINATED BY ';' LOCATION '/user/"+context.username+"/ packt/chp02/formatedTweets"
So far, we only have the part that creates a formatted_tweets table over HDFS, but we need to use the Talend Hive ELT features to feed the formatted tweets HDFS folder. This is done by performing the following steps:
1. From the palette, drag-and-drop a tHiveELTInput component, a
tHiveELTMap component, and a tHiveELTOutput component. ELT
components, as compared to ETL components, execute the transformation / mapping code on the related technology server, whereas ETL components execute the processing code on Talend server. This means that, here, the Hive-generated transformation code will be executed on our Hadoop server. 2. In the tHiveELTInput component, we need to specify the source table name,
which is tweets here, and specify the schema. To avoid creating each column manually again in the edit schema section, go to the previous CH02_01
Job, click on Edit schema of the tHDFSOutput component, and copy all the columns present in the schema by selecting all the columns and using the Copy button next to the down arrow:
Chapter 3
[ 37 ]
3. Go back to our new Job, click on the Edit schema button of the tELTInput component, and paste the schema, as shown in the preceding screenshot. 4. Paste it also in the tELTOutput component and add a username column
before the last content column.
5. Link the tELTInput component to the tELTMap component.
6. Link the tELTMap component to the tELTOuput component; the new output creation dialog will appear; name it like our new table formatted_tweets. 7. We need to map the source data to the target column; some are the same,
whereas others need to call a Hive user-defined function. Instead of mapping them one by one, click on the Auto Map button in the top-right corner and then modify the mapping for the following columns:
Target Source
username regexp_replace( split(tweets.content,'\\\\)')[0], '\\\\
(', '')
content substr(tweets.content, locate(')', tweets.content)+2)
The first expression contains a nested split expression, which first splits the content where the first closing bracket occurs and gets the first element in the return array.
If we apply this to the previous example, we would get the following result : (Nats25
Then second part of the expression uses the regexp_replace function to delete the opening brackets. If we take the result of the first part, then we should get the username without any brackets, which is, Nats25.
The second expression is just a substr expression, which extracts the tweet content from the first closing bracket to the end of the tweet content.
The Hive tweet formatting Job
Run the Job and check in Hive if the table has been created and fed by issuing the following command in the Hive command-line tool:
$ select * from formatted_tweets
You should see that now, the username and the content are separated.
Summary
Processing Tweets with
Apache Hive
In this chapter, we'll learn how to use tweets to highlight sentiments by performing the following actions:
• Extracting hashtags and emoticons from tweets
• Joining the newly created hashtags and emoticon tables to create sentiments
Extracting hashtags
In this part and the following one, we'll see how to extract data efficiently from tweets such as hashtags and emoticons. We need to do it because we want to be able to know what the most discussed topics are, and also get the mood across the tweets. And then, we'll want to join that information to get people's sentiments.
We'll start with hashtags; to do so, we need to do the following:
1. Create a new hashtag table.
2. Use a function that will extract the hashtags from the tweet string. 3. Feed the hashtag table with the result of the extracted function. So, I have some bad news and good news:
• Good news: Hive provides an extremely efficient way to create a Hive table from an array. We'll then use the lateral view and the Explode Hive UDF to do that.
The following is the Hive-processing workflow that we are going to apply to our tweets:
Hive-processing workflow
The preceding diagram describes the workflow to be followed to extract the hashtags. The steps are basically as follows:
1. Receive the tweets.
2. Detect all the hashtags using the custom Hive user-defined function. 3. Obtain an array of hashtags.
4. Explode it and obtain a lateral view to feed our hashtags table.
Chapter 4
[ 41 ]
Let's do this by creating a new CH04_01_HIVE_PROCESSING_HASH_TAGS job under a new Chapter4 folder. This job will contain six components:
• One to connect to Hive; you can easily copy and paste the connection component from the CH03_03_HIVE_FORMAT_DATA job
• One tHiveRow to add the custom Hive UDF to the Hive runtime classpath
The following would be the steps to create a new job:
1. First, we will add the following context variable to our PacktContext group:
Name Value
custom_udf_jar PATH_TO_THE_JAR
For example: /Users/bahaaldine/here/is/ the/jar/extractHashTags.jar
This new context variable is just the path to the Hive UDF JAR file provided in the source file
2. Now, we can add the "add jar "+context.custom_udf_jar Hive query in our tHiveRow component to load the JAR file in the classpath when the job is being run.
3. We use the add jar query so that Hive will load all the classes in the JAR file when the job starts, as shown in the following screenshot:
4. After the JAR file is loaded by the previous component, we need tHiveRow to register the custom UDF into the available UDF catalog. The custom UDF is a Java class with a bunch of methods that can be invoked from Hive-QL code. The custom UDF that we need is located in the org.talend.demo package of the JAR file and is named ExtractPattern. So we will simply add the "create temporary function extract_patterns as 'org. talend.demo.ExtractPattern'" configuration to the component.
We use the create temporary function query to create a new extract_patterns function in Hive UDF catalog and give the implementation class contained in our package
5. We need one tHiveRow to drop the hashtags table if it exists. As we have done in the CH03_02_HIVE_CREATE_TWEET_TABLE job, just add the "DROP TABLE IF EXISTS hash_tags" drop statement to be sure that the table is removed when we relaunch the job.
6. We need one tHiveRow to create the hashtags table. We are going to create a new table to store the hashtags. For the purpose of simplicity, we'll only store the minimum time and description information as shown in the following table:
7. The essential information here is the hash_tags_label column, which contains the hashtag name. With this knowledge, the following is our create table query:
CREATE EXTERNAL TABLE hash_tags ( hash_tags_id string,
Chapter 4
[ 43 ] hash_tags_label string)
ROW FORMAT DELIMITED FIELDS TERMINATED BY ';' LOCATION '/user/"+context.hive_user+"/packt/chp04/hashtags'
Nothing new here, just a new table as we have created in the previous chapter.
8. Finally we need a tHiveRow component to feed the hashtags table. Here, we are going to use all the assets provided by the previous components as shown in the following query:
insert into table hash_tags select
concat(formatted_tweets.day_of_week, formatted_tweets. day_of_month,
formatted_tweets.time, formatted_tweets.month) as hash_id, formatted_tweets.day_of_week, formatted_tweets.day_of_month, formatted_tweets.time,
formatted_tweets.month, hash_tags_label
from formatted_tweets LATERAL VIEW explode(
extract_patterns(formatted_tweets.content,'#(\\\\w+)') ) hashTable as hash_tags_label
Let's analyze the query from the end to the beginning. The last part of the query uses the extract_patterns function to parse in the formatted_tweets.content all hashtags based on the regex #(+).
In Talend, all strings are Java string objects. That's why we need here to escape all backslash. Hive also needs special character escape, that brings
us to finally having four backslashes.
The extract_patterns command returns an array that we inject in the exploded Hive UDF in order to obtain a list of objects. We then pass them to the lateral view statement, which creates a new on-the-fly view called hashTable with one column hash_tags_label. Take a breath. We are almost done.
We just need to run the job, and then, using the following query, we will check in Hive if the new table contains our hashtags:
$ select * from hash_tags
The following diagram shows the complete hashtags-extracting job structure:
Hive processing job
Extracting emoticons
I think you have guessed that it is exactly the same job for emoticons. Instead of running into details for each step, like we did for the hashtags, it will be a good exercise for you to duplicate the hashtags job and adapt it for the emoticons, keeping in mind the following requirements:
• Create a new CH04_01_HIVE_PROCESSING_EMOTICONS job
• The emoticons table named emoticons has the following structure:
Name Value
emoticons_id String
day_of_week String
day_of_month String
time String
month String
emoticons_label String
• The following is a regex pattern I've built for emoticons:
Chapter 4
[ 45 ]
One word crosses my mind when I read fat. In case you want to learn more about regular expressions, I recommend that you read a documentation from Mozilla at https://developer.mozilla.org/en-US/docs/Web/ JavaScript/Guide/Regular_Expressions, which gives a detailed description of all regular expressions. Also, if you want to test your regex, then I recommend an online Ruby tool, which is really convenient and efficient for debugging, and can be found at http://rubular.com/. • The following is a screenshot of what the tHiveRow configuration and
whole query looks like:
Emoticons extracting query
• Following is the request for your convenience:
insert into table emoticons
select concat(tweets.day_of_week, tweets.day_of_month, tweets. time, tweets.mont)
as emoticons_id, tweets.day_of_week, tweets.day_of_month, substr(tweets.time,1,2), tweets.mont, emoticons_label from tweets LATERAL VIEW explode( extract_pattern(tweets.con tent,'((?:\\;|:|=|8|\\\\^|X|:\\'|<|>)(?:-|O|c|\\\\.|_|\\\\^) ?(?:D|P|<|>|\\\\)\\\\)|\\\\(\\\\(|\\\\|\\\\||\\;|=|X|O|\\\\* |S|\\\\||\\\\{|\\\\}|\\\\[|\\\\]|\\\\(|\\\\)))' ) )
emoticonTable as emoticons_label
As I said, you will obtain exactly the same job structure as shown in the following diagram:
At the end, you should obtain, as you did for the hashtags, an emoticons table with all emoticons in it. Run the following query to check it in Hive:
$ select * from emoticons
Joining the dots
This part is pretty straightforward because we only need to join our two hashtags and emoticons table to create the sentiment table, so we need the following components:
• A tHiveConnection component to connect to Hive; nothing new here, just copy and paste one of the previous connection components
• A tHiveRow component to drop the sentiment table if it exists; just add the following drop statement to remove the sentiment table each time you run the job:
DROP TABLE IF EXISTS sentiments
• The following screenshot shows tHiveRow with the drop statement:
tHiveRow Sentiment drop component
• A tHiveRow component to create the sentiment table:
CREATE EXTERNAL TABLE sentiments ( hash_tags_label string,
Chapter 4
[ 47 ] emoticons_label string)
ROW FORMAT DELIMITED FIELDS TERMINATED BY ';'
LOCATION '/user/"+context.hive_user+"/packt/chp04/ /sentiments'
• A tHiveRow component to feed the sentiment table by joining the hashtags and emoticons tables:
insert into table sentiments select hash_tags.hash_tags_label, hash_tags.time,
emoticons.emoticons_label
from hash_tags INNER JOIN emoticons
ON hash_tags.hash_tags_id == emoticons.emoticons_id
This is still very simple; using the INNER JOIN statement, one subrequest will join the hashtags and emoticons tables and then select the hash_tags_label and the emoticons_label component, and one master request is used to insert the selected data in our new table.
Configuring the Hive join request to build sentiments
• The sentiment table job should have a structure as shown in the following diagram:
So simple and so fast! This is one of the benefits of developing with Talend, reusing assets. Most of the time, your job will use the same connection, the same data structure, the same context variables, and so on, so you then have several ways to reuse assets, and they are as follows:
• Define your connection and data structure in the repository and reuse them among your jobs
• Define the project and job templates and kick off a new development from that
• Duplicate existing jobs and modify them to fit the new needs
Most of the reusing features are only available in the enterprise version of the product, especially when it comes to the repository, which is just present in its lightest version in the product community versions. Basically, duplicating jobs and copying and pasting components are your only options in the community versions.
By now, you should have verified in Apache Hive that the sentiment table has been created correctly with a list of hashtags and the related emoticons.
You just need to run the following query to visualize the rows in the sentiment table:
$ select * from sentiments
Summary
Aggregate Data with
Apache Pig
In this chapter, we'll learn how to highlight the top records including the following ones using Pig:
• The top Twitter users • The top hashtags • The top emoticons • The top sentiments
Knowing about Pig
Like Apache Hive, Apache Pig is an abstraction layer in HDFS. It enables developers to process data stored in HDFS with a language called Pig Latin, which is completely different from HiveQL, but is an easy-to-use, optimized, and extensible programming language.
You will see that in Talend, the integration with Pig is better than for Hive, where, except for the tHiveELT component, we often have to write the HiveQL language. Talend ships out of the box Pig components that implement 90 percent of Pig's use cases.
So basically, what we want to do here is highlight the top data. The processing workflow would be as follows:
• Loading the data from HDFS
• Applying some filters on the loaded data
A Talend Pig filtering component is shown in the following screenshot:
The Talend Pig filtering component
• Using grouping functions such as count to count the number of occurrences, or max to get the maximum among records, as shown in the following screenshot:
Chapter 5
[ 51 ]
• Sorting data in the descending mode, as shown in the following screenshot:
Talend Pig sorting component
• Storing processed data in HDFS
We'll start by extracting the top Twitter users, then hashtags, emoticons, and finally the sentiments we have built.
Extracting the top Twitter users
As you may have understood, all jobs will have the same structure; I will describe in great detail this job and then give a big picture for the other parts.
At the end, your job should look as follows:
The basic steps will be to load the data, filter columns, use aggregate functions, sort data, and store the resulting data.
To create the CH05_01_PIG_TOP_TWITTERS job under a new chapter5 directory, we will need the following components:
• A tPigLoad component to load the data from HDFS.
Actually, this component can load data from another type of storage; you can even extend your own loader or storer by implementing a Pig UDF given in the following screenshot:
Pig UDF
We need the following context variables to use this component:
Name Value
resourceManagerHost CLOUDERA_HOST
for example, 172.16.253.202
resourceManagerPort 8032
Chapter 5
[ 53 ]
Property Value
Distribution Cloudera
Version Cloudera 4.3+
Namenode URI "hdfs://+context.
hdfsHost+:context.hdfsPort"
Resource Manager context.
resourceManagerHost+":"+context. resourceManagerPort
Input File URI "/user/"+context.username+"/ packt/chp02/formatedData"
Field separator ";"
The component points to the file that contains all the formatted data obtained with the CH03_03_HIVE_FORMAT_DATA job.
• A tPigFilterColumns component to filter the username and time columns in order to get the top Twitter users across the time. You need to click on the Edit schema button and only retain the username and time columns. Don't forget that we are designing a Pig job, and that the goal is to generate the Pig code in our Talend Studio. Thus, it's not possible to use a usual Talend component such as tFilterColumns that does the same job as that of the tPigFilterColumns component, but doesn't generate Pig code.
• A tPigAggregate component (tPigAggregate_1) to count the number of occurrences by username. We will group by username and time, and add the count operation on the username column to obtain the username_count column, as shown in the following screenshot:
Count usernames by time
• A tPigAggregate component to get the username that appeared the most number of times. We will still group by username and time, and add the max operation on the username_count column, as shown in the following screenshot:
Chapter 5
[ 55 ]
• A tPigSort component to get the list of usernames in the descending order. Here, we will just add the created username_count column ordered in the descending mode, as shown in the following screenshot:
Descending ordering
• A tPigStoreResult component to store the processed results. Finally, we'll just set the Result Folder URI field in the component, as shown in the following screenshot:
The tPigStoreResult component's settings
Run the job and check in HDFS by issuing the following command to be sure that we have the list of top Twitter users sorted by time:
$ hadoopfs –cat /user/bahaaldine/packt/chp05/twitters
Extracting the top hashtags, emoticons,
and sentiments
Now that you have understood the pattern used to design the job, you can duplicate it and reproduce the flow to highlight the hashtags, emoticons, and sentiments.
The following are the broad outlines for the hashtags', emoticons', and sentiments' Pig-processing jobs:
• We don't need the max grouping function as it will filter some records, and we want to keep all the records. The job structure of the top values is as follows:
Top values' job structure
• The source columns to filter hashtags are hash_tags_label and time, and the ones to filter emoticons are emoticon_label and time. The source columns to filter hashtags are shown in the following screenshot:
The hashtag job's filtered columns
• The top sentiment job doesn't need to filter columns, as we only have the hash_tag_label, emoticon_label, and time columns, as shown in the following diagram:
Chapter 5
[ 57 ]
• For hashtags, store the data in "/user/"+context.username+"/packt/ chp05/hashtags".
• For emoticons, store the data in "/user/"+context.username+"/packt/ chp05/emoticons".
• For sentiments, store the data in "/user/"+context.username+"/packt/ chp05/sentiments".
At the end, you should have four jobs, one for the top Twitter users, one for the top hashtags, one for the top emoticons, and one for the top sentiments, as shown in the following screenshot:
A repository of top extracting jobs
From the point of view of the Twitter sentiment use case, as we have these top values, we can draw chart-like timelines, such as the Twitters timeline shown in the following diagram, which reveals the most active users for each hour:
Summary
After Hive, we have seen in this chapter how to process data using Talend Pig components, and how filtering, grouping, and sorting can be achieved with some clicks.
Back to the SQL Database
In this chapter, we'll learn how to work with the Talend Sqoop component in order to export data from HDFS to a SQL database.
Linking HDFS and RDBMS with Sqoop
Apache Sqoop is a project that enables developers to transfer data between their Hadoop cluster and relational database. Talend provides components to implement a data process based on Sqoop transfer, as shown in the following screenshot:
Sqoop components
Exporting and importing data to a MySQL
database
As you can imagine, exporting data using Sqoop will be pretty easy with Talend, so easy that it will require only the following components:
• A tLibraryLoad component to load our database library JAR file. Some components in Talend Palette are dedicated to a specific database, so when you use them in a job, all the required drivers are loaded without the need of thinking about it. For example, if I want to read a table in MySQL, I'll use the tMySQLInput component, which loads the MySQL JAR driver.
Here, with Sqoop, as it's a generic component, we don't know in advance what kind of database we want to work with; that's why we have to manually load the JAR file with the tLibraryLoad component. • A tSqoopExport component to export the data. The library load only
requires to point on your database library JAR file, which can be chosen in the tLibraryLoad component's drop-down list, as shown in the following screenshot:
Chapter 6
[ 61 ]
Just search in the drop-down list to check whether the library is shipped in the Studio, or click on the button next to the dropdown to manually add your JAR file. Here, I'm using the mysql-connector-java-5.1.22-bin.jar library to connect to MySQL.
Before configuring the tSqoopExport component, we will add to our existing context group the following context variables, which will be used to connect our database:
Name Value
mysql_host MYSQL_HOST
for example, 172.16.253.203
mysql_port MYSQL_PORT
for example, 3396
mysql_user MYSQL_USER
mysql_password MYSQL_PASSWORD
mysql_twitters_table MYSQL_TWITTERS_TABLE
for example, top_twitters
mysql_hash_tags_table MYSQL_HASH_TAGS_TABLE
for example, top_hash_tags
mysql_emoticons_table MYSQL_EMOTICONS_TABLE
for example, top_emoticons
mysql_sentiments_table MYSQL_SENTIMENTS_TABLE
Then, we just add the context group to our job, like we did in the previous hands-on chapter, and we will set up the tSqoopExport component's properties as shown in the following screenshot:
The Sqoop component's properties tab
Here is the table of properties from where you can copy and paste easily:
Name Value
Distribution Cloudera
Hadoop version Cloudera CDH4.X (MR 1 mode)
NameNode URI "hdfs://"+context.
hdfsPort+":"+context.hdfsPort
JobTracker Host context.JTHost+":"+context. JTPort
Chapter 6
A word on the Export Dir variable: This variable defines the folder
from where the data will be exported. In our case, it will be all the directories that we created in the previous hands-on chapter.
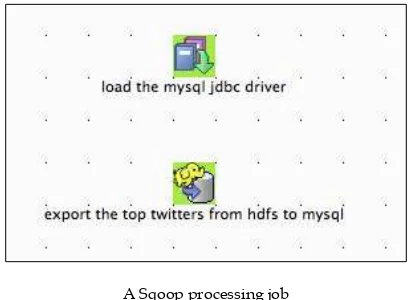
That's it. Your job should have the following structure:
A Sqoop processing job
Here, we have completed the job for exporting the top Twitter users, and this is the same for the rest. You just need to change the Sqoop Export Dir property and the Table Name property in each case. As you may have understood, the MySQL table will have the exact same structure as that of the output of the Pig Jobs that we created in the previous chapter; so typically, if I stick to the twitters example, then the table creation script will be as follows:
CREATE TABLE `top_twitters` ( `username` varchar(50) NOT NULL, `time` varchar(2) NOT NULL,
In the provided source files, you will find a SQL script to create all the tables. Importing data is also really easy to implement; keep the same job structure and replace the tSqoopExport component with a tSqoopImport component, then set the component's properties. The following screenshot shows the tSqoopImport component's properties tab, which is almost the same that you have set for the tSqoopExport component:
The tSoopImport component's properties
Summary
Big Data Architecture and
Integration Patterns
In this chapter, we'll see two examples of deployment based on Twitter Sentiment analysis:
• The streaming pattern • The partitioning pattern
The streaming pattern
In a Big Data project, you have two common ways to write your data in the cluster: • Bulk mode: In this mode, big files are punctually written and processed in the cluster. These are generally handled by background schedule jobs, for example a nightly scheduled job. We have seen how to design such a job in Chapter 2, Building Our First Big Data Job.
• Streaming mode: In this mode, the Hadoop cluster is coupled with a real-time technology layer such as Apache Flume or an Enterprise Service Bus (ESB) so that the files are polled and automatically written in real time as they are created. Depending on polling rules, you can configure the file, such as the file size.
So, Talend ESB is based on Apache projects such as Apache Camel for the routing part. An ESB is mainly used for the following purposes:
• It eases integration between IT system applications • Service enablement such as web services
• It acts as a single point of service accesses monitoring in the system Here, we are using Talend ESB integration and service-enablement capabilities to stream tweets from Twitter using the Camel Twitter component, and then writing the data in a file that is then pushed in HDFS.
Talend ESB is then used to create a Twitter-to-HDFS service using the two worlds: Camel and HDFS data-integration components. The following diagram gives an overview of the data-flow process:
The data-flow process of the Streaming mode
As files are pushed in HDFS, all contained tweets continuously integrate the processing chain we have implemented so far. The data will then stay updated. Talend ESB consists of two services: