HTML5
Step by Step
Sebastopol, California 95472
Copyright © 2011 Faithe Wempen
Complying with all applicable copyright laws is the responsibility of the user. All rights reserved. Without limiting the rights under copyright, no part of this document may be reproduced, stored in or introduced into a retrieval system, or transmitted in any form or by any means (electronic, mechanical, photocopying, recording, or otherwise), or for any purpose, without express written permission of O’Reilly Media, Inc.
Printed and bound in Canada.
1 2 3 4 5 6 7 8 9 TG 6 5 4 3 2 1
Microsoft Press titles may be purchased for educational, business or sales promotional use. Online editions are also available for most titles (http://my.safaribooksonline.com). For more information, contact our corporate/institutional sales department: (800) 998-9938 or [email protected]. Visit our website at microsoftpress.oreilly.com. Send comments to mspinput@ microsoft.com.
Microsoft, Microsoft Press, ActiveX, Excel, FrontPage, Internet Explorer, PowerPoint, SharePoint, Webdings, Windows, and Windows 7 are either registered trademarks or trademarks of Microsoft Corporation in the United States and/or other countries. Other product and company names mentioned herein may be the trademarks of their respective owners.
Unless otherwise noted, the example companies, organizations, products, domain names, e-mail addresses, logos, people, places, and events depicted herein are fictitious, and no association with any real company, organization, product, domain name, e-mail address, logo, person, place, or event is intended or should be inferred.
This book expresses the author’s views and opinions. The information contained in this book is provided without any ex-press, statutory, or implied warranties. Neither the author, O’Reilly Media, Inc., Microsoft Corporation, nor their respective resellers or distributors, will be held liable for any damages caused or alleged to be caused either directly or indirectly by such information.
Acquisitions and Development Editors: Russell Jones and Kim Spilker
Production Editor: Kristen Borg
Production Services: Octal Publishing, Inc.
What do you think of this book? We want to hear from you!
Microsoft is interested in hearing your feedback so we can continually improve our books and learning resources for you. To participate in a brief online survey, please visit:
microsoft.com/learning/booksurvey
Contents
Acknowledgments . . . xiii
Introduction . . . xv
What Is HTML? . . . xix
Understanding HTML Tags . . . .xix
Understanding Cascading Style Sheets . . . .xxi
Why Learn HTML in Notepad? . . . .xxi
Choosing an HTML Version . . . . xxii
Why Code in HTML5? . . . .xxiii
Minimum System Requirements . . . .xxiv
Using the Practice Files . . . xxv
Getting Help . . . xxviii
Conventions and Features in This Book . . . xxix
What Next? . . . . xxx
Part 1
Getting Started with HTML
1
Editing and Viewing HTML Files
3
Opening a Web Page in Notepad . . . . 3Adding the Data File Location to the Favorites List . . . . 5
Opening a File from Windows Explorer . . . . 7
Previewing a Web Page in a Web Browser . . . . 7
Making, Saving, and Viewing Changes . . . . 10
2
Setting Up the Document Structure
13
4
Using Lists and Backgrounds
47
Creating Bulleted and Numbered Lists . . . .485
Creating Hyperlinks and Anchors
67
Hyperlinking to a Web Page . . . .68Using Partial Paths and Filenames . . . .68
Using Relative and Absolute Paths . . . . 69
Contents vii
Hyperlinking to an E-Mail Address . . . . 71
Creating and Hyperlinking to Anchors . . . . 75
Hyperlinking to Other Content . . . . 78
Key Points . . . . 81
Part 2
Style Sheets and Graphics
6
Introduction to Style Sheets
85
Understanding Styles . . . .867
Formatting Text by Using Style Sheets
103
Specifying a Font Family . . . .1049
Displaying Graphics
141
Part 3
Page Layout and Navigation
10
Creating Navigational Aids
165
Embedding Video Clips . . . .277
16
Including JavaScript and External Content
287
Introducing the Canvas . . . .287Contents xi
Inserting Hyperlinks . . . .340
Key Points . . . .343
Part 5
Appendixes
A
Designing for Usability
347
Understanding Usability . . . .347B
Designing for Accessibility
353
Guideline 1: Provide Equivalent Alternatives to Auditory and Visual Content . . . .354Guideline 2: Don’t Rely on Color Alone . . . .354
Guideline 3: Use Markup and Style Sheets, and Do So Properly . . . . 355
Guideline 4: Clarify Natural Language Usage . . . .356
Guideline 5: Create Tables that Transform Gracefully . . . .356
Acknowledgments
Introduction
Hypertext Markup Language (HTML) is the underlying markup language of the World Wide Web . It’s the common thread that ties together virtually every Web site, from large-scale corporate sites such as Microsoft’s to single-page classroom projects at the local grade school .
Don’t let the phrase “markup language” intimidate you . A markup language annotates or “marks up” plain text, letting a browser know how to format that text so it looks good on a Web page . It’s easy to get started—in fact, you can create a simple Web page in just a few minutes . While full-featured What You See Is What You Get (WYSIWYG) tools exist that can help speed up the process of writing Web pages, all you really need is an ordi-nary text-editing program such as Microsoft Notepad . You don’t need special software or extensive training .
In this introduction, you’ll learn some basics about HTML . You’ll find out how they turn plain text into attractive formatting, how they incorporate graphics and hyperlinks, and how anyone can create Web content in virtually any program that edits text . This intro-duction explains what cascading style sheets (CSS) are, and how they make formatting consistent across large Web sites . You’ll also discover the differences between HTML4, XHTML, and HTML5, so you can make the important decision about which version of HTML you want your code to conform to . Finally, you’ll learn about the conventions used in this book for pointing out special helps like notes, tips, cautions, and references to the data files .
How to Access Your Online Edition Hosted by Safari
The voucher bound in to the back of this book gives you access to an online edition of the book . (You can also download the online edition of the book to your own computer; see the next section .)To access your online edition, do the following:
1. Locate your voucher inside the back cover, and scratch off the metallic foil to reveal your access code .
2. Go to http://microsoftpress.oreilly.com/safarienabled .
(Please note that the access code in this image is for illustration purposes only .)
4. Click the CONFIRM COUPON button .
A message will appear to let you know that the code was entered correctly . If the code was not entered correctly, you will be prompted to re-enter the code .
5. In this step, you’ll be asked whether you’re a new or existing user of Safari Books Online . Proceed either with Step 5A or Step 5B .
Introduction xvii
5B. If you are a new user, click the NEW USER – FREE ACCOUNT button under Step 2 .
● You’ll be taken to the “Register a New Account” page .
● This will require filling out a registration form and accepting an End User Agreement .
● When complete, click the CONTINUE button .
6. On the Coupon Confirmation page, click the My Safari button .
7. On the My Safari page, look at the Bookshelf area and click the title of the book you want to access .
How to Download the Online Edition to
Your Computer
In addition to reading the online edition of this book, you can also download it to your computer . First, follow the steps in the preceding section . After Step 7, do the following:
1. On the page that appears after Step 7 in the previous section, click the Extras tab .
A new browser window or tab will open, followed by the File Download dialog box:
3. Click Save .
4. Choose Desktop and click Save .
5. Locate the .zip file on your desktop . Right-click the file, click Extract All, and then follow the instructions .
Note If you have a problem with your voucher or access code, please contact
What Is HTML?
In simple terms, a Web page (or HTML document) is a plain text file that has been encoded using Hypertext Markup Language (HTML) so that it appears nicely formatted in a Web browser . Here’s what HTML means, word-by-word:
● Hypertext Text that you click to jump from document to document . This is a refer-ence to the ability of Web pages to link to one another .
● Markup Tags that apply layout and formatting conventions to plain text . Literally, the plain text is “marked up” with the tags .
● Language A reference to the fact that HTML is considered a programming language .
Tip When people think of computer programming, they usually think of writing a compiled program. A compiled programming language runs the human-readable programming code through a utility that converts it to an executable file (usually with an .exe or .com extension), which is then distributed to users. In contrast, HTML is an interpreted programming language. That means the program is distributed in human-readable format to users, and the program in which it is opened takes care of running it. The HTML code for Web pages resides in files. Each time your Web browser opens a Web page, it processes the HTML code within the file.
Understanding HTML Tags
The code within an HTML file consists of text surrounded by tags . These tags indicate where the formatting should be applied, how the layout should appear, what pictures should be placed in certain locations, and more .
For example, suppose you wanted a certain word to be italicized, like this: Everything is on sale .
In HTML, there’s no Italics button to click, like there is in a word-processing program . There-fore, you have to “tag” the word that you want to be italicized . The code to turn on italics is <i>, and the code to turn italics off is </i> . Your HTML code would look something like this: <i>Everything</i> is on sale.
To understand how this system of tagging came about, you need to know that back in the olden days of the Internet, nearly everyone connected to it by using a dial-up modem, at speeds ranging from 2400 bps to 28 .8 Kbps . That’s really slow . Text files transfer much faster than binary files, so for any type of information-sharing system to be popular, it had to be text-based . Otherwise, people would doze off while waiting for a page to load .
People designing Web pages also wanted their pages to be attractive . They couldn’t just format pages in a word processor, though, because every word processor handled formatting differently, and it was impossible to know which one a visitor to a site might be using . Word processing files are also much larger than plain text files .
The Web’s creators developed an elegant solution . Instead of sending the formatted pages over the Internet, they created an application—a Web browser—that could interpret plain-text code (HTML tags) as formatting instructions . The text could be sent quickly and efficiently in plain-text format, and then be processed and displayed attrac-tively and graphically on the local PC .
HTML worked great all by itself for all kinds of text formatting, but some Web designers wanted to include graphics on their pages . To accommodate this, the <img> tag was created, which designers use to refer to a graphic stored on a server . When the Web browser gets to that tag, it requests that the image file be downloaded from the server and displayed on the page . (You’ll learn how to insert images in Chapter 9, “Displaying Graphics .”)
The <img> tag is different in several ways from the <i> tag . It is one-sided, meaning it does not have a closing tag, and it takes attributes . An attribute is text within the tag that contains information about how the tag should behave . For example, for an <img> tag, you have to specify a source, abbreviated src . Here’s an example:
<img src=”tree.gif”>
This <img> tag uses the src= attribute, and specifies that the file tree.gif be displayed .
Many tags accept attributes, either optional or required . You’ll see many examples throughout the exercises in this book .
What Is HTML? xxi
The tag for a hyperlink is <a>, a two-sided tag, but most people wouldn’t recognize it without the attribute that specifies the file or location to which to jump . For example, to create a hyperlink with the words Click Here that jumps to the file index.htm when clicked, the coding would look like this:
<a href=”index.htm”>Click Here</a>
There’s a lot more to HTML, of course, but that’s basically how it works . Plain text is marked up with tags that indicate where elements such as formatting, hyperlinks, and graphics should be applied, and a Web browser interprets those tags and displays the page in its formatted state . The trick, of course, is to know which tags to use, and where they’re appropriate, and what attributes they need . And that’s the subject of this book .
Understanding Cascading Style Sheets
Web designers who worked with early versions of HTML to create large Web sites were often frustrated by the amount of repetition involved in their jobs . Suppose a Web site has 200 pages, all using the same basic layout and design . To make a design change to the entire site, a designer would have had to go in and manually edit each of those 200 pages .
Later versions of HTML have gotten around this by supporting cascading style sheets . Based on the same principle as style templates in a word-processing or page-layout pro-gram, Web designers use cascading style sheets to specify the formatting for a particular tag type—usually in a separate style sheet document—and then apply that style sheet to multiple pages . Need to make a change to the style? Simply make it in the style sheet, and the change is applied automatically to all pages .
Although you can still format documents by using older methods—and you’ll learn how to do a little of that in this book—most Web designers rely almost exclusively on cascad-ing style sheets for formattcascad-ing these days, and XHTML all but demands that you do so . It might seem intimidating at first, but if you are creating a multi-page site, the extra trouble involved in setting up a cascading style sheet will pay for itself many times over .
Why Learn HTML in Notepad?
Simply put, it’s because doing your own coding is the best way to learn HTML . In this book you’ll build a Web site from the ground up, writing every line of code yourself . It’s slower and not as much fun as a fancy graphical program, but it’s great training .
The last chapter of this book shows how to use Microsoft Expression Web to create Web content, and you may eventually choose to move to a program like that . However, you will be a much better Web designer—and understand what is going on in design pro-grams much better—if you tough it out with Notepad in the beginning .
Choosing an HTML Version
Different versions of HTML use different tags for some types of content, although they more similar than different overall, especially at the beginner level covered in this book . Here’s a quick comparison of the HTML versions you may encounter:
● HTML4 A very stable, universally accepted code set, which is also fairly forgiving of small coding errors . Using HTML4 codes is desirable when compatibility with all browsers is important .
● XHTML A strict, standards-based implementation of HTML4 created with XML (eXtensible Markup Language) . XHTML coding uses the same codes as HTML4, so it is compatible with the same browsers as HTML4 . (See the sidebar about XML on the next page for more information .)
● HTML5 A revised code set that builds upon HTML4 to add new capabilities . HTML5 offers many dramatic improvements in the areas of application handling and multimedia, but a lot of those features are beyond the scope of this book . In terms of basic coding, which is what this book teaches, the biggest difference is that there are new specific codes for different types of content that were previously handled with more general codes . For example, HTML5 has <audio> and <video> tags for inserting multimedia content, whereas HTML4 inserts all types of multimedia content via a generic <embed> tag .
Since this is a book about HTML5, it might seem like an obvious decision to do your cod-ing uscod-ing HTML5 tags, but it is not quite as simple as that in real-world situations . A good Web browser should ideally support every tag and every version of HTML it can, because the various HTML version differences should be completely invisible to the Web site visitor . However, HTML5 is so new that not all browsers have caught up to it yet, and people who use older computers may not have the latest version of a browser even if an HTML5 compatible version is available .
What Is HTML? xxiii
The code you will create as you work through the exercises in this book is based on HTML5, but I will also show you some workarounds in situations where HTML5 codes might cause problems in some browsers . You’ll learn both ways of creating a certain effect, so that you can make the call of which codes to use in your real-life work as the situations arise .
What are XML and XHTML?
There is a language related to HTML called Extensible Markup Language (XML) that programmers use to create their own tags . It’s widely used for Web databases, for example, because it can define tags for each data field . Because XML can be so completely customized, programmers can create almost any other markup lan-guage within it, just by re-creating all the officially accepted tags of that lanlan-guage . The W3C did just that: they re-created the entire HTML language in XML, and called it Extensible HTML (XHTML) . Version 1 .0 was released in 2001; the current version is XHTML 2 .0, released in 2004 .
XHTML, then, is HTML written within the larger language of XML . Because it is vir-tually identical to HTML in its functionality, the basic set of tags is the same, and you can learn both HTML and XHTML at the same time . You can also use XHTML to create new tags and extensions, which is a valuable feature for advanced Web developers .
There’s just one thing about XHTML to watch out for: it’s not tolerant of mistakes . For example, in HTML, technically you are supposed to begin each paragraph with <p> and end each paragraph with </p> . But in HTML you can leave out the closing </p> tag if you want (or if you forget it) . That won’t work in XHTML . There are lots of little ways that XHTML is picky like that .
At one point, it was thought that XHTML would eventually replace HTML4 as its successor, but due to interoperability problems, that has not happened; instead HTML5 is poised to succeed HTML4 . This book doesn’t explicitly cover XHTML, but most of what you will learn can be applied to XHTML coding .
Why Code in HTML5?
A slightly longer answer is because it enables cleaner, easier-to-write code . Web page technology has grown by leaps and bounds, mostly due to the increase of the average person’s Internet connection speed, but also because users, designers, and programmers increasingly demand more functionality from their Web pages, such as more precise control of fonts and layout, better rendering on devices that vary wildly in size from mobile phones to huge desktop monitors, better images, more interactivity, video, audio, animations, and better support for various image and file formats . Because most people have fast connections, they don’t have to wait a long time for pages to load that contain large audio and video files, which means more and more sites are including audio and video content .
HTML was not originally designed for the rigors of multimedia content delivery, so more and more high-end professional sites have moved to other languages and technologies that piggyback on HTML to deliver that content, such as JavaScript, Java, and Active Server Pages (ASP) .
HTML5 adds some important new tags to make audio, video, and application integration smoother and more reliable . You’ll learn about many of these new tags in Chapters 15 and 16, including <audio>, <video>, and <canvas> .
HTML5 removes support for some of the older tags . For example, an old way (pre-HTML4) of specifying a font was the <font> tag . Today, most people use cascading style sheets to define fonts, so the <font> tag has not been used by many Web designers in a long time anyway . HTML5 formally removes it from the language .
One of the biggest things that HTML5 removes is the ability to create multi-framed Web sites with the <frame> and <frameset> commands . You can still create Web sites with multiple sections, but they’re handled much more capably using tables or divisions . Chapter 11 covers divisions—the newer way, preferred by most professional Web design-ers . Chaptdesign-ers 12 and 13 cover tables, still an acceptable way, and preferred by many casual Web page designers who are familiar with tables from programs like Word .
Minimum System Requirements
There are no minimum system requirements for developing HTML; you can do it in any text editing program with any type of computer and any operating system . That’s the beauty of HTML! This book uses Notepad as the text editor, but you can use any editor that you like .
Using the Practice Files
Each exercise in the lessons is preceded by a paragraph or paragraphs that list the files needed for that exercise and explain any file preparation you need to take care of before you start working through the exercise . The practice files are available for download from http://oreilly.com/catalog/0790145302083/ . When you unzip them from the download file, separate folders will be created for each chapter, and separate folders within each of those for each exercise .
The following table lists the practice file folders for each chapter and the subfolders you’ll find within them . The practice file folder for each chapter also includes a Solutions subfolder containing finished versions of the practice files used in that chapter .
Chapter Folder Subfolder
Chapter 1:
HTML and XHTML Basics 01Editing no subfolders Chapter 2:
Setting Up the Document Structure 02Structure CreatingParagraphsPublishingFiles SpecifyingKeywords SpecifyingTitle Chapter 3:
Formatting Text by Using Tags 03Format ApplyingBoldApplyingSuperscript ConfiguringSettings CreatingHeadings FormattingQuotes UsingMonospace Chapter 4:
Using Lists and Backgrounds 04Lists ChoosingColorsCreatingGlossary InsertingCharacters InsertingLines NestingLists SpecifyingImages Chapter 5:
Chapter Folder Subfolder Chapter 6:
Introduction to Style Sheets 06Styles ConstructingRulesCreatingClasses CreatingExternal CreatingNested StylingHyperlinks Chapter 7:
Formatting Text by Using Style Sheets 07Text AdjustingSpacingApplyingBold ApplyingStrike CreatingSpan SelectingFont SelectingSize Chapter 8:
Formatting Paragraphs Using Style Sheets 08Paragraphs AddingBordersAdjustingHeight Indenting
Creating Navigational Aids 10Navigation CreatingGraphicBarCreatingImageMap CreatingTextBar Redirecting Chapter 11:
Chapter Folder Subfolder Chapter 13:
Formatting Tables 13FmtTables ApplyingBackgroundApplyingBorders ChangingPadding Chapter 14:
Creating User Forms 14Forms CreatingButtonsCreatingForms CreatingLists Chapter 15:
Incorporating Sound and Video 15AudioVideo Chapter 16:
Including JavaScript and External Content 16Canvas Chapter 17:
xxviii
Getting Help
Every effort has been made to ensure the accuracy of this book . If you do run into prob-lems, please contact the sources listed in the following topics .
Getting Help with This Book
If your question or issue concerns the content of this book or its practice files, please first consult the book’s errata page, which can be accessed at:
http://oreilly.com/catalog/0790145302083/
This page provides information about known errors and corrections to the book . If you do not find your answer on the errata page, send your question or comment to O’Reilly Media Customer Service at:
Conventions and Features in
This Book
You can save time when you use this book by understanding how the Step by Step series shows special instructions, keys to press, buttons to click, and so on .
Convention Meaning
SET UP These words are found at the beginning of paragraphs preceding step-by-step exercises . They point out items you should check or actions you should carry out before beginning an exercise . Use
Open
These words are found within the SET UP paragraphs that pre-cede step-by-step exercises . They draw your attention to practice files that you’ll need to use in the exercise .
CLEAN UP These words are found at the beginning of paragraphs following step-by-step exercises . They give instructions for closing open files or programs before moving on to another topic .
1 . Numbered steps guide you through hands-on exercises in each topic .
● A round bullet indicates an exercise that has only one step . Troubleshooting These paragraphs show you how to fix a common problem that
might prevent you from continuing with the exercise .
Tip These paragraphs provide a helpful hint or shortcut that makes working through a task easier .
Important These paragraphs point out information that you need to know to complete a procedure .
Note These paragraphs provide supplementary or related information . Compatibility These paragraphs explain alternate coding you can use for
greater backward compatibility
Ctrl+C A plus sign (+) between two key names means that you must hold down the first key while you press the second key . For exam-ple, “press Ctrl+C” means “hold down the Ctrl key while you press the c key .”
user interface elements In exercises, the names of program elements such as buttons, commands, and dialog boxes .
user input Anything you are supposed to type .
What Next?
Part 1
Getting Started
with HTML
1
Editing and Viewing HTML Files . . . .3
2
Setting Up the Document Structure. . . .13
3
Formatting Text by Using Tags . . . .25
4
Using Lists and Backgrounds. . . .47
Chapter at a Glance
Open a Web page in Notepad, page 2
Preview a Web page in Internet Explorer, page 7
1
Editing and Viewing
HTML Files
In this chapter, you will learn how to
4 Open a Web page in Notepad .
4 Preview a Web page in Internet Explorer . 4 Make, save, and view changes .
As you work through this book’s exercises, you’ll learn HTML by creating and editing text files in Notepad, and then viewing them in a Web browser to check your work . This chapter teaches the important basic skills you need to work in these programs .
See Also Do you need only a quick refresher on the topics in this chapter? See the Key Points section at the end of this chapter.
Practice Files Before you can use the practice files provided for this chapter, you need to download and install them from the book’s companion content location. See “Using the Practice Files” at the beginning of this book for more information.
Opening a Web Page in Notepad
Notepad is included with all versions of Windows, and you’ll find it in the AllPrograms (or Programs)/Accessories folder on the Start menu . It’s a simple text editor that saves only in plain text format . That’s ideal for HTML editing because you don’t need to worry about any extra word processing formatting being included in the file .
Note You are welcome to use a different text editor application to complete the exercises in this book. Notepad is just a suggestion.
Note You may run into various extensions on Web page files on the Internet, such as .php, .asp, and .jsp. Those are all special formats designed for use with specific server technologies. This book only covers developing the basic type of Web page: the type with an .htm or .html extension.
In this exercise, you will open a Web page in Notepad and examine its text and tags .
SET UP Use the welcome file in the practice file folder for this topic. This practice file is located in the Documents\Microsoft Press\HTML5 SBS\01Editing folder.
1.
From the Start menu, select All Programs | Accessories | Notepad .2.
In the untitled Notepad window, select File | Open .3.
Navigate to the folder containing the practice files for this chapter .On the Places bar, click Documents (or My Documents if you are using Windows XP) . In the Open dialog box, double-click Microsoft Press, HTML5 SBS, and then
01Editing .
Note You won’t see any files in the list at this point. The only thing that you should see is just a _Solutions folder. (That folder contains the solution files for the lesson, but you don’t need those now.)
4.
Click the Files Of Type down arrow, and then click All Files .Opening a Web Page in Notepad 5
5.
In the Open dialog box, click welcome.htm, and then click Open .The welcome .htm file opens in Notepad .
Note The .htm extension might not appear on the welcome file in the Open dialog box. By default, file extensions for known file types are turned off in Windows. To turn them on, open Computer (or My Computer), and on the Tools menu (press the Alt key for the menu bar if you don’t see it), click Folder Options. On the View tab of the Folder Options dialog box, clear the Hide Extensions For Known File Types check box, and then click OK.
6.
Locate the <html> and </html> tags .These tags signify the beginning and end of the HTML code .
7.
Locate the <body> and </body> tags .These tags signify the beginning and end of the visible portion of the Web page when viewed in a browser .
8.
Locate the <p> and </p> tags .These tags signify the beginning and end of a paragraph .
CLEAN UP Leave the page open in Notepad for later use.
Adding the Data File Location to the Favorites List
In the course of working through this book, you will open many files in Notepad . To save yourself the trouble of navigating to the data file folder each time (HTML5 SBS), you might want to add that folder to your Favorites bar in the Open dialog box for easy access to the data files .
SET UP Open Notepad.
1.
Select File | Open .2.
Navigate to the folder containing the practice files for this chapter .On the Places bar, click Documents (or My Documents if you are using Windows XP) . In the Open dialog box, double-click Microsoft Press . The HTML5 SBS folder appears as an icon .
3.
Drag the HTML5 SBS icon to the Favorites list on the left side of the window .A shortcut for it appears on the Favorites list .
Drag the folder here to create a shortcut
CLEAN UP Close the Windows Explorer window
Previewing a Web Page in a Web Browser 7
Opening a File from Windows Explorer
A quick way to open most file types in their default applications is to double-click them from any Windows Explorer window . However, the problem with doing that for HTML files is that the default application is your Web browser, not Notepad; thus, instead of the file opening in Notepad, it opens in your Web browser . One way to get around this is to right-click a file in Windows Explorer, choose Open With from the contextual menu, and then click Notepad . This opens Notepad and loads the file .
Previewing a Web Page in a Web Browser
Because Notepad is not a WYSIWYG (“What You See Is What You Get”) program, you won’t be able to immediately see how the tags you type will affect the finished product . To work around this, most Web page designers keep a browser window open next to Notepad .
For beginners, though, Internet Explorer is a good choice because it’s the most popular browser—the one your target audience is most likely to be using . Other popular brows-ers include Google Chrome, Firefox, Safari, and Opera .
Caution Versions of Internet Explorer prior to version 9 do not support some of the HTML5 features. You will probably want to test your Web pages in an earlier version to make sure that people who use them will be able to view your page. But don’t use an earlier version of Internet Explorer as you work through this book’s examples; you won’t get the full effect of the new HTML5 features.
Tip If the video card in your computer has two monitor connectors on it, or if you have an additional video card that you could install in your system, you might want to set up two monitors side-by-side. That way you could work on your HTML code in Notepad on one monitor and display the page full-screen in Internet Explorer in the other. All recent versions of Windows support at least two monitors, and some versions support even more.
In this exercise, you will display an HTML file in Internet Explorer . To see the displayed file and the underlying code at the same time, open the practice files from this exercise and the previous exercise in separate windows and arrange them so both are visible .
SET UP Use the welcome file from the previous exercise, or use the one in the practice file folder for this topic. The practice file is located in the Documents\ Microsoft Press\HTML5 SBS\01Editing folder.
1.
Select Start | Internet Explorer .Note Depending on your system and your default browser, Internet Explorer might not be pinned to the top of your Start menu. If it is not, click Start | All Programs | Internet Explorer.
2.
Select File | Open .The Open dialog box appears .
Previewing a Web Page in a Web Browser 9
3.
Click the Browse button, and then browse to Documents\Microsoft Press\HTML5 SBS\01Editing .Tip If you created the shortcut in the Favorites bar earlier in the chapter, you can use it to save a few clicks when browsing for the location.
4.
Click welcome.htm, and then click Open .The path to the file appears in the Open dialog box .
The file opens in Internet Explorer .
CLEAN UP Leave Internet Explorer open for the next exercise.
The method you just learned works especially well when you already have your Web browser open, in which case you can skip step 1 . An alternate method is to browse to the storage location by using Windows Explorer, and double-click the file . Remember that you can’t just double-click a Web page to edit it; you must right-click it . By default, the double-click operation is reserved for opening the page in your Web browser . What was a hardship only a few pages ago is now a convenience!
Tip Not all Web browser software displays pages exactly the same way. For example, one browser’s idea of what text should look like might be different from another. It’s a good idea to check your pages in multiple Web browsers, such as Firefox, Netscape, and Opera. These are available as free downloads from www.firefox.com, www.netscape.com, and www.opera.com, respectively.
Making, Saving, and Viewing Changes
After you’ve made a change to a Web page, you will probably want to preview the result of that change . If you set up your Internet Explorer and Notepad windows side by side in the preceding two exercises, it’s easy to view those changes . Simply save your work in Notepad, and then refresh the display in Internet Explorer .
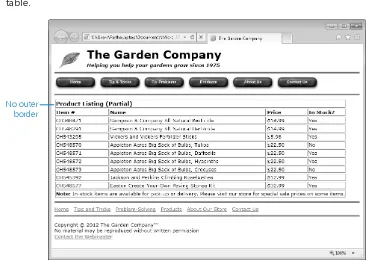
In this exercise, you will change “Iowa” to “Indiana” in the welcome .htm file, and then preview that change in Internet Explorer . This exercise builds on the previous two, so make sure you have completed them . You can use this procedure throughout the rest of the book to preview your work from each exercise .
Key Points 11
1.
In Notepad, locate the word Iowa, and change it to Indiana, as shown in bold text in the following code:<p>Welcome to the Garden Company, located in the heart of Central Indiana. </p>
2.
Save your work (File | Save) .3.
On the Internet Explorer toolbar, click the Refresh button .Notice that the Web page shown in Internet Explorer now reads “Indiana,” too .
CLEAN UP Close the welcome file, and then exit Notepad and Internet Explorer.
Key Points
● Any plain text editor, including Notepad, can be an HTML editor .
● Most Web pages have an .htm or .html extension . You can open them in Notepad, but first you need to change the Files Of Type setting in the Open dialog box to All Files . You must change this setting each time you use the Open dialog box .
● An alternative way to open a Web page in Notepad is to right-click it in Windows Explorer, select Open With from the contextual menu, and then click Notepad . ● To preview a page in a Web browser, select File | Open from the browser’s menu .
Chapter at a Glance
Create the HTML, head, and body sections, page 15
Create paragraph and line breaks, page 17
2
Setting Up the
Document Structure
In this chapter, you will learn how to
4 Specify the document type .
4 Create the HTML, Head, and Body sections . 4 Create paragraphs and line breaks .
4 Specify a page title and keywords . 4 Publish a file to a server .
Every society needs an infrastructure with certain rules that everyone agrees to for the general public good . For example, we have all agreed that a red light means “stop” and a green light means “go .” Everyone who wants to participate in the transportation system must play by those rules, or chaos ensues .
HTML is the same way . You can get creative with your Web content, but there must be an underlying structure in place for Web browsers to read and render your Web pages properly . That means the document must contain certain tags that delineate its major sections and indicate to the browser what type of coding the document uses .
In this chapter, you’ll learn how to structure a document with the correct underlying tags . You’ll learn how to specify the type of HTML you are writing and how to create Head and Body sections . You’ll also learn how to create paragraph and line breaks, specify a page title, enter hidden keywords by which your page can be found in search engines, and publish a test page to a Web server .
See Also Do you need only a quick refresher on the topics in this chapter? See the Key Points section at the end of this chapter.
Specifying the Document Type
When creating an HTML5 document, the first line of the document should be this tag:
<!DOCTYPE html>
The DOCTYPE tag always begins with an exclamation point and is always placed at the beginning of the document, before any other tag . Most HTML tags are not case-sensitive, but the word DOCTYPE should always be uppercase .
Using the DOCTYPE tag is like signing a contract . It is an optional tag, but when you use it, you are promising that your coding will conform to certain standards . When a Web browser encounters a DOCTYPE tag, it processes the page in standards mode . When it doesn’t encounter the DOCTYPE tag, it assumes that there is something quirky about the page, and processes the page in quirks mode . When the browser sees the tag <!DOC-TYPE html>, it assumes you are using HTML5 .
The distinction between standards mode and quirks mode came about in earlier days, when there were problems with standardization between Web browsers . In some brows-ers, to display pages properly, you needed to get a little creative with the HTML code . Modern HTML coding does not allow that, but some older pages still include these obsolete workarounds . By using the DOCTYPE tag, you are making a promise to the Web browser that there is nothing but pure HTML code in the page .
Earlier versions of HTML used more complex DOCTYPE tags . If you’re using HTML Ver-sion 4 .01, the syntax for the tag is:
<!DOCTYPE HTML PUBLIC "-//W3C/DTD HTML 4.01 Transitional//EN" "http://www.w3.org/TR/html4/loose.dtd">
If you’re using XHTML, the syntax for the tag is:
<!DOCTYPE HTML PUBLIC "-//W3C/DTD XHTML 1.0 Transitional//EN" "http://www.w3.org/TR/xhtml1/DTD/xhtml1-transitional.dtd">
Creating the HTML, Head, and Body Sections 15
Creating the HTML, Head, and Body Sections
All of your HTML coding—except the DOCTYPE tag—should be placed within the two-sided <html> tag . Recall from the Introduction that when a tag is two-sided, it requires a corresponding closing tag that is identical to the opening tag but contains a slash: </html> . The tags <html> and </html> serve as a “wrapper” around all the other tags in the document .
In addition, your document should have two sections: a Head and a Body . The Head sec-tion is defined by the two-sided tag <head> . The Head section contains the page title, which is the text that will appear in the title bar of the Web browser and on the Microsoft Windows taskbar button . It also includes information about the document that is not dis-played, such as its <meta> tags (which you’ll learn about on page 19) . You can also include lines of code that run scripts, like Javascript .
The Body section is defined by the two-sided tag <body>, and it contains all the infor-mation that appears in the Web browser when you view the page .
Note The <html>, <head>, and <body> tags are all optional in HTML—but you should still use them because it’s a good design practice. They are required in XHTML. In addition, in XHTML you must add an argument to the <html> tag that declares its XML namespace, a reference to the fact that XHTML is created within XML (as you learned in Chapter 1, “Editing and Viewing HTML Files”). Here’s how the opening <html> tag should look in an XHTML document: <html xlmns=”http://www.w3.org/1999/xhtml”>.
In this exercise, you will create an HTML5 template file that you can reuse later for your own work .
SET UP Start Microsoft Notepad before beginning this exercise.
1.
In Notepad, open the Format menu . Word Wrap should have a check mark next to it . If it does not, click it to enable the Word Wrap feature .2.
In the Notepad window, type the following:<!DOCTYPE html>
3.
Press Enter, and then type:<html> <head>
4.
Press Enter two or three times to add some blank lines, and then type:</head> <body>
5.
Press Enter two or three times to add some blank lines, and then type:</body> </html>
6.
Save the file as HTML5.htm on your Windows desktop (or to any other location that is convenient for you) .Note Most of the files you work with in this book will be stored elsewhere, but you might find it helpful to keep the templates created in this exercise handy for reuse. The desktop is a convenient place to store them, or you can store them anywhere you like.
CLEAN UP Close the Notepad window.
You now have a template for creating any HTML documents you like . You can reopen this template file and save it under different names, which will save time re-creating these basic tags .
Creating Paragraphs and Line Breaks 17
Creating Paragraphs and Line Breaks
Within the <body> section of the document, you type the text that will appear on the Web page . Each paragraph of text should be enclosed in a two-sided tag that indicates its type .
The most basic paragraph type is the body paragraph, indicated by the <p> tag . It is a two-sided tag, so the paragraph text is placed between a <p> and a </p> .
Note In HTML, the code will still work even if the </p> is omitted; in XHTML, it won’t. However, even if you never plan on coding in XHTML, it is a good practice to include the </p> tag. This way, you won’t fall into any sloppy habits.
When a browser displays a Web page, it inserts vertical white space between paragraphs:
That spacing is usually convenient, but it can be a problem when the extra space between lines is unwanted, such as with an address .
To create a line break without officially starting a new paragraph (and thereby adding that extra white space), use the <br> tag . This is a one-sided tag placed within a para-graph, at the end of each line, like this:
Note In XHTML, the line break tag is <br />. The end slash (and the space) is necessary to indicate that it’s a self-closing tag. Notice that the slash is placed after the letters, not before, as with the closing end of a two-sided tag. In XHTML, one-sided tags must end with a slash to indicate that they are self-closing. The space between the text and the final slash is also required so the tag will be recognized in HTML.
In this exercise, you will add text to an HTML file template, and then preview it in Micro-soft Internet Explorer .
SET UP Use the HTML5.htm file from the previous exercise or in the practice file folder for this topic. This practice file is located in the Documents\Microsoft Press\ HTML5 SBS\02Structure\CreatingParagraphs folder. Open the HTML5 file in Notepad.
1.
Save the HTML5 file in the Documents\Microsoft Press\HTML5 SBS folder asindex.htm .
Note It is customary to name the opening page of a Web site index.htm, index.html, default.htm, or default.html. When users type a URL in their Web browsers but omit the file name (for example, typing www.microsoft.com rather than www.microsoft.com/ filename.htm), most servers will automatically respond with the index or default page if one exists.
2.
Open the index file in Internet Explorer and arrange the Notepad and Internet Explorer windows so that both are visible .The index file displayed in Internet Explorer is currently blank .
3.
In the Notepad window, type the following between the <body> and </body> tags:<p>Welcome to The Garden Company! We hope you will find our site a useful resource for becoming a better gardener.<p>
<p>Our main store is located at:<br> 108 Ponting Street<br>
Macon, IN 46062</p>
<p>Please stop by and browse our extensive inventory from Monday through Saturday, 7:00 a.m. to 8:00 p.m.</p>
Specifying a Page Title and Metatags 19
Note Your screen might look slightly different, depending on the settings you have configured in your browser.
CLEAN UP Close the Notepad and Internet Explorer windows.
Specifying a Page Title and Metatags
Perhaps you noticed in the preceding exercise that the complete path to the file appeared in the title bar of Internet Explorer . Usually when you view a Web page, a friendly, descriptive title appears in that spot instead . That text is specified by a <title> tag that is placed in the <head> section (also called the header) . Here’s an example: <head>
<title>The Garden Company</title> </head>
Troubleshooting Make sure you place the <title> tag in the <head> section, and not in the <body> section.
Note Not all search engines refer to <meta> tags. Google does not, for example; it indexes only the text contained in the <body> area. Because of the potential for abuse of the system, such as Web developers packing their pages with unrelated keywords, fewer and fewer search engines these days are using them.
For example, suppose The Garden Company’s Web site would be useful to people who are searching for information about all types of gardening problems, such as pests, weeds, and fungus, and about growing flowers and vegetables . Perhaps all these topics are not mentioned on the main page, but you want people who search for those words to be directed to the main page anyway . You could place the following in the <head> section:
<meta name="keywords" content="pests, weeds, fungus, plants, flowers, vegetables">
Notice that the <meta> tag in the above code is a single-sided tag that contains two attributes: name and content . The values for each of those arguments follow the equals sign and are contained in double quotation marks .
Note If you are coding in XHTML, you would add a space and a slash (/) at the end of a <meta> tag because it is a one-sided (self-closing) tag. This is not necessary in HTML.
The <meta> tag can also be used to redirect visitors to another page . For example, sup-pose you told everyone the address of your Web site, and then you needed to move it to another URL . You could place a “We’ve Moved” page at the original address and use the <meta> tag to redirect users to the new address after five seconds, like this:
<meta http-equiv="refresh" content="5; url=http://www.contoso.com/newpage.htm">
Here’s yet another common use: the <meta> tag can specify a character encoding scheme . This is not a big issue if you are coding only in English (or in a language like English that uses a Roman character set), but it is considered a tidy coding practice to include anyway . If you want, you can add <meta charset=”utf-8”> to the <head> section of your document to explicitly spell out that your page is in English .
Specifying a Page Title and Metatags 21
SET UP Use the index.htm file from the previous exercise or in the practice file folder for this topic. This practice file is located in the Documents\Microsoft Press\HTML5 SBS\02Structure\SpecifyingTitle folder. Open the index file in Notepad.
1.
Between the <head> and </head> tags, type the following to create the page title:<title>The Garden Company</title>
2.
After the title, type the following <meta> tag:<meta name="keywords" content="pests, weeds, fungus, plants, flowers, vegetables">
3.
Press Enter to start a new line, and type the following <meta> tag:<meta encoding="utf-8">
4.
Save your work, and then view the file in Internet Explorer .The tab displays the site name, but notice that the inclusion of the <meta> tags caused no apparent difference in the displayed text of the page . This is because the keywords and encoding specification do not appear on the Web page itself .
Publishing a File to a Server
Throughout most of this book’s exercises, you will save pages to your own hard drive . That way they don’t get into the public’s hands before they are completed . When a page is finalized, however, you will want to transfer it to a publicly accessible Web server (that is, to publish it) so that others can view it .
There are several ways to transfer files to a server . The company or individual in charge of the server should be able to advise you about your options . Here are some of the pos-sibilities that might be available:
● Uploading through an FTP connection by using Internet Explorer. You do this by entering the address of an FTP server (which will start with ftp://) in the Address bar of Internet Explorer . A dialog box prompts you for your user name and password for that server . If you enter those correctly, a Windows Explorer-like file-management window appears, just as though you were browsing any folder on your hard disk . You can then transfer the files by dragging them into that window, or copying them and pasting them into the FTP window .
● Uploading through an FTP connection by using FTP software. There are many third-party FTP applications available that make it simple to transfer files . These utilities have some advantages over the Internet Explorer transfer method, such as the ability to restart uploads that are interrupted due to communication errors . Some examples include FileZilla (www.filezilla-project.org) and BulletProof FTP (www.bpftp.com) .
● Saving directly to a Web folder. Most Web development tools, such as Microsoft Expression Web, let you to save directly to a Web server by typing the URL of the site into the Save As dialog box . That’s very convenient! Unfortunately, you can’t do that in Notepad, .
Key Points 23
Key Points
● To specify HTML5 as the document type, add <!DOCTYPE html> at the beginning of the file .
● All the HTML coding in a document (except the DOCTYPE) is enclosed within a two-sided <html> tag .
● The <html> and </html> tags enclose the <head> and <body> sections . ● The <head> area contains the page title (<title>) and any <meta> tags . The
<body> area contains all the displayable text for the page .
● Enclose each paragraph in a two-sided <p> tag . Most browsers add space between paragraphs when displaying the page .
● To create a line break without starting a new paragraph, use the one-sided <br> tag . ● When coding for XHTML, end one-sided tags with a space and a slash ( /) . The
space is required for recognition in HTML, and the slash is necessary for recognition in XHTML .
● Use <meta> tags in the <head> section to indicate keywords and the document encoding language .
● Use the <title> and </title> tags to enclose the text that should appear in the browser’s title bar . Place these in the <head> section of the file .
Chapter at a Glance
Apply superscript and subscript
formatting, page 46 Create headings,
page 27
3
Formatting Text by
Using Tags
In this chapter, you will learn how to
4 Create headings .
4 Apply bold and italic formatting .
4 Apply superscript and subscript formatting . 4 Use monospaced and preformatted text . 4 Format a block quotation .
4 Configure Internet Explorer view settings .
Creating Web pages is not word processing. It’s important to keep that in mind as you learn HTML, because I’m going to ask you to be patient for a few chapters as you learn HTML the right way—that is, the standards-compliant way .
This chapter introduces several important tags that format text according to its purpose . In Chapter 2, “Setting Up the Document Structure,” you learned about the <p> tag for regular paragraphs, but there are many other tags that are used for headings, program-ming code, quotations, and more . Most of the tags discussed in this chapter are semantic tags; they describe the function of the text, rather than provide directions for formatting . For example, the <h1> heading tag specifies that the text within it should be formatted as a major heading, but it provides no specifics as to what that formatting should be . The formatting specifics for semantic tags can come from a variety of sources:
● Styles As you will learn in Part 2 of this book, you can specify the font families and sizes to use throughout your entire Web site . For example, you can select a font family that will be suggested to the browser whenever a certain tag is applied . ● The Web browser in use Each Web browser has defaults for the standard HTML
tags . For example, in Internet Explorer (and most other browsers), <h1> is left-aligned, 18-point Times New Roman . Most browsers use the same defaults for the very basic tags, but non-standard browsers, such as those on phones, often display text differently .
● Individual user customization A user can customize his Web browser to suit his preferences . Later in this chapter, you’ll get to play with these settings in Internet Explorer so you’ll know what your potential audience might be doing .
Keep in mind as you practice using tags that their formatting is not fixed . The results you see when previewing the exercise pages in Internet Explorer represent the default set-tings for your version of Internet Explorer (or whatever browser you are using to preview them); the style is not intrinsic to those tags themselves . That will become important in Part 2 of the book, when you learn how to define more specific formatting for tags .
See Also Do you need only a quick refresher on the topics in this chapter? See the Key Points section at the end of this chapter.
Practice Files Before you can use the practice files provided for this chapter, you need to download and install them from the book’s companion content location. See “Using the Practice Files” at the beginning of this book for more information.
Creating Headings
Creating Headings 27
As noted earlier, there are no specific sizes or fonts assigned to the heading tags—their appearance can vary depending on the browser and its settings . But the heading levels connote relative sizes; the higher the heading number, the smaller the size in which it will render on the screen . In Internet Explorer 9, for example, using the default settings will make these six heading levels look as shown in the following graphic .
Perhaps you noticed that headings 5 and 6 are actually smaller than body text . Keep in mind, though, that these are just the default settings; you can redefine these headings to appear any way you want .
Many screen reader programs use the heading codes <h1> through <h6> to help visually-impaired users navigate a document, and some page structures rely on headings for outlining, too . (HTML5 has a new way of outlining documents, but that’s beyond the scope of this book .) In some cases, though, you might have a stack of headings that col-lectively should take up only one spot in an outline, like this:
<h1>Dog Agility Club of Indiana</h1>
<h2>Training for canine athletes and their humans</h2>
HTML5 introduces a new tag to deal with this situation, called <hgroup> . When you enclose a stack of headings within <hgroup>, only the first heading in the stack will appear in an outline; the others will be ignored by screen readers and other outlining tools .
<h1>Dog Agility Club of Indiana</h1>
<h2>Training for canine athletes and their humans</h2>
</hgroup>
Browsers that do not support this tag simply ignore it, so there is no harm in using it when appropriate .
In this exercise, you will create some headings for the opening page of The Garden Com-pany’s Web site .
SET UP In both Internet Explorer and Notepad, open the index.htm file that you created in Chapter 2, or use the index.htm file in the practice file folder for this topic. This practice file is located in the Documents\Microsoft Press\HTML5 SBS\03Format\ CreatingHeadings folder.
1.
Immediately below the <body> tag, type the following:<hgroup>
<h1>The Garden Company</h1>
<h5>Helping you help your gardens grow since 1975</h5>
</hgroup>
Note Some coding purists will tell you that you should use an <h2> heading instead of <h5> for the subtitle above, and then apply a style to make the text look the way you want, but because it is a few chapters yet until you will learn about styles, I’m taking a shortcut. For now, the default appearance of the <h5> heading is much closer to the desired look we want for this exercise.
2.
Immediately above the line containing the text Our Main Store is Located At, type the following:<h2>Come See Our Store</h2>
3.
Save the file, and then refresh the Internet Explorer display to check your work .Applying Bold and Italic Formatting 29
CLEAN UP Close the Notepad and Internet Explorer windows.
Applying Bold and Italic Formatting
Applying bold and italic styles are two ways of making text stand out and attract attention . You generally use these styles in paragraphs rather than in headings, but it’s perfectly acceptable to use them anywhere .
For simple boldface and italics, use the <b> and <i> tags, respectively . These are two-sided tags that enclose the text to be formatted . For example:
<p>I had a <i>great</i> time at the party.</p>
<p>The reception will be held at <b>The Arbor Arch</b> in Plainfield.</p>
If you want to apply both bold and italic formatting, you can nest one tag inside the other . Don’t mix up their order, though . When nesting tags, the rule is: first in, last out . So this is correct:
<p>The next book we will read is <b><i>The Catcher in the Rye</i></b></p>
In contrast, the following example is wrong, because the order of the ending </b> and </i> tags are reversed:
<p>The next book we will read is <b><i>The Catcher in the Rye</b></i></p>
Note HTML also allows the <strong> tag as a substitute for <b>, and the <em> tag (emphasis) as a substitute for <i>. For example, Expression Web (covered in Chapter 17, “HTML and Microsoft Expression Web”) uses <em> and <strong> when you apply italics and boldface from its toolbar. You will probably never use those, but you should know what they are in case you come across them. You can also define bold and italic attributes for styles, as you will learn in Part 2.
In this exercise, you will make text bold and italic .
SET UP In both Internet Explorer and Notepad, open the index.htm file from the previous exercise, or use the index.htm file in the practice file folder for this topic. This practice file is located in the Documents\Microsoft Press\HTML5 SBS\03Format\ ApplyingBold folder.
1.
In the index file, locate the <h5> heading near the top of the document, and then enclose it in an <i> tag:<i><h5>Helping you help your gardens grow since 1975</h5></i>
2.
In the first body paragraph, enclose The Garden Company in a <b> tag .<p>Welcome to <b>The Garden Company!</b> We hope you will find our site a useful resource for becoming a better gardener.</p>
3.
Enclose the store hours in <b> and <i> tags .<p>Please stop by and browse our extensive inventory from <b><i>Monday through Saturday, 7:00 a.m. to 8:00 p.m.</i></b></p>
Note Remember the “first in, last out” rule. If you begin with <b><i>, end with </i></b>.
Applying Superscript and Subscript Formatting 31
CLEAN UP Close the Notepad and Internet Explorer windows.
Applying Superscript and Subscript Formatting
Superscript formatting makes text smaller and raises it off the baseline . You’d typically use superscript to format exponents in math equations (for example, X2 + 1) and for footnote numbers and symbols (like this*) . You can also use superscript to format ordinal numbers such as 1st, 2nd, and 3rd to make your page look more polished .Subscript makes text smaller and lowers it below the baseline . The most common use for subscripts is in chemical formulas (for example, H2SO4) .
Note How much the text shifts up or down, and how much smaller the font size becomes, depends on the browser.
In this exercise, you will apply superscript formatting to create a footnote and an ordinal .
SET UP In both Internet Explorer and Notepad, open the index.htm file from the previous exercise, or use the index.htm file in the practice file folder for this topic. This practice file is located in the Documents\Microsoft Press\HTML5 SBS\03Format\ ApplyingSuperscript folder.
1.
At the end of the last line of text, between the </b> and the </p> tags, insert a code for a 1 in superscript, as shown in the following:<p>Please stop by and browse our extensive inventory from <b><i>Monday through Saturday, 7:00 a.m. to 8:00 p.m.</i></b><sup>1</sup></p>
This creates a superscript number for a footnote .
2.
Immediately before the </body> tag, type the following:<p><sup>1</sup>Closed the 1<sup>st</sup> Saturday in January</p>
This creates the footnote itself .