VFX Solutions for the Independent
Filmmaker
Bill Byrne
AMSTERDAM • BOSTON • HEIDELBERG • LONDON • NEW YORK • OXFORD PARIS • SAN DIEGO • SAN FRANCISCO • SINGAPORE • SYDNEY • TOKYO
Copyright © 2009, Elsevier Inc. All rights reserved.
No part of this publication may be reproduced, stored in a retrieval system, or transmitted in any form or by any means, electronic, mechanical, photocopying, recording, or otherwise, without the prior
written permission of the publisher.
Permissions may be sought directly from Elsevier’s Science & Technology Rights Department in Oxford, UK: phone: ( ⫹ 44) 1865 843830, fax: ( ⫹ 44) 1865 853333, E-mail: [email protected] . You may also complete your request on-line via the Elsevier homepage ( http://elsevier.com ), by selecting “ Support & Contact ” then “ Copyright and Permission ” and then “ Obtaining Permissions. ”
Library of Congress Cataloging-in-Publication Data
Application submitted
British Library Cataloguing-in-Publication Data
A catalogue record for this book is available from the British Library.
ISBN: 978-0-240-81135-2
For information on all Focal Press publications visit our website at www.elsevierdirect.com
Printed in Canada
09 10 11 12 5 4 3 2 1
Chapter 8
Horror Effects ... 151
Evil Eyes ... 151
Zombie Faces ... 158
Digital Dismemberment ... 165
Ghostly Apparitions ... 172
PROfi les ... 178
Paul D el Vecchio: D irector, Editor , VFX Artist ... 178
Chapter 9
Action ... 181
Vehicle Explosions ... 182
Building Fire ... 189
Creating Realistic Gunplay ... 199
Cliffhangers ... 203
Tornadoes ... 208
PROfi les ... 214
Jonah Goldstein: D irector/Cinematographer ... 214
Chapter 10
Science Fiction ... 217
Creating a 3D Planet Earth ... 217
Alien Planets ... 221
Star Fields and Light Speed ... 225
The Disintegrating Man ... 231
Light Sabers ... 234
Morphing ... 237
3D Spaceship Dogfi ght ... 244
PROfi les ... 252
Jerron S mith: Editor , Animator, Ed ucator ... 252
Chapter 11
Flashy Techniques ... 255
Frozen Time ... 255
Time Remapping ... 258
Wall of TV’s ... 262
Low-Low Tech Bullet Time ... 273
PROfi les ... 276
Bryan Wetzel: Editor ... 276
Chapter 12
Animation ... 279
Two-Dimensional Character Animation ... 279
The Digital Camera Stop-Motion Trick ... 283
Bringing Inanimate Objects to Life ... 286
Character Lip-Sync ... 289
PROfi les ... 293
Felipe M atos: 3D Animator, Writer, D irector ... 293
Chapter 13
Text Effects ... 295
Title Sequence Workfl ow ... 295
Text Background Integration ... 299
Horror Film Titles ... 303
Three-Dimensional Text ... 308
Chapter 14
Return to Render ... 311
The Spec List ... 311
Rendering in After Effects ... 312
Rendering in Motion ... 314
Rendering in Combustion ... 316
Output Issues and Demystifi cation ... 316
Title Safety, Action Safety, and Domestic Cut-Off ... 316
Quicktime C odecs and C ompression S tandards ... 317
Square and No nsquare Pixels ... 318
Frame R ate ... 319
Color D epth (or B it D epth) ... 319
Final Thoughts ... 320
Index ... 321
To my father
Tom Byrne, who guided and encouraged a mind to love technology and creativity.
To my mother
Marie Byrne, who has given me so much and expected nothing in return.
In loving memory of James J. Byrne who I wish would have been around long enough to see a copy of this book.
Acknowledgments
Jonah Goldstein, for all his help by supplying footage, his directorial knowledge, and being an interview subject. Tisha R. Johnson, and Monika Mozynski for acting in Jonah’s footage.
Bryan Wetzel, for getting me into the world of commercial postproduction, where I learned many valuable lessons, and for being an interview subject.
Larry Caldwell, for his acting and advice on being a writer.
Jerron Smith, Jeff Martini, Phil Matos, Roger White, Randy Dottin, Mark Evoski, and Colin Stackpole for being great interview subjects.
Matthew Lancit for providing footage and Joshua Loring for his performance in that footage.
Andrea Paldy, Stephen Pite and the rest of my former colleagues, and students from New York’s Katharine Gibbs School’s Digital Filmmaking department. It was the questions from my students that became the pri-mordial soup for this book.
Paul Del Vecchio for being an interview subject and the book’s technical editor.
John C. Byrne, Ph.D, for his support, valuable advice and an introductory education provided a young age that helped shape my career.
Dean Carol Kelley for bringing me on board at the Art Institute of Austin and students for waiting patiently for grades while I wrote this book.
Maury Loeb, JJ Lask, John Zieman and everyone at PS 260 and Brandname.
Charles Traub and the MFA in Photography and Related Media department at New York’s School of Visual Arts.
Bob Forward from Detonation Films for allowing me to use his great fi re footage. Andre Cuello, and Anais Wheeler for all their help.
Focal Press, Dennis McGonagle and Paul Temme for making this happen.
1
HOW TO USE THIS BOOK
When I teach classes in visual effects, I made an observation about what motivates students to learn. As I lay out to them what they will learn in my class, they don’t get excited about terms such as fractal noise , rotoscoping , and particle systems . Why would they, unless they know what those things can do for them?
When I teach my lessons, it’s not the tool they get excited about, it’s what the tool can do for them. So, I realized what is the problem in teaching software. Too often students are taught how to use a piece of software without being taught what to do with the software.
This book does not teach readers how to use the software. This book is meant for people who have a solid understanding of Adobe After Effects or something like After Effects, a nonlinear editing software and Adobe Photoshop. What this book does teach is technique. I gathered the mate-rial and lessons here to be a compendium of problems solved.
Most of the time, students who wait until class is over don’t wait to ask me about the inner workings of motion tracking , they are waiting to ask me “ How do I create an explosion? ” or “ How do I make it rain? ”
Often they can go Google a tutorial, which is not a bad approach; I often do that to see if there’s a technique I did not know about. However, there are tons of Web-based tutorials out there; many of them are top quality, such as the great material on Creative Cow (creativecow.net) or Video Co-Pilot (videocopilot.net). Often though, you will run into a tutorial that is too old, poorly or incomprehensibly written, or simply doesn’t work.
I decided to go through my own techniques, ones I’ve gathered from years of reading on the Web and things I have been taught and put together a collection of problem-solving techniques for a large variety of visual effects. I tried to cover as broad of a range of issues that could be solved with common, off-the-shelf software without expensive third-party plug-ins. I also decided that it was important not to focus on a single application but rather to teach the techniques and how something similar can be achieved cross-platform.
In many cases if there’s a silver-bullet absolute method to doing some-thing, that’s what I demonstrate. In most cases, I am sharing the best technique I have found for something, which may change or you may fi nd another method that works better for you.
that becomes the industry standard, what will I do then? ” If you know the core techniques of your fi eld, then learning another piece of software is much easier.
Look at it this way, let’s say that tomorrow someone introduces a new raster-based image editor and Photoshop becomes obsolete. This is very unlikely, as no one has been able to remotely compete with Photoshop, but let’s just say this for argument’s sake. Since most people have been using Photoshop, all the same questions you would likely have will be applicable to most users, so therefore the new software would have to meet the capabilities of Photoshop. So essentially, it’s the same set of capabilites, the buttons would just be in different places.
In fact, something like this is going on right now. Apple’s Shake looks like it will be discontinued at some point. So while researching this book, I stumbled upon many guides to users about how you would switch from Shake to Eyeon Fusion or Nuke.
The overall point I’m trying to make here is this: the techniques have a longer shelf life than software, and as software moves very quickly, the techniques will more than likely be the same for a very long time. Most of the techniques discussed in this book have been around longer than computers themselves. The computer has only been implemented because it’s a faster, easier way of pulling off these effects.
Sections
Each tutorial is broken up into sections; some will appear in every tuto-rial, whereas others will appear where appropriate. I wanted to treat these tutorials like recipes, as there are lots of similarities between the two.
Ingredients — These are what you will need to create your version of this technique should you need a special kind of footage or prop. In some cases I will recommend that you use elements created from another tutorial.
The Shoot — In this section you’ll get some quick advice on things to look out for during the shoot or ways to advise the director of photography.
The Design — Consider this to be the Photoshop section. It will dis-cuss preparing the needed elements for an effect in Photoshop. As you will see throughout this book, you can’t underestimate the importantance of using Photoshop just because it’s not meant for working with moving footage. It’s one of the most powerful tools we have.
The Effect — This is the heart of each tutorial; each of these will be done in Adobe After Effects. I’ll go through all the techniques for using this software to solve the major issues of visual effects. Even though After Effects is a very basic compositer, I decided to focus on After Effects because of its market share. If most users have a piece of visual effects software already, it is probably After Effects. In most cases, for young fi lmmakers the cost of Nuke or Fusion is too crippling to a budget to make it feasible.
effects either created on the set or within the camera.
Both of these processes are employed to take advantage of technol-ogy to make imagery that is impossible to fi nd in the real world or far too diffi cult, dangerous, or expensive to achieve without the use of visual or special effects.
Before the 1990s there were two major special effects categories. Optical effects are techniques such as multiple exposures, glass shots, or mattes.
Also in this category were the effects achieved through the optical printer, where footage could be rephotographed. Optical printing effects are the basis for the software-based effects of today. The second category is mechanical effects , which are effects created on set, in front of the camera, such as with models, props, and make-up.
In the late 1980s, digital compositing emerged. Compositing is the act of combining two different imagery sources; a process that was once done on an optical printer is now enhanced with the greater control allowed by computers, at a greatly reduced cost. The early 1990s saw the beginning of wide usage of what is commonly referred to as CGI or CG . CGI or computer-generated imagery combines the process of animation with the use of photorealistic textures to create characters, scenery, and whatever else the mind can imagine to create what cannot be shot.
In today’s visual effects world, two major sets of techniques are used to solve most issues. Can the shot a director needs be achieved by gen-erating graphics, combining different sources of footage, or employing both processes?
Digital Compositing
The use of digital compositing has become so commonplace in mod-ern entertainment that it will often go completely under the viewer’s radar. An example of everyday compositing is your TV weatherman. Your weatherman is standing in front of a green screen (or blue screen ), which is removed and replaced with computer-generated maps.
Green screens and blue screens are used in a process called chroma keying or color keying . The use of keying began in the 1930s when a painstaking chemical process, aside from a diffi cult sync shooting pro-cess, was employed at a great cost of time and money. However, with the use of video and digital compositing, the process has become quick and inexpensive.
The color screen background can then be removed. When footage is captured digitally, information is stored in separate color channels . These would be red, green, and blue. In addition, there is a fourth channel, the alpha channel . The alpha channel controls the transparency of the color channels, and in a composite shot the compositor can specify the color range that will receive either a reduced transparency or removal. Then a separate piece of footage can be put behind the color-keyed shot and the combined shot is complete.
Keying is not the only method of employing the use of alpha channels. The use of garbage mattes is often necessary to aid where color keys are too diffi cult. Garbage mattes usually refer to the process of hand drawing the area that will have a reduced transparency. The adjective “ garbage ” refers to the fact that it is usually temporary or used as part of another technique.
When this is not employed as a temporary or supportive measure, the compositor is said to be masking . The reason why this process is not used more often than color keying is due to the fact that it usually requires adjustment frame by frame. Treating footage with a hand-drawn process frame by frame is called rotoscoping .
Rotoscoping is the process of reshaping a matte, but it can also be used to describe a shot that includes a hand-drawn or adjusted technique that requires attention for each individual frame. So, some quick math, a movie has 24 frames per second (fps) whereas a TV show or commercial has approximately 30 fps. Even on a 30-second commercial that would be 900 separate images that a rotoscoper must attend to, which is not always desirable in the quick turn-around entertainment environment we live in.
The digital compositing world comes equipped with little helpers to reduce the need for rotoscoping. One of these is motion tracking . An area of an image can be tracked by the computer so that some other process can be employed to that area. For example, the tutorial called Digital Dismemberment in Chapter 8, we paint out and replace half of an actor’s arm. To avoid rotoscoping, we put a black dot with a marker on our actor’s arm that the computer is able to track and then something could be attached to that point in its place.
Another technique explored in Chapter 7, where we recreate the look from the fi lms Waking Life and A Scanner Darkly. This tutorial discusses batch processing . A batch process is when footage is broken down into its individual still images and then an image editor, Adobe Photoshop, is used to treat each individual image following a user-specifi ed set of com-mands. However, even with these techniques the process of rotoscoping cannot always be avoided.
Computer-Generated Imagery
Often combined with compositing, the other category of techniques used to solve most visual effects problems is the creation of CGI or CG . What this will entail is either building two- or three-dimensional digital models that, unlike live actors or real world locations can be changed and moved easily around to achieve the desired scene.
well as Apple’s Motion and Autodesk’s Combustion, but these programs can only scratch the surface of the 3D graphics world, as there are quite a few dedicated programs for the purpose of creating and animating 3D characters and worlds.
Three-dimensional character animation has largely replaced the tra-ditional hand-drawn animated characters. In fantasy-genre fi lms, such as the recent Star Wars prequel trilogy, 300 , Sin City , and the Lord of the Rings trilogy, actors were mostly shot in blue or green rooms to have 2D- and 3D-rendered sets replacing the screen backgrounds. The ease of control and the range of possibilities have made 3D-rendered sets an ideal choice over the old-fashioned system of using scale models. Even when scale models are chosen by the production teams, 3D graphics are employed to enhance the models.
Particle systems are used to recreate natural phenomena such as smoke, fi re, rain, snow, and dust. Essentially, like a fl owing fountain of pixels, these particles can be controlled to respond to real-world physics at the discretion of the VFX artist.
The Underrealized Power of Available Software
One of the most commonly used tools by VFX artists is something you probably have on your computer already, Adobe Photoshop . Originally written by Thomas Knoll while he was a doctoral student, the idea caught the attention of his brother John Knoll, who was working for Industrial Light and Magic. John Knoll has become an academy award winner for his VFX work on the recent Pirates of the Caribbean fi lms and is recog-nized for his work on many other fi lms that rely on VFX.However, in addition to Photoshop’s lineage as having a connec-tion to the world of visual effects, it has practical use as a tool for VFX artists. Considered to be the foundation software for editing any image on a computer, it’s often used in conjunction with Adobe After Effects . After Effects reads the separate layers of a Photoshop document and allows the user to apply keyframe style animation to them. For paint-ing style effects, users will edit images from After Effects in Photoshop to take advantage of Photoshop’s unequaled strength with painting tools and then return the image to After Effects. The original vision of software designers of After Effects was to take what Photoshop does and put it on a time line.
Apple introduced Motion in 2004, which later became part of the Final Cut Studio. Designed at fi rst to help alleviate the need to leave the Final Cut environment, Motion has grown into a capable competitor to After Effects. It has some limitations, so it’s not quite a true replacement for AE yet; however, it has the strong advantage of tight integration with Final Cut.
7
YOUR TOOLBOX
There’s basic equipment that VFX artists will need to solve the day-to-day issues of visual effects.
Hardware
A Digital Video Camera
Most independent fi lmmakers rely on the digital video (DV) medium to get their productions made, to make them look and feel professional, and to contain them in a budget. The great appeal of DV lies in the light, transportable size of the cameras, the affordability, and the tight integra-tion with desktop computers.
For VFX artists working on a fi lm, it’s often a necessity to have a DV camera on hand to shoot test shots, to take a practice attempt at getting a piece of footage, and to look for potential unanticipated problems.
Visual effects supervisors will often go to the set armed with knowl-edge gathered from the test shoot to guide the production team through avoiding potential mistakes. This might be a nice time saver on a big Hollywood production, but it can be an essential measure to save time and money on a smaller indie shoot.
In addition to having it available for test shoots, the VFX artist needs a camera to gather additional elements to bring into his or her computer. For example in Chapter 5, we have a tutorial on creating a Driving Shot . The VFX artist would be responsible for replacing greened windows with driving footage, and often it makes sense for the VFX artist to gather this footage on their own without the bulk of a crew.
When it comes to buying a DV camera, there are so many options out there that you may become overwhelmed. Do you need a DV, HD, or Red camera? If you feel like a standard digital video camera is all that you’d need, make sure that you get one with manual focus, manual exposure, and shutter control. Shutter control is important, as 1/30 shutter speed on a DV camera will start to mimic the shutter speed of fi lm.
HDV cameras have a ratio of 4:2:0, which is better, but ideally you want 4:4:4 or at least 4:2:2. DVCPRO50, DVCPRO HD, and HDCAM SR all shoot at 4:2:2. Also, the new line of Red cameras that shoot in RAW for-mats leave the chroma subsampling as raw data to be processed later on the postproduction side, making it an appealing option for VFX artists.
A Digital Still Camera
As a backup for the DV camera, a digital still camera is very handy. Many situations that call for the gathering of elements will not require them to be in motion. Also, it will sometimes require a larger image size so that it can be scaled without distortion.
Here’s a sample workfl ow from a situation where a digital still image was processed in Photoshop and used as an animated element in Adobe After Effects (AE).
I have a small Canon Power Shot camera that I can keep in my pocket. Thanks to its convenient size, I take it with me when I’m just going about my daily business and take shots of anything I think I might want to use later.
In the fi gure above, it begins with a snapshot of a ground texture, which I then painted over in Photoshop and fi nally used in After Effects as the walls for a 3D tunnel animation.
Tripod
You need a tripod. Everyone does and VFX artists are no exception. Simply because, if nothing else, for a large number of visual effects shots it is much easier if you can just treat the image without having to chase what you are trying to apply an effect to around the screen like you would with a hand-held shot.
Computer
In order to do VFX, you need a computer, that much is clear.
But what do you get? Mac or PC? Well that’s largely up to you and your personal preferences. The guiding rule is to get the platform that you know and feel comfortable using. The other rule would be to get the plat-form that runs the software you want to use.
Adobe’s software comes in both Mac and PC versions. Do some research as to what the differences are, as there are differing hardware requirements (for example with the CS4 version, Photoshop maxes out at 32-bit images on a Mac, but on a PC it can go up to 64-bit). Adobe threw me a bit a surprise while I was writing this book. After Effects CS4 is Intel only, meaning I had to say goodbye to my G5. So I would defi nitely recommend getting at an Intel Mac.
Apple’s software is obviously Mac only. However, Final Cut Pro, the dominant DV editing software is not the only game in town. Avid Media Composer and Adobe Premiere Pro are available on both platforms, and equal to (in the opinions of some loyal users better than) Final Cut. If your plan is to go into deep compositing and/or 3D software, there are choices for both platforms.
Many of Autodesk’s applications are both Mac and PC, but not all (3DS Max, the most widely used commercial 3D application, is PC only). Either way, all your needs are covered in both formats, so it’s really up to you and what you feel most comfortable using. Also if you purchase a new Mac, it’s built with Intel chips, meaning you can set it to run Windows and OSX getting the best of both worlds (and while you are at it why not throw a Linux distro in there?).
What is of the highest importance are the capacity and the perfor-mance of your machine. You’ll need a good amount of RAM to get opti-mal performance from your machine with fast render times and the ability to run multiple applications simultaneously. Adobe states that 1GB of RAM for DV and 2GB for HD are suffi cient, but I believe that if you can afford to get 8GB you should, but I wouldn’t go for less than 3GB. Adobe also recommends using an NVIDIA card.
You will need lots of disk space so it’s wise to have two internal hard drives at a large capacity. Internal drives perform better than external ones and less likely to crash. You will benefi t from having more than one, as video is a real space eater. Also, some programs such as Final Cut just about require you to load footage onto a separate drive than the one it is running the software from.
Other Considerations
There are very expensive green screens made for chroma keying out there, but they aren’t neces-sary. All you need is a solid color green background and a good amount of space so that you can light the subject separate from the green screen. There are some do-it-yourself solutions, such as building a frame from PVC pipe and draping it with green fabric.
Software
Image Editing — Adobe Photoshop
When I begin an introductory computer graphics or digital imaging class, I tell the students that to be a creative professional without using Photoshop is like being an administrative assistant that doesn’t use MS Word. That is what it has become in the crea tive industry.Photoshop CS4 is the 11th version of the software, and since Adobe began its Creative Suite, they have been packing PS with great tools for fi lmmakers. In its latest incarnation it will now read footage as video layers, generate 3D objects, and there’s a time line that looks and works like the one from After Effects. However, what will make it most valu-able to VFX artists are its traditional strong points, layer-based workfl ow, strong cross-platform compatibility, batch processing, and powerful painting tools.
You would be hard pressed to fi nd a more useful piece of software than Adobe Photoshop.
is Adobe After Effects. The Adobe Creative Suite is tightly integrated, and if you need to hop to Photoshop quickly you can with a simple key-stroke, make a change and After Effects will update immediately.
After Effects is a keyframe animation pack-age. A keyframe is a term used by animators to describe a frame that determines a change in the action. If our character starts at point A and then walks to point B, the fi rst frame that determines point A is a keyframe and the last frame that determines point B is a keyframe.
Now, because video moves at roughly 30 frames per second and fi lm at 24 frames per second, all the frames between our keyframes at points A and B are called inbetweens . In a digital animation program like After Effects, the user defi nes the keyframes and the soft-ware creates all the inbetweens; this is often called tweening .
When it comes to VFX, After Effects is capa-ble across a broad spectrum of generated imag-ery and compositing needs. However, although many experts in the fi eld acknowledge that AE has become more and more powerful with each version, they will often say many issues are better handled by a dedicated piece of
time line.
Adobe’s After Effects uses keyframe animation, which allows users to defi ne two points and the software will generate every frame in between.
positing software (such as Apple’s Shake, The Foundry’s Nuke, Eyeon Fusion, or Autodesk’s Combustion/Flame/Inferno line).
After Effects used to have major limitations on the 3D front, as objects could not be turned in 3D space. However with Photoshop and After Effects CS4 you have Photoshop ’ s primitive 3D engine, for generating objects you can then use in After Effects. (A company called Zaxwerks makes an After Effects plug-in called 3D Invigorator that can extrude volumetric images from bezier paths.)
As shown throughout this book, AE is quite powerful. It’s also the most widely used VFX software package, and there’s a huge amount of Web-based, print and video resources for the program. Most common VFX shots can be realized with After Effects.
Aside from After Effects, there’s a new motion graphics software pack-age on the block that has got some great selling points. Introduced in 2004, Apple’s Motion is now in its third version and has quietly grown into being a pretty powerful application. It hasn’t really taken away much of AE’s user base, as Apple stopped selling it outside of the Final Cut Pro Studio. However, you will see through-out this book this overlooked application is quite powerful.
Its most impressive feature is its tight integration with Final Cut Pro. Anyone who edits and designs motion graphics can tell you why it’s handy to have the ability to jump from one program to another without exporting. In its fi rst incarnation, Motion felt fairly lightweight, but with its latest version it feels capable of doing most of what After Effects can do, often in a similar manner.
Its workfl ow appears to have a similar layer-based setup to AE. Apple did include a nice feature where you can create Groups on the fl y, making nesting/precomposing a more native aspect of the environ-ment. Also, rather than forcing the user to keyframe animate everything, Motion has the option of using preset animations called Behaviors. The user can apply the Behavior and add keyframes to adjust to their needs. With version 3, Motion now has quite possibly the most user friendly motion tracking tool on the market.
While still lacking some equivalents to After Effects ’ more advanced tools, it’s defi nitely one powerful alternative.
Video Editing
The last of our software essentials, video editing is a hotly contested market, with lots of arguments about which is the best. Non-Linear Editing software is a very valued companion to a motion graphics soft-ware package. Though After Effects and Motion are capable of editing, you would not want to edit in them as it can be quite frustrating.
The editing software associated most commonly with the greatly expanded professional video market and the DV medium is Apple’s Final Cut Pro. It’s based on Apple’s widely adopted Quicktime format. Since it’s designed by Apple for their equipment Final Cut is quite stable and pow-erful and it caught on with users quickly.
For VFX artists, if you happen to be editing and creating effects for the same project, Final Cut has a host of tools for creating keyframe anima-tion in a similar way to how it would be done in After Effects. Extensive VFX projects should be done in a software package that is dedicated to effects, as the constant need to render in FCP will slow you down.
If you don’t own a Mac, there are still great alternatives to Final Cut, which is not available for Windows and is not likely to ever be available in a PC format. Sony ’ s Vegas software offers comparable capabilities to Final Cut and a pretty solid footing in the industry. Adobe has developed a powerful competitor for FCP in its cross-platform Premiere Pro CS4.
Adobe Premiere Pro CS4 is a new version of the Adobe’s Premiere soft-ware, which was rewritten in 2003 as Premiere Pro. Final Cut’s introduc-tion took over the market Premiere once held. Because many VFX users need a strong integration with editing software, Premiere Pro is very alluring to After Effects users because the same time line can be pre-served between the two programs.
CS3 marked the fi rst version of Premiere Pro that has been made available in both Windows and OSX formats.
However, the competition between Apple, Sony and Adobe has yet another party involved, the once industry standard (as to whether or not it’s still safe to call Avid the industry standard is a popular debate in forums) Avid line of products. Avid still has about a quarter of the market and their user base has not fallen off; it’s just there are a lot more edi-tors in the market place and new users appear to gravitate to Final Cut.
Avid did dominate the video editing market for a long time for a rea-son: they have a solid video editing system. VFX artists will like the excel-lent choice of effects.
I won’t state my preference for video editors, as, honestly, they are all of equal power. I used Final Cut Pro for the tutorials in this book because it has the most users and the techniques are the same (the buttons will be in different places) in all of the big name NLEs.
Optional Software
Compositing
Although it’s very capable, After Effects is not the only player on the fi eld when it comes to compositing. In fact, most professional composi-tors recommend a software package that uses a node-based schematic workfl ow, which is common among professional compositing software packages, something After Effects does not have.
Node workfl ows work like your entertainment center, each box has an in and out and lines representing cables connect one to another.
Autodesk’s Combustion is a compositing software package capable of many similar aspects of After Effects ’ feature set with some very handy extra tools fi lling out its tool box. Combustion is famous for its excellent tools for rotoscoping, particle effects, and painting. Combustion also features a similar interface to its high-end professional older brother systems Flame and Inferno. These dedicated systems are out of the price range of many amateurs and professionals, but Combustion is far more affordable. Autodesk also makes the 3D software packages Maya and 3DS Max, which integrate well with Combustion.
While we wait for Apple’s rumored new compositing software, Shake is being sold at a great low price.
Apple has recently entered the high-end compositing market with its very powerful software Shake. Most users consider Combustion’s node system to be inferior to that of Shake’s, as the layer order in Combustion cannot be controlled in the node setup. Shake also takes advantage of Apple’s hardware and is known for its stability.
However, because Shake is about to be discontinued, I refrain from giving an endorsement of this product. Apple is rumored to be discontin-uing Shake in lieu of an exciting all-new product, so keep an eye out for it. In the meantime, Shake is now bargain priced at $499. If Apple stops
but from what I understand, its feature set is similar to Shake.
The Foundry’s Nuke has won an Academy Award for its abilities.
Finally, and certainly not least, is the Foundry’s Academy Award-win-ning Nuke. One of the youngest software packages discussed here, the Foundry has garnered itself an impressive reputation for their plug-ins for Autodesk and Adobe software. Nuke is a node-based environment with an impressive array of professional compositing effects available to users. This comes, of course, at a very hefty price tag.
Three-Dimensional Software
Motion and Combustion are capable of using 3D space, but you can’t create volumetric objects. After Effects CS4 can import Photoshop’s 3D objects but you are limited to primitive shapes. When your needs exceed the above software’s limited capabilities, there are numerous choices out there that vary greatly in price and in capability.
Although 3DS Max has a larger user base, those users are more in the realms of TV and other industries outside entertainment, whereas Maya is used mostly in the fi lm industry. Maya’s abilities come at a cost; it also has a reputation of being diffi cult to learn. 3DS Max and Maya both carry a high price tag.
This is due to the ability to export 3D data that can be read easily by AE and FCP. Cinema 4D is also known for its ease of use for a high-end 3D application. It also has a much lower price tag than the packages listed previously.
A 3D cube in Blender.
Also worth mentioning is the freeware 3D application Blender. Even though it is free, Blender has a similar list of capabilities to the top-tier 3D animation packages and has the largest user base of any 3D appli-cation (that’s no surprise). There’s a good amount of online resources and tutorials. Blender’s biggest downside is that it has a fairly signifi cant learning curve.
Although this book does not cover 3D applications, I think it is valu-able to consider the options. Also, I will show you how to identify situa-tions where a 3D package would be needed to achieve certain effects.
Third-Party Plug-Ins
After Effects can’t really be discussed without going over the issue of third-party plug-ins. Much like audio software, After Effects allows for users to expand the capabilities of the program by adding in outside ele-ments or plug-ins. Since part of this book is about keeping one’s costs down, I decided that the tutorials provided would not include third-party plug-ins.
Knoll Light Factory
This set of light designing plug-ins is one of the oldest and most widely used sets of plug-ins. It’s from the same ILM guys who invented Photoshop, and many fi nd this set of lens fl ares and lighting effects essential.
Magic Bullet
Magic Bullet’s Looks and Misfi re line gives you a great way to con-trol the look and feel of your footage. People will always be looking for ways to make their video work look more like fi lm and these Magic Bullet plug-ins are great for that.
Zaxwerks 3D Invigorator
Much loved by some, maligned by others, it’s the only game in town for creating volumetric shapes without leaving After Effects. It has got a learning curve, but it really is like having an entire 3D application inside of After Effects.
Final Thoughts on Software
Before you go out and buy expensive software, try a demo, if avail-able. Explore all your pricing options; if you are a student or someone in your crew is a student, there are signifi cant education pricing reductions available for many of the software packages discussed here.
19
PREPARING FOR YOUR VISUAL
EFFECTS SHOT
This chapter discusses tips and techniques for preparing a VFX shot. The amount of time spent in preproduction can save valuable hours on the production and days in postproduction.
A great example is something like this. Let’s say you’re working on a shoot that requires a sunny day, but in preproduction the weather reports were not checked and it’s overcast. On the set, they waited for the clouds to spread, but the clouds don’t, so they shoot anyway. Now despite many attempts to cut around the overcast footage, the editor needs the shot. A compositor is called in to replace the clouds and brighten up the footage to make it look right. Depending on the shot, it could take hours, but if there’s lots of motion, it could take longer. Now, had the weather been checked, the problem could have been worked around.
Now every problem can’t be anticipated, and schedules have to be met. However, what should be avoided are things that can be taken care of easily on the preproduction and production levels. Ever hear the old joke “ we’ll fi x it in post? ” Well, it’s not a joke to too many, and while many problems can be fi xed in postproduction, why do that when it can be fi xed by just changing the frame or, better yet, just going into production with a better thought-out plan.
Tips for VFX Artists in Preproduction
Here are a few tips on how to help your VFX shot run as smoothly as possible.
Storyboard the Effect
Film students have this oil-and-water relationship with storyboards. It’s unfortunate because planning is pretty crucial, and if you can visu-alize it, early problems can be anticipated. This chapter demonstrates using Photoshop to create storyboards.
There are some distinct advantages to storyboarding an effect digi-tally; using Photoshop you can come up with something much closer to the fi nal shot than stick fi gures.
Grab Your Camera and Do a Test Shoot
there and fi ght bad footage for hours before even considering a reshoot or a pick-up shot.
When I worked in TV postproduction, one of our frequent clients, a director, had an idea for an effect he wanted to create. He came in with test footage, we brought in our VFX artists, and we did a test. When asked, the director was not actually doing this test for a specifi c project, he said “ I’ll use it for something. ” He did eventually.
If you know that you have an effects shot coming up, why not try it out? Grab your camera and create a test shot. You should have some idea of what you are going to be getting and to give yourself the opportunity to anticipate problems. Is it important that the shot be hand-held or locked off? Is lighting going to be a problem? Will you need track points?
Make an Appearance on Set
Some directors, if the shot is going to rely on an effect, will insist on a VFX person being present during the shoot. Big-budget Hollywood mov-ies do this, and there’s no reason for an indie to be any different.
Especially if the VFX artist has done tests already, now he or she can advise on how everything is being done. Knowing where the problems will come, you can shout to the director that perhaps a retake is in order, provided of course that the production team is open to this, as some will, some won’t.
Research the Technique
When I am handed a visual effects project I usually have some idea about how to go about it. Although, why stick to what you know when you have a world of knowledge at your fi ngertips?
Hop over to Google and do a little quick research. How do people solve this problem? If you follow a time-honored technique for creating a certain effect, has the technique changed?
Traditionally, character animation in After Effects was done by tak-ing the character into Photoshop, cutttak-ing all the parts up into layers, and then importing all those layers into After Effects, changing all the Anchor Points, and using a complex Parenting scheme. Sound like a lot of work? It is.
When After Effects CS3 came out, it seemed like a minor upgrade, wrong! One new effect has completely changed the process of character animation, the Puppet Tool. Now you can have full control over a charac-ter on a single layer.
Aside from the possibility that you may not have the best technique for creating an effect, the best techniques often change.
Get a Commitment from the Producer or Editor
on the Final Output Settings
I was working on VFX shots for an indie feature and when I started the job, I sat down with the director and producer and asked what the output would be. They told me DV. This sounded strange because it was shot on 16mm, and I just couldn’t imagine why someone would transfer 16mm just to go out to digital video.
so from that point on, every project I work on I have an early meeting to make sure that I am working at the resolution that is needed for the fi nal output.
Be a Very Organized Project
Manager
This chapter shows you a way to organize an effects project so that you never lose a fi le again. Clients hate sitting there watching you look for a fi le.
Creating a Digital Storyboard
In this tutorial, I’ll go through the steps involved in creating a storyboard using Photoshop.
Shot begins with Plant on table
Plant fades and reshapes to dog
Plant is now completely gone and dog is fully visible Dog fades up and reshapes
from plant
Step 1 — Create a new Photoshop document using the standard U.S. letter-size paper preset.
Paths palette. Set your Paintbrush to a 9 pixel brush and set the foreground color to black. In the Paths Palette Options , choose Stroke Path and then choose Brush .
Step 3 — Rename the layer that has our rectangle “ cell 1, ” duplicate it three times, and then rename the copies “ cell 2 ” and this step is repeated for the amount of cells that are created in the fi gure .
Shot begins with Planton table
Shot begins with Plant on table
Plant fades and reshapes to dog
Plant is now completely gone and dog is fully visible Dog fades up and reshapes
from plant
Done — Plan out each step, with its own layer group, and explain each step with text below; if you need more cells, make more pages of our storyboard. I’ve included a blank storyboard tem-plate with the extras on the DVD.
Project Management
Being able to fi nd everything related to your project at any point in time is crucial. I learned and adapted this method of project manage-ment from my professional experience and I have not found anything that works better.
Music Video
Step 1 — Make a folder for your project, not all of your projects, just the one you will be working on; I chose the name Music Video , but name it appropriately for your project. Do this before you start the project.
Step 2 — Inside this folder make the following folders:
AE Project — Save your After Effects project, the .aep fi le, in here.
AE Renders — From After Effects, render your movie fi les here.
FCP Project — Save your Final Cut projects to this folder.
FCP Targets — When you set your Final Cut scratch disks, send the fi les to this folder.
Original Art — Use this folder for research elements, test shots, or artwork provided by your client; if you manipulate it, save it from Photoshop to the Photoshop folder, as the original art folder should contain the unaltered original artwork.
Photoshop — Collect all of your altered artwork here and composi-tions that are going to be imported into FCP or AE.
Posts — Exported compressed Quicktimes for the client that will posted on the Web or given to the clients.
Done — This is just a basic framework; if you are only using After Effects, there’s no need to create FCP folders. Also, customize to fi t your needs if you are making something that requires Adobe Illustrator and not Photoshop; make an Illustrator folder instead.
Randall Dottin: Director
Randall Dottin received his directing MFA from Columbia University. His thesis fi lm, A-Alike , won the Student Academy Award in 2004 for Best Narrative Short. His second short fi lm,
Lifted , was sponsored by Fox Searchlight’s program for emerging directors, the Fox Searchlab. Lifted premiered in April 2007 and has screened at over 25 fi lm festivals and has won eight fi lm festival awards. Recently Randall completed principal photography on his fi rst feature fi lm, Indelible , which tells the story of a scientist who races to fi nd a cure for a rare disease that killed her husband and threatens to kill her teenaged son. For Indelible , Randall was awarded the $100,000 Alfred P. Sloan Feature Film grant for fi rst time writer/director teams who are telling a story that deals with science.
1. Describe your job or position in fi lmmaking and how you got there.
I’m a writer/director who’s made two short fi lms and am in the middle of shooting my fi rst feature. I started off as a playwright in the mid-1990s and when I graduated from college I taught elementary and high school English for a couple of years before entering fi lm school. My fi rst short fi lm A-Alike won the Student Academy Award in 2004 for Best Narrative Short and was licensed by HBO for 2 years. A-Alike is the story of two brothers from opposite sides of the social spectrum who must learn to reconcile their estrangement in order to save their family and themselves. After A-Alike , I was recruited by Fox Searchlight to participate in a program for emerging directors called the Fox Searchlab. In the Fox Searchlab, you sign a fi rst look deal with the studio and then make a short fi lm that serves as an audition piece for Fox executives. If they like your short they request you send them feature scripts you want to make. My Fox Searchlab short is called Lifted, which has screened at over 25 festivals and has won eight festival awards since its premiere in the spring of 2007.
making their fi rst features that realistically deal with science. The fi lm I am directing, Indelible , is the story of female scientist who races to fi nd a cure for a rare disease that killed her husband and threatens the life of her teenaged son.
2. What was the one moment when you knew for certain that this was going to be your career?
I knew when I saw Spike Lee’s Do the Right Thing for the fi rst time that I wanted to be a fi lmmaker. When I watched that fi lm I felt like fi nally here is a fi lmmaker who is telling stories that refl ect my experiences and background in a passionate, smart, complex and often funny way. What I love about Spike’s fi lms, especially his earlier work, is that he was unapologetic about expressing both the good and bad and the ugly about issues of race and growing up Black in America. Additionally, I feel like his characters usually have a very deep humanity as opposed to being just a mouthpiece for his political views.
3. What software (or equipment, whichever is more applicable) do you use?
When I write screenplays I use Final Draft. When I cut my movies I use Final Cut Pro. On my last fi lm, the special effects program I used was After Effects.
in the prequel trilogy. I feel like in the original trilogy they truly used special effects as a storytelling tool. I think when you use too much CG, the world tends to look a little too synthetic and fabricated. I tend to like special effects that are more organic and rooted in reality.
5. Is there a shot technique used in that movie that really made an impression on you?
I loved how they used compositing and motion to create the battle in the Death Star trench.
6. Where do your ideas come from? What inspires you? Reading, watching people just do their everyday thing. Movies defi nitely inspire me. I’m also very infl uenced by African American folklore and late 1980s and early 1990s hip-hop music.
7. Share a visual effects technique that you use with our readers. Tell us why you like it so much. This can be anything from something that you do in a visual effects software package, editing software package, or something on the set, in camera, anything you’d like to share with the readers.
Recently, I’ve really gotten into the work of Michel Gondry. He has a way of fi nding that which is fantastic in what seems to be very ordinary. I love the special effects work in Eternal Sunshine of the Spotless Mind . So much of that movie is a combination of old camera tricks, special effects, and sleight of hand. There were some great scenes when Jim Carrey is telling a story and he just walks from one location to the other.
In my fi lm Lifted there is a sequence where a guardian angel walks behind a series of pillars and disappears behind one and appears out from behind another pillar all in one shot without cutting. We called this the “ whack a mole ” sequence, because every time the main character, Deena, thinks she’s about to grab him, he disappears and pops up from behind another pillar.
To achieve the effect we used After Effects to erase the character once he went behind the pillars and then we whip panned to the next pillar from which the character would reappear. By the way, we shot Lifted using the Panasonic Varicam
HD camera. So, to take you back to production … the camera followed the spiritual guardian who walks behind the pillar, we then whip panned to the next pillar and then we cut. We rolled camera again and whipped from the old pillar to the new pillar and the spiritual guardian walked out from behind the new pillar. When we composited the two shots, it looked like we never cut the camera. I probably should subscribe to some magazines or buy this book when it comes out!
9. If you were going to give our readers a homework assignment, what would it be?
I would tell them to create a shot sequence of their choosing where they know they will need to use a special effect. Then I would have them do the special effect in two ways: I would have them do it completely CG and then do a version of the same scenario using as little to no CG in order to discover the many different ways to do the shot.
27
THE NEW GLASS SHOT
A glass shot is a technique that is extremely low tech but very effec-tive. Simply put, when a director needs to add scenery elements and it’s too costly to make set pieces, fi lmmakers would paint the needed extra scenery on a sheet of glass and shoot the actors with the glass directly in front of the camera.
Sounds charming and quaint, right? This technique was quite mon until surprisingly recently. However, now, thanks to digital com-positing software, shots that used to use these glass techniques can be adjusted digitally with more precision and greater capability. The visual effects techniques discussed in this chapter are not designed to hit the viewers over the head; rather these techniques not disrupt the scene.
After learning these techniques, it’s surprising how often these are used and often go unnoticed. If the effect is done well, the audience never loses that suspension of disbelief, and these are probably some of the easiest to pull off without showing the hand of the VFX artist too much.
Modifying a Building
During production on a fi lm, directors are often in the situation of needing an exterior shot that doesn’t exist. Let’s say we want to create a world with big messages to our protagonist so let’s add a billboard to the top of a building in Photoshop.
Ingredients
● A master shot of the building that should be modifi ed
The Shoot
For this example we will use a still image, either from a still camera or from the camera used for the rest of the production. This effect is achieved much more easily on a still. However, if the rest of the fi lm is being done in a hand-held shaky camera style, the shot should be mov-ing. If this is the case, the visual effects person on set should make sure that the shot has suffi cient track points.
When using a still that will be part of a fi lm we will have to do a noise effect on the shot when it’s fi nished in order to give it some movement.
The Design
In some cases, a piece of white gaffer’s tape can be used to put a track point where there is not one. In the case of this example, when the exterior of a building is being shot, it’s not likely that a piece of tape can be added so keep anStep 1 — The bulk of the effect created here is done in Pho-toshop. Open the images building.psd and billboard.psd.
additions
original
Step 3 — On our “ additions ” layer, use the Polygonal Lasso to select the top 10 fl oors of our building.
Step 4 — Using the Move tool, drag our selection down to remove a few fl oors.
Step 6 — Drag and drop the image from the billboard.psd fi le into our building.psd image. Use Edit ⬎ Transform ⬎ Scale to size it appropriately to the top of the building.
Step 7 — With our billboard layer highlighted, go to Edit ⬎ Trans-form ⬎ Perspective. Use the sides of the building as guides to match the angle. When we have it right, switch to the Eraser and erase the bottom of the billboard’s poles to make them blend well into the top of the building. Also add a little Blur to match the focus of the image better and darken the billboard layer.
Done — Lower the sky color correct layer’s Opacity to about 70% and set its transfer mode to Soft Light . It’s a quick minor touch that makes a world of difference, and now we can bring it over to After Effects.
The Effect
Because we did all the CG magic in Photoshop, in After Effects we will just add some noise and grain to make this seem less like a still photo and more like real footage.
Step 1 — In After Effects, put our altered building into a composition and set it for the duration that we need for the edit.
Also add in Add Grain , keeping the Intensity and Size low, around .3. Experiment here, as it will vary depending on the shot. We may want to try using the Match Grain fi lter, but be forewarned, it increases render time greatly. Later in this chapter we will discuss adding in moving cloud footage, which is something worth trying on this shot.
The Options
we managed to solve the problem without leaving our editor.
Adding Refl ections to a Shot
Often diffi cult to shoot, shots containing a refl ection can add a little punch and meaning to a particular scene. Refl ective objects will often need the hand of the visual effects artists to make the shot land exactly as it should.
Ingredients
● A master shot of the scene containing the refl ective surface
● A second shot used on the refl ective surface to show the refl ection we want (this is optional as there will likely be situations where the shot already contains what we need to refl ect)
The Shoot
Step 1 — Import rain.mov and killer.mov into After Effects and put the rain.mov in a composition .
Step 2 — Put the killer.mov footage on the layer above the rain .mov and create a Mask around the man’s shape to determine what we will include in our shot.
In After Effects, a Mask is used as a means of cutting a matte. In fi lm, a matte shot is the same as a composite shot, a shot where two or more different pieces of footage are combined. The term
Step 3 — Adjust the Mask Feather and Mask Opacity to smoothly blend our actor into the glass. Use one of the window’s panes to shape our mask. Set a keyframe for Position and Mask Shape.
Step 4 — Now because the actor doesn’t quite look like a refl ection yet, our next step is to use Effect ⬎ Distort ⬎ Displacement Map , which we use to grab the contours from our rain.mov layer and use that to distort the image of the actor.
Step 5 — A great technique for blending this shot into the window is to apply Luma Key . It will remove either the lights or the darks of shot; in this case, use Key Out Brighter .
Done — Depending on the lighting situation, try adding Lens Blur and lowering the Master Saturation in Hue/Saturation.
The Options
Basically the same functions are used to create this effect in Motion.
Step 1 — Import our two shots into Motion and put the killer.mov on the layer above the rain.mov . Create a mask to shape our killer. mov footage.
Step 3 — Go to Library ⬎ Filters ⬎ Keying ⬎ Luma Key . Choose Key Out Brighter .
Done— Of course, don’t forget to do our keyframe animation. Highlight the killer layer and go to the Properties tab. Folks who are like me, new to Motion and very comfortable in After Effects, keyframing in Motion takes a little getting used to. Mainly, when adding keyframes, get used to clicking the Add Keyframe but-ton, because moving a layer does not automatically make a new keyframe.
scene to capture the mood perfectly.
Ingredients
● A master shot of the sign that will be modifi ed
● A graphic of a new sign (which will be created in Photoshop)
The Shoot
For this example we will use a hand held shot, so that means that we will use the star on the sign as a track point. Also, the horizontal lines on the building will show us the correct angle for the shot to be on. We’ll make a new sign in Photoshop and then we’ll use After Effects to track the movement and replace the sign.
The Design
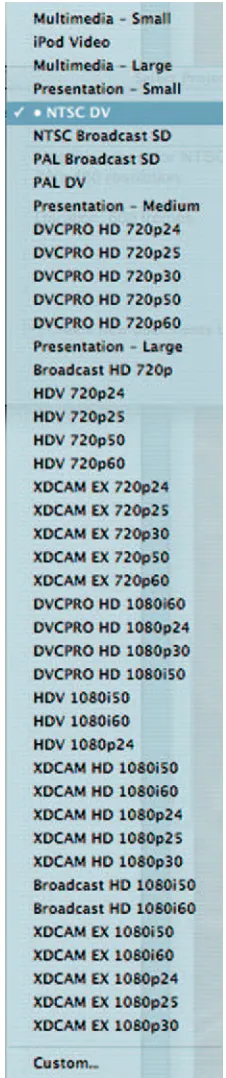
Step 1 — Make a new document in Photoshop and use the preset under Video/Film for NTSC DV 720 ⫻ 480.
Step 3 — Use Filter ⬎ Noise and Grain ⬎ Add Noise to give it some tex-ture (10%, Gaussian, and Monochromatic) . Use Filter ⬎ Blur and Sharpen ⬎ Motion Blur to make the Noise look like wood grain.
Step 4 — Use the Bevel and Emboss (Inner Bevel, Chisel Hard, Depth 71%) layer style to give the sign some 3D depth.
The Effect
Step 1 — Import our replacement sign, and the shot with original sign into After Effects, and make a composition .
Step 2 — Use Effect ⬎ Distort ⬎ Corner Pin to scale our new sign over the old one; as we do this, also try to match the perspective. Let’s not concern ourselves with the lighting right now, we will match that later.
Step 3 — Highlight the footage layer and select Animation ⬎ Track Motion. This will open the Track Motion window.
Use the outer rectangle (Search Area) to select the immediate area around the point we are tracking. It should be in stark contrast to the point we are tracking; if it’s not, then we may need to fi nd another track point. Use the inner rectangle (Feature Area) around the point we are tracking and keep the crosshair (Feature Center) in the middle.
The Play arrow (Analyze Forward) will search the whole shot, and it is hoped that our point will be tracked the whole time; if not, we may need a new point or we might need to try trimming down our shot.
Step 4 — Put the Search Area so that it’s around the blue area next to the star and the Feature Area right on the edge of the star. Analyze forward and then apply it to our signreplacement.psd layer.
Step 5 — Our new sign should travel nicely over the original. It may move the entire sign away from cover the original sign so in that case highlight all the Position keyframes on the sign layer and drag it back over the original sign.
In this case we are directly applying track data to a layer. However, in most cases this is not going to be the best solution. The reason why is because you will normally need to use that tracking data over and over again, so it would be best to apply track data to a
Done — Add Effect ⬎ Color Correction ⬎ Hue/Saturation and reduce the Master Saturation to about – 33. Also use Effect ⬎ Noise and Grain ⬎ Add Noise , set Amount of Noise to around 6%, and uncheck Use Color Noise . This will help match the sign to our footage and make it feel more realistic.
The Options
Motion Tracking is an exciting and handy tool, and it’s absolutely cru-cial to the art of compositing. Let’s do the same thing in Combustion.
Step 2 — Shape the sign to match the angle of the shot by going to the Composite Controls tab and choosing Transform . Use the Shear tool to match the angle.
Step 3 — With our replacement sign selected, go to the Tracker tab. Choose our original sign layer for the Source . Click the button for Position . We should see the familiar looking tracker controls; look close as it defaults to white unless we change the color.
Levels) to reduce contrast and make it darker.
Removing Objects from the Frame
No matter how rigorous the director, the director of photography, the location scout, and the whole team are, there will undoubtedly be shots that have objects in the frame that should not be there and can be removed.
Ingredients
● Footage with an item that needs removing; in this case it’s signs with logos.
The Shoot
If the shot can be achieved without including something that should not be there, then of course do so. Sometimes this is something that the director or DP did not notice or something that was unavoidable.
Also, note that the following tutorial would only apply to a static shot. If there is movement in the shot, that tracking data would be needed.