Oracle APEX 4.0 Cookbook
Over 80 great recipes to develop and deploy fast, secure,
and modern web applications with Oracle Application
Express 4.0
Marcel van der Plas
Michel van Zoest
Oracle APEX 4.0 Cookbook
Copyright © 2010 Packt Publishing
All rights reserved. No part of this book may be reproduced, stored in a retrieval system, or transmitted in any form or by any means, without the prior written permission of the publisher, except in the case of brief quotations embedded in critical articles or reviews.
Every effort has been made in the preparation of this book to ensure the accuracy of the information presented. However, the information contained in this book is sold without warranty, either express or implied. Neither the authors, nor Packt Publishing, and its dealers and distributors will be held liable for any damages caused or alleged to be caused directly or indirectly by this book.
Packt Publishing has endeavored to provide trademark information about all of the companies and products mentioned in this book by the appropriate use of capitals. However, Packt Publishing cannot guarantee the accuracy of this information.
First published: December 2010
Production Reference: 1081210
Published by Packt Publishing Ltd. 32 Lincoln Road
Olton
Birmingham, B27 6PA, UK.
ISBN 978-1-849681-34-6
www.packtpub.com
Credits
Authors
Marcel van der Plas Michel van Zoest
Reviewers
Dimitri Gielis
Maarten van Luijtelaar Surachart Opun
Development Editor
Maitreya Bhakal
Technical Editor
Neha Damle
Indexers
Monica Ajmera Mehta Rekha Nair
Editorial Team Leader
Gagandeep Singh
Project Team Leader
Priya Mukherji
Project Coordinator
Srimoyee Ghoshal
Proofreader
Aaron Nash
Graphics
Geetanjali Sawant
Production Coordinator
Shantanu Zagade
Cover Work
About the Authors
Marcel van der Plas
has been an Oracle Consultant for over 15 years. And from the beginning, he learned to work with Oracle Forms, Oracle Reports, and Oracle Designer. Marcel has worked on many projects with these tools. Later on, he became interested in APEX and did some projects with APEX.Marcel currently works for Ciber. Other companies he worked for are Atos Origin and Whitehorses. For Whitehorses, he wrote some articles ("Whitebooks") about Oracle.
I would like to thank Michel van Zoest, my co-author for helping and working together. I also want to thank the reviewers Maarten van Luijtelaar, Dimitri Gielis, and Surachart Opun. Their comments were so valuable and helpful. I would like to thank Douwe Pieter van den Bos for introducing us to Packt and I would like to thank Packt for giving me this opportunity to write this book. I would like to thank my employer, Ciber, for giving me the freedom to write this book.
Michel van Zoest
is a consultant with more than 10 years of experience in building (web) applications using Oracle technology such as Oracle (web) Forms, Oracle Designer, MOD_PLSQL, ADF, SOA Suite and of course, APEX.He is one of the first Oracle Application Express Developer Certified Experts in the world.
He has used his APEX knowledge in projects for companies ranging in size from a single employee to large multinationals. His experience in these projects has been used in the realization of this book.
Michel currently works at Whitehorses in the Netherlands and runs his own blog at http://www.aboutapex.com. Next to that, he blogs at the company website on http://blog.whitehorses.nl and he regularly writes Whitebook articles (in Dutch) for Whitehorses.
First of all, I would like to thank my co-author Marcel van der Plas. Thanks to the easy way that we could work together, the writing of this book has gone as smooth as possible.
I would like to thank the people at Packt Publishing for offering me the chance to write this book. It has been a long process with a lot of hard work, but I'm very happy with the result. I also would like to thank Douwe Pieter van den Bos for introducing me and Marcel to Packt and his invaluable help in the early stages of the book.
Furthermore, I would like to thank Maarten van Luijtelaar, Dimitri Gielis, and Surachart Opun for their hard work in reviewing our drafts. This book has become so much better thanks to you guys.
I also would like to thank my employer Whitehorses for the support I have been given.
About the Reviewers
Dimitri Gielis
was born in 1978. Together with his family he lives in Leuven, Belgium.At an early age, Dimitri started working with computers (Apple II, IBM XT) and he quickly knew he would like to work with computers and especially with databases all his life.
In 2000, Dimitri began his career working as a consultant for Oracle, Belgium where he got in touch with almost every Oracle product. His main expertise was in the database area, but at that time he was also exposed to HTMLDB, which was renamed Oracle Application Express later on. From the very start he liked the Oracle database and APEX so much that he never stopped working with it. Dimitri then switched to another company to create an Oracle team and do pre-sales, to later create and manage an Oracle Business Unit.
In 2007, Dimitri co-founded APEX Evangelists (http://www.apex-evangelists.com), together with John Scott. APEX Evangelists is a company which specializes in
providing training, development, and consulting specifically for the Oracle
Application Express product.
On his blog (http://dgielis.blogspot.com) he shares his thoughts and experience about Oracle and especially Oracle Application Express.
Dimitri is a frequent presenter at OBUG Connect, IOUG Collaborate, ODTUG Kaleidoscope, UKOUG conference, and Oracle Open World. He likes to share his experience and meet other people. He's also President of the OBUG (Oracle Benelux User Group) APEX SIG.
In 2008, Dimitri became an Oracle ACE Director. Oracle ACE Directors are known for their strong credentials as Oracle community enthusiasts and advocates.
In 2009, Dimitri received the "APEX Developer of the year" award by Oracle Magazine.
Surachart Opun
has been working with Oracle products for over six years. Surachart is co-founder for Oracle User Group in Thailand. He is Oracle ACE, OCE RAC, and OCP 10g/11g. He implemented, migrated, and operated about Oracle Products including Oracle Database, Application Express and so on. He contributes more about Oracle Products.www.PacktPub.com
Support files, eBooks, discount offers and more
You might want to visit www.PacktPub.com for support files and downloads related to your book.
Did you know that Packt offers eBook versions of every book published, with PDF and
ePub files available? You can upgrade to the eBook version at www.PacktPub.com and as a print book customer, you are entitled to a discount on the eBook copy. Get in touch with us at [email protected] for more details.
At www.PacktPub.com, you can also read a collection of free technical articles, sign up for a range of free newsletters and receive exclusive discounts and offers on Packt books and eBooks.
http://PacktLib.PacktPub.com
Do you need instant solutions to your IT questions? PacktLib is Packt's online digital book
library. Here, you can access, read and search across Packt's entire library of books.
Why Subscribe?
Fully searchable across every book published by Packt Copy and paste, print and bookmark content
On demand and accessible via web browser
Free Access for Packt account holders
If you have an account with Packt at www.PacktPub.com, you can use this to access PacktLib today and view nine entirely free books. Simply use your login credentials for immediate access.
Table of Contents
Preface
1
Chapter 1: Creating a Basic APEX Application
7
Introduction 8 Creating an APEX 4.0 application 8 Creating a simple form page 12 Creating a simple report 15 Implementing an interactive report 19 Creating a chart 24 Creating a map chart 26 Creating a navigation bar 29 Creating a list of values 32 Including different item types 35 Protecting a page using an authorization scheme 38 Securing an application with Authentication 40 Control the display of regions and items with Dynamic Actions 42 Creating a computation 45 Creating an automated row fetch with a page process 46 Putting some validation in a form 49 Creating a report with PL/SQL Dynamic Content 55
Chapter 2: Themes and Templates
59
Table of Contents
Chapter 3: Extending APEX
81
Introduction 81 Adding JavaScript code to your application 82 Creating a tag cloud with AJAX 85 Creating visual effects with JavaScript libraries 91 Enhancing your application with the Google API 96 Including Google maps 98 Embedding multimedia objects in your application 104 Creating a region selector 108 Sending mail via APEX 112
Uploading and downloading files 116
Calling APEX from an Oracle Form 120
Chapter 4: Creating Websheet Applications
123
Introduction 123 Creating a websheet application 124 Creating a page in a websheet 126 Adding a navigation section to a page 128 Implementing a datagrid 130 Allowing multiple users access to a websheet 133 Creating an enhanced datagrid from a spreadsheet 136
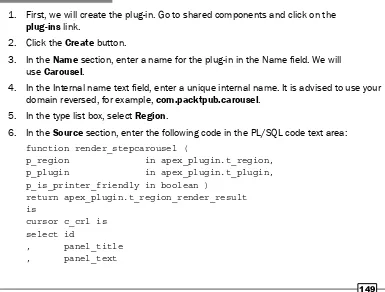
Chapter 5: APEX Plug-ins
141
Introduction 141 Creating an item type plug-in 142 Creating a region type plug-in 149 Creating a dynamic action plug-in 153 Creating a process type plug-in 157
Chapter 6: Creating Multilingual APEX Applications
161
Introduction 161 Creating a translatable application 162
Using XLIFF files 166
Switching languages 172 Translating data in an application 174
Chapter 7: APEX APIs
179
Table of Contents
Chapter 8: Using Webservices
201
Introduction 201 Creating a SOAP webservice reference 201 Creating a REST webservice reference 207 Building a page on a webservice reference 210
Chapter 9: Publishing from APEX
217
Introduction 217
Exporting to a comma separated file 217
Creating a PDF report 220 Creating a report query 224 Creating a report layout using Oracle BI Publisher 225 Linking the report layout to the report query 227 Calling a report from a page 229
Chapter 10: APEX Environment
231
Introduction 231 Setting up a development environment using subscriptions 232 Debugging an APEX application 237 Debugging an APEX application remotely 244 Deploying an application with SQL Developer 250 Setting up version control with APEX and SVN 252 Setting up a production environment using an Apache proxy 255 Setting up the APEX Listener on Weblogic 258
Chapter 11: APEX Administration
261
Introduction 261 Creating a workspace manually 262 Creating a workspace by request 264 Creating a user 268 Adding a schema to your workspace 269 Setting a system message 271 Setting a workspace announcement 272 Setting news items on the home page 273
Creating a site-specific task list 274
Creating a public theme 276 Locking a workspace 279
Chapter 12: Team Development
281
Table of Contents
Using Feedback 297 Using Follow-ups 300
Preface
Oracle Application Express 4.0 is a rapid web application development tool that works with the Oracle database. Using features like Plug-ins and Dynamic Actions, APEX helps you build applications with the latest techniques in AJAX and JavaScript.The Oracle Application Express 4.0 Cookbook shows you recipes to develop and deploy reliable, modern web applications using only a web browser and limited programming experience. With recipes covering many different topics, it will show you how to use the many features of APEX 4.0.
You will learn how to create simple form and report pages and how to enhance the look of your applications by using stylesheets. You will see how you can integrate things such as Tag Clouds, Google Maps, web services, and much more in your applications. Using Plug-ins, Dynamic Actions, BI Publisher, Translations, and Websheets, you will be able to enhance your applications to a new level in APEX.
This book will show you how to be agile in the development of your web applications by using Team Development, debugging, and third-party tools.
After reading this book, you will be able to create feature-rich web applications in Application
Express 4.0 with ease and confidence.
What this book covers
Chapter 1, Creating a basic APEX application, describes the basic steps to create an APEX application. We will learn to make an intranet application where employees can get information.
Chapter 3, Extending APEX, shows us how to we will extend our application with some nice features like visual effects, a tag cloud, and a Google map.
Chapter 4, Creating Websheet Applications, teaches us how to create a websheet application, create a page in the application, add a navigation page to the websheet, and allow multiple users to access the websheet.
Chapter 5, APEX Plug-ins, describes the four types of plug-ins: Item type, Region type, Dynamic action, and Process type plug-ins.
Chapter 6, Creating Multilingual APEX Applications, shows us how we can fully translate an application using built-in functionality to translate applications, without having to rebuild the application completely and adding something of ourselves to easily switch between languages.
Chapter 7, APEX APIs, shows us how to use APIs as they offer a lot of flexibility and speed in developing web applications.
Chapter 8, Using Webservices, teaches us how to use webservices in APEX.
Chapter 9, Publishing From APEX, shows you how to export reports and get the output in some kind of digital format and how to interact with BI Publisher.
Chapter 10, APEX Environment, contains recipes that will show how to set up and use a development environment, how to use version control and how to deploy Application Express on a web container with the APEX Listener.
Chapter 11, APEX Administration, shows you how to create a workspace, how to create users on the workspace and how to manage the workspaces.
Chapter 12, Team Development, we will see how we can take advantage of the features in Team Development in our project. Each recipe will show how a part of Team Development
can be put to use in a specific part of the project cycle.
What you need for this book
APEX 4.0 or higher.Oracle RDBMS database 10.2.0.3 or higher. Either one of the following Internet browsers:
Who this book is for
This book is aimed both at developers new to the APEX environment and at intermediate developers. More advanced developers will also gain from the information at hand.
If you are new to APEX you will find recipes to start development. If you are an experienced user you will find ways to work smarter and more easily with APEX
and enhance your applications.
A little knowledge of PL/SQL, HTML and JavaScript is assumed.
Conventions
In this book, you will find a number of styles of text that distinguish between different kinds of
information. Here are some examples of these styles, and an explanation of their meaning. Code words in text are shown as follows: "We can include other contexts through the use of the include directive."
A block of code is set as follows:
select rv_meaning display_value , rv_low_value return_value from app_ref_codes
where rv_domain = 'ADDRESSES'
When we wish to draw your attention to a particular part of a code block, the relevant lines or items are set in bold:
select rv_meaning display_value , rv_low_value return_value from app_ref_codes
where rv_domain = 'ADDRESSES'
In this book, code snippets are followed by a small note, for example, [1346_01_01.txt] which
points to that particular code file in the code bundle available on the Packt website.
Any command-line input or output is written as follows:
# cp /usr/src/asterisk-addons/configs/cdr_mysql.conf.sample
/etc/asterisk/cdr_mysql.conf
Warnings or important notes appear in a box like this.
Tips and tricks appear like this.
Reader feedback
Feedback from our readers is always welcome. Let us know what you think about this book— what you liked or may have disliked. Reader feedback is important for us to develop titles that you really get the most out of.
To send us general feedback, simply send an e-mail to [email protected], and mention the book title via the subject of your message.
If there is a book that you need and would like to see us publish, please send us a note in the SUGGEST A TITLE form on www.packtpub.com or e-mail [email protected].
If there is a topic that you have expertise in and you are interested in either writing or contributing to a book, see our author guide on www.packtpub.com/authors.
Customer support
Now that you are the proud owner of a Packt book, we have a number of things to help you to get the most from your purchase.
Downloading the example code for this book
You can download the example code files for all Packt books you have
purchased from your account at http://www.PacktPub.com. If you purchased this book elsewhere, you can visit http://www.PacktPub.com/support and
Errata
Although we have taken every care to ensure the accuracy of our content, mistakes do
happen. If you find a mistake in one of our books—maybe a mistake in the text or the code—we
would be grateful if you would report this to us. By doing so, you can save other readers from
frustration and help us improve subsequent versions of this book. If you find any errata,
please report them by visiting http://www.packtpub.com/support, selecting your book, clicking on the erratasubmissionform link, and entering the details of your errata. Once
your errata are verified, your submission will be accepted and the errata will be uploaded on
our website, or added to any list of existing errata, under the Errata section of that title. Any existing errata can be viewed by selecting your title from http://www.packtpub.com/support.
Piracy
Piracy of copyright material on the Internet is an ongoing problem across all media. At Packt, we take the protection of our copyright and licenses very seriously. If you come across any illegal copies of our works, in any form, on the Internet, please provide us with the location address or website name immediately so that we can pursue a remedy.
Please contact us at [email protected] with a link to the suspected pirated material.
We appreciate your help in protecting our authors, and our ability to bring you valuable content.
Questions
1
Creating a Basic
APEX Application
In this chapter, we will cover:
Creating an APEX 4.0 application
Protecting a page using an authorization scheme Securing an application with authentication
Controlling the display of regions and items with dynamic actions Creating a computation
Creating an automated row fetch via page process Putting some validation in a form
Creating a report with PL/SQL dynamic content
Introduction
This chapter describes the basic steps to create an APEX application. Using APEX, it is really simple to create a basic application. The user interface is web-based and very intuitive. A lot of objects can be created using wizards which will guide you through the creation process. Our aim is to make an intranet application where employees can get information. When starting
the application, it shows a homepage with information such as weather, traffic company information, latest news, blogs, and so on. Employees can see their colleagues' profiles, just like
in Facebook. Employees also have access to documents like timesheets and project plans.
Creating an APEX 4.0 application
How to do it...
1. Click on the Application Builder icon on the left side of the screen.
You will see a page where you can choose between database applications or websheet applications. Furthermore, you see already created applications. 2. Click on the Create button on the right side of the screen. Two options are shown.
You can now choose between a database application and a websheet application. We select the database application.
In APEX you have two ways of selecting and proceeding to the next step most of the time. Usually, there is an icon accompanied by a radio button. When you check the radio button, you must click the Next button after that to proceed. When you click the icon, you automatically go to the next step. In this book, when there is the situation that you have to select one of the shown options, we will only tell which one of the options you should select. You can decide yourself which way to select and proceed.
3. Select Database.
4. In the next step we can now choose between FromScratch, FromSpreadsheet and DemonstrationApplication. When you choose DemonstrationApplication, Oracle APEX creates an application which shows the possibilities of APEX. However, we want to create an application by ourselves, and we can install this demonstration application at a later time. For now, we select "From Scratch".
5. Enter a name and an application ID . Preferably choose a name which covers the goal of the application. In our case, we call the application "Intranet".
6. Application ID is a generated and unique identification number, but you can also use
some other number for your convenience.
8. Finally, select the schema where the tables that you want to use for your application reside and click Next.
The next step in the wizard is the pages. You can start with a blank page and, from that starting point, extend your APEX application. You can also choose to add reports
and forms beforehand. At this point you don't actually define the contents of the
pages, you just create the 'skeleton' of them.
9. We choose to add one blank page and proceed to the next step.
10. Now you can choose to include tabs in your application. Tabs are components that help you navigate through the application. For now, we are not going to use tabs, so select "No Tabs".
The next step is the option to copy shared components from another application. Shared components are objects that can be used throughout the application, for example a list of values or images. Since we create a simple application from scratch, we don't want to copy shared components from another application. Select No.
An authentication scheme is a means of allowing users access to our application. APEX offers different methods for this. More will be explained in another recipe. The scheme for this application will be selected in the next step.
1. Select the standard Application Express authentication scheme.
2. You can select the language used in your application, as well as where the user language should be derived from.
3. The last option in this step is the date format mask. Click on the LOV button next to the text item to get a list with possible date format masks and select one.
4. The last step in the wizard is the theme. Theme 1 and Theme 2 are basic themes. If you don't like all those colors, just select something like Theme 18. That is quite a simple theme.
5. We select Theme 1 and that completes the create page wizard.
Now that we have completed the wizard, we can click on the create button to confirm. The
Depending on the type of authentication, we will also see page 101—Login. This is the default page APEX navigates to when you run an application using authentication. It is generated automatically with all functionality to allow users to log in to our application.
Click the large RunApplication button to go to the login page.
We can log in on this page with the same credentials we use to gain access to the APEX development environment. So enter this username and password and click the Login button.
Well, that's it! We've created and run our first Oracle APEX 4.0 application. We can now click on the pages to define them, or we can add new pages to extend our application. We can also
How it works...
We have just created our first application. Even though it's just an empty shell, this is the starting point for all APEX applications. Creating content for our application is a whole different story and will be explained in the following recipes.
Creating a simple form page
After you have created the application it is time to create one or more forms and reports. First let's get started with a simple form. We will build a tabular form with insert, update, and delete possibilities.
Gett
ing ready
Make sure that the table our form is based on contains a primary key and a sequence to update the primary key. In this case, we will be using the EMP table, so we have to make sure it is available in our database schema.
Also we have to make sure the application that we created in the previous recipe is available.
How to do it...
The starting point for this recipe is the overview of the Intranet application we created in the previous recipe.
1. Click on the CreatePage button.
2. You will get an overview of page types. Select Form.
3. Now you get an overview of types of Forms pages such as form based on a procedure, forms based on a table or view, or form on a query. Select tabular form.
4. The next step is the table owner and the allowed operations. Here you can decide what your form should do: update only, update and insert, update and delete or all operations (update, insert, delete). Select all operations.
5. Select the table or view your form should be based on. If you know the table name
you can type it in the text field. Otherwise, click on the button next to the field and
select a table from the pop-up list. We choose the employees table, EMP.
6. Now you can select the columns, which should be visible in the form. You can select columns by clicking on the column while holding the control key. To select all columns
you can click on the first column and drag your mouse to the last column.
7. If a primary key constraint is defined on the table we use, then it will automatically be
8. Next, you can choose which way the primary key is automatically filled. Maybe you created a trigger which updates the primary key in case it is empty. However, we choose to update the primary key via an existing sequence. Select this option and in the following listbox, select the appropriate sequence and proceed to the next step. 9. Next, you can select which columns in the form should be updatable. Select the
desired columns and click next.
10. In this step, you can give the page a name and a page ID. Furthermore, you can fill
in the region title, the region template, the report template and if your forms page should contain breadcrumbs. A breadcrumb is a navigation component that shows the path to the current page. Leave the options as they are and click next.
11. We are not going to use tabs, so leave this option on its default selection and click next.
12. Next, fill in the names that should appear on the buttons in the form and click next. 13. In this step, you must define the branches. Branches are links to other pages. It is
important to know which ID a page had, in order to fill in the branches at this point.
Usually, the cancel button branches to the main page of the application. But it's also
possible to find the page to branch to by using the LOV button. For the page submit
branch, select the page ID assigned to the page we want to branch to. Click Next.
14. The last step in the wizard is the confirmation page. Check the data. If something is
wrong you can go back using the Previous button. Otherwise click the finish button. The form will be created and here you can choose to run the form to see how it looks or you
How it works...
A tabular form is actually an updateable report. In the region section you can find the query
which populates the data to show on the screen. By default, every row of the table is shown. We can restrict the result set by adding a where-clause to this query.
When we edit the page we can see that the wizard created the four buttons and the processes for the DML (data manipulation language). The tree view shows an overview of the components the page is built up of. On the left we can see the components used for the rendering of the page (Regions, Items and such). It is built up in such a way that we can see the order of the components that are rendered when the page is loaded.
The middle section shows the components used for the processes on the page; in this case, these are validations, data manipulation, and branching. The right section shows an overview of all shared components used on this page, if any are available.
We can right-click on any component in the tree view to see the possible actions for that component.
You can see that there are two multi-row update processes. The first one is triggered by the submit button and updates the changed rows. The add rows button initiates two processes: the second multi-row update process and the add rows process. So, actually the add rows button submits the changes the user made so far and after that it creates an empty row.
The delete button initiates a JavaScript process that asks the user for confirmation. And this confirmation starts the delete process. This JavaScript function can be found in the HTML
There's more…
You can also make a simple single record form. Here's how to do it. In the application builder, click on the created application.
1. Click create page. 2. Click on the form icon.
3. Click on form on table or view.
4. Select the schema where the employees table resides and click Next. 5. Enter the table name. In this case it is EMP. Click Next.
6. In the page number/page name dialog, just leave the settings as they are and click Next.
7. Select do not use tabs and click Next. 8. Select the primary key and click Next.
9. Select Existing and select the desired sequence name in the listbox. Click Next.
10. Select all columns and click Next.
11. Change the button labels or leave them as they are and click Next.
12. Enter the page numbers APEX should call when submitting or cancelling and click next.
13. In the confirmation dialog, click Finish. 14. In the success message dialog, click Edit.
Creating a simple report
In our application we would also like to have an overview of all employees in the company. We can get this overview by creating a report. There are several types of reports and we just start with a simple report based on a query.
Getting ready
How to do it...
1. In the application builder, go to the application we just created and click on the CreatePage button.
2. In the page type dialog, select Report.
3. A page is shown where we can choose between the different types of reports. Options are: interactive report, classic report, report based on a web service result, and wizard report. We will choose classic report so select classic report.
Some of the other types of reports will be covered in other recipes in this book. The next recipe is on Interactive Reports. In Chapter 8, Webservices, some examples of building reports on Webservices are explained. The option wizard report is not explained separately, because it just offers an easier, step-by-step way of building a report.
4. In the next step you can assign a page number and a page name to the report. Furthermore you can indicate whether you would like to have breadcrumbs on your report page. Leave the breadcrumb option to "do not use breadcrumbs on page" and click Next.
5. In this step you can choose to include tabs in your report page. We leave it to "do not use tabs". Click Next.
6. In this step you must enter a query in the textarea. You can use the query builder to help you build your query, but you can also enter it manually. We use the following query:
select * from emp
7. After you have entered the query, click Next.
8. In the next step you can define a number of settings such as the report template, the region name, the number of rows displayed per page, and whether the user should
be able to print the report on paper or spool it to a comma separated file. Leave the
options as they are and click Next.
9. In the last step, you see the confirmation page. If the choices made are not satisfactory, click the previous button to go back and modify the options. Otherwise, click the finish button.
The report is ready now. You can edit the report to define the settings or you can run the
How it works...
When you look at the page in the Application Builder, you will see that APEX created a reports region.
1. Right-click on the region name of the report and click Edit to see the details of the report.
3. Here you can modify the column heading, the heading alignment, or the names of the columns. To go more into detail about the column you can click on the pencil icon next to the column name.
Sometimes in a project, the business case for a report changes. Instead of a classic report, the customer would like an Interactive Report. In case there are two options, remove the current report region and create a new one based on an Interactive Report or just migrate the current report using built-in functionality.
When we are looking at the Region Definition tab of the Edit region page, we can
see a Tasks list on the right side of the screen. One of the options is Migrateto InteractiveReport. This migration is not a Holy Grail, but can save a lot of time in the migration process.
4. Click the link to MigratetoInteractiveReport.
5. In the following page, enter EMPNO in the Unique Column field and click the Migrate button to see what happens.
More on Interactive Reports is explained in the following recipe.
See also
Chapter 8 explains (among many other things) how to create a report on Webservice references.
The next recipe "Implement an interactive report" explains how to build a page with an interactive report and what options there are when using them.
Implementing an interactive report
In this recipe, we are going to create an interactive report and show you how to use it. An interactive report is a special kind of report, which offers a lot of options to the user for
filtering, sorting, publishing, and much more.
Getting ready
It's always a good idea to start by creating a view that already selects all columns you want to
show in your report. This simplifies the query required for your report region and separates the
logic from presentation in your application architecture.
In this recipe, we are going to base the interactive report on the APP_VW_CONTACTS view that joins the tables for contacts, addresses, and communications. The query for this view is:
select ctt.firstname
We will also need a named LOV later on in the recipe. To create it, follow the next steps: 1. Go to SharedComponents and then to ListsofValues.
2. Click Create to make a new LOV.
3. Create it from scratch and call it ADDRESS_TYPE, it should be a dynamic LOV. 4. The query that it's based on is:
select rv_meaning display_value , rv_low_value return_value from app_ref_codes
where rv_domain = 'ADDRESSES' [1346_01_02.txt]
How to do it...
The starting point for this recipe is an empty page, so the first thing that we're going to do is create a new region to contain the interactive report.
1. Create a new region by right-clicking on the Regions label and select Create.
2. Select Report as the type of region.
3. Then select InteractiveReportas the Report Implementation. 4. Give the Region a title "Contacts".
5. Select Region Template APEX 4.0 – Reports Region. Keep the other fields on the default.
6. As the source for the Region, enter the SQL Query: SELECT *
FROM app_vw_contacts [1346_01_03.txt]
7. Leave the other options on default.
As you can see in the tree view, we now have a new Region with all columns from the view.
When we run the page now, we can already see some data. APEX also generated
a toolbar above the report that we can use to filter data or change the way it
is presented.
The next step is to alter the report, so we can customize the column labels and change the way some of the data is presented.
9. In the Page Definition's tree view, right-click on the ContactsRegion and select ReportAttributes from the pull-down menu.
10. Change the heading for some of the columns: Firstname -> First Name
Lastname -> Last Name
Default Yn -> Default Address?
11. Click ApplyChanges to confirm the changes.
This changes the labels for some of the columns in the report. Next, we will change the presentation of the data inside one of the columns.
12. Expand the tree view to show the contents of Report Columns of the Contacts Region. 13. Right-click on ADDRESS_TYPE and click Edit.
14. Change the item Display Text As to Display as Text (Based on LOV, escape special characters).
15. Under ListofValues, select Use Named List of Values to Filter Exact Match from the pull-down Column Filter List of Values.
16. Select ADDRESS_TYPE as the Named List of Values. 17. Click ApplyChanges.
When we take a look at the page by clicking Run we can see the changes to the column names and the AddressType no longer shows the abbreviation, but the full text.
There's more...
After the developer is done with creating an interactive report, the user will have a host of
possibilities in the action menu to change the way the information is presented and filtered.
These possibilities can be granted or revoked by the developer to an extent.
The first section holds the options that can be used in the Search Bar. When a user clicks the
Action button in the SearchBar, a menu will unfold revealing all the possible options. Data
can be filtered, sorted, highlighted, and aggregated for instance. It's also possible for the user
to generate a chart.
When a user wants to save the changes he made to the report, this is also possible. He can
save it for personal or public use, so other users can benefit as well.
Creating a chart
In many reports it's required to show some (or all) of the figures in charts. This will give users the opportunity to quickly see the data and possibly take actions accordingly.
This recipe will show how to create a chart and some possibilities to configure them.
Getting ready
In the earlier recipes, we created the regions while building a new page. Of course it's also
possible to add regions on existing pages. To do so in this example, first prepare an empty
page which will hold the region with the chart.
How to do it...
1. Create a new region by right-clicking on the Regions label and choose Create. 2. Select Chart and click Next.
3. Choose Flashchart and click Next. 4. Select Pie&Doughnut and click Next. 5. Select 3DPie and click Next.
6. Enter Employeesinadepartment in the title, leave the other fields on the default and click Next.
7. Enter Employeesinadepartment in the Chart title, leave the other fields on the default and click Next.
We are going to select all employees per department, so we will enter a query that will get us that data into the chart.
8. Enter the following query into the SQL Query field:
The page shows a graphical representation of the number of employees in each department:
There's more...
There are a number of possibilities to change and enhance this chart. Besides the 3D pie we have created here, there are dozens of other chart types. But there is a catch. Once a chart is created, the number of types it can be changed to is limited. When we would like to use a completely different chart type, the chart region has to be re-created.
This recipe can be easily expanded with a link to another page which can be clicked inside the chart.
To do this, first navigate to the Chart Series by expanding the tree view under the chart region or by clicking the edit link in the chart properties page. Edit the query on which the chart is
based and change the first column. If we, for example, would have a page with ID 888, a query
with a link to that page would look like this:
select 'f?p=&APP_ID.:888:&APP_SESSION.::NO::P888_DEPT_ID:'||dept.id link
We have chosen to show a dynamically generated link here. A few of the parameters need an explanation:
APP_ID is the ID for this application.
APP_SESSION is the ID for the current session.
P888_DEPT_ID is the fictitious item on page 888 that holds the dept_id.
It is also possible to create a link by altering the action link region on the Chart Series page.
The same items will be filled by this process, but it is easier to use when it is a relatively
simple application.
Creating a map chart
A new type of chart available in Application Express 4.0 is the map chart. This allows users to present data on a geographical map. APEX 4.0 offers many maps from a world overview to maps of single countries.
Map charts allow applications a new way to visualize location-related data without much programming.
In this recipe, we will show you how to create a map that lists all contacts in the United States by state.
Getting ready
First we need to have a structure ready in our database tables that holds at least one geographical related column (for example, country, state, or province names). This will be the pointer for our chart to which it can relate its map.
For this recipe, we will reuse the APP_VW_CONTACTS view. This view holds a column called STATE that we can use in our chart.
How to do it...
Our starting point is again an empty page. The first thing to do is to add a new region. 1. Right-click on Regions and select Create.
2. Select Map as the RegionType.
This will bring up a window with a couple of main categories of maps. Selecting one of these categories will bring up a list of sub-categories that can be drilled-down even further.
3. Select UnitedStatesofAmerica and click Next.
5. Enter ContactsbyState for the title and leave the rest on default and click Next. 6. Enter the same text as the MapTitle.
7. Enter the following query in the appropriate SQL Query area: select null link
, STATE label
, COUNT(CONTACT_ID) value from APP_VW_CONTACTS
group by STATE [1346_01_06.txt]
8. Click CreateRegion.
9. Run the page to see the result.
As we can see, each state that contains one or more contacts is highlighted. APEX also generates labels containing the state name and number of contacts if there is room for it. The other labels can be viewed by hovering over the state with the mouse pointer.
How it works...
When using a Map chart it is important that a column for the label is used that contains the name of the geographical region that you want highlighted on the map. For the standard maps provided by APEX, it's not allowed to use abbreviations, but it has to be the full name (for example, New York instead of NY and Virginia instead of VA).
There's more...
Just like any other chart type it is possible to create links to other pages. This can be used to create, for instance, a drill down type of structure. We could create a series of pages from a world map, to a continent map, to a country map, and so forth.
How such a link can be created is explained in the chart recipe before this one.
Creating a navigation bar
The navigation bar is the area of an APEX application that is normally placed into the header of each page (unless the template is changed of course). As a standard, the Logout link is provided here, so users can quickly log out of the application from any page.
This recipe will show how a navigation bar can be customized. This will allow users to quickly reach certain pages in the application.
Getting ready
In this recipe we are going to see how you can create a quick link to a contact page. Before we
can do that, we first need to have this page ready.
Create a new blank page. Name it Contact and assign page ID 999 to it. Create a new HTML region on this page and enter the following text into it: "For more information send an e-mail to [email protected]"
For the second part of the recipe, we need an icon available. This can be any available icon as long as it measures 32 x 32 pixels. The Images directory of APEX offers some examples like "fndtip11.gif".
Go to SharedComponents. Click on Images.
Click on Create. Select your application.
How to do
it...
The navigation bar can be found in Shared Components. To reach it navigate to Shared Components | NavigationBarEntries.
As a default there is already a Logout entry available. Our new entry will be added here: Click the button Create.
Select From Scratch and click Next. Select NavigationtoURL and click Next.
In the EntryLabel, enter "Contact" and leave the rest on default. Click Next.
Enter 999 into Page and default the other fields. Click Next. Click Create.
As you can see, a new entry is created next to the Logout entry. This means we are done and can now test it by running the application.
Instead of a link text it is also possible to use images. This can be helpful when developing, for example, a multi language application with a short list of languages. Instead of writing the full language name, we can use small icons depicting the available language.
In this example, we will only show you how to create a navigation bar icon and reuse our Contact page for this. Later on in the book, we will show you the details of how to create a language switch.
Go to SharedComponents | NavigationBarEntries and click the button Create. Select FromScratch and click Next.
Select NavigationtoURL and click Next.
This time we need to enter some more information on this screen.
Alter the Sequence to 15. In the EntryLabel enter nothing.
In IconImageName, click the button to the right of the field and select the icon "fndtip11.gif."
Alternatively, you can enter "#APP_IMAGES#fndtip11.gif" into the field. Enter Contact into ImageALT.
Enter 32 for both ImageHeight and Width.
Click Next.
Enter 999 into Page and default the other fields. Click Next. Click Create.
You will notice a new entry in the list of the Navigation Bar. When running the application, this will be shown with the selected icon.
There's more...
New in Application Express 4.0 is the possibility to add a feedback link to the navigation bar. This will allow visitors of the application to quickly send feedback to the application developers or administrators.
Create a new navigation bar entry From Scratch. Select Feedback and click Next.
Set the page number to 102, leave everything else at default, and click Create. The focus will be returned to the navigation bar overview, so we have to repeat the
first two steps.
Now select page 102 from the Feedback Page pull down list, enter 20 into the DisplaySequence, and click Create.
If you were to run the application now, no feedback link would be visible, because we have to
allow the feedback option first.
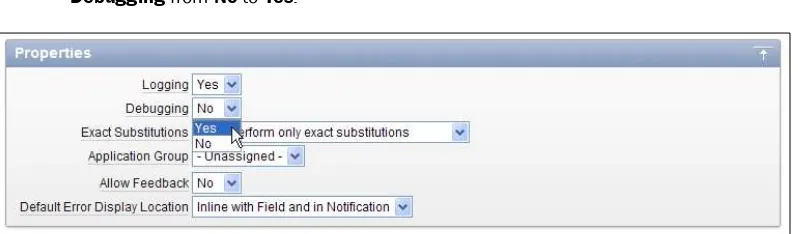
So click EditApplicationProperties and find the option AllowFeedback. Set the pull down to Yes and click ApplyChanges. Now the application is ready to receive some feedback from its visitors.
See also
Chapter 6, Creating multilingual APEX applications, will cover translating your application and offering quick language switching to the visitors.
Chapter 12, Team Development, will show how feedback can be used to the advantage of the development team.
Creating a list of values
When you use forms with items that are foreign keys to other tables, it would be handy to derive the primary key from the lookup table instead of having to enter this ID manually in the
text field. Or, when dealing with lots of similar, predefined data, you don't want to enter the
same values over and over again. In those cases, you would want to use items like listboxes, quick picks, or lists of values which display the data of the lookup items where the user can easily pick the right value.
In this recipe, we'll create a list of values. A list of values can be a list of predefined static
values but it can also be a dynamic list with data retrieved from a table. We will create a static list of values. A list of values is a shared component so it can be used in more pages.
Getting ready
Starting point is an existing application like the one we created. To define a list of values you don't need to have a page. However, to make use of a list of values, you must define an item
with a reference to the list of values. We will make a list of values on the JOB column.
How to do it...
There are two ways to start the Create List of Values wizard. The first one is in the edit page. On the right side of the screen, under shared components, click on the Add icon under list of values.
The second one is via the shared components:
In the application builder, go to the shared components and then list of values. On the list of values page, click the Create button.
You can create a list of values from scratch or you can copy an existing list of values
and make some modifications to the newly created list of values. In our case, we will
create a list of values from scratch. Click Next.
Enter a name for the list of values, Jobs for example, and select dynamic or static. Choose static and click Next.
In the next step, you can enter the desired values. There are two types of values: the display value and the return value. The display value indicates how it is displayed and the return value is the value which will be returned into the text item the list of values is called from.
After you have entered the values, click on the CreateListofValues button.
The list of values is created and can now be used by items. To assign an existing item to the list of values, go to the page where you want to include your list of values. In this case, we go to the tabular form based on the EMP table, that we created in the recipe called "Create a simple form page" in Chapter 1.
Click in the regions section on the report link. Click on the pencil icon near the Job column.
In the tabular form element section, select "select list (named lov)" at the
"display as" field.
Next, in the list of values section, at the named lov field, select the list of values you
just created.
Click on the apply changes button.
Run the form to see the result. It should look like the following:
How it works...
The list of values serves as a source for items types like a list box or pop-up list of values. A list of values contains two columns: a display column and a column with the return value. This return value will be the actual data which will be stored in the item which is assigned to the list of values.
A list item can also be created directly upon a report column or item, but then is not reusable.
There's more...
Another possibility is to use a previously defined List of Values as a basis when creating a
new item. This is useful in situations where you want to reuse a List of Values on more than one occasion. A question that requires the answer Yes or No for example, can return on many pages in an application.
1. Go to the page where you want to have the item.
2. Right-click on the Items section of the region where the item should go and select CreatePageItem.
3. In the SelectItemType dialog, click on the SelectList.
4. In the next step, enter a name for the item. You may also enter a sequence number and the region where the item should appear. Click Next.
5. In this step, provide some additional information such as the label, the height, and the alignment. Click Next.
6. Next, define what APEX should do when you select some value from the list. You can
redirect the user to another page or you can submit the page. Another option in this step is the indication whether APEX should allow multi selection. Leave this option to No and click Next.
7. In the next step, enter the name of the existing List of Values that you want to use in the NamedLOV field. Leave the other options and click Next.
8. In the last step, define the source of the item. Leave the options and click on the
CreateItem button.
Including different item types
In APEX it is possible to use many different item types. Some of these we've already seen in other recipes. In this recipe we're going to talk about some of the advanced item types like shuttles and HTML editors and how to interact with them.
Getting ready
How to do it...
The first example of an advanced item type is the shuttle list. We will use this list to add employees to the IT department. The shuttle will show a list of available employees on the left side and a list of employees already in the IT department on the right side.
1. Create a new item on your page by right-clicking on the IT Employees region and selecting CreatePageItem.
2. Select Shuttle and click Next.
3. Name the item P15_IT_SHUTTLE and click Next until you reach the List of Values page in the wizard.
4. Enter the following query to populate the left side of the shuttle: select username display_value
, id return_value from app_employees where dept_id <> 3 [1346_01_07.txt]
5. After clicking Next, you will be asked to enter the Source Value. This will populate the right side of the shuttle. For this, we will use a PL/SQL Function Body as the Source Type that will return a list of usernames delimited by colons.
declare
v_list apex_application_global.vc_arr2; begin
select username return_value bulk collect
into v_list
from app_employees where dept_id = 3;
return(apex_util.table_to_string(v_list)); end;
[1346_01_08.txt]
Now the item will be populated with the employees.
The right side of the Shuttle Item can also be populated by the Default value that can be
defined on the item's properties.
Another type of item we want to discuss here is the Cascading Select Item. Let's say we want to make a list of all employees. This is potentially a very long list, so before showing the
employees, we first want to select the department we are working with.
First, we create the item that shows all departments for our company: 1. Create a new page item.
2. Use item type SelectList. 3. Name it P15_DEPARTMENTS.
4. Give it a label and click Next until you reach the LOV query, and enter the following SQL:
select name display_value , id return_value from app_departments [1346_01_09.txt]
5. Now create the item.
The next part is to create the select list for the employees in the department. Again, we create a select list like before and name it P15_EMPLOYEES.
Now when we reach the LOV wizard screen, we enter the following SQL: select firstname||' '||lastname display_value
, id return_value from app_employees
where dept_id = :P15_DEPARTMENTS [1346_01_10.txt]
When we now run the page and select a Department, we can see that the Employees list changes immediately.
Protecting a page using an authorization
scheme
In some cases, you might want to restrict access to certain parts of your application to certain users. For example not everyone should have access to the Form Page where you can alter the salaries. In such a case you can protect your page using an authorization scheme.
Ge
tting ready
Before starting with the recipe you should have a table created in the database with usernames and roles. Let's say you have the following table APP_USERS:
ID NUMBER(5) USERNAME VARCHAR2(50) PASSWORD VARCHAR2(50) ROLE VARCHAR2(10)
The table contains two rows. One is a user with admin privileges (role is ADMIN). The other one is a user with the no extra privileges (role is DEFAULT).
How to do it...
1. Go to the SharedComponents.
2. Click on the link Authorization Schemes. You can find it in the Security section.
3. Next, you might see the authorization schemes that have already been created. If no authorization schemes have been created in the past, you see an empty page. Click on the Create button.
4. Next, select From Scratch and click Next.
In our case, we name the scheme AUTH_ADMIN. The scheme type could be a PL/SQL function returning Boolean or an EXISTS SQL query. You have to create this function or query by yourself. The code could be included in the "Expression 1" textarea but you can also make a call to a function stored in the database. In our case, we put the code in here and we choose for the EXISTS SQL query. You see the query as follows: select 1
from app_users
where username = :APP_USER and role = 'ADMIN'
[1346_01_11.txt]
The query returns 1 if the username is the current user (:APP_USER) and the user has admin privileges.
6. Also, enter the error message APEX should display if the query returns no rows. Click the Create button.
7. In the EvaluationPoint section, select Onceperpageview to validate the authorization scheme. This will make APEX check the authorization for every call that is made to pages (or other components) using this scheme.
8. The other option is Oncepersession. This is much more efficient, because the check is only done once (at the start of the session). But when it's possible that the session state changes or there is anything else that is not consistent during the session, this option is not reliable.
9. The authorization scheme is now ready. Now, page access must be restricted by this authorization scheme.
10. Go to the page that requires authorization and click on the Edit icon (the pencil) in the page section.
11. Go to the Security section and select the AuthorizationScheme we just created (AUTH_ADMIN) in the Authorization Scheme list element.
That's it. The page now requires authorization to be accessed. Run the page to see how it works. Also see what happens if you do an update on the APP_USERS table:
How it works...
Every time you navigate to this page, APEX executes the query in the Authorization Scheme.
If the query returns one row, everything is fine and the user is authorized to view this page. If
the query returns no rows, the user is not authorized to view the page and the error message is displayed.
There's more...
You don't have to go to the shared components to create an Authorization Scheme. It can also be done when you are on a page. In the Security section on the right side of the screen, click on the Add icon. The CreateAuthorizationScheme wizard will be started.
Securing an application with Authentication
Application Express comes with three standard ways to authenticate users on applications.We can use the credentials of Database users, we can use the credentials of users defined within APEX itself, or we can use the credentials defined in the Database Access Descriptor. In
this recipe, we will show how to add our own Authentication Scheme to this list. An Authentication Scheme controls access to an entire application as opposed to an Authorization Scheme that controls access to individual components inside the application. Simply put, an Authentication Scheme is what is called when a user clicks the Login button.
Getting ready
First, we need a table to store the data for our users. In our application, this table will be APP_USERS. It contains columns for username and password, so we can create a very basic authentication scheme. Make sure this table is ready before continuing in this recipe. Enter at least one row of data into the table that we can use to login at the end of the recipe. Also we need two functions in place. APP_HASH is a function that will use a hashing algorithm and a salt to mask the real password. To make it more secure, the current date can be used in the algorithm, but this is enough for our example.
In a production environment, it is probably a good idea to wrap this code, because it can help intruders gain access to the application.
create or replace function app_hash (p_username in varchar2, p_ password in varchar2)
return varchar2 is
l_salt varchar2(4000) := 'DFS2J3DF4S5HG666IO7S8DJGSDF8JH';
begin
l_password := utl_raw.cast_to_raw(dbms_obfuscation_toolkit.md5 (input_string => p_password || substr(l_salt,10,13) || p_username || substr(l_salt, 4,10)));
return l_password; end;
[1346_01_13.txt]
APP_AUTH is a function that will check if the user is valid and if the password is entered correctly.
create or replace function app_auth (p_username in VARCHAR2, p_ password in VARCHAR2)
where upper(username) = upper(p_username);
if l_count > 0 then
select password
into l_stored_password from app_users
where upper(username) = upper(p_username);
l_password := app_hash(p_username, p_password);
How to do it...
The first thing we have to do is add the new authentication scheme to the list of existing schemes.
1. Click the Create button.
2. Choose From Scratch and click Next.
3. Name it ApplicationAuthentication and click Next. 4. Click Next on the following two screens as well.
5. Select PageinThisApplication and page 101 on the Invalid Session Target and click Next until you reach Credentialsverificationmethod.
6. Select Usemycustomfunctiontoauthenticate and enter returnapp_auth in the Authentication Function.
7. Click Next until you reach LogoutURL.
8. The Logout URL is wwv_flow_custom_auth_std.logout?p_this_flow=&APP_ ID.&p_next_flow_page_sess=&APP_ID.:1
9. Click Next and Create Scheme.
The last step is to make the new Authentication Scheme the current for the application. To do this, navigate to the tab Change Current on the schemes overview screen. Select the new scheme from the list and click the MakeCurrent button.
You can now log in to the application using a username and password from the APP_USERS table.
Control the display of regions and items
with Dynamic Actions
Dynamic Actions are control items that dynamically can affect the display of regions or items on a page. There are several situations when you want to show or hide items. For example, a text item asking for a maiden name should only be displayed when the person is female and married. In other cases, it is irrelevant to ask for a maiden name (on the other hand, with homosexual marriages it's possible for a man to have a 'maiden' name, and in some cases a
man can adopt the family name of his wife, but let's not make this example more difficult
The same applies to the commission field in the employees table. This item should only
be enterable when the employee’s job is a salesman. Let's build the functionality for this last situation.
Getting ready
You should already have an application and a simple single record form on the employees table.
How to do it...
1. Right-click on the DynamicActions link in the leftmost section and click Create. 2. Select Standard and proceed to the next step.
3. Enter a name for this Dynamic Action. For example, D_JOB_COMM_SHOW. Click Next.
4. In the next screen the Selection Type is "Item(s)" and in the Item(s) field, enter the
name of the item holding Job. You can use the ListofValues button to select the right Page Item.
5. In the Conditionlist box, select equalto.
6. In the Value textarea, enter SALESMAN. Click Next. 7. Select Show as the TrueAction and go to the next step.
8. In the next screen select Item(s) in the SelectionType. In the Shuttle item that now
appears, move the name of the commission field to the right.
9. Click the Create button.
You have now created a Dynamic Action which shows the commission field when the job is
SALESMAN and hides the commission field when the job is not'SALESMAN.
How it works...
The Dynamic Actions are actually event handlers in HTML. There are several event handlers. Because these events are HTML (or rather JavaScript) they are handled client side. This has the advantage that the page doesn't have to be reloaded completely when an action is triggered to show or hide items.
Event Meaning
After refresh Item has been refreshed (that is, by page refresh)
Before refresh Fires before item has been refreshed (that is, by page refresh) Blur User navigates to another item
Event Meaning
Click User clicks on the item with a pointing device (like a mouse) Dblclick User double-clicks on the item with a pointing device
Focus User navigates to the item via the tab key or a pointing device keydown User clicks a key on the keyboard
keypress User "clicks" a key on the keyboard (=onkeyDown followed by onkeyUp) keyup User releases the key after having pressed it
load The browser loads all content
mousedown User clicks the mouse button when the mouse pointer is over the item mouseenter User clicks on the item with the pointing device
mouseleave User moves away the mouse from the item
mousemove User moves the mouse while the mouse pointer is over the item mouseover User moves the mouse pointer over the item
mouseout User moves away the mouse pointer from the item nmouseup User releases the mouse button after having it pressed submit Form is submitted
Resize Document view is resized Scroll Document view is scrolled
Select User selects some text in a text field Submit Form is submitted
Unload Page is unloaded
In our example, we use the onchange event handler. So, when the user changes the value in JOB, the onchange is triggered and it calls the action to show or hide the COMMISSION
field, depending on the value in JOB. If it is SALESMAN then show commission, else hide commission.
There's more...
You can control the display of more than one item at a time. Simply separate the items by a
comma in the items field.
You can also control the display of regions. So, you can show or hide a complete report. Instead of item, select region and the name of the region in the affected element section
Creating a computation
Computations are events that will prepare items with data. As the name implies, computations can 'compute' how data is to be shown on screen or how data is handled after submitting. Computations can be triggered during Page Rendering, but they can also be used in the AfterSubmit process.
This example will show an implementation of a computation, but there are many more possible uses for computations.
How to do it...
Start by creating a normal text item on the form that was created in the second recipe of
the first chapter. This is a normal form based on the EMP table. Normally, a user would have
to manually enter the commission. What we are going to do is to create a computation that
will automatically enter an amount into this field, based on a percentage of the salary and a
bonus for people that work in the Sales department. First, identify the item that holds the commission column.
The next step is to find the moment when we want to execute the computation. In this case,
before the page is submitted but after the Save button is pressed. So in this case we will create the computation AfterSubmit.