Oracle® Fusion Middleware
User's Guide for Oracle Imaging and Process Management
11g Release 1 (11.1.1)
E12783-03
Oracle Fusion Middleware User's Guide for Oracle Imaging and Process Management, 11g Release 1 (11.1.1)
E12783-03
Copyright © 2011, Oracle and/or its affiliates. All rights reserved.
Primary Author: Bruce Silver
Contributing Author: David Jones
This software and related documentation are provided under a license agreement containing restrictions on use and disclosure and are protected by intellectual property laws. Except as expressly permitted in your license agreement or allowed by law, you may not use, copy, reproduce, translate, broadcast, modify, license, transmit, distribute, exhibit, perform, publish, or display any part, in any form, or by any means. Reverse engineering, disassembly, or decompilation of this software, unless required by law for interoperability, is prohibited.
The information contained herein is subject to change without notice and is not warranted to be error-free. If you find any errors, please report them to us in writing.
If this software or related documentation is delivered to the U.S. Government or anyone licensing it on behalf of the U.S. Government, the following notice is applicable:
U.S. GOVERNMENT RIGHTS Programs, software, databases, and related documentation and technical data delivered to U.S. Government customers are "commercial computer software" or "commercial technical data" pursuant to the applicable Federal Acquisition Regulation and agency-specific supplemental regulations. As such, the use, duplication, disclosure, modification, and adaptation shall be subject to the restrictions and license terms set forth in the applicable Government contract, and, to the extent applicable by the terms of the Government contract, the additional rights set forth in FAR 52.227-19, Commercial Computer Software License (December 2007). Oracle USA, Inc., 500 Oracle Parkway, Redwood City, CA 94065.
This software is developed for general use in a variety of information management applications. It is not developed or intended for use in any inherently dangerous applications, including applications which may create a risk of personal injury. If you use this software in dangerous applications, then you shall be responsible to take all appropriate fail-safe, backup, redundancy, and other measures to ensure the safe use of this software. Oracle Corporation and its affiliates disclaim any liability for any damages caused by use of this software in dangerous applications.
Oracle is a registered trademark of Oracle Corporation and/or its affiliates. Other names may be trademarks of their respective owners.
iii
Contents
Preface
... viiAudience... vii
Documentation Accessibility ... vii
Oracle I/PM User Interface Keyboard Shortcuts ... viii
Related Documents ... ix
Conventions ... ix
1
Introduction
1.1 About This Guide... 1-1 1.2 About This Product ... 1-1 1.2.1 Supported Document Repository... 1-2 1.2.2 Supported Databases... 1-2 1.2.3 Key Features and Benefits ... 1-2 1.3 Logging In ... 1-3 1.4 Using Help ... 1-3 1.4.1 Online Help ... 1-3 1.4.2 Tooltips... 1-3
2
Understanding Applications and Metadata
2.1 Understanding Applications... 2-1 2.2 Understanding Metadata... 2-1 2.2.1 Visible Metadata ... 2-2 2.2.2 System Metadata... 2-2 2.3 Associating Metadata with Documents... 2-2 2.4 Searching Document Metadata... 2-3
3
Uploading Content
iv
4
Searching for Content
4.1 Executing a Search ... 4-2 4.2 Working with Search Results ... 4-3 4.2.1 Manipulating Search Results ... 4-3 4.2.1.1 Resizing Columns... 4-3 4.2.1.2 Showing or Hiding Columns... 4-4 4.2.1.3 Reordering Columns... 4-4 4.2.1.4 Detaching Search Results ... 4-4 4.2.1.5 Sending Search Results by E-Mail... 4-5 4.2.1.6 Exporting Search Results... 4-5 4.2.2 Manipulating Documents In a Search Results Table... 4-5 4.2.2.1 Opening a Document in the Viewer ... 4-6 4.2.2.2 Locking and Unlocking a Document ... 4-7 4.2.2.3 Updating a Document... 4-7 4.2.2.4 Downloading a Document ... 4-7 4.2.2.5 Copying a Document ... 4-7 4.2.2.6 Moving a Document... 4-8 4.2.2.7 Deleting a Document ... 4-8
5
Viewing, Annotating, and Retrieving Documents
v 5.4.2 Printing Documents... 5-13
A
User Interface
A.1 Icons ... A-1 A.2 Home Page ... A-1 A.3 Preferences Page... A-2 A.3.1 Personal Information Section ... A-3 A.3.2 Viewer Setting Section ... A-4 A.4 Upload Document Page ... A-5 A.5 Search Pages... A-6 A.5.1 Picklist Data Field Input Operators ... A-7 A.5.2 Search Form Criteria and Search Results Table ... A-8 A.5.2.1 Search Results Toolbar... A-9 A.5.2.2 Search Results Contextual Menu... A-10 A.5.3 Reorder Columns Page ... A-10 A.6 Copy Document Page... A-11 A.7 Move Document Page ... A-11 A.8 Update Document Page ... A-12 A.9 Viewer... A-13 A.9.1 Viewer Menus ... A-14 A.9.2 Properties Panel ... A-16 A.9.3 History Panel ... A-16 A.9.4 Sticky Notes Panel ... A-16 A.9.5 Viewer Toolbar... A-17 A.9.5.1 Basic Viewer Toolbar Options ... A-17 A.9.5.2 Advanced Viewer Toolbar Options ... A-18 A.9.6 Annotations ... A-19 A.9.6.1 Assigning Annotation Security Level... A-19 A.9.6.2 Creator/Last Modifier Icon and Dialog ... A-20 A.9.6.3 Text Annotation ... A-20 A.9.6.4 Highlight Annotation... A-22 A.9.6.5 Line Annotation ... A-23 A.9.6.6 Sticky Note Annotation Rich Text Editor... A-23 A.9.6.7 Sticky Note Annotation Toolbar... A-25 A.9.6.8 Redaction Annotation ... A-26 A.9.6.9 Stamp Annotation ... A-26 A.10 Download Document Page... A-27
vii
Preface
Oracle Imaging and Process Management (Oracle I/PM) provides a way to easily access, track, and annotate documents across an enterprise. Different types of
information can be tracked for different types of documents based on business use. For example, managing invoices and contracts require using different types of
information. After a document is uploaded, its metadata can be used to search for and retrieve the document for printing or for viewing through a standard web browser. If you have the proper permissions, you can also add annotations which can be saved to a document for review. Annotations can be secured so that only people with the appropriate permissions are allowed to view specific annotations.
Audience
This guide is intended for users who must upload documents to the Oracle I/PM system or use Oracle I/PM to search, view, annotate, and retrieve documents.
Documentation Accessibility
Our goal is to make Oracle products, services, and supporting documentation accessible to all users, including users that are disabled. To that end, our
documentation includes features that make information available to users of assistive technology. This documentation is available in HTML format, and contains markup to facilitate access by the disabled community. Accessibility standards will continue to evolve over time, and Oracle is actively engaged with other market-leading
technology vendors to address technical obstacles so that our documentation can be accessible to all of our customers. For more information, visit the Oracle Accessibility Program Web site at http://www.oracle.com/accessibility/.
Accessibility of Code Examples in Documentation
Screen readers may not always correctly read the code examples in this document. The conventions for writing code require that closing braces should appear on an
otherwise empty line; however, some screen readers may not always read a line of text that consists solely of a bracket or brace.
Accessibility of Links to External Web Sites in Documentation
This documentation may contain links to Web sites of other companies or
viii
Access to Oracle Support
Oracle customers have access to electronic support through My Oracle Support. For information, visit http://www.oracle.com/support/contact.html or visit http://www.oracle.com/accessibility/support.html if you are hearing impaired.
Oracle I/PM User Interface Keyboard Shortcuts
The shortcuts listed in the following table are available in the Oracle I/PM user interface.
The shortcuts listed in the following table are available in the advanced viewer mode when the viewer has focus.
Keyboard Shortcut Description
Alt + B (Internet Explorer, Safari
Shift + Alt + B (Firefox, Safari)
Focuses on and executes the Back button to move back through a navigation train when creating or modifying Searches, Applications, Inputs, or Connections.
Alt + E (Internet Explorer, Safari
Shift + Alt + E (Firefox, Safari)
Focuses on and executes the Next button to move back through a navigation train when creating or modifying Searches, Applications, Inputs, or Connections.
Ctl + Alt + P Moves focus to the splitter bars in succession to adjust size of content region. Once focus is achieved, use the arrow keys to move the splitter bar up and down for horizontal bars, and left or right for vertical bars.
Keyboard Shortcut Description
M Exits the applet and changes the focus to the panels or menus at the top of the viewer page.
H Adds a highlight.
R Adds a redaction.
L Adds a line.
S Adds a sticky note.
T Opens a new text annotation.
X Places a stamp annotation.
Tab Tabs forward through the toolbar and annotations.
Shift + Tab Tabs backward through the toolbar and annotations.
N Selects the next annotation.
P Selects the previous annotation.
Arrows (or number pad arrows)
Moves the selected annotation.
Ctl + Tab Navigates out of a text entry field when adding either a text annotation or sticky note annotation.
Shift + Arrows (or Shift + number pad arrows)
ix
Related Documents
For more information, see the following documents:
■ Oracle® Fusion Middleware Administrator's Guide for Imaging and Process
Management
■ Oracle® Fusion Middleware Developer's Guide for Imaging and Process Management
Conventions
The following text conventions are used in this document: C Copies the selected annotation.
V Pastes the copied annotation.
Del Deletes the selected annotation.
Z Undoes the last deletion.
W Rotates the document clockwise.
Q Rotates the document counterclockwise.
E Changes the magnification to fit the document’s height.
F Changes the magnification to fit the document’s width.
1,2,3,4 Zooms to a quadrant on the document.
G Opens the GoTo Page dialog box.
Convention Meaning
boldface Boldface type indicates graphical user interface elements associated with an action or terms defined in text or the glossary.
italic Italic type indicates book titles, emphasis, or placeholder variables for which you supply particular values.
monospace Monospace type indicates commands within a paragraph, URLs, code in examples, text that appears on the screen, or text that you enter.
1
Introduction 1-1
1
Introduction
This section covers the following topics:
■ Section 1.1, "About This Guide" ■ Section 1.2, "About This Product" ■ Section 1.3, "Logging In"
■ Section 1.4, "Using Help"
1.1 About This Guide
This guide details how to use Oracle Imaging and Process Management (Oracle I/PM). The information contained in this document is subject to change as the product technology evolves and as hardware, operating systems, and third-party software are created and modified. Due to the technical nature of browsers, databases, web servers, and operating systems, Oracle cannot warrant compatibility with all versions and features of third-party products.
1.2 About This Product
Oracle Imaging and Process Management (Oracle I/PM) is one of the products contained within the Oracle Enterprise Content Management suite that specializes in providing features unique to the storage, classification, and utilization of scanned images of physical documents. Oracle I/PM is particularly well suited for storing the various document artifacts that are core to operation of many common business functions such as invoices, shipping documents, expense receipts, and other related documents.
By allowing you to convert physical documents into an electronic format, Oracle I/PM enables organizations to quickly integrate their content and processes directly with Oracle enterprise applications, such as Oracle E-Business Suite, PeopleSoft Enterprise, and JD Edwards EnterpriseOne. This allows you to proactively and automatically deliver critical invoices, checks, faxes, applications, resumes, expense forms, and reports where and when they are needed. Additionally, users will benefit from having a single source for all transaction-based content, eliminating the need for duplicating work.
About This Product
1-2 User's Guide for Oracle Imaging and Process Management
they are managed in one system instead of being mailed or faxed. Also, security and version control ensure that only the right users can edit or access content, and when used in conjunction with Oracle Universal Records Management, additional control of documents and legal retention policies can be used.
Oracle I/PM takes advantage of Oracle’s Business Process Management Suite or Oracle BPEL Process Manager to integrate with process automation throughout the organization. BPEL provides enterprises with an industry standard for business process orchestration and execution. Using BPEL, a system administrator can design a business process that integrates a series of discrete services into an end-to-end process flow. This integration reduces the complexity of the process through improved productivity and decreased costs.
1.2.1 Supported Document Repository
Oracle I/PM leverages Oracle Content Server for storage of documents and metadata. Oracle Content Server is the foundation for a variety of Oracle content management products. It provides a flexible, secure, centralized, web-based repository that
manages all phases of the content life cycle: from creation and approval to publishing, searching, expiration, and archival or disposition. Every contributor throughout the organization can easily contribute content from native desktop applications, efficiently manage business content via rich library services, and securely access that content anywhere using a web browser. All content, regardless of content type, is stored in the web repository or database for management, reuse and access. While stored in the repository, all types of content, ranging from e-mail, discussions, documents, reports, spreadsheets and records to images, multimedia or other digital formats, receive the same set of fundamental core services.
For more information about the integration of Oracle I/PM and Oracle Content Server, see Oracle Fusion Middleware Administrator’s Guide for Imaging and Process Management.
1.2.2 Supported Databases
Oracle I/PM supports the following databases:
■ Oracle
■ SQL Server
■ DB2
For more information about these databases and the storage mechanisms available for document content, see the Oracle Fusion Middleware Administrator’s Guide for Imaging and Process Management.
1.2.3 Key Features and Benefits
Oracle I/PM improves your business with the following key features and benefits.
Key Features
■ Apply metadata, security, and version control to documents
■ Annotate and mark up documents
■ Automate routing and approvals
■ Allow easy and secure searching across different document types
Using Help
Introduction 1-3
■ Integrates with leading document scanning and capture solutions
■ Can work within a clustered environment to facilitate load balancing
■ Certified integrations with ERP and LOB applications
■ Supports high-volume applications for billions of items
Key Benefits
■ Decreases business transaction cycle times for back-office operations
■ Eliminates duplicate data entry
■ Allows internal customers to check transaction status on their own
■ Eliminates process bottlenecks
■ Minimizes document error and loss
■ Eliminates mailed and faxed documents
■ Reduces physical storage space costs
■ Finds and retrieves documents directly from ERP, CRM, and HR management systems
■ Enhances customer and vendor satisfaction
1.3 Logging In
Oracle I/PM provides secure access to documents based on user and group rights. Like most systems, security starts with entering a user name and password for the system. As a web-based application, you access Oracle I/PM through a web browser by accessing the I/PM log in page. Once there, enter your user name and password to access Oracle I/PM. If you do not know your user name and password, or how to access the log in page, contact your system administrator.
1.4 Using Help
In addition to the Oracle Fusion Middleware User's Guide for Oracle Imaging and Process Management, you can access help about Oracle I/PM product functionality by using online help, context-sensitive tooltips, and keyboard shortcuts. The following subsections discuss these methods:
■ Online Help ■ Tooltips
1.4.1 Online Help
Click Help in the Oracle I/PM information bar displayed at the top of each page to view general information about the page currently displayed. If you are in a special window or section of a page, click Help to display context-sensitive help information.
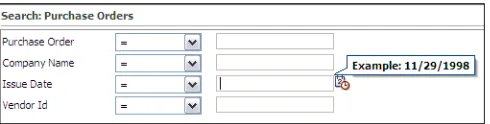
1.4.2 Tooltips
Using Help
1-4 User's Guide for Oracle Imaging and Process Management Figure 1–1 Download Icon Tooltip
If a field requires a special format, such as a date, click the field to display a tooltip showing an example.
2
Understanding Applications and Metadata 2-1
2
Understanding Applications and Metadata
This section explains what an application is and provides an overview of how
metadata is defined and subsequently associated with documents managed by Oracle I/PM. It contains the following topics:
■ Section 2.1, "Understanding Applications" ■ Section 2.2, "Understanding Metadata"
■ Section 2.3, "Associating Metadata with Documents" ■ Section 2.4, "Searching Document Metadata"
2.1 Understanding Applications
Applications are the core of Oracle I/PM. Consider an application as a type of management container for documents. You select an application to use when uploading documents to Oracle I/PM and that application determines what
information, or metadata, is associated with the uploaded document. The associated metadata may be visible to you and require you to input information into a form, such as entering an invoice number for the document, or the metadata may be invisible to you and used by the Oracle I/PM system, such as the security permissions required to retrieve the document. Each application has a different set of metadata, called a definition, which is determined by the person creating the application. An application definition is used to:
■ Assign permissions: applications determine what security permissions are appropriate to access uploaded documents.
■ Define indexing options: applications determine what information associated with a document is indexed and made available for searching.
■ Set storage policy: applications determine how a document is handled in a repository and when it is archived.
■ Define storage location and rules: applications determine the physical location of a document.
■ Specify workflow processes to initiate as part of the document workflow: applications are used to manage interaction with other business systems to integrate documents with standard business processes.
2.2 Understanding Metadata
Associating Metadata with Documents
2-2 User's Guide for Oracle Imaging and Process Management
upload the document. Metadata is different for each type of document because each type of document is uploaded using a different application. The metadata defined in each application is different because it is determined by the business need and agreed upon by the people responsible for the business process. Metadata can be visible to you, such as the information you enter when uploading or searching for a document, or it may be invisible to you and used by the Oracle I/PM system, such as security settings allowing access to the document, or a workflow that must be initiated when the document is uploaded.
2.2.1 Visible Metadata
Metadata can include invoice numbers, dates, company names, and any other information required by a business process. For example, invoice numbers may be tracked for invoices, but not for vendor contracts, job applications, or loan
applications. The person creating the application determines the metadata fields used throughout the Oracle I/PM interface. This visible metadata is displayed on forms used when uploading documents, or on search forms used for retrieving documents. For example, the Accounting and Shipping departments for Corporate Car Rental may agree that lease metadata should include the following information which will allow both departments to access the required information to complete their jobs:
■ Lease number
■ Car Delivery Date
■ Lease Expiration Date
■ Amount Due
You would fill in values for these fields on a form used to upload lease documents, and the metadata can be indexed and used to search for and retrieve documents from the repository.
2.2.2 System Metadata
An application definition also includes information that you cannot see when uploading or searching for a document, but is necessary for the document to move through a business process. Such metadata includes permissions to retrieve and view a document, information regarding the document storage and archiving, and whether or not the document must go through a workflow. This metadata is not something you control, but is defined in the application by the person creating the application based on the needs of the business process for which the application is being used.
2.3 Associating Metadata with Documents
Each time a document is uploaded to Oracle I/PM, it is put into an application that has been designed for that type of document. If uploaded through a scanning station or other automated process, the metadata values are specified and populated during the upload process. If you are uploading the document manually, you choose the application to use and the application displays a form listing the metadata for which you can specify values. The values you specify in the form are the values for the metadata associated with the document as it is uploaded. Whether the metadata values are specified automatically during an automated upload or by you when you upload the document manually, the values are indexed and can then be used to search for and retrieve documents.
For example, when uploading an invoice, you might select an application named
Searching Document Metadata
Understanding Applications and Metadata 2-3
enter the invoice number into the field and upload the document, that value gets indexed. To retrieve the document, you can select Invoices under your Searches panel and enter the value into the Invoice Number field in the search form. Because the value was indexed when the document was uploaded, Oracle I/PM finds it and displays it in the viewer.
2.4 Searching Document Metadata
The metadata associated with documents when they are uploaded can be used as criteria to search for and retrieve documents from Oracle I/PM. All fields are searchable, but not all fields may be made available to you on a search form.
The person creating a search creates it in a way similar to creating an application. The person creating the search determines what metadata fields you see in a search form. Each search is displayed in the Searches panel of the Navigator pane. Clicking a search link displays a form requesting search parameter metadata associated with the type of documents you are searching for. Because an application determines the metadata to be used as search criteria, most search options in Oracle I/PM have a direct correlation with the application in which a document resides. For example, if there is an
application named “Leases” for uploading leases, then there is likely a search named “Current Leases” that displays a search form to enter criteria to find lease documents within a certain date range. However if necessary, a single search form can be created to be used to search across multiple applications.
Depending on how Oracle I/PM is configured, document content (full text) may also be made available for searching. For example, text from a leasing contract may get indexed when the lease is uploaded to Oracle I/PM, enabling you to search for words or phrases from within the lease. Like metadata, searches for the full text of documents is done using a field on the search form when the search is created. If you are
Searching Document Metadata
3
Uploading Content 3-1
3
Uploading Content
The upload process, also called ingestion, involves creating an electronic image of your document, using a predefined application in Oracle I/PM to associate metadata to the document, and manually assigning values to required metadata by completing fields on the Oracle I/PM document upload page.
This section covers the following topics:
■ Section 3.1, "Creating An Electronic Image"
■ Section 3.2, "Uploading a Document to Oracle I/PM" ■ Section 3.3, "Updating Existing Content in Oracle I/PM"
3.1 Creating An Electronic Image
Before you can upload a document, it must be in an electronic format such as a TIFF or JPEG image, a PDF file, or a Microsoft Word business document. If your document is not in an electronic format, scan the document to create and capture an electronic image. You can use a desktop scanner or your company may have individuals or a department responsible for scanning all paper documentation.
After it has been scanned and before you can upload, you will need to know where the electronic copy of the document is. If you scanned the document yourself, you likely saved it to your local file system or to a networked file system to which you have access. If the document was scanned by someone else, talk to them to see if it was saved or could be moved to a networked file system to which you have access. You must be able to navigate to the electronic file from within the Oracle I/PM interface in order to upload the file.
3.1.1 Document Capture Options
Oracle offers two solutions for streamlining the capture process for paper and electronic documents:
■ Oracle Document Capture
■ Oracle Distributed Document Capture
Uploading a Document to Oracle I/PM
3-2 User's Guide for Oracle Imaging and Process Management
Server to provide you with one system to capture, manage, store and electronically retrieve your mission critical business content. For more information about Oracle Document Capture and Oracle Distributed Document Capture, see the Oracle Document Capture web site.
3.2 Uploading a Document to Oracle I/PM
Once a document is captured and an electronic version available on a file system to which you have access, you can upload the document. You must have the rights to create a document in at least one application in order to upload a document. To upload a document, do the following:
1. Click Tools in the Navigation pane to expand it, then click Upload Document. The
Upload Document Page is displayed. Note that if you do not have rights to create a document in at least one application, the Upload Document option is not displayed.
2. From the Select an Application field, choose the correct application for the type of document you are uploading. The correct application is determined by the
business process in which the document type is used.
Additional metadata fields are displayed on the Upload Document page when an application is selected. The additional fields are unique to each application and are defined by the person creating the application. The fields are determined by the type of document being uploaded and its associated business process. Required fields are noted with an asterisk (*). For more information about metadata fields, see "Understanding Metadata" on page 2-1.
3. Click Browse to locate the document image you want to upload. A standard dialog box opens for you to locate the document.
4. Navigate to the document and click Open. The dialog box closes and the path to the document is shown in the Document Image field
5. Click Upload. A confirmation message displays after a successful upload.
3.2.1 Previewing and Annotating When Uploading a Document
You can view and annotate an electronic document prior to uploading it by using the
Viewer, provided you have the rights to do so. This can allow you to speed a process along, for example by stamping an invoice Approved with the Stamp Annotation prior to uploading the invoice. For detailed information on using the Viewer, see Chapter 5, "Viewing, Annotating, and Retrieving Documents".
To upload a document using the Viewer, do the following:
Note: If using your keyboard rather than your mouse to select the Browse button, use the Space bar to execute the Browse button function and open the dialog box. The Enter key does not execute the Browse button function.
Note: Oracle I/PM has been optimized to store files of sizes 200KB or smaller, but upload times can be affected by your document size as well as the speed of your network connection. If the documents you need to upload are larger than 200KB, contact your system
Updating Existing Content in Oracle I/PM
Uploading Content 3-3 1. Click Tools in the Navigation pane to expand it, then click Upload Document. The
Upload Document Page is displayed.
2. From the Select an Application field, choose the correct application for the type of document you are uploading. The correct application is determined by the
business process in which the document type is used.
Additional metadata fields are displayed on the Upload Document page when an application is selected. The additional fields are unique to each application and are defined by the person who created the application. The fields are determined by the type of document being uploaded and its associated business process. Required fields are noted with an asterisk (*). For more information about metadata fields, see "Understanding Metadata" on page 2-1.
3. Click Open Viewer. The viewer is opened in the advanced viewer mode.
4. Click the Open a local file icon in the Advanced Viewer Toolbar Options section of the Viewer Toolbar. A dialog box opens for you to locate the document.
5. Navigate to the document and click Select the file to open. The dialog box closes and the document is displayed in the viewer.
6. Add desired annotations and save them by clicking the Save icon in the Viewer Toolbar, then click Upload. A confirmation message displays after a successful upload. For detailed information on annotating a document, see "Creating Annotations" on page 5-7.
3.3 Updating Existing Content in Oracle I/PM
If you have a reason to change a document or update its metadata, you can do so provided that you have the proper permissions.
To update the document and document metadata, do the following:
1. Search for the document you want to update. For detailed information on how to search, see "Executing a Search" on page 4-2.
2. Click the row in the search results with the document you want to update to select it, and click Update in the Search Results Toolbar, or right-click on a document and select Update from the Search Results Contextual Menu. The Update Document Page window opens.
3. If you want to update the document, click Browse to locate the new document to upload. A standard dialog box opens for you to locate the document.
a. Navigate to the new document and click Open. The dialog box closes and the path to the document is displayed in the Document Image field. The new document creates a new revision of the original.
4. Update the information in the desired metadata fields.
5. Optionally, enable Lock Document or Keep Lock, depending on whether or not you have previously locked the document. It is recommended that you lock the document before updating it. Locking a document does not prevent others from viewing it, but ensures that no one else can update the document while you have
Updating Existing Content in Oracle I/PM
3-4 User's Guide for Oracle Imaging and Process Management
it locked. Once locked, a document can be unlocked either by the person that locked it, or someone with Lock Admin rights.
6. Click Update. A confirmation is displayed at the bottom of the Update Document page.
7. Close the Update Document Page.
3.3.1 Updating a Document From the Properties Panel
You can also update a document from the Properties Panel of the Viewer by doing the following:
1. With the document displayed in the Viewer, click Update in the Properties Panel. The metadata fields in the panel are enabled.
2. If you want to update the document, click Browse to locate the new document to upload. A standard dialog box opens for you to locate the document.
a. Navigate to the new document and click Open. The dialog box closes and the path to the document is displayed in the Document Image field. The new document creates a new revision of the original.
3. Update the information in the desired metadata fields.
4. Optionally, enable Lock Document or Keep Lock, depending on whether or not you have previously locked the document. It is recommended that you lock the document before updating it. Locking a document does not prevent others from viewing it, but ensures that no one else can update the document while you have it locked. Once locked, a document can be unlocked either by the person that locked it, or someone with Lock Admin rights.
5. Click Update. A confirmation is displayed at the bottom of the Properties Panel.
Note: In some cases when updating a document you may receive an error stating that you are unable to lock the document. This is due to a permission error in the repository that stores the document and metadata and is not related to the Lock Document option. Contact your system administrator if you have questions about any error you receive if unable to update a document.
4
Searching for Content 4-1
4
Searching for Content
The application into which a document is uploaded contains metadata fields whose values can be indexed and used to find the document within Oracle I/PM. If a document contains textual information, that can be searched for as well, provided full text indexing is enabled on the Content Server repository and is enabled in the application used to upload the document.
To search for documents in Oracle I/PM, you use a predefined search set up by a user with Search Create permissions. Predefined searches are listed in the Searches panel of the navigator pane. Only searches to which you have view rights are displayed.
Clicking a predefined search in the Searches panel displays a tab in the page region with a search form where you can enter the criteria on which you want to search. For example, a search titled Invoices may allow you to enter an invoice number into the search form and return the invoice you need. The results of the search are listed underneath the original search form in the tab on the page region. Only documents to which you have security access are returned, ensuring that people only have access to what they have rights to see.
A new tab and search form is displayed each time you click on a predefined search in the Searches panel. Clicking a tab brings it to the front of the page region, allowing you to access and compare search results from multiple searches. For example, one tab can be used to search for purchase orders while another tab can be used to search for outstanding invoices. Individual tabs can be closed manually by selecting the search tab and clicking the x located on the tab. Right-clicking anywhere on a tab allows additional options of closing all search tabs or closing all but the currently selected search tab.
Searches can be defined to search across multiple applications. For example, a search may be set up that would allow you to search for a purchase order number across three applications: purchase orders, shipping receipts, and invoices. The results would list a purchase order you can view to make sure you ordered a particular item, a shipping receipt to verify the item was received, and an invoice that you can then authorize for payment.
This section contains the following topics:
■ Section 4.1, "Executing a Search"
■ Section 4.2, "Working with Search Results"
Note: Only users with create permissions can create a search. If you require a specific search to be defined, talk to the person who
Executing a Search
4-2 User's Guide for Oracle Imaging and Process Management
4.1 Executing a Search
Searches to which you have View rights are listed in the navigator pane in the Searches panel. Clicking a search in the Searches panel opens a tab in the page region and displays a search form. An example of a typical search form is displayed in
Section A.5, "Search Pages".
In some cases there may be a search defined where the search criteria is predetermined and does not require you to enter any search values. In that case, no search form would be necessary. For example, when searching for invoices from the last 5 days.
To execute a search, do the following:
1. Click Searches to open the panel in the navigator pane. All searches available to you are displayed.
2. Click the search that corresponds to the type of document you want to locate. For example, if you are looking for an invoice that has not been paid, there may be a search titled “Outstanding Invoices.”
3. Enter the criteria you want to search for in the appropriate field on the search form if necessary. For example, when searching for an invoice there is likely an option to enter the invoice number. Required fields are noted with an asterisk (*). If the person creating the search provided additional instructions on how best to use the search, an Instruction area is displayed above the search area. Instructions are displayed by clicking the icon next to the instruction area title to expand the area. Depending on the display skin chosen on the preferences page, the icon could be a plus sign, an arrow, or some other indicator.
If you leave a field blank, the search is executed without that condition, and the part of the search that uses the parameter will be omitted. If the blank field is a required field, an error message is displayed.
4. Optionally, select a search operator. In some cases a search may have multiple operators available for you to select against a specific field. This gives you greater flexibility on how you would like the search to be performed. For instance, a field may default to the Equal to (=) operator so that you can look for a specific value but also have the Greater than (>) and the Less than (<) operators available so that you can look for a range of values if needed. For additional information on search operators, see "Picklist Data Field Input Operators" on page A-7.
5. Click Search to return the results based off the criteria you specified. Search results are displayed in a table beneath the search form in the search tab. Note that once you have executed a search, clicking the Refresh link in the main banner refreshes the information on the page but does not execute the search again. If you or another user updates document metadata, the new metadata is not displayed in the search results table until you run the search again by clicking Search.
An example of a typical search result is displayed in the section "Search Form Criteria and Search Results Table" on page A-8.
Working with Search Results
Searching for Content 4-3
4.2 Working with Search Results
You can modify how search results are displayed to suit your needs and perform actions on individual or multiple documents returned in a search. This section has the following topics:
■ Section 4.2.1, "Manipulating Search Results"
■ Section 4.2.2, "Manipulating Documents In a Search Results Table"
4.2.1 Manipulating Search Results
You can modify how search results are displayed to suit your needs and e-mail searches you have executed to others. Use the View menu on the Search Results Toolbar to show, hide, or reorder columns, and to detach the results and display them as a separate page. You can also reorder columns by clicking on them and dragging them to the position you want.
Sort on different columns by clicking the column title. Text fields are sorted
alphabetically, number and date fields are sorted numerically. To view an example of a search results table, see "Search Form Criteria and Search Results Table" on page A-8. This section has the following topics:
■ Section 4.2.1.1, "Resizing Columns"
■ Section 4.2.1.2, "Showing or Hiding Columns" ■ Section 4.2.1.3, "Reordering Columns"
■ Section 4.2.1.4, "Detaching Search Results"
■ Section 4.2.1.5, "Sending Search Results by E-Mail" ■ Section 4.2.1.6, "Exporting Search Results"
4.2.1.1 Resizing Columns
To resize columns, do the following:
1. In the search results table of a search tab, position your cursor between the titles of the columns you want to resize. The cursor arrow changes to display two arrows facing in opposite directions.
Note: Broad search criteria can return many results, which may make it difficult to find the document you are looking for. You can refine your search by using additional search criteria to narrow and reduce the number of results returned. If you are unable to narrow the search down enough to find the document you are looking for then see the person who manages Oracle I/PM for help in refining the existing search or defining a new search.
Working with Search Results
4-4 User's Guide for Oracle Imaging and Process Management
2. Click the divider line between the two field headings and drag to resize the columns.
4.2.1.2 Showing or Hiding Columns
Columns displayed in a search results table are dependent on the metadata fields assigned to the search when it was created. Each of the columns have fields from one or more of the applications searched. The Lock Document and MIME Type columns are included on each search result, but the remaining columns change. In some cases the number of columns displayed may be extensive and make it difficult to quickly access the information you want. To help, you can hide unwanted columns.
To hide columns in the search results table, do the following:
1. Select View then Columns. A listing of all available columns is displayed. Enabled columns have a check beside the name. By default, all are enabled.
2. Click the name of the enabled column you want to hide in the listing to disable it. The page refreshes and the column is hidden.
To unhide columns, repeat the steps but select the disabled column you want displayed. The column is enabled and the page refreshes to display the column. Alternately, you can select View then Columns then Show All to view all available columns in the table.
4.2.1.3 Reordering Columns
You can change the order of columns in a results table to make it easier to compare information in one of two ways. One way is by clicking the column header and dragging the column to the preferred location in the search results table. Alternately, to change column order, do the following:
1. In the search results table of a search tab, select View then Reorder Columns. The
Reorder Columns Page is displayed.
2. Select the column or columns you would like to move and click the up or down arrow to reposition the column in the display order. Multiple columns can be selected and moved at the same time.
3. Click OK. The Reorder Columns Page closes and the page refreshes to display the search results table with the columns in the new order.
4.2.1.4 Detaching Search Results
Search results tables can be extensive depending on the number of documents
returned, how much metadata is associated with the documents, and how many of the metadata fields are set to display in the predefined search. In addition to hiding and reordering columns to make viewing your results easier, you can also detach the results table from the search tab. This gives you more display room to see all of the results.
To detach the search results table from the search tab, do the following:
1. In the search results tool bar, click Detach. A new page opens displaying only the search results table.
Working with Search Results
Searching for Content 4-5
4.2.1.5 Sending Search Results by E-Mail
In some cases you may need to share the results of a search with a coworker. This may be to ask for their input on a problem or to have them monitor a process. You can e-mail a link to run a search using criteria you have specified without having them enter the criteria themselves, provided they have view rights to the search.
To send an e-mail containing a link to run a search you have made, do the following:
1. In the search results tool bar, click Email. An e-mail from your default e-mail client is displayed that contains a link to the results of your search.
2. Enter the e-mail address of the person to whom you want to send the results and send the e-mail.
4.2.1.6 Exporting Search Results
To export search results to a file, do the following:
1. In the search results tool bar, click Export to Excel. A dialog box opens asking if you want to save the results as an .xls file, or open the file.
2. Select Save File to save the file in an XLS format, select Open With to open with the default program for .xls files, or browse to an alternate program using the menu.
4.2.2 Manipulating Documents In a Search Results Table
You can perform actions on individual or multiple documents in a search result by clicking a document to select it and then clicking the action you want to take on the
Search Results Toolbar. Available actions on the toolbar are dependent on if you have a single document or multiple documents selected in the search results list. To select multiple documents listed consecutively, hold the shift key down while selecting the first and last document in the range. If you want to select multiple documents that are not consecutive, hold the Control (Ctl) key down while clicking each document in the list you want to select. The actions available in the Search Results Toolbar are also available by right-clicking on a document in the search result to display the Search Results Contextual Menu. Like the toolbar, available actions in the contextual menu are dependent on if you have selected one or multiple documents.
This section has the following topics:
■ Section 4.2.2.1, "Opening a Document in the Viewer"
Note: The size of the new search results table page is determined by the original size of your browser page. Also, the new page is
constrained by the original browser page. It cannot be moved outside of the original browser page. If you make the original browser page smaller after detaching the search results table, the results table page is masked by the original page border and you may not be able to see some of the results or close the results table page until you scroll using the browser scroll bars or make your original browser page larger than the results table page.
Working with Search Results
4-6 User's Guide for Oracle Imaging and Process Management
■ Section 4.2.2.2, "Locking and Unlocking a Document" ■ Section 4.2.2.3, "Updating a Document"
■ Section 4.2.2.4, "Downloading a Document" ■ Section 4.2.2.5, "Copying a Document" ■ Section 4.2.2.6, "Moving a Document" ■ Section 4.2.2.7, "Deleting a Document"
4.2.2.1 Opening a Document in the Viewer
Documents are viewed using either the basic or the advanced viewer mode,
depending on the preference set for Default Viewer Mode on the Preferences Page. If you regularly need to make or edit annotations, ensure the preference setting is set to use the advanced viewer mode. You can also switch between modes if necessary from within the viewer.
Note that multiple documents can be opened in the viewer to facilitate comparing documents. If multiple documents are opened, they are each displayed on their own tab. Each tab can be closed individually using the Close Current icon to the right of the open tabs, or options to close all tabs or all but the active tab can be selected from the Close menu next to the icon.
Multiple documents can be opened one at a time, or all at the same time by selecting multiple documents from a search results table before opening. Multiple documents can be selected using Shift+click for documents listed sequentially in a search results table, or Ctl+click documents not in sequence in a results table. Detailed information about the two viewers and their options is found in Chapter 5, "Viewing, Annotating, and Retrieving Documents".
To open a document in the viewer, do the following:
1. From a search results table, click the document icon in the MIME Type column next to the item you want to open. A separate page opens to display the document in the viewer.
Alternately, you can use Open from either the Search Results Toolbar or the Search Results Contextual Menu. To open a document in the viewer using the toolbar, do the following:
1. From a search results table, select the document or documents you want to open in the viewer.
2. Click Open in the toolbar. A separate page opens to display the document or documents in the viewer.
To open a document in the viewer using the contextual menu, do the following:
1. From a search results table, right-click on the document or documents you want to open in the viewer. A contextual menu is displayed with the options also available from the toolbar.
2. Select Open from the contextual menu options. A separate page opens to display the document or documents in the viewer.
Working with Search Results
Searching for Content 4-7 1. With the document open in the basic viewer, select View then Use Advanced
Viewer. The viewer changes to the advanced mode and the Advanced Viewer Toolbar Options are enabled.
4.2.2.2 Locking and Unlocking a Document
To keep other users from modifying a document’s metadata or adding or editing a document’s annotations, you can lock it. Once locked, only the person who locked it can update the metadata or add annotations. This is recommended to prevent two people from updating a document at the same time, causing a conflict. Once locked, only the person who locked the document or someone with Lock Admin document security can unlock it.
To lock a document, do the following:
1. In the search results table, select the document you want to lock and click Lock in the toolbar, or right-click on the document and select Lock from the contextual menu. An icon is displayed in the Locked column of the search results and the document or its metadata can no longer be modified until someone with the proper security unlocks it.
To unlock a document, do the following:
1. In the search results tool bar, select the document you want to unlock and click
Unlock in the toolbar, or right-click on the document and select Unlock from the contextual menu. The icon is no longer displayed in the Locked column of the search results and the document or its metadata can now be modified.
4.2.2.3 Updating a Document
If a document or document metadata needs to be updated, you can do so from a search results table. For information on updating a document, see "Updating Existing Content in Oracle I/PM" on page 3-3.
4.2.2.4 Downloading a Document
You can download a document from a Search Form Criteria and Search Results Table
using either the Search Results Toolbar or the Search Results Contextual Menu. To download a copy of the document in its original format without annotations, you must have the proper permissions to modify the annotations, or the download will be denied. You can also download a TIFF image of the document with annotations. For information on how to download a document, see "Downloading Documents" on page 5-12.
4.2.2.5 Copying a Document
You can copy an existing document, its metadata, and annotations into the same or a different application. You must have security rights to create a document in the application you select.
To copy a document, do the following:
1. From a search results table, select the document you want to copy.
2. Click Copy in the toolbar or right-click on the document and select Copy from the contextual menu. The Copy Document Page is displayed.
Working with Search Results
4-8 User's Guide for Oracle Imaging and Process Management
3. Select the application to use when copying the document. You must have security rights to create a document in the application you select. The metadata fields pertinent to the selected application are displayed. If the document is being copied to the same application, the metadata fields are populated with the values from the document you are copying. If the document is being copied to a different application, shared metadata fields are populated with the previous values and unique metadata fields are blank.
4. Enable the Copy existing annotations check box if you want annotations to be copied along with the file. When enabling this check box, Oracle I/PM attempts to copy the native file with the existing annotations as is. If you do not have security rights to modify an annotation being copied, Oracle I/PM permanently burns the annotation into a TIFF version of the original document. If the original document is not in a TIFF format, Oracle I/PM converts the native document to TIFF.
5. Modify or enter the necessary metadata values for the new document and click
Copy. A message is displayed at the bottom of the page confirming the document was copied successfully.
6. Close the Copy Document Page.
4.2.2.6 Moving a Document
You can move an existing document and its metadata from one application to another.
To move a document, do the following:
1. From a search results table, select the document you want to move.
2. Click Move in the toolbar or right-click on the document and select Move from the contextual menu. The Move Document Page is displayed.
3. Select the application to use when moving the document. The metadata fields pertinent to the selected application are displayed. Metadata fields shared between the initial application and the one the document is being moved to are populated with the previous values. Metadata fields unique to the application the document is being moved to are blank. You cannot move a document to the same application.
4. Modify or enter the necessary metadata values for the new document and click
Move. A message is displayed at the bottom of the page confirming the document was moved successfully.
5. Close the Move Document Page.
4.2.2.7 Deleting a Document
If for any reason you no longer need a document, for example if a document has been uploaded twice by mistake, you can delete it provided you have the document security rights to delete a document from an application. Once deleted, a document cannot be recovered.
Working with Search Results
Searching for Content 4-9
To delete a document, you can use Delete from either the Search Results Toolbar or the
Search Results Contextual Menu. To delete a document using the toolbar, do the following:
1. From a search results table, select the document you want to delete.
2. Click Delete in the toolbar. A separate page opens asking you to confirm that you want to delete the document.
3. Click Yes and close the confirmation page. The document remains displayed in the search results table until the search is executed again.
To delete a document using the contextual menu, do the following:
1. From a search results table, right-click on the document you want to delete.
2. Select Delete in the contextual menu. A separate page opens asking you to confirm that you want to delete the document.
Working with Search Results
5
Viewing, Annotating, and Retrieving Documents 5-1
5
Viewing, Annotating, and Retrieving
Documents
Documents stored in Oracle I/PM are viewed using a document viewer. The document viewer displays a document in a separate window. In addition to the document, the viewer displays any annotations you have rights to view, as well as document properties and history. Document properties are a list all of the metadata associated with a document. Document history is a list of all actions that have occurred to a document while in Oracle I/PM.
The document viewer has two modes: basic and advanced. Both modes display the document, annotations, history and properties. The advanced mode also enables you to add or edit document annotations, provided you have the security rights to do so. In order to use the advanced viewer mode and add or edit annotations, Java version 1.6 must be installed on your computer and your browser must allow Java applets to run. Java is a free technology that expands the ability of your computer. If you do not have Java set to run the first time you use the viewer in advanced mode, you will be asked to install and approve the Java plug-in. You can do so by following the instructions presented by your web browser. If you are uncertain if you have Java installed and working on your computer, or if you need the advanced viewer mode and are unable to get it working, contact your system administrator.
The default viewer mode for opening documents is set on the Preferences Page and is initially defined when Oracle I/PM is installed. If you regularly need to make or edit annotations, ensure that the preference setting is set to use advanced viewer mode. You can also switch between modes easily from within the viewer if necessary.
This section details the steps necessary to view and annotate documents. It contains the following topics:
■ Section 5.1, "Viewing Documents"
■ Section 5.2, "Viewing Document Information" ■ Section 5.3, "Working With Annotations" ■ Section 5.4, "Retrieving Documents"
Viewing Documents
5-2 User's Guide for Oracle Imaging and Process Management
5.1 Viewing Documents
Documents can be opened in the viewer from a Search Form Criteria and Search Results Table. To open a document in the viewer from a search results table, do the following:
1. From a search results table, click the document icon in the MIME Type column next to the item you want to open. A separate page opens to display the document in the viewer.
Alternately, you can use Open from either the Search Results Toolbar or the Search Results Contextual Menu. To open a document in the viewer using the toolbar, do the following:
1. From a search results table, select the document you want to open in the viewer.
2. Click Open in the toolbar. A separate page opens to display the document in the viewer.
To open a document in the viewer using the contextual menu, do the following:
1. From a search results table, right-click on the document you want to open in the viewer. A contextual menu is displayed with the options also available from the toolbar.
2. Select Open from the contextual menu options. A separate page opens to display the document in the viewer.
5.1.1 Switching Between Basic and Advanced Viewer Mode
You can easily switch between viewer modes from within the viewer. For example, if your default is set to open a document in basic viewer mode but you need to add or edit an annotation and have rights to do so, you would want to switch to the advanced mode. Or, if you are in the advanced viewer mode and you want to see how
annotations will display for someone using the basic viewer mode, you would switch to the basic viewer mode.
To switch between viewer modes from within the viewer, do the following:
1. If in the Basic viewer mode, select View then Use Advanced Viewer. The document is displayed in the advanced mode and the Advanced Viewer Toolbar Options are enabled. If in the Advanced viewer mode, select View then Use Basic Viewer. The document is displayed in the basic mode and the Advanced Viewer Toolbar Options are disabled.
5.1.2 Rotating Documents
If a document has been uploaded in an incorrect orientation, or if you otherwise need to rotate the document orientation in the viewer, you can rotate a document by 90 degree increments either clockwise or counterclockwise.
If you rotate a document in the basic viewer mode, it does not stay rotated after you close it. The next time you open the document in either the basic or advanced viewer modes, you would need to rotate it again. Rotating a document in the advanced viewer mode maintains the new orientation provided that:
■ you have at least Annotate Standard security rights to the document
Viewing Documents
Viewing, Annotating, and Retrieving Documents 5-3
Once rotated in the advanced viewer mode and the changes are saved, the document stays in the new orientation for you and all other users in both the basic and advanced viewer modes.
To rotate a document in the viewer, do the following:
1. With the document displayed in the viewer, click the Rotate Counter Clockwise
icon or Rotate Clockwise icon on the Viewer Toolbar. The document is rotated 90 degrees in the requested direction.
5.1.3 Zooming Document Views
You can increase or decrease the size at which a document is displayed in several ways. The original size or resolution of the document in I/PM is not changed. Only the size at which the document is displayed is changed.
This section has the following topics:
■ Section 5.1.3.1, "Zooming Incrementally"
■ Section 5.1.3.2, "Fitting Document View to Viewer Size" ■ Section 5.1.3.3, "Zooming Selection to Viewer Size"
5.1.3.1 Zooming Incrementally
To incrementally change the displayed size of a document, do the following:
1. With the document displayed in the viewer, click the Zoom In icon on the Viewer Toolbar to increase the size, or click the Zoom Out icon to decrease the size. When the document is zoomed to the maximum or minimum size, the Zoom icon is disabled.
5.1.3.2 Fitting Document View to Viewer Size
You can quickly zoom a document to maximize the full width of the document, the full height of the document, or the full page of the document in the viewer.
To maximize the full width of a document, do the following:
1. With the document displayed in the viewer, click the Fit Width icon on the Viewer Toolbar. The document changes to the largest size possible while still seeing the full width of the document. Note that if the document is oriented so that it is taller than it is wide, the bottom part of the document is initially off of the page. You can scroll down the document to see the bottom part of the page.
To maximize the full height of a document, do the following:
1. With the document displayed in the viewer, click the Fit Height icon on the
Viewer Toolbar. The document changes to the largest size possible while still seeing the full height of the document. Note that if the document is oriented so that it is wider than it is tall, one side of the document is off of the page. You can scroll the document to see the part off the page.
To maximize the document so that all of it is visible, do the following:
Viewing Document Information
5-4 User's Guide for Oracle Imaging and Process Management
5.1.3.3 Zooming Selection to Viewer Size
To quickly fill the viewer area with a small section of a document without having to zoom incrementally, do the following:
1. With the document displayed in the viewer, click the Start Rubberband Zoom Mode icon on Viewer Toolbar.
2. Click and drag the cursor over the area of the document you want to enlarge. A marquee is drawn to help with the selection. When a document has reached its maximum size, it will no longer be enlarged. Attempts to zoom further using the rubberband zoom will stay at the maximum size, but center the display on the selected area.
3. Release the mouse button to snap the selected area to the size of the viewer.
5.1.4 Navigating Multi-Page Documents
When viewing a multi-page document, you can navigate the document incrementally a page at a time, skip to the first or last page of a document, or select the page number of the document you want to view.
To navigate a document incrementally page by page, do the following:
1. With the document displayed in the viewer, click the Go Forward One Page icon on the Viewer Toolbar. The next page of the document is displayed.
2. With the document displayed in the viewer, click the Go Back One Page icon on the Viewer Toolbar. The previous page of the document is displayed.
To quickly navigate to the first and last page of a document, do the following:
1. With the document displayed in the viewer, click the Go To Last Page icon on the
Viewer Toolbar. The last page of the document is displayed.
2. With the document displayed in the viewer, click the Go To First Page icon on the
Viewer Toolbar. The first page of the document is displayed. To quickly navigate to a specific page of a document, do the following:
1. With the document displayed in the viewer, select Go to page from the Go To Page Number menu on the Viewer Toolbar. A dialog box is displayed where you enter the number of page you want displayed.
2. Enter the page number you want displayed. The selected page of the document is displayed. If the page entered is not valid, an error is displayed.
Alternately, you may select a page number directly from the Go To Page Number
menu on the Viewer Toolbar. Ten pages before and after the currently displayed page are available for selection.
5.2 Viewing Document Information
When a document is uploaded, the application used to upload it associates metadata with the document. You enter metadata manually into a form when you upload a single document. A system administrator specifies it automatically when uploading a large number of documents. When a document is viewed, the Properties Panel in the viewer lists all the metadata associated with it. Similarly, each action performed on a document in Oracle I/PM is tracked and displayed in the History Panel. The following events are tracked in the History Panel: