•Workwithbothwell-knownandprivaterepositories •Usebranchesforeverydaytasks
•Joinindependenthistoriesusingbothmergeandrebaseoperations •Simplifymostcommonlyusedcommandswithappropriatealiases •Dealwithtroublesomeissueslikedanglingrevisions
•Rewritethehistory
•Pinpointwhomadespecificchanges •Dealwithtextualandbinaryconflicts •WorkwithhostedsolutionslikeGitHub •WorkwithGitingroups
•InstallandconfigureavirtualsystemthatprovidesGithostingservices •Usevagrantforconfiguringvirtualhosts
For your convenience Apress has placed some of the front
matter material after the index. Please use the Bookmarks
v
Contents at a Glance
About the Author ...
xxvii
About the Technical Reviewer ...
xxix
Acknowledgments ...
xxxi
Chapter 1: Getting Started with Git
■
...
1
Chapter 2: Working with Well-Known Repositories
■
...
7
Chapter 3: Creating Local Repositories with Linear History
■
...
41
Chapter 4: Managing Files
■
...
79
Chapter 5: Branches
■
...
105
Chapter 6: Merging Branches
■
...
147
Chapter 7: Rebasing Branches
■
...
163
Chapter 8: Modifying the History
■
...
183
Chapter 9: Resolving Conflicts
■
...
209
Chapter 10: Remote Repositories and Synchronization
■
...
227
Chapter 11: Hosting git Git Repositories
■
...
279
Chapter 12: Working with Github.com
■
...
327
Chapter 13: More Recipes
■
...
355
1
CHAPTER 1
Getting Started with Git
The manufacturers of computer software are facing difficult challenges caused by quite trivial reasons. A typical application is produced by a team of developers working on hundreds, if not thousands, of files on a short schedule. Each file needs to be available for modification by all of the developers at any moment. The situation is complicated even more when we supplement the scenario with the time line. Every file can be modified by any developer at any chosen moment. The following three simple factors make the management of a source code a nontrivial task:
The number of files
These problems have been known for many years, and as you might expect, there are various software tools that make group work on text files a lot of easier. These tools are commonly referred to as version control software or
revision control software. And git belongs to this family.
What is git?
Git is a distributed version control system created to support the development of a Linux kernel. It was started in April 2005 by Linus Torvalds and is now maintained by Junio C. Hamano.
The main features that set git apart among other version control systems are: Branching
The branching model is git's most amazing feature. I consider it alone to be a sufficient reason to switch to git. With git, branches can be created almost instantaneously and can be easily merged and shared with other developers. Although there are many sophisticated operations that can be performed on branches, the basic usage is easy and straightforward. This encourages the extensive usage of branches, and I think I am not exaggerating when I say that the git branching model changed the way developers work.
CHAPTER 1 ■ GETTING STARTED WITH GIT
2
Locality increases git’s efficiency and allows you to execute many git commands even if the network is down. When you work with git you are not connected to any server. Most commands, such as commit, branch, merge, and rebase are performed locally in a similar way to typical filesystem commads such as mkdir, ls, rm. They don’t carry out any data transfer.
Because git is a distributed version control system, every repository is fully functional and can serve both as a sender and a receiver. If there is a channel of communication between the computers, their repositories can exchange the contents in both directions. Therefore, you can create more complicated workflows than just the client/server paradigm that are used by centralized revision control systems.
Added to this is the fact that git is an open-source project and it is becoming the most popular version control system on the world—you’ll see that there is good reason to start learning git.
1-1. Installing git on Windows
Problem
You want to install git on Windows.
Solution
Go to http://msysgit.github.io/ and download the most recent installer version of git for Windows. At the time of writing this was version 1.8.3. The installer was named: Git-1.8.3-preview20130601.exe. Run the installer leaving all options set to default values. After this, git is ready to be run on your system.
How It Works
There are two methods for installing git on Windows: Use Cygwin package available at
• http://www.cygwin.com
Use the standalone installer called msysgit.
•
In this procedure we use msysgit package.
When you run the msysgit installer downloaded from http://code.google.com/p/msysgit/ you will be asked two questions:
How to configure the paths?
•
How to configure the conversion of end of line character?
•
The dialog box titled Adjusting your PATH environment sets the path environment variable. Msysgit installer contains not only git binaries but also a number of Linux programs such as ssh, curl, ls, mkdir, rm, and find. With default settings the installer copies git and these programs to the following directories:
C:\Program Files (x86)\Git\bin
This folder contains ls, mkdir, ssh, curl, find, etc.
C:\Program Files (x86)\Git\cmd
CHAPTER 1 ■ GETTING STARTED WITH GIT
3
The first choice in the dialog box is Use Git Bash only. With this setting the path variable is not modified. When you start a Windows command line and type git, the command line will respond with a message that the git command does not exist.
The second choice, Run Git from the Windows Command Prompt, adds the C:\Program Files (x86)\Git\cmd folder to your path. Thus, you can use git command in the windows command line. When you type ssh in the windows command line, however, the system will respond with an unknown command message.
The last choice is Run Git and included Unix tools from the Windows Command Prompt. This choice adds two folders C:\Program Files (x86)\Git\bin and C:\Program Files (x86)\Git\cmd to your path. Now, you can use all the included tools in the Windows Command line: ssh, git, ls, curl, and so on. But some commands in C:\Program Files (x86)\Git\bin, such as find, overlap with the original commands available in Windows. The original find is not available now in the command line.
When I was writing this book my intention was to present the commands that can work in exactly the same way on all platforms. Thus I decided to use the bash command line. If you work on Windows and want to use bash command line, then you can leave the default first choice Use Git Bash only.
The second dialog box, which is titled Configuring the line ending conversions, sets the configuration option named
core.autocrlf to one of these values: true, input, or false. The meaning of this setting is summarized in Table 1-1.
Table 1-1. All values of the core.autocrlf option and their influence on the checkout and commit operations
Value
Checkout
Commit
True LF => CRLF CRLF => LF
input None CRLF => LF
false None None
When you choose the first setting, the value true, git will convert the end-of-line characters in your files during the checkout and commit operations. When you check the files out, git will convert LF to CRLF and when you commit git will convert CRLF to LF.
The second choice, input, turns the conversion of new lines only when you commit. In this case git converts the line endings from CRLF to LF.
The third setting (false) turns all the conversions off.
The conversion of end-of-line characters is explained in greater detail in Recipes 13-2 through 13-6. No matter which is your current choice, you can always change the setting using one of these commands:
$ git config --global core.autocrlf true $ git config --global core.autocrlf input $ git config --global core.autocrlf false
When the installer finishes, run the git bash application available in the Start menu. To verify that the installation was successful, you can run the command:
$ git --version
It should print the version of git installed on your system.
Hint
CHAPTER 1 ■ GETTING STARTED WITH GIT
4
1-2. Installing git on Linux
Problem
You want to install git on Linux.
Solution
Depending on your system run one of the commands:
# for Ubuntu
$ sudo apt-get install git
# for Fedora
$ sudo yum install git
How It Works
The easiest way to install git on Linux is to use the available packages. If you want to compile and install git using its source follow the procedure described in Recipe 11-3.
To verify that the installation was successful, you can run the command:
$ git --version
It should print the version of git installed on your system.
1-3. Installing git on OS X
Problem
You want to install git on OS X.
Solution
Visit the http://code.google.com/p/git-osx-installer/ site and download the most recent available version of git. Run the downloaded installer leaving all options set to the default values.
How It Works
The easiest way of installing git on OS X is to use the graphical installer. To verify that the installation was successful, you can run the command:
$ git --version
CHAPTER 1 ■ GETTING STARTED WITH GIT
5
1-4. Accessing the manual
Problem
You want to access the git manual.
Solution
Git commands are divided into two major groups: Porcelain commands
•
Plumbing commands
•
Porcelain commands are high-level commands meant for every day use. This group includes, among the others:
$ git add $ git commit $ git help $ git push
The other group, called plumbing, contains low-level commands. Here are some examples:
$ git receive-pack $ git update-index $ git upload-pack
By default, the command $ git help lists only porcelain commands. If you want to the list plumbing commands as well as the porcelain commands, use -a switch $ git help -a.
You can access the documentation for a specific git subcommand using the following syntax:
$ git help [COMMAND] $ git [COMMAND] --help
Here are the commands to access the documentation of the $ git commit command:
CHAPTER 1 ■ GETTING STARTED WITH GIT
6
1-5. Configuring git
Problem
You want to configure git to be ready for work.
Solution
Run the following command:
$ git config --global user.name
It should print the empty results. That is because right after the installation the user name is not configured. Set the user.name configuration option using the following command:
$ git config --global user.name "John Doe"
Instead of John Doe type your name and surname. Next, run the command:
$ git config --global user.email [email protected]
This command will set your email.
How It Works
7
CHAPTER 2
Working with Well-Known
Repositories
We will start our tour exploring existing and quite well-known repositories. The main goal of this chapter is to get familiar with repositories—their types and structure. In this chapter, you will learn the following:
What are the most popular hosting solutions for git repositories?
•
How to create a local copy of a repository that is hosted on
• Github.com or Bitbucket.org?
Once we know how to clone a repository, we can then analyze its structure. Then we will explore the working directory—the git directory and its contents. At that point we will be able to classify a repository as either bare or non-bare.
Next, we will discuss the various commands that print the information about the repository, such as The list of revisions
•
The list of contributors
•
The number of revisions
•
The number of contributors
•
The disk usage of the git directory and the working directory
•
To make the chore of typing long git commands easier, I will define their aliases.
Note
■
I have tested all the commands presented in this chapter and in the book on two platforms: Linux and
Windows. My aim was to provide one set of instructions that will work regardless of your platform. To achieve this goal,
file system operations are performed with Linux commands, such as
lsand
rm. Moreover, the listings start with
$and
paths use
/as separator—suggesting that they are prepared for Linux. However, do not worry if you are using Windows.
Just use the bash command interpreter distributed with git and all the commands will work fine.
CHAPTER 2 ■ WORKING WITH WELL-KNOWN REPOSITORIES
8
2-1. Cloning a repository hosted on Github
Problem
You want to get a local copy of a jQuery repository.
Solution
Start the command line and create the git-recipes/ and git-recipes/02-01/ directories:
$ cd /some/where/on/your/system $ mkdir git-recipes
$ cd git-recipes $ mkdir 02-01
Change the current directory to 02-01/:
$ cd 02-01
Then execute the command as shown in Listing 2-1.
Listing 2-1. The command to clone jQuery repository
$ git clone https://github.com/jquery/jquery.git
Caution
■
During a clone command, git copies a complete repository from its original location to your local storage
system. Depending on your bandwidth and the project size, this operation can take quite some time. But don’t worry about
it. The cloning is done only once, when you set up your local repository. All subsequent data transfers are very efficient
because git transfers only the missing portions of data. The internals of cloning are explained in Chapter 10 (Recipe 10-1).
CHAPTER 2 ■ WORKING WITH WELL-KNOWN REPOSITORIES
9
Caution
■
Figure
2-1
was prepared in April 2013. As you can guess, the jQuery project goes forward all the time.
Thus the contents of your
git-recipes/02-01/directory may be different.
How It Works
To clone jQuery you have to find the URL that points to its repository. Start your web browser, go to Google.com, and search for "jquery git repository". The results will include:
https://github.com/jquery/jquery
In a similar, way you can find URLs for other popular open source projects. Table 2-1 lists keywords and URLs for three other projects: Linux, git and Mozilla.
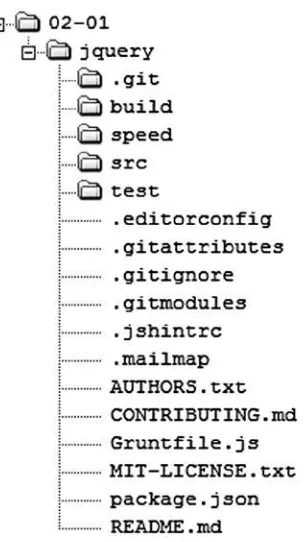
Figure 2-1. The contents of git-recipes/02-01/ directory after the git clone command
Table 2-1. How to find git repositories for other projects?
Phrase searched in Google.com
The URL of the repository
linux git repository https://github.com/torvalds/linux
git git repository https://github.com/git/git
CHAPTER 2 ■ WORKING WITH WELL-KNOWN REPOSITORIES
10
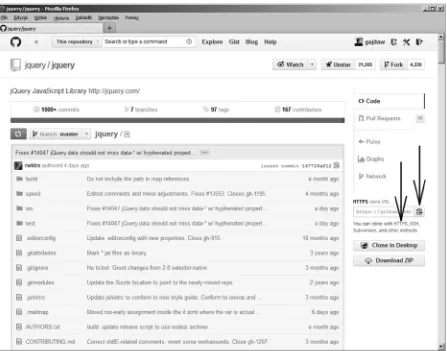
Once you know URL of the jQuery repository, you can start your web browser and visit:
https://github.com/jquery/jquery
You will see the page presented as shown in Figure 2-2.
Figure 2-2. The main page of jQuery repository https://github.com/jquery/jquery
Every repository stored on Github is available under two different URLs: HTTPS and SSH. You can copy them using the buttons pointed to by the arrows in Figure 2-2. The URLs for the jQuery repository are:
HTTPS: https://github.com/jquery/jquery.git SSH: [email protected]:jquery/jquery.git
CHAPTER 2 ■ WORKING WITH WELL-KNOWN REPOSITORIES
11
Hint
■
In chapter 13 we will create and configure a Github account. Then you will be able to use SSH URL as well;
until then, you must use HTTPS URLs.
In this way you can clone all repositories available on Github.com. Remember this command:
$ git clone https://github.com/abc/def.git
For it creates the subdirectory def/. And the clone is stored inside it.
However, if you work on Windows and try to clone the Linux source code, for example, you will encounter problems because filename restrictions are different with different systems. We will analyze this in chapter 11.
What will happen if you don’t have a Github account with SSH keys configured and use SSH URL? The SSH URL for jQuery is:
[email protected]:jquery/jquery.git
If you use it for git clone command:
$ git clone [email protected]:jquery/jquery.git
Then you would get the following error:
Permission denied (publickey)
2-2. Cloning a repository hosted on Bitbucket
Problem
You want to get a local copy of the Atlassian AUI repository that is stored on Bitbucket.org:
https://bitbucket.org/atlassian/aui
You want the clone to be saved directly under git-recipes/02-02/, without having an additional aui/
subdirectory.
Solution
Start the command line and create a git-recipes/02-02/ directory:
$ cd git-recipes $ mkdir 02-02
Change your current directory to 02-02/:
$ cd 02-02
CHAPTER 2 ■ WORKING WITH WELL-KNOWN REPOSITORIES
12
Listing 2-2. The command to clone Atlassian AUI repository
$ git clone https://bitbucket.org/atlassian/aui.git.
Note
■
The syntax for the git clone command is:
$ git clone URL [directory]. If used, the optional
[directory]parameter sets the target directory for the cloned repository.
How It Works
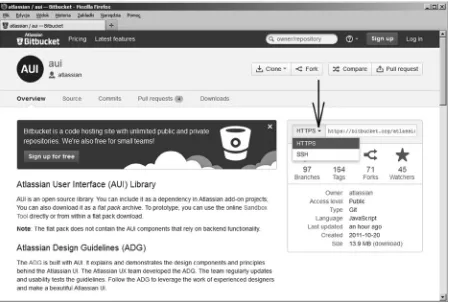
Start your web browser and go to https://bitbucket.org/atlassian/aui. The main page of Atlassian AUI repository is shown in Figure 2-3.
CHAPTER 2 ■ WORKING WITH WELL-KNOWN REPOSITORIES
13
Bitbucket offers two URLs for every repository: HTTPS and SSH. Figure 2-3 and the following listing will give you access to both of them:
HTTPS: https://bitbucket.org/atlassian/aui.git SSH: [email protected]:atlassian/aui.git
As with Github, SSH URL can only be used if you have a Bitbucket account with the SSH keys configured.
Hint
■
The two most popular hosted solutions for git are
Github.comand
Bitbucket.org. Both offer unlimited free
accounts for public repositories.
2-3. Cloning a local repository
Problem
You want to clone a repository git-recipes/02-01/jquery/ that you created in Recipe 2-1, and you prefer to store a new clone directly under git-recipes/02-03/ without an additional jquery/ directory.
Solution
Go to your git-recipes/ directory:
$ cd git-recipes
Then you need to execute the command shown in Listing 2-3.
Listing 2-3. The command that clones a local repository
$ git clone 02-01/jquery 02-03
CHAPTER 2 ■ WORKING WITH WELL-KNOWN REPOSITORIES
14
How It Works
The Git clone command accepts both a URL and a local path that points to the repository. Thus, you can clone a local repository by passing a path instead of a URL to the command.
2-4. Copying a local repository
Problem
You want to clone the repository git-recipes/02-03/ that you created in Recipe 2-3. This time, instead of using a git clone you want to use a standard cp command with a –R flag.
Solution
Enter the directory git-recipes/:
$ cd git-recipes
Second, you then execute the command:
$ cp -R git-recipes/02-03 git-recipes/02-04
The command will create the exact copy of files from git-recipes/02-03/. The content of git-recipes/02-04/
is a valid git repository.
CHAPTER 2 ■ WORKING WITH WELL-KNOWN REPOSITORIES
15
How It Works
By using the cp -R command, you can recursively copy a directory. If used on a directory containing a repository it will create a correct repository that is almost identical with a repository created with git clone command. We will explore the difference between repositories created in Recipes 2-3 and 2-4 in Recipe 2-5.
Hint
■
Once you know that a repository can be copied with standard filesystem operations such as
cp, you can use
rsyncor
scpto achieve the same result. In chapter 11 we will use scp command to start a new project.
2-5. Exploring the contents of a git repository
Problem
What does the directory created by the git clone command contain? To answer this question you will need to explore the contents of git-recipes/02-03/ directory with cd, ls, and cat commands. You also can use your favorite file manager.
Solution
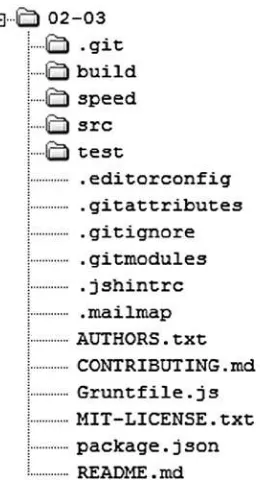
The contents of the git-recipes/02-03/ directory, shown in Figure 2-5, contains jQuery files and directories and a special directory named .git.
Figure 2-5. The repository created in Recipe 2-3
CHAPTER 2 ■ WORKING WITH WELL-KNOWN REPOSITORIES
16
How It Works
If you want to display the contents of a .git directory you can use the following commands:
$ cd git-recipes/02-03/ $ cd .git
$ ls -l
The last command will print the files and directories shown in Figure 2-6. The role of every item is briefly described in Table 2-2. The complete descriptions are included in the recipes dealing with the specific details of git.
Table 2-2. The contents of a .git directory
Directory/file
Description
hooks/ Directory contains scripts that can be automatically executed by git when some events occur; for example, before each commit and after each commit.
info/ Directory contains a single file named exclude, which can be used to exclude files from a repository. Unlike the .gitignore file, this file is not shared by others.
logs/ Directory contains logs of local changes made to the repository.
objects/ This is the database that contains all the information about files, directories, revisions, and tags.
refs/ This is where git stores the information about branches and lightweight tags.
config This is the local configuration file containing the options that will be applied to this repository only.
description This is the short description of the repository. It is used by the Gitweb CGI application distributed with git.
HEAD The current branch or revision of the repository
index The staging area of the repository
packed-refs The list of references from refs/ in a packed format
CHAPTER 2 ■ WORKING WITH WELL-KNOWN REPOSITORIES
17
Let’s now compare the contents of three config files:
git-recipes/02-01/jquery/.git/config git-recipes/02-03/.git/config git-recipes/02-04/.git/config
The first solution, created in Recipe 2-1 is a clone of the original jQuery repository stored on Github. Inside
git-recipes/02-01/jquery/.git/config you will find the following lines:
[remote "origin"]
url = https://github.com/jquery/jquery.git
The entry [remote "origin"] stores the address passed to the git clone command.
The second solution, git-recipes/02-03/ is a clone of a local directory. The file git-recipes/02-03/.git/ config contains:
[remote "origin"]
url = /home/john/git-recipes/02-01/jquery
As you can see this time [remote "origin"] points to the local directory.
Hint
■
I assumed that the full path to your
git-recipes/directory is:
/home/john/git-recipes/.
The third solution is an exact copy of git-recipes/02-03/. Thus, the file git-recipes/02-04/.git/config
contains:
[remote "origin"]
url = /home/john/git-recipes/02-01/jquery
If we had used:
$ cd git-recipes $ git clone 02-03 02-04
to create git-recipes/02-04/; the file git-recipes/02-04/.git/config would have instead contained:
[remote "origin"]
url = /home/john/git-recipes/02-03
There isn’t any difference between git-recipes/02-03/ and git-recipes/02-04/. Later, in chapter 10, we will learn to change [remote "origin"] entries in the config file using the git remote command.
Conclusion
CHAPTER 2 ■ WORKING WITH WELL-KNOWN REPOSITORIES
18
2-6. Deleting and restoring the contents of the working directory
Problem
You want to verify that git has stored all your files in the database .git/objects. To achieve this you need to delete the contents of the working directory and then restore it from the git database.
Solution
Enter the repository created in Recipe 2-3:
$ cd git-recipes/02-03
Remove all files and directories, except the .git subdirectory:
$ ls -la $ rm -rf * $ rm .????*
Now, the directory git-recipes/02-03/ contains only one subdirectory .git. You can check it with:
$ ls -l
Next, execute the command:
$ git reset --hard
All the files will be restored. The command:
$ ls -l
now prints the result that is identical with those in Figure 2-4.
How It Works
CHAPTER 2 ■ WORKING WITH WELL-KNOWN REPOSITORIES
19
The working directory is the temporary storage that contains your work. The git directory, on the other hand, contains the database that stores all snapshots of your project. Recipe 2-6 should convince you that the contents of your working directory can be easily restored from the database.
2-7. Cloning a bare repository
Problem
You want to create a bare clone of a repository from Recipe 2-3.
Solution
Issue the following commands:
$ cd git-recipes
$ git clone --bare 02-03 02-06
Enter the 02-06/ directory and check its contents:
$ cd 02-06 $ ls -la
The above command will print the output identical to Figure 2-6.
How It Works
The git clone command takes an optional parameter --bare. You can use the --bare parameter to create a bare repository. A bare repository contains only the contents of the git directory. It does not contain the working directory. This type of repository is used for synchronization purposes only. We will use it in chapter 10.
CHAPTER 2 ■ WORKING WITH WELL-KNOWN REPOSITORIES
20
Remember
■
The bare repository can be created with the
$ git clone --bare [URL]command. This type of repository
doesn't contain the working directory. Its content is equivalent to the content of a
.gitdirectory in a non-bare repository.
2-8. Exploring the history with a git log command
Problem
You want to print the following information about a jQuery repository: The complete list of the revisions in the repository
•
The shortened and simplified list of the latest revisions in the repository
•
The list of revisions by John Resig
•
The list containing last five revisions in 2012
•
Solution
Enter the directory git-recipes/02-01/jquery/:
$ cd git-recipes/02-01/jquery
To print the complete list of revisions in the repository execute:
$ git log
You will see that the output is similar to the one presented in Listing 2-4. This is the complete list of revisions that are accessible from the current revision. You can scroll the output with space and arrow keyboard keys. Press q to quit the git log.
Listing 2-4. The output of git log command
commit 18cccd04a6f69018242bce96ef905bc5d3be6ff8 Author: Richard Gibson <[email protected]> Date: Mon Apr 29 13:31:59 2013 -0400
Fix #13803: domManip remote-script evaluation per 1.9 (AJAX dataType "script")
commit 55e319aa52eb828a3a4c2298aa75b6d15cfa06f8 Author: Corey Frang <[email protected]>
Date: Wed Apr 24 16:07:15 2013 -0400
Fixes #13815: Ensure each element has its own private data object - Tests by @rwldrn
commit 3a6194076b8b7ab5a9d9f5e6ec602db2ab427d3e Author: Oleg <[email protected]>
Date: Wed Apr 24 22:15:41 2013 +0400
CHAPTER 2 ■ WORKING WITH WELL-KNOWN REPOSITORIES
21
The output shown in Listing 2-4 presents three revisions. The first revision has the name:
18cccd04a6f69018242bce96ef905bc5d3be6ff8
This revision was created by Richard Gibson on Monday, April 29, 2013. The comment:
Fix #13803: domManip remote-script evaluation per 1.9 (AJAX dataType "script")
provides the information that the revision contains the fix for issue number 13803.
Shortened and simplified, the list of revisions can be printed with the command shown in Listing 2-5.
Listing 2-5. The command that produces simplified and shortened log information
$ git log --abbrev-commit --abbrev=4 --pretty=oneline -10
It will print an output similar to:
18cc Fix #13803: domManip remote-script... 55e3 Fixes #13815: Ensure each element... 3a619 Fix #13818: Add wrapMap entry for... 78c8 Fix #13819: .parent sort direction... ad71f Fix #13809: Avoid collisions with...
Every line concerns one revision and contains a short abbreviated name SHA-1 and the comment. If possible, the abbreviations are shortened to four characters:
18cc 55e3 78c8
When necessary, more characters are used:
3a619 ad71f
Using -10 parameter, the output is restricted to the last 10 revisions only.
The command shown in Listing 2-6 prints the revisions that were authored by John Resig.
Listing 2-6. Revisions authored by John Resig
$ git log --author="John Resig"
The parameters shown in Listing 2-5 and Listing 2-6 can be used together. The command:
$ git log --abbrev-commit --abbrev=4 --pretty=oneline -10 --author="John Resig"
prints the last 10 revisions by John Resig in their simplified form.
The command to produce the list of the last five revisions made in 2013 is presented at Listing 2-7.
Listing 2-7. Last five revisions of 2013
CHAPTER 2 ■ WORKING WITH WELL-KNOWN REPOSITORIES
22
How It Works
The history of a git repository consists of a series of revisions. Each revision is a snapshot of the working directory at a particular point in time. The revisions are stored within the .git/objects database.
Every revision is identified by its name. Git uses a SHA-1 algorithm to generate names. Because the revision’s SHA-1 is computed using many different types of data—the author’s name, the current timestamp, and the snapshot, among others—we can treat them as unique identifiers. The probability that two different revisions will have the same SHA-1 is so small that it can be disregarded. In fact, SHA-1 uniqness is one of the most basic git assumptions. As you will see in chapter 11. the whole process of synchronization relies on it.
Hint
■
The user cannot assign a name to the revision. All names are automatically generated by git. Git rules here and
you can trust that it will never generate two identical names for different revisions.
SHA-1 names are 20 bytes long, and thus, their hex representation takes 40 characters, for example:
18cccd04a6f69018242bce96ef905bc5d3be6ff8
Later in the book we will need to use the name as a parameter passed to various commands; if that is the case, one will not have to use all 40 characters. Usually, the first seven characters are sufficient. The shortest possible abbreviation of a name has to be four characters long. Remember that abbreviation needs to be unique—if it is not, then you’ll have to use more characters.
The list of revisions stored in the repository can be printed with a git log command. Its various options and switches can be used to filter and reformat displayed revisions. The output of a git log command is sorted by the time the revisions were created. The latest revision is displayed at the top of the output.
By default, the git log prints all revisions that are available from your current revision.
The format of the output can be changed with the --pretty parameter. Available values and their meanings are summarized in Table 2-3.
Table 2-3. The values for --pretty parameter
Value
Description
oneline The name and the comment printed in one line.
short The name, the author, and the comment
medium Same as short but augmented with the revision’s date
full The name, the author, the committer, and the comment
fuller The name, the author, the author’s date, the committer, the commit’s date, and the comment
email Same as short in email format
raw Low-level revision’s information: the name, the tree, the parent revision’s name, the author, and the committer with timestamps
CHAPTER 2 ■ WORKING WITH WELL-KNOWN REPOSITORIES
23
The parameters shown in Table 2-3 can be passed to a git log command as:
$ git log --pretty=oneline $ git log --pretty=short $ git log --pretty=raw
The value -–pretty=oneline can be shortened to:
$ git log --oneline
Additional parameters that influence the format are:
--abbrev-commit—this option turns on abbreviations.
--abbrev=n—this option sets the length of the abbreviated names.
--decorate—this option includes tags and branches for each revision.
The shortest possible abbreviation has to contain four characters. Thus, the minimal value for --abbrev is four:
$ git log --abbrev-commit --abbrev=4
Hint
■
The parameter
--onelineabbreviates SHA-1 to seven characters.
The parameter --pretty=format allows you to define the arbitrary output’s format. The special string containing placeholders defines the output. The command:
$ git log --pretty=format:"%an --- %H"
will print the output in this form:
Joe Doe --- 123456...
The first part of the output (e.g., Joe Doe) is the author’s name, while the second part is a full SHA-1 of a revision. This output is produced with two placeholders:
%an – author's name %H – full SHA-1 hash
The other useful placeholders include:
%h: abbreviated commit hash, %ae: author email,
CHAPTER 2 ■ WORKING WITH WELL-KNOWN REPOSITORIES
24
Hint
■
A full list of placeholders is available in the manual for
git log. You can access it with the
git help logcommand.
Here are some parameters to filter revisions included in the output:
-n—number of revisions, for example, –7 restricts git log to the last seven revisions
--since="yyyy-mm-dd"—starting date
--until="yyyy-mm-dd"—finishing date
--author="John Doe"—commits by a given author
Hint
■
The dates passed to
--sinceand
--untilparameters can be set in
yyyy-mm-ddformat or less formally
as
--since="1 week ago",
--since="Two months ago",
--until="5 days ago",
--until="7 hours ago",
--until="yesterday"
. To avoid typing quotation marks, you can also use dots for spaces, like in
--since=1.week.ago,
--since=Two.months.ago,
--until=5.days.ago.
2-9. Analyzing a repository with git log and shortlog commands
Problem
You want answers to the following questions for the jQuery project: How many revisions does the repository contain?
•
How many developers contributed to the project?
•
How many days did they work on the project?
•
How much space is used by the working directory?
•
How much space is used by the git directory?
•
How many files are in the working directory?
•
Solution
Enter the directory git-recipes/02-01/jquery/:
$ cd git-recipes/02-01/jquery
To answer the questions execute the commands shown in Listings 2-8 to 2-13.
Listing 2-8. The command that prints the number of commits in the repository
$ git log --pretty=oneline | wc -l
Listing 2-9. The command that prints the number of contributors
CHAPTER 2 ■ WORKING WITH WELL-KNOWN REPOSITORIES
25
Listing 2-10. The command that produces the number of days during which contributions were made
$ git log --pretty=format:%cd --date=short | uniq | wc -l
Listing 2-11. The command that returns the amount of space used by the git directory
$ du -h -s .git
Listing 2-12. The command that returns the amount of space used by the working directory
$ du -h -s --exclude=.git
Listing 2-13. The command that produces the number of files in the working directory
$ git ls-files | wc -l
Hint
■
Linux and Windows version of
duboth support
--excludeparameter. But some other systems, such as BSD,
use other options. In BSD, exclusions are set with
–Ioption (
Istands for Ignore).
How It Works
The answers to the above questions can be found using the following commands:
git log git shortlog git ls-files du
wc uniq grep
As we already know, the command:
$ git log --pretty=oneline
prints the list of all revisions in a simplified form, where every revision occupies one line. Piping the list to wc -l:
$ git log --pretty=oneline | wc -l
we get the number of revisions.
The git shortlog command presents the information about commits grouped by authors. Without any parameters, its output has the form:
Adam Coulombe (1): Fix #13150, ...
CHAPTER 2 ■ WORKING WITH WELL-KNOWN REPOSITORIES
26
Add a comment to e Add link to chrome shorten the SHA Fix tabs vs spaces Revert grunt, grun ...
The above list contains all the developers and their revisions. The parameter -s prints only the number of revisions and developer’s name:
1 Adam Coulombe 7 Adam J. Sontag ...
Parameter -n prints the results sorted in numeric order by the number of revisions. To print the number of contributors we pipe the result of git shortlog -s to wc -l:
$ git shortlog -s | wc -l
The next question is a little more difficult to answer. First, we want to print the output of the git log command in a special form. We want every line to contain only a commit’s date in the form yyyy-mm-dd. It can be accomplished by:
$ git log --pretty=format:%cd --date=short
The above command will produce the list of dates:
2013-04-22 2013-04-22 2013-04-20 2013-04-20 2013-04-18 ...
The date of every commit will be present in the output. Let’s remove the duplicates. We can do it using the
uniq command:
$ git log --pretty=format:%cd --date=short | uniq
Thus, we will find out the different dates when contributions to the project were made. If we pipe the result to wc -l:
$ git log --pretty=format:%cd --date=short | uniq | wc -l
We then get the desired number of days.
Hint
CHAPTER 2 ■ WORKING WITH WELL-KNOWN REPOSITORIES
27
The next two questions concern the amount of space that the working directory and the git directory contain. The amount of space the git directory contains is returned by the command:
$ du -h -s .git
The amount of space the working directory contains is printed by the command:
$ du -h -s --exclude=.git
Here are the results for the jQuery project: The working directory: 1.3 MB The git directory: 16 MB
As you can see the git directory uses much more space than the working directory. This is not surprising: the database stored in .git/objects contains 5,192 revisions. Every revision can be thought of as a snapshot of a complete working directory.
The last question can be answered with the git ls-files command:
$ git ls-files | wc -l
The git ls-files command prints the names of all the files in the working directory. We use wc –l to count them.
2-10. Defining aliases for the commands discussed in
Recipes 2-8 and 2-9
Problem
The commands shown in Listings 2-5 and 2-8 through 2-13 are quite long to type. You would like to define aliases that would be easier to type while returning the same output.
Solution
Open the command line and go to your home directory. Using Linux, Mac, or a bash command line on Windows it can be done with:
$ cd ~
If you use a standard Windows’ command line, then try:
$ cd %userprofile%
Start the editor of the text files and open the file .gitconfig. If you use vi, you can do it with:
$ vi .gitconfig
CHAPTER 2 ■ WORKING WITH WELL-KNOWN REPOSITORIES
28
Listing 2-14. The aliases for the commands shown in Listings 2-5 and 2-8 through 2-13
[alias]
l = log --oneline --abbrev-commit --abbrev=4 -25
days = "!days() {
git log --pretty=format:%cd --date=short | uniq; }; days"
stat = "!stat() {
echo -n Number of revisions:; git log --oneline | wc -l; echo -n Number of developers:; git shortlog -s | wc -l; echo -n Number of days:; git days | wc -l;
echo -n The working directory:; du -h -s --exclude=.git; echo -n The git directory:; du -h -s .git;
echo -n Number of files in the working dir:; git ls-files | wc -l;
}; stat"
Hint
■
You don't have to type the aliases presented in Listing 2-14. They are all available in the
https://github.com/gajdaw-git-recipes/aliasesrepository.
Note
■
The Listing 2-14 should be typed without newline characters within stat and days aliases. The file should
look like:
days = "!days() { ... }; days" stat = "!stat() { ... }; stat"
The newline characters were used only for readability purposes.
When you finish entering the contents of Listing 2-14 at the bottom of your .gitconfig file, go to the directory
git-recipes/02-01/jquery/:
$ cd git-recipes/02-01/jquery
and execute the first of the aliases:
CHAPTER 2 ■ WORKING WITH WELL-KNOWN REPOSITORIES
29
You should see an output similar to:
18cc Fix #13803: domManip remote-script ... 55e3 Fixes #13815: Ensure each element ... 3a619 Fix #13818: Add wrapMap entry for ... ...
Next try the second alias:
$ git stat
It will produce similar results:
Number of revisions: 5192 Number of developers: 190 Number of days: 1246
The working directory: 1.3M . The git directory: 16M .git
Number of files in the working dir: 149
Caution
■
The alias git stat uses
echowith
–nparameter to suppress the output of newline characters. If your system
doesn’t support
echo –n, the formatting of the above results will be different.
How It Works
Git allows you to define aliases for arbitrary commands. The aliases should be stored in the user’s configuration file. The file should be named .gitconfig and stored in your home directory. If you have already executed any commands to configure git with --global option, for example, git config --global user.name, then the .gitconfig file already exists in your home directory. Otherwise, you will have to create it.
The first of the aliases shown in Listing 2-14 can be created with:
$ git config --global alias.l "log --oneline --abbrev-commit --abbrev=4 -25"
The command git config –global alias.abc "def" just creates an entry abc = def in the [alias] section of your personal .gitconfing file.
If you want to find the location of your home directory type:
$ cd ~ $ pwd
The above commands will work well on Linux, Mac, or the bash command line on Windows. If you use a standard Windows’ command line use:
CHAPTER 2 ■ WORKING WITH WELL-KNOWN REPOSITORIES
30
If you work with vi you can open your git configuration file with:
# Linux
$ vi ~/.gitconfig
# Windows
$ vi %userprofile%\.gitconfig
The syntax of .gitconfig file
We will start the explanation of aliases with the syntax of a .gitconfig file. The interesting characters are: hash marks, semicolons, quotes, and backslashes.
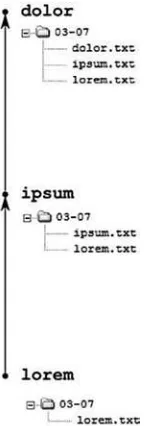
Inside a .gitconfig file you can use hash marks and semicolons to denote comments that span to the end of the line. Thus the definition:
word = lorem ; ipsum
sets the property named word with the value lorem. The second word ipsum is skipped because a semicolon starts the comment. Similar rules apply to hash marks. The definition:
word2 = dolor # sit
sets the property word2 with value dolor.
If you want to define the value containing semicolons or hash marks, you have to use quotes:
sentence = "Lorem ; ipsum"
The above defines a property named sentence with value:
Lorem ; ipsum
It is not surprising that quotation marks should be escaped. The line:
person = "John \"Moo\" Cowboy"
defines the property person with the value:
John "Moo" Cowboy
The same escaping procedure applies to backslashes. The definition:
str = "a\\b"
sets the value of the str property to:
a\b
The above description clarifies the following notation:
CHAPTER 2 ■ WORKING WITH WELL-KNOWN REPOSITORIES
31
Surrounding quotes are necessary because we use semicolons. The quotes inside are escaped. Double backslash is an escaped backslash, hence the property something has the value:
x ; "y" ; \ ; z
Remember, that these rules apply to everything you store in your .gitconfig file.
Hint
■
The syntax of
.gitconfigfile is described in the manual in the section on Syntax: $ git help config
The alias syntax
The syntax to define a git alias in a .gitconfig file is either:
alias = command
or
alias = !command
The first version—the one without exclamation mark—applies to git subcommands. Alias:
abc = def
defines the command that can be named as:
$ git abc
When executed, git abc will produce the same effect as:
$ git def
Thus we can define alias:
l = log --pretty=oneline
that when called:
$ git l
will be expanded to:
$ git log --pretty=oneline
The second syntax for aliases—the one with exclamation mark—applies to arbitrary shell commands. The alias:
CHAPTER 2 ■ WORKING WITH WELL-KNOWN REPOSITORIES
32
can be called:
$ git list-files
This call will result in the following command:
$ ls
I use aliases prefixed with exclamation mark together with shell functions. The alias:
foo = "!bar(){ }; bar"
can be called:
$ git foo
The exclamation mark tells git that this alias should be passed to shell. The next part:
bar(){};bar
consists of a function definition:
bar(){};
and a function call:
bar
Inside the braces you can place an arbitrary number of complete shell calls, separated with semicolons, for example:
foo = "!bar(){ echo abc; ls; }; bar"
This alias can be called:
$ git foo
It will result in two commands:
$ echo abc $ ls
In a similar way, the alias:
info = "!funInfo(){ git --version; git log --pretty=oneline -3; }; funInfo"
can be called:
CHAPTER 2 ■ WORKING WITH WELL-KNOWN REPOSITORIES
33
It will produce the same output as two commands:
$ git --version
$ git log --pretty=oneline -3
Because of the semicolons, the alias using the shell function needs to be enclosed in quotes.
The aliases from Listing 2-14
The first alias presented at Listing 2-14 is:
l = log --oneline --abbrev-commit --abbrev=4 -25
It doesn’t use the exclamation mark; therefore, it refers to a git subcommand. When called:
$ git l
it will be expanded to:
$ git log --pretty=oneline --abbrev-commit --abbrev=4 -25
Git allows you to pass additional parameters to aliases. Therefore, if you want to produce a simplified list of revisions by John Doe, call the alias with the --author parameter:
$ git l --author="John Doe"
You can pass any other parameters in the same manner. The next alias is:
days = "!days() {
git log --pretty=format:%cd --date=short | uniq; }; days"
Because of the exclamation mark it is expanded to a shell command. The command defines and calls the function named days(). When you type:
$ git days
it will eventually execute:
$ git log --pretty=format:%cd --date=short | uniq
The last alias is a shell function that calls a number of other commands.
stat = "!stat() {
CHAPTER 2 ■ WORKING WITH WELL-KNOWN REPOSITORIES
34
echo -n The working directory:; du -h -s --exclude=.git; echo -n The git directory:; du -h -s .git;
echo -n Number of files in the working dir:; git ls-files | wc -l;
}; stat"
Notice, that we produce the number of days with the subalias:
$ git days | wc -l
Hint
■
There are two methods for creating aliases in git. The first method is discussed in Recipe 2-10 and the second
in Recipe 5-3. I prefer to define aliases inside .gitconfig files, as shown in Recipe 2-10. This method doesn't depend on
user platform or permisions making it is easier to adopt during classes and training.
2-11. Analyzing one of the popular repositories
Problem
One of the most popular Github repositories is twitter/bootstrap, available at:
https://github.com/twitter/bootstrap.git
You want to analyze it using the aliases from Recipe 2-10.
Solution
Open command line and clone twitter/bootstrap:
$ git clone https://github.com/twitter/bootstrap.git 02-11
The command:
$ git stat
will print:
CHAPTER 2 ■ WORKING WITH WELL-KNOWN REPOSITORIES
35
How It Works
Using the $ git clone command you can clone any public repository available on Github or Bitbucket. The alias created in Recipe 2-10 will help you to get some basic information about the project.
2-12. Visualizing the history of a repository
Problem
You want to display the history of the HTML 5 Boilerplate repository in a graphical form using a gitk application.
Solution
Clone the HTML 5 Boilerplate repository:
$ cd git-recipes
$ git clone https://github.com/h5bp/html5-boilerplate.git 02-12
Enter the 02-12/ directory:
$ cd 02-12
and run the gitk command:
$ gitk
Note
■
If you append the ampersand
$ gitk &, the gitk application will run in the background, and you can use
command line to execute other commands.
How It Works
The command $ gitk will display the window shown in Figure 2-8. It contains five panels:
1. The revisions
2. The authors
3. The dates
4. The list of modifications
CHAPTER 2 ■ WORKING WITH WELL-KNOWN REPOSITORIES
36
Using gitk you can easily check not only the list of revisions but also the modifications introduced in every revision.
Try scrolling down the revisions. You will see that the revisions do not necessarily form a linear history. The nonlinear history is shown in Figure 2-9. We will deal with nonlinear histories in chapters 5, 6, and 7.
CHAPTER 2 ■ WORKING WITH WELL-KNOWN REPOSITORIES
37
Note
■
The
$ gitkcommand accepts all the filters we discussed in Recipe 2-8. You can for example use gitk to
display only the commits by a given author:
$ gitk --author=john.
2-13. Removing a .git directory
Problem
You wish to discover how removing a .git directory will affect a repository.
Solution
Clone the FontAwesome repository:
$ cd git-recipes
CHAPTER 2 ■ WORKING WITH WELL-KNOWN REPOSITORIES
38
Enter the directory:
$ cd 02-13
Right now, the directory 02-13/ contains a git repository. Thus, you can list the log entries:
$ git log
or the project’s contributors:
$ git shortlog -n -s
If you remove .git directory with:
$ rm -rf .git
you will be left with the contents of the working directory. Git commands do not work anymore. If you issue:
$ git log
you will get the error:
fatal: Not a git repository (or any of the parent directories): .git
How It Works
The git directory can be removed with the simple command:
$ rm -rf .git
After this command you will lose the entire history of your project. The project’s directory will contain only the latest version of the files stored in the working directory.
Summary
In this chapter, we’ve discussed the basic abilities to work with git repositories. You now know how to: Clone a repository (both: remote and local).
•
Enter the repository and issue various git commands.
•
Print the list or revisions stored in the repository.
•
Analyze the history with git log and gitk.
•
Discover the list and the number of revisions, contributors, and files stored in the repository.
•
Define aliases for the most frequently used commands.
CHAPTER 2 ■ WORKING WITH WELL-KNOWN REPOSITORIES
39
You also have learned the role of The git directory
•
The git database
•
The working directory
•
All of which will be needed to understand the later chapters.
The git directory is a special directory named .git, which usually is stored inside your project’s directory. It contains all the history of your project and various configuration entries necessary for git to operate. Do not modify the contents of the .git directory unless you are strictly instructed to do so.
Inside the git directory there is a special subdirectory named .git/objects. It is the git database, which is also called the object store. That is where various git’s commands store data. Revisions, different versions of files, directories, their contents, and so forth—they are all stored in this database. From time to time git tries to optimize this database. If you use git improperly, this can cause data loss.
The third area is called the working directory. It is the directory of your project excluding the git directory. This is where you work. Once the work is finished you can store the contents of your working directory as the next revision in the database. You will learn how to do this in the next chapter.
Do you remember Recipe 2-6? If not, analyze it once again. This recipe demonstrated a very important aspect of using git. The revisions you stored in the database can be retrieved into the working directory. We used git reset --hard to restore deleted files. From now on you should think about the working directory as a temporary storage.
The working directory and the git directory are used to classify every repository as either non-bare or bare. A non-bare repository contains the working directory and the git directory. The configuration file .git/config
of a non-bare repository contains the following entry:
[core]
bare = false
The bare repository consists of the .git directory only. Its .git/config file contains:
[core]
bare = true
41
CHAPTER 3
Creating Local Repositories
with Linear History
In this chapter you will learn how to create your own repositories, and how to use them in your daily work. This includes
Initialization of a new repository with
• $ git init
Storing snapshots as revisions with
• $ git add –A and $ git commit -m "..."
Checking the status of the repository with
• $ git status -s -b
You’ll learn how to start a new project from scratch as well as how to import existing files.
Three recipes will focus on restoring the working directory to snapshots stored in revisions. After learning these recipes you should be able to reset the working directory of any repository—such as jQuery—to an arbitrary revision, such as the very first revision in the repository, and then return the working directory to its latest state.
I give special attention to situations that may cause problems. Two recipes describe precisely how and when you can lose uncommitted or committed modifications. This knowledge should build your confidence. If you adhere to some simple rules, you will never lose what you store in your git repository.
In chapter 2, we characterized the repository as either non-bare or bare. This characterization was based on the presence of a working directory. Here we will introduce another classification: clean or dirty. This classification applies only to non-bare repositories. A repository is clean when its working directory contents are identical to the snapshot stored in its latest revision. If, on the other hand, the files in the working directory were modified and not committed, we call that repository dirty. To find out whether a repository is clean or dirty, we use the $ git status command.
3-1. Creating your first repository
Problem
CHAPTER 3 ■ CREATING LOCAL REPOSITORIES WITH LINEAR HISTORY
42
Solution
In this recipe you will create your first revisions with the git commit command. Git doesn’t allow committing unless you store your identity in a configuration file. If you haven’t done it so far, please run the following two commands, replacing John Doe and [email protected] with your personal information:
$ git config --global user.name "John Doe"
$ git config --global user.email [email protected]
When you are ready to commit, initialize a new repository:
$ cd git-recipes $ git init 03-01 $ cd 03-01
Now the directory 03-01 contains the git repository. To verify, run the command:
$ ls -la
It will print three items:
. .. .git
As you will guess, the repository is empty. That means the database contains no revisions. We can verify that with the $ git log and the $ git status commands. First, print the history with:
$ git log
CHAPTER 3 ■ CREATING LOCAL REPOSITORIES WITH LINEAR HISTORY
43
The answer will be:
fatal: bad default revision 'HEAD'
Now, check the status with:
$ git status
The information printed by git status will be:
# On branch master #
# Initial commit #
nothing to commit (create/copy files and use "git add" to track)
The comment # Initial commit means that the repository is ready to store the very first commit. Let’s do that. Create the first file:
$ vi agatha-christie.txt
The file can contain the text shown in Listing 3-1, but that is not crucial.
Listing 3-1. The contents of agatha-christie.txt
Novels
1943 | Five Little Pigs
1934 | Murder on the Orient Express
After the file agatha-christie.txt is saved, check the state of the repository with:
$ git status -s
You will see the following output:
?? agatha-christie.txt
The two question marks ?? inform you that the agatha-christie.txt file is not tracked. It is a new file that hasn’t been committed. Right now, the repository is dirty.
Create your first revision with the following two commands:
$ git add -A
$ git commit -m "First revision [Agatha Christie]"
The file is now stored in a new revision. The command:
CHAPTER 3 ■ CREATING LOCAL REPOSITORIES WITH LINEAR HISTORY
44
returns the empty output and it means that there are no pending changes in the working directory. In other words the repository is clean. Let’s check the log with $ git log. The output will be similar to:
commit de3680b0a770dd46ede81f46cba0ae32f9e4687c Author: Włodzimierz Gajda <[email protected]> Date: Thu May 2 12:50:19 2013 +0200
First commit [Agatha Christie]
The current state of the repository is shown in Figure 3-2.
Figure 3-2. The repository from Recipe 3-1 after the first revision
Let’s create the second revision. Follow these steps:
1. Create the file john-grisham.txt $ vi john-grisham.txt
2. Type the contents of the file:
Novels
1989 | A Time to Kill 1991 | The Firm
1992 | The Pelican Brief
3. Save the file and close the editor.
4. Check the status of the repository:
$ git status -s
The output:
?? john-grisham.txt
informs you about one new, untracked file:
john-grisham.txt
5. Save the current state of the working directory as a new revision:
$ git add -A
$ git commit -m "Second revision [John Grisham]"
6. Check the status of the repository with:
$ git status -s
The empty output proves that the repository is clean.
7. Check the log of the repository with the alias from Recipe 2-10:
CHAPTER 3 ■ CREATING LOCAL REPOSITORIES WITH LINEAR HISTORY
45
The output contains two revisions:
0468 Second revision: [John Grisham] de36 First commit [Agatha Christie]
8. The repository should look like Figure 3-3.
Figure 3-3. The repository from Recipe 3-1 after the second revision
Finish the recipe creating the third file stephen-king.txt and the third revision. Here is the procedure:
1. Create the file stephen-king.txt $ vi stephen-king.txt
2. Enter the contents:
Novels
1974 | Carrie 1975 | Salem’s Lot 1977 | The Shining
3. Save the file and close the editor.
4. Check the status of the repository:
$ git status -s
The repository is dirty:
?? stephen-king.txt
5. Create the revision for the current state of the working directory:
$ git add -A
$ git commit -m "Third revision [Stephen King]"
6. Check the status of the repository:
$ git status -s
CHAPTER 3 ■ CREATING LOCAL REPOSITORIES WITH LINEAR HISTORY
46
7. Check the log with:
$ git l
The output will contain three revisions:
ffa6 Third revision [Stephen King] 0468 Second revision: [John Grisham] de36 First commit [Agatha Christie]
8. The repository is shown in Figure 3-1.
Note
■
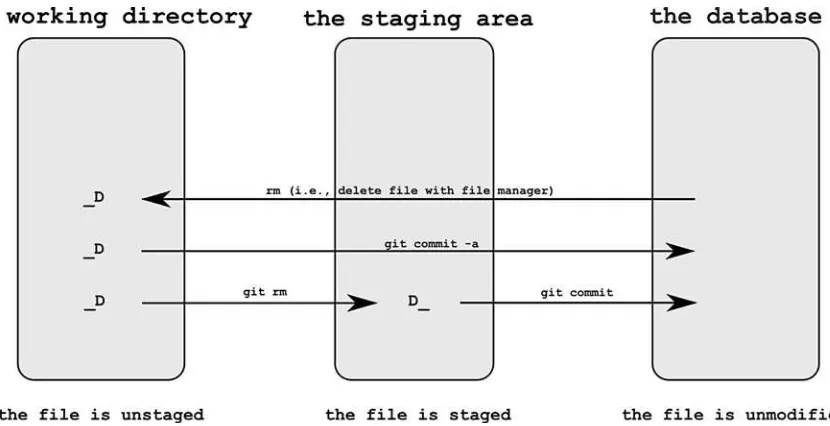
The two commands introduced in Recipe 3-1:
$ git add –Aand
$ git commit -m "..."save the current
state of your working directory as a new revision. We used them to store one new file in every revision, but that is not
necessary. You can create, delete, move, and copy any arbitrary number of files. These two commands store the working
directory, no matter how many files were modified or which type of tools were used.
How It Works
The new repositories are initialized with the command:
$ git init
You can pass a path to tell git where you want your project to be stored. The command:
$ git init 03-01
creates a new empty directory 03-01 and initializes an empty repository inside. Without any parameters the
$ git init command will initialize a new repository in the current directory.
When the repository is initialized, you can work on your project: you can create files and type into their contents. Git is very smart in tracking changes you make in the working directory. It knows all about the modifications you make. If you doubt this, try using this command:
$ git status
It returns the exact information about the changes that were introduced in the working directory. The shortened form of this command is also very useful. It is shown in Listing 3-2.
Listing 3-2. The command to answer the question: Is the repository dirty or clean?
$ git status -s
Hint
CHAPTER 3 ■ CREATING LOCAL REPOSITORIES WITH LINEAR HISTORY
47
The command from Listing 3-2 prints the list of modifications in a very compact form. You can treat it as a quick answer to the question: is the repository clean? If the output is empty then the repository is clean. Otherwise the repository is dirty and the output lists the modifications.
At some point you will need to make a decision that the current state of the working directory should be saved as a new revision. To achieve this use the two commands shown in Listing 3-3.
Listing 3-3. Two commands that save the current state of working directory as a new revision
$ git add -A
$ git commit -m "Comment..."
For now, treat them both as one atomic operation. We will discuss their exact role in chapter 4. Right now it is enough to know that when executed, they will create a new revision and leave the repository in the clean state.
If you are new git user, I suggest that at this early stage of learning you should check the status and log of the repository after every revision. As you already know, it can be done with:
$ git status -s $ git log
You also can use the $ git l alias defined in Recipe 2-10.
3-2. Creating the git snapshot alias
Problem
As you already know, the snapshot of your working directory can be saved with two commands shown in Listing 3-3. Because we treat it as a single operation, you want to define the alias snapshot that will execute these two commands. Your alias, when executed as:
$ git snapshot
should store the current state of the working directory as a new revision.
Solution
Open the command line, go to your home directory, and edit your .gitconfig file. Follow the procedure given at the beginning of Recipe 2-10.
Type the contents of Listing 3-4 at the end of the [alias] section in your .gitconfig file, save the file, and close the editor.
Listing 3-4. Alias git snapshot
CHAPTER 3 ■ CREATING LOCAL REPOSITORIES WITH LINEAR HISTORY
48
How It Works
Similar to Recipe 2-10, the alias was split with newlines. Remember that newlines are here only to make the alias easier to read—you must type the alias as one long line in your .gitconfig file.
The alias uses the shell function snapshot that after parsing of .gitconfig becomes:
snapshot() { COMMENT=wip; if [ "$*" ]; then COMMENT="$*"; fi;
git add -A;
git commit -m "$COMMENT"; }
The instruction:
COMMENT=wip;
defines a variable named COMMENT with the value wip. Wip is an abbreviation for work in progress. The special variable
$* contains all the parameters passed to the script. Consider the command:
$ some-script a b c
This call sends to the script some-script three parameters: a, b, and c. You can access all three parameters as one using the quoted $* variable "$*".
The conditional statement if-then-fi:
if [ "$*" ]; then COMMENT="$*"; fi;
checks the parameters passed to the script. If the script was called with parameters they will be assigned to COMMENT
variable. Otherwise the COMMENT variable will stay unchanged—it stores the default value wip.
Now you know everything that will enable you to understand how the snapshot alias works. When we run the command:
$ git snapshot
it creates a revision with comment wip. If we pass any parameters:
$ git snapshot Lorem ipsum dolor